oil Hyundai H-1 (Grand Starex) 2007 Owner's Manual
[x] Cancel search | Manufacturer: HYUNDAI, Model Year: 2007, Model line: H-1 (Grand Starex), Model: Hyundai H-1 (Grand Starex) 2007Pages: 284, PDF Size: 11.33 MB
Page 12 of 284

YOUR VEHICLE AT A GLANCE
F12
B255A01P-GAT INDICATOR SYMBOLS ON THE INSTRUMENT CLUSTER * More detailed explanations of these items will be found beginning on page 2-8.
O/D OFF Indicator Light (Automatic Transmission Only)
Fuel Filter Warning Light (Diesel only)
Diesel Pre-heat Indicator Light (Diesel only)
Immobilizer Warning Light (If installed)
SRS (Airbag) Service Reminder Indicator Light (SRI) (If installed)
ABS Service Reminder Indicator Light(If installed)
Turn Signal Indicator Lights High Beam Indicator LightLow Oil Pressure Warning Light Parking Brake/Low Brake Fluid Level Warning Light Charging System Warning Light Seat Belt Warning Light (If installed) Door Ajar Warning Light Low Fuel Level Warning Light
POWER/HOLD Indicator Light (If installed) Malfunction Indicator Light (If installed)
4WD HIGH/LOW Indicator Light (If installed)
Page 14 of 284
1BEFORE DRIVING YOUR VEHICLE
2
B010A02CM-GAT Use Unleaded Gasoline For Europe
– For the optimal vehicle
performance, we recommend you to use unleaded gasoline with an octane rating of RON (Research Octane Num- ber) 95 /AKI (Anti Knock Index) 91 orhigher. You may use unleaded gasoline with an octane rating of RON 91~94/AKI 87~90but it may result in slight performance reduction of the vehicle. Except Europe – Unleaded gasoline
with a Pump Octane Rating of 87 (Re- search Octane Number 91) or highermust be used in Hyundai vehicle. If leaded gasoline is used, it will cause the catalytic converter to become inef- fective and the emission control sys- tem to malfunction.This can also result in increased main- tenance expense. To avoid accidental use of leaded fuel, the large nozzleused with leaded gasoline at service stations can not be inserted into fuel tank opening of Hyundai vehicle. NOTE:
o For some countries, Hyundai ve-
hicles are designed to use leaded gasoline. When you are going touse leaded gasoline, ask to Hyundai dealer whether leaded gasoline in your vehicle is avail-able or not.
o Octane rating of leaded gasoline
is same with unleaded one.
Use Diesel Diesel fuel Diesel engine must be operated only on commercially available diesel fuel thatcomplies with EN 590 or comparable standard. (EN stands for "European Norm"). Do not use marine diesel fuel,heating oils, or non-approved fuel addi- tives, as this will increase wear and cause damage to the engine and fuelsystem. The use of non-approved fuels and / or fuel additives will result in a limitation of your warranty rights.Diesel fuel of 52 to 54 cetane is used in Hyundai vehicle. If two types of diesel fuel are available, use summer or winterfuel properly according to the following temperature conditions. CAUTION:
Do not let any gasoline or water enterthe tank. This would make it neces- sary to drain it out and to bleed thelines to avoid jamming the injection pump and damaging the engine.
!
FUEL RECOMMENDATIONS
o Above -5°C (23°F) ... Summer typediesel fuel.
o Below -5°C (23°F) ... Winter type diesel fuel.
Watch the fuel level in the tank very carefully : If the engine stops through fuel failure, the circuits must be com-pletely purged to permit restarting.
Page 15 of 284
1
BEFORE DRIVING YOUR VEHICLE
3BEFORE DRIVING YOUR VEHICLE SAFETY CHECKS
!
B010A01P-GAT Be sure you know your vehicle and its equipment and how to use it safely. B010B01P-GAT Before entering the vehicle
o Check that windows, mirrors and
lights are clean.
o Check if any tire is low or flat.
o Look for fluid leaks.
o Check that area is clear if you're about to back up.
B010C03P-GAT After entering the vehicle
o Lock all doors.
o The driver and passengers are wear- ing properly adjusted seat belts.
o The head restraints are properly adjusted, if so equipped.
o Adjust inside and outside mirrors.
o Check warning lights for correct
operation, with the ignition key in the position "ON".
o Check all gauges, for normal opera- tion. WARNING: (Diesel only)
To ensure that sufficient vacuum exists within the brake system dur-ing cold weather start-up condi- tions, it is necessary to run the engine at idle after starting the en-gine. NOTE: Fluid levels, such as engine oil, engine coolant, brake fluid, and windshield washer fluid, should be checked daily and/or weekly, orwhenever you refuel. Further details are described in the "CONSUMER INFORMATION" sec-tion.
Biodiesel Commercially supplied biodiesel blends of no more than 5% biodiesel, com- monly known as "B5 biodiesel" may beused in your vehicle if it meets EN 14214 or equivalent specifications. (EN stands for "European Norm"). The useof biofuels made from rapeseed methyl ester (RME), fatty acid methyl ester (FAME), vegetable oil methyl ester(VME) etc. or mixing diesel with biodiesel will cause increased wear or damage to the engine and fuel system.Repair or replacement of worn or dam- aged components due to the use of non approved fuels will not be covered bythe manufactures warranty.
CAUTION:
o Never use any fuel, whether diesel or B5 biodiesel that fails to meetthe latest petroleum industry speci-fication.
o Never use any fuel additives or
treatments that are not recom-mended or approved by the ve- hicle manufacturer.
!
Page 70 of 284
2
INSTRUMENTS AND CONTROLS
3
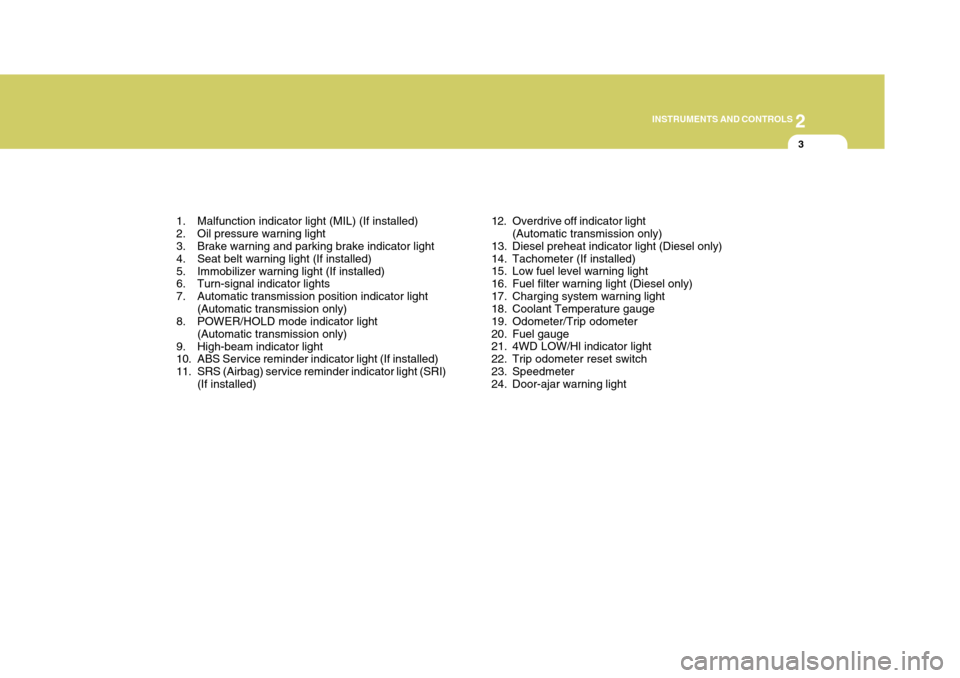
1. Malfunction indicator light (MIL) (If installed)
2. Oil pressure warning light
3. Brake warning and parking brake indicator light
4. Seat belt warning light (If installed)
5. Immobilizer warning light (If installed)
6. Turn-signal indicator lights
7. Automatic transmission position indicator light (Automatic transmission only)
8. POWER/HOLD mode indicator light
(Automatic transmission only)
9. High-beam indicator light
10. ABS Service reminder indicator light (If installed)
11. SRS (Airbag) service reminder indicator light (SRI) (If installed) 12. Overdrive off indicator light
(Automatic transmission only)
13. Diesel preheat indicator light (Diesel only)
14. Tachometer (If installed)
15. Low fuel level warning light
16. Fuel filter warning light (Diesel only)
17. Charging system warning light
18. Coolant Temperature gauge
19. Odometer/Trip odometer
20. Fuel gauge
21. 4WD LOW/Hl indicator light
22. Trip odometer reset switch
23. Speedmeter
24. Door-ajar warning light
Page 72 of 284
2
INSTRUMENTS AND CONTROLS
5
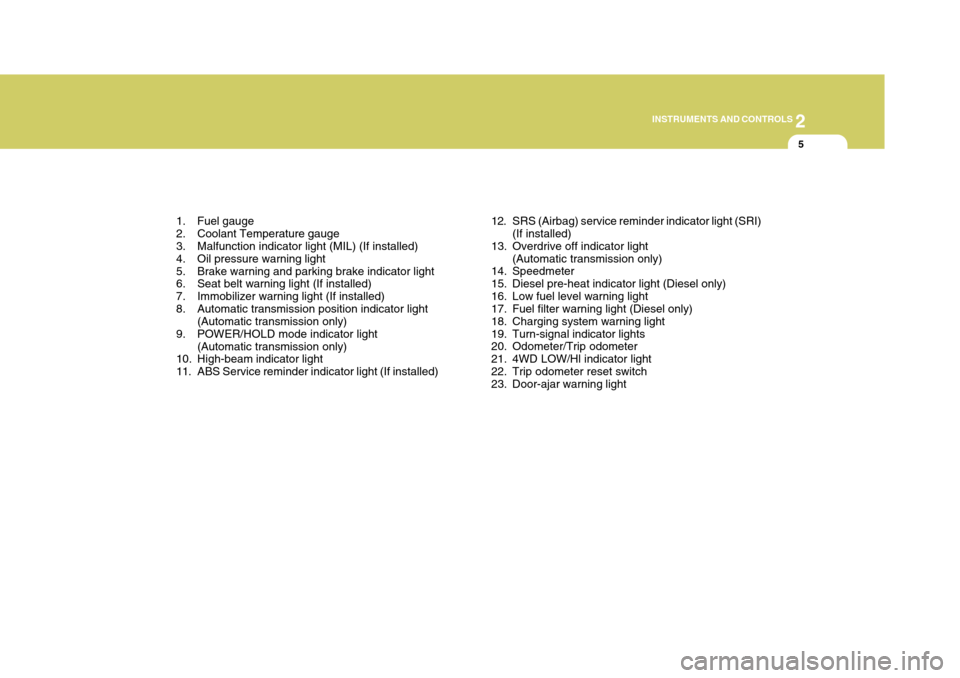
1. Fuel gauge
2. Coolant Temperature gauge
3. Malfunction indicator light (MIL) (If installed)
4. Oil pressure warning light
5. Brake warning and parking brake indicator light
6. Seat belt warning light (If installed)
7. Immobilizer warning light (If installed)
8. Automatic transmission position indicator light (Automatic transmission only)
9. POWER/HOLD mode indicator light
(Automatic transmission only)
10. High-beam indicator light
11. ABS Service reminder indicator light (If installed) 12. SRS (Airbag) service reminder indicator light (SRI)
(If installed)
13. Overdrive off indicator light (Automatic transmission only)
14. Speedmeter
15. Diesel pre-heat indicator light (Diesel only)
16. Low fuel level warning light
17. Fuel filter warning light (Diesel only)
18. Charging system warning light
19. Turn-signal indicator lights
20. Odometer/Trip odometer
21. 4WD LOW/Hl indicator light
22. Trip odometer reset switch
23. Door-ajar warning light
Page 74 of 284
2
INSTRUMENTS AND CONTROLS
7
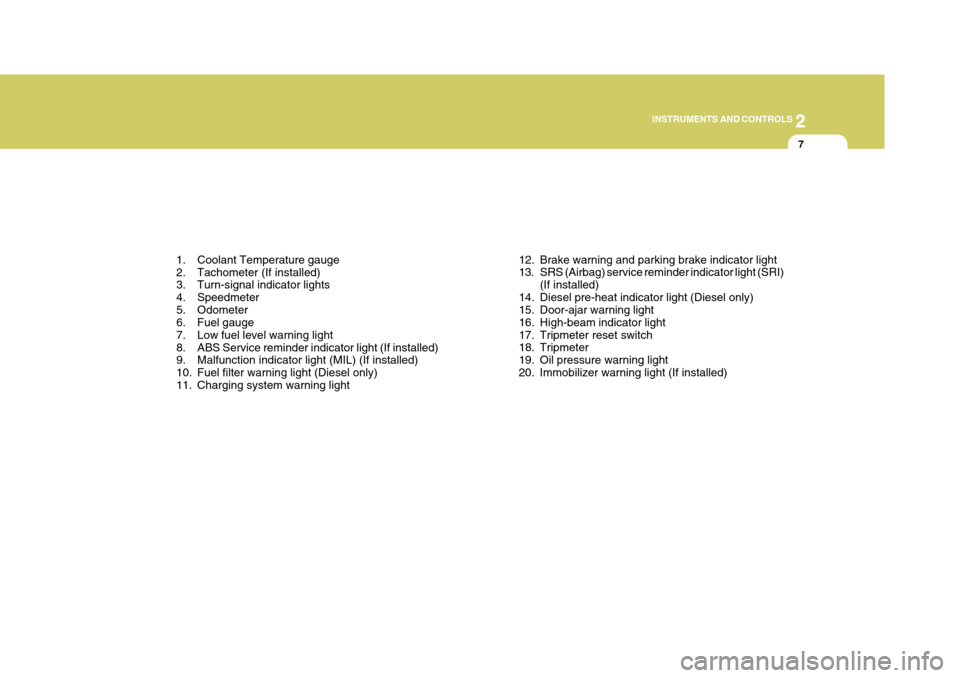
1. Coolant Temperature gauge
2. Tachometer (If installed)
3. Turn-signal indicator lights
4. Speedmeter
5. Odometer
6. Fuel gauge
7. Low fuel level warning light
8. ABS Service reminder indicator light (If installed)
9. Malfunction indicator light (MIL) (If installed)
10. Fuel filter warning light (Diesel only)
11. Charging system warning light 12. Brake warning and parking brake indicator light
13. SRS (Airbag) service reminder indicator light (SRI)
(If installed)
14. Diesel pre-heat indicator light (Diesel only)
15. Door-ajar warning light
16. High-beam indicator light
17. Tripmeter reset switch
18. Tripmeter
19. Oil pressure warning light
20. Immobilizer warning light (If installed)
Page 76 of 284
2
INSTRUMENTS AND CONTROLS
9
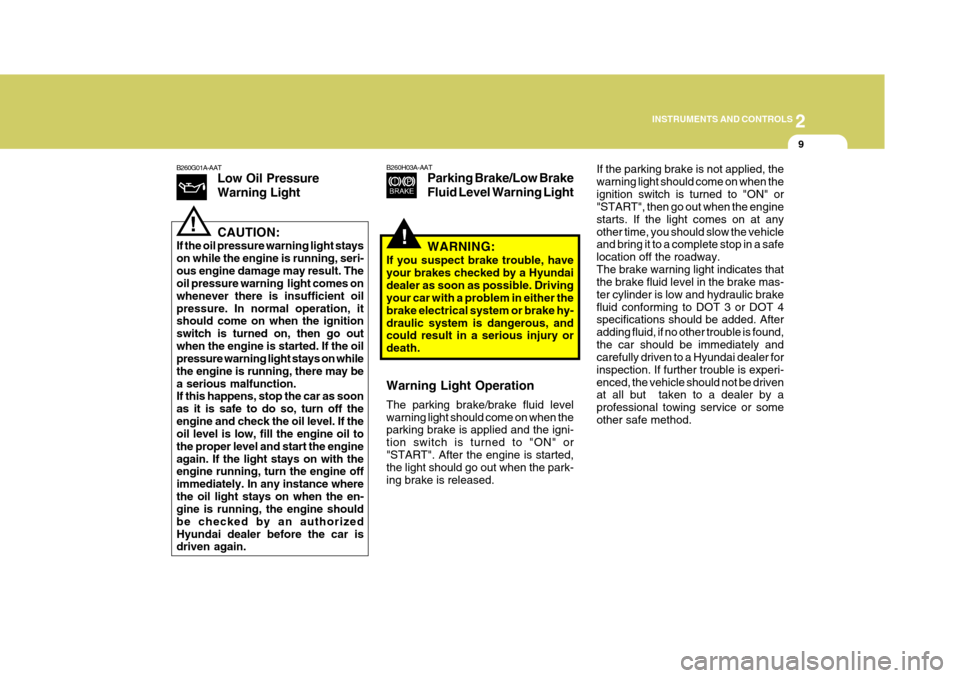
B260G01A-AAT
Low Oil Pressure Warning Light CAUTION:
If the oil pressure warning light stays on while the engine is running, seri-ous engine damage may result. The oil pressure warning light comes on whenever there is insufficient oilpressure. In normal operation, it should come on when the ignition switch is turned on, then go outwhen the engine is started. If the oil pressure warning light stays on while the engine is running, there may bea serious malfunction. If this happens, stop the car as soon as it is safe to do so, turn off theengine and check the oil level. If the oil level is low, fill the engine oil to the proper level and start the engineagain. If the light stays on with the engine running, turn the engine off immediately. In any instance wherethe oil light stays on when the en- gine is running, the engine should be checked by an authorizedHyundai dealer before the car is driven again.
!
!
B260H03A-AAT Parking Brake/Low Brake Fluid Level Warning Light If the parking brake is not applied, the warning light should come on when theignition switch is turned to "ON" or "START", then go out when the engine starts. If the light comes on at anyother time, you should slow the vehicle and bring it to a complete stop in a safe location off the roadway.The brake warning light indicates that the brake fluid level in the brake mas- ter cylinder is low and hydraulic brakefluid conforming to DOT 3 or DOT 4 specifications should be added. After adding fluid, if no other trouble is found,the car should be immediately and carefully driven to a Hyundai dealer for inspection. If further trouble is experi-enced, the vehicle should not be driven at all but taken to a dealer by a professional towing service or someother safe method.
WARNING:
If you suspect brake trouble, have your brakes checked by a Hyundaidealer as soon as possible. Driving your car with a problem in either the brake electrical system or brake hy-draulic system is dangerous, and could result in a serious injury or death. Warning Light Operation The parking brake/brake fluid level warning light should come on when the parking brake is applied and the igni- tion switch is turned to "ON" or"START". After the engine is started, the light should go out when the park- ing brake is released.
Page 92 of 284
2
INSTRUMENTS AND CONTROLS
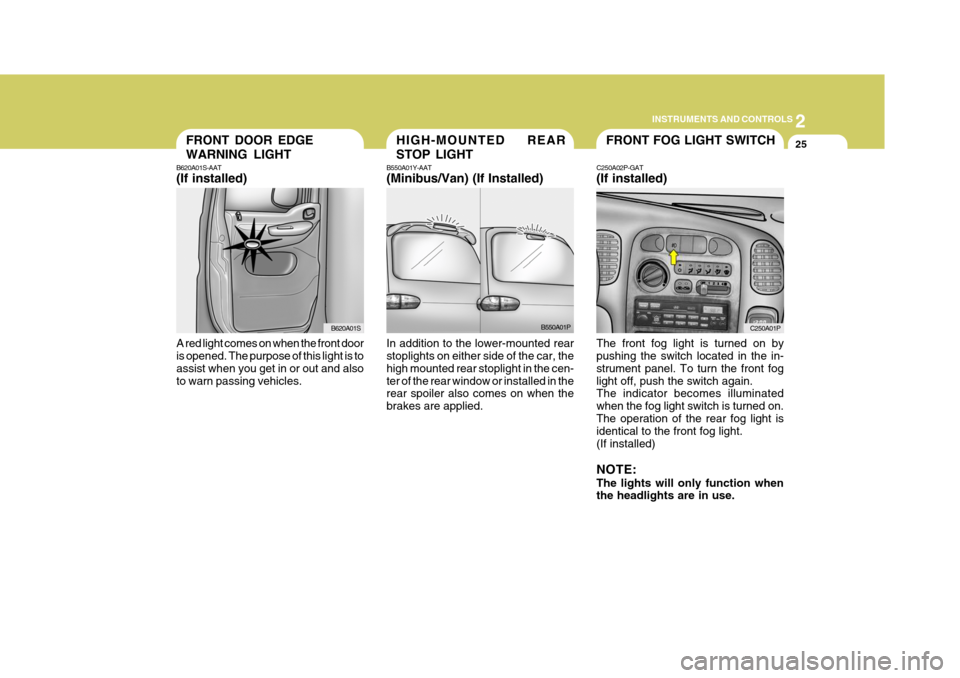
25FRONT FOG LIGHT SWITCH
C250A02P-GAT (If installed) The front fog light is turned on by pushing the switch located in the in- strument panel. To turn the front foglight off, push the switch again. The indicator becomes illuminated when the fog light switch is turned on.The operation of the rear fog light is identical to the front fog light. (If installed) NOTE: The lights will only function when the headlights are in use. C250A01PFRONT DOOR EDGE WARNING LIGHT
B620A01S-AAT (If installed) A red light comes on when the front door is opened. The purpose of this light is to assist when you get in or out and alsoto warn passing vehicles. B620A01SHIGH-MOUNTED REAR STOP LIGHT
B550A01Y-AAT (Minibus/Van) (If Installed) In addition to the lower-mounted rear stoplights on either side of the car, the high mounted rear stoplight in the cen-ter of the rear window or installed in the rear spoiler also comes on when the brakes are applied. B550A01P
Page 127 of 284
2 INSTRUMENTS AND CONTROLS
60
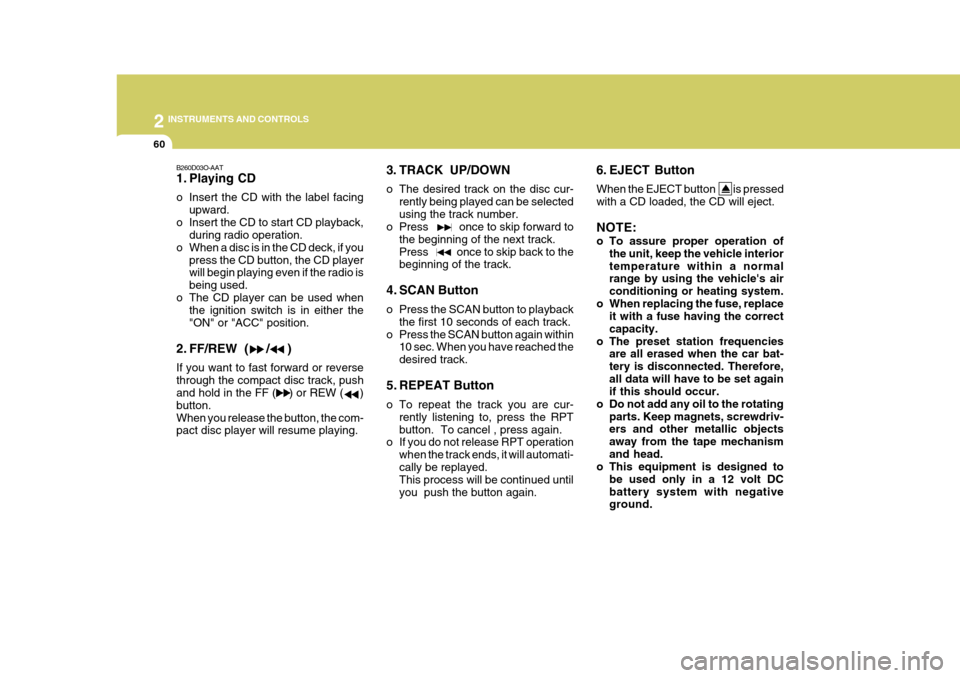
B260D03O-AAT
1. Playing CD
o Insert the CD with the label facingupward.
o Insert the CD to start CD playback, during radio operation.
o When a disc is in the CD deck, if you press the CD button, the CD player will begin playing even if the radio is being used.
o The CD player can be used when the ignition switch is in either the"ON" or "ACC" position.
2. FF/REW ( / ) If you want to fast forward or reverse through the compact disc track, push and hold in the FF ( ) or REW ( ) button.When you release the button, the com- pact disc player will resume playing. 3. TRACK UP/DOWN
o The desired track on the disc cur-
rently being played can be selected using the track number.
o Press once to skip forward to
the beginning of the next track.Press once to skip back to the beginning of the track.
4. SCAN Button
o Press the SCAN button to playback the first 10 seconds of each track.
o Press the SCAN button again within 10 sec. When you have reached the desired track.
5. REPEAT Button
o To repeat the track you are cur- rently listening to, press the RPT button. To cancel , press again.
o If you do not release RPT operation
when the track ends, it will automati-cally be replayed. This process will be continued until you push the button again. 6. EJECT Button When the EJECT button is pressed with a CD loaded, the CD will eject. NOTE:
o To assure proper operation of
the unit, keep the vehicle interior temperature within a normal range by using the vehicle's air conditioning or heating system.
o When replacing the fuse, replace it with a fuse having the correctcapacity.
o The preset station frequencies are all erased when the car bat-tery is disconnected. Therefore,all data will have to be set again if this should occur.
o Do not add any oil to the rotating parts. Keep magnets, screwdriv-ers and other metallic objects away from the tape mechanismand head.
o This equipment is designed to
be used only in a 12 volt DCbattery system with negative ground.
Page 135 of 284
2 INSTRUMENTS AND CONTROLS
68
H290F02O-GAT
1. CD Select Button
o Insert the CD with the label facingupward.
o Insert the CD to start CD playback, during radio operation or cassette tape playing.
o When a disc is in the CD deck, if you
press the CD button the CD playerwill begin playing even if the radio or cassette player is being used.
o The CD player can be used when the ignition switch is in either the"ON" or "ACC" position.
2. FF/REW ( / ) If you want to fast forward or reverse through the compact disc track, push and hold in the FF ( ) or REW ( ) button.When you release the button, the com- pact disc player will resume playing. 3. TRACK UP/DOWN
o The desired track on the disc cur-
rently being played can be selected using the track number.
o Press button once to skip for- ward to the beginning of the nexttrack. Press button once to skipback to the beginning of the track.
4. REPEAT BUTTON
o To repeat the track you are cur- rently listening to, press the RPT button. To cancel , press again.
o If you do not release RPT operation when the track ends, it will automati- cally be replayed.This process will be continued until you push the button again.
5. EQUALIZER BUTTON Press the EQ button to select the CLASSIC, JAZZ, ROCK and DEFEAT MODE for the desired tone quality.Each press of the button changes the display as follows; 6. CD EJECT Button When the button is pressed with a CD loaded, the CD will eject.
7. SCAN Button (If installed)
o Press the SCAN button to playback
the first 10 seconds of each track.
o Press the SCAN button again within
10 sec. for the desired track.
NOTE:
o To assure proper operation of the unit, keep the vehicle interior temperature within a normal range by using the vehicle's airconditioning or heating system.
o When replacing the fuse, replace
it with a fuse having the correctcapacity.
o The preset station frequencies
are all erased when the car bat-tery is disconnected. Therefore, all data will have to be set again if this should occur.
o Do not add any oil to the rotating parts. Keep magnets, screwdriv-ers and other metallic objectsaway from the tape mechanism and head.
CLASSIC
JAZZ ROCK DEFEAT