ECO mode Hyundai H-1 (Grand Starex) 2016 Owner's Manual - RHD (UK, Australia)
[x] Cancel search | Manufacturer: HYUNDAI, Model Year: 2016, Model line: H-1 (Grand Starex), Model: Hyundai H-1 (Grand Starex) 2016Pages: 332, PDF Size: 6.89 MB
Page 105 of 332
437
Features of your vehicle
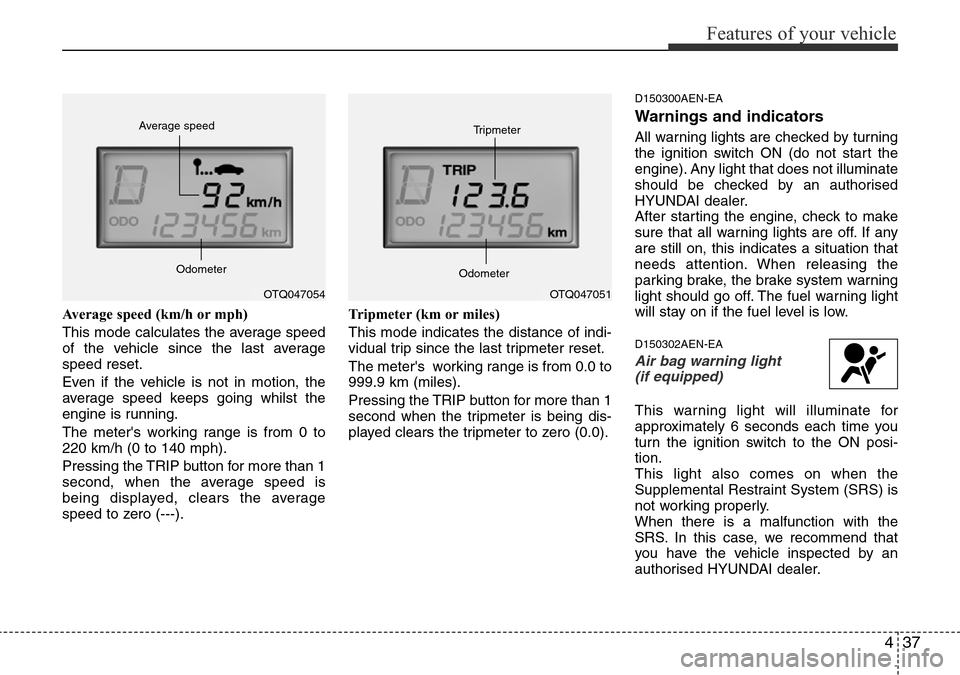
Average speed (km/h or mph)
This mode calculates the average speed
of the vehicle since the last average
speed reset.
Even if the vehicle is not in motion, the
average speed keeps going whilst the
engine is running.
The meter's working range is from 0 to
220 km/h (0 to 140 mph).
Pressing the TRIP button for more than 1
second, when the average speed is
being displayed, clears the average
speed to zero (---).Tripmeter (km or miles)
This mode indicates the distance of indi-
vidual trip since the last tripmeter reset.
The meter's working range is from 0.0 to
999.9 km (miles).
Pressing the TRIP button for more than 1
second when the tripmeter is being dis-
played clears the tripmeter to zero (0.0).
D150300AEN-EA
Warnings and indicators
All warning lights are checked by turning
the ignition switch ON (do not start the
engine). Any light that does not illuminate
should be checked by an authorised
HYUNDAI dealer.
After starting the engine, check to make
sure that all warning lights are off. If any
are still on, this indicates a situation that
needs attention. When releasing the
parking brake, the brake system warning
light should go off. The fuel warning light
will stay on if the fuel level is low.
D150302AEN-EA
Air bag warning light
(if equipped)
This warning light will illuminate for
approximately 6 seconds each time you
turn the ignition switch to the ON posi-
tion.
This light also comes on when the
Supplemental Restraint System (SRS) is
not working properly.
When there is a malfunction with the
SRS. In this case, we recommend that
you have the vehicle inspected by an
authorised HYUNDAI dealer.
OTQ047051 Tripmeter
OdometerOTQ047054 Average speed
Odometer
Page 111 of 332
443
Features of your vehicle
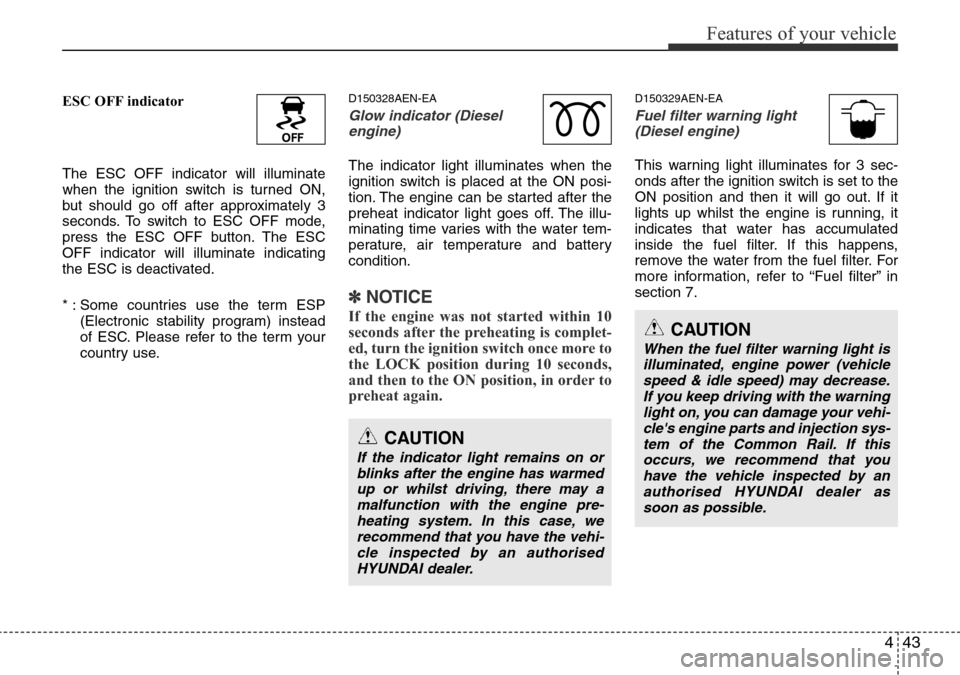
ESC OFF indicator
The ESC OFF indicator will illuminate
when the ignition switch is turned ON,
but should go off after approximately 3
seconds. To switch to ESC OFF mode,
press the ESC OFF button. The ESC
OFF indicator will illuminate indicating
the ESC is deactivated.
* : Some countries use the term ESP
(Electronic stability program) instead
of ESC. Please refer to the term your
country use.D150328AEN-EA
Glow indicator (Diesel
engine)
The indicator light illuminates when the
ignition switch is placed at the ON posi-
tion. The engine can be started after the
preheat indicator light goes off. The illu-
minating time varies with the water tem-
perature, air temperature and battery
condition.
✽NOTICE
If the engine was not started within 10
seconds after the preheating is complet-
ed, turn the ignition switch once more to
the LOCK position during 10 seconds,
and then to the ON position, in order to
preheat again.
D150329AEN-EA
Fuel filter warning light
(Diesel engine)
This warning light illuminates for 3 sec-
onds after the ignition switch is set to the
ON position and then it will go out. If it
lights up whilst the engine is running, it
indicates that water has accumulated
inside the fuel filter. If this happens,
remove the water from the fuel filter. For
more information, refer to “Fuel filter” in
section 7.
CAUTION
If the indicator light remains on or
blinks after the engine has warmed
up or whilst driving, there may a
malfunction with the engine pre-
heating system. In this case, we
recommend that you have the vehi-
cle inspected by an authorised
HYUNDAI dealer.
CAUTION
When the fuel filter warning light is
illuminated, engine power (vehicle
speed & idle speed) may decrease.
If you keep driving with the warning
light on, you can damage your vehi-
cle's engine parts and injection sys-
tem of the Common Rail. If this
occurs, we recommend that you
have the vehicle inspected by an
authorised HYUNDAI dealer as
soon as possible.
Page 135 of 332
467
Features of your vehicle
• When using the air conditioning sys-
tem, you may notice clear water drip-
ping (or even puddling) on the ground
under the passenger side of the vehi-
cle. This is a normal system operation
characteristic.
• Operating the air conditioning system
in the recirculated air position provides
maximum cooling, however, continual
operation in this mode may cause the
air inside the vehicle to become stale.
• During cooling operation, you may
occasionally notice a misty air flow
because of rapid cooling and humid air
intake. This is a normal system opera-
tion characteristics.D230504ATQ-EA
Fuel-fired Heater (if equipped)
The low fuel consumption fuel-fired
heater supplies additional heat to the
interior compartment to assist with cabin
heating during engine warm-up.
The following 3 conditions should be met
at the same time for automatic operation
of the fuel-fired heater.
• Engine running.
• Ambient temperature is lower than 5°C.
• Coolant temperature is lower than
68°C.
A cleaning process of the fuel-fired
heater will be performed automatically
when the heater is not operated due to
increase of coolant temperature and igni-
tion off.
During cleaning process, supplied fuel in
the heater will be burnt completely and
any smoke will be expelled. It is a neces-
sary process for next operation and dura-
bility of the heater and takes about 1~3
minutes.
✽NOTICE
• The following symptoms will occur
and it is normal.
- A white smoke may come out from
the fuel-fired heater exhaust pipe
during operation of the heater.
However, when an excessive black
smoke is discharged, the fuel-fired
heater should be inspected.
- A “buk-buk” noise from the heater is
a noise to form flame for combus-
tion.
- When the heater is operated at full
load, a “Wooing” noise occurs.
- When shutting off the engine during
heater operation, a “Wing” noise
occurs to perform the cleaning
process.
• When refuelling, stop operation of the
fuel-fired heater by shutting off the
engine.
Page 138 of 332
Features of your vehicle
70 4
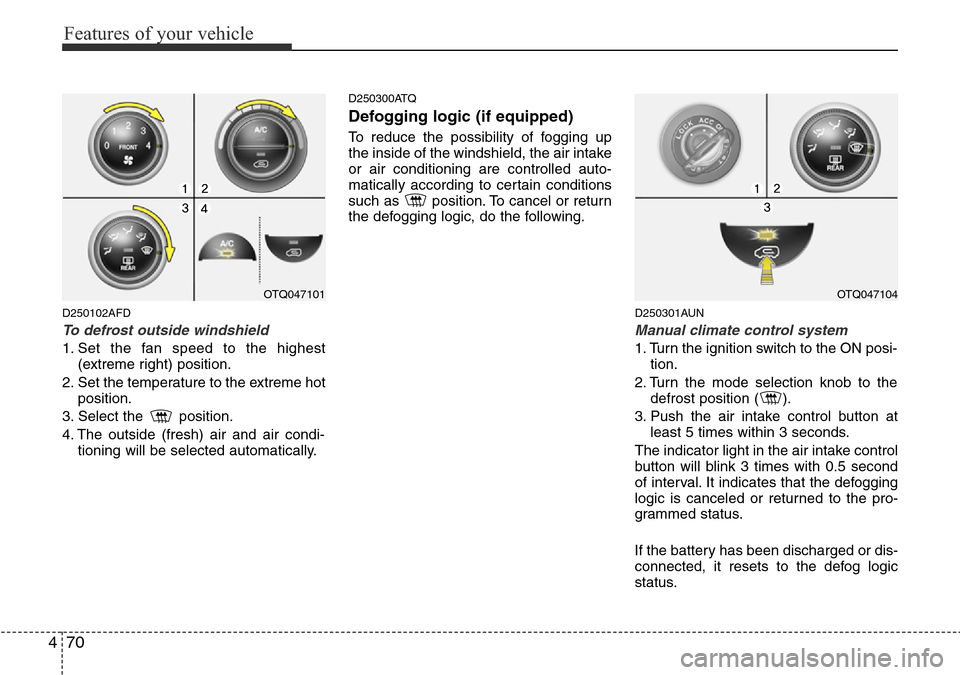
D250102AFD
To defrost outside windshield
1. Set the fan speed to the highest
(extreme right) position.
2. Set the temperature to the extreme hot
position.
3. Select the position.
4. The outside (fresh) air and air condi-
tioning will be selected automatically.
D250300ATQ
Defogging logic (if equipped)
To reduce the possibility of fogging up
the inside of the windshield, the air intake
or air conditioning are controlled auto-
matically according to certain conditions
such as position. To cancel or return
the defogging logic, do the following.
D250301AUN
Manual climate control system
1. Turn the ignition switch to the ON posi-
tion.
2. Turn the mode selection knob to the
defrost position ( ).
3. Push the air intake control button at
least 5 times within 3 seconds.
The indicator light in the air intake control
button will blink 3 times with 0.5 second
of interval. It indicates that the defogging
logic is canceled or returned to the pro-
grammed status.
If the battery has been discharged or dis-
connected, it resets to the defog logic
status.
OTQ047101OTQ047104
Page 147 of 332
479
Features of your vehicle
D300200ATQ
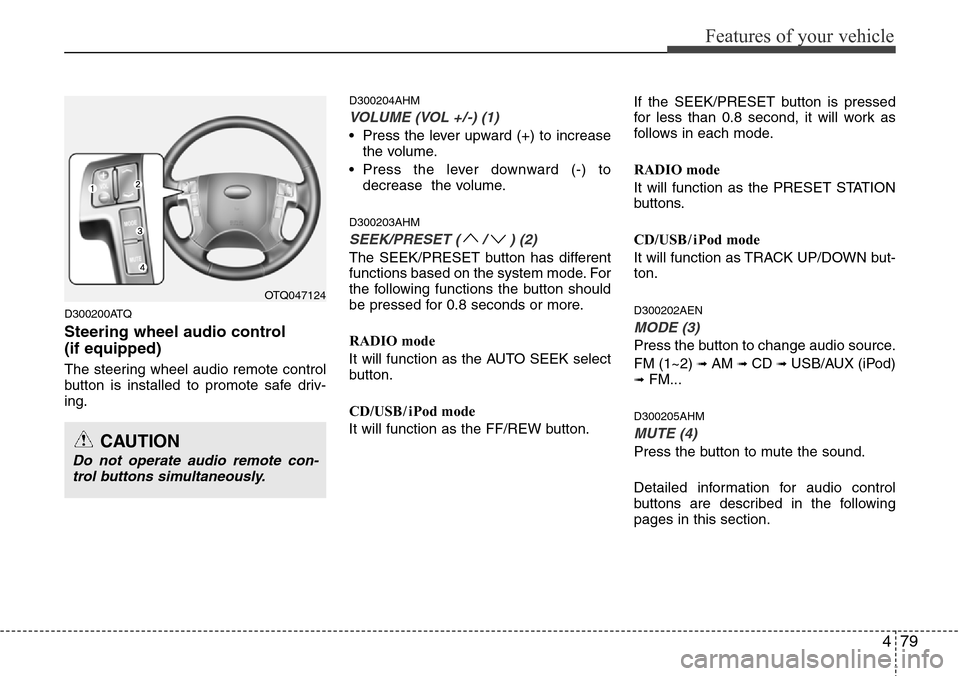
Steering wheel audio control
(if equipped)
The steering wheel audio remote control
button is installed to promote safe driv-
ing.
D300204AHM
VOLUME (VOL +/-) (1)
• Press the lever upward (+) to increase
the volume.
• Press the lever downward (-) to
decrease the volume.
D300203AHM
SEEK/PRESET ( / ) (2)
The SEEK/PRESET button has different
functions based on the system mode. For
the following functions the button should
be pressed for 0.8 seconds or more.
RADIO mode
It will function as the AUTO SEEK select
button.
CD/USB / i Pod mode
It will function as the FF/REW button.If the SEEK/PRESET button is pressed
for less than 0.8 second, it will work as
follows in each mode.
RADIO mode
It will function as the PRESET STATION
buttons.
CD/USB / i Pod mode
It will function as TRACK UP/DOWN but-
ton.
D300202AEN
MODE (3)
Press the button to change audio source.
FM (1~2)
➟ AM ➟ CD ➟ USB/AUX (iPod)➟ FM...
D300205AHM
MUTE (4)
Press the button to mute the sound.
Detailed information for audio control
buttons are described in the following
pages in this section.
OTQ047124
CAUTION
Do not operate audio remote con-
trol buttons simultaneously.
Page 155 of 332
487
Features of your vehicle
1. TAPE PROGRAM/AUX Button
This allows you to play the reverse side
of the tape by merely pressing the pro-
gram button. The PLAY and an arrow will
appear in the display to show the tape
direction.
• If you press this button more than 0.8
second. you can change to AUX mode.
• AUX mode is available only when AUX
jack is plugged in and will change back
to the last mode if you pull it out.
2. TAPE EJECT Button
• When the button is pressed with a
cassette loaded, the cassette will eject.
• When the button is pressed during
FF/REW mode, the cassette will eject.
3. DOLBY Button
If you get background noise during tape
PLAY, you can reduce this considerably
by merely pressing the DOLBY button. If
you want to cancel the DOLBY feature,
press the button again.
4. REPEAT (RPT) Button
• To repeat the track you are currently
listening to, press the RPT button. To
cancel , press again.• If you do not release RPT operation
when the track ends, it will automati-
cally be replayed.
This process will continue until you
push the button again.
5. AUTO MUSIC Search (AMS)
Button
Press the button to find the starting point
of each song in a prerecorded music
tape. The quiet space between songs
(must have at least a 4 sec. gap) can be
identified by the AUTO MUSIC Search
button.
• Pressing the will play the begin-
ning of the next music segment.
• Pressing the will start replay at the
beginning of the music just listened to.
• To stop FF or REW action, press the
button again.
6. FF/REW Button
• Fast forward tape winding starts when
the FF button is pressed during PLAY
or REW mode.
• PLAY starts when the FF button is
pressed again during FF mode.
• Tape rewinding starts when the
REW button is pressed during PLAY or
FF mode.• PLAY starts when the REW button
pressed again during REW mode.✽NOTICE
When using a portable audio device
connected to the power outlet, noise may
occur during playback. If this happens,
use the orignal power source of the
portable audio device(e.g., batteries).
CAUTION
• Do not insert anything like coins
into the player slot as damage to
the unit may occur.
• Do not place beverages close to
the audio system. The playback
mechanism may be damaged if
you spill them.
• Do not strike or allow anything to
impact the audio system, damage
to the system mechanisms could
occur.
• When no device is connected to
the AUX cable, please pull out the
cable from the JACK on the car.
(AUX MODE is operational and
noise may heard in the AUX
MODE.)
Page 158 of 332
Features of your vehicle
90 4
5. Best Station Memory (BSM)
Button
When the BSM button is pressed, the six
channels from the highest field intensity
are selected next and stored in memory.
The stations selected are stored in the
sequence frequency from the first preset
key.
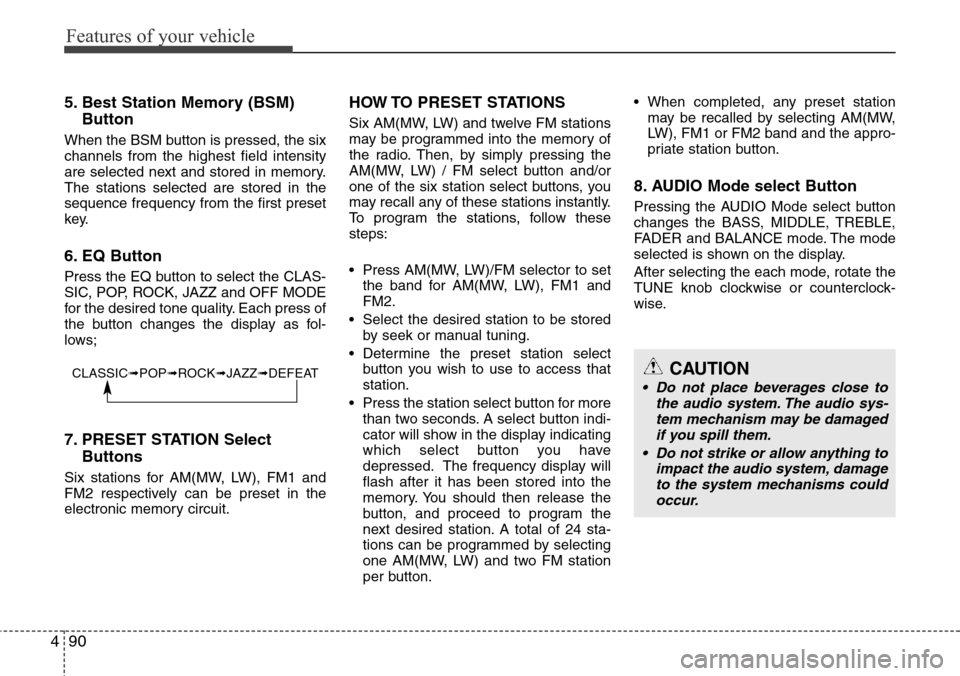
6. EQ Button
Press the EQ button to select the CLAS-
SIC, POP, ROCK, JAZZ and OFF MODE
for the desired tone quality. Each press of
the button changes the display as fol-
lows;
7. PRESET STATION Select
Buttons
Six stations for AM(MW, LW), FM1 and
FM2 respectively can be preset in the
electronic memory circuit.
HOW TO PRESET STATIONS
Six AM(MW, LW) and twelve FM stations
may be programmed into the memory of
the radio. Then, by simply pressing the
AM(MW, LW) / FM select button and/or
one of the six station select buttons, you
may recall any of these stations instantly.
To program the stations, follow these
steps:
• Press AM(MW, LW)/FM selector to set
the band for AM(MW, LW), FM1 and
FM2.
• Select the desired station to be stored
by seek or manual tuning.
• Determine the preset station select
button you wish to use to access that
station.
• Press the station select button for more
than two seconds. A select button indi-
cator will show in the display indicating
which select button you have
depressed. The frequency display will
flash after it has been stored into the
memory. You should then release the
button, and proceed to program the
next desired station. A total of 24 sta-
tions can be programmed by selecting
one AM(MW, LW) and two FM station
per button.• When completed, any preset station
may be recalled by selecting AM(MW,
LW), FM1 or FM2 band and the appro-
priate station button.
8. AUDIO Mode select Button
Pressing the AUDIO Mode select button
changes the BASS, MIDDLE, TREBLE,
FADER and BALANCE mode. The mode
selected is shown on the display.
After selecting the each mode, rotate the
TUNE knob clockwise or counterclock-
wise.
CLASSIC➟POP➟ROCK➟JAZZ➟DEFEATCAUTION
• Do not place beverages close to
the audio system. The audio sys-
tem mechanism may be damaged
if you spill them.
• Do not strike or allow anything to
impact the audio system, damage
to the system mechanisms could
occur.
Page 160 of 332
Features of your vehicle
92 4
1. CD/AUX Select Button
• Insert the CD with the label facing
upward.
• Insert the CD to start CD playback,
during radio operation.
• When a disc is in the CD deck, if you
press the CD button the CD player will
begin playing even if the radio player is
being used.
• The CD player can be used when the
ignition switch is in either the “ON” or
“ACC” position.
• Push the CD button to start CD play-
back without pushing Power ON-OFF
control knob. (Only when a CD is in the
deck.)
• If you press this button you can change
to AUX mode.
• AUX mode is available only when AUX
jack is plugged in and change back to
last mode if you pull it out.
2. CD EJECT Button
• When the EJECT button is pressed
with a CD loaded, the CD will eject.
• To eject all of the discs, press this but-
ton for one second or more.
✽NOTICE
• Do not stick paper or tape etc., on the
label side or the recording side of any
discs, as it may cause a malfunction.
• The unit cannot play a CD-
R(Recordable CD) and CD-
RW(Rewritable CD) that is not final-
ized. Please refer to the manual of CD-
R/CD-RW recorder or CD-R/CD-RW
software for more information on
finalization process.
• Depending on the recording status,
some CD-Rs/CD-RWs may not be
played on this unit.
3. TRACK UP/DOWN Button
• The desired track on the disc currently
being played can be selected using the
track number.
• Press button once to skip forward to
the beginning of the next track.
Press within a second after play-
back begins to quickly move backward
through a CD.
If you press after more than a sec-
ond, it will take you to the beginning of
the track you are now listening to.
4. FF/REW Button
If you want to fast forward or reverse
through the compact disc track, push and
hold the FF or REW button.
When you release the button, the com-
pact disc player will resume playing.
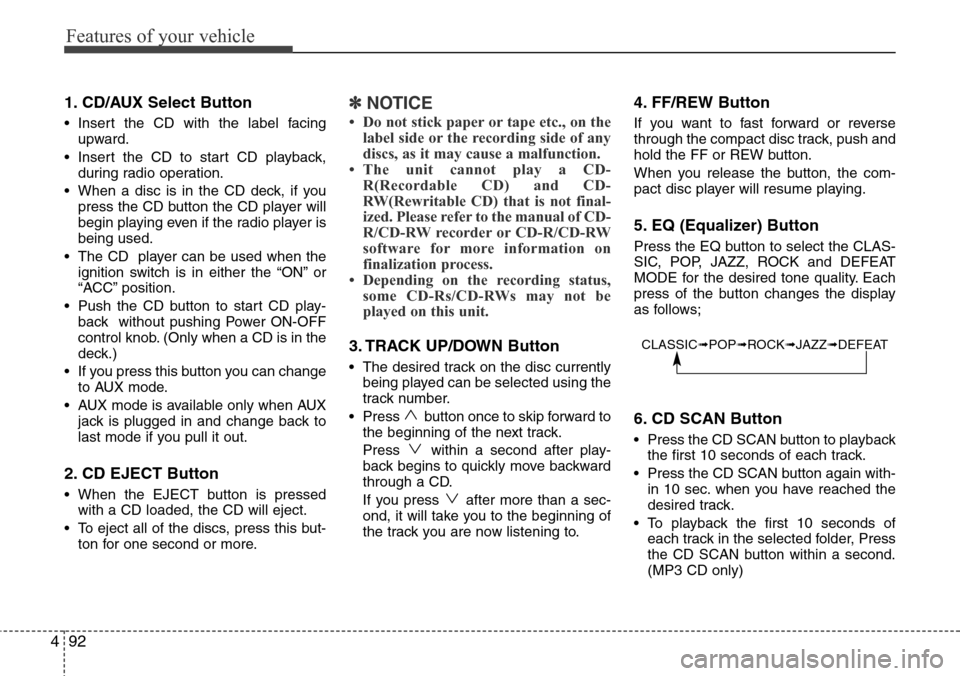
5. EQ (Equalizer) Button
Press the EQ button to select the CLAS-
SIC, POP, JAZZ, ROCK and DEFEAT
MODE for the desired tone quality. Each
press of the button changes the display
as follows;
6. CD SCAN Button
• Press the CD SCAN button to playback
the first 10 seconds of each track.
• Press the CD SCAN button again with-
in 10 sec. when you have reached the
desired track.
• To playback the first 10 seconds of
each track in the selected folder, Press
the CD SCAN button within a second.
(MP3 CD only)
CLASSIC➟POP➟ROCK➟JAZZ➟DEFEAT
Page 161 of 332
493
Features of your vehicle
7. MARK (Bookmark) Button
When the CD player unit is operating, the
desired track on the disc can be book-
marked by using the MARK button.
• Press the MARK button for more than
one second to bookmark the desired
track. "M" will be displayed on the LCD
and "MEMORY NO." will display for
approximately five seconds with a
beep sound. To play the bookmarked
tracks, press the MARK button within
one second and select the book-
marked track to play.
• To erase a bookmarked track, press
the MARK button for more than one
second. This will erase the bookmark
with a beep sound.
If you want to delete all tracks stored on
Mark Memory, press FILE SEARCH
knob in the Mark Play mode for more
than one second. You will hear a beep
sound and all tracks will be deleted from
Mark Memory with "MARK DELETE
ALL" displayed on the LCD.
✽NOTICE
Tracks stored on Mark Memory will be
automatically erased after you eject CDs
that contain those tracks.
8. RPT (Repeat) Button
• To repeat the track you are currently
listening to, press the RPT button. To
cancel, press it again. If it is pressed
for more than one second, it will repeat
all tracks within the currently played
CD.
• To repeat the music within currently
played folder, press the RPT button for
more than one second. Then it will
repeat in sequential order within the
currently played folder. To cancel,
press it again. (MP3 CD only)
• If you do not release RPT operation
when the track ends, it will automati-
cally be replayed. This process will
continue until you push the button
again.
9. RDM (Random) Button
• To listen to the music in random order,
press the RDM Button with a beep
sound for more than one second. To
cancel, press it again.
• To listen to the music within the cur-
rently played folder in random order,
press the RDM Button within one sec-
ond.To cancel, press it again within one
second. If it is pressed for more than
one second, it will be played in random
order within currently played CD (MP3
CD only).
10. FILE SEARCH Knob (TUNE
Select Knob)
• You can move through the track by
turning the FILE SEARCH knob clock-
wise or counterclockwise.
• After moving through the desired file,
press the FILE SEARCH knob to play-
back in the selected file.
• If you do not press the FILE SEARCH
knob within five seconds, the file
searching function will be released.
11. FLDR (FOLDER Search)
Button
• You can move through the folder by
pushing the FLDR button to up ( )
and down ( ).
• After moving the desired folder, press
the FILE SEARCH knob to play back in
the selected folder. If you do not press
the FILE SEARCH knob within 5 sec-
onds, the folder searching function will
be released. It is not operated in a sin-
gle folder.
Page 162 of 332
Features of your vehicle
94 4
✽NOTICE
• When using a portable audio device
connected to power outlet, noise may
occur during playback.
If this happens, use the original power
source of the portable audio device
(e.g., batteries).
• To assure proper operation of the unit,
keep the vehicle interior temperature
within a normal range by using the
vehicle’s air conditioning or heating
system.
• When replacing the fuse, replace it
with a fuse having the correct capaci-
ty.
• All stored bookmarks are all erased
when the car battery is disconnected
or power to the vehicle is lost. If this
occurs, the bookmarks will have to be
reset.
• Do not add any oil to the rotating
parts. Keep magnets, screwdrivers
and other metallic objects away from
the tape mechanism and head.CAUTION
• Do not insert warped or poor
quality discs into the CD player
as damage to the unit may occur.
• Do not insert anything like coins
into the player slot as damage to
the unit may occur.
• Do not place beverages close to
the audio system. The playback
mechanism may be damaged if
you spill them.
• Do not strike or allow anything to
impact the audio system, damage
to the system mechanisms could
occur.
• Off-road or rough surface driving
may cause the compact disc to
skip. Do not use the compact disc
when driving in such conditions
as damage to the compact disc
face could occur.
• Do not attempt to grab or pull the
compact disc out whilst the disc
is being pulled into the audio unit
by the self-loading mechanism.
Damage to the audio unit and
compact disc could occur.
• This equipment is designed to be
used only in a 12 volt DC battery
system with negative ground.
• This unit is made of precision
parts. Do not attempt to disas-
semble or adjust any parts.
• When driving your vehicle, be
sure to keep the volume of the
unit set low enough to allow you
to hear sounds coming from the
outside.
• Do not expose this equipment
(including the speakers and tape)
to water or excessive moisture.
• Avoid using recorded compact
discs in your audio unit. Original
compact discs are recommended.
• The unit is not sure of playing CD-
RW (Rewritable).
• When using the EQ function, turn
off the EQ function of the device
on the AUX input.
• When no device is connected to
the AUX cable, please pull out the
cable from the JACK on the car.
(AUX MODE is operational and
noise may heard in the AUX
MODE.)