change time Hyundai H-1 (Grand Starex) 2016 Owner's Manual
[x] Cancel search | Manufacturer: HYUNDAI, Model Year: 2016, Model line: H-1 (Grand Starex), Model: Hyundai H-1 (Grand Starex) 2016Pages: 417, PDF Size: 9.94 MB
Page 1 of 417
OWNER'S MANUAL
Operation
Maintenance
Specifications
All information in this Owner's Manual is current at the time of publication.
However, Hyundai reserves the right to make changes at any time so that
our policy of continual product improvement may be carried out.
This manual applies to all models of this vehicle and includes descriptions
and explanations of optional as well as standard equipment. As a result,
you may find material in this manual that does not apply to your specific
vehicle.
Please note that some models are equipped with Right-Hand Drive (RHD).
The explanations and illustrations for some operations in RHD models are
opposite of those written in this manual.
Page 22 of 417
35
Safety features of your vehicle
Front seat adjustment
C010101AUN
Forward and backward
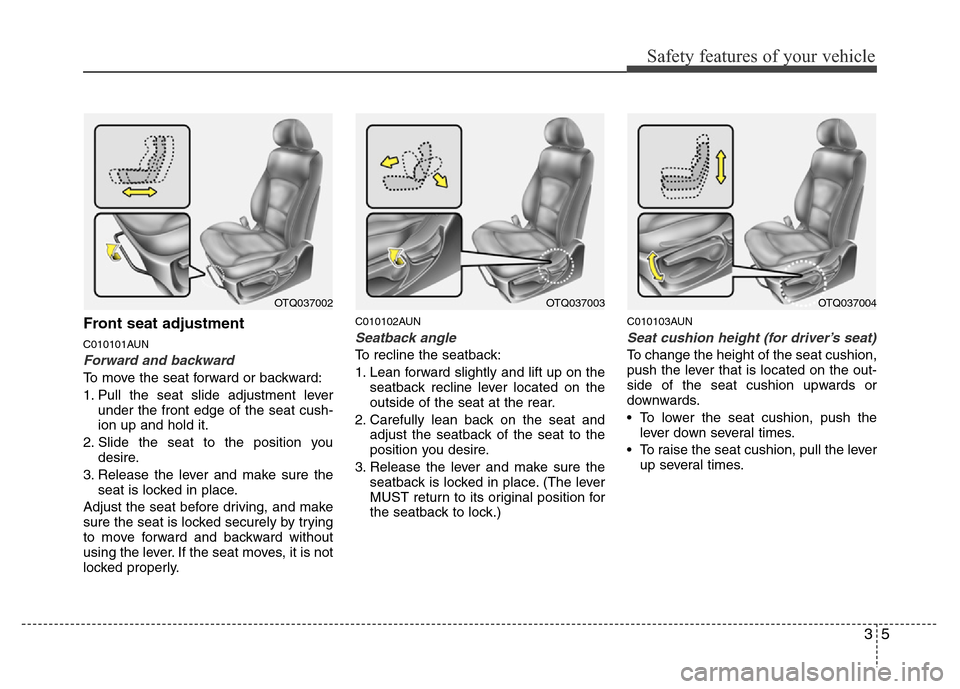
To move the seat forward or backward:
1. Pull the seat slide adjustment lever
under the front edge of the seat cush-
ion up and hold it.
2. Slide the seat to the position you
desire.
3. Release the lever and make sure the
seat is locked in place.
Adjust the seat before driving, and make
sure the seat is locked securely by trying
to move forward and backward without
using the lever. If the seat moves, it is not
locked properly.
C010102AUN
Seatback angle
To recline the seatback:
1. Lean forward slightly and lift up on the
seatback recline lever located on the
outside of the seat at the rear.
2. Carefully lean back on the seat and
adjust the seatback of the seat to the
position you desire.
3. Release the lever and make sure the
seatback is locked in place. (The lever
MUST return to its original position for
the seatback to lock.)
C010103AUN
Seat cushion height (for driver’s seat)
To change the height of the seat cushion,
push the lever that is located on the out-
side of the seat cushion upwards or
downwards.
• To lower the seat cushion, push the
lever down several times.
• To raise the seat cushion, pull the lever
up several times.
OTQ037004OTQ037003OTQ037002
Page 23 of 417
Safety features of your vehicle
6 3
Seat warmer
(Driver’s seat, if equipped)
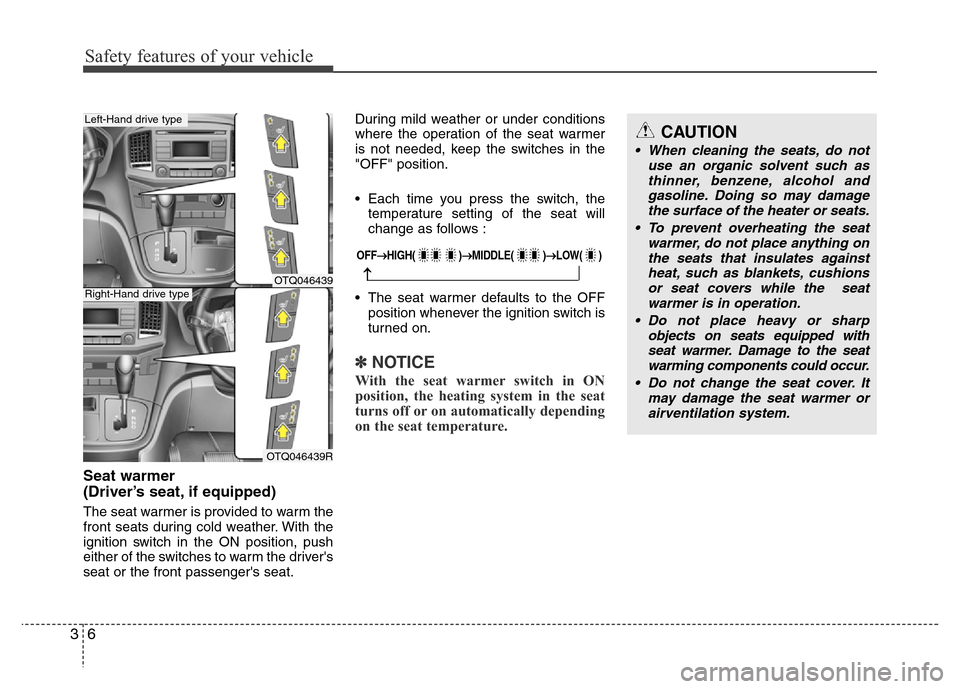
The seat warmer is provided to warm the
front seats during cold weather. With the
ignition switch in the ON position, push
either of the switches to warm the driver's
seat or the front passenger's seat.During mild weather or under conditions
where the operation of the seat warmer
is not needed, keep the switches in the
"OFF" position.
• Each time you press the switch, the
temperature setting of the seat will
change as follows :
• The seat warmer defaults to the OFF
position whenever the ignition switch is
turned on.
✽NOTICE
With the seat warmer switch in ON
position, the heating system in the seat
turns off or on automatically depending
on the seat temperature.
OTQ046439
OTQ046439R
Right-Hand drive type
Left-Hand drive type
OFF→HIGH( )→MIDDLE( )→LOW( )
→
CAUTION
Page 147 of 417
475
Features of your vehicle
DEFROSTER (IF EQUIPPED)
➃MOOD : Push the switch to turn the
mood lamp on when the
room lamp is off. Once the
mood lamp is on, each time
you press the button the color
of the light will change. The
mood lamp will turn off when
the button is pressed again
after the last color or when
the mood lamp button is
pressed for approximately 4
seconds or when the ROOM,
DOOR or DIMMER button is
pressed.
➄DIMMER : Whenever you push this
button when the room lamp
is turned on, the brightness
of the room lamp will
change within 3 level.
D220000AUN
✽NOTICE
If you want to defrost and defog the
front windshield, refer to “Windshield
defrosting and defogging” in this sec-
tion.
D220100AUN
Rear window defroster (if equipped)
The defroster heats the window to
remove frost, fog and thin ice from the
rear window, while the engine is running.
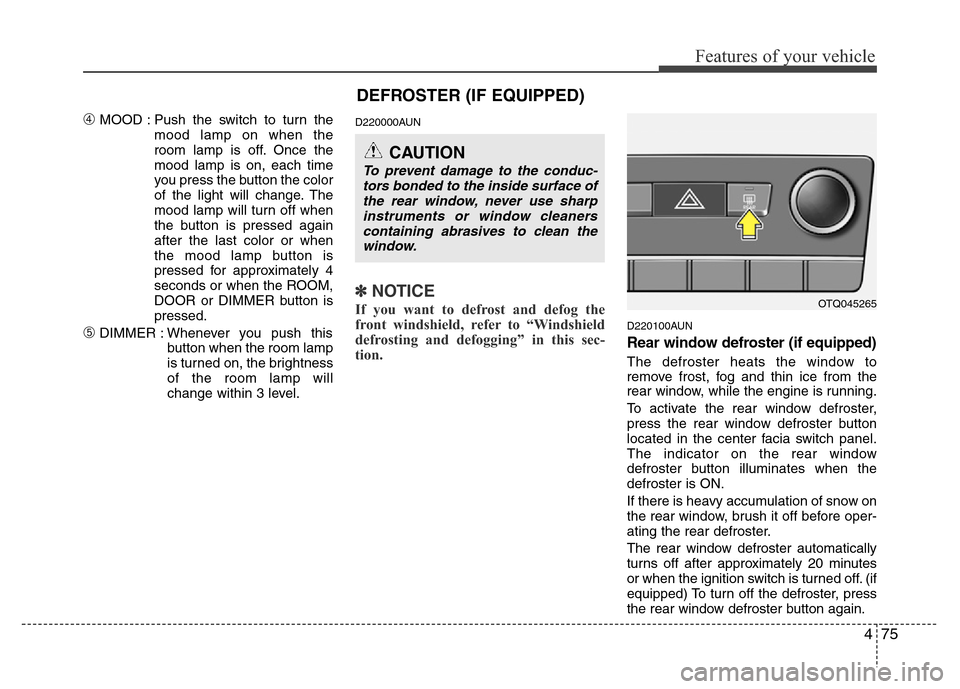
To activate the rear window defroster,
press the rear window defroster button
located in the center facia switch panel.
The indicator on the rear window
defroster button illuminates when the
defroster is ON.
If there is heavy accumulation of snow on
the rear window, brush it off before oper-
ating the rear defroster.
The rear window defroster automatically
turns off after approximately 20 minutes
or when the ignition switch is turned off. (if
equipped) To turn off the defroster, press
the rear window defroster button again.
OTQ045265
CAUTION
To prevent damage to the conduc-
tors bonded to the inside surface of
the rear window, never use sharp
instruments or window cleaners
containing abrasives to clean the
window.
Page 158 of 417
Features of your vehicle
86 4
• During air conditioning system opera-
tion, you may occasionally notice a
slight change in engine speed as the
air conditioning compressor cycles.
This is a normal system operation
characteristic.
• Use the air conditioning system every
month only for a few minutes to ensure
maximum system performance.
• When using the air conditioning sys-
tem, you may notice clear water drip-
ping (or even puddling) on the ground
under the passenger side of the vehi-
cle. This is a normal system operation
characteristic.
• Operating the air conditioning system
in the recirculated air position provides
maximum cooling, however, continual
operation in this mode may cause the
air inside the vehicle to become stale.
• During cooling operation, you may
occasionally notice a misty air flow
because of rapid cooling and humid air
intake. This is a normal system opera-
tion characteristics.Fuel-fired Heater (If Equipped)
This fuel-fired heater supplies additional
heat to the interior compartment with a
low fuel consumption to compensate the
heat provided by engine alone.
The following 3 conditions should be
meet at the same time for automatic
operation of the fuel-fired heater.
• Engine runs.
• Ambient temperature is lower than 5°C.
• Coolant temperature is lower than
68°C.
A cleaning process of the fuel-fired
heater will be performed automatically
when the heater is not operated due to
increase of coolant temperature and igni-
tion off.
During cleaning process, supplied fuel in
the heater will be burnt completely and
any smoke will be expelled. It is a neces-
sary process for next operation and dura-
bility of the heater and takes about 1~3
minutes.
✽NOTICE
• The following symptoms will occur
and it is normal.
- A white smoke may come out from
the fuel-fired heater exhaust pipe
during operation of the heater.
However, when an excessive black
smoke is discharged, the fuel-fired
heater should be inspected.
- A “buk-buk” noise from the heater is
a noise to form flame for combus-
tion.
- When the heater is operated at full
load, a “Wooing” noise occurs.
- When shutting off the engine during
heater operation, a “Wing” noise
occurs to perform the cleaning
process.
• When refueling, stop operation of the
fuel-fired heater by shutting off the
engine.
Page 159 of 417
487
Features of your vehicle
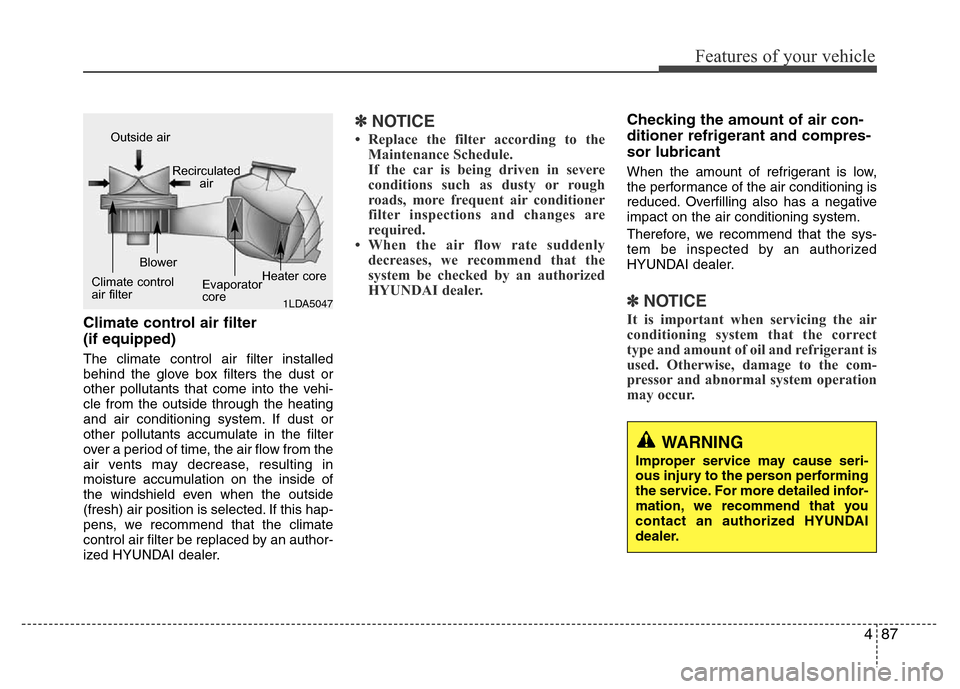
Climate control air filter
(if equipped)
The climate control air filter installed
behind the glove box filters the dust or
other pollutants that come into the vehi-
cle from the outside through the heating
and air conditioning system. If dust or
other pollutants accumulate in the filter
over a period of time, the air flow from the
air vents may decrease, resulting in
moisture accumulation on the inside of
the windshield even when the outside
(fresh) air position is selected. If this hap-
pens, we recommend that the climate
control air filter be replaced by an author-
ized HYUNDAI dealer.
✽NOTICE
• Replace the filter according to the
Maintenance Schedule.
If the car is being driven in severe
conditions such as dusty or rough
roads, more frequent air conditioner
filter inspections and changes are
required.
• When the air flow rate suddenly
decreases, we recommend that the
system be checked by an authorized
HYUNDAI dealer.
Checking the amount of air con-
ditioner refrigerant and compres-
sor lubricant
When the amount of refrigerant is low,
the performance of the air conditioning is
reduced. Overfilling also has a negative
impact on the air conditioning system.
Therefore, we recommend that the sys-
tem be inspected by an authorized
HYUNDAI dealer.
✽NOTICE
It is important when servicing the air
conditioning system that the correct
type and amount of oil and refrigerant is
used. Otherwise, damage to the com-
pressor and abnormal system operation
may occur.
1LDA5047
Outside air
Recirculated
air
Climate control
air filterBlower
Evaporator
coreHeater core
WARNING
Improper service may cause seri-
ous injury to the person performing
the service. For more detailed infor-
mation, we recommend that you
contact an authorized HYUNDAI
dealer.
Page 164 of 417
Features of your vehicle
92 4
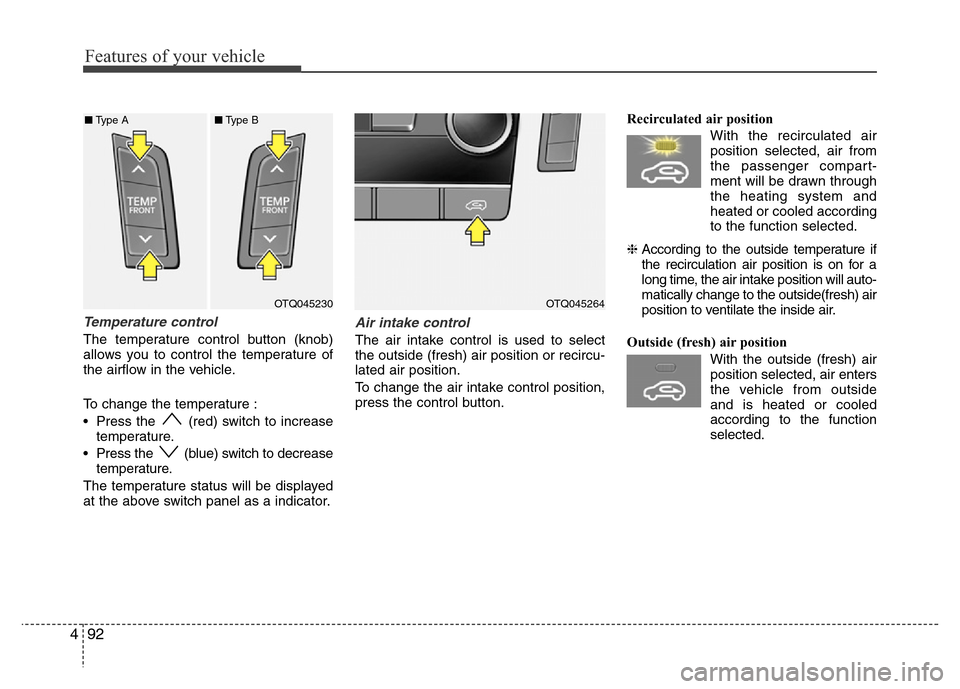
Temperature control
The temperature control button (knob)
allows you to control the temperature of
the airflow in the vehicle.
To change the temperature :
• Press the (red) switch to increase
temperature.
• Press the (blue) switch to decrease
temperature.
The temperature status will be displayed
at the above switch panel as a indicator.
Air intake control
The air intake control is used to select
the outside (fresh) air position or recircu-
lated air position.
To change the air intake control position,
press the control button.Recirculated air position
With the recirculated air
position selected, air from
the passenger compart-
ment will be drawn through
the heating system and
heated or cooled according
to the function selected.
❈According to the outside temperature if
the recirculation air position is on for a
long time, the air intake position will auto-
matically change to the outside(fresh) air
position to ventilate the inside air.
Outside (fresh) air position
With the outside (fresh) air
position selected, air enters
the vehicle from outside
and is heated or cooled
according to the function
selected.
OTQ045264OTQ045230 ■Type A■Type B
Page 169 of 417
497
Features of your vehicle
Air conditioning (if equipped)
HYUNDAI Air Conditioning Systems are
filled with environmentally friendly
R-134a refrigerant.
1. Start the engine. Push the air condi-
tioning button.
2. Set the mode to the position.
3. Set the air intake control to the outside
air or recirculated air position.
4. Adjust the fan speed control and tem-
perature control to maintain maximum
comfort.
• When maximum cooling is desired, set
the temperature control to the extreme
left position, then set the fan speed
control to the highest speed.✽NOTICE
• When using the air conditioning sys-
tem, monitor the temperature gauge
closely while driving up hills or in
heavy traffic when outside tempera-
tures are high. Air conditioning sys-
tem operation may cause engine over-
heating. Continue to use the blower
fan but turn the air conditioning sys-
tem off if the temperature gauge indi-
cates engine overheating.
• When opening the windows in humid
weather air conditioning may create
water droplets inside the vehicle.
Since excessive water droplets may
cause damage to electrical equipment,
air conditioning should only be run
with the windows closed.
Air conditioning system operation tips
• If the vehicle has been parked in direct
sunlight during hot weather, open the
windows for a short time to let the hot
air inside the vehicle escape.
• To help reduce moisture inside of the
windows on rainy or humid days,
decrease the humidity inside the vehi-
cle by operating the air conditioning
system.• During air conditioning system opera-
tion, you may occasionally notice a
slight change in engine speed as the
air conditioning compressor cycles.
This is a normal system operation
characteristic.
• Use the air conditioning system every
month only for a few minutes to ensure
maximum system performance.
• When using the air conditioning sys-
tem, you may notice clear water drip-
ping (or even puddling) on the ground
under the passenger side of the vehi-
cle. This is a normal system operation
characteristic.
• Operating the air conditioning system
in the recirculated air position provides
maximum cooling, however, continual
operation in this mode may cause the
air inside the vehicle to become stale.
• During cooling operation, you may
occasionally notice a misty air flow
because of rapid cooling and humid air
intake. This is a normal system opera-
tion characteristics.
Page 182 of 417
Features of your vehicle
110 4
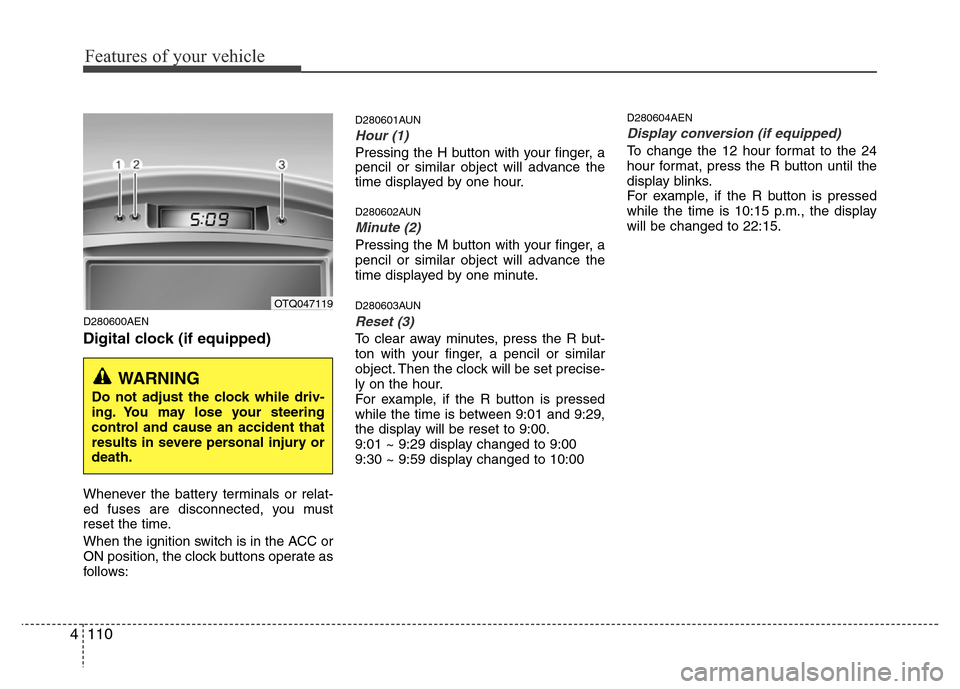
D280600AEN
Digital clock (if equipped)
Whenever the battery terminals or relat-
ed fuses are disconnected, you must
reset the time.
When the ignition switch is in the ACC or
ON position, the clock buttons operate as
follows:
D280601AUN
Hour (1)
Pressing the H button with your finger, a
pencil or similar object will advance the
time displayed by one hour.
D280602AUN
Minute (2)
Pressing the M button with your finger, a
pencil or similar object will advance the
time displayed by one minute.
D280603AUN
Reset (3)
To clear away minutes, press the R but-
ton with your finger, a pencil or similar
object. Then the clock will be set precise-
ly on the hour.
For example, if the R button is pressed
while the time is between 9:01 and 9:29,
the display will be reset to 9:00.
9:01 ~ 9:29 display changed to 9:00
9:30 ~ 9:59 display changed to 10:00
D280604AEN
Display conversion (if equipped)
To change the 12 hour format to the 24
hour format, press the R button until the
display blinks.
For example, if the R button is pressed
while the time is 10:15 p.m., the display
will be changed to 22:15.
OTQ047119
WARNING
Do not adjust the clock while driv-
ing. You may lose your steering
control and cause an accident that
results in severe personal injury or
death.
Page 194 of 417
Features of your vehicle
122 4
✽NOTICE - USING THE iPod®
DEVICE
• Some iPod®models may not support
communication protocol and files may
not properly play.
Supported iPod
®models:
- iPod®Mini
- iPod®4th (Photo) ~ 6th (Classic)
generation
- iPod
®Nano 1st~4th generation
- iPod®Touch 1st~2nd generation
• The order of search or playback of
songs in the iPod
®can be different
from the order searched in the audio
system.
• If the iPod
®disabled due to its own
malfunction, reset the iPod®. (Reset:
Refer to iPod®manual)
• An iPod®may not operate normally
on low battery.
(Continued)(Continued)
• Some iPod
®devices, such as the
iPhone®, can be connected through
the Bluetooth®Wireless Technology
interface. The device must have audio
Bluetooth
®Wireless Technology capa-
bility (such as for stereo headphone
Bluetooth
®Wireless Technology ). The
device can play, but it will not be con-
trolled by the audio system.
• To use iPod
®features within the
audio, use the cable provided upon
purchasing an iPod
®d device.
• Skipping or improper operation may
occur depending on the characteris-
tics of your iPod
®/iPhone®device.
• If your iPhone®is connected to both
the Bluetooth®Wireless Technology
and USB, the sound may not be prop-
erly played. In your iPhone
®, select
the Dock connector orBluetooth®
Wireless Technology to change the
sound output (source).
(Continued)(Continued)
• When connecting
iPod®with theiPod®Power Cable, insert the connec-
tor to the multimedia socket complete-
ly. If not inserted completely, communi-
cations between
iPod®and audio may
be interrupted.
• When adjusting the sound effects of
the
iPod®and the audio system, the
sound effects of both devices will over-
lap and might reduce or distort the
quality of the sound.
• Deactivate (turn off) the equalizer
function of an
iPod®when adjusting
the audio system’s volume, and turn
off the equalizer of the audio system
when using the equalizer of an
iPod®.
• When not using iPod®with car audio,
detach the iPod®cable from iPod®.
Otherwise, iPod®may remain in
accessory mode, and may not work
properly.