check oil Hyundai H-100 Truck 2010 s User Guide
[x] Cancel search | Manufacturer: HYUNDAI, Model Year: 2010, Model line: H-100 Truck, Model: Hyundai H-100 Truck 2010Pages: 207, PDF Size: 7.9 MB
Page 163 of 207
6
DO-IT-YOURSELF MAINTENANCE
5
G020A01HR-GAT Engine Compartment The following should be checked regu- larly:
o Engine oil level and condition
o Transmission fluid level and condi-
tion
o Brake fluid level
o Engine coolant level
o Windshield washer fluid level
o Accessory drive belt condition
o Engine coolant hose condition
o Fluid leaks (on or below compo- nents)
o Power steering fluid level
o Battery condition
o Air filter condition G020C01HR-GAT Vehicle Interior The following should be checked each time when the vehicle is driven:
o Lights operation
o Windshield wiper operation
o Horn operation
o Defroster, heater system operation
(and air conditioning, if installed)
o Steering operation and condition
o Mirror condition and operation
o Turn signal operation
o Accelerator pedal operation
o Brake operation, including parking
brake
o Manual transmission operation, in- cluding clutch operation
o Seat control condition and operation
o Seat belt condition and operation
o Sunvisor operation If you notice anything that does not operate correctly or appears to be functioning incorrectly, inspect it care-fully and seek assistance from your Hyundai dealer if service is needed.
G020B01A-AAT Vehicle Exterior The following should be checked monthly:
o Overall appearance and condition
o Wheel condition and wheel nut torque
o Exhaust system condition
o Light condition and operation
o Windshield glass condition
o Wiper blade condition
o Paint condition and body corrosion
o Fluid leaks
o Door and hood lock condition
o Tire pressure and condition
(including spare tire)
GENERAL CHECKS
Page 164 of 207
6 DO-IT-YOURSELF MAINTENANCE
6
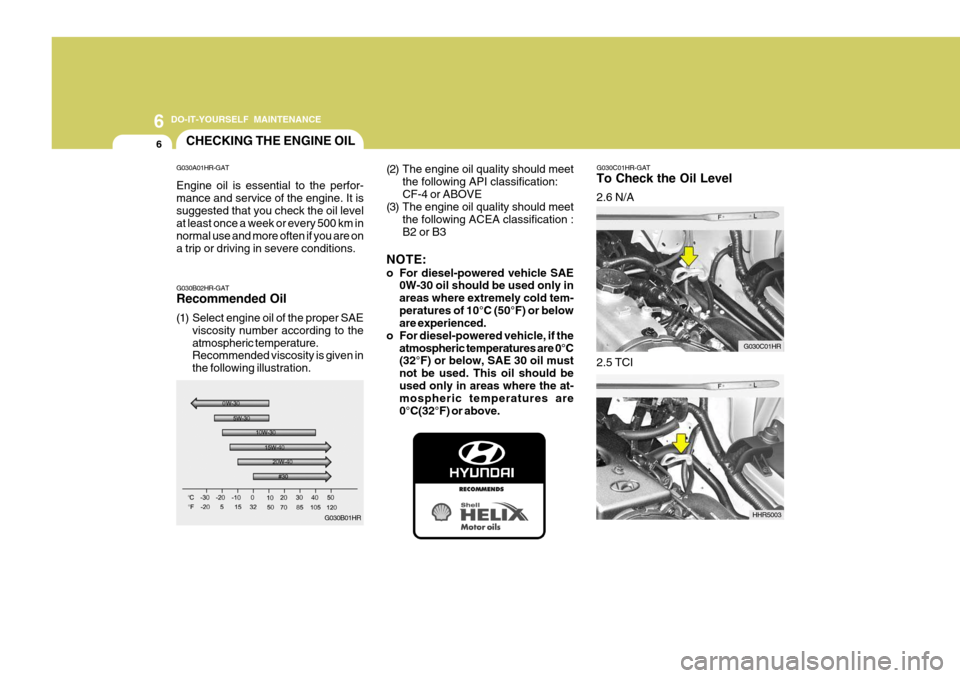
G030C01HR-GAT To Check the Oil Level 2.6 N/A
HHR5003
2.5 TCI
CHECKING THE ENGINE OIL
G030B01HR
G030B02HR-GAT Recommended Oil
(1) Select engine oil of the proper SAE
viscosity number according to the atmospheric temperature. Recommended viscosity is given in the following illustration. (2) The engine oil quality should meet
the following API classification:CF-4 or ABOVE
(3) The engine oil quality should meet
the following ACEA classification :B2 or B3
NOTE:
o For diesel-powered vehicle SAE 0W-30 oil should be used only in areas where extremely cold tem-peratures of 10°C (50°F) or below are experienced.
o For diesel-powered vehicle, if the
atmospheric temperatures are 0°C(32°F) or below, SAE 30 oil must not be used. This oil should beused only in areas where the at- mospheric temperatures are 0°C(32°F) or above. G030C01HR
G030A01HR-GAT Engine oil is essential to the perfor- mance and service of the engine. It issuggested that you check the oil level at least once a week or every 500 km in normal use and more often if you are ona trip or driving in severe conditions.
Page 165 of 207
6
DO-IT-YOURSELF MAINTENANCE
7
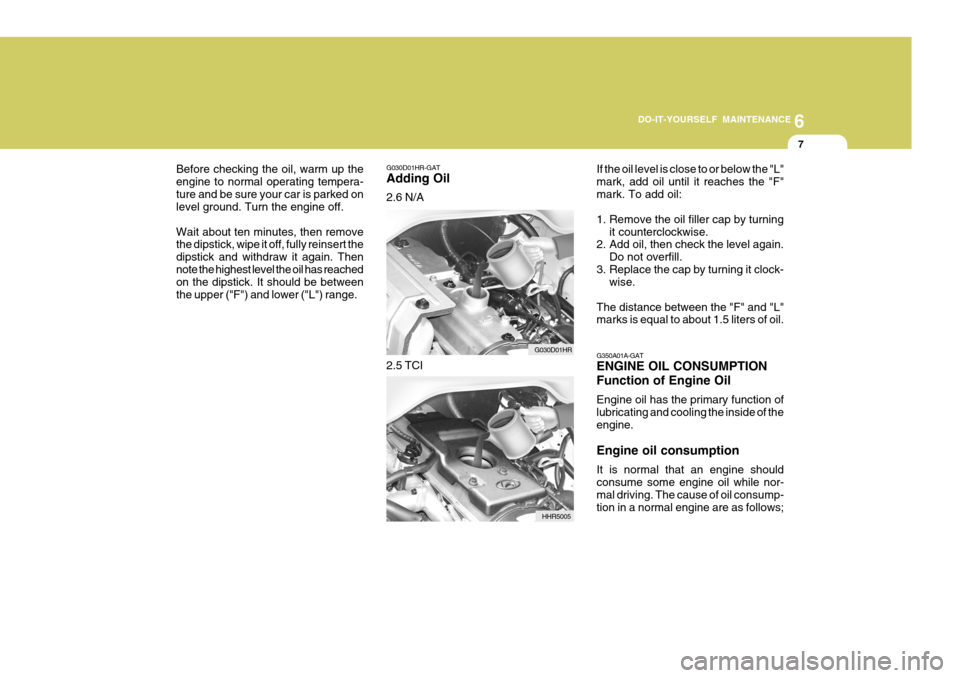
G030D01HR-GAT Adding Oil 2.6 N/A
Before checking the oil, warm up the engine to normal operating tempera-ture and be sure your car is parked on level ground. Turn the engine off. Wait about ten minutes, then remove the dipstick, wipe it off, fully reinsert the dipstick and withdraw it again. Thennote the highest level the oil has reached on the dipstick. It should be between the upper ("F") and lower ("L") range.
G030D01HR
2.5 TCI
HHR5005If the oil level is close to or below the "L"mark, add oil until it reaches the "F"mark. To add oil:
1. Remove the oil filler cap by turning
it counterclockwise.
2. Add oil, then check the level again.
Do not overfill.
3. Replace the cap by turning it clock- wise.
The distance between the "F" and "L" marks is equal to about 1.5 liters of oil. G350A01A-GAT ENGINE OIL CONSUMPTION Function of Engine Oil Engine oil has the primary function of
lubricating and cooling the inside of theengine. Engine oil consumption It is normal that an engine should consume some engine oil while nor- mal driving. The cause of oil consump- tion in a normal engine are as follows;
Page 167 of 207
6
DO-IT-YOURSELF MAINTENANCE
9
!WARNING:
Be very careful when draining the engine oil as it may be hot enough to burn you!
4. When the oil has stopped draining, replace the drain plug using a new gasket and retighten by turning it clockwise.
Tightening torque : 3.5 ~ 4.5 kgf.m
5. Remove the oil filter by turning it counterclockwise with a oil filter wrench of the proper size. A certainamount of oil will come out when you remove the filter. So be sure to have your drain pan in place underneathit.
6. Install a new oil filter in accordance
with the instructions on the carton oron the filter itself. Do not over-tighten.
Tightening torque: 2.3 ~ 2.5 kgf.m Be sure that the mounting surfaceon the engine is clean and that theold gasket is removed completely. Lubricate the new gasket on the filter with clean engine oil beforeinstallation.!
7. Remove the engine oil level dipstick.
8. Refill the crankcase with the recom- mended engine oil slowly. Refer to the specification in chapter 9 for engine oil capacity.
CAUTION:
Slowly pour the recommended oilby using a funnel. Do not overfill not to damage the engine.
9. Start the engine and check to be sure no oil is leaking from the drain plug or oil filter.
10. Shut off the engine and recheck the
oil level.
NOTE: Always dispose of used engine oil in an environmentally acceptable man-ner. It is suggested that it be placed in a sealed container and taken to a service station for reclamation. Donot pour the oil on the ground or put it into the household trash. WARNING:
Used motor oil may cause irritation or cancer of the skin if left in contact with the skin for prolonged periods of time. Wash your hands thoroughlywith soap and warm water as soon as possible after handling used oil.
!
Page 173 of 207
6
DO-IT-YOURSELF MAINTENANCE
15
CAUTION:
o Radiator antifreeze (engine cool- ant) should not be used in the washer system because it will damage the car's finish.
o The washer should not be oper- ated if the washer reservoir isempty. This can damage thewasher fluid pump.!
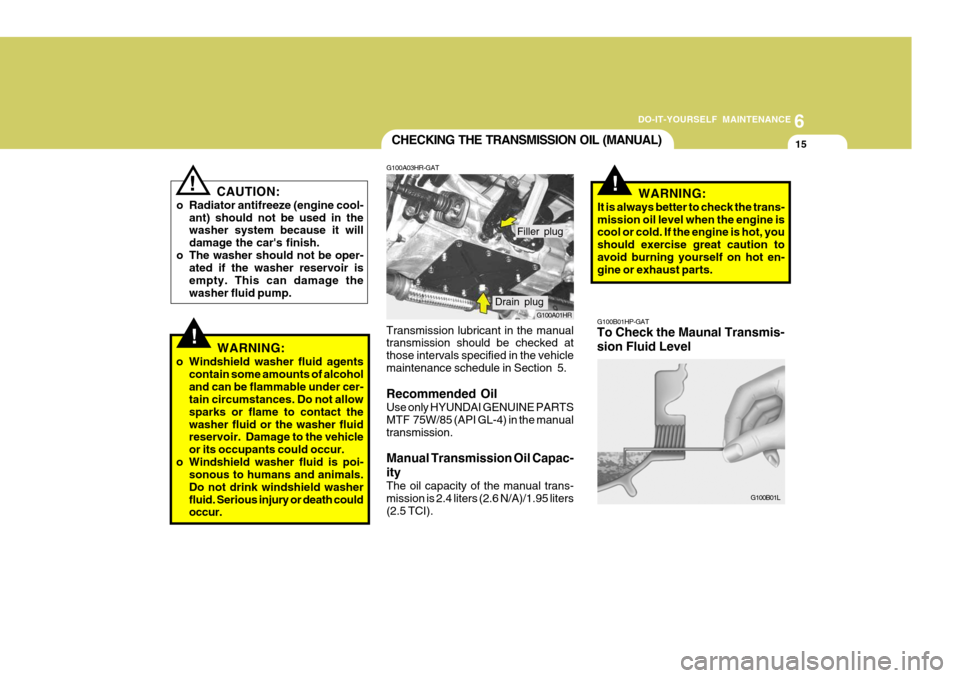
CHECKING THE TRANSMISSION OIL (MANUAL)
G100A03HR-GAT
G100A01HR
Transmission lubricant in the manual transmission should be checked at those intervals specified in the vehiclemaintenance schedule in Section 5. Recommended Oil Use only HYUNDAI GENUINE PARTS MTF 75W/85 (API GL-4) in the manualtransmission. Manual Transmission Oil Capac- ity The oil capacity of the manual trans- mission is 2.4 liters (2.6 N/A)/1.95 liters(2.5 TCI).
Drain plug Filler plug
!WARNING:
o Windshield washer fluid agents contain some amounts of alcohol and can be flammable under cer- tain circumstances. Do not allow sparks or flame to contact thewasher fluid or the washer fluid reservoir. Damage to the vehicle or its occupants could occur.
o Windshield washer fluid is poi- sonous to humans and animals.Do not drink windshield washerfluid. Serious injury or death could occur.
!
G100B01HP-GAT To Check the Maunal Transmis- sion Fluid Level
G100B01L
WARNING:
It is always better to check the trans- mission oil level when the engine is cool or cold. If the engine is hot, you should exercise great caution toavoid burning yourself on hot en- gine or exhaust parts.
Page 174 of 207
6 DO-IT-YOURSELF MAINTENANCE
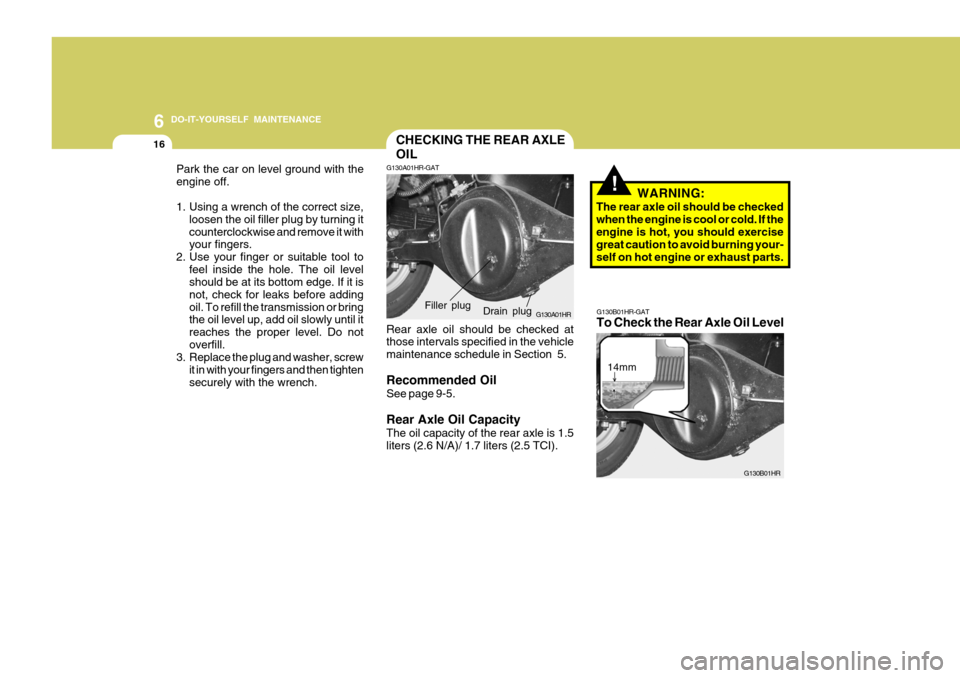
16CHECKING THE REAR AXLE OIL
!
Park the car on level ground with the engine off.
1. Using a wrench of the correct size,
loosen the oil filler plug by turning it counterclockwise and remove it with your fingers.
2. Use your finger or suitable tool to
feel inside the hole. The oil levelshould be at its bottom edge. If it is not, check for leaks before addingoil. To refill the transmission or bring the oil level up, add oil slowly until it reaches the proper level. Do notoverfill.
3. Replace the plug and washer, screw
it in with your fingers and then tightensecurely with the wrench. G130A01HR-GAT
G130A01HR
Rear axle oil should be checked at those intervals specified in the vehicle maintenance schedule in Section 5. Recommended Oil See page 9-5. Rear Axle Oil Capacity The oil capacity of the rear axle is 1.5 liters (2.6 N/A)/ 1.7 liters (2.5 TCI). WARNING:
The rear axle oil should be checkedwhen the engine is cool or cold. If the engine is hot, you should exercise great caution to avoid burning your-self on hot engine or exhaust parts.
Drain plug
Filler plug
G130B01HR-GAT To Check the Rear Axle Oil Level
G130B01HR
14mm
Page 175 of 207
6
DO-IT-YOURSELF MAINTENANCE
17
Park the car on level ground with the engine off.
1. Using a wrench of the correct size, loosen the oil filler plug by turning it counterclockwise and remove it with your fingers.
2. Use a suitable tool to feel inside the
hole. The oil level should be within 14mm from its bottom edge. If it is not, check for leaks before adding oil. Torefill the rear axle or bring the oil level up,add oil slowly until it reaches the proper level. Do not overfill.
3. Replace the plug and washer, screw it in with your fingers and then tightensecurely with the wrench.
NOTE: It is recommended that the rear axle oil should be checked by an autho- rized Hyundai dealer.
!
CHECKING THE BRAKES
G120A01A-AAT
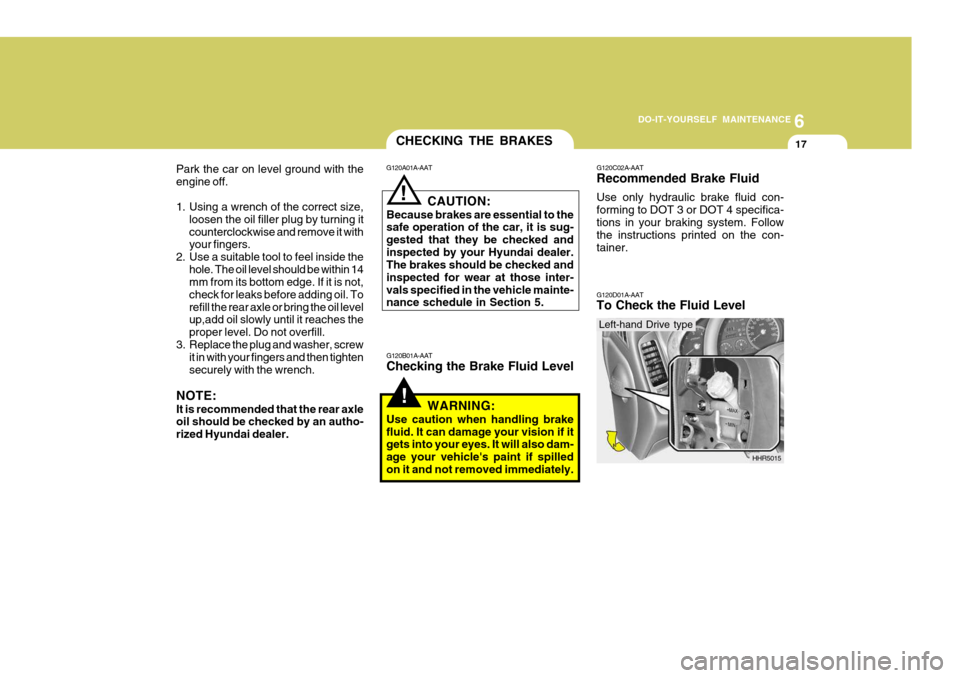
G120B01A-AAT Checking the Brake Fluid Level
! CAUTION:
Because brakes are essential to the safe operation of the car, it is sug- gested that they be checked andinspected by your Hyundai dealer. The brakes should be checked and inspected for wear at those inter-vals specified in the vehicle mainte- nance schedule in Section 5.
WARNING:
Use caution when handling brake fluid. It can damage your vision if it gets into your eyes. It will also dam- age your vehicle's paint if spilledon it and not removed immediately.
G120C02A-AAT Recommended Brake Fluid Use only hydraulic brake fluid con- forming to DOT 3 or DOT 4 specifica-tions in your braking system. Follow the instructions printed on the con- tainer. G120D01A-AAT To Check the Fluid Level
HHR5015
Left-hand Drive type
Page 183 of 207
6
DO-IT-YOURSELF MAINTENANCE
25
!
o If battery fluid is on your skin, flush
the affected areas with water for at least 15 minutes and then seek medi- cal assistance.
o If battery fluid is in your eyes, rinse out your eyes with water and getmedical assistance as soon as pos- sible. While you are being driven toget medical assistance, continue to rinse your eyes by using a sponge or soft cloth saturated with water.
o If you swallow battery fluid, drink a large quantity of water or milk fol-lowed by milk of magnesia, eat a rawegg or drink vegetable oil. Get medi- cal assistance as soon as possible.
While batteries are being charged (ei-ther by a battery charger or by the vehicle's alternator), they produce ex-plosive gases. Always observe these warnings to prevent injuries from oc- curring:
o Charge batteries only in a well ven- tilated area.
o Do not permit flames, sparks or smoking in the area.
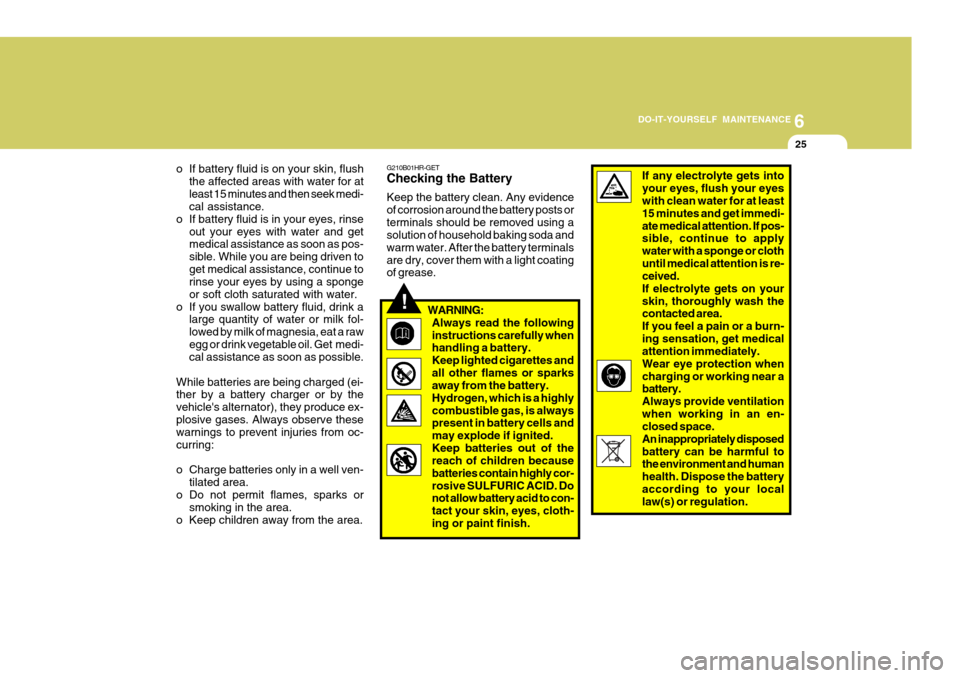
o Keep children away from the area.G210B01HR-GET Checking the Battery Keep the battery clean. Any evidence of corrosion around the battery posts orterminals should be removed using a solution of household baking soda and warm water. After the battery terminalsare dry, cover them with a light coating of grease.
WARNING:Always read the following instructions carefully when handling a battery. Keep lighted cigarettes andall other flames or sparks away from the battery. Hydrogen, which is a highlycombustible gas, is always present in battery cells and may explode if ignited.Keep batteries out of the reach of children because batteries contain highly cor-rosive SULFURIC ACID. Do not allow battery acid to con- tact your skin, eyes, cloth-ing or paint finish. If any electrolyte gets intoyour eyes, flush your eyes with clean water for at least 15 minutes and get immedi-ate medical attention. If pos- sible, continue to apply water with a sponge or clothuntil medical attention is re- ceived. If electrolyte gets on yourskin, thoroughly wash the contacted area. If you feel a pain or a burn-ing sensation, get medical attention immediately. Wear eye protection whencharging or working near a battery. Always provide ventilationwhen working in an en- closed space. An inappropriately disposedbattery can be harmful to the environment and human health. Dispose the batteryaccording to your local law(s) or regulation.
Page 185 of 207
6
DO-IT-YOURSELF MAINTENANCE
27
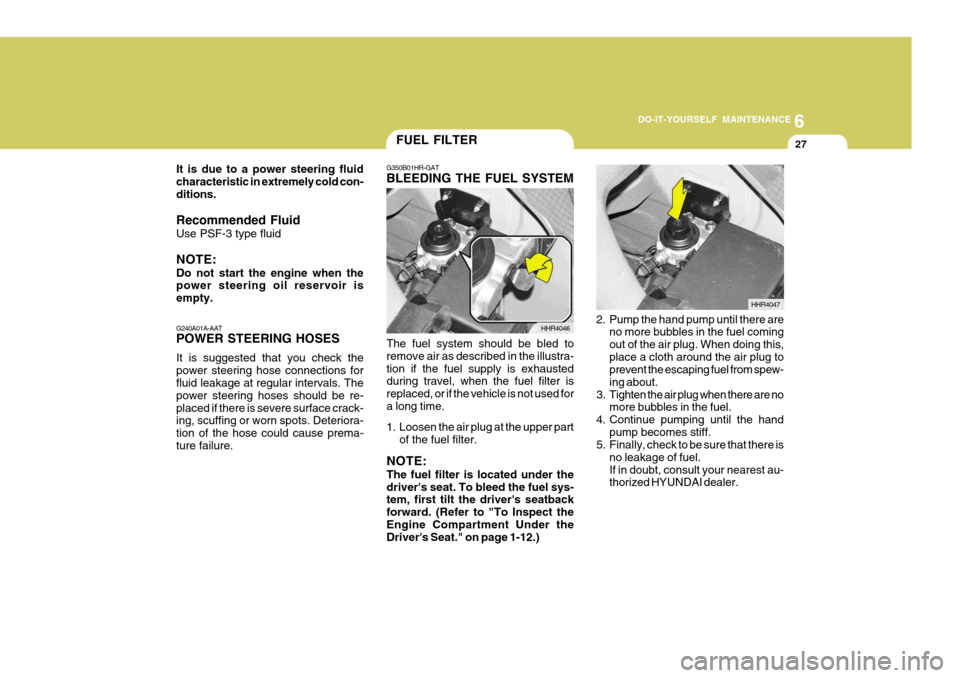
G350B01HR-GAT BLEEDING THE FUEL SYSTEM
The fuel system should be bled to remove air as described in the illustra-tion if the fuel supply is exhausted during travel, when the fuel filter is replaced, or if the vehicle is not used fora long time.
1. Loosen the air plug at the upper part of the fuel filter.
NOTE: The fuel filter is located under the driver's seat. To bleed the fuel sys- tem, first tilt the driver's seatback forward. (Refer to "To Inspect theEngine Compartment Under the Driver's Seat." on page 1-12.) HHR4046
2. Pump the hand pump until there are
no more bubbles in the fuel coming out of the air plug. When doing this,place a cloth around the air plug to prevent the escaping fuel from spew- ing about.
3. Tighten the air plug when there are no more bubbles in the fuel.
4. Continue pumping until the hand
pump becomes stiff.
5. Finally, check to be sure that there is
no leakage of fuel.If in doubt, consult your nearest au- thorized HYUNDAI dealer. HHR4047
FUEL FILTER
G240A01A-AAT POWER STEERING HOSES It is suggested that you check the power steering hose connections for fluid leakage at regular intervals. The power steering hoses should be re-placed if there is severe surface crack- ing, scuffing or worn spots. Deteriora- tion of the hose could cause prema-ture failure.
It is due to a power steering fluidcharacteristic in extremely cold con-ditions. Recommended Fluid Use PSF-3 type fluid NOTE: Do not start the engine when the power steering oil reservoir is empty.
Page 188 of 207
6 DO-IT-YOURSELF MAINTENANCE
30REPLACEMENT OF LIGHT BULBS
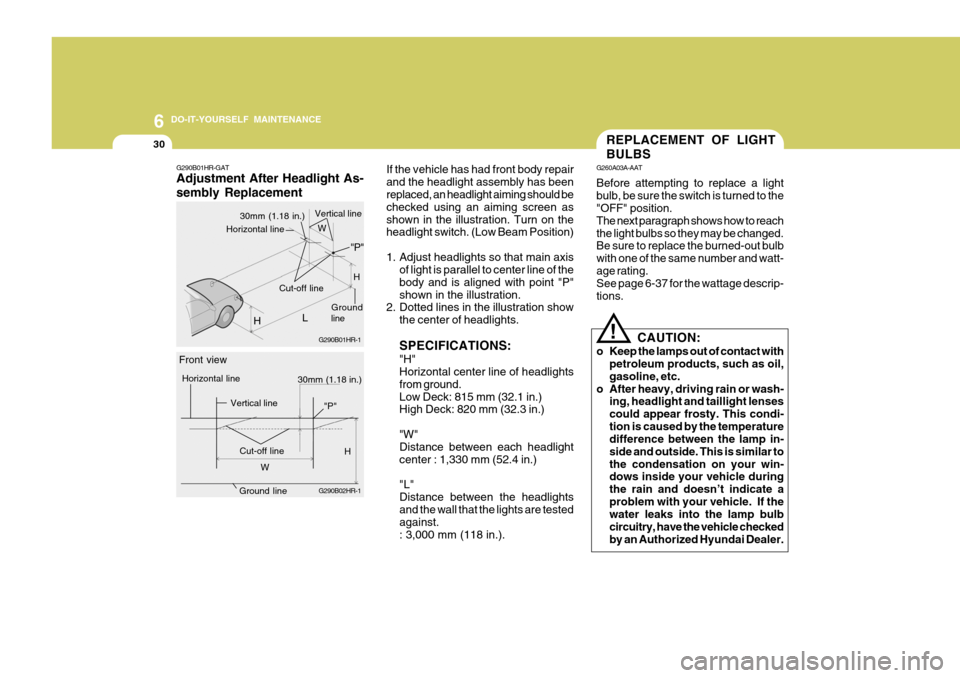
If the vehicle has had front body repair and the headlight assembly has been replaced, an headlight aiming should be checked using an aiming screen asshown in the illustration. Turn on the headlight switch. (Low Beam Position)
1. Adjust headlights so that main axis of light is parallel to center line of the body and is aligned with point "P"shown in the illustration.
2. Dotted lines in the illustration show
the center of headlights. SPECIFICATIONS: "H" Horizontal center line of headlights from ground.Low Deck: 815 mm (32.1 in.) High Deck: 820 mm (32.3 in.) "W" Distance between each headlight center : 1,330 mm (52.4 in.) "L" Distance between the headlightsand the wall that the lights are tested against. : 3,000 mm (118 in.). G260A03A-AAT Before attempting to replace a light bulb, be sure the switch is turned to the "OFF" position. The next paragraph shows how to reachthe light bulbs so they may be changed. Be sure to replace the burned-out bulb with one of the same number and watt-age rating. See page 6-37 for the wattage descrip- tions.
CAUTION:
o Keep the lamps out of contact with petroleum products, such as oil,gasoline, etc.
o After heavy, driving rain or wash- ing, headlight and taillight lensescould appear frosty. This condi-tion is caused by the temperature difference between the lamp in- side and outside. This is similar tothe condensation on your win- dows inside your vehicle during the rain and doesn’t indicate aproblem with your vehicle. If the water leaks into the lamp bulb circuitry, have the vehicle checkedby an Authorized Hyundai Dealer.
!
G290B01HR-GAT Adjustment After Headlight As- sembly Replacement
G290B01HR-1
H
Ground line
30mm (1.18 in.)
Vertical line
L
Cut-off line "P"
Horizontal line
G290B02HR-1
30mm (1.18 in.)
Front view
Horizontal line
Vertical line
Cut-off lineH
W H
W
Ground line
"P"