check oil Hyundai H-100 Truck 2010 Owner's Manuals
[x] Cancel search | Manufacturer: HYUNDAI, Model Year: 2010, Model line: H-100 Truck, Model: Hyundai H-100 Truck 2010Pages: 207, PDF Size: 7.9 MB
Page 27 of 207
1FEATURES OF YOUR HYUNDAI
26WARNING AND INDICATOR LIGHTS
!
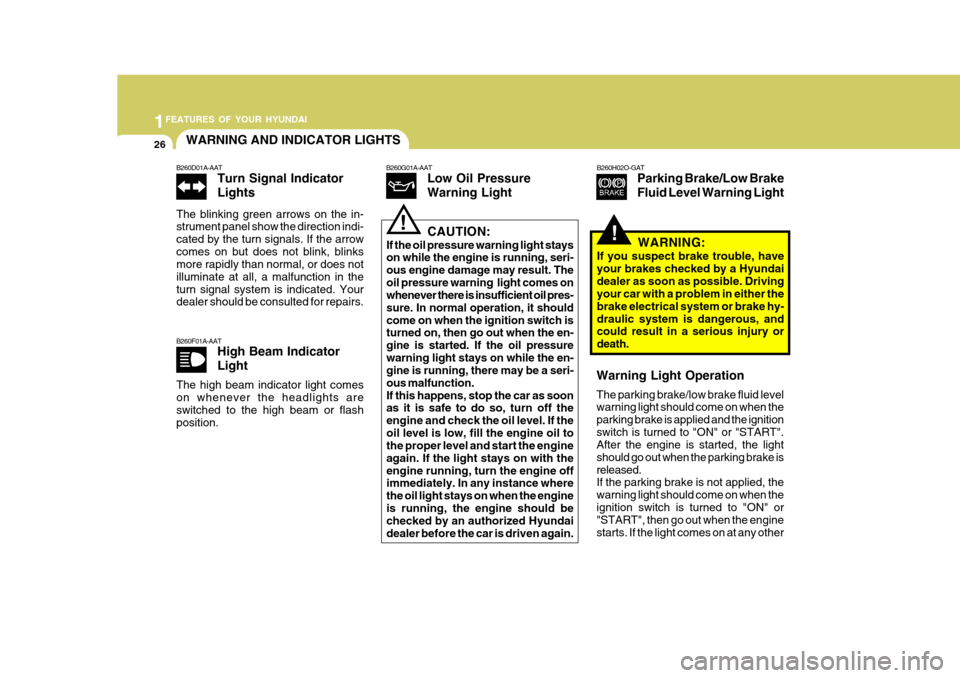
B260F01A-AAT
High Beam Indicator Light
The high beam indicator light comes on whenever the headlights are switched to the high beam or flash position. B260H02O-GAT
Parking Brake/Low Brake Fluid Level Warning Light
B260G01A-AAT
Low Oil PressureWarning Light
!CAUTION:
If the oil pressure warning light stays on while the engine is running, seri- ous engine damage may result. Theoil pressure warning light comes on whenever there is insufficient oil pres- sure. In normal operation, it shouldcome on when the ignition switch is turned on, then go out when the en- gine is started. If the oil pressurewarning light stays on while the en- gine is running, there may be a seri- ous malfunction.If this happens, stop the car as soon as it is safe to do so, turn off the
engine and check the oil level. If the oil level is low, fill the engine oil to the proper level and start the engine again. If the light stays on with theengine running, turn the engine off immediately. In any instance where the oil light stays on when the engineis running, the engine should be checked by an authorized Hyundai dealer before the car is driven again. WARNING:
If you suspect brake trouble, haveyour brakes checked by a Hyundaidealer as soon as possible. Driving your car with a problem in either the brake electrical system or brake hy-draulic system is dangerous, and could result in a serious injury or death.
B260D01A-AAT
Turn Signal Indicator Lights
The blinking green arrows on the in- strument panel show the direction indi- cated by the turn signals. If the arrowcomes on but does not blink, blinks more rapidly than normal, or does not illuminate at all, a malfunction in theturn signal system is indicated. Your dealer should be consulted for repairs.
Warning Light Operation The parking brake/low brake fluid level warning light should come on when the parking brake is applied and the ignitionswitch is turned to "ON" or "START". After the engine is started, the light should go out when the parking brake isreleased. If the parking brake is not applied, the warning light should come on when theignition switch is turned to "ON" or "START", then go out when the engine starts. If the light comes on at any other
Page 105 of 207
2 DRIVING YOUR HYUNDAI
2
C010A01HR-GAT
WARNING: ENGINE EXHAUST CAN BE DANGEROUS!
Engine exhaust fumes can be extremely dangerous. If, at any time, you smell exhaust fumes inside the vehicle, open the windows immediately. o Do not inhale exhaust fumes. Exhaust fumes contain carbon monoxide, a colorless, odorless gas that can cause unconsciousness and death by asphyxiation. o Be sure the exhaust system does not leak. The exhaust system should be checked whenever the vehicle is raised to change the oil or for any other purpose. If you hear a change in the sound of the exhaust or if you drive over something that strikes the underneath side of the car, have the exhaust system checked as soon as possible by your Hyundai dealer. o Do not run the engine in an enclosed area. Letting the engine idle in your garage, even with the garage door open, is a hazardous practice. Never run the engine in your garage any longer than it takes to start the engine and back the car out. o Avoid idling the engine for prolonged periods with people inside the car. If it is necessary to idle the engine for a prolonged period with people inside the car, be sure to do so only in an open area with the air intake set at "Fresh" and fan operating at one of the higher speeds so fresh air is drawn into the interior. To assure proper operation of the ventilation system, be sure the ventilation air intakes located just in front of the windshield are kept clear of snow, ice, leaves or other obstructions.
!
Page 106 of 207
2
DRIVING YOUR HYUNDAI
3
!
TO START THE ENGINEBEFORE STARTING THE EN- GINE
C020A02A-AAT Before you start the engine, you should always:
1. Look around the vehicle to be sure
there are no flat tires, puddles of oil, water or other indications of pos- sible trouble.
2. After entering the car, check to be sure the parking brake is engaged.
3. Check that all windows, and lights are clean.
4. Check that the interior and exterior
mirrors are clean and in position.
5. Check your seat, seatback and headrest to be sure they are in theirproper positions.
6. Lock all the doors.
7. Fasten your seat belt and be sure
that all other occupants have fas- tened theirs.
8. Turn off all lights and accessories
that are not needed.
9. When you turn the ignition switch to "ON", check that all appropriatewarning lights are operating andthat you have sufficient fuel.
10.Check the operation of warning
lights and all bulbs when key is inthe "ON" position. C030A03HR-GAT COMBINATION IGNITION SWITCH
o Place the shift lever in neutral and
depress the clutch pedal fully.
o To start the engine, insert the igni- tion key and turn it to the "START" position. Release it as soon as theengine starts. Do not hold the key in the "START" position for more than 15 seconds.
!WARNING:
To ensure that sufficient vacuum exists within the brake system dur-ing cold weather start-up condi- tions, it is necessary to run the engine at idle for several secondsafter starting the engine.
WARNING:
Always wear appropriate shoes when operating your vehicle. Unsuitable shoes (high heels, ski boots,etc.)may interfere with your ability to use the brake and accelerator pedal, and the clutch (if installed).
!WARNING:
When you intend to park or stop the vehicle with the engine on, be care- ful not to depress the acceleratorpedal for a long period of time. It may overheat the engine or exhaust sys- tem and cause fire.
Page 116 of 207
2
DRIVING YOUR HYUNDAI
13WINTER DRIVING
chains on the tire will provide a greater driving force, but will not prevent sideskids. NOTE: Tire chains are not legal in all prov- inces. Check province laws beforefitting tire chains. C160C01A-AAT Use High Quality Ethylene Glycol Coolant Your Hyundai is delivered with high quality ethylene glycol coolant in thecooling system. It is the only type of coolant that should be used because it helps prevent corrosion in the coolingsystem, lubricates the water pump and prevents freezing. Be sure to replace or replenish your coolant in accor-dance with the maintenance schedule in Section 5. Before winter, have your coolant tested to assure that its freez-ing point is sufficient for the tempera- tures anticipated during the winter.
C160A01A-AAT The more severe weather conditions of winter result in greater wear and other problems. To minimize the prob- lems of winter driving, you should fol-low these suggestions:
C160B01A-GAT Snowy or Icy Conditions To drive your vehicle in deep snow, it may be necessary to use snow tires orto install tire chains on your tires. If snow tires are needed, it is necessary to select tires equivalent in size andtype to the original equipment tires. Failure to do so may adversely affect the safety and handling of your car.Speeding, rapid acceleration, sudden brake applications, and sharp turns are potentially very hazardous prac-tices. During deceleration, use engine braking to the fullest extent. Sudden brake applications on snowy or icyroads may cause skids to occur. You need to keep sufficient distance be- tween the vehicle in front and yourvehicle. Also, apply the brake gently. It should be noted that installing tire C160D01A-AAT Check Battery and Cables Winter puts additional burdens on the battery system. Visually inspect thebattery and cables as described in Section 6. The level of charge in your battery can be checked by your Hyun-dai dealer or a service station.
C160E01A-AAT Change to "Winter Weight" Oil if Necessary In some climates it is recommended that a lower viscosity "winter weight" oil be used during cold weather. SeeSection 9 for recommendations. If you aren't sure what weight oil you should use, consult your Hyundai dealer.
Page 118 of 207
2
DRIVING YOUR HYUNDAI
15USE OF LIGHTSHIGHER SPEED MOTORING
C180A01A-AAT Check your lights regularly for correct operation and always keep them clean. When driving during the day in condi- tions of poor visibility, it is helpful todrive with headlights on low beam. This enables you to be seen as well as to see.
C170A01A-AAT Pre-Trip Inspections 1. Tires: Adjust the tire inflation pressures to specification. Low tire inflation pres-sures will result in overheating and possible failure of the tires. Avoid using worn or damaged tireswhich may result in reduced traction or tire failure. NOTE: Never exceed the maximum tire in- flation pressure shown on the tires.
2. Fuel, engine coolant and
engine oil:
High speed travel consumes more fuel than urban motoring. Do not forget tocheck both engine coolant and engine oil. 3. Drive belt: A loose or damaged drive belt may result in overheating of the engine.TRAILER OR VEHICLE TOWING
C190A01HR-GAT If you are considering towing with your car, you should first check with your Province Department of Motor Vehicles to determine their legal requirements.Since laws vary from province to prov- ince, the requirements for towing trail- ers, cars, other types of vehicles, orapparatus may differ. Ask your Hyundai dealer for further details before towing.
! CAUTION
Do not do any towing with your car during its first 1,000 km (600 miles)in order to allow the engine to prop- erly break in. Failure to heed this caution may result in serious en-gine or transmission damage.
Page 148 of 207
5VEHICLE MAINTENANCE REQUIREMENTS
2MAINTENANCE INTERVALS
F010C01HR-GAT
Specified Scheduled Procedures
These are the procedures such as
inspections, adjustments and replace- ments that are listed in the mainte-nance charts starting on page 5-4. These procedures must be performed at the intervals shown in the mainte-nance schedule to assure that your warranty remains in effect. Although it is strongly recommended that they beperformed by the factory-trained or distributor-trained technicians at your Hyundai dealer, these procedures maybe performed at any qualified service facility. F010D01A-GAT
General Checks
These are the regular checks you should perform when you drive your Hyundai or you fill the fuel tank. A list of these items will be found on page6-5.
F010A01A-GAT Service Requirements To assure that you receive the great- est number of kilometers of satisfying operation from your Hyundai, certain maintenance procedures must beperformed. Although careful design and engineering have reduced these to a minimum, those that are requiredare of the utmost importance.It is your responsibility to have thesemaintenance procedures performed to comply with the terms of the war- ranties covering your new Hyundai.The Service Passport supplied with your new vehicle provides further in- formation about these warranties.
F010B01A-AAT
Maintenance Requirements
The maintenance required for your
Hyundai can be divided into three main areas:
o Specified scheduled procedures
o General checks
o Do-it-yourself maintenance It is suggested that genuine Hyundai
service parts be used for any requiredrepairs or replacements. Other parts of equivalent quality such as engine oil, engine coolant, manual transmission
oil, brake fluid and so on which are not supplied by Hyundai Motor Company or its distributor may be used withoutaffecting your warranty coverage but you should always be sure these are equivalent to the quality of the originalHyundai parts. Your Service Passport provides further information about your warranty coverage.
Page 155 of 207
5
VEHICLE MAINTENANCE REQUIREMENTS
9
!
EXPLANATION OF SCHEDULED MAINTENANCE ITEMS
F060M01A-AAT
o Engine Oil and Filter
The engine oil and filter should be
changed at those intervals specified in the maintenance schedule. If the ve- hicle is being driven in severe condi-tions, more frequent oil and filter changes are required.
F060N01HR-GAT
o Valve Clearances
An incorrect valve clearance will not
only result in rough engine operation, but will also cause excessive noiseand reduced engine output.
Inspect valve clearance and adjust as
required while the engine is hot.
See page 9-4 for the valve clearance
description. F060D01TB-GAT
o Fuel Lines, Fuel Hoses and
Connections
Check the fuel lines, fuel hoses and
connections for leakage and damage. Have a trained technician replace any damaged or leaking parts immediately. F060C01A-AAT
o Fuel Filter A clogged filter can limit the speed at which the vehicle may be driven, dam- age the emission system and cause hard starting. If an excessive amountof foreign matter accumulates in the fuel tank, the filter may require re- placement more frequently.After installing a new filter, run theengine for several minutes, and checkfor leaks at the connections. Fuel fil- ters should be installed by trained technicians.
WARNING:
Never work on injection system withengine running or within 30 sec- onds after shutting off engine. High pressure pump, rail, injectors andhigh pressure pipes are subject to high pressure even after the engine stopped. The fuel jet produced byfuel leaks may cause serious injury, if it touch the body. People using pacemakers should not move than30cm closer to the ECU or wiring harness within the engine room while engine is running, since thehigh currents in the Common Rail system produce considerable mag- netic fields.
Page 156 of 207
5VEHICLE MAINTENANCE REQUIREMENTS
10
F060F01A-AAT
o Vacuum and Crankcase
Ventilation Hoses
Inspect the surface of hoses for evi- dence of heat and/or mechanical dam- age. Hard and brittle rubber, cracking, tears, cuts, abrasions, and excessiveswelling indicate deterioration. Particu- lar attention should be paid to examin- ing those hose surfaces nearest tohigh heat sources, such as the ex- haust manifold. Inspect the hose routing to assure that the hoses do not come in contact with any heat source, sharp edges or mov- ing component which might cause heatdamage or mechanical wear. Inspect all hose connections, such as clamps and couplings, to make sure they aresecure, and that no leaks are present. Hoses should be replaced immedi- ately if there is any evidence of dete-rioration or damage. F060B01HR-GAT
o Drive Belts
Inspect all drive belts (water pump andalternator) for evidence of cuts, cracks, excessive wear or oiliness, and re- place if necessary. Drive belts shouldbe checked periodically for proper ten- sion and adjusted as necessary. F060E01A-GAT
o Timing Belt
Inspect all parts related with the timing
belt for damage and deformation. Re- place any damaged parts immediately.
F060H01A-AAT
o Air Cleaner Filter
A Genuine Hyundai air cleaner filter isrecommended when the filter is re-placed.
F060G01A-AAT
o Vapor Hose and Fuel Filler Cap
The vapor hose and fuel filler cap
should be inspected at those intervals specified in the maintenance sched- ule. Make sure that a new vapor hoseor fuel filler cap is correctly replaced.
F070B01A-GAT
o Cooling System
Check the cooling system part, suchas radiator, coolant reservoir, hoses and connections for leakage and dam- age. Replace any damaged parts. F070C01A-AAT
o Coolant
The coolant should be changed at the intervals specified in the mainte- nance schedule. F070D01HP-GAT
o Manual Transmission Oil
Inspect the manual transmission oil
according to the maintenance sched- ule. NOTE:
If the oil level is low, check for
possible leaks before adding oil. Do not overfill.
Page 157 of 207
5
VEHICLE MAINTENANCE REQUIREMENTS
11
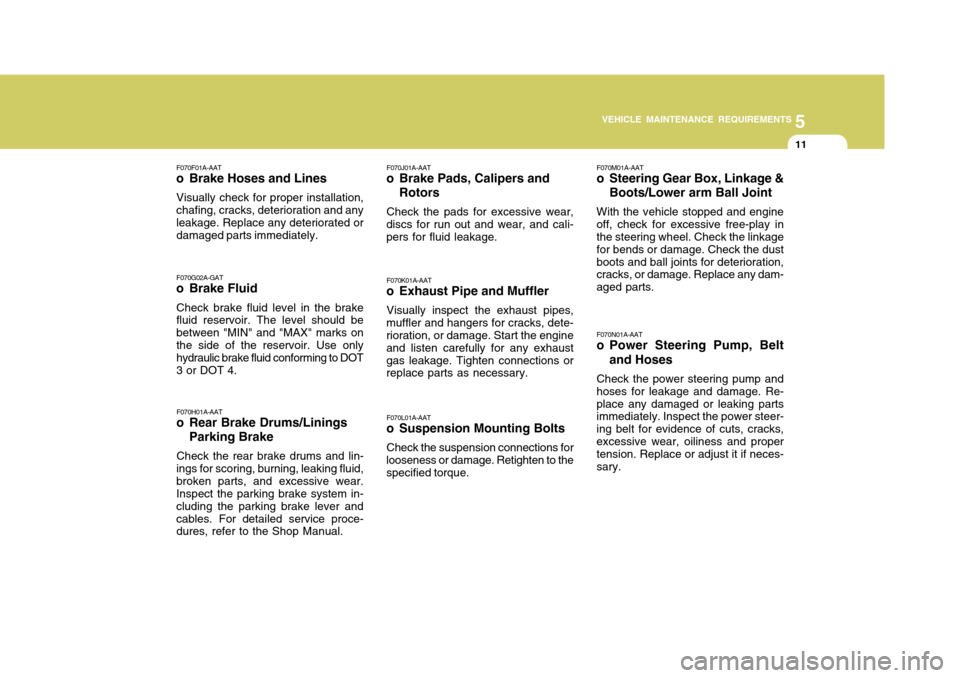
F070F01A-AAT
o Brake Hoses and Lines
Visually check for proper installation, chafing, cracks, deterioration and any leakage. Replace any deteriorated or damaged parts immediately. F070G02A-GAT
o Brake Fluid
Check brake fluid level in the brake fluid reservoir. The level should be between "MIN" and "MAX" marks on the side of the reservoir. Use only hydraulic brake fluid conforming to DOT3 or DOT 4.
F070L01A-AAT
o Suspension Mounting Bolts
Check the suspension connections for
looseness or damage. Retighten to thespecified torque. F070M01A-AAT
o Steering Gear Box, Linkage &
Boots/Lower arm Ball Joint
With the vehicle stopped and engine off, check for excessive free-play in the steering wheel. Check the linkage for bends or damage. Check the dustboots and ball joints for deterioration, cracks, or damage. Replace any dam- aged parts. F070N01A-AAT
o Power Steering Pump, Belt and Hoses
Check the power steering pump and hoses for leakage and damage. Re-place any damaged or leaking parts immediately. Inspect the power steer- ing belt for evidence of cuts, cracks,excessive wear, oiliness and proper tension. Replace or adjust it if neces- sary.
F070J01A-AAT
o Brake Pads, Calipers and
Rotors
Check the pads for excessive wear,
discs for run out and wear, and cali- pers for fluid leakage.
F070K01A-AAT
o Exhaust Pipe and Muffler
Visually inspect the exhaust pipes,
muffler and hangers for cracks, dete-rioration, or damage. Start the engine and listen carefully for any exhaustgas leakage. Tighten connections or replace parts as necessary.
F070H01A-AAT
o Rear Brake Drums/Linings
Parking Brake
Check the rear brake drums and lin-
ings for scoring, burning, leaking fluid, broken parts, and excessive wear. Inspect the parking brake system in- cluding the parking brake lever andcables. For detailed service proce- dures, refer to the Shop Manual.
Page 159 of 207
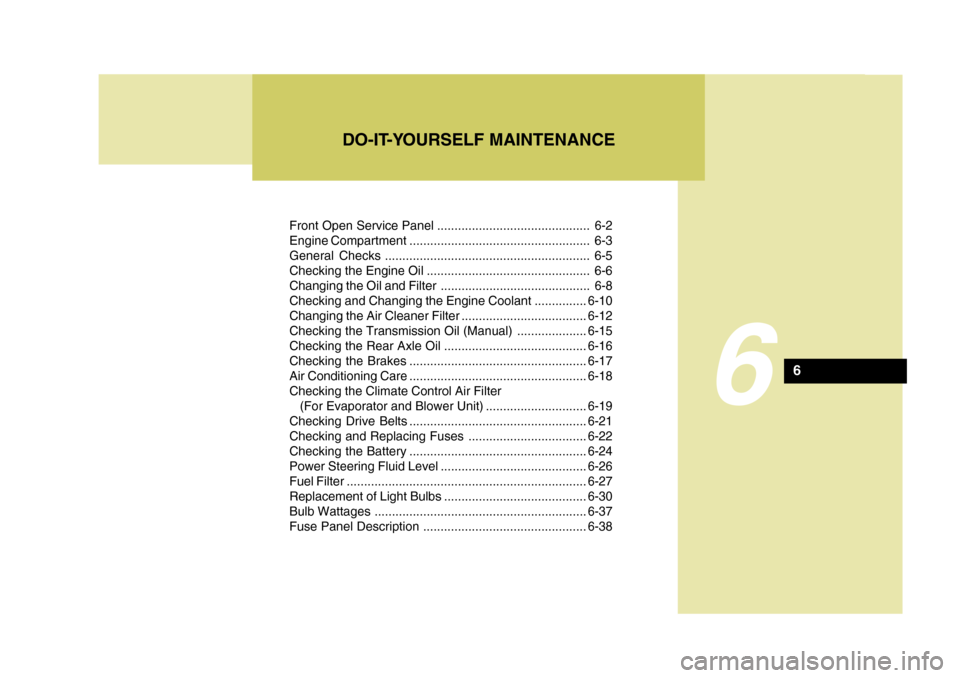
Front Open Service Panel ............................................ 6-2
Engine Compartment .................................................... 6-3
General Checks ........................................................... 6-5
Checking the Engine Oil ............................................... 6-6
Changing the Oil and Filter ........................................... 6-8
Checking and Changing the Engine Coolant ...............6-10
Changing the Air Cleaner Filte r ....................................6-12
Checking the Transmission Oil (Manual) ....................6-15
Checking the Rear Axle Oil......................................... 6-16
Checking the B rakes ................................................... 6-17
Air Conditioning Care ................................................... 6-18
Checking the Climate Control Air Filter
(For Evaporator and Blower U nit) .............................6-19
Checking Drive Belts................................................... 6-21
Checking and Replacing Fuses .................................. 6-22
Checking the Battery ................................................... 6-24
Power Steering Fluid Level .......................................... 6-26
Fuel Fil ter ..................................................................... 6-27
Replacement of Light Bulbs ......................................... 6-30
Bulb Wattages ............................................................. 6-37
Fuse Panel Description ............................................... 6-38
DO-IT-YOURSELF MAINTENANCE
6
6