Hyundai H350 2015 Owners Manual
Manufacturer: HYUNDAI, Model Year: 2015, Model line: H350, Model: Hyundai H350 2015Pages: 473, PDF Size: 26.4 MB
Page 91 of 473
3-29
Convenient features of your vehicle
3
And if the power window switch is
pulled up continuously again within 5
seconds after the window is lowered
by the automatic window reversal
feature, the automatic window rever-
sal will not operate.Information
The automatic reverse feature for the
driver's window is only active when
the "auto up" feature is used by fully
pulling up the switch. The automatic
reverse feature will not operate if the
window is raised using the halfway
position on the power window switch.Rear seat window
(Type A, if equipped)
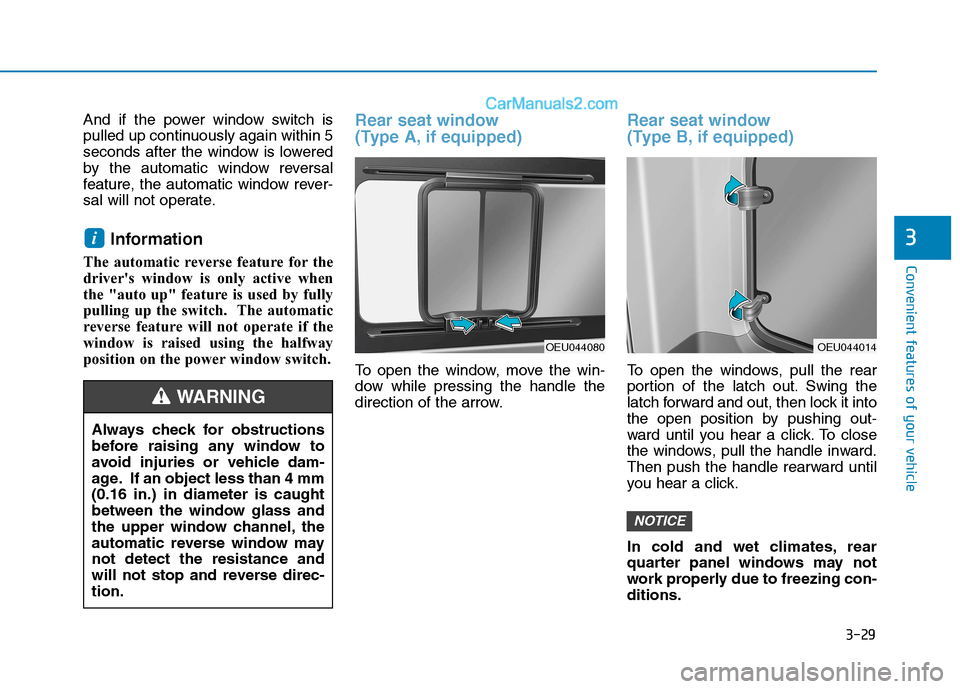
To open the window, move the win-
dow while pressing the handle the
direction of the arrow.
Rear seat window
(Type B, if equipped)
To open the windows, pull the rear
portion of the latch out. Swing the
latch forward and out, then lock it into
the open position by pushing out-
ward until you hear a click. To close
the windows, pull the handle inward.
Then push the handle rearward until
you hear a click.
In cold and wet climates, rear
quarter panel windows may not
work properly due to freezing con-ditions.
NOTICE
i
OEU044080
Always check for obstructions
before raising any window to
avoid injuries or vehicle dam-
age. If an object less than 4 mm(0.16 in.) in diameter is caught
between the window glass and
the upper window channel, the
automatic reverse window maynot detect the resistance and
will not stop and reverse direc-tion.
WARNING
OEU044014
Page 92 of 473
3-30
Convenient features of your vehicle
Opening the hood
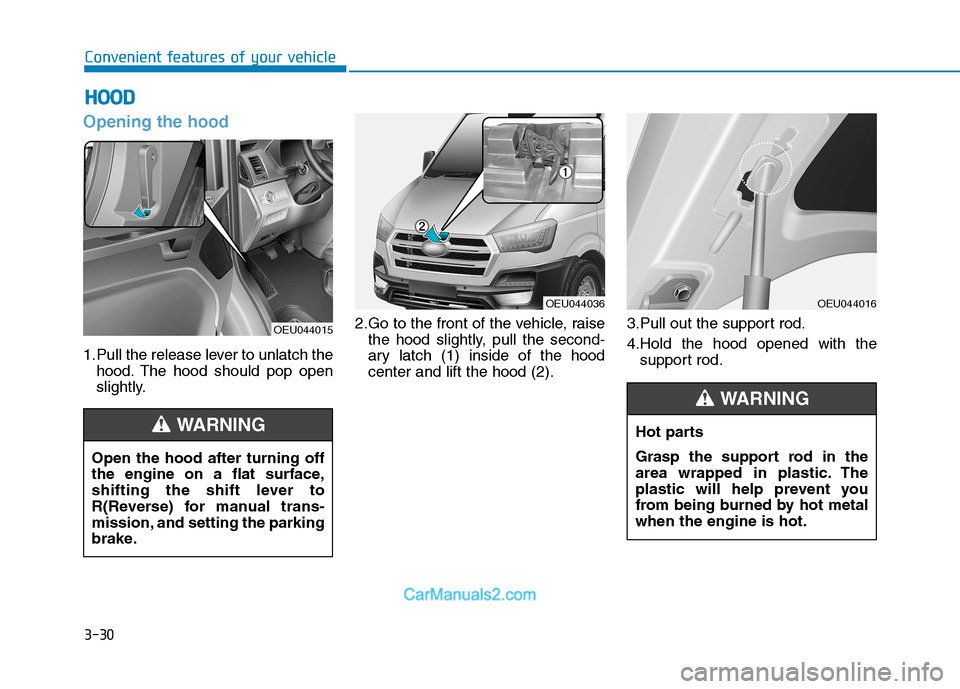
1.Pull the release lever to unlatch thehood. The hood should pop open
slightly. 2.Go to the front of the vehicle, raise
the hood slightly, pull the second-
ary latch (1) inside of the hoodcenter and lift the hood (2). 3.Pull out the support rod.
4.Hold the hood opened with the
support rod.
Open the hood after turning off
the engine on a flat surface,
shifting the shift lever to
R(Reverse) for manual trans-
mission, and setting the parking
brake.
WARNING
HH OO OO DD
OEU044015
Hot parts
Grasp the support rod in the
area wrapped in plastic. The
plastic will help prevent you
from being burned by hot metalwhen the engine is hot.
WARNING
OEU044036OEU044016
Page 93 of 473
3-31
Convenient features of your vehicle
3
Closing the hood
1.Before closing the hood, check thefollowing:
ment must be correctly installed.
bustible material must be
removed from the engine com-
partment.
2.Return the support rod to its clip to prevent it from rattling.
3.Lower the hood until it is about 30 cm (1 ft.) above the closed position
and let it drop. Make sure that it
locks into place. Hood
Before closing the hood, ensure that all obstructions
are removed from the hood
opening. Closing the hoodwith an obstruction present in
the hood opening may result
in property damage or severe
personal injury.
Do not leave gloves, rags or
any other combustible materi-
al in the engine compartment.
Doing so may cause a heat-
induced fire.
WARNING
Always double check to be
sure that the hood is firmly
latched before driving away. If
it is not latched, the hood
could fly open while the vehi-
cle is being driven, causing a
total loss of visibility, whichmight result in an accident.
The support rod must be
inserted completely into the
hole whenever you inspect
the engine compartment. This
will prevent the hood from
falling and possibly injuring
you.
Do not move the vehicle with
the hood raised. The view will
be blocked and the hood
could fall or be damaged.
WARNING
Page 94 of 473
3-32
Convenient features of your vehicle
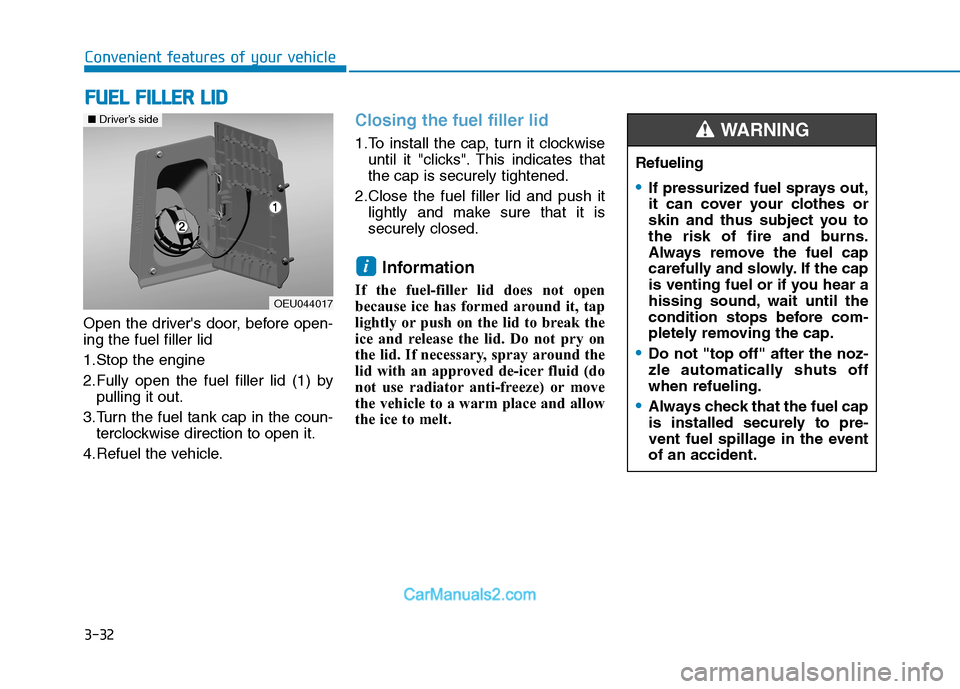
Open the driver's door, before open- ing the fuel filler lid
1.Stop the engine
2.Fully open the fuel filler lid (1) bypulling it out.
3.Turn the fuel tank cap in the coun- terclockwise direction to open it.
4.Refuel the vehicle.
Closing the fuel filler lid
1.To install the cap, turn it clockwise until it "clicks". This indicates that the cap is securely tightened.
2.Close the fuel filler lid and push it lightly and make sure that it issecurely closed.
Information
If the fuel-filler lid does not open
because ice has formed around it, tap
lightly or push on the lid to break the
ice and release the lid. Do not pry on
the lid. If necessary, spray around the
lid with an approved de-icer fluid (do
not use radiator anti-freeze) or move
the vehicle to a warm place and allow
the ice to melt.
i
FF UU EELL FF IILL LLEE RR LL IIDD
OEU044017
■Driver’s side
Refueling
If pressurized fuel sprays out,
it can cover your clothes or
skin and thus subject you to
the risk of fire and burns.
Always remove the fuel cap
carefully and slowly. If the cap
is venting fuel or if you hear a
hissing sound, wait until the
condition stops before com-
pletely removing the cap.
Do not "top off" after the noz-
zle automatically shuts offwhen refueling.
Always check that the fuel cap
is installed securely to pre-
vent fuel spillage in the eventof an accident.
WARNING
Page 95 of 473
3-33
Convenient features of your vehicle
3
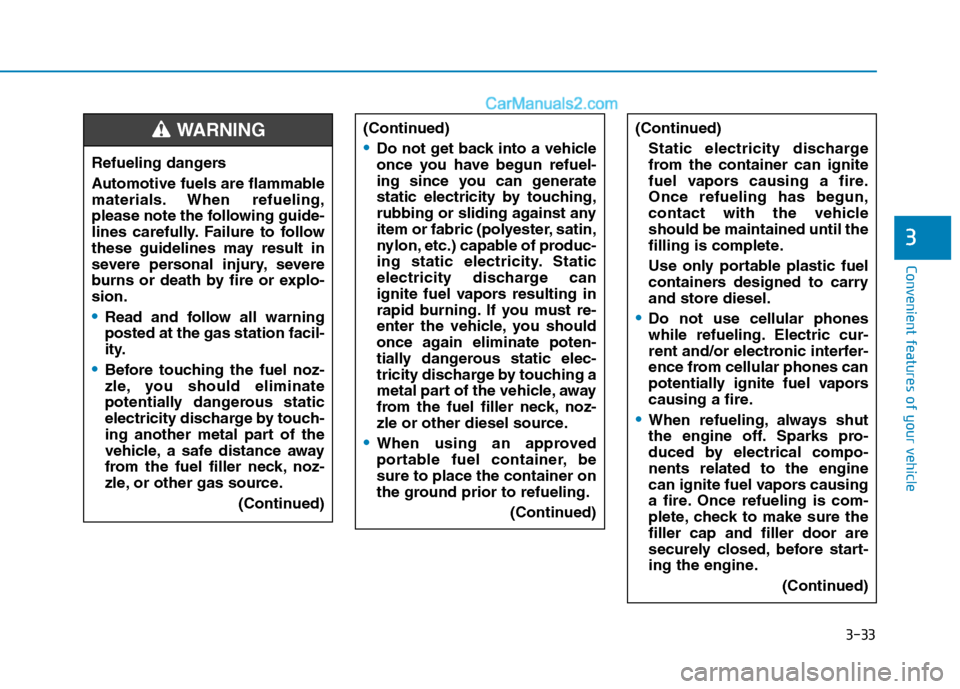
Refueling dangers
Automotive fuels are flammable
materials. When refueling,
please note the following guide-
lines carefully. Failure to follow
these guidelines may result in
severe personal injury, severe
burns or death by fire or explo-sion.
Read and follow all warning posted at the gas station facil-
ity.
Before touching the fuel noz-
zle, you should eliminate
potentially dangerous static
electricity discharge by touch-
ing another metal part of the
vehicle, a safe distance away
from the fuel filler neck, noz-
zle, or other gas source.(Continued)
WARNING (Continued)
Do not get back into a vehicle
once you have begun refuel-
ing since you can generate
static electricity by touching,
rubbing or sliding against any
item or fabric (polyester, satin,
nylon, etc.) capable of produc-
ing static electricity. Static
electricity discharge can
ignite fuel vapors resulting in
rapid burning. If you must re-
enter the vehicle, you should
once again eliminate poten-
tially dangerous static elec-
tricity discharge by touching a
metal part of the vehicle, away
from the fuel filler neck, noz-
zle or other diesel source.
When using an approved
portable fuel container, besure to place the container on
the ground prior to refueling.(Continued)
(Continued)
Static electricity discharge
from the container can ignite
fuel vapors causing a fire.Once refueling has begun,
contact with the vehicleshould be maintained until the
filling is complete.
Use only portable plastic fuel
containers designed to carryand store diesel.
Do not use cellular phones
while refueling. Electric cur-
rent and/or electronic interfer-
ence from cellular phones can
potentially ignite fuel vapors
causing a fire.
When refueling, always shut
the engine off. Sparks pro-
duced by electrical compo-nents related to the engine
can ignite fuel vapors causing
a fire. Once refueling is com-
plete, check to make sure thefiller cap and filler door are
securely closed, before start-
ing the engine. (Continued)
Page 96 of 473
3-34
Convenient features of your vehicle
Make sure to refuel your vehicleaccording to the "Fuel require-
ments" suggested in section 1.
If the fuel filler cap requires replacement, we recommend
that you use parts for replace-
ment from an authorized
HYUNDAI dealer. An incorrectfuel filler cap can result in a seri-ous malfunction of the fuel sys-
tem or emission control system.
Do not spill fuel on the exterior surfaces of the vehicle. Any typeof fuel spilled on painted sur-
faces may damage the paint.
After refueling, make sure the fuel cap is installed securely to
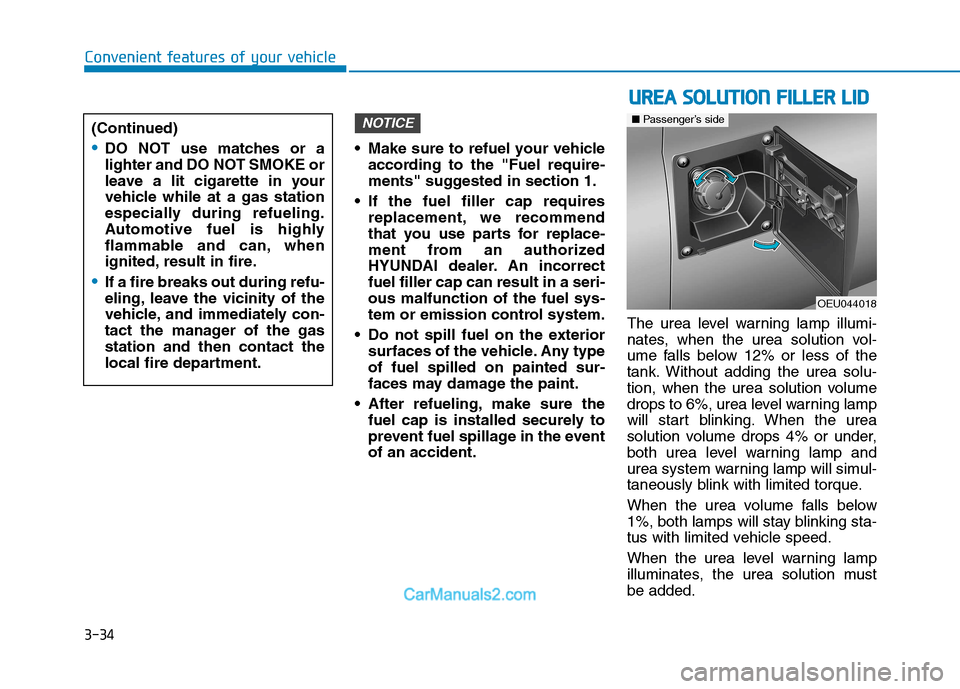
prevent fuel spillage in the eventof an accident. The urea level warning lamp illumi-
nates, when the urea solution vol-
ume falls below 12% or less of the
tank. Without adding the urea solu-
tion, when the urea solution volume
drops to 6%, urea level warning lamp
will start blinking. When the urea
solution volume drops 4% or under,
both urea level warning lamp and
urea system warning lamp will simul-
taneously blink with limited torque.
When the urea volume falls below
1%, both lamps will stay blinking sta-
tus with limited vehicle speed.
When the urea level warning lamp
illuminates, the urea solution mustbe added.
NOTICE(Continued)
DO NOT use matches or a
lighter and DO NOT SMOKE or
leave a lit cigarette in your
vehicle while at a gas station
especially during refueling.
Automotive fuel is highly
flammable and can, when
ignited, result in fire.
If a fire breaks out during refu-
eling, leave the vicinity of the
vehicle, and immediately con-
tact the manager of the gasstation and then contact the
local fire department.
UU
RREEAA SS OO LLUU TTIIOO NN FF IILL LLEE RR LL IIDD
OEU044018
■ Passenger’s side
Page 97 of 473
3-35
Convenient features of your vehicle
To open the urea solution filler lid;
1.Open the urea solution filler lid.
2.To remove the cap, turn the ureasolution tank cap counterclock-
wise.
3.Refill as needed.
After completely filling, urea solu-
tion in the tank, refill urea solution
every 10,000 km.
NOTICE3
If the vehicle is driven with
urea solution volume less
than 4%, engine output will belimited.
REFILL IN GOOD TIME
The reducing agent must be replenished as soon as the
urea level warning lamp illu-
minates or blinks, otherwise
either engine torque or vehi-
cle speed can be limited. (Continued)
CAUTION
When opening the urea solu- tion tank cap at high outside
temperatures, ammonia
vapors may escape. Ammonia
vapors have a pungent smell
and primarily cause irritationof the: - Skin- Mucous membranes
- Eyes
You may experience a burning
sensation in your eyes, nose
and throat, as well as cough-
ing and watering of the eyes. Do not inhale ammonia
vapors. Do not allow ureasolution to come in direct
contact with your skin. It is
hazardous to your health.
Wash any affected areas off
with plenty of clean water. If
necessary, consult a doctor.
(Continued)
WARNING(Continued)
Liquid that are not recom-
mended such as diesel, gaso-
line, and alcohol shall neverbe used other than the recom-mended urea solution thatsatisfy ISO22241 or DIN70070.
Driver must use with a reduc-
ing agent UREA solution for
the SCR system working
properly. In order to complywith emissions regulations,
the vehicle must be operatedusing UREA solution.
If driver is driving a vehicle without using a UREA solu-
tion, driving permit may be
revoked, in some countries
you may be a criminal
offense, such as road traffic
offenses.
Page 98 of 473
3-36Urea solution consumption depends on operation and driving
conditions. If the urea level warn-
ing lamp illuminates, you should
refill before the next scheduled
service to replenish the fluid.
NOTICE
Convenient features of your vehicle
In case the vehicle was
parked with very low ambient
temperature (below 11 degree
Celcius) for a long time, the
urea solution will be frozen in
the urea solution tank. With
frozen urea, the tank level may
not be detected correctly untilthe urea solution will be
defrosted by activated heater.
To conform to emission regu-
lation, you must operate the
vehicle with urea solution and
refill the supply regularly.
WARNING
If defective urea solution or liq- uid that is not recommended is
supplied, there may be damage
on the parts of the vehicle such
as processing device. If defec-
tive fuel is used, foreign objects
will be accumulated to SCR cat-
alyst and cause catalyst pushed
away or breaking.
After adding the incorrect urea
solution, please visit the closest
service center as early as possi-
ble.
CAUTION(Continued)
When handling with urea
solution in closed space,ensure good ventilation.When the bottle of urea solu-
tion container is opened, pun-
gent smelling fumes may
escape.
Keep urea solution out of
reach of children.
When urea solution overflows
into vehicle surface, wash out
vehicle surface with clean
water to prohibit corrosion
from occurring.
Page 99 of 473
3-37
Convenient features of your vehicle
3
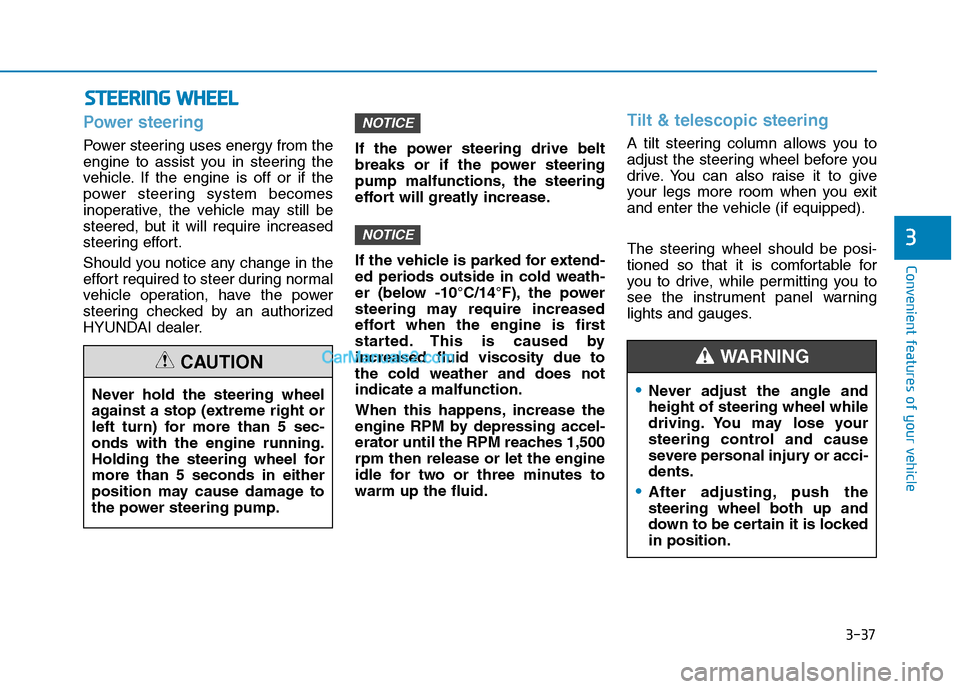
Power steering
Power steering uses energy from the
engine to assist you in steering the
vehicle. If the engine is off or if the
power steering system becomes
inoperative, the vehicle may still be
steered, but it will require increased
steering effort.
Should you notice any change in the
effort required to steer during normal
vehicle operation, have the power
steering checked by an authorized
HYUNDAI dealer.If the power steering drive belt
breaks or if the power steering
pump malfunctions, the steering
effort will greatly increase.
If the vehicle is parked for extend- ed periods outside in cold weath-
er (below -10°C/14°F), the power
steering may require increased
effort when the engine is first
started. This is caused byincreased fluid viscosity due tothe cold weather and does notindicate a malfunction.
When this happens, increase the
engine RPM by depressing accel-
erator until the RPM reaches 1,500rpm then release or let the engine
idle for two or three minutes towarm up the fluid.
Tilt & telescopic steering
A tilt steering column allows you to
adjust the steering wheel before you
drive. You can also raise it to give
your legs more room when you exit
and enter the vehicle (if equipped).
The steering wheel should be posi-
tioned so that it is comfortable for
you to drive, while permitting you to
see the instrument panel warning
lights and gauges.
NOTICE
NOTICE
SS
TT EEEERR IINN GG WW HHEEEELL
Never hold the steering wheel
against a stop (extreme right or
left turn) for more than 5 sec-onds with the engine running.
Holding the steering wheel formore than 5 seconds in either
position may cause damage to
the power steering pump.
CAUTION
Never adjust the angle and height of steering wheel while
driving. You may lose your
steering control and cause
severe personal injury or acci-dents.
After adjusting, push the steering wheel both up and
down to be certain it is lockedin position.
WARNING
Page 100 of 473
3-38
Convenient features of your vehicle
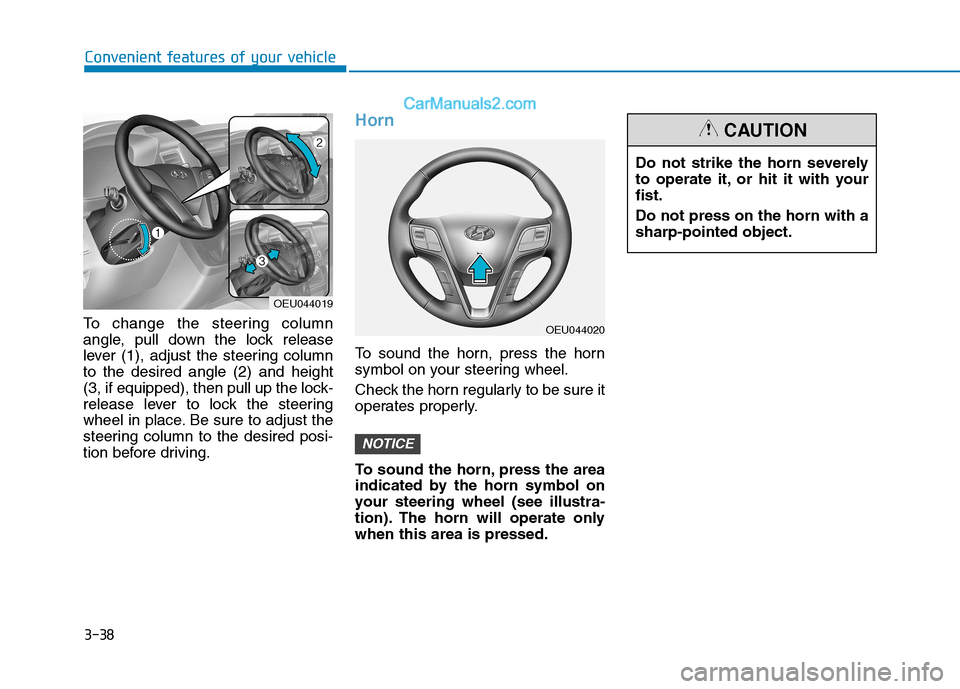
To change the steering column
angle, pull down the lock release
lever (1), adjust the steering columnto the desired angle (2) and height
(3, if equipped), then pull up the lock-
release lever to lock the steering
wheel in place. Be sure to adjust the
steering column to the desired posi-
tion before driving.
Horn
To sound the horn, press the horn
symbol on your steering wheel.
Check the horn regularly to be sure it
operates properly.
To sound the horn, press the area
indicated by the horn symbol on
your steering wheel (see illustra-
tion). The horn will operate onlywhen this area is pressed.
NOTICE
Do not strike the horn severely
to operate it, or hit it with yourfist. Do not press on the horn with a sharp-pointed object.
CAUTION
OEU044020
OEU044019