warning light HYUNDAI I10 2009 Owner's Manual
[x] Cancel search | Manufacturer: HYUNDAI, Model Year: 2009, Model line: I10, Model: HYUNDAI I10 2009Pages: 354, PDF Size: 37.04 MB
Page 88 of 354
49
Features of your vehicle
D030200AUN-EE
Theft-alarm stage
The alarm will be activated if any of the
following occurs while the system is
armed.
A front or rear door is opened withoutusing the transmitter.
The tailgate is opened without using the transmitter.
The engine hood is opened.The siren will sound and the hazard
warning lights will blink continuously for
approximately 30 seconds (for Europe,Middle East Area and China), and repeat
the alarm 3 times unless the system is
disarmed (except Europe, Middle East
Area and China). To turn off the system,
unlock the doors with the transmitter. D030400APA
Disarmed stage
The system will be disarmed when the
doors (and tailgate) are unlocked with the
transmitter.
After depressing the unlock button, the
hazard warning lights will blink twice to
indicate that the system is disarmed.
After depressing the unlock button, if any door (or tailgate) is not opened within 30
seconds, the system will be rearmed.
✽✽
NOTICE
If the system is not disarmed with the transmitter, insert the key into the
ignition switch and start the engine.
Then the system will be disarmed.
If you lose your keys, consult your
authorized HYUNDAI dealer.
CAUTION
Do not change, alter or adjust the
theft-alarm system because it could
cause the theft-alarm system to malfunction and should only beserviced by an authorized HYUNDAI dealer.
Malfunctions caused by improperalterations, adjustments or modifi-cations to the theft-alarm system are not covered by your vehicle
manufacturer warranty.
Page 96 of 354
417
Features of your vehicle
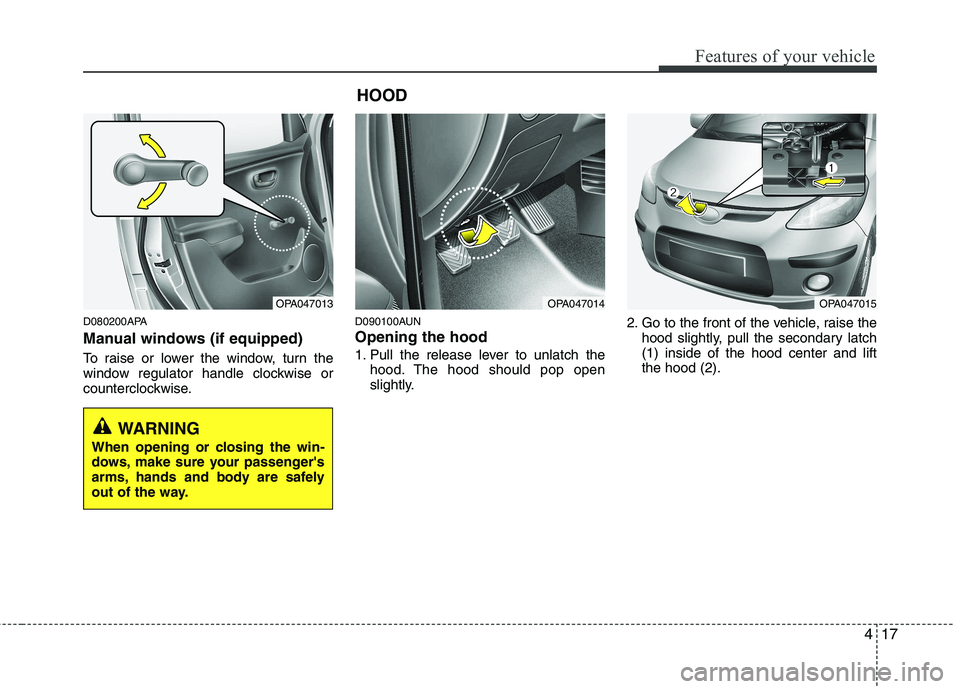
D080200APA
Manual windows (if equipped)
To raise or lower the window, turn the
window regulator handle clockwise or
counterclockwise.D090100AUN Opening the hood
1. Pull the release lever to unlatch the
hood. The hood should pop open
slightly. 2. Go to the front of the vehicle, raise the
hood slightly, pull the secondary latch(1) inside of the hood center and liftthe hood (2).
OPA047013
WARNING
When opening or closing the win-
dows, make sure your passenger's
arms, hands and body are safely
out of the way.
OPA047014OPA047015
HOOD
Page 98 of 354
419
Features of your vehicle
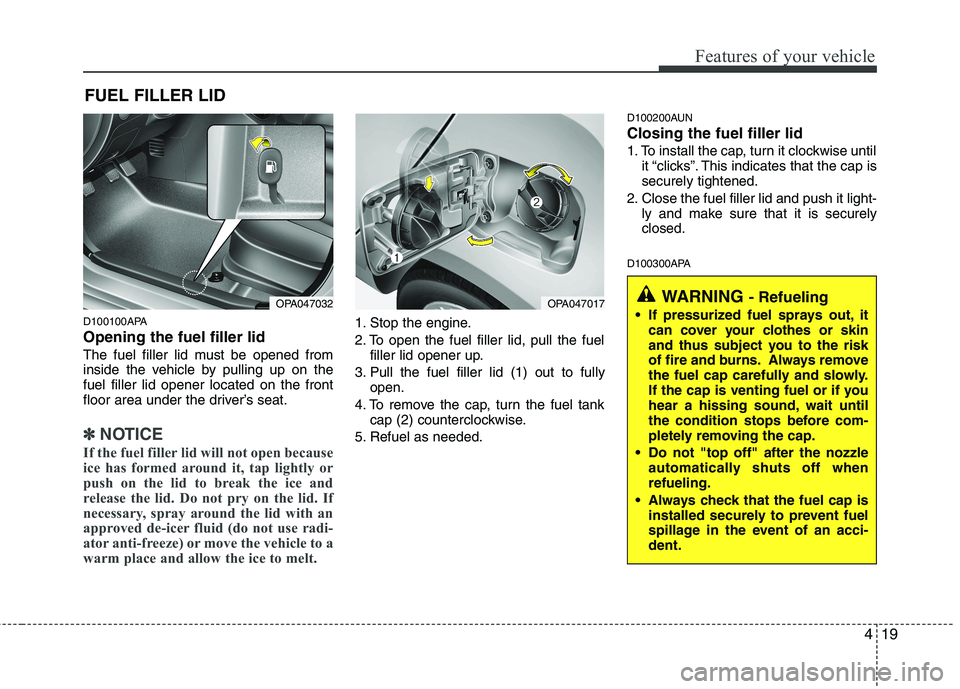
D100100APA Opening the fuel filler lid
The fuel filler lid must be opened from
inside the vehicle by pulling up on thefuel filler lid opener located on the front
floor area under the driver’s seat.
✽✽NOTICE
If the fuel filler lid will not open because
ice has formed around it, tap lightly or
push on the lid to break the ice and
release the lid. Do not pry on the lid. If
necessary, spray around the lid with an
approved de-icer fluid (do not use radi-
ator anti-freeze) or move the vehicle to a
warm place and allow the ice to melt.
1. Stop the engine.
2. To open the fuel filler lid, pull the fuel filler lid opener up.
3. Pull the fuel filler lid (1) out to fully open.
4. To remove the cap, turn the fuel tank cap (2) counterclockwise.
5. Refuel as needed. D100200AUN Closing the fuel filler lid
1. To install the cap, turn it clockwise until
it “clicks”. This indicates that the cap is securely tightened.
2. Close the fuel filler lid and push it light- ly and make sure that it is securelyclosed.
D100300APA
FUEL FILLER LID
OPA047032OPA047017WARNING
- Refueling
If pressurized fuel sprays out, it can cover your clothes or skin
and thus subject you to the risk
of fire and burns. Always remove
the fuel cap carefully and slowly.
If the cap is venting fuel or if you
hear a hissing sound, wait until
the condition stops before com-
pletely removing the cap.
Do not "top off" after the nozzle automatically shuts off whenrefueling.
Always check that the fuel cap is installed securely to prevent fuel
spillage in the event of an acci-dent.
Page 104 of 354
425
Features of your vehicle
D130200APA
Electric power steering (if equipped)
Power steering uses the motor to assist
you in steering the vehicle. If the engine
is off or if the power steering system
becomes inoperative, the vehicle may
still be steered, but it will require
increased steering effort.
The motor driven power steering is con-
trolled by power steering control unit
which sense the steering wheel torque
and vehicle speed to command the
motor.
The steering wheel becomes heavier as
the vehicle’s speed increases and
becomes lighter as the vehicle’s speed
decreases for the better control of the
steering wheel.
Should you notice any change in the
effort required to steer during normal
vehicle operation, have the power steer-
ing checked by an authorized Hyundai
dealer.✽✽NOTICE
The following symptoms may occur dur-
ing normal vehicle operation:
The EPS warning light does not illumi- nate.
The steering effort is high immediate- ly after turning the ignition switch on.
This happens as the system performs
the EPS system diagnostics. When the
diagnostics is completed, the steering
wheel will return to its normal condi-
tion.
A click noise may be heard from the
EPS relay after the ignition switch is
turned to the ON or LOCK position.
Motor noise may be heard when the vehicle is at a stop or at a low driving
speed.
If the Electric Power Steering System
does not operate normally, the warn-
ing light will illuminate on the instru-
ment cluster. The steering wheel may
become difficult to control or operate
abnormally. Take your vehicle to an
authorized Hyundai dealer and have
the vehicle checked as soon as possi-
ble. (Continued)(Continued)
The steering effort increases if the
steering wheel is rotated continuously
when the vehicle is not in motion.
However, after a few minutes, it will
return to its normal condition.
When you operate the steering wheel in low temperature, abnormal noise
could occur. If temperature rises, the
noise will disappear. This is a normal
condition.
STEERING WHEEL
Page 105 of 354
Features of your vehicle
26
4
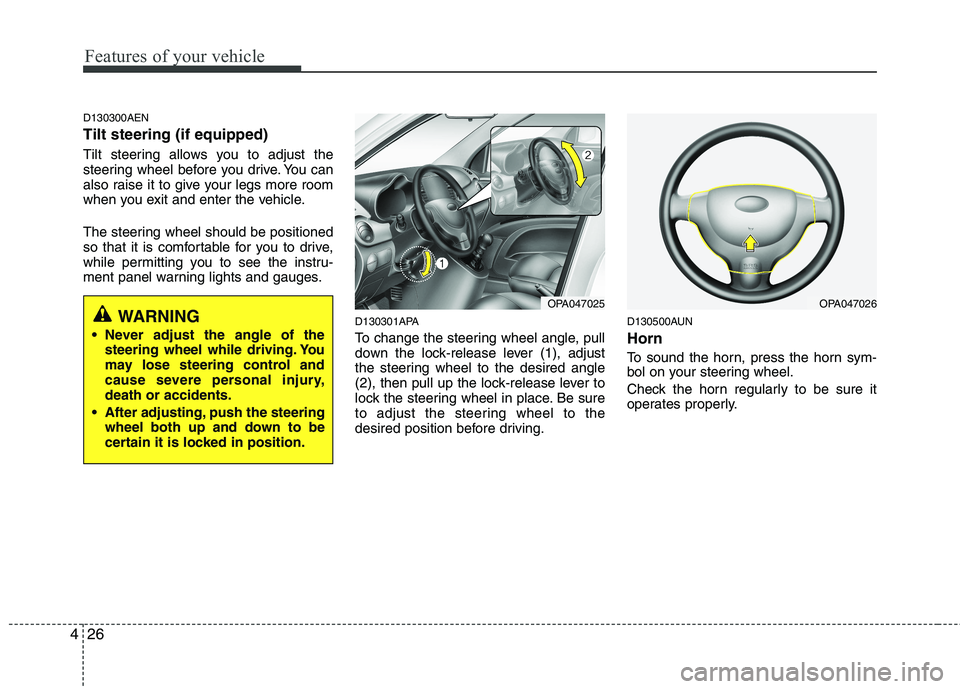
D130300AEN Tilt steering (if equipped)
Tilt steering allows you to adjust the
steering wheel before you drive. You can
also raise it to give your legs more room
when you exit and enter the vehicle.
The steering wheel should be positioned
so that it is comfortable for you to drive,
while permitting you to see the instru-
ment panel warning lights and gauges.
D130301APA
To change the steering wheel angle, pull
down the lock-release lever (1), adjust
the steering wheel to the desired angle
(2), then pull up the lock-release lever to
lock the steering wheel in place. Be sure
to adjust the steering wheel to the
desired position before driving.D130500AUN Horn
To sound the horn, press the horn sym-
bol on your steering wheel.
Check the horn regularly to be sure it
operates properly.
OPA047025OPA047026WARNING
Never adjust the angle of the steering wheel while driving. You
may lose steering control and
cause severe personal injury,death or accidents.
After adjusting, push the steering wheel both up and down to be
certain it is locked in position.
Page 107 of 354
Features of your vehicle
28
4
D140100AUN
Inside rearview mirror
Adjust the rearview mirror to center on
the view through the rear window. Make
this adjustment before you start driving.
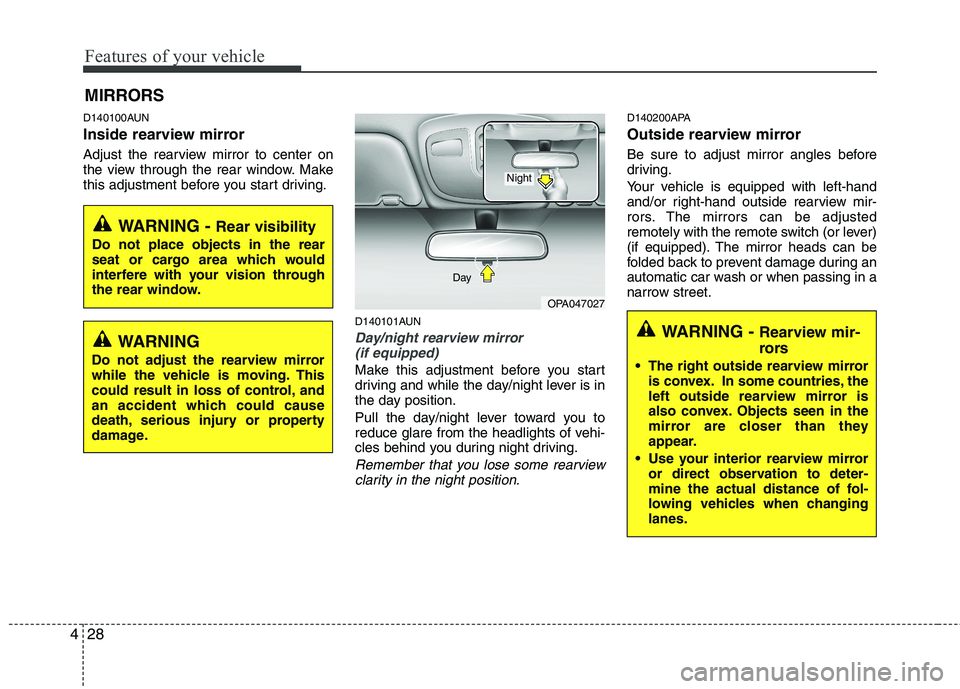
D140101AUN
Day/night rearview mirror (if equipped)
Make this adjustment before you start
driving and while the day/night lever is in
the day position.
Pull the day/night lever toward you to
reduce glare from the headlights of vehi-
cles behind you during night driving.
Remember that you lose some rearviewclarity in the night position.
D140200APA
Outside rearview mirror
Be sure to adjust mirror angles before
driving.
Your vehicle is equipped with left-hand
and/or right-hand outside rearview mir-
rors. The mirrors can be adjusted
remotely with the remote switch (or lever)
(if equipped). The mirror heads can be
folded back to prevent damage during an
automatic car wash or when passing in a
narrow street.
MIRRORS
WARNING -
Rear visibility
Do not place objects in the rear
seat or cargo area which would
interfere with your vision through
the rear window.
OPA047027
Day
Night
WARNING -
Rearview mir-
rors
The right outside rearview mirror is convex. In some countries, the
left outside rearview mirror is
also convex. Objects seen in the
mirror are closer than they
appear.
Use your interior rearview mirror or direct observation to deter-
mine the actual distance of fol-
lowing vehicles when changinglanes.WARNING
Do not adjust the rearview mirror
while the vehicle is moving. This
could result in loss of control, and
an accident which could cause
death, serious injury or property
damage.
Page 110 of 354
431
Features of your vehicle
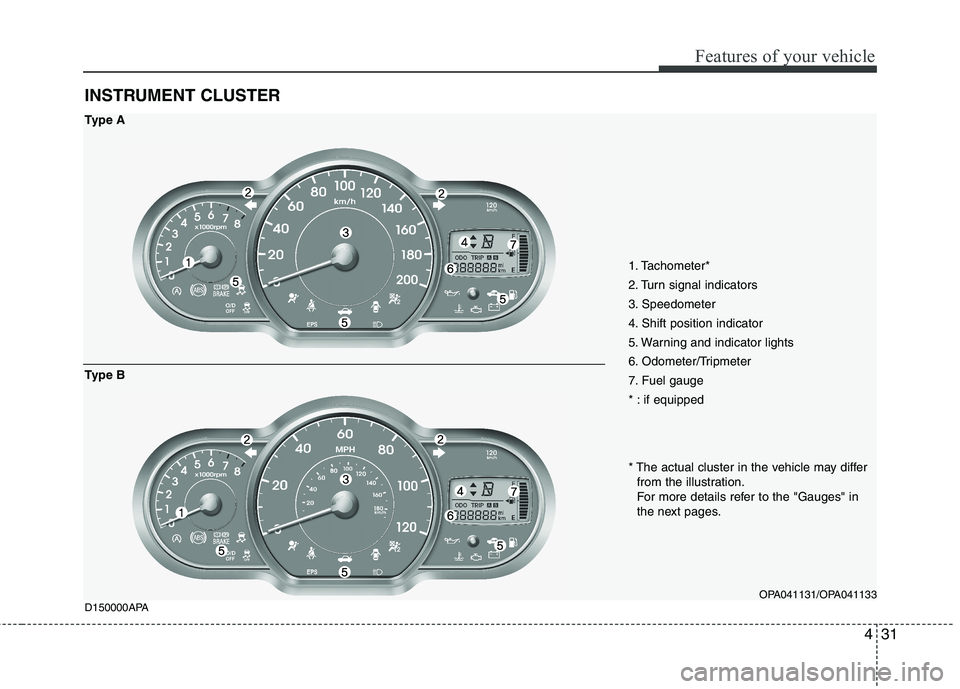
INSTRUMENT CLUSTER
1. Tachometer*
2. Turn signal indicators
3. Speedometer
4. Shift position indicator
5. Warning and indicator lights
6. Odometer/Tripmeter
7. Fuel gauge
* : if equippedOPA041131/OPA041133
D150000APA
Type A
* The actual cluster in the vehicle may differ
from the illustration.
For more details refer to the "Gauges" in
the next pages.
Type B
Page 112 of 354
433
Features of your vehicle
When the door is open, or if the engine is
not started within 1 minute, the tachome-
ter pointer may move slightly in ON posi-
tion with the engine OFF. This movement
is normal and will not affect the accuracy
of the tachometer once the engine is run-ning.D150204AUN
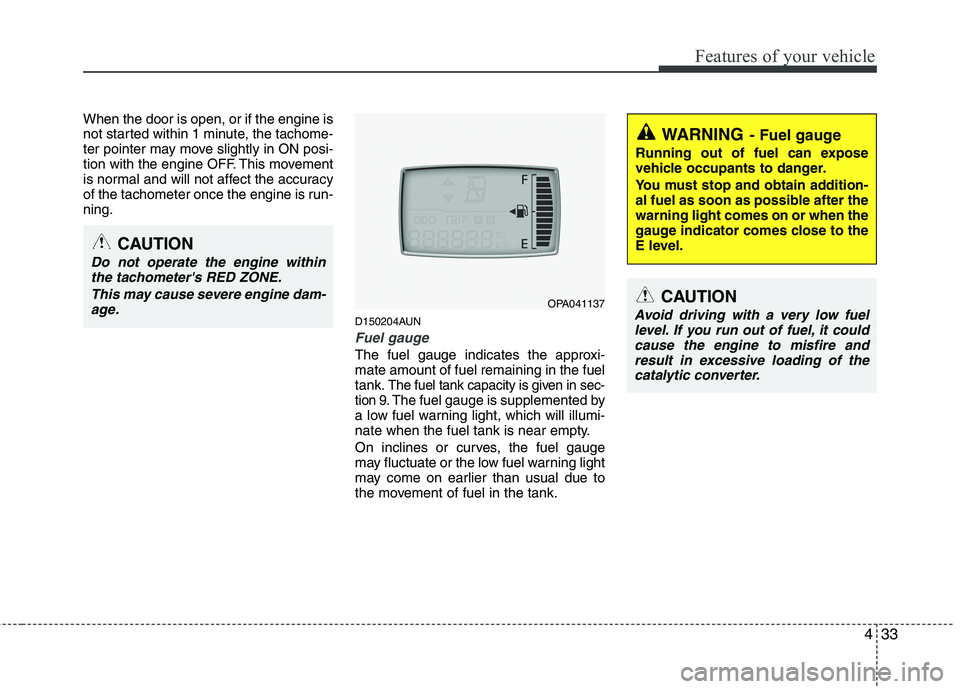
Fuel gauge
The fuel gauge indicates the approxi- mate amount of fuel remaining in the fueltank.
The fuel tank capacity is given in sec-
tion 9.The fuel gauge is supplemented by
a low fuel warning light, which will illumi-
nate when the fuel tank is near empty.
On inclines or curves, the fuel gauge
may fluctuate or the low fuel warning light
may come on earlier than usual due to
the movement of fuel in the tank.
CAUTION
Do not operate the engine within
the tachometer's RED ZONE.
This may cause severe engine dam-age.
WARNING - Fuel gauge
Running out of fuel can expose
vehicle occupants to danger.
You must stop and obtain addition-
al fuel as soon as possible after thewarning light comes on or when the
gauge indicator comes close to the
E level.
CAUTION
Avoid driving with a very low fuel level. If you run out of fuel, it could
cause the engine to misfire andresult in excessive loading of the catalytic converter.OPA041137
Page 114 of 354
435
Features of your vehicle
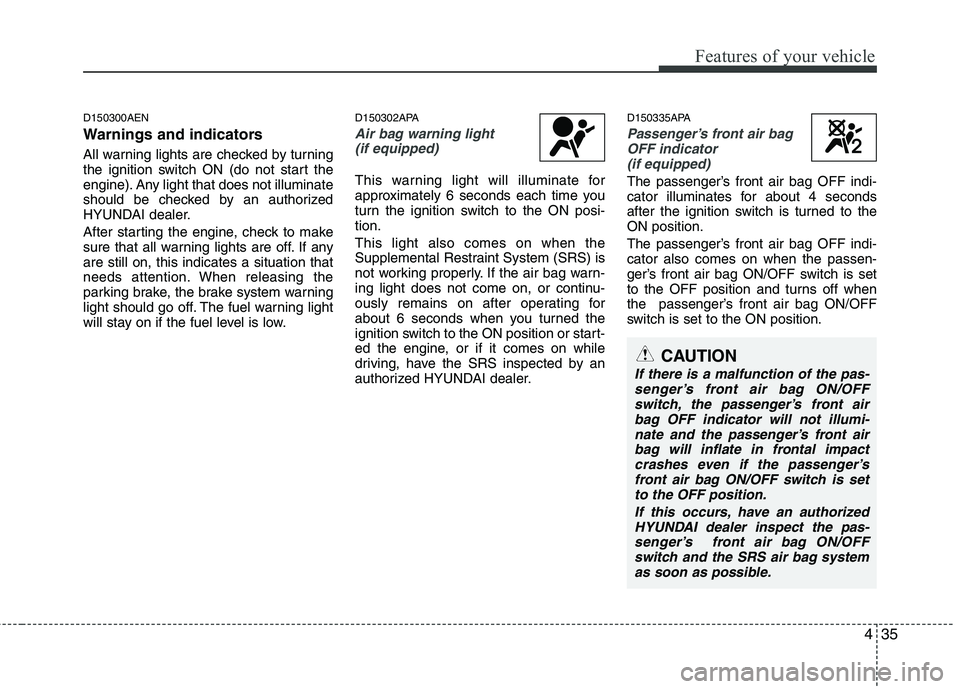
D150300AEN
Warnings and indicators
All warning lights are checked by turning
the ignition switch ON (do not start the
engine). Any light that does not illuminate
should be checked by an authorized
HYUNDAI dealer.
After starting the engine, check to make
sure that all warning lights are off. If anyare still on, this indicates a situation that
needs attention. When releasing the
parking brake, the brake system warning
light should go off. The fuel warning light
will stay on if the fuel level is low.D150302APA
Air bag warning light
(if equipped)
This warning light will illuminate for
approximately 6 seconds each time you
turn the ignition switch to the ON posi-tion. This light also comes on when the
Supplemental Restraint System (SRS) is
not working properly. If the air bag warn-
ing light does not come on, or continu-
ously remains on after operating for
about 6 seconds when you turned the
ignition switch to the ON position or start-
ed the engine, or if it comes on while
driving, have the SRS inspected by an
authorized HYUNDAI dealer. D150335APA
Passenger’s front air bag
OFF indicator
(if equipped)
The passenger’s front air bag OFF indi-
cator illuminates for about 4 seconds
after the ignition switch is turned to theON position.
The passenger’s front air bag OFF indi- cator also comes on when the passen-
ger’s front air bag ON/OFF switch is set
to the OFF position and turns off when
the passenger’s front air bag ON/OFF
switch is set to the ON position.
CAUTION
If there is a malfunction of the pas-senger’s front air bag ON/OFFswitch, the passenger’s front air bag OFF indicator will not illumi-
nate and the passenger’s front air bag will inflate in frontal impactcrashes even if the passenger’s front air bag ON/OFF switch is set
to the OFF position.
If this occurs, have an authorizedHYUNDAI dealer inspect the pas- senger’s front air bag ON/OFFswitch and the SRS air bag system
as soon as possible.
Page 115 of 354
Features of your vehicle
36
4
D150303AEN
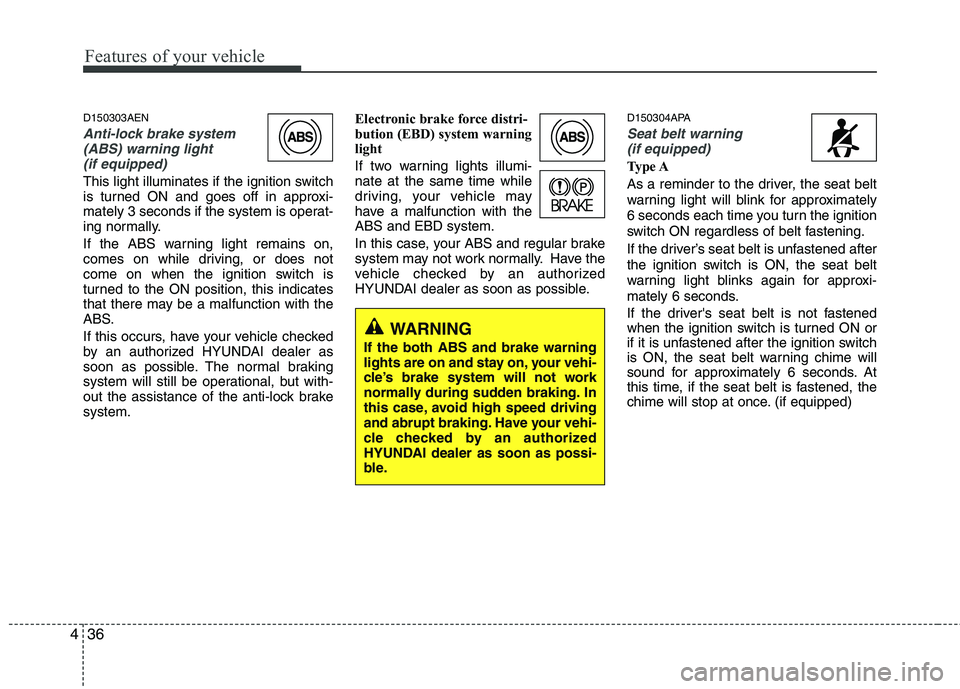
Anti-lock brake system
(ABS) warning light
(if equipped)
This light illuminates if the ignition switch
is turned ON and goes off in approxi-
mately 3 seconds if the system is operat-
ing normally.
If the ABS warning light remains on,
comes on while driving, or does not
come on when the ignition switch is
turned to the ON position, this indicates
that there may be a malfunction with the
ABS.
If this occurs, have your vehicle checked
by an authorized HYUNDAI dealer as
soon as possible. The normal braking
system will still be operational, but with-
out the assistance of the anti-lock brakesystem. Electronic brake force distri-
bution (EBD) system warning
light
If two warning lights illumi- nate at the same time while
driving, your vehicle may
have a malfunction with theABS and EBD system.
In this case, your ABS and regular brake
system may not work normally. Have the
vehicle checked by an authorized
HYUNDAI dealer as soon as possible.
D150304APA
Seat belt warning
(if equipped)
Type A
As a reminder to the driver, the seat belt
warning light will blink for approximately
6 seconds each time you turn the ignition
switch ON regardless of belt fastening.
If the driver’s seat belt is unfastened after
the ignition switch is ON, the seat belt
warning light blinks again for approxi-
mately 6 seconds.
If the driver's seat belt is not fastened
when the ignition switch is turned ON or
if it is unfastened after the ignition switch
is ON, the seat belt warning chime will
sound for approximately 6 seconds. At
this time, if the seat belt is fastened, the
chime will stop at once. (if equipped)
WARNING
If the both ABS and brake warning
lights are on and stay on, your vehi-
cle’s brake system will not work
normally during sudden braking. In
this case, avoid high speed driving
and abrupt braking. Have your vehi-
cle checked by an authorized
HYUNDAI dealer as soon as possi-
ble.