window HYUNDAI I30 2015 User Guide
[x] Cancel search | Manufacturer: HYUNDAI, Model Year: 2015, Model line: I30, Model: HYUNDAI I30 2015Pages: 635, PDF Size: 40.66 MB
Page 95 of 635
417
Features of your vehicle
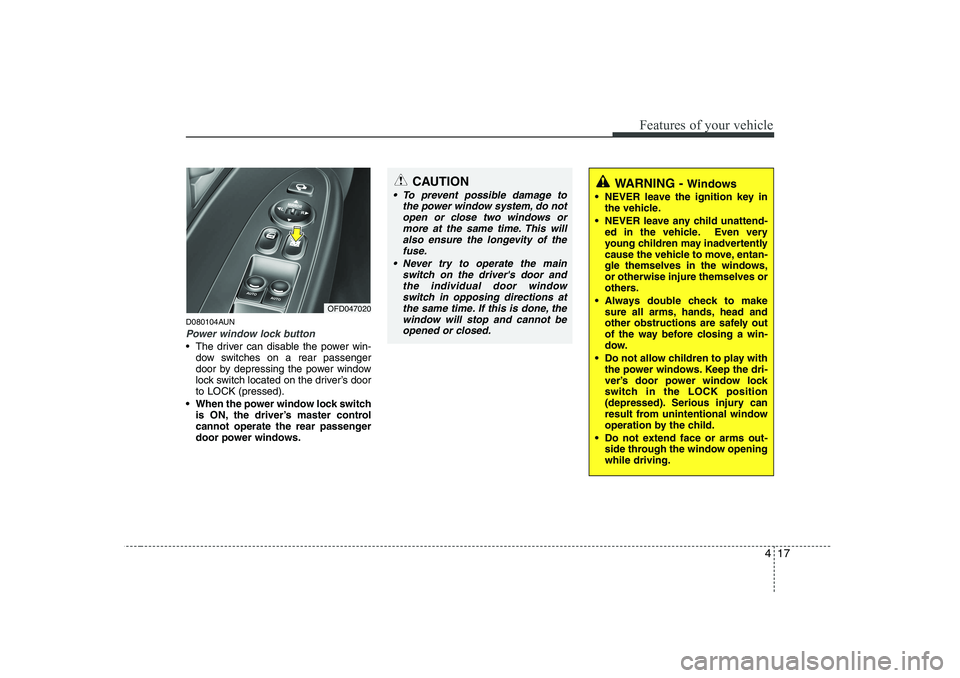
D080104AUN
Power window lock button
The driver can disable the power win-dow switches on a rear passenger
door by depressing the power window
lock switch located on the driver’s doorto LOCK (pressed).
When the power window lock switch is ON, the driver’s master control
cannot operate the rear passenger
door power windows.
OFD047020
CAUTION
To prevent possible damage to
the power window system, do not
open or close two windows ormore at the same time. This willalso ensure the longevity of thefuse.
Never try to operate the main switch on the driver's door andthe individual door windowswitch in opposing directions at
the same time. If this is done, the window will stop and cannot beopened or closed.WARNING - Windows
NEVER leave the ignition key in the vehicle.
NEVER leave any child unattend- ed in the vehicle. Even very
young children may inadvertently
cause the vehicle to move, entan-
gle themselves in the windows,or otherwise injure themselves or
others.
Always double check to make sure all arms, hands, head and
other obstructions are safely out
of the way before closing a win-
dow.
Do not allow children to play with the power windows. Keep the dri-
ver’s door power window lock
switch in the LOCK position
(depressed). Serious injury can
result from unintentional window
operation by the child.
Do not extend face or arms out- side through the window openingwhile driving.
Page 96 of 635
Features of your vehicle
18
4
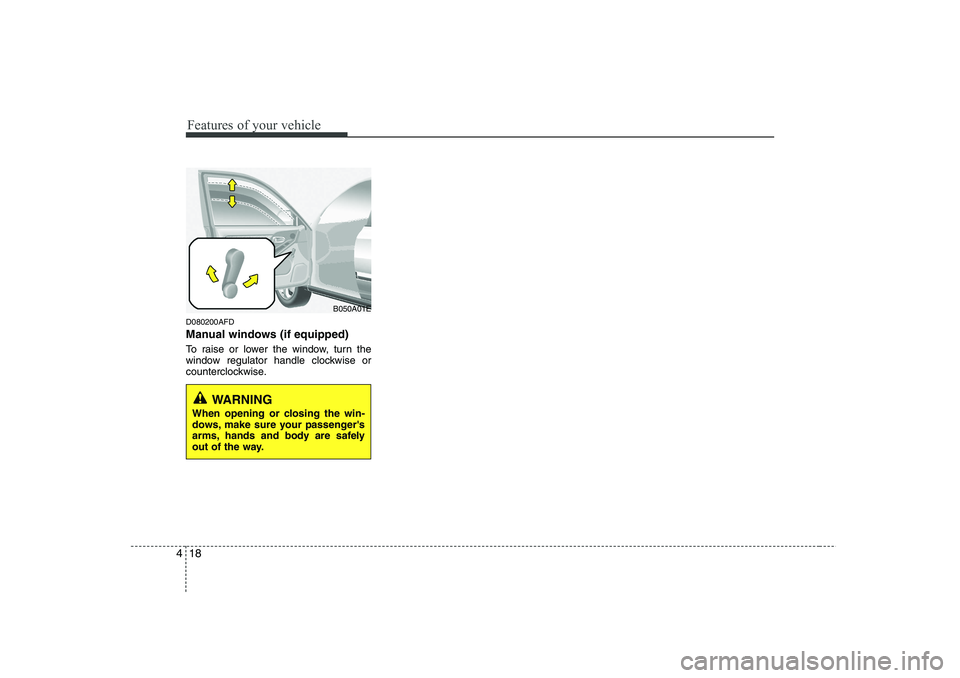
D080200AFD
Manual windows (if equipped)
To raise or lower the window, turn the
window regulator handle clockwise or
counterclockwise.
WARNING
When opening or closing the win-
dows, make sure your passenger's
arms, hands and body are safely
out of the way.
B050A01E
Page 109 of 635
431
Features of your vehicle
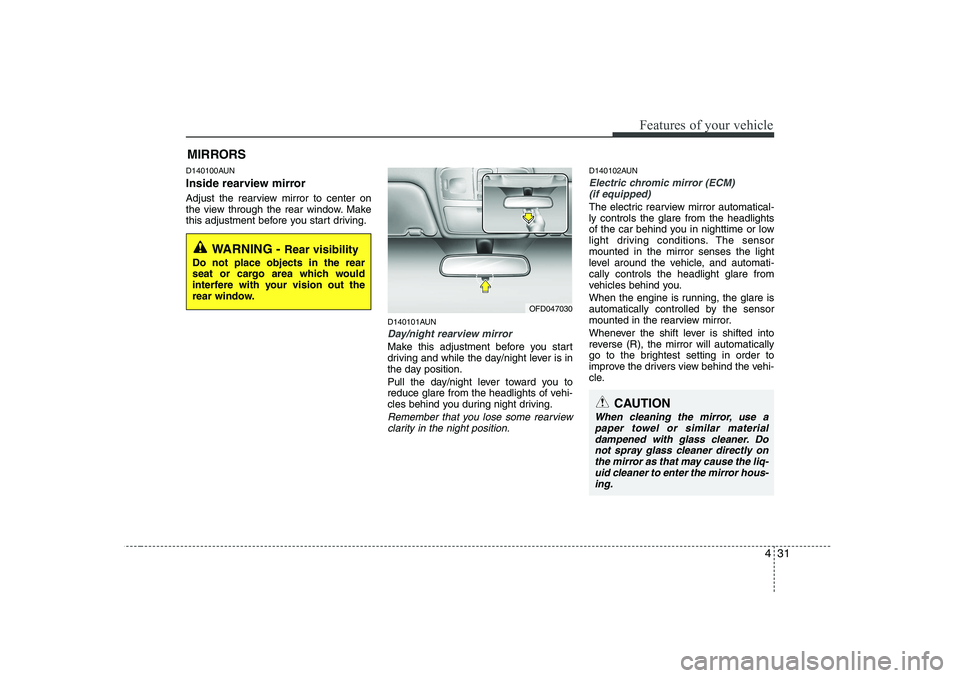
D140100AUN
Inside rearview mirror
Adjust the rearview mirror to center on
the view through the rear window. Make
this adjustment before you start driving.D140101AUN
Day/night rearview mirror
Make this adjustment before you start
driving and while the day/night lever is in
the day position.
Pull the day/night lever toward you to
reduce glare from the headlights of vehi-
cles behind you during night driving.
Remember that you lose some rearviewclarity in the night position.
D140102AUN
Electric chromic mirror (ECM)(if equipped)
The electric rearview mirror automatical- ly controls the glare from the headlights
of the car behind you in nighttime or low
light driving conditions. The sensormounted in the mirror senses the light
level around the vehicle, and automati-cally controls the headlight glare from
vehicles behind you.
When the engine is running, the glare is
automatically controlled by the sensor
mounted in the rearview mirror.
Whenever the shift lever is shifted into
reverse (R), the mirror will automatically
go to the brightest setting in order to
improve the drivers view behind the vehi-
cle.
MIRRORS
WARNING -
Rear visibility
Do not place objects in the rear
seat or cargo area which would
interfere with your vision out the
rear window.
OFD047030
CAUTION
When cleaning the mirror, use a paper towel or similar materialdampened with glass cleaner. Do not spray glass cleaner directly on
the mirror as that may cause the liq- uid cleaner to enter the mirror hous-ing.
Page 111 of 635
433
Features of your vehicle
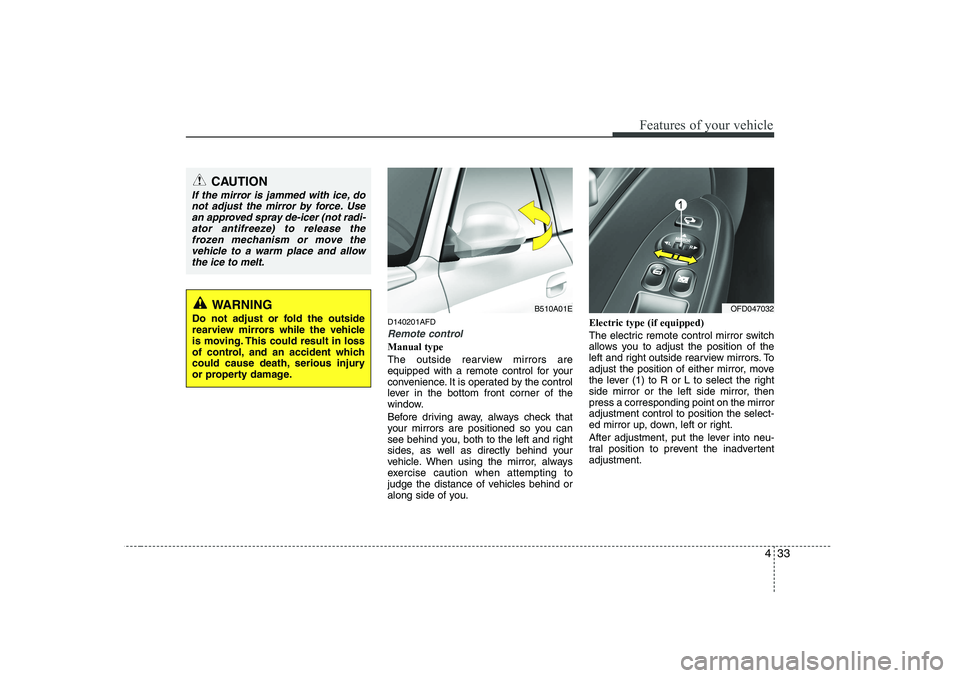
D140201AFD
Remote control
Manual type
The outside rearview mirrors are
equipped with a remote control for your
convenience. It is operated by the control
lever in the bottom front corner of the
window.
Before driving away, always check that
your mirrors are positioned so you can
see behind you, both to the left and right
sides, as well as directly behind your
vehicle. When using the mirror, always
exercise caution when attempting to
judge the distance of vehicles behind or
along side of you.Electric type (if equipped)
The electric remote control mirror switch
allows you to adjust the position of the
left and right outside rearview mirrors. To
adjust the position of either mirror, move
the lever (1) to R or L to select the right
side mirror or the left side mirror, thenpress a corresponding point on the mirroradjustment control to position the select-
ed mirror up, down, left or right.
After adjustment, put the lever into neu-
tral position to prevent the inadvertentadjustment.
CAUTION
If the mirror is jammed with ice, do
not adjust the mirror by force. Use
an approved spray de-icer (not radi-ator antifreeze) to release thefrozen mechanism or move the vehicle to a warm place and allow
the ice to melt.
WARNING
Do not adjust or fold the outside
rearview mirrors while the vehicle
is moving. This could result in loss
of control, and an accident which
could cause death, serious injury
or property damage.OFD047032B510A01E
Page 139 of 635
461
Features of your vehicle
D190403AUN
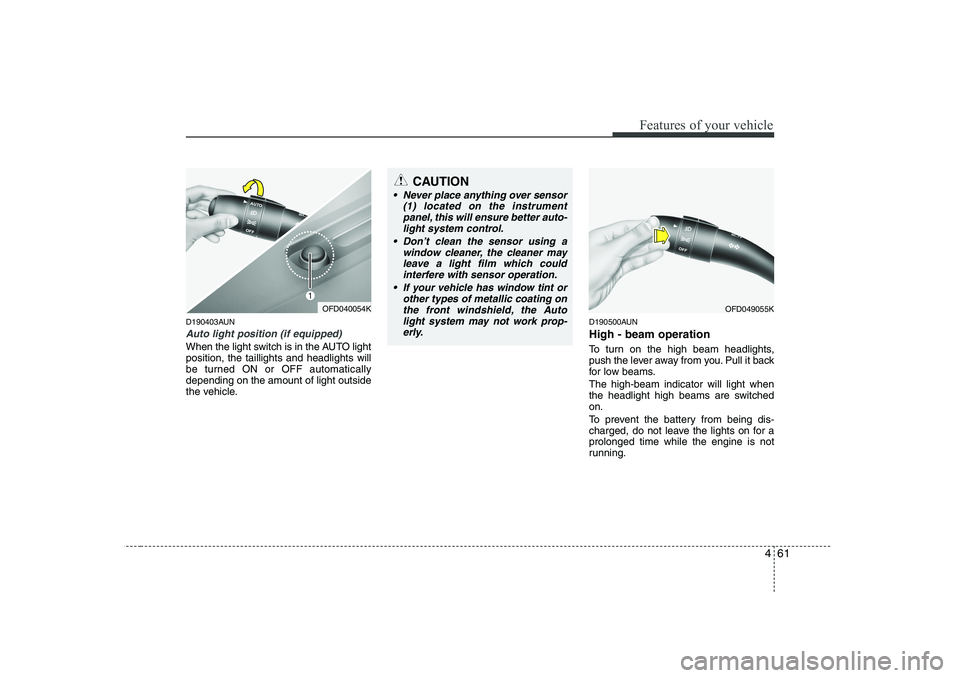
Auto light position (if equipped)
When the light switch is in the AUTO light position, the taillights and headlights will
be turned ON or OFF automaticallydepending on the amount of light outside
the vehicle.D190500AUN High - beam operation
To turn on the high beam headlights,
push the lever away from you. Pull it back
for low beams. The high-beam indicator will light when
the headlight high beams are switchedon.
To prevent the battery from being dis-
charged, do not leave the lights on for aprolonged time while the engine is not
running.
OFD049055KOFD040054K
CAUTION
Never place anything over sensor
(1) located on the instrument
panel, this will ensure better auto- light system control.
Don’t clean the sensor using a window cleaner, the cleaner may
leave a light film which could interfere with sensor operation.
If your vehicle has window tint or other types of metallic coating onthe front windshield, the Auto
light system may not work prop- erly.
Page 143 of 635
465
Features of your vehicle
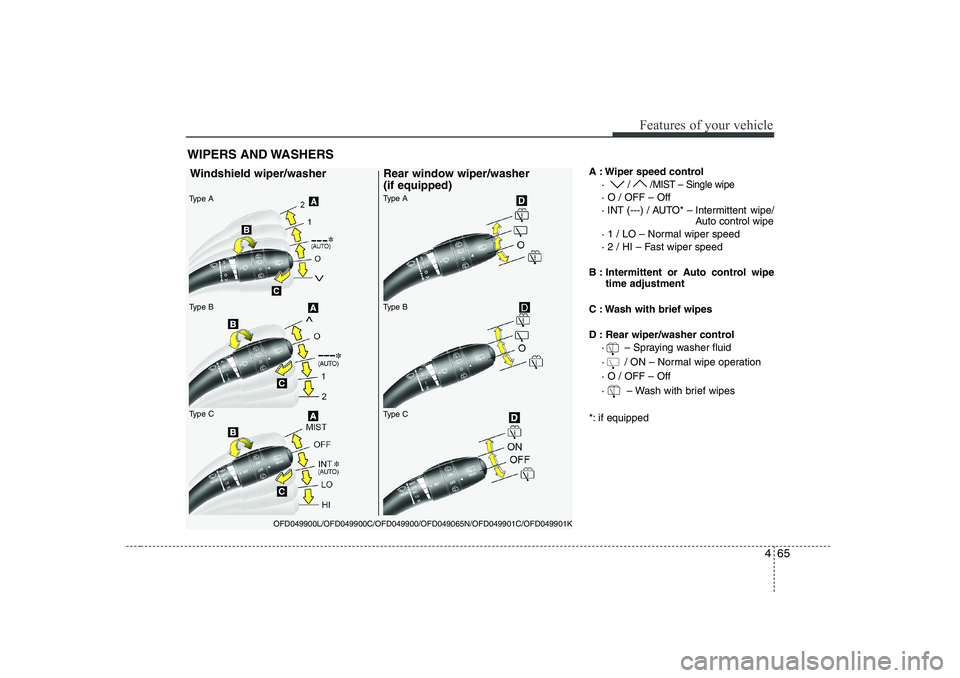
A : Wiper speed control·
/ /MIST – Single wipe
· O / OFF – Off
· INT (---) / AUTO* – Intermittent wipe/ Auto control wipe
· 1 / LO – Normal wiper speed
· 2 / HI – Fast wiper speed
B : Intermittent or Auto control wipe time adjustment
C : Wash with brief wipes
D : Rear wiper/washer control · – Spraying washer fluid
· / ON – Normal wipe operation· O / OFF – Off
· – Wash with brief wipes
*: if equipped
WIPERS AND WASHERS
OFD049900L/OFD049900C/OFD049900/OFD049065N/OFD049901C/OFD049901K
Windshield wiper/washer
Type B
Type A
Type C Rear window wiper/washer (if equipped)Type B
Type A
Type CD
Page 145 of 635
467
Features of your vehicle
D200200AFD
Windshield washers
In the O (OFF) position, pull the lever
gently toward you to spray washer fluid
on the windshield and to run the wipers
1-3 cycles. Use this function when the
windshield is dirty. The spray and wiper
operation will continue until you release
the lever. If the washer does not work,
check the washer fluid level. If the fluid
level is not sufficient, you will need to add
appropriate non-abrasive windshield
washer fluid to the washer reservoir.
The reservoir filler neck is located in the
front of the engine compartment on the
passenger side.D200300AFD
Rear window wiper and washer
switch (if equipped)
The rear window wiper and washer
switch is located at the end of the wiper
and washer switch lever. Turn the switch
to desired position to operate the rear
wiper and washer.
- Spraying washer fluid and wiping
/ ON - Normal wiper operation
O / OFF - Wiper is not in operation - Spraying washer fluid and wiping
CAUTION
When washing the vehicle, set thewiper switch in the O (OFF) position
to stop the auto wiper operation.
The wiper may operate and be dam-aged if the switch is set in the AUTOmode while washing the vehicle.
Do not remove the sensor coverlocated on the upper end of the pas-senger side windshield glass. Damage to system parts couldoccur and may not be covered by
your vehicle warranty.
When starting the vehicle in winter,set the wiper switch in the O (OFF)position. Otherwise, wipers may
operate and ice may damage thewindshield wiper blades. Always remove all snow and ice and defrostthe windshield properly prior to
operating the windshield wipers.
CAUTION
To prevent possible damage to the washer pump, do not operate thewasher when the fluid reservoir is empty.
WARNING
Do not use the washer in freezing
temperatures without first warming
the windshield with the defrosters;
the washer solution could freeze oncontact with the windshield and
obscure your vision.
CAUTION
To prevent possible damage to the wipers or windshield, do not
operate the wipers when thewindshield is dry.
To prevent damage to the wiper blades, do not use gasoline,
kerosene, paint thinner, or othersolvents on or near them.
To prevent damage to the wiper arms and other components, donot attempt to move the wipers
manually.
Page 148 of 635
Features of your vehicle
70
4
D210500AUN
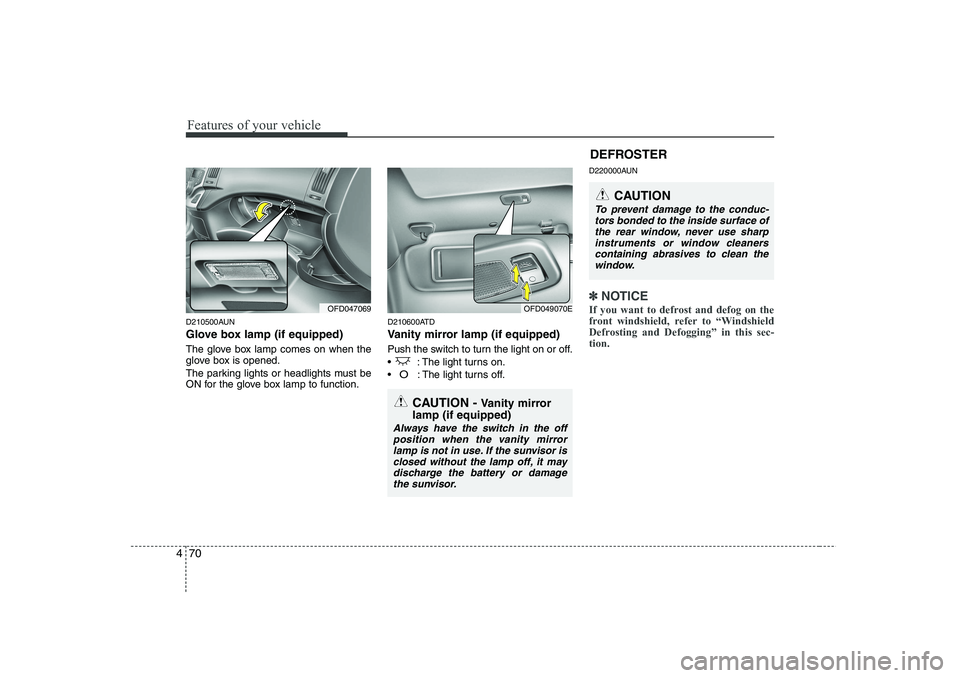
Glove box lamp (if equipped)
The glove box lamp comes on when the
glove box is opened.
The parking lights or headlights must be
ON for the glove box lamp to function. D210600ATD
Vanity mirror lamp (if equipped)
Push the switch to turn the light on or off.
: The light turns on.
O: The light turns off.D220000AUN
✽✽
NOTICE
If you want to defrost and defog on the
front windshield, refer to “Windshield
Defrosting and Defogging” in this sec-tion. OFD049070EOFD047069
CAUTION
To prevent damage to the conduc- tors bonded to the inside surface of the rear window, never use sharp
instruments or window cleaners containing abrasives to clean thewindow.
CAUTION - Vanity mirror
lamp (if equipped)
Always have the switch in the off position when the vanity mirrorlamp is not in use. If the sunvisor is closed without the lamp off, it maydischarge the battery or damage
the sunvisor.
DEFROSTER
Page 149 of 635
471
Features of your vehicle
D220100AUN
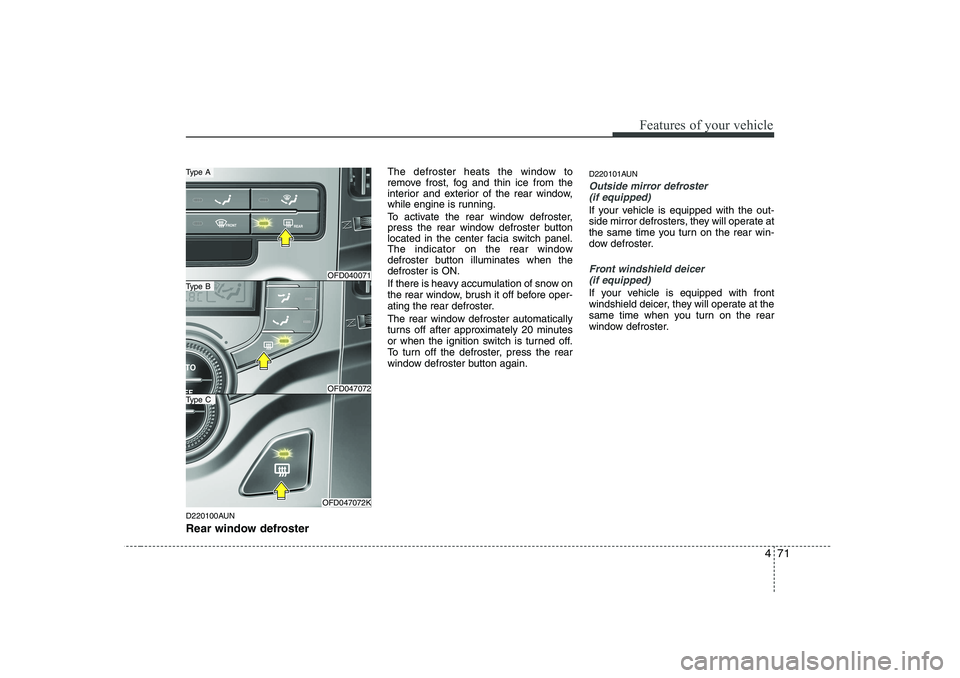
Rear window defrosterThe defroster heats the window to
remove frost, fog and thin ice from the
interior and exterior of the rear window,
while engine is running.
To activate the rear window defroster,
press the rear window defroster button
located in the center facia switch panel.
The indicator on the rear window
defroster button illuminates when thedefroster is ON.
If there is heavy accumulation of snow on
the rear window, brush it off before oper-
ating the rear defroster.
The rear window defroster automatically
turns off after approximately 20 minutes
or when the ignition switch is turned off.
To turn off the defroster, press the rear
window defroster button again.
D220101AUN
Outside mirror defroster
(if equipped)
If your vehicle is equipped with the out-
side mirror defrosters, they will operate at
the same time you turn on the rear win-
dow defroster.
Front windshield deicer (if equipped)
If your vehicle is equipped with front
windshield deicer, they will operate at the
same time when you turn on the rear
window defroster.
OFD040071
OFD047072
OFD047072K
Type B
Type A
Type C
Page 150 of 635
Features of your vehicle
72
4
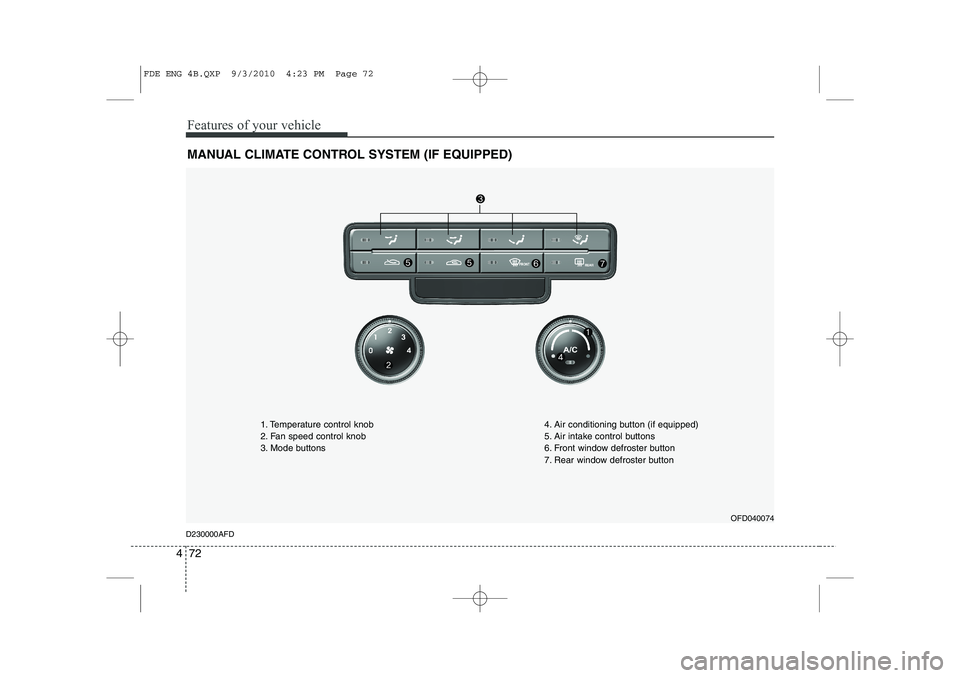
MANUAL CLIMATE CONTROL SYSTEM (IF EQUIPPED)
OFD040074
D230000AFD 1. Temperature control knob
2. Fan speed control knob
3. Mode buttons
4. Air conditioning button (if equipped)
5. Air intake control buttons
6. Front window defroster button
7. Rear window defroster button
FDE ENG 4B.QXP 9/3/2010 4:23 PM Page 72