chapter 7 HYUNDAI I30 2016 Service Manual
[x] Cancel search | Manufacturer: HYUNDAI, Model Year: 2016, Model line: I30, Model: HYUNDAI I30 2016Pages: 659, PDF Size: 17.14 MB
Page 226 of 659
3-76
Convenient features of your vehicle
- Late/Normal/Early To adjust the initial warning alert
time for Autonomous Emergency
Braking system.
For more information, refer to
"Autonomous Emergency Braking
(AEB)" in chapter 5.
To activate or deactivate the Rear
Cross Traffic Alert system.
For more information, refer to
"Blind Spot Detection" in chapter 5.
To activate or deactivate the Speed
Limit Information Function.
For more information, refer to
"Speed Limit Information Function"
in chapter 5. 2. Door
- Disable: The auto door lock opera-
tion will be canceled.
- Enable on Speed: All doors will be automatically locked when the vehi-
cle speed exceeds 15km/h
(9.3mph).
- Enable on Shift: All doors will be automatically locked if the automat-
ic transmission/dual clutch trans-
mission shift lever is shifted from
the P (Park) position to the R
(Reverse), N (Neutral), or D (Drive)
position.
- Disable: The auto door unlock oper- ation will be canceled.
- Vehicle Off: All doors will be auto- matically unlocked when the
Engine Star/Stop button is set to
the OFF position. (if equipped with
smart key) - On Key Out: All doors will be auto-
matically unlocked when the igni-
tion key is removed from the igni-
tion switch. (if equipped with remote
key)
- On Shift to P: All doors will be auto- matically unlocked if the automatic
transmission/dual clutch transmis-
sion shift lever is shifted to the P
(Park) position.
- Driver Door Unlock: All doors will be automatically unlocked when the
driver’s door is opened.
To activate or deactivate the horn
feedback.
If the horn feedback is activated,
after locking the door by pressing the
lock button on the remote key, and
pressing it again within 4 seconds,
the horn feedback sound will operate
once to indicate that all doors are
locked. (if equipped with remote key)
Page 227 of 659
3-77
Convenient features of your vehicle
3
3. Lights
- Off: The one touch turn signal func-tion will be deactivated.
- 3, 5, 7 Flashes: The turn signal indi- cator will blink 3, 5, or 7 times when
the turn signal lever is moved slightly.
For more information, refer to
"Light" in this chapter.
To activate or deactivate the head-
lamp delay function.
For more information, refer to
"Light" in this chapter
To activate or deactivate the wel-
come light function.
For more information, refer to
"Light" in this chapter. 4. Sound
- Softer/Louder
To adjust the Park Assist System
volume.
To activate or deactivate the Blind
Spot Detection sound.
For more information, refer to
"Blind Spot Detection" in chapter 5.
To activate or deactivate the wel-
come sound.
5. Convenience
- Off: The seat easy access function is deactivated.
- Normal/Extended: When you turn off the engine, the driver's seat will
automatically move rearward short
(Normal) or long (Extended) for you
to enter or exit the vehicle more
comfortably. For more information, refer to
"Driver Position Memory System"
in this chapter.
To activate or deactivate the wireless
charging system in the front seat.
For more information, refer to
"Wireless Charging System" in
this chapter.
To activate or deactivate the Wiper/
Light mode.
When activated, the LCD display
shows the selected Wiper/Light
mode whenever you changed the
mode.
To activate or deactivate the rear
wiper while the vehicle is in reverse
with the front wiper ON.
To activate or deactivate the gear
position pop-up.
Page 228 of 659
3-78
Convenient features of your vehicle
When activated, the gear position
will be displayed on the LCD display.
(if equipped with automatic transmis-
sion/dual clutch transmission)
6. Service Interval
To activate or deactivate the service
interval function.
If the service interval menu is acti-
vated, you may adjust the time and
distance.
Information
To use the service interval menu, con-
sult an authorized HYUNDAI dealer.
If the service interval is activated and
the time and distance is adjusted,
messages are displayed in the fol-
lowing situations each time the vehi-
cle is turned on.
- Service in : Displayed to inform the driver theremaining mileage and days to
service. - Service required
: Displayed when the mileage anddays to service has been reached
or passed.
Information
If any of the following conditions
occur, the mileage and number of days
to service may be incorrect.
- The battery cable is disconnected.
- The fuse switch is turned off.
- The battery is discharged.
7. Other Features
- Off: The average fuel economy will not reset automatically whenever
refueling.
- After Ignition: The average fuel economy will reset automatically
whenever it has passed 4 hours
after turning OFF the engine.
- After Refueling: The average fuel economy will reset automatically
when refueling.
For more information, refer to
"Trip Computer" in this chapter.
To select the fuel economy unit.
(km/L, L/100, MPG)
To select the temperature unit.
(°C,°F)
To select the tire pressure unit.
(psi, kPa, bar)
8. Reset
You can reset the menus in the User
Settings Mode. All menus in the User
Settings Mode are initialized, except
language and service interval.
i
i
Page 236 of 659
Steering wheel audio control
(if equipped)
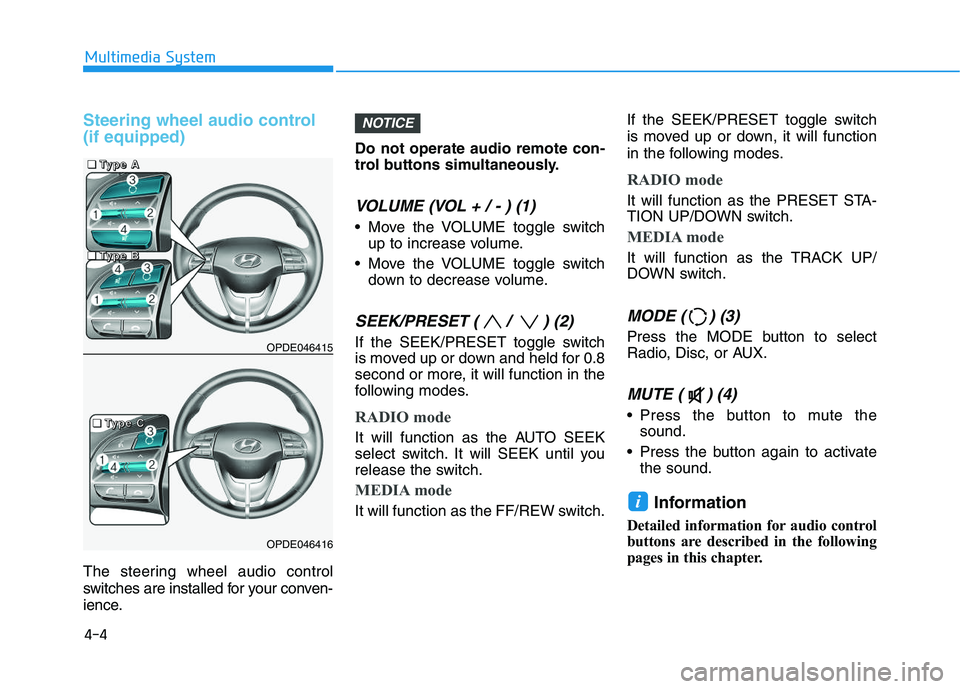
The steering wheel audio control
switches are installed for your conven-
ience.Do not operate audio remote con-
trol buttons simultaneously.
VOLUME (VOL + / - ) (1)
Move the VOLUME toggle switch
up to increase volume.
Move the VOLUME toggle switch down to decrease volume.
SEEK/PRESET ( / ) (2)
If the SEEK/PRESET toggle switch
is moved up or down and held for 0.8
second or more, it will function in the
following modes.
RADIO mode
It will function as the AUTO SEEK
select switch. It will SEEK until you
release the switch.
MEDIA mode
It will function as the FF/REW switch. If the SEEK/PRESET toggle switch
is moved up or down, it will function
in the following modes.
RADIO mode
It will function as the PRESET STA-
TION UP/DOWN switch.
MEDIA mode
It will function as the TRACK UP/
DOWN switch.
MODE ( ) (3)
Press the MODE button to select
Radio, Disc, or AUX.
MUTE ( ) (4)
Press the button to mute the
sound.
Press the button again to activate the sound.
Information
Detailed information for audio control
buttons are described in the following
pages in this chapter.
i
NOTICE
OPDE046415
OPDE046416
4-4
Multimedia System
■
■
■
■
T
T
T
T
y
y
y
y
p
p
p
p
e
e
e
e
A
A
A
A
■
■
■
■
T
T
T
T
y
y
y
y
p
p
p
p
e
e
e
e
C
C
C
C
■
■
■
■
T
T
T
T
y
y
y
y
p
p
p
p
e
e
e
e
B
B
B
B
Page 237 of 659
Bluetooth®Wireless Technology
hands-free
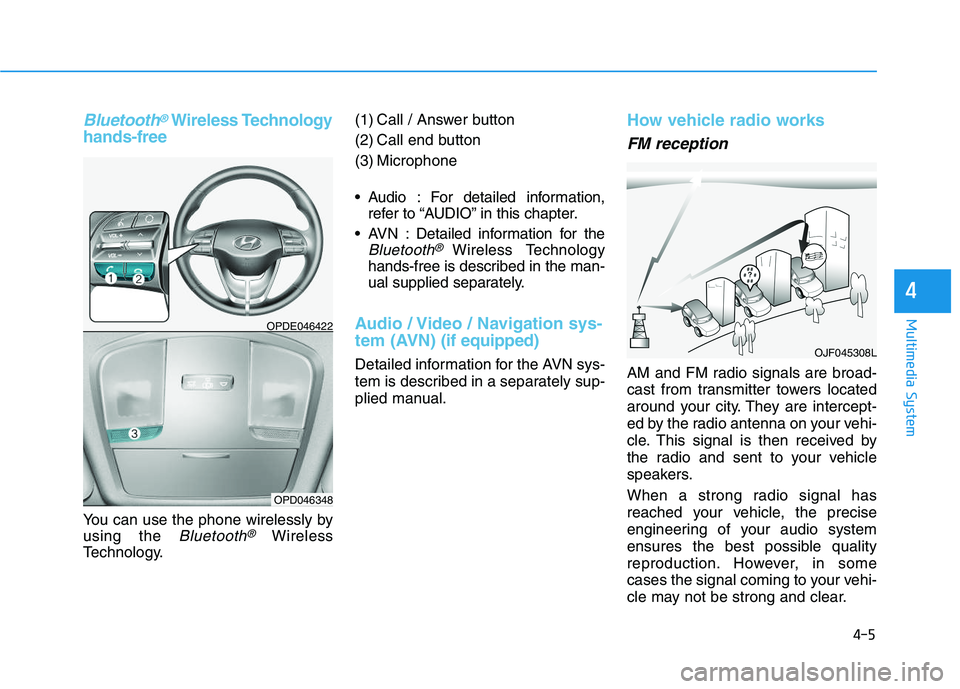
You can use the phone wirelessly by
using the
Bluetooth®Wireless
Technology. (1) Call / Answer button
(2) Call end button
(3) Microphone
Audio : For detailed information,
refer to “AUDIO” in this chapter.
AVN : Detailed information for the
Bluetooth® Wireless Technology
hands-free is described in the man-
ual supplied separately.
Audio / Video / Navigation sys-
tem (AVN) (if equipped)
Detailed information for the AVN sys-
tem is described in a separately sup-
plied manual.
How vehicle radio works
FM reception
AM and FM radio signals are broad-
cast from transmitter towers located
around your city. They are intercept-
ed by the radio antenna on your vehi-
cle. This signal is then received by
the radio and sent to your vehicle
speakers.
When a strong radio signal has
reached your vehicle, the precise
engineering of your audio system
ensures the best possible quality
reproduction. However, in some
cases the signal coming to your vehi-
cle may not be strong and clear.
OJF045308L
OPDE046422
OPD046348
4-5
Multimedia System
4
Page 309 of 659
5-5
Driving your vehicle
5
Before entering the vehicle
• Be sure all windows, outside mir-ror(s), and outside lights are clean
and unobstructed.
Remove frost, snow, or ice.
Visually check the tires for uneven wear and damage.
Check under the vehicle for any sign of leaks.
Be sure there are no obstacles behind you if you intend to back up.
Before starting
Make sure the hood, the tailgate,and the doors are securely closed
and locked.
Adjust the position of the seat and steering wheel.
Adjust the inside and outside rearview mirrors.
Verify all the lights work.
Fasten your seatbelt. Check that all passengers have fastened their
seatbelts.
Check the gauges and indicators in the instrument panel and the mes-
sages on the instrument display
when the ignition switch is in the
ON position.
Check that any items you are car- rying are stored properly or fas-
tened down securely.
B
B E
E F
F O
O R
R E
E
D
D R
R I
I V
V I
I N
N G
G
To reduce the risk of SERIOUS
INJURY or DEATH, take the fol-
lowing precautions:
•ALWAYS wear your seat belt.
All passengers must be prop-
erly belted whenever the vehi-
cle is moving. For more infor-
mation, refer to "Seat Belts" in
chapter 2.
Always drive defensively.
Assume other drivers or pedes-
trians may be careless and
make mistakes.
Stay focused on the task of
driving. Driver distraction can
cause accidents.
Leave plenty of space between
you and the vehicle in front of
you.
WARNING
Page 329 of 659
5-25
Driving your vehicle
5
Transmission ranges
The indicator in the instrument clus-
ter displays the shift lever position
when the ignition switch is in the ON
position.
P (Park)
Always come to a complete stop
before shifting into P (Park).
To shift from P (Park), you must
depress firmly on the brake pedal
and make sure your foot is off the
accelerator pedal.
If you have done all of the above
and still cannot shift the lever out of
P (Park), see "Shift-Lock Release"
in this chapter.
The shift lever must be in P (Park)
before turning the engine off.
R (Reverse)
Use this position to drive the vehicle
backward.
Always come to a complete stop
before shifting into or out of R
(Reverse); you may damage the
transmission if you shift into R
(Reverse) while the vehicle is in
motion.
NOTICE
To reduce the risk of serious
injury or death:
ALWAYS check the surround-
ing areas near your vehicle for
people, especially children,
before shifting a vehicle into
D (Drive) or R (Reverse).
Before leaving the driver's
seat, always make sure the
shift lever is in the P (Park)
position, then set the parking
brake, and place the ignition
switch in the LOCK/OFF posi-
tion. Unexpected and sudden
vehicle movement can occur
if these precautions are not
followed.
Do not use the engine brake
(shifting from a high gear to
lower gear) rapidly on slip-
pery roads. The vehicle may
slip causing an accident.
WARNING
Shifting into P (Park) while the
vehicle is in motion may
cause you to lose control of
the vehicle.
After the vehicle has stopped,
always make sure the shift
lever is in P (Park), apply the
parking brake, and turn the
engine off.
When parking on an incline,
block the wheels to prevent
the vehicle from rolling down.
Do not use the P (Park) posi-
tion in place of the parking
brake.
WARNING
Page 339 of 659
5-35
Driving your vehicle
5
When the message "Trans cooled.Resume driving." appears you can
continue to drive your vehicle
When possible, drive the vehicle smoothly.
If any of the warning messages in
the LCD display continue to blink, for
your safety, we recommend you con-
tact an authorized HYUNDAI dealer
and have the system checked.Transmission ranges
The indicator in the instrument clus-
ter displays the shift lever position
when the ignition switch is in the ON
position.
P (Park)
Always come to a complete stop
before shifting into P (Park).
To shift from P (Park), you must
depress firmly on the brake pedal
and make sure your foot is off the
accelerator pedal.
If you have done all of the above
and still cannot shift the lever out
of P (Park), see "Shift-Lock
Release" in this chapter.
The shift lever must be in P (Park)
before turning the engine off.
Shifting into P (Park) while the
vehicle is in motion may
cause you to lose control of
the vehicle.
After the vehicle has stopped,
always make sure the shift
lever is in P (Park), apply the
parking brake, and turn the
engine off.
Do not use the P (Park) posi-
tion in place of the parking
brake.
WARNING
Page 360 of 659
5-56
Driving your vehicle
ESC operation
ESC ON condition
When the ignition switch is in the ON
position, the ESC and the ESC OFF
indicator lights illuminate for approxi-
mately three seconds and goes off,
then the ESC is turned on.
When operating
When the ESC is in opera-
tion, the ESC indicator light
blinks:
conditions which may lock the
wheels, you may hear sounds from
the brakes, or feel a corresponding
sensation in the brake pedal. This is
normal and it means your ESC is
active.
engine may not respond to the
accelerator as it does under routine
conditions.
when the ESC activates, the Cruise
Control automatically disengages.
The Cruise Control can be reen-
gaged when the road conditions
allow. See "Cruise Control System"
later in this chapter. (if equipped)
driving on a slippery road, the
engine rpm (revolutions per minute)
may not increase even if you press
the accelerator pedal deeply. This is
to maintain the stability and traction
of the vehicle and does not indicate
a problem.
ESC OFF condition
To cancel ESC operation :
Press the ESC OFF button briefly.
The ESC OFF indicator light and
message "Traction Control disabled"
will illuminate. In this state, the trac-
tion control function of ESC (engine
management) is disabled, but the
brake control function of ESC (brak-
ing management) still operates.
Page 423 of 659
5-119
Driving your vehicle
5
The driver can monitor their drivingconditions on the LCD display.
The DAA screen will appear when
you select the Assist Mode tab on
the LCD display if the system is
activated. (For more information,
refer to "LCD Modes" in chapter
3.)
The driver's attention level is dis- played on the scale of 1 to 5. The
lower the number is, the more inat-
tentive the driver is.
The number decreases when the driver does not take a break for a
certain period of time.
The number increases when the driver attentively drives for a cer-
tain period of time.Take a break
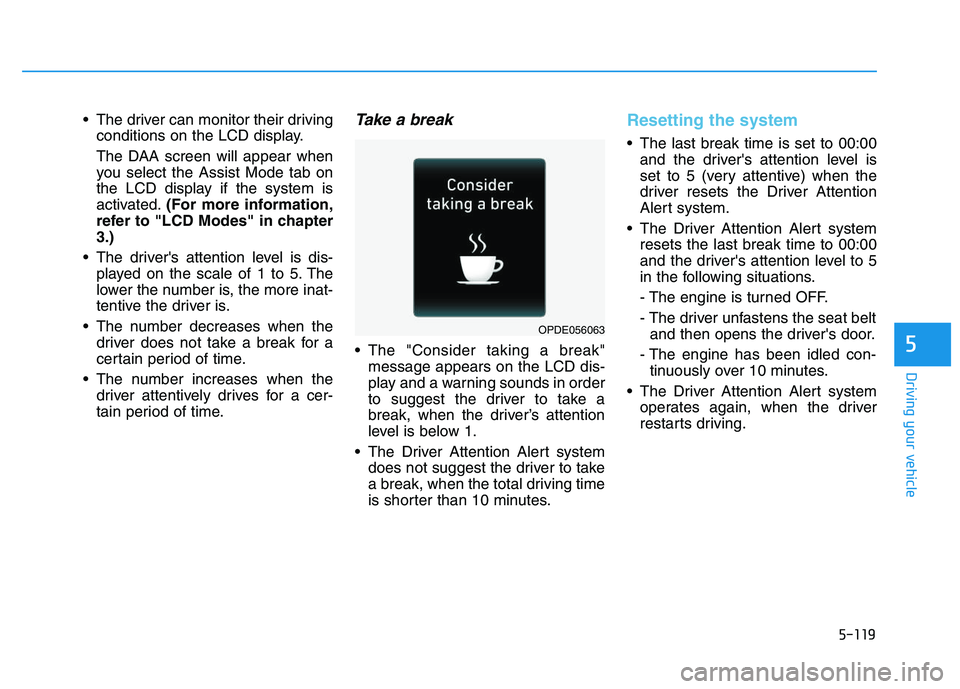
The "Consider taking a break"message appears on the LCD dis-
play and a warning sounds in order
to suggest the driver to take a
break, when the driver’s attention
level is below 1.
The Driver Attention Alert system does not suggest the driver to take
a break, when the total driving time
is shorter than 10 minutes.
Resetting the system
The last break time is set to 00:00and the driver's attention level is
set to 5 (very attentive) when the
driver resets the Driver Attention
Alert system.
The Driver Attention Alert system resets the last break time to 00:00
and the driver's attention level to 5
in the following situations.
- The engine is turned OFF.
- The driver unfastens the seat beltand then opens the driver's door.
- The engine has been idled con- tinuously over 10 minutes.
The Driver Attention Alert system operates again, when the driver
restarts driving.
OPDE056063