cap HYUNDAI I30 2019 Service Manual
[x] Cancel search | Manufacturer: HYUNDAI, Model Year: 2019, Model line: I30, Model: HYUNDAI I30 2019Pages: 659, PDF Size: 17.14 MB
Page 564 of 659
7-51
7
Maintenance
By jump starting
After a jump start from a good bat-
tery, drive the vehicle for 20-30 min-
utes before it is shutoff. The vehicle
may not restart if you shut it off
before the battery had a chance to
adequately recharge. See “Jump
Starting” in chapter 6 for more infor-
mation on jump starting procedures.
Information
An inappropriately disposedbattery can be harmful to
the environment and human
health.
Dispose the battery according to your
local law(s) or regulation.
Reset items
Items should be reset after the bat-
tery has been discharged or the bat-
tery has been disconnected.
Auto up/down window
Sunroof
Trip computer
Climate control system
Driver position memory system
Clock
Audio system
i
AGM battery (if equipped)
Absorbent Glass Matt (AGM)
batteries are maintenance-
free and we recommend that
the AGM battery be serviced
by an authorized HYUNDAI
dealer. For charging your
AGM battery, use only fully
automatic battery chargers
that are specially developed
for AGM batteries.
When replacing the AGM bat-
tery, we recommend that you
use parts for replacement
from an authorized HYUNDAI
dealer.
Do not open or remove the
cap on top of the battery. This
may cause leaks of internal
electrolyte that could result in
severe injury.
CAUTION
Page 567 of 659
7-54
Maintenance
Check tire inflation pressure
Check your tires, including the spare
tire, once a month or more.
How to check
Use a good quality tire pressure
gauge to check tire pressure. You
can not tell if your tires are properly
inflated simply by looking at them.
Radial tires may look properly inflat-
ed when they are under-inflated.
Remove the valve cap from the tire
valve stem. Press the tire gauge firm-
ly onto the valve to get a pressure
measurement. If the cold tire inflation
pressure matches the recommended
pressure on the tire and loading
information label, no further adjust-
ment is necessary. If the pressure is
low, add air until you reach the rec-
ommended pressure. Make sure to
put the valve caps back on the valve
stems. Without the valve cap, dirt or
moisture could get into the valve
core and cause air leakage. If a valve
cap is missing, install a new one as
soon as possible.If you overfill the tire, release air by
pushing on the metal stem in the
center of the tire valve. Recheck the
tire pressure with the tire gauge. Be
sure to put the valve caps back on
the valve stems. Without the valve
cap, dirt or moisture could get into
the valve core and cause air leakage.
If a valve cap is missing, install a new
one as soon as possible.
Tire rotation
To equalize tread wear, HYUNDAI
recommends that the tires be rotated
every 12,000 km (7,500 miles) or
sooner if irregular wear develops.
During rotation, check the tires for
correct balance.
When rotating tires, check for uneven
wear and damage. Abnormal wear is
usually caused by incorrect tire pres-
sure, improper wheel alignment, out-
of-balance wheels, severe braking or
severe cornering. Look for bumps or
bulges in the tread or side of tire.
Replace the tire if you find either of
these conditions. Replace the tire if
fabric or cord is visible. After rotation,
be sure to bring the front and rear tire
pressures to specification and check
lug nut tightness (proper torque is
11~13 kgf·m [79~94 lbf·ft]).
Page 575 of 659
7-62
Maintenance
F
F U
U S
S E
E S
S
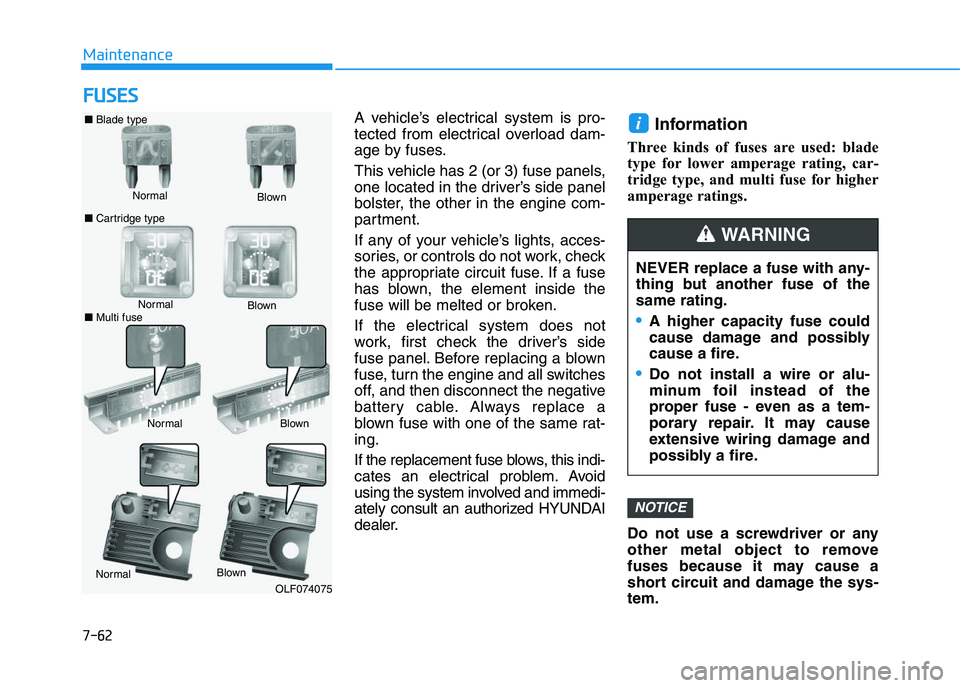
A vehicle’s electrical system is pro-
tected from electrical overload dam-
age by fuses.
This vehicle has 2 (or 3) fuse panels,
one located in the driver’s side panel
bolster, the other in the engine com-
partment.
If any of your vehicle’s lights, acces-
sories, or controls do not work, check
the appropriate circuit fuse. If a fuse
has blown, the element inside the
fuse will be melted or broken.
If the electrical system does not
work, first check the driver’s side
fuse panel. Before replacing a blown
fuse, turn the engine and all switches
off, and then disconnect the negative
battery cable. Always replace a
blown fuse with one of the same rat-
ing.
If the replacement fuse blows, this indi-
cates an electrical problem. Avoid
using the system involved and immedi-
ately consult an authorized HYUNDAI
dealer.Information
Three kinds of fuses are used: blade
type for lower amperage rating, car-
tridge type, and multi fuse for higher
amperage ratings.
Do not use a screwdriver or any
other metal object to remove
fuses because it may cause a
short circuit and damage the sys-
tem.
NOTICE
i
Normal
■
Blade type
■ Cartridge type Blown
Normal Blown
Normal Blown
OLF074075
NEVER replace a fuse with any-
thing but another fuse of the
same rating.
A higher capacity fuse could
cause damage and possibly
cause a fire.
Do not install a wire or alu-
minum foil instead of the
proper fuse - even as a tem-
porary repair. It may cause
extensive wiring damage and
possibly a fire.
WARNING
Normal Blown
■ Multi fuse
Page 578 of 659
7-65
7
Maintenance
4. Check the removed fuse; replace itif it is blown. To remove or insert
the fuse, use the fuse puller in the
engine compartment fuse panel.
5. Push in a new fuse of the same rating, and make sure it fits tightly
in the clips. If it fits loosely, consult
an authorized HYUNDAI dealer.
After checking the fuse panel in
the engine compartment, securely
install the fuse panel cover. You
may hear a clicking sound if the
cover is securely latched. If it is
not securely latched, electrical
failure may occur from water con-
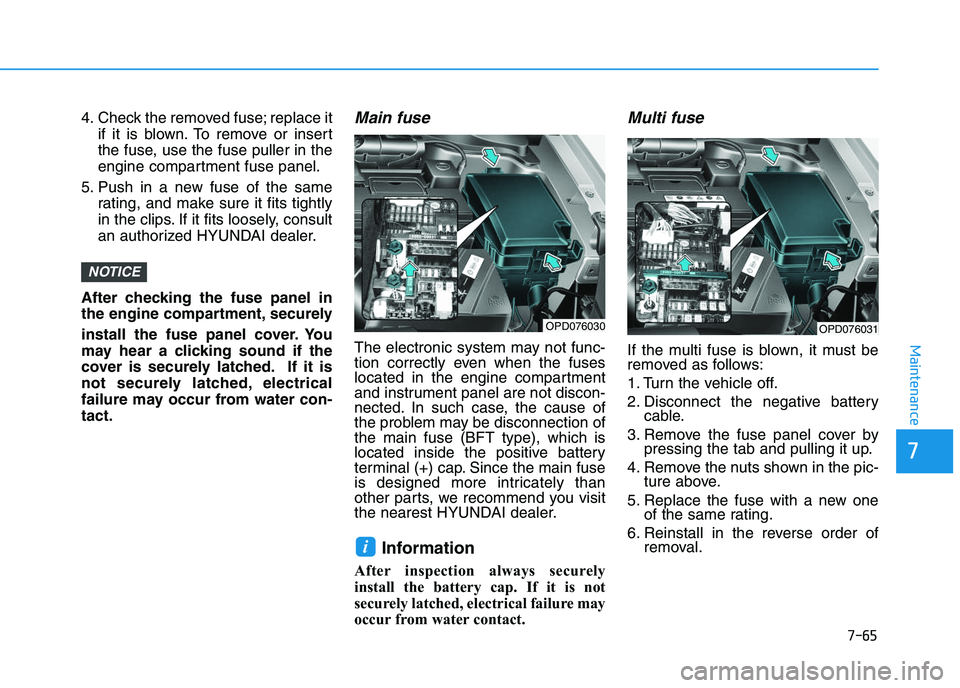
tact.Main fuse
The electronic system may not func-
tion correctly even when the fuses
located in the engine compartment
and instrument panel are not discon-
nected. In such case, the cause of
the problem may be disconnection of
the main fuse (BFT type), which is
located inside the positive battery
terminal (+) cap. Since the main fuse
is designed more intricately than
other parts, we recommend you visit
the nearest HYUNDAI dealer.
Information
After inspection always securely
install the battery cap. If it is not
securely latched, electrical failure may
occur from water contact.
Multi fuse
If the multi fuse is blown, it must be
removed as follows:
1. Turn the vehicle off.
2. Disconnect the negative battery cable.
3. Remove the fuse panel cover by pressing the tab and pulling it up.
4. Remove the nuts shown in the pic- ture above.
5. Replace the fuse with a new one of the same rating.
6. Reinstall in the reverse order of removal.
i
NOTICE
OPD076030OPD076031
Page 579 of 659
7-66
Maintenance
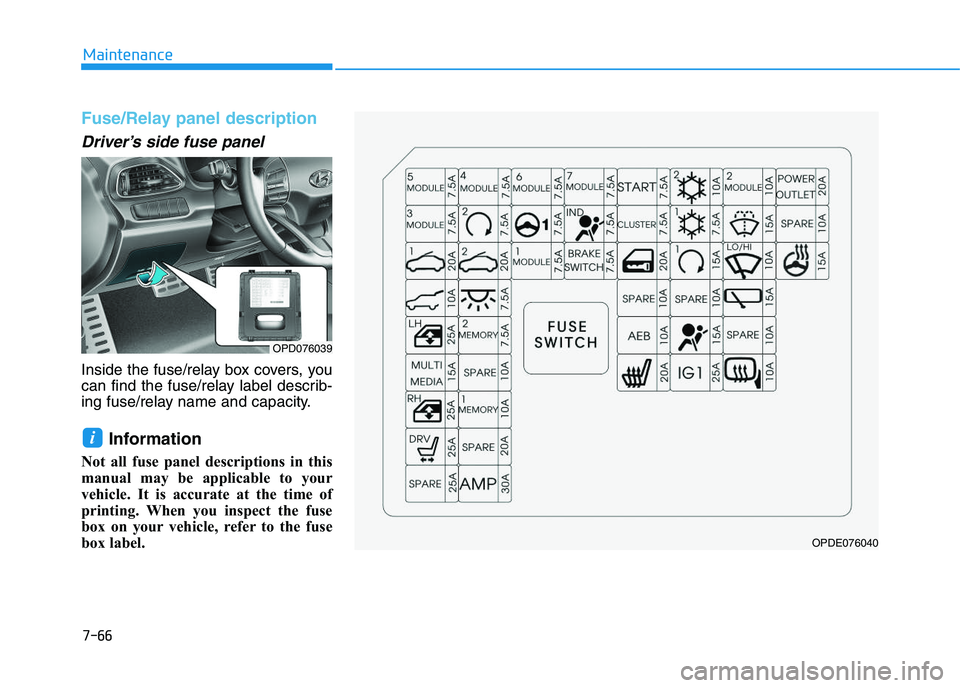
Fuse/Relay panel description
Driver’s side fuse panel
Inside the fuse/relay box covers, you
can find the fuse/relay label describ-
ing fuse/relay name and capacity.
Information
Not all fuse panel descriptions in this
manual may be applicable to your
vehicle. It is accurate at the time of
printing. When you inspect the fuse
box on your vehicle, refer to the fuse
box label.
i
OPD076039
OPDE076040
Page 584 of 659
7-71
7
Maintenance
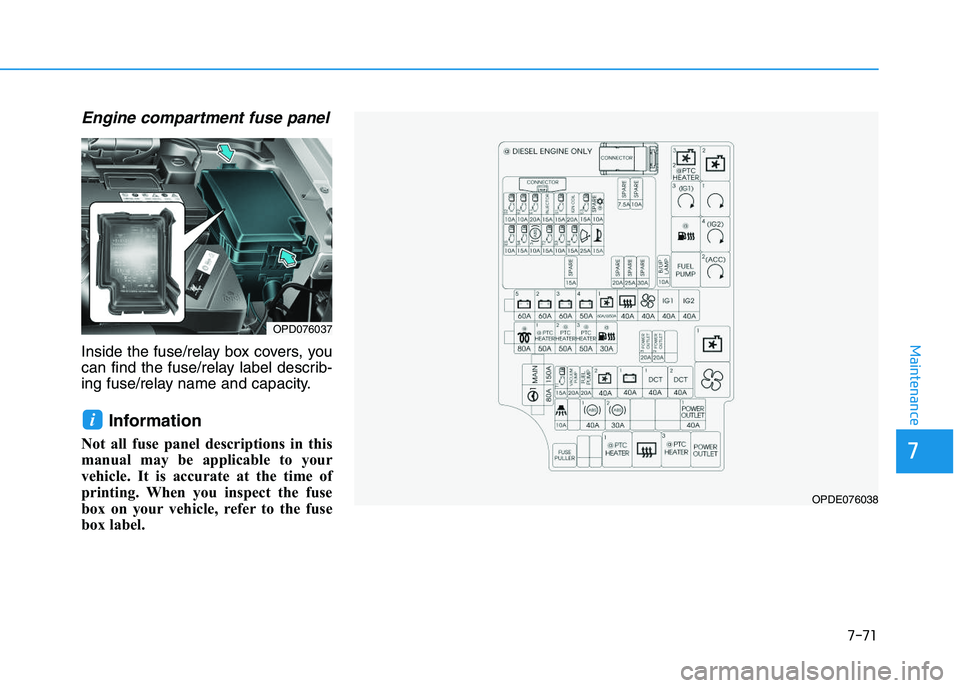
Engine compartment fuse panel
Inside the fuse/relay box covers, you
can find the fuse/relay label describ-
ing fuse/relay name and capacity.
Information
Not all fuse panel descriptions in this
manual may be applicable to your
vehicle. It is accurate at the time of
printing. When you inspect the fuse
box on your vehicle, refer to the fuse
box label.
i
OPD076037
OPDE076038
Page 597 of 659
7-84
Maintenance
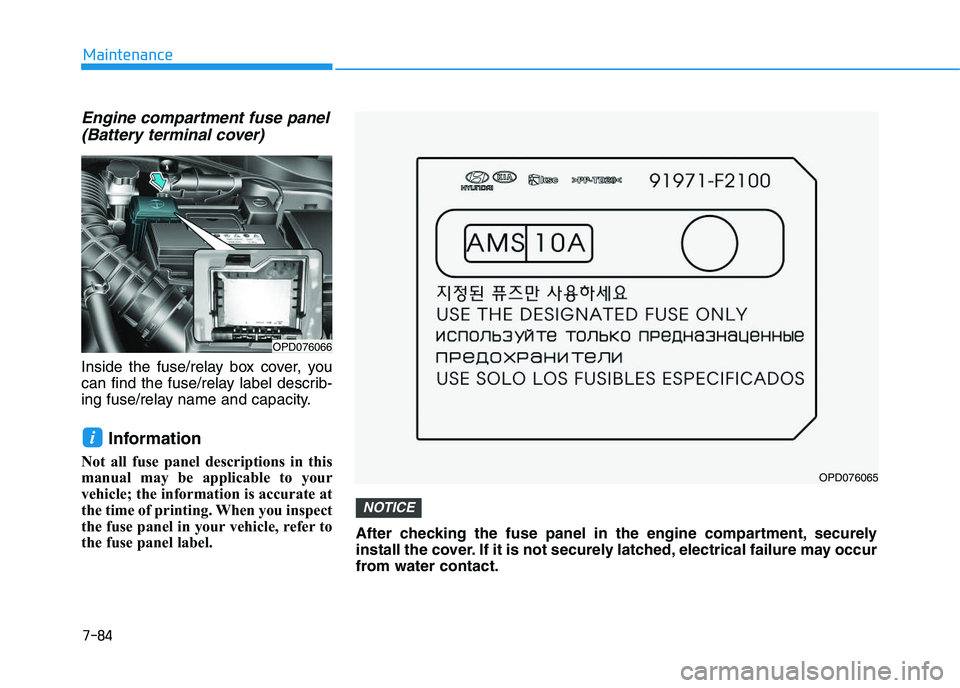
Engine compartment fuse panel(Battery terminal cover)
Inside the fuse/relay box cover, you
can find the fuse/relay label describ-
ing fuse/relay name and capacity.
Information
Not all fuse panel descriptions in this
manual may be applicable to your
vehicle; the information is accurate at
the time of printing. When you inspect
the fuse panel in your vehicle, refer to
the fuse panel label.
i
OPD076066
OPD076065
After checking the fuse panel in the engine compartment, securely
install the cover. If it is not securely latched, electrical failure may occur
from water contact.
NOTICE
Page 622 of 659
7-109
7
Maintenance
Keep your car clean
The best way to prevent corrosion is
to keep your car clean and free of
corrosive materials. Attention to the
underside of the car is particularly
important.
If you live in a high-corrosion area— where road salts are used, near
the ocean, areas with industrial
pollution, acid rain, etc.—, you
should take extra care to prevent
corrosion. In winter, hose off the
underside of your car at least once
a month and be sure to clean the
underside thoroughly when winter
is over.
When cleaning underneath the car, give particular attention to the
components under the fenders and
other areas that are hidden from
view. Do a thorough job; just damp-
ening the accumulated mud rather
than washing it away will acceler-
ate corrosion rather than prevent
it. Water under high pressure and
steam are particularly effective in
removing accumulated mud and
corrosive materials. When cleaning lower door panels,
rocker panels and frame members,
be sure that drain holes are kept
open so that moisture can escape
and not be trapped inside to accel-
erate corrosion.
Keep your garage dry
Don't park your car in a damp, poor-
ly ventilated garage. This creates a
favorable environment for corrosion.
This is particularly true if you wash
your car in the garage or drive it into
the garage when it is still wet or cov-
ered with snow, ice or mud. Even a
heated garage can contribute to cor-
rosion unless it is well ventilated so
moisture is dispersed.
Keep paint and trim in good condition
Scratches or chips in the finish
should be covered with "touch-up"
paint as soon as possible to reduce
the possibility of corrosion. If bare
metal is showing through, the atten-
tion of a qualified body and paint
shop is recommended.
Bird droppings : Bird droppings are
highly corrosive and may damage
painted surfaces in just a few hours.
Always remove bird droppings as
soon as possible.
Don't neglect the interior
Moisture can collect under the floor
mats and carpeting to cause corro-
sion. Check under the mats periodi-
cally to be sure the carpeting is dry.
Use particular care if you carry fertil-
izers, cleaning materials or chemi-
cals in the car.
These should be carried only in
proper containers and any spills or
leaks should be cleaned up, flushed
with clean water and thoroughly
dried.
Page 624 of 659
7-111
7
Maintenance
E
E M
M I
I S
S S
S I
I O
O N
N
C
C O
O N
N T
T R
R O
O L
L
S
S Y
Y S
S T
T E
E M
M
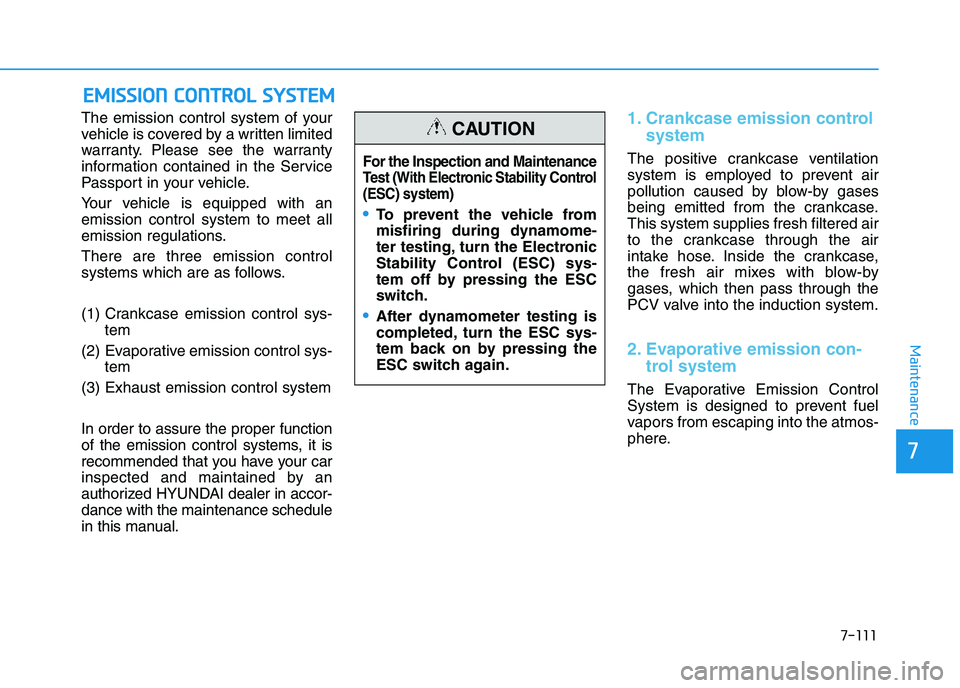
The emission control system of your
vehicle is covered by a written limited
warranty. Please see the warranty
information contained in the Service
Passport in your vehicle.
Your vehicle is equipped with an
emission control system to meet all
emission regulations.
There are three emission control
systems which are as follows.
(1) Crankcase emission control sys-
tem
(2) Evaporative emission control sys- tem
(3) Exhaust emission control system
In order to assure the proper function
of the emission control systems, it is
recommended that you have your car
inspected and maintained by an
authorized HYUNDAI dealer in accor-
dance with the maintenance schedule
in this manual.1. Crankcase emission control system
The positive crankcase ventilation
system is employed to prevent air
pollution caused by blow-by gases
being emitted from the crankcase.
This system supplies fresh filtered air
to the crankcase through the air
intake hose. Inside the crankcase,
the fresh air mixes with blow-by
gases, which then pass through the
PCV valve into the induction system.
2. Evaporative emission con-trol system
The Evaporative Emission Control
System is designed to prevent fuel
vapors from escaping into the atmos-
phere.
For the Inspection and Maintenance
Test (With Electronic Stability Control
(ESC) system)
To prevent the vehicle from
misfiring during dynamome-
ter testing, turn the Electronic
Stability Control (ESC) sys-
tem off by pressing the ESC
switch.
After dynamometer testing is
completed, turn the ESC sys-
tem back on by pressing the
ESC switch again.
CAUTION
Page 629 of 659
8
Specifications & Consumer information
8
Specifications & Consumer information
8
Dimensions ..............................................................8-2
Engine ......................................................................8-2
Bulb wattage ...........................................................8-3
Tires and wheels ....................................................8-4
Load and speed capacity tires (for europe)......8-5
Air conditioning system ........................................8-6
Vehicle weight and luggage volume ....................8-6
Recommended lubricants and capacities ...........8-7
Recommended engine oil (For Europe) .......................8-9
Recommended SAE viscosity number ..........................8-9
Vehicle identification number (VIN) ..................8-12
Vehicle certification label ...................................8-12
Tire specification and pressure label ...............8-13
Engine number .....................................................8-13
Air conditioner compressor label ......................8-14
Refrigerant label ..................................................8-14
Declaration of conformity ..................................8-14