ECO mode HYUNDAI I40 2018 User Guide
[x] Cancel search | Manufacturer: HYUNDAI, Model Year: 2018, Model line: I40, Model: HYUNDAI I40 2018Pages: 534, PDF Size: 11.05 MB
Page 206 of 534
Downloaded from www.Manualslib.com manuals search engine 4119
Features of your vehicle
✽
✽NOTICE
• When using the air conditioning sys-
tem, monitor the temperature gauge
closely while driving up hills or in
heavy traffic when outside tempera-
tures are high. Air conditioning sys-
tem operation may cause engine over-
heating. Continue to use the blower
fan but turn the air conditioning sys-
tem off if the temperature gauge indi-
cates engine overheating.
• When opening the windows in humid weather air conditioning may create
water droplets inside the vehicle.
Since excessive water droplets may
cause damage to electrical equipment,
air conditioning should only be used
with the windows closed.
Air conditioning system operation tips
If the vehicle has been parked in direct
sunlight during hot weather, open the
windows for a short time to let the hot
air inside the vehicle escape.
Use air conditioning to reduce humidi- ty and moisture inside the vehicle on
rainy or humid days.
During air conditioning system opera- tion, you may occasionally notice a
slight change in engine speed as the
air conditioning compressor cycles.
This is a normal system operation
characteristic.
Use the air conditioning system every month only for a few minutes to ensure
maximum system performance. When using the air conditioning sys-
tem, you may notice clear water drip-
ping (or even puddling) on the ground
under the passenger side of the vehi-
cle. This is a normal system operation
characteristic.
Operating the air conditioning system in the recirculated air position provides
maximum cooling, however, continual
operation in this mode may cause the
air inside the vehicle to become stale.
During cooling operation, you may occasionally notice a misty air flow
because of rapid cooling and humid air
intake. This is a normal system opera-
tion characteristic.
Page 213 of 534
Downloaded from www.Manualslib.com manuals search engine Features of your vehicle
126
4
Adjusting the driver and passenger side
temperature equally
1. Press the DUAL button again to deac-
tivate DUAL mode. The passenger
side temperature will be set to the
same temperature as the driver side.
2. Operate the driver side temperature control button. The driver and passen-
ger side temperature will be adjusted
equally.
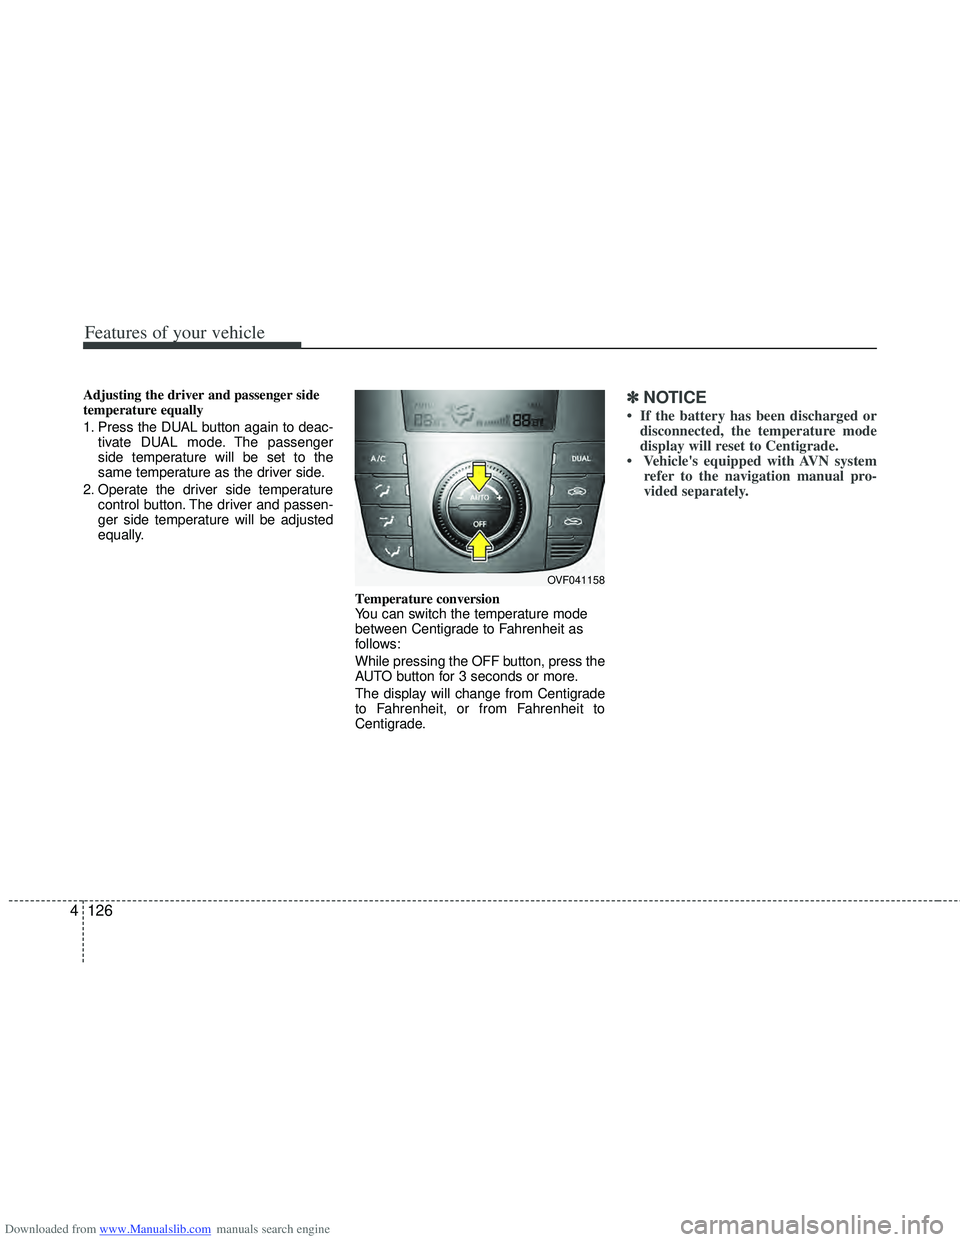
Temperature conversion
You can switch the temperature mode
between Centigrade to Fahrenheit as
follows:
While pressing the OFF button, press the
AUTO button for 3 seconds or more.
The display will change from Centigrade
to Fahrenheit, or from Fahrenheit to
Centigrade.✽ ✽NOTICE
• If the battery has been discharged or
disconnected, the temperature mode
display will reset to Centigrade.
• Vehicle's equipped with AVN system refer to the navigation manual pro-
vided separately.
OVF041158
Page 218 of 534
Downloaded from www.Manualslib.com manuals search engine 4131
Features of your vehicle
Air conditioning system operation tips
If the vehicle has been parked in directsunlight during hot weather, open the
windows for a short time to let the hot
air inside the vehicle escape.
Use air conditioning to reduce humidi- ty and moisture inside the vehicle on
rainy or humid days.
During air conditioning system opera- tion, you may occasionally notice a
slight change in engine speed as the
air conditioning compressor cycles.
This is a normal system operation
characteristic.
Use the air conditioning system every month only for a few minutes to ensure
maximum system performance. When using the air conditioning sys-
tem, you may notice clear water drip-
ping (or even puddling) on the ground
under the passenger side of the vehi-
cle. This is a normal system operation
characteristic.
Operating the air conditioning system in the recirculated air position provides
maximum cooling, however, continual
operation in this mode may cause the
air inside the vehicle to become stale.
During cooling operation, you may occasionally notice a misty air flow
because of rapid cooling and humid air
intake. This is a normal system opera-
tion characteristic.
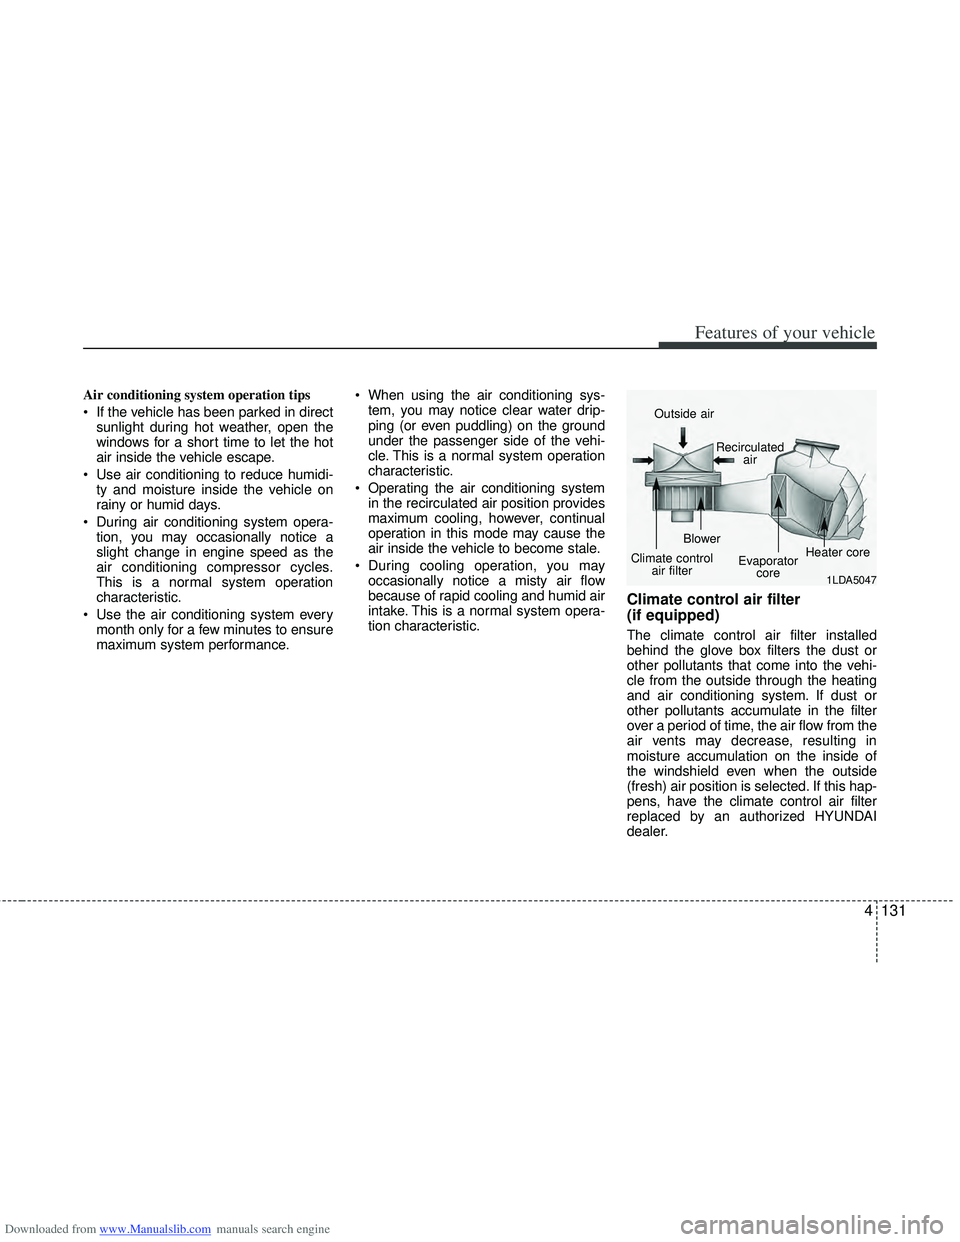
Climate control air filter
(if equipped)
The climate control air filter installed
behind the glove box filters the dust or
other pollutants that come into the vehi-
cle from the outside through the heating
and air conditioning system. If dust or
other pollutants accumulate in the filter
over a period of time, the air flow from the
air vents may decrease, resulting in
moisture accumulation on the inside of
the windshield even when the outside
(fresh) air position is selected. If this hap-
pens, have the climate control air filter
replaced by an authorized HYUNDAI
dealer.
1LDA5047
Outside air
Recirculatedair
Climate control air filter Blower
Evaporatorcore Heater core
Page 222 of 534
Downloaded from www.Manualslib.com manuals search engine 4135
Features of your vehicle
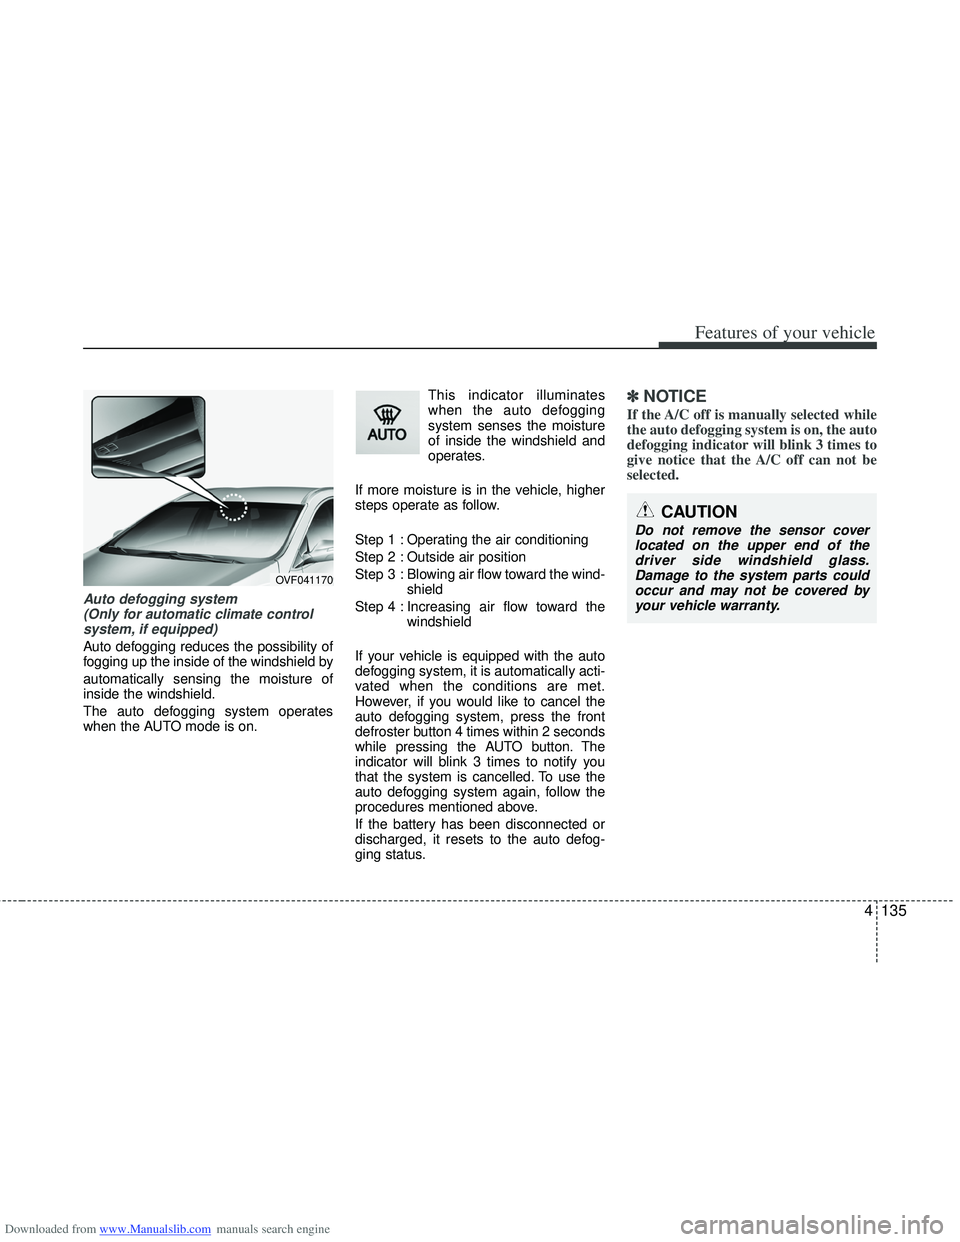
Auto defogging system (Only for automatic climate controlsystem, if equipped)
Auto defogging reduces the possibility of
fogging up the inside of the windshield by
automatically sensing the moisture of
inside the windshield.
The auto defogging system operates
when the AUTO mode is on. This indicator illuminates
when the auto defogging
system senses the moisture
of inside the windshield and
operates.
If more moisture is in the vehicle, higher
steps operate as follow.
Step 1 : Operating the air conditioning
Step 2 : Outside air position
Step 3 : Blowing air flow toward the wind- shield
Step 4 : Increasing air flow toward the windshield
If your vehicle is equipped with the auto
defogging system, it is automatically acti-
vated when the conditions are met.
However, if you would like to cancel the
auto defogging system, press the front
defroster button 4 times within 2 seconds
while pressing the AUTO button. The
indicator will blink 3 times to notify you
that the system is cancelled. To use the
auto defogging system again, follow the
procedures mentioned above.
If the battery has been disconnected or
discharged, it resets to the auto defog-
ging status.
✽ ✽ NOTICE
If the A/C off is manually selected while
the auto defogging system is on, the auto
defogging indicator will blink 3 times to
give notice that the A/C off can not be
selected.
OVF041170
CAUTION
Do not remove the sensor cover
located on the upper end of thedriver side windshield glass. Damage to the system parts couldoccur and may not be covered byyour vehicle warranty.
Page 241 of 534
Downloaded from www.Manualslib.com manuals search engine Features of your vehicle
154
4
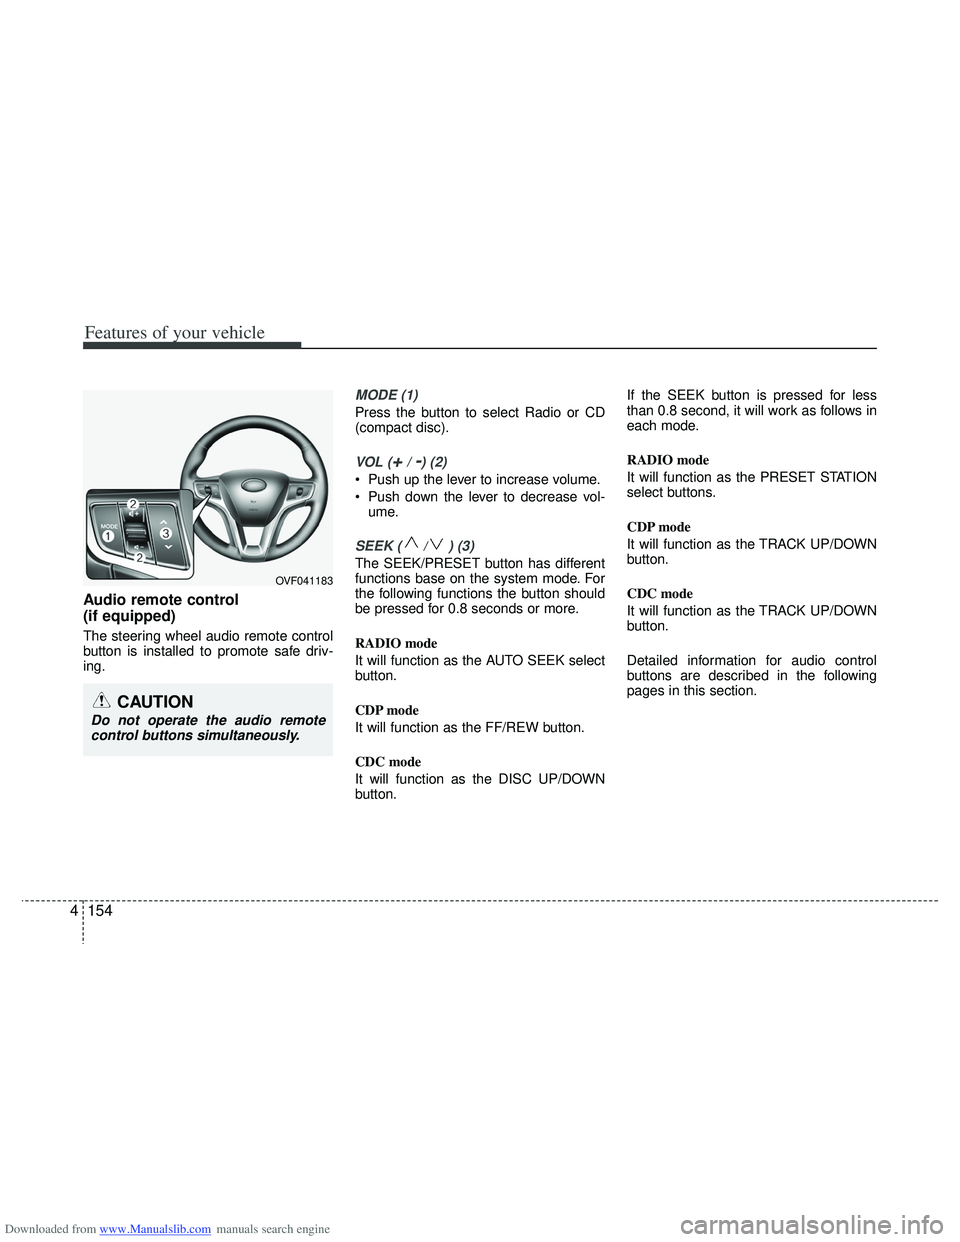
Audio remote control
(if equipped)
The steering wheel audio remote control
button is installed to promote safe driv-
ing.
MODE (1)
Press the button to select Radio or CD
(compact disc).
VOL (+/ -) (2)
• Push up the lever to increase volume.
Push down the lever to decrease vol-
ume.
SEEK ( / ) (3)
The SEEK/PRESET button has different
functions base on the system mode. For
the following functions the button should
be pressed for 0.8 seconds or more.
RADIO mode
It will function as the AUTO SEEK select
button.
CDP mode
It will function as the FF/REW button.
CDC mode
It will function as the DISC UP/DOWN
button. If the SEEK button is pressed for less
than 0.8 second, it will work as follows in
each mode.
RADIO mode
It will function as the PRESET STATION
select buttons.
CDP mode
It will function as the TRACK UP/DOWN
button.
CDC mode
It will function as the TRACK UP/DOWN
button.
Detailed information for audio control
buttons are described in the following
pages in this section.
CAUTION
Do not operate the audio remote
control buttons simultaneously.
OVF041183
Page 246 of 534
Downloaded from www.Manualslib.com manuals search engine 4159
Features of your vehicle
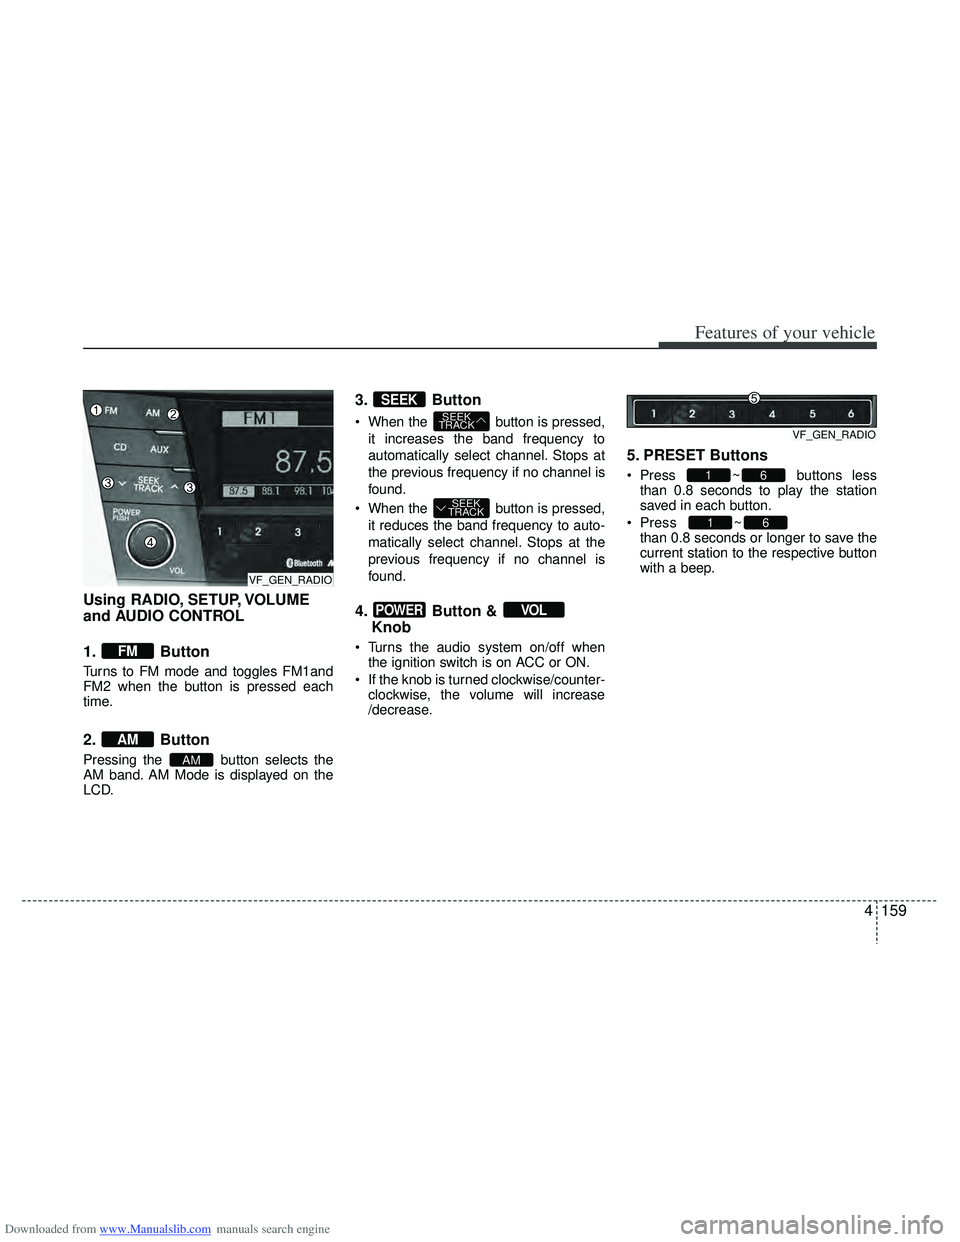
Using RADIO, SETUP, VOLUME
and AUDIO CONTROL
1. Button
Turns to FM mode and toggles FM1and
FM2 when the button is pressed each
time.
2. Button
Pressing the button selects the
AM band. AM Mode is displayed on the
LCD.
3. Button
When the button is pressed,it increases the band frequency to
automatically select channel. Stops at
the previous frequency if no channel is
found.
When the button is pressed, it reduces the band frequency to auto-
matically select channel. Stops at the
previous frequency if no channel is
found.
4. Button & Knob
Turns the audio system on/off when
the ignition switch is on ACC or ON.
If the knob is turned clockwise/counter- clockwise, the volume will increase
/decrease.
5. PRESET Buttons
Press ~ buttons lessthan 0.8 seconds to play the station
saved in each button.
Press ~
button more
than 0.8 seconds or longer to save the
current station to the respective button
with a beep.
61
61
VOLPOWER
SEEK
TRACK
SEEK
TRACK
SEEK
AM
AM
FM
VF_GEN_RADIOVF_GEN_RADIO
VF_GEN_RADIO
Page 248 of 534
Downloaded from www.Manualslib.com manuals search engine 4161
Features of your vehicle
Select default display of MP3 play infor-
mation. “Folder/File” or “Artist/Title” can
be selected.
)
This function displays the previous
MODE screen.
Select this item to enter CLOCK setup
mode.
Adjust the hour and press the
button to set. Adjust the minute and
press the button to complete
and exit from clock adjustment mode.
Pressing the button more than
0.8 seconds while in power off, screen
will allow the user to make immediately
adjustments to the clock.
Select this item to enter PHONE setup
mode. Refer to “BLUETOOTH PHONE
OPERATION” section for detailed infor-
mation.
❈
“PHONE” menu is not available if the
audio does not support Bluetooth fea-
tures.
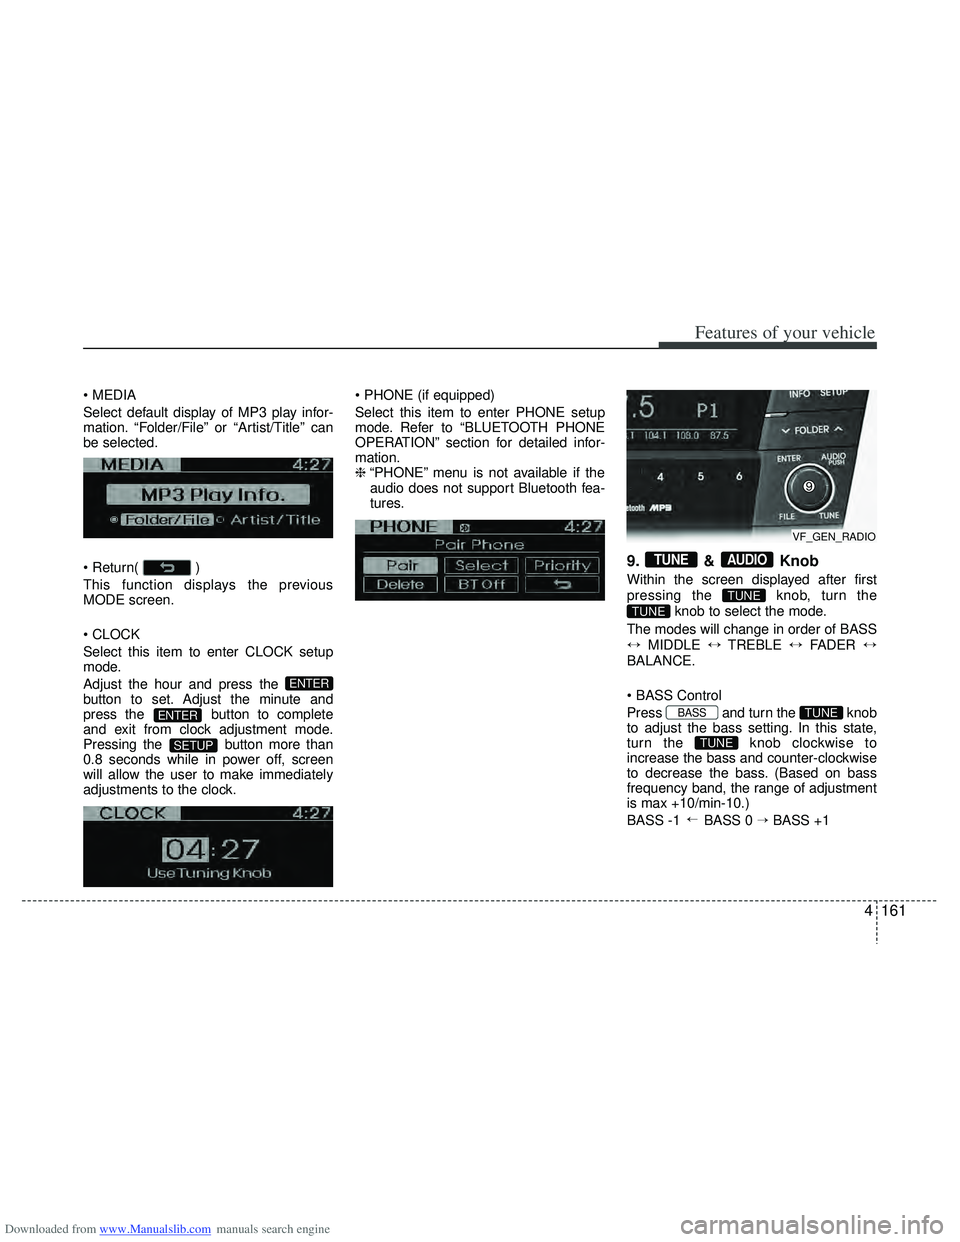
9. & Knob
Within the screen displayed after first
pressing the knob, turn the
knob to select the mode.
The modes will change in order of BASS
↔ MIDDLE ↔TREBLE ↔FADER ↔
BALANCE.
Press and turn the knob
to adjust the bass setting. In this state,
turn the knob clockwise to
increase the bass and counter-clockwise
to decrease the bass. (Based on bass
frequency band, the range of adjustment
is max +10/min-10.)
BASS -1 BASS 0 → BASS +1
→
TUNE
TUNEBASS
TUNE
TUNE
AUDIOTUNE
SETUP
ENTER
ENTER
VF_GEN_RADIO
Page 250 of 534
Downloaded from www.Manualslib.com manuals search engine 4163
Features of your vehicle
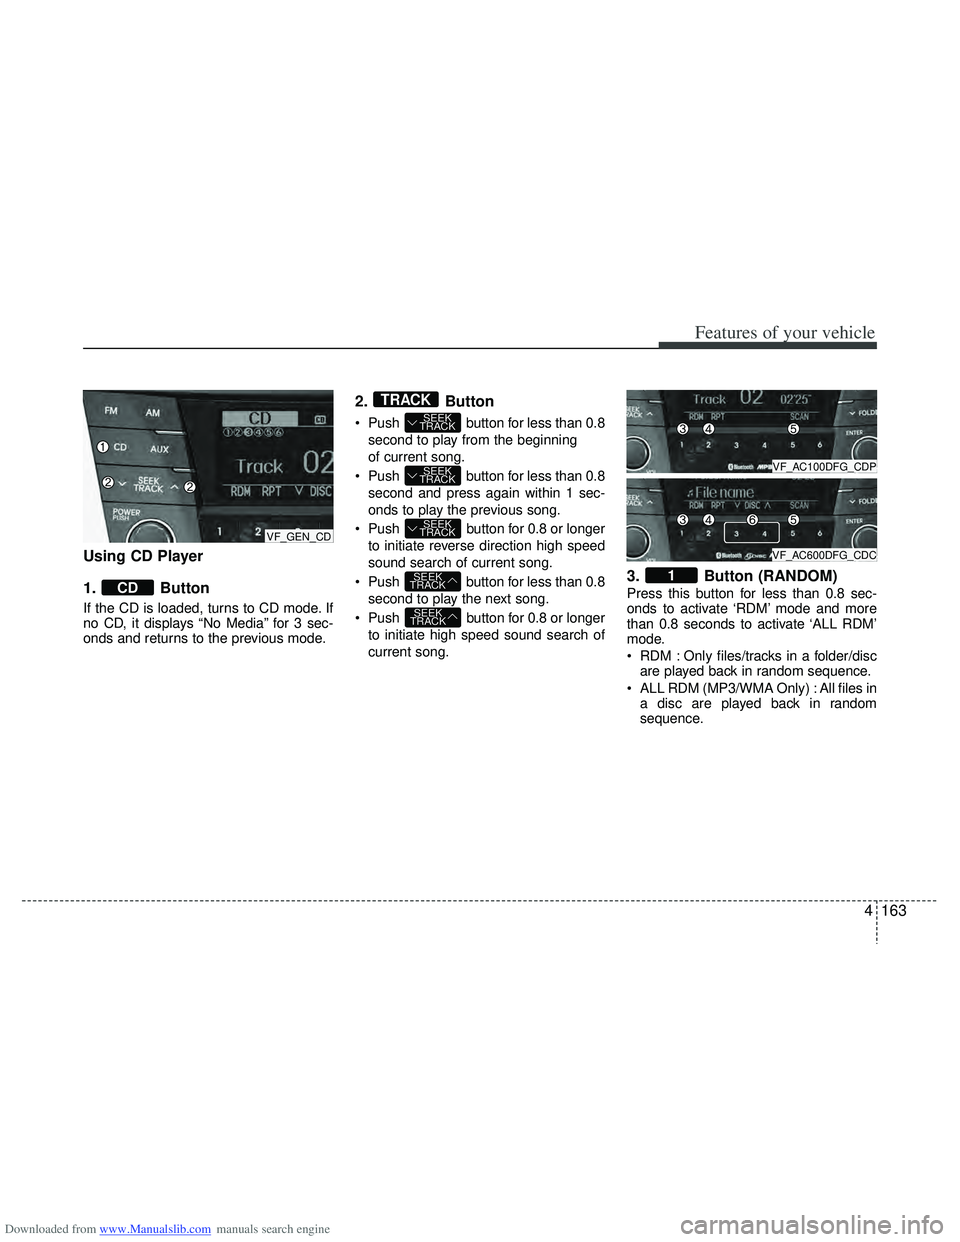
Using CD Player
1. Button
If the CD is loaded, turns to CD mode. If
no CD, it displays “No Media” for 3 sec-
onds and returns to the previous mode.
2.Button
Push button for less than 0.8
second to play from the beginning
of current song.
Push button for less than 0.8 second and press again within 1 sec-
onds to play the previous song.
Push button for 0.8 or longer to initiate reverse direction high speed
sound search of current song.
Push button for less than 0.8 second to play the next song.
Push button for 0.8 or longer to initiate high speed sound search of
current song.
3. Button (RANDOM)
Press this button for less than 0.8 sec-
onds to activate ‘RDM’ mode and more
than 0.8 seconds to activate ‘ALL RDM’
mode.
RDM : Only files/tracks in a folder/discare played back in random sequence.
ALL RDM (MP3/WMA Only) : All files in a disc are played back in random
sequence.
1
SEEK
TRACK
SEEK
TRACK
SEEK
TRACK
SEEK
TRACK
SEEK
TRACK
TRACK
CD
VF_GEN_CD
VF_AC100DFG_CDP
VF_AC600DFG_CDC
Page 251 of 534
Downloaded from www.Manualslib.com manuals search engine Features of your vehicle
164
4
4. Button (REPEAT)
Press this button for less than 0.8 second
to activate ‘RPT’ mode and more than 0.8
seconds to activate ‘FLD.RPT’ mode.
RPT : Only a track(file) is repeatedly
played back.
FLD.RPT (MP3/WMA Only) : Only files in a folder are repeatedly played back.
5. Button (SCAN)
Play each song in the CD for 10 seconds.
To cancel SCAN Play, press this button
again.
6. DISC Button (CD changer : AC600 DFG/AC610DFG)
Preset button changes disc to
the previous disc.
Preset button changes disc to the next disc.
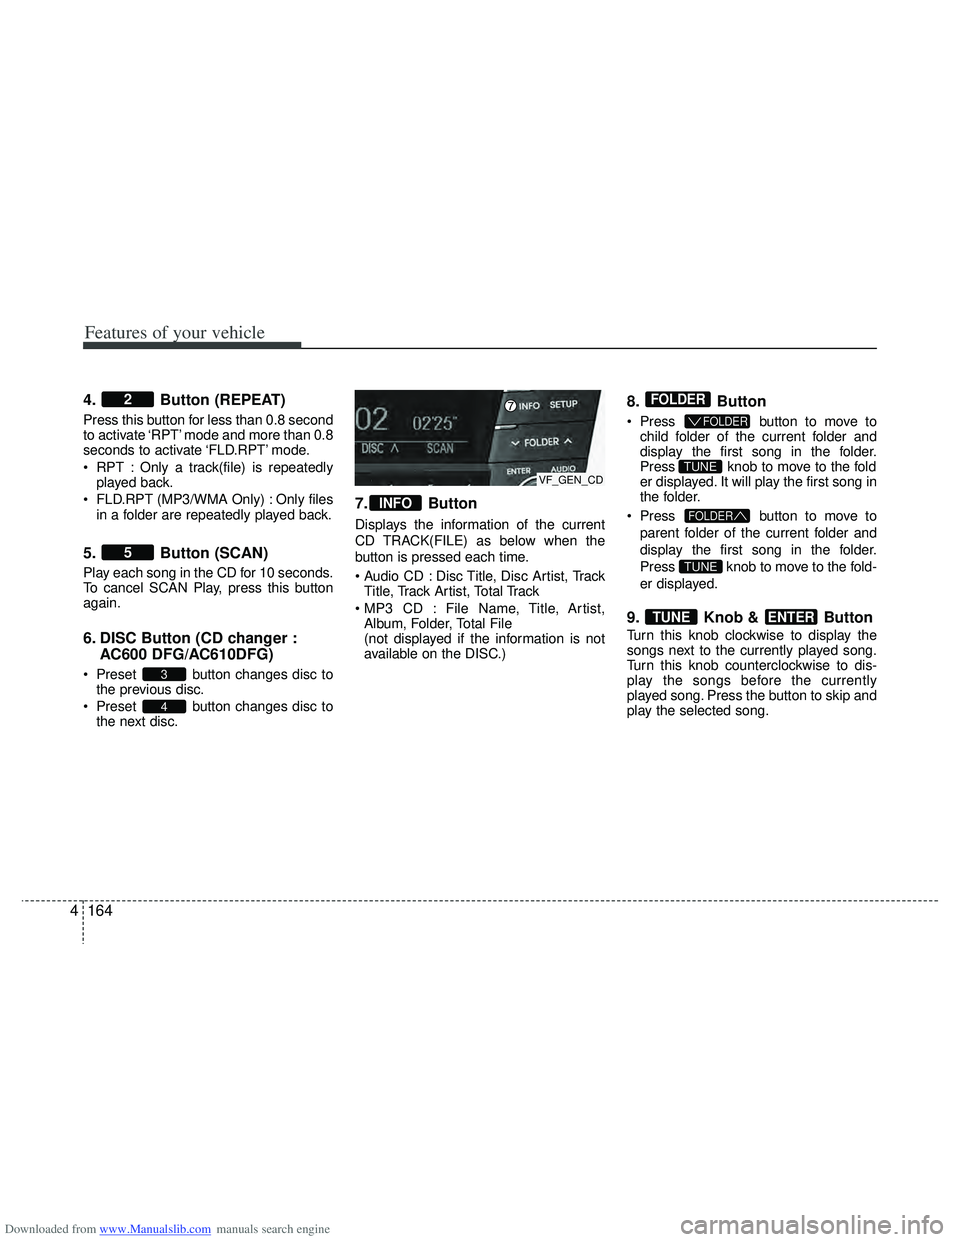
7. Button
Displays the information of the current
CD TRACK(FILE) as below when the
button is pressed each time.
Disc Title, Disc Artist, TrackTitle, Track Artist, Total Track
File Name, Title, Artist, Album, Folder, Total File
(not displayed if the information is not
available on the DISC.)
8. Button
Press button to move to
child folder of the current folder and
display the first song in the folder.
Press knob to move to the fold
er displayed. It will play the first song in
the folder.
Press button to move to
parent folder of the current folder and
display the first song in the folder.
Press knob to move to the fold-
er displayed.
9. Knob & Button
Turn this knob clockwise to display the
songs next to the currently played song.
Turn this knob counterclockwise to dis-
play the songs before the currently
played song. Press the button to skip and
play the selected song.
ENTERTUNE
TUNE
FOLDER
TUNE
FOLDER
FOLDER
INFO
4
3
5
2
VF_GEN_CD
Page 254 of 534
Downloaded from www.Manualslib.com manuals search engine 4167
Features of your vehicle
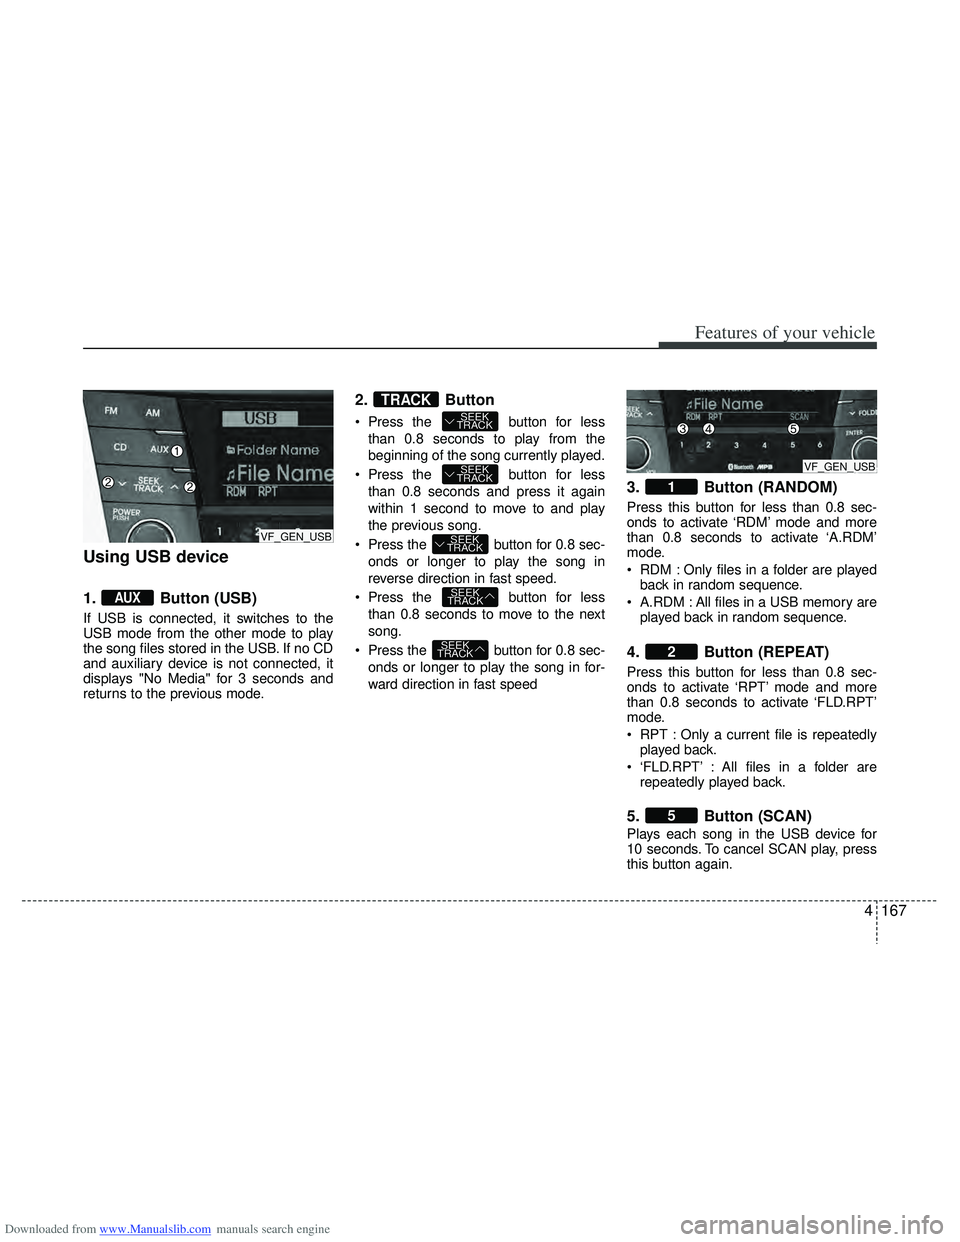
Using USB device
1. Button (USB)
If USB is connected, it switches to the
USB mode from the other mode to play
the song files stored in the USB. If no CD
and auxiliary device is not connected, it
displays "No Media" for 3 seconds and
returns to the previous mode.
2.Button
Press the button for less
than 0.8 seconds to play from the
beginning of the song currently played.
Press the button for less than 0.8 seconds and press it again
within 1 second to move to and play
the previous song.
Press the button for 0.8 sec- onds or longer to play the song in
reverse direction in fast speed.
Press the button for less than 0.8 seconds to move to the next
song.
Press the button for 0.8 sec- onds or longer to play the song in for-
ward direction in fast speed
3. Button (RANDOM)
Press this button for less than 0.8 sec-
onds to activate ‘RDM’ mode and more
than 0.8 seconds to activate ‘A.RDM’
mode.
RDM : Only files in a folder are playedback in random sequence.
A.RDM : All files in a USB memory are played back in random sequence.
4. Button (REPEAT)
Press this button for less than 0.8 sec-
onds to activate ‘RPT’ mode and more
than 0.8 seconds to activate ‘FLD.RPT’
mode.
RPT : Only a current file is repeatedlyplayed back.
‘FLD.RPT’ : All files in a folder are repeatedly played back.
5. Button (SCAN)
Plays each song in the USB device for
10 seconds. To cancel SCAN play, press
this button again.
5
2
1
SEEK
TRACK
SEEK
TRACK
SEEK
TRACK
SEEK
TRACK
SEEK
TRACKTRACK
AUX
VF_GEN_USB
VF_GEN_USB