Inspect HYUNDAI IONIQ 5 2023 User Guide
[x] Cancel search | Manufacturer: HYUNDAI, Model Year: 2023, Model line: IONIQ 5, Model: HYUNDAI IONIQ 5 2023Pages: 680, PDF Size: 48.22 MB
Page 113 of 680
Seats & Safety System
3-26
Air Ventilation Seats
The air ventilation seats are provided
to cool the front seats by blowing air
through small vent holes on the surface
of the seat cushions and seatbacks.
When the operation of the air ventilation
seat is not needed, keep the air
ventilation seats OFF.
NOTICE
To prevent damage to the air ventilation
seats: • Never use a solvent such as paint
thinner, benzene, alcohol or gasoline
to clean the seats.
• Avoid spilling liquids on the surface
of the front seats and seatbacks; this
may cause the air vent holes to block
and not work properly.
• Do not place materials such as plastic
bags or newspapers under the seats.
They may block the air intake causing
malfunction of the air vent.
• Do not change the seat covers. It may
damage the air ventilation seat.
• If the air vents do not operate, restart
the vehicle. If there is no change,
have the vehicle to be inspected by
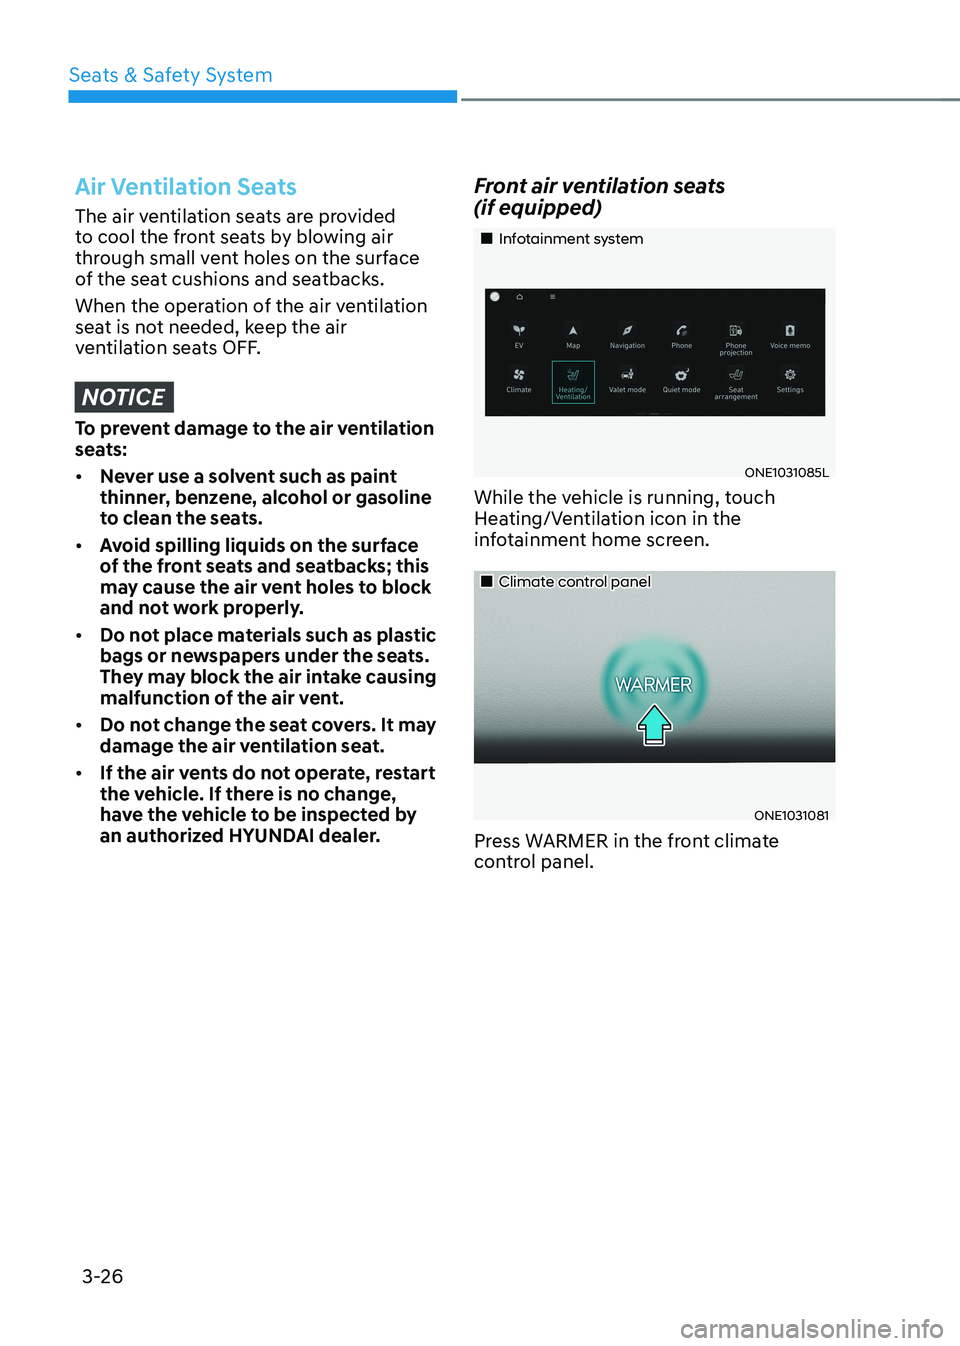
an authorized HYUNDAI dealer. Front air ventilation seats (if equipped)
„„Infotainment system
ONE1031085L
While the vehicle is running, touch
Heating/Ventilation icon in the
infotainment home screen.
„„Climate control panel
ONE1031081
Press WARMER in the front climate
control panel.
Page 121 of 680
Seats & Safety System
3-34
(1) Retractor Pretensioner
The purpose of the retractor pre-
tensioner is to make sure that the
shoulder belts fit in tightly against the
occupant’s upper body in certain frontal
or side collision(s).
If the system senses excessive tension
on the driver or passenger’s seat belt
when the pre-tensioner system activates,
the load limiter inside the retractor
pre-tensioner will release some of the
pressure on the affected seat belt.
WARNING
• Always wear your seat belt and sit
properly in your seat.
• Do not use the seat belt if it is loose
or twisted. A loose or twisted seat
belt will not protect you properly in
an accident.
• Do not place anything near the
buckle. This may adversely affect
the buckle and cause it to function
improperly.
• Always replace your pre-tensioners
after activation or an accident.
• NEVER inspect, service, repair or
replace the pre-tensioners yourself.
Have the pre-tensioners inspected,
serviced, repaired or replaced by an
authorized HYUNDAI dealer.
• Do not hit the seat belt assemblies.
WARNING
Do not touch the pre-tensioner seat
belt assemblies for several minutes
after they have been activated. When
the pre-tensioner seat belt mechanism
deploys during a collision, the pre-
tensioner can become hot and can burn
you.
CAUTION
Body work on the front area of the
vehicle may damage the pre-tensioner
seat belt system. Therefore, have the
system serviced by an authorized
HYUNDAI dealer.
Page 122 of 680
03
3-35
OHI038175L
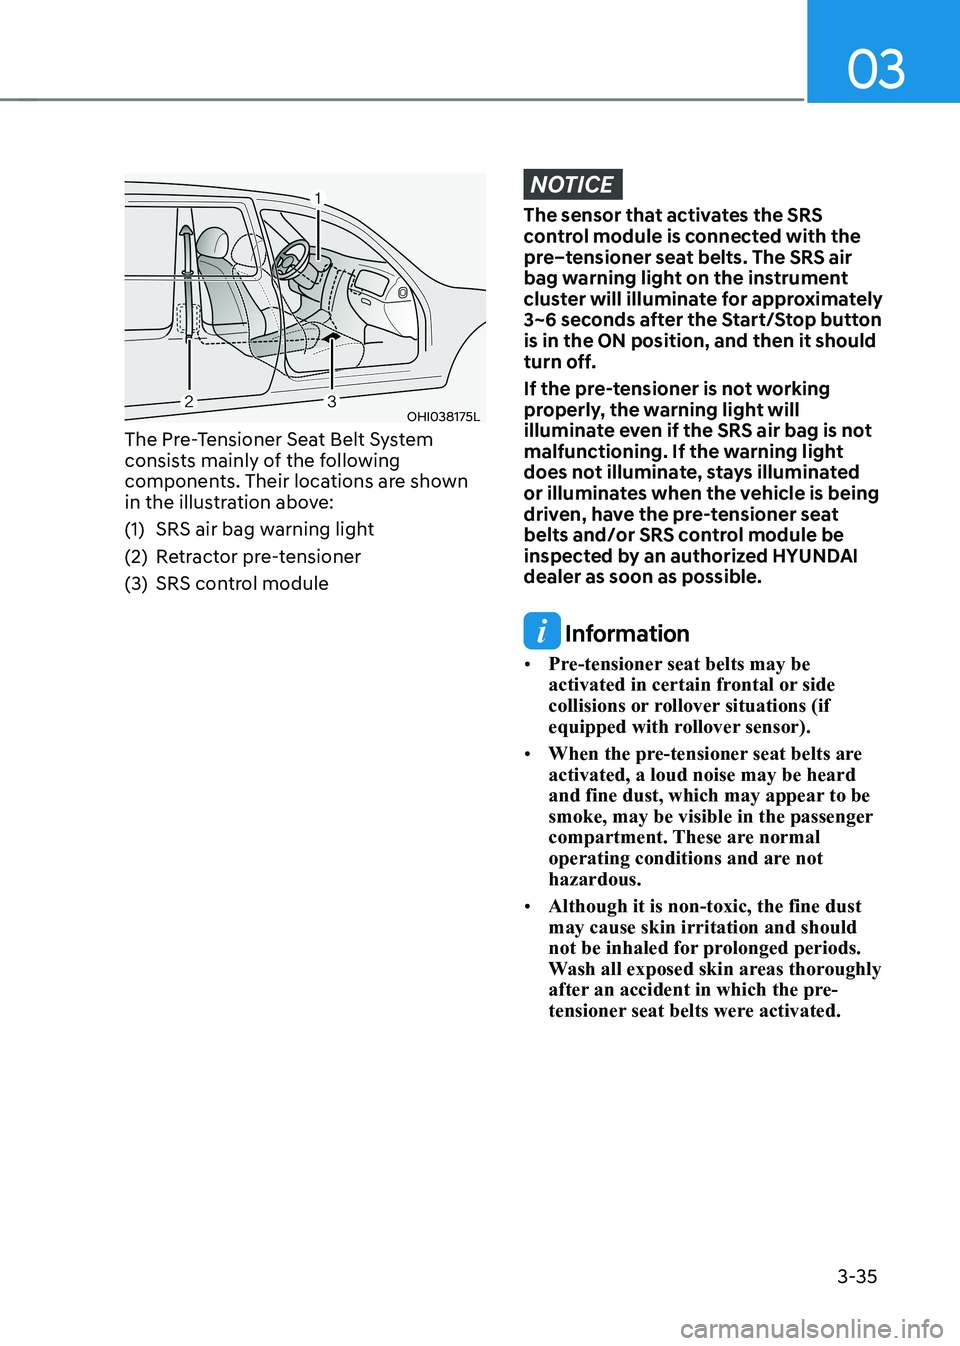
The Pre-Tensioner Seat Belt System
consists mainly of the following
components. Their locations are shown
in the illustration above:
(1) SRS air bag warning light
(2) Retractor pre-tensioner
(3) SRS control module
NOTICE
The sensor that activates the SRS
control module is connected with the
pre–tensioner seat belts. The SRS air
bag warning light on the instrument
cluster will illuminate for approximately
3~6 seconds after the Start/Stop button is in the ON position, and then it should
turn off.
If the pre-tensioner is not working
properly, the warning light will
illuminate even if the SRS air bag is not
malfunctioning. If the warning light
does not illuminate, stays illuminated
or illuminates when the vehicle is being
driven, have the pre-tensioner seat
belts and/or SRS control module be
inspected by an authorized HYUNDAI dealer as soon as possible.
Information
• Pre-tensioner seat belts may be
activated in certain frontal or side
collisions or rollover situations (if
equipped with rollover sensor).
• When the pre-tensioner seat belts are activated, a loud noise may be heard
and fine dust, which may appear to be
smoke, may be visible in the passenger
compartment. These are normal
operating conditions and are not hazardous.
• Although it is non-toxic, the fine dust may cause skin irritation and should
not be inhaled for prolonged periods.
Wash all exposed skin areas thoroughly
after an accident in which the pre-
tensioner seat belts were activated.
Page 125 of 680
Seats & Safety System
3-38
Care of Seat Belts
Seat belt systems should never be disassembled or modified. In addition,
care should be taken to assure that seat
belts and belt hardware are not damaged
by seat hinges, doors or other abuse.
Periodic inspection
All seat belts should be inspected
periodically for wear or damage of any
kind. Any damaged parts should be
replaced as soon as possible.
Keep belts clean and dry
Seat belts should be kept clean and
dry. If belts become dirty, they can be
cleaned by using a mild soap solution
and warm water. Bleach, dye, strong
detergents or abrasives should not be
used because they may damage and
weaken the fabric.
When to replace seat belts
The entire seat belt assembly or
assemblies should be replaced if the
vehicle has been involved in an accident.
This should be done even if no damage is
visible. Consult an authorized HYUNDAI
dealer.
Page 130 of 680
03
3-43
ONE1031041
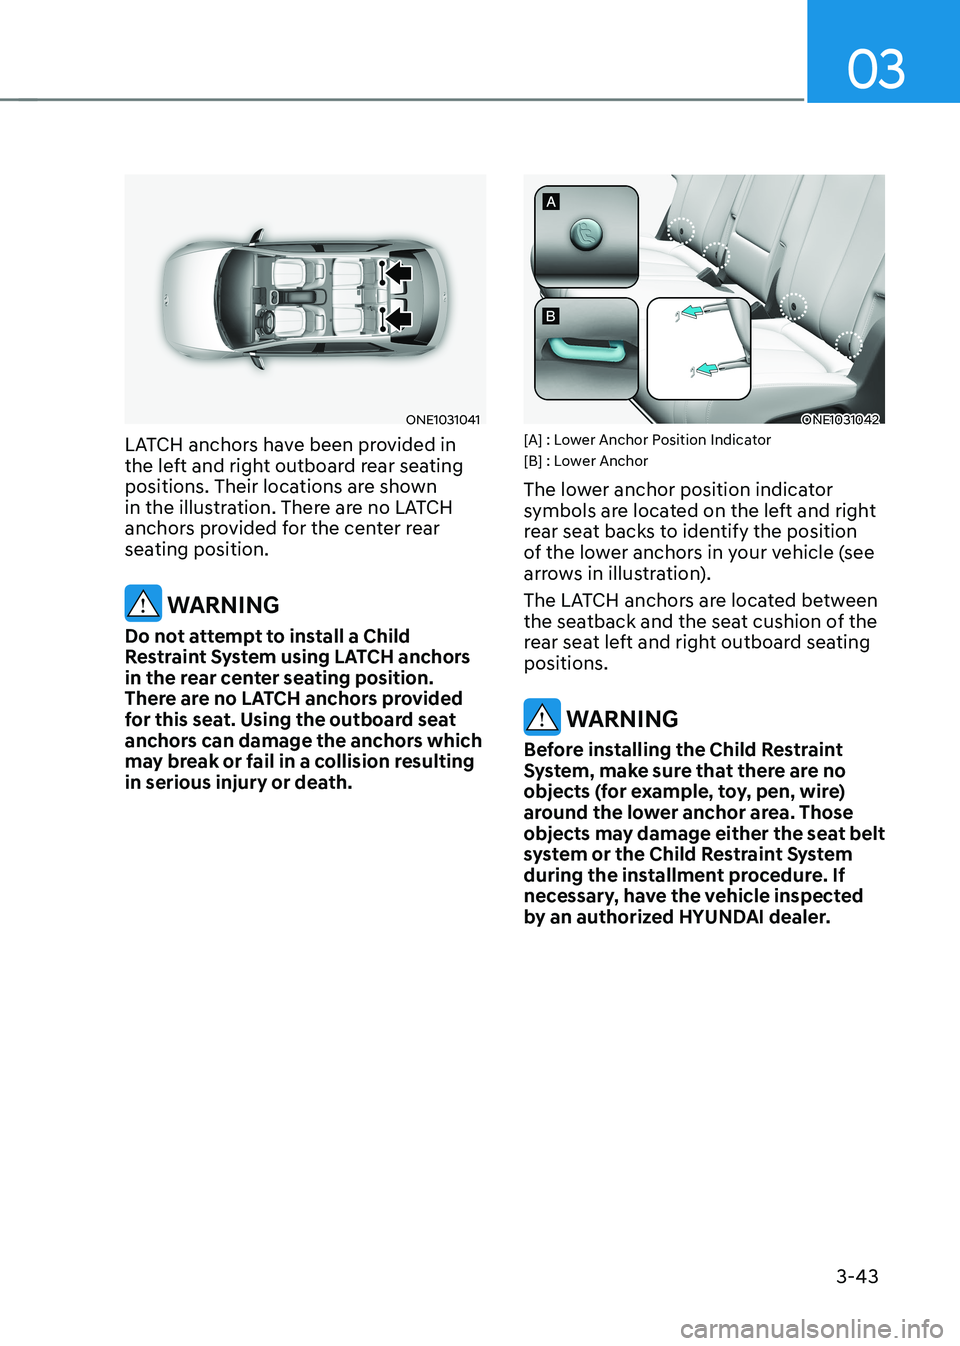
LATCH anchors have been provided in
the left and right outboard rear seating
positions. Their locations are shown
in the illustration. There are no LATCH
anchors provided for the center rear
seating position.
WARNING
Do not attempt to install a Child
Restraint System using LATCH anchors
in the rear center seating position.
There are no LATCH anchors provided
for this seat. Using the outboard seat
anchors can damage the anchors which
may break or fail in a collision resulting
in serious injury or death.
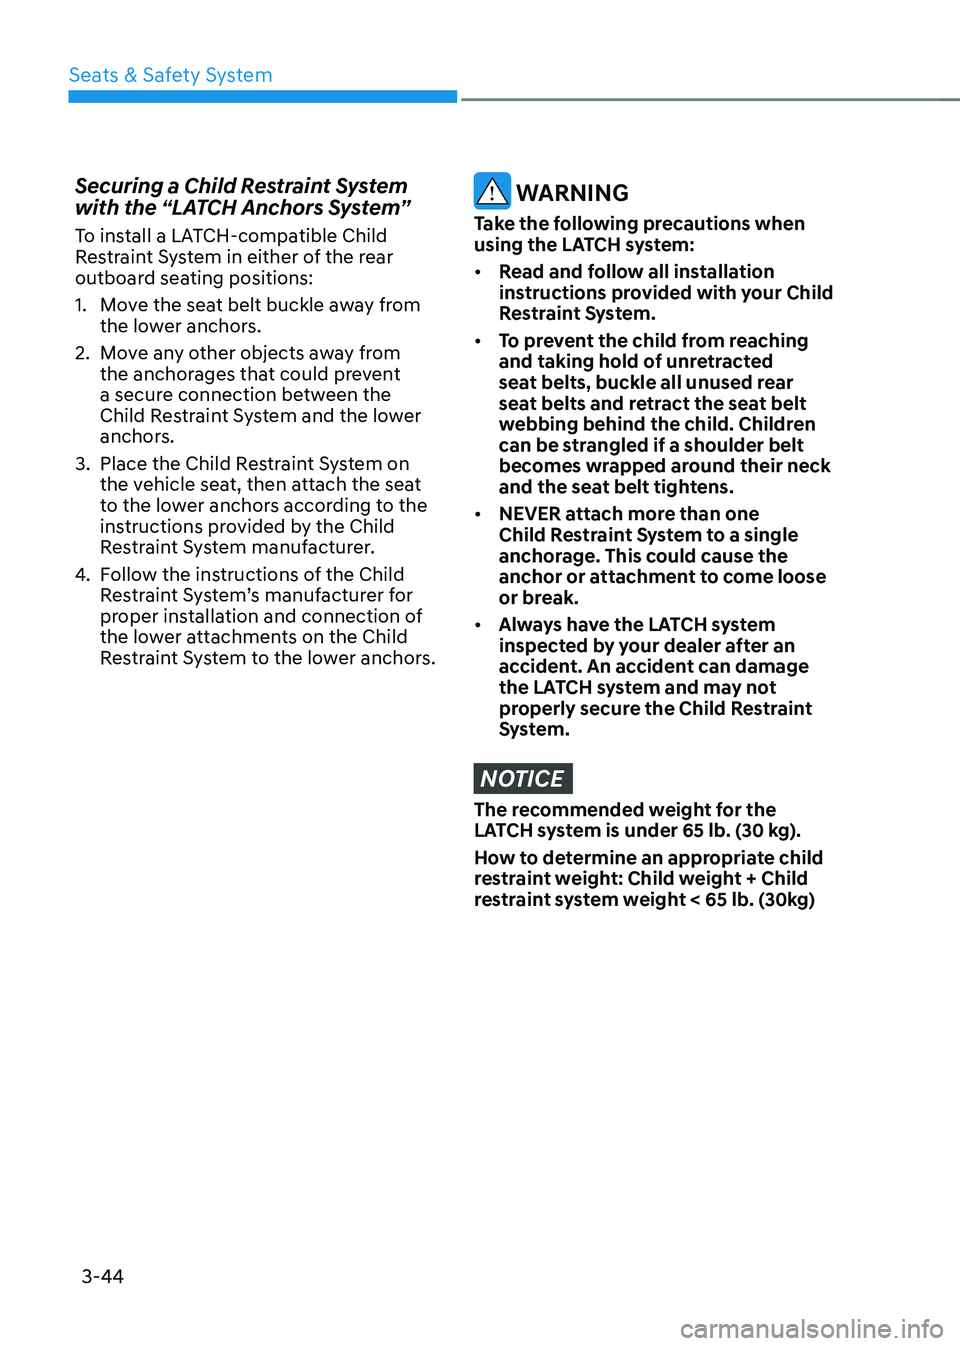
ONE1031042
[A] : Lower Anchor Position Indicator
[B] : Lower Anchor
The lower anchor position indicator
symbols are located on the left and right
rear seat backs to identify the position
of the lower anchors in your vehicle (see
arrows in illustration).
The LATCH anchors are located between
the seatback and the seat cushion of the
rear seat left and right outboard seating positions.
WARNING
Before installing the Child Restraint
System, make sure that there are no
objects (for example, toy, pen, wire)
around the lower anchor area. Those
objects may damage either the seat belt
system or the Child Restraint System
during the installment procedure. If
necessary, have the vehicle inspected
by an authorized HYUNDAI dealer.
Page 131 of 680
Seats & Safety System
3-44
Securing a Child Restraint System
with the “LATCH Anchors System”
To install a LATCH-compatible Child
Restraint System in either of the rear
outboard seating positions:
1. Move the seat belt buckle away from
the lower anchors.
2. Move any other objects away from the anchorages that could prevent
a secure connection between the
Child Restraint System and the lower
anchors.
3. Place the Child Restraint System on the vehicle seat, then attach the seat
to the lower anchors according to the
instructions provided by the Child
Restraint System manufacturer.
4. Follow the instructions of the Child
Restraint System’s manufacturer for
proper installation and connection of
the lower attachments on the Child
Restraint System to the lower anchors.
WARNING
Take the following precautions when
using the LATCH system: • Read and follow all installation
instructions provided with your Child
Restraint System.
• To prevent the child from reaching
and taking hold of unretracted
seat belts, buckle all unused rear
seat belts and retract the seat belt
webbing behind the child. Children
can be strangled if a shoulder belt
becomes wrapped around their neck
and the seat belt tightens.
• NEVER attach more than one
Child Restraint System to a single
anchorage. This could cause the
anchor or attachment to come loose
or break.
• Always have the LATCH system
inspected by your dealer after an
accident. An accident can damage
the LATCH system and may not
properly secure the Child Restraint
System.
NOTICE
The recommended weight for the
LATCH system is under 65 lb. (30 kg).
How to determine an appropriate child
restraint weight: Child weight + Child
restraint system weight < 65 lb. (30kg)
Page 142 of 680
03
3-55
The SRSCM (Supplemental Restraint
System Control Module) continually
monitors all SRS components while the
Start/Stop button is ON to determine if a
crash impact is severe enough to require
air bag deployment or pre-tensioner seat
belt deployment.
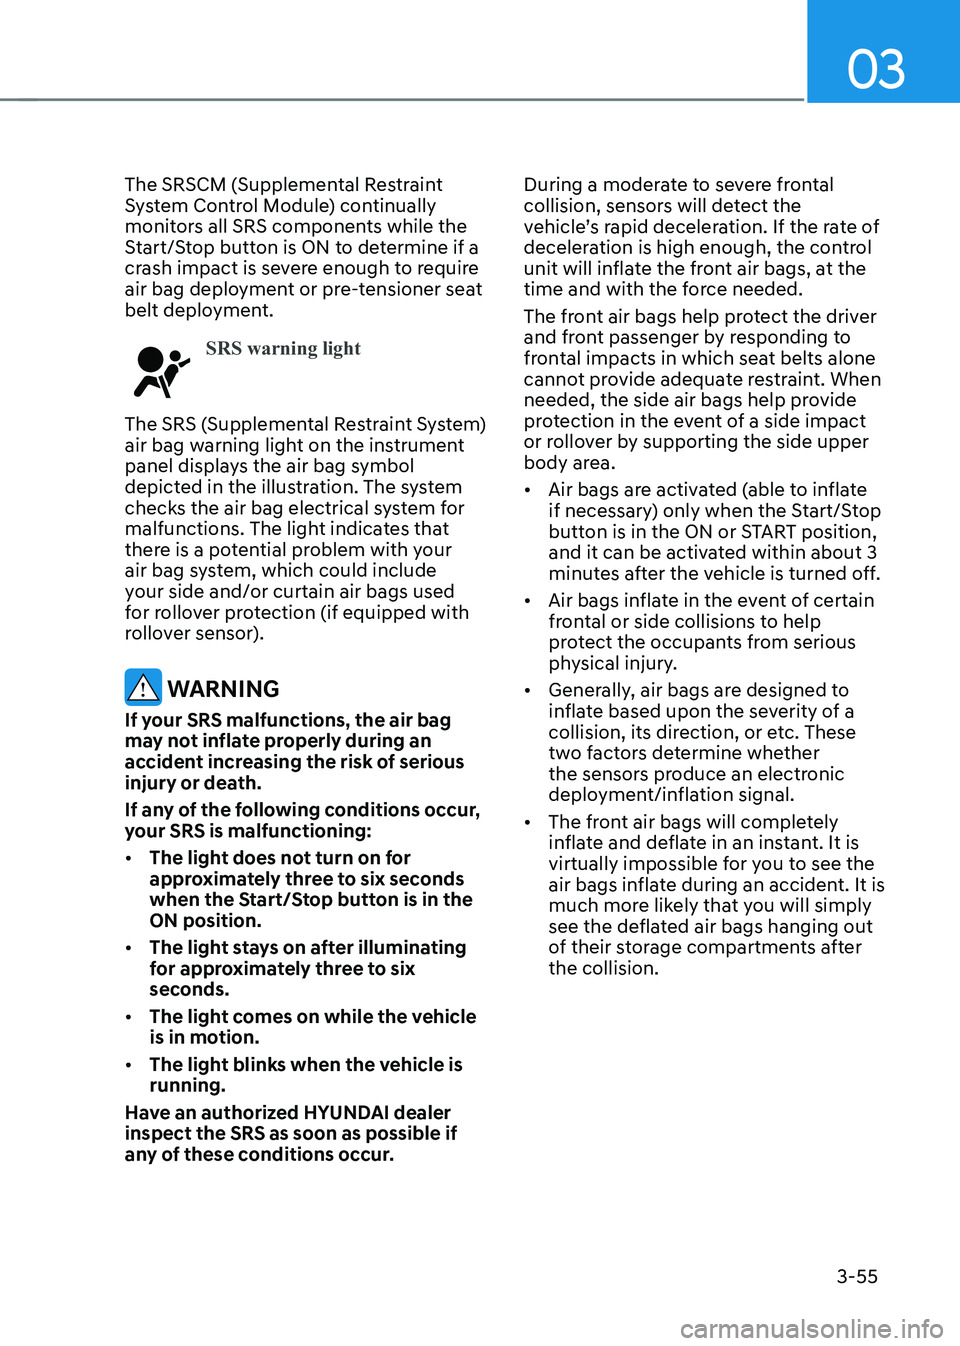
SRS warning light
The SRS (Supplemental Restraint System)
air bag warning light on the instrument
panel displays the air bag symbol
depicted in the illustration. The system
checks the air bag electrical system for
malfunctions. The light indicates that
there is a potential problem with your
air bag system, which could include
your side and/or curtain air bags used
for rollover protection (if equipped with
rollover sensor).
WARNING
If your SRS malfunctions, the air bag
may not inflate properly during an
accident increasing the risk of serious
injury or death.
If any of the following conditions occur,
your SRS is malfunctioning: • The light does not turn on for
approximately three to six seconds
when the Start/Stop button is in the ON position.
• The light stays on after illuminating
for approximately three to six
seconds.
• The light comes on while the vehicle
is in motion.
• The light blinks when the vehicle is running.
Have an authorized HYUNDAI dealer inspect the SRS as soon as possible if
any of these conditions occur. During a moderate to severe frontal
collision, sensors will detect the
vehicle’s rapid deceleration. If the rate of
deceleration is high enough, the control
unit will inflate the front air bags, at the
time and with the force needed.
The front air bags help protect the driver
and front passenger by responding to
frontal impacts in which seat belts alone
cannot provide adequate restraint. When
needed, the side air bags help provide
protection in the event of a side impact
or rollover by supporting the side upper
body area. •
Air bags are activated (able to inflate
if necessary) only when the Start/Stop
button is in the ON or START position,
and it can be activated within about 3
minutes after the vehicle is turned off.
• Air bags inflate in the event of certain
frontal or side collisions to help
protect the occupants from serious
physical injury.
• Generally, air bags are designed to
inflate based upon the severity of a
collision, its direction, or etc. These
two factors determine whether
the sensors produce an electronic
deployment/inflation signal.
• The front air bags will completely
inflate and deflate in an instant. It is
virtually impossible for you to see the
air bags inflate during an accident. It is
much more likely that you will simply
see the deflated air bags hanging out
of their storage compartments after the collision.
Page 157 of 680
Seats & Safety System
3-70
SRS Care
The SRS is virtually maintenance-free
and there are no parts you can safely
service by yourself. If the SRS air bag
warning light does not illuminate
when the Start/Stop button is in the
ON position, or continuously remains
on, have the system be immediately
inspected by an authorized HYUNDAI
dealer.
We recommend any work on the SRS
system, such as removing, installing,
repairing, or any work on the steering
wheel, the front passenger’s panel, front
seats and roof rails be performed by an
authorized HYUNDAI dealer. Improper
handling of the SRS system may result in
serious personal injury. WARNING
To reduce the risk of serious injury or
death take the following precautions: • Do not attempt to modify or
disconnect the SRS components or
wiring, including the addition of any
kind of badges to the pad covers or
modifications to the body structure.
• Do not place objects over or near
the air bag modules on the steering
wheel, instrument panel, and the
front passenger’s panel above the
glove box.
• Clean the air bag pad covers with
a soft cloth moistened with plain
water. Solvents or cleaners could
adversely affect the air bag covers
and proper deployment of the
system.
• Have the inflated air bags be
replaced by an authorized HYUNDAI
dealer.
• If components of the air bag system
must be discarded, or if the vehicle
must be scrapped, certain safety
precautions must be observed.
Consult an authorized HYUNDAI
dealer for the necessary information.
Failure to follow these precautions
could increase the risk of personal
injury.
Page 167 of 680
04
4-9
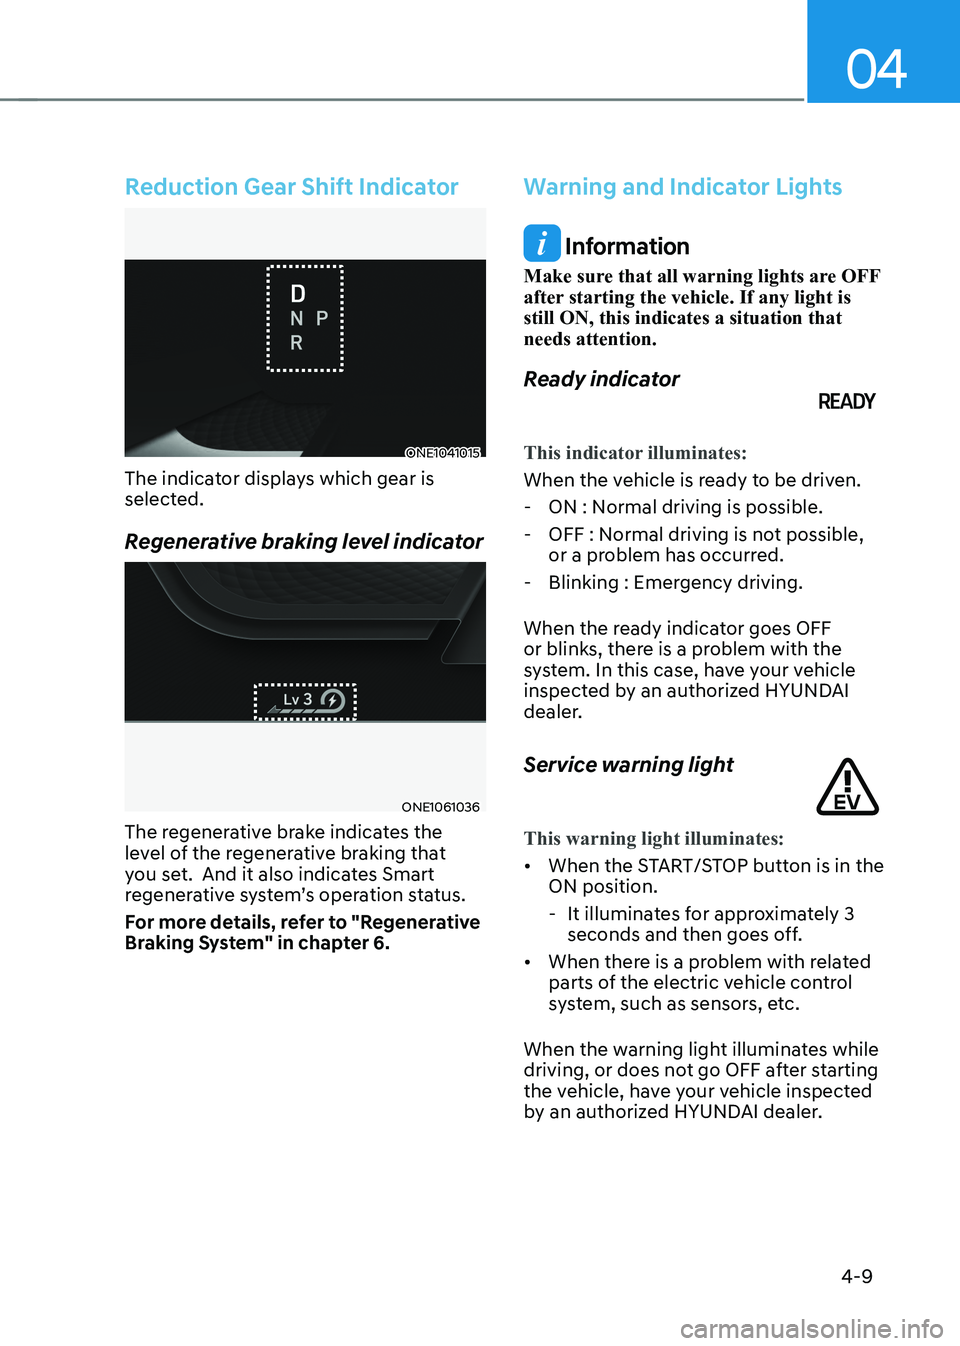
Reduction Gear Shift Indicator
ONE1041015
The indicator displays which gear is
selected.
Regenerative braking level indicator
ONE1061036
The regenerative brake indicates the
level of the regenerative braking that
you set. And it also indicates Smart
regenerative system’s operation status.
For more details, refer to "Regenerative
Braking System" in chapter 6.
Warning and Indicator Lights
Information
Make sure that all warning lights are OFF
after starting the vehicle. If any light is still ON, this indicates a situation that needs attention.
Ready indicator
This indicator illuminates:
When the vehicle is ready to be driven. - ON : Normal driving is possible.
- OFF : Normal driving is not possible, or a problem has occurred.
- Blinking : Emergency driving.
When the ready indicator goes OFF
or blinks, there is a problem with the
system. In this case, have your vehicle
inspected by an authorized HYUNDAI
dealer.
Service warning light
This warning light illuminates:
• When the START/STOP button is in the ON position.
- It illuminates for approximately 3 seconds and then goes off.
• When there is a problem with related
parts of the electric vehicle control
system, such as sensors, etc.
When the warning light illuminates while
driving, or does not go OFF after starting
the vehicle, have your vehicle inspected
by an authorized HYUNDAI dealer.
Page 169 of 680
04
4-11
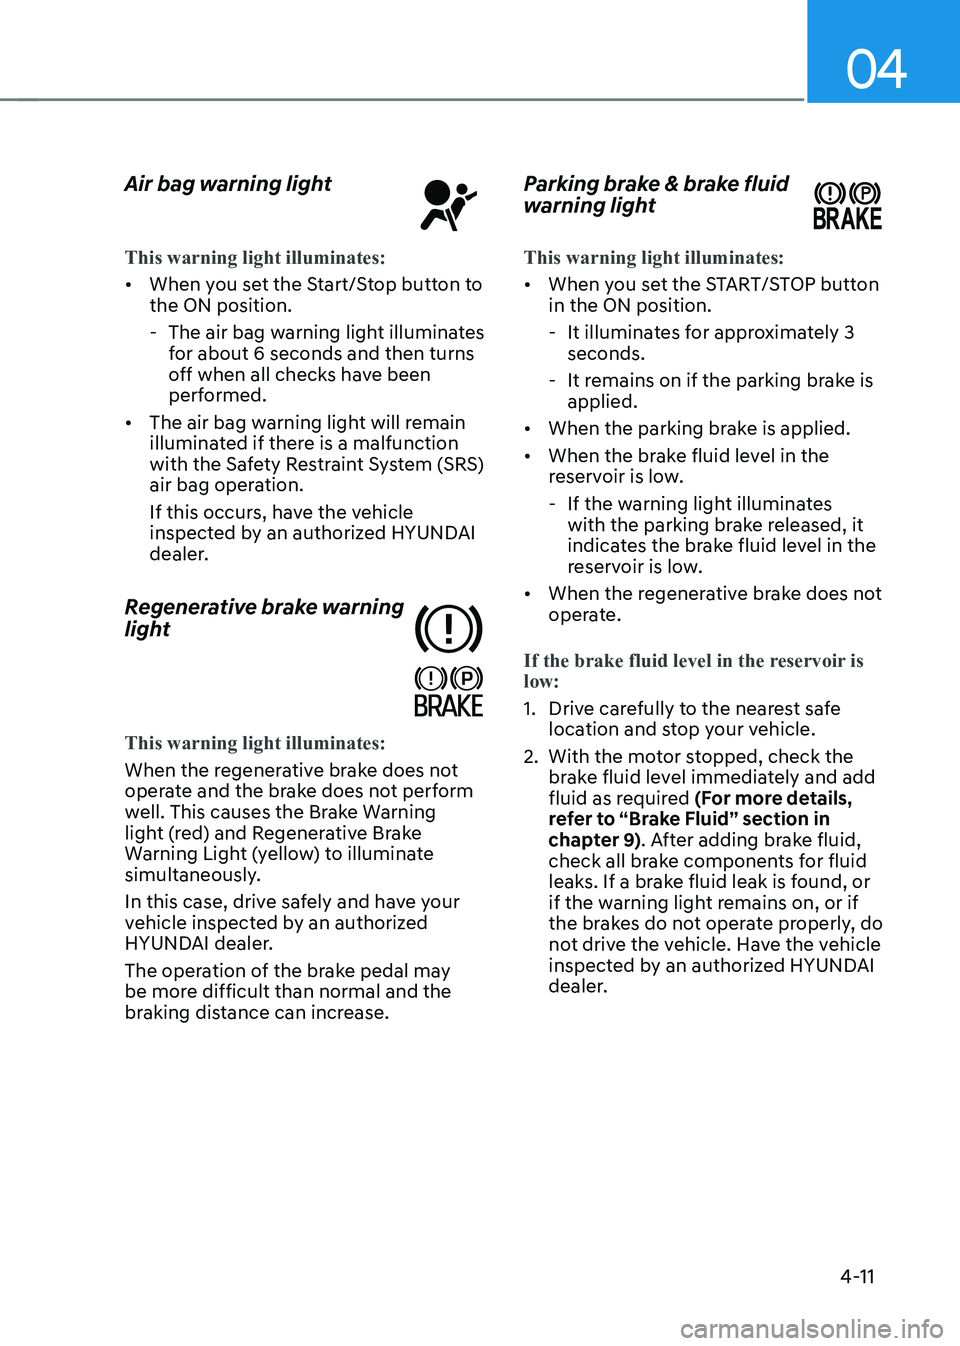
Air bag warning light
This warning light illuminates:
•
When you set the Start/Stop button to the ON position.
- The air bag warning light illuminates for about 6 seconds and then turns
off when all checks have been
performed.
• The air bag warning light will remain
illuminated if there is a malfunction
with the Safety Restraint System (SRS)
air bag operation.
If this occurs, have the vehicle
inspected by an authorized HYUNDAI
dealer.
Regenerative brake warning
light
This warning light illuminates:
When the regenerative brake does not
operate and the brake does not perform
well. This causes the Brake Warning
light (red) and Regenerative Brake
Warning Light (yellow) to illuminate
simultaneously.
In this case, drive safely and have your
vehicle inspected by an authorized
HYUNDAI dealer.
The operation of the brake pedal may
be more difficult than normal and the
braking distance can increase. Parking brake & brake fluid
warning light
This warning light illuminates:
•
When you set the START/STOP button in the ON position.
- It illuminates for approximately 3 seconds.
- It remains on if the parking brake is applied.
• When the parking brake is applied.
• When the brake fluid level in the
reservoir is low.
- If the warning light illuminates with the parking brake released, it
indicates the brake fluid level in the
reservoir is low.
• When the regenerative brake does not
operate.
If the brake fluid level in the reservoir is low:
1. Drive carefully to the nearest safe
location and stop your vehicle.
2. With the motor stopped, check the brake fluid level immediately and add
fluid as required (For more details,
refer to “Brake Fluid” section in
chapter 9) . After adding brake fluid,
check all brake components for fluid
leaks. If a brake fluid leak is found, or
if the warning light remains on, or if
the brakes do not operate properly, do
not drive the vehicle. Have the vehicle
inspected by an authorized HYUNDAI
dealer.