instrument panel HYUNDAI IONIQ 5 2023 User Guide
[x] Cancel search | Manufacturer: HYUNDAI, Model Year: 2023, Model line: IONIQ 5, Model: HYUNDAI IONIQ 5 2023Pages: 680, PDF Size: 48.22 MB
Page 146 of 680
03
3-59
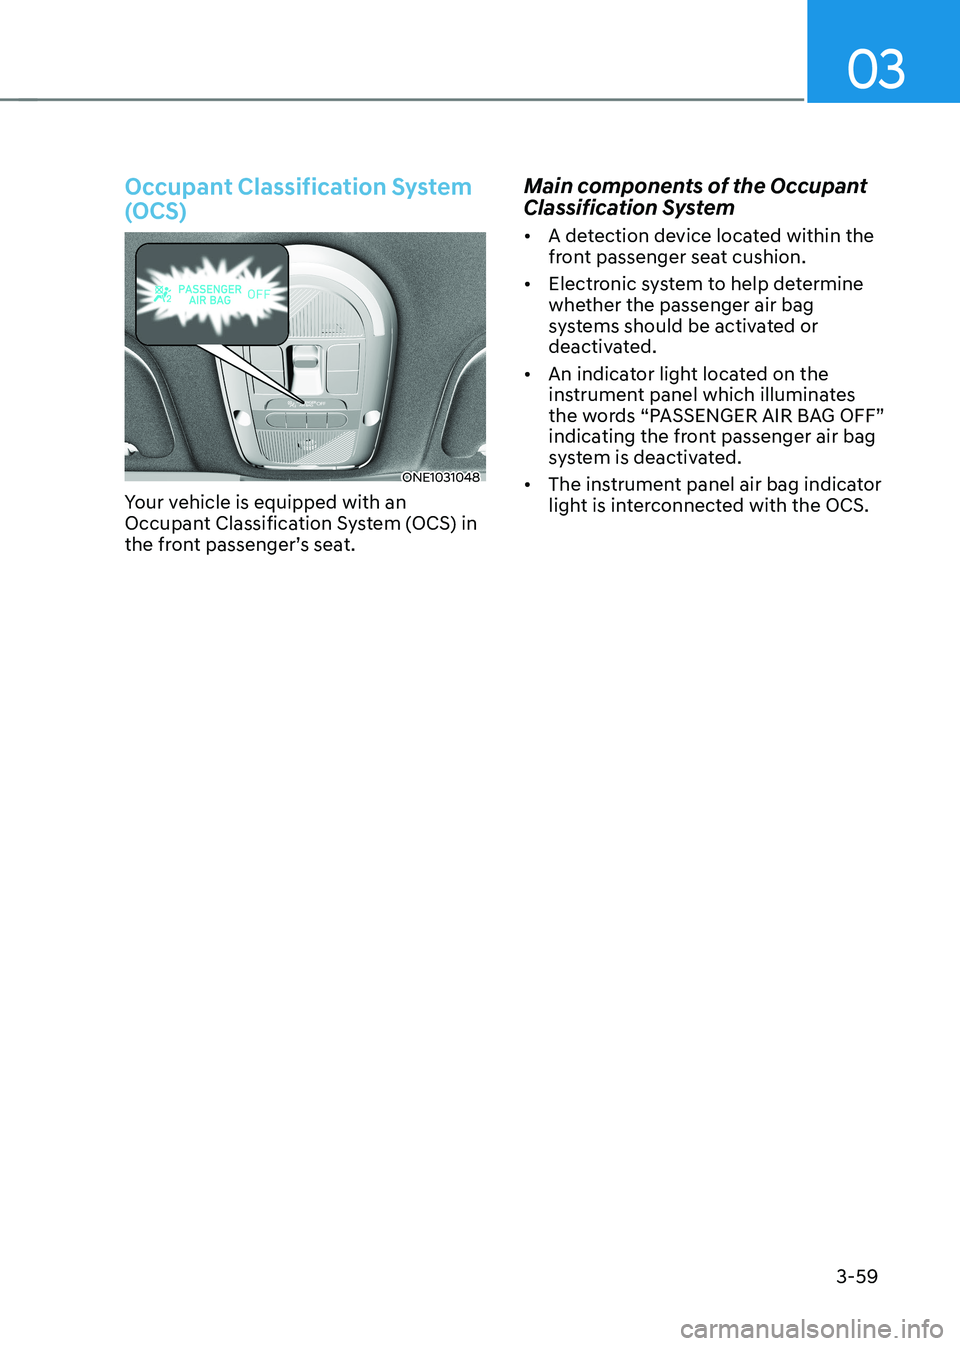
Occupant Classification System
(OCS)
ONE1031048
Your vehicle is equipped with an
Occupant Classification System (OCS) in
the front passenger’s seat. Main components of the Occupant
Classification System •
A detection device located within the
front passenger seat cushion.
• Electronic system to help determine
whether the passenger air bag
systems should be activated or
deactivated.
• An indicator light located on the
instrument panel which illuminates
the words “PASSENGER AIR BAG OFF”
indicating the front passenger air bag
system is deactivated.
• The instrument panel air bag indicator
light is interconnected with the OCS.
Page 157 of 680
Seats & Safety System
3-70
SRS Care
The SRS is virtually maintenance-free
and there are no parts you can safely
service by yourself. If the SRS air bag
warning light does not illuminate
when the Start/Stop button is in the
ON position, or continuously remains
on, have the system be immediately
inspected by an authorized HYUNDAI
dealer.
We recommend any work on the SRS
system, such as removing, installing,
repairing, or any work on the steering
wheel, the front passenger’s panel, front
seats and roof rails be performed by an
authorized HYUNDAI dealer. Improper
handling of the SRS system may result in
serious personal injury. WARNING
To reduce the risk of serious injury or
death take the following precautions: • Do not attempt to modify or
disconnect the SRS components or
wiring, including the addition of any
kind of badges to the pad covers or
modifications to the body structure.
• Do not place objects over or near
the air bag modules on the steering
wheel, instrument panel, and the
front passenger’s panel above the
glove box.
• Clean the air bag pad covers with
a soft cloth moistened with plain
water. Solvents or cleaners could
adversely affect the air bag covers
and proper deployment of the
system.
• Have the inflated air bags be
replaced by an authorized HYUNDAI
dealer.
• If components of the air bag system
must be discarded, or if the vehicle
must be scrapped, certain safety
precautions must be observed.
Consult an authorized HYUNDAI
dealer for the necessary information.
Failure to follow these precautions
could increase the risk of personal
injury.
Page 159 of 680
4
4. Instrument Cluster
Instrument Cluster ............................................................................................ 4-4
Instrument Cluster Control .......................................................................................... 4-5
Instrument panel illumination ................................................................................... 4-5
Gauges and Meters ...................................................................................................... 4-5
Speedometer ............................................................................................................. 4-5
Power/Charge Gauge ................................................................................................. 4-6
State of Charge (SOC) Gauge for High Voltage Battery ...........................................4-6
Outside temperature gauge ...................................................................................... 4 -7
Odometer .................................................................................................................. 4-8
Distance to empty .................................................................................................... 4-8
Reduction Gear Shift Indicator ................................................................................... 4-9
Regenerative braking level indicator ....................................................................... 4-9
Warning and Indicator Lights ..................................................................................... 4-9
Ready indicator ......................................................................................................... 4-9
Service warning light ................................................................................................ 4-9
Power down indicator light ..................................................................................... 4-10
Charging indicator light ........................................................................................... 4-10
High voltage battery level warning light ................................................................4-10
Seat belt warning light ............................................................................................ 4-10
Air bag warning light ................................................................................................ 4-11
Regenerative brake warning light ............................................................................ 4-11
Parking brake & brake fluid warning light ...............................................................4-11
Anti-lock Brake System (ABS) warning light ..........................................................4-12
Electronic Brake Force Distribution (EBD) system warning light .........................4-12
Electric Power Steering (EPS) warning light ..........................................................4-13
Master warning light ................................................................................................ 4-13
Electronic Parking Brake (EPB) warning light ........................................................4-14
Low tire pressure warning light .............................................................................. 4-14
Forward safety warning light .................................................................................. 4-15
Lane safety indicator light ...................................................................................... 4-15
All Wheel Drive (AWD) warning light ...................................................................... 4-15
LED headlight warning light .................................................................................... 4-16
Icy road warning light .............................................................................................. 4-16
Electronic Stability Control (ESC) indicator light ....................................................4-17
Electronic Stability Control (ESC) OFF indicator light ............................................4-17
Immobilizer indicator light ....................................................................................... 4-17
Turn signal indicator light ........................................................................................ 4-18
High beam indicator light ....................................................................................... 4-18
Light ON indicator light ........................................................................................... 4-18
High Beam Assist indicator light (if equipped) ......................................................4-19
AUTO HOLD indicator light ..................................................................................... 4-19
Page 163 of 680
04
4-5
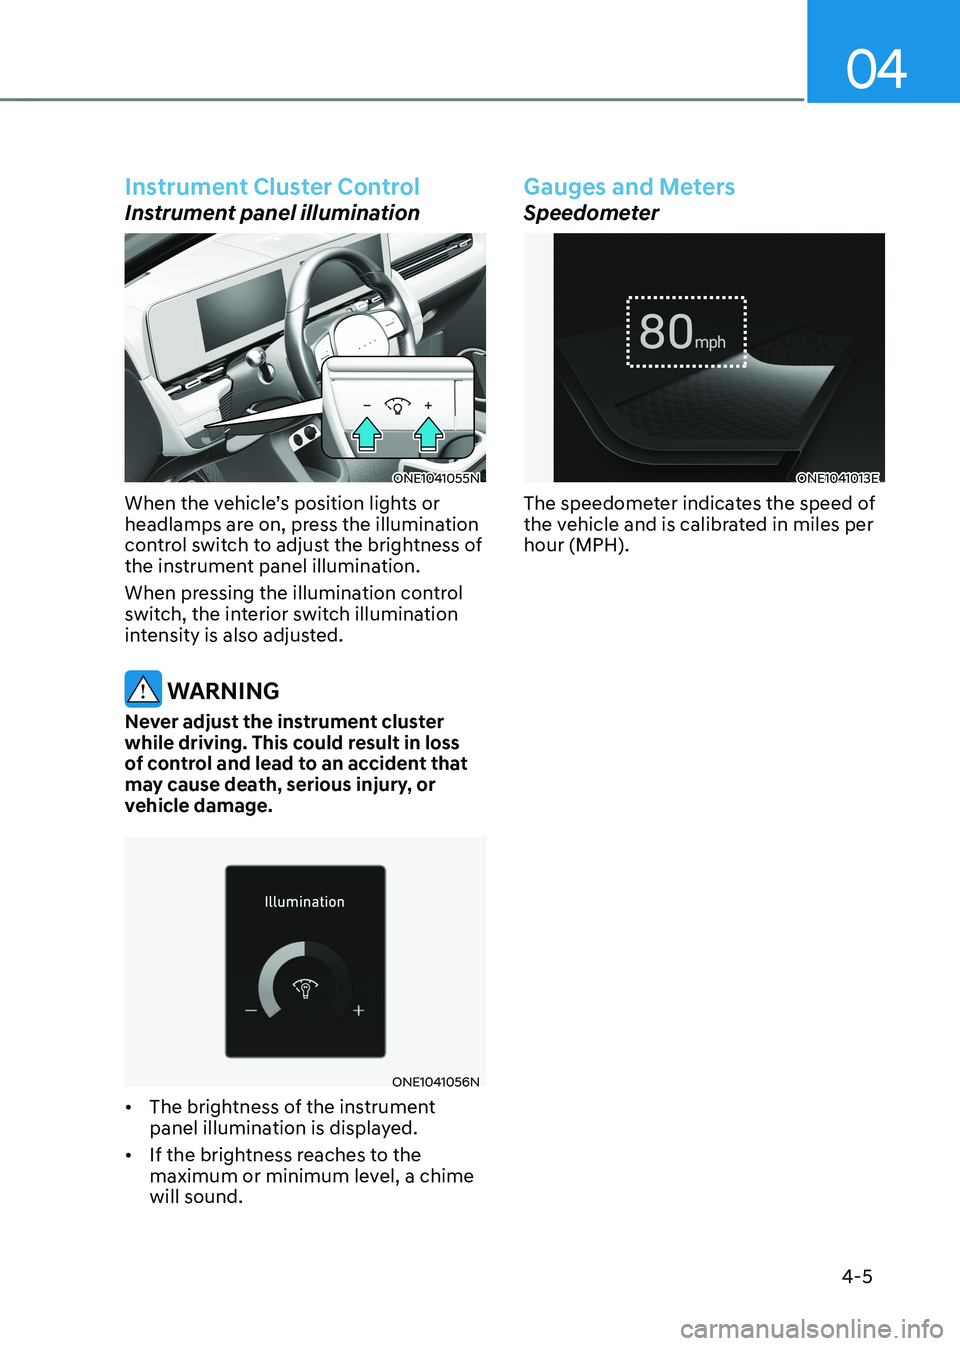
Instrument Cluster Control
Instrument panel illumination
ONE1041055N
When the vehicle’s position lights or
headlamps are on, press the illumination
control switch to adjust the brightness of
the instrument panel illumination.
When pressing the illumination control
switch, the interior switch illumination
intensity is also adjusted.
WARNING
Never adjust the instrument cluster
while driving. This could result in loss
of control and lead to an accident that
may cause death, serious injury, or
vehicle damage.
ONE1041056N
• The brightness of the instrument
panel illumination is displayed.
• If the brightness reaches to the
maximum or minimum level, a chime will sound.
Gauges and Meters
Speedometer
ONE1041013E
The speedometer indicates the speed of
the vehicle and is calibrated in miles per hour (MPH).
Page 278 of 680
Convenience Features
5-86
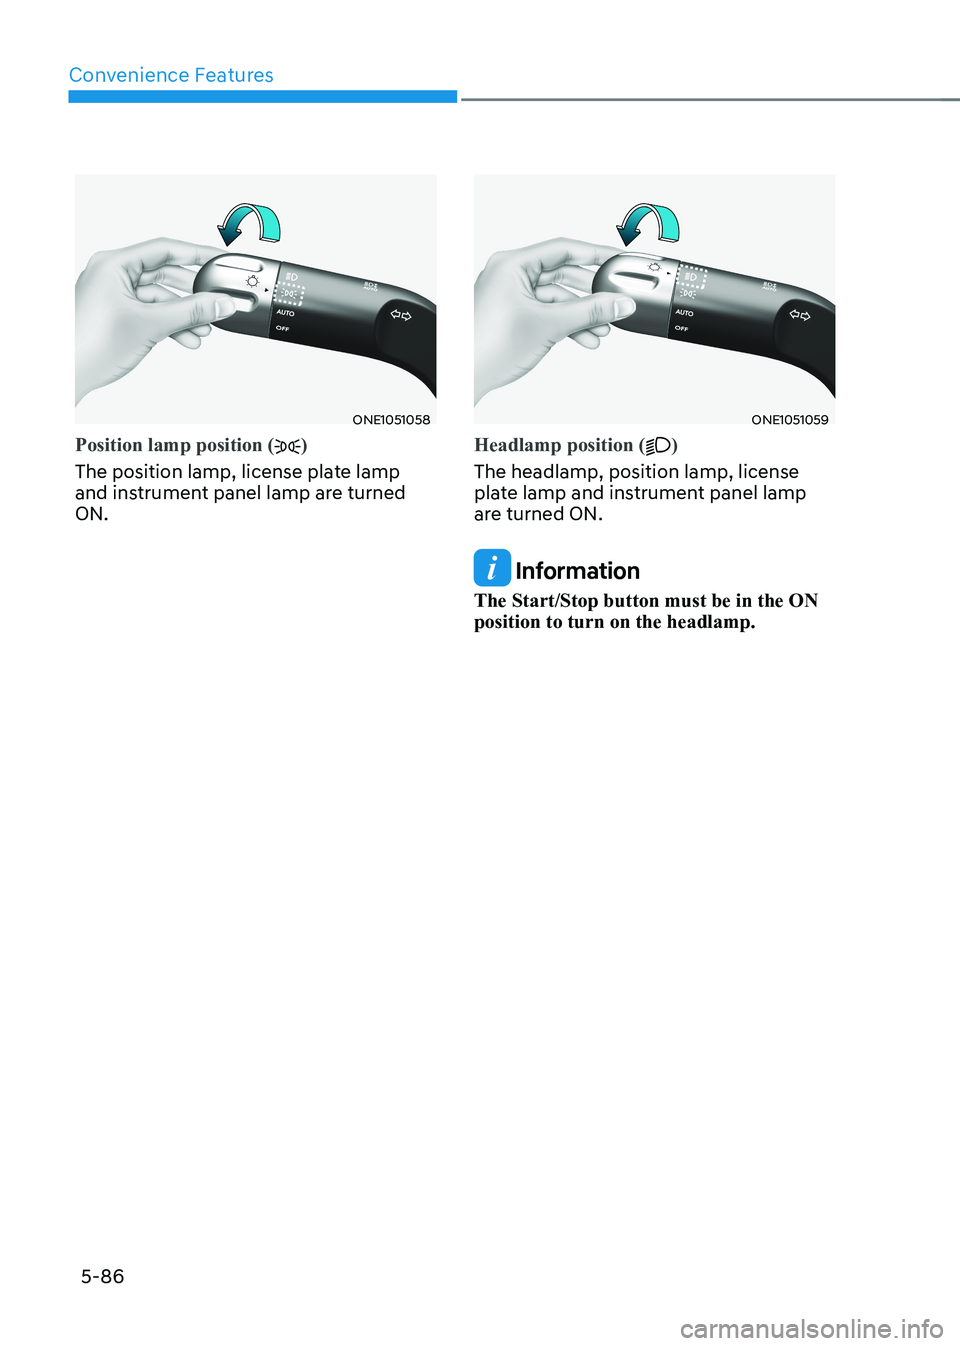
ONE1051058
Position lamp position ()
The position lamp, license plate lamp
and instrument panel lamp are turned ON.
ONE1051059
Headlamp position ()
The headlamp, position lamp, license
plate lamp and instrument panel lamp
are turned ON.
Information
The Start/Stop button must be in the ON position to turn on the headlamp.
Page 286 of 680
Convenience Features
5-94
High Beam Assist Operation
Display and control • After selecting ‘High Beam Assist’
in the Settings menu, High Beam
Assist will operate by following the
procedure below.
- Place the headlamp switch in the AUTO position and push
the headlamp lever towards the
instrument cluster. The High Beam
Assist (
) indicator light will
illuminate on the cluster and High
Beam Assist will be enabled.
- When High Beam Assist is enabled, high beam will turn on when vehicle
speed is above 40 km/h (25 mph).
When vehicle speed is below 25
km/h (15 mph), high beam will turn
off.
- The High Beam (
) indicator light
will illuminate on the cluster when high beam is on.
• When High Beam Assist is operating, if
the headlamp lever or switch is used,
High Beam Assist operates as follow:
- If the headlamp lever is pulled towards you when the high beam
is off, the high beam will turn on
without High Beam Assist canceled.
When you let go of the headlamp
lever, the lever will move to the middle and the high beam will turn
off.
- If the headlamp lever is pulled towards you when the high beam is
on by High Beam Assist, low beam will turn on and the function will
turn off.
- If the headlamp switch is placed from AUTO to another position
(headlamp/position/off), High
Beam Assist will turn off and the
corresponding lamp will turn on. •
When High Beam Assist is operating,
high beam switches to low beam if
any of the following conditions occur:
- When the headlamp of an oncoming vehicle is detected.
- When the tail lamp of a vehicle in front is detected.
- When the headlamp or tail lamp of a motorcycle or a bicycle is detected.
- When the surrounding ambient light is bright enough that high beams
are not required.
- When streetlights or other lights are detected.
Information
The images or colors may be displayed
differently depending on the specifications
of the instrument panel or theme.
Page 297 of 680
05
5-105
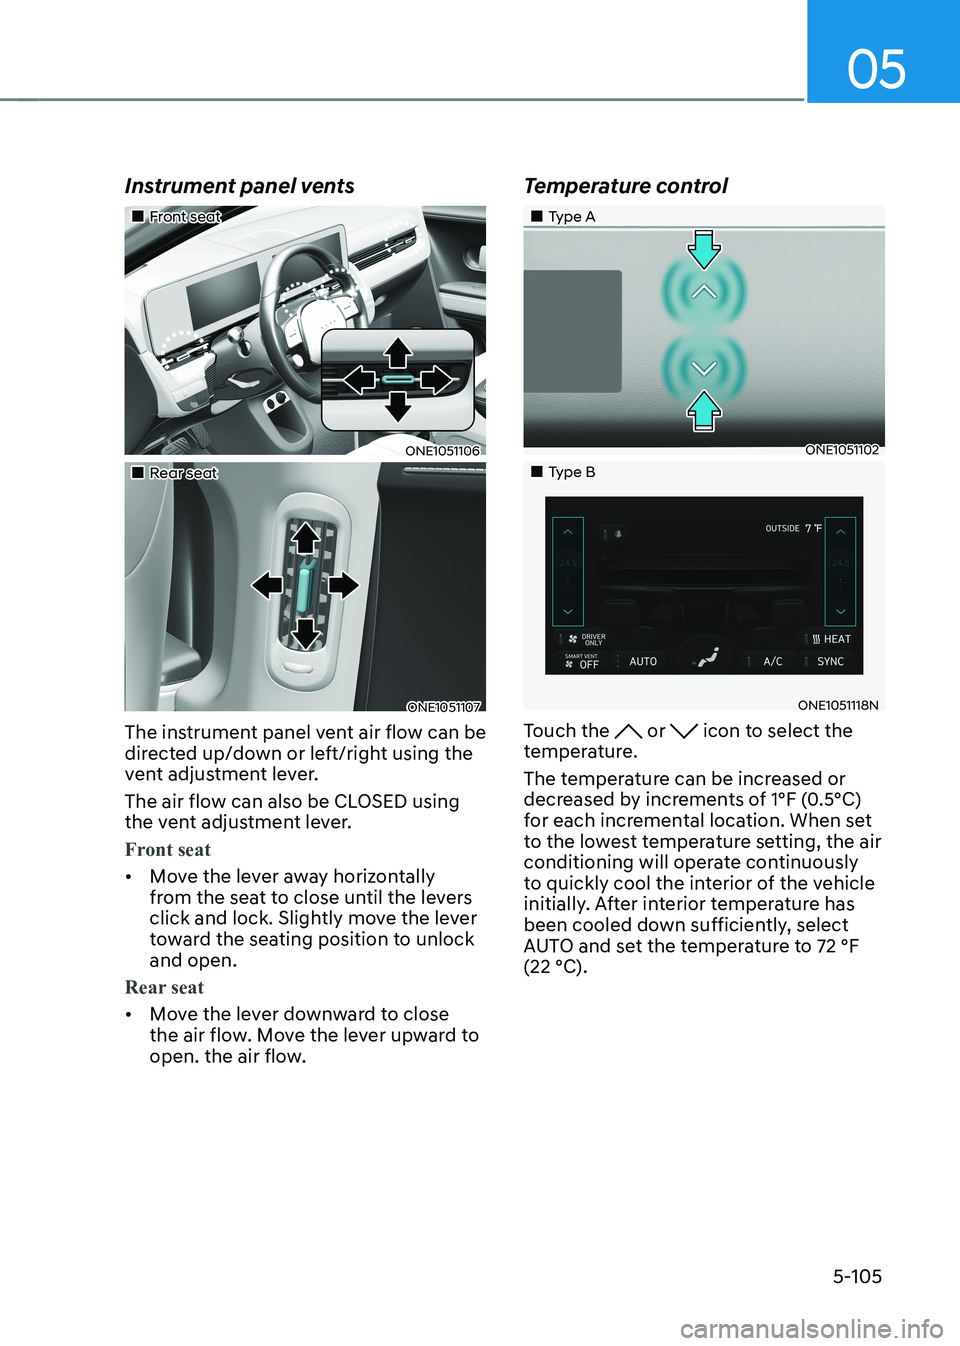
Instrument panel vents
„„Front seat
ONE1051106
„„Rear seat
ONE1051107
The instrument panel vent air flow can be
directed up/down or left/right using the
vent adjustment lever.
The air flow can also be CLOSED using
the vent adjustment lever.
Front seat
• Move the lever away horizontally
from the seat to close until the levers
click and lock. Slightly move the lever
toward the seating position to unlock and open.
Rear seat
• Move the lever downward to close
the air flow. Move the lever upward to
open. the air flow. Temperature control
„„Type A
ONE1051102
„„Type B
ONE1051118N
Touch the
or icon to select the
temperature.
The temperature can be increased or
decreased by increments of 1°F (0.5°C)
for each incremental location. When set
to the lowest temperature setting, the air
conditioning will operate continuously
to quickly cool the interior of the vehicle
initially. After interior temperature has
been cooled down sufficiently, select
AUTO and set the temperature to 72 °F (22 °C).
Page 307 of 680
05
5-115
Rear Window Defroster
NOTICE
To prevent damage to the rear window
defroster conducting elements bonded
to the inside surface of the rear window,
never use sharp instruments or window
cleaners containing abrasives to clean
the window.
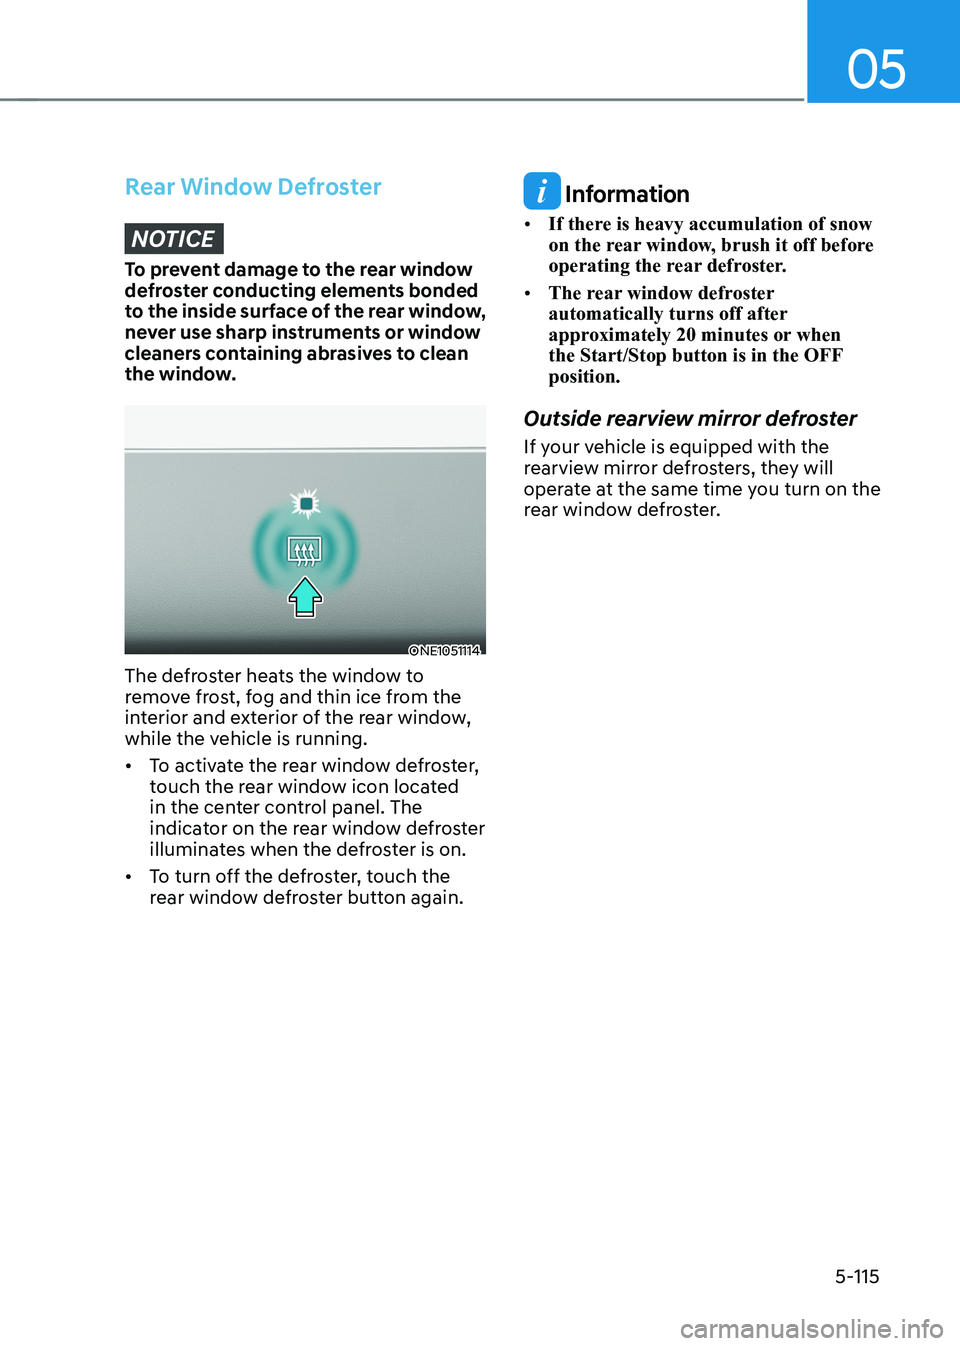
ONE1051114
The defroster heats the window to
remove frost, fog and thin ice from the
interior and exterior of the rear window,
while the vehicle is running. • To activate the rear window defroster,
touch the rear window icon located
in the center control panel. The
indicator on the rear window defroster
illuminates when the defroster is on.
• To turn off the defroster, touch the
rear window defroster button again.
Information
• If there is heavy accumulation of snow
on the rear window, brush it off before
operating the rear defroster.
• The rear window defroster
automatically turns off after
approximately 20 minutes or when
the Start/Stop button is in the OFF position.
Outside rearview mirror defroster
If your vehicle is equipped with the
rearview mirror defrosters, they will
operate at the same time you turn on the
rear window defroster.
Page 329 of 680
06
6-3
WARNING
CALIFORNIA PROPOSITION 65
WARNING
Engine exhaust and a wide variety of
automobile components including
components found in the interior
furnishings in a vehicle, contain or
emit harmful chemicals known to the
State of California to cause cancer and
birth defects and reproductive harm.
In addition, certain fluids contained
in vehicles and certain products of
components contain or emit chemicals
known to the State of California to
cause cancer and birth defects or other
reproductive harm.
Before Entering the Vehicle
• Be sure all windows, outside mirror(s),
and outside lights are clean and
unobstructed.
• Remove frost, snow, or ice.
• Visually check the tires for uneven
wear and damage.
• Check under the vehicle for any sign
of leaks.
• Be sure there are no obstacles behind
you if you intend to back up.
Before Starting
• Make sure the hood, the liftgate, and
the doors are securely closed and
locked.
• Adjust the position of the seat and
steering wheel.
• Adjust the inside and outside rearview
mirrors.
• Verify all the lights work.
• Fasten your seat belt. Check that all
passengers have fastened their seat belts.
• Check the gauges and indicators
in the instrument panel and the
messages on the instrument display
when the vehicle is in the ON position. •
Check that any items you are carrying
are stored properly or fastened down
securely.
WARNING
To reduce the risk of SERIOUS INJURY or
DEATH, take the following precautions: • ALWAYS wear your seat belt. All
passengers must be properly belted
whenever the vehicle is moving.
For more information, refer to “Seat
Belts” section in chapter 3.
• Always drive defensively. Assume
other drivers or pedestrians may be
careless and make mistakes.
• Stay focused on the task of driving.
Driver distraction can cause
accidents.
• Leave plenty of space between you
and the vehicle in front of you.
WARNING
NEVER drink or take drugs and drive. Drinking or taking drugs and driving
is dangerous and may result in an
accident and SERIOUS INJURY or
DEATH. Drunk driving is the number one
contributor to the highway death
toll each year. Even a small amount
of alcohol will affect your reflexes,
perceptions and judgment. Just
one drink can reduce your ability to
respond to changing conditions and
emergencies and your reaction time
gets worse with each additional drink.
Driving while under the influence
of drugs is as dangerous or more
dangerous than driving under the
influence of alcohol.
You are much more likely to have a
serious accident if you drink or take
drugs and drive. If you are drinking or
taking drugs, don’t drive. Do not ride
with a driver who has been drinking
or taking drugs. Choose a designated
driver or call a taxi.
Before driving
Page 399 of 680
06
6-73
Distance
Stay at least twice as far behind the
vehicle ahead as you would when driving
your vehicle without a trailer. This can
help you avoid situations that require
heavy braking and sudden turns.
Passing
You will need more passing distance up
ahead when you’re towing a trailer. And,
because of the increased vehicle length,
you’ll need to go much farther beyond
the passed vehicle before you can return
to your lane. Backing up
Hold the bottom of the steering wheel
with one hand. Then, to move the trailer
to the left, move your hand to the left. To
move the trailer to the right, move your
hand to the right. Always back up slowly
and, if possible, have someone guide
you.
Making turns
When you’re turning with a trailer, make
wider turns than normal. Do this so your
trailer won’t strike soft shoulders, curbs,
road signs, trees, or other objects. Avoid
jerky or sudden maneuvers. Signal well in
advance.
Turn signals
When you tow a trailer, your vehicle has
to have a different turn signal flasher and
extra wiring. The green arrows on your
instrument panel will flash whenever you
signal a turn or lane change. Properly
connected, the trailer lights will also flash
to alert other drivers you’re about to turn,
change lanes, or stop.
When towing a trailer, the green arrows
on your instrument panel will flash for
turns even if the bulbs on the trailer
are burned out. Thus, you may think
drivers behind you are seeing your
signals when, in fact, they are not. It’s
important to check occasionally to be
sure the trailer bulbs are still working.
You must also check the lights every time
you disconnect and then reconnect the
wires.
WARNING
Do not connect a trailer lighting system
directly to your vehicle’s lighting
system. Use an approved trailer wiring
harness. Failure to do so could result
in damage to the vehicle electrical
system and/or personal injury. Consult
an authorized HYUNDAI dealer for
assistance.