parking brake HYUNDAI IONIQ 5 2023 User Guide
[x] Cancel search | Manufacturer: HYUNDAI, Model Year: 2023, Model line: IONIQ 5, Model: HYUNDAI IONIQ 5 2023Pages: 680, PDF Size: 48.22 MB
Page 171 of 680
04
4-13
WARNING
Electronic Brake Force Distribution
(EBD) system warning light
When both ABS and Parking Brake &
Brake Fluid warning lights are on, the
brake system will not work normally
and you may experience an unexpected
and dangerous situation during sudden
braking.
If this occurs, avoid high speed driving
and abrupt braking.
Have the vehicle inspected by an
authorized HYUNDAI dealer as soon as possible.
NOTICE
Electronic Brake Force Distribution
(EBD) system warning light
When the ABS warning light is on
or both ABS and Parking Brake &
Brake Fluid warning lights are on, the
speedometer, odometer, or tripmeter
may not work. Also, the EPS warning
light may illuminate and the steering
effort may increase or decrease.
If this occurs, have the vehicle
inspected by an authorized HYUNDAI dealer as soon as possible. Electric Power Steering (EPS)
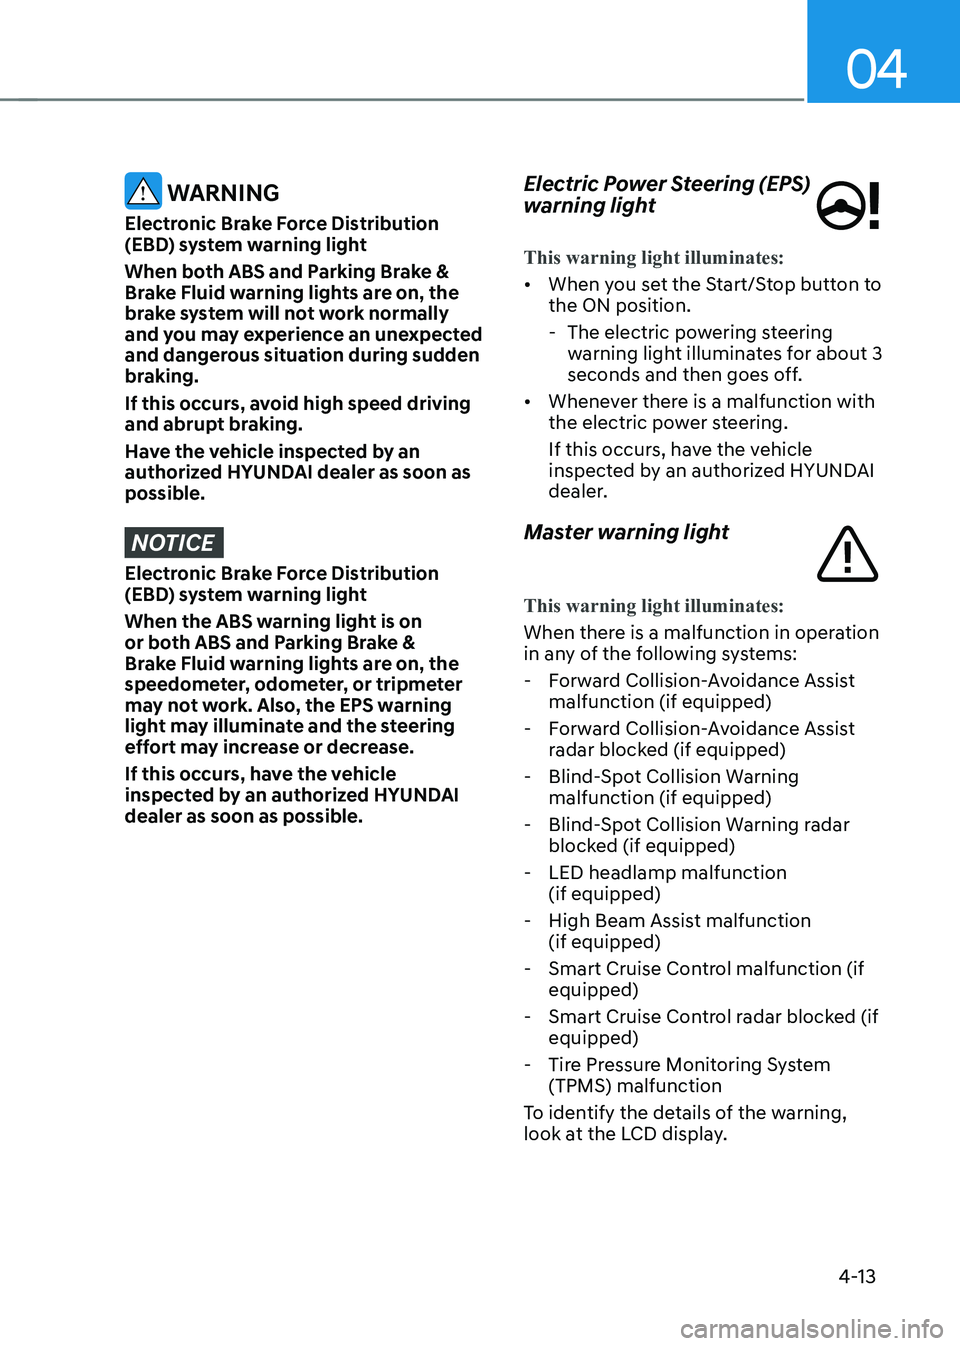
warning light
This warning light illuminates:
•
When you set the Start/Stop button to the ON position.
- The electric powering steering warning light illuminates for about 3
seconds and then goes off.
• Whenever there is a malfunction with
the electric power steering.
If this occurs, have the vehicle
inspected by an authorized HYUNDAI
dealer.
Master warning light
This warning light illuminates:
When there is a malfunction in operation
in any of the following systems: - Forward Collision-Avoidance Assist malfunction (if equipped)
- Forward Collision-Avoidance Assist radar blocked (if equipped)
- Blind-Spot Collision Warning malfunction (if equipped)
- Blind-Spot Collision Warning radar blocked (if equipped)
- LED headlamp malfunction (if equipped)
- High Beam Assist malfunction (if equipped)
- Smart Cruise Control malfunction (if equipped)
- Smart Cruise Control radar blocked (if equipped)
- Tire Pressure Monitoring System (TPMS) malfunction
To identify the details of the warning,
look at the LCD display.
Page 172 of 680
Instrument Cluster
4-14
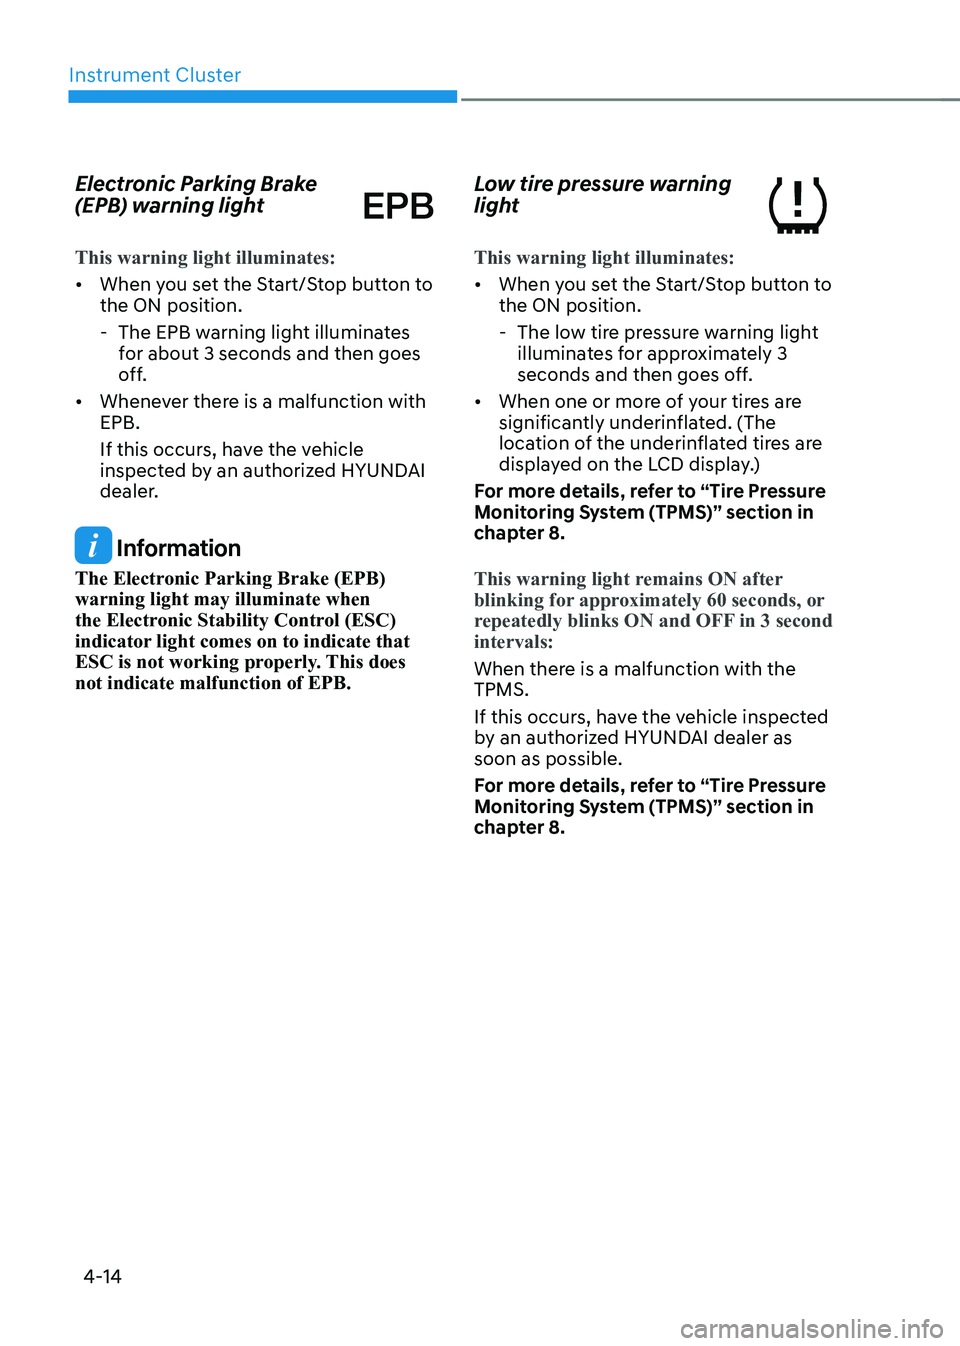
Electronic Parking Brake
(EPB) warning light
This warning light illuminates:
•
When you set the Start/Stop button to the ON position.
- The EPB warning light illuminates for about 3 seconds and then goes
off.
• Whenever there is a malfunction with EPB.
If this occurs, have the vehicle
inspected by an authorized HYUNDAI
dealer.
Information
The Electronic Parking Brake (EPB) warning light may illuminate when
the Electronic Stability Control (ESC)
indicator light comes on to indicate that
ESC is not working properly. This does not indicate malfunction of EPB. Low tire pressure warning
light
This warning light illuminates:
•
When you set the Start/Stop button to the ON position.
- The low tire pressure warning light illuminates for approximately 3
seconds and then goes off.
• When one or more of your tires are
significantly underinflated. (The
location of the underinflated tires are
displayed on the LCD display.)
For more details, refer to “Tire Pressure
Monitoring System (TPMS)” section in
chapter 8.
This warning light remains ON after
blinking for approximately 60 seconds, or
repeatedly blinks ON and OFF in 3 second intervals:
When there is a malfunction with the TPMS.
If this occurs, have the vehicle inspected
by an authorized HYUNDAI dealer as soon as possible.
For more details, refer to “Tire Pressure
Monitoring System (TPMS)” section in
chapter 8.
Page 177 of 680
04
4-19
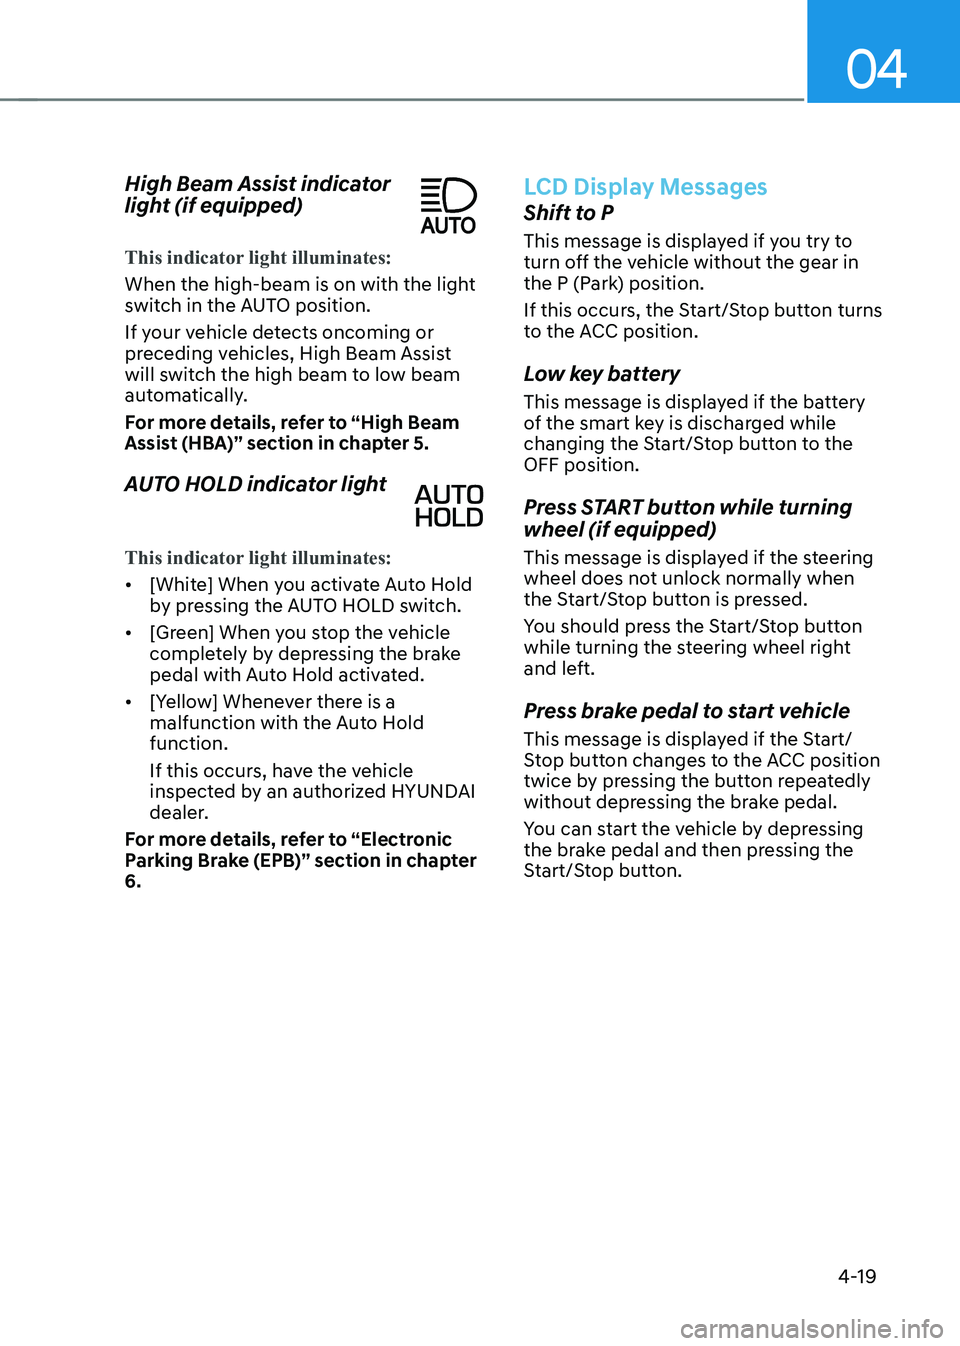
High Beam Assist indicator
light (if equipped)
This indicator light illuminates:
When the high-beam is on with the light
switch in the AUTO position.
If your vehicle detects oncoming or
preceding vehicles, High Beam Assist
will switch the high beam to low beam
automatically.
For more details, refer to “High Beam
Assist (HBA)” section in chapter 5.
AUTO HOLD indicator light
This indicator light illuminates:
•
[White] When you activate Auto Hold
by pressing the AUTO HOLD switch.
• [Green] When you stop the vehicle
completely by depressing the brake
pedal with Auto Hold activated.
• [Yellow] Whenever there is a
malfunction with the Auto Hold function.
If this occurs, have the vehicle
inspected by an authorized HYUNDAI
dealer.
For more details, refer to “Electronic
Parking Brake (EPB)” section in chapter 6.
LCD Display Messages
Shift to P
This message is displayed if you try to
turn off the vehicle without the gear in
the P (Park) position.
If this occurs, the Start/Stop button turns
to the ACC position.
Low key battery
This message is displayed if the battery
of the smart key is discharged while
changing the Start/Stop button to the OFF position.
Press START button while turning wheel (if equipped)
This message is displayed if the steering
wheel does not unlock normally when
the Start/Stop button is pressed.
You should press the Start/Stop button
while turning the steering wheel right
and left.
Press brake pedal to start vehicle
This message is displayed if the Start/
Stop button changes to the ACC position
twice by pressing the button repeatedly
without depressing the brake pedal.
You can start the vehicle by depressing
the brake pedal and then pressing the
Start/Stop button.
Page 227 of 680
05
5-35
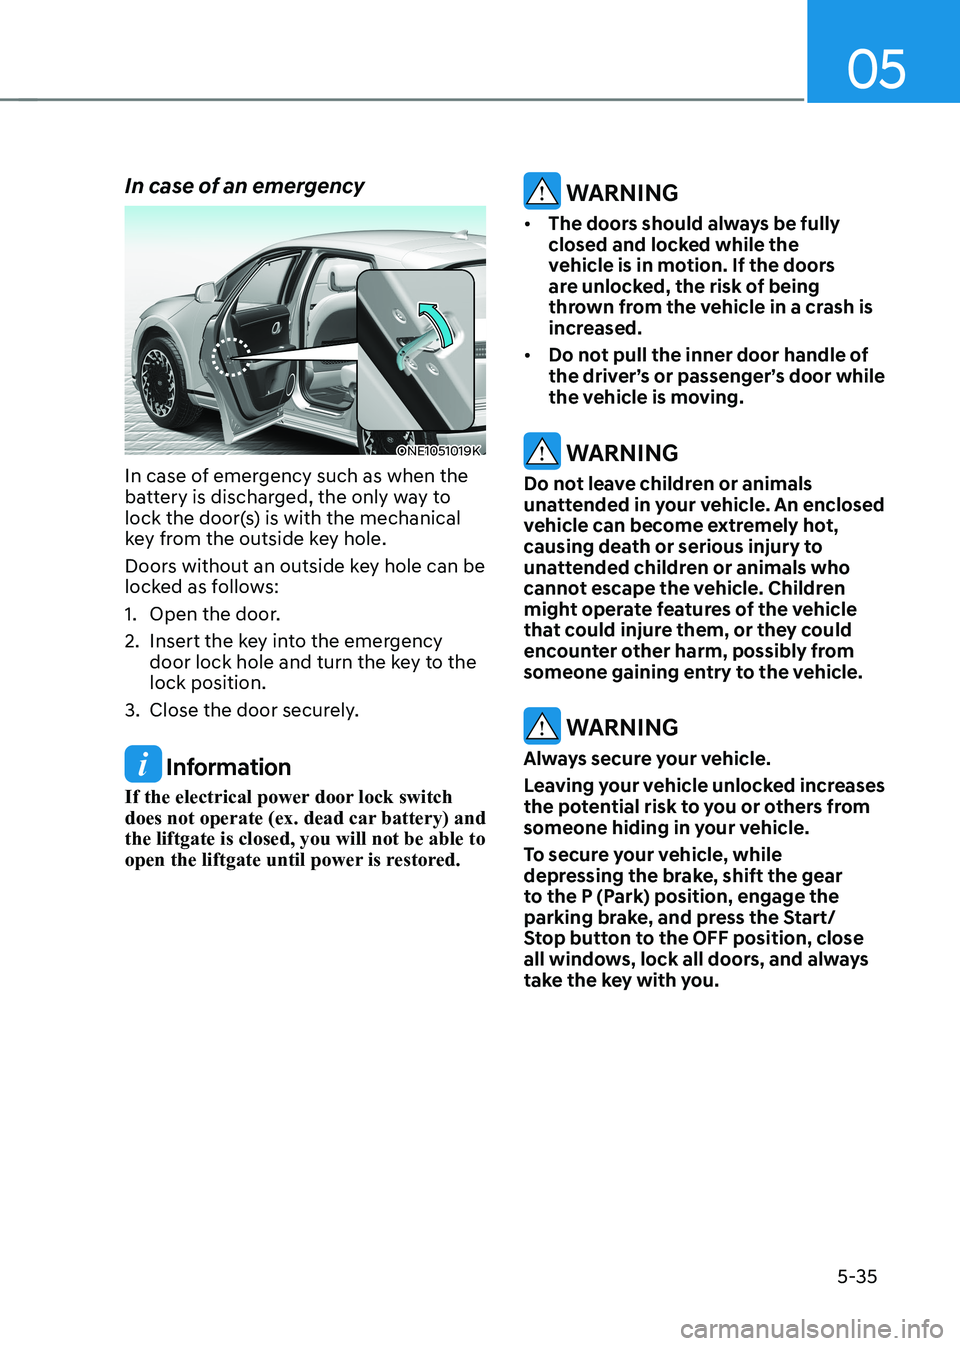
In case of an emergency
ONE1051019K
In case of emergency such as when the
battery is discharged, the only way to
lock the door(s) is with the mechanical
key from the outside key hole.
Doors without an outside key hole can be
locked as follows:
1. Open the door.
2. Insert the key into the emergency door lock hole and turn the key to the lock position.
3. Close the door securely.
Information
If the electrical power door lock switch
does not operate (ex. dead car battery) and the liftgate is closed, you will not be able to
open the liftgate until power is restored.
WARNING
• The doors should always be fully
closed and locked while the
vehicle is in motion. If the doors
are unlocked, the risk of being
thrown from the vehicle in a crash is
increased.
• Do not pull the inner door handle of
the driver’s or passenger’s door while
the vehicle is moving.
WARNING
Do not leave children or animals
unattended in your vehicle. An enclosed
vehicle can become extremely hot,
causing death or serious injury to
unattended children or animals who
cannot escape the vehicle. Children
might operate features of the vehicle
that could injure them, or they could
encounter other harm, possibly from
someone gaining entry to the vehicle.
WARNING
Always secure your vehicle.
Leaving your vehicle unlocked increases
the potential risk to you or others from
someone hiding in your vehicle.
To secure your vehicle, while
depressing the brake, shift the gear
to the P (Park) position, engage the
parking brake, and press the Start/
Stop button to the OFF position, close
all windows, lock all doors, and always
take the key with you.
Page 254 of 680
Convenience Features
5-62
Reverse parking aid user settings mode
You may change the angle of the outside
rearview mirror if it is difficult to see
the rear view with the basic downward
mirror angle provided when reversing.
When the vehicle is first delivered, the
set downward angle of the left and right
outside rearview mirror are different to
ensure driver visibility.
1. Make sure the vehicle is stopped.
2. Depress the brake pedal and shift the
gear to R (Reverse). When L (Left) or R
(Right) button is pressed, both outside
rearview mirror angle will move
downward to the basic set position.
3. Press either L or R button to select the outside rearview mirror you would like
to adjust. Then press “ ▼, ▲ , ◄ , ► ”
switch to adjust the outside rearview
mirror to the desired angle.
4. After adjusting the angle to save the
adjusted outside rearview mirror
angle, shift the gear to another
position other than R (Reverse), or
change the L and R buttons to the
neutral position (L and R buttons are
not pressed).
5. Set the other outside rearview mirror following the above procedure 1 to 4.
Resetting reverse parking aid user settings mode
To change the outside rearview mirror
angle back to the basic angle, shift the
gear to R (Reverse), and adjust the mirror angle higher than when the gear is in P
(Park), N (Neutral) and D (Drive).
NOTICE
When changing the angle of both
outside rearview mirrors, it is
recommended to change the angle one
side at a time following the procedure
1 to 4.
Page 262 of 680
Convenience Features
5-70
exterior feAtures
Hood
Opening the hood
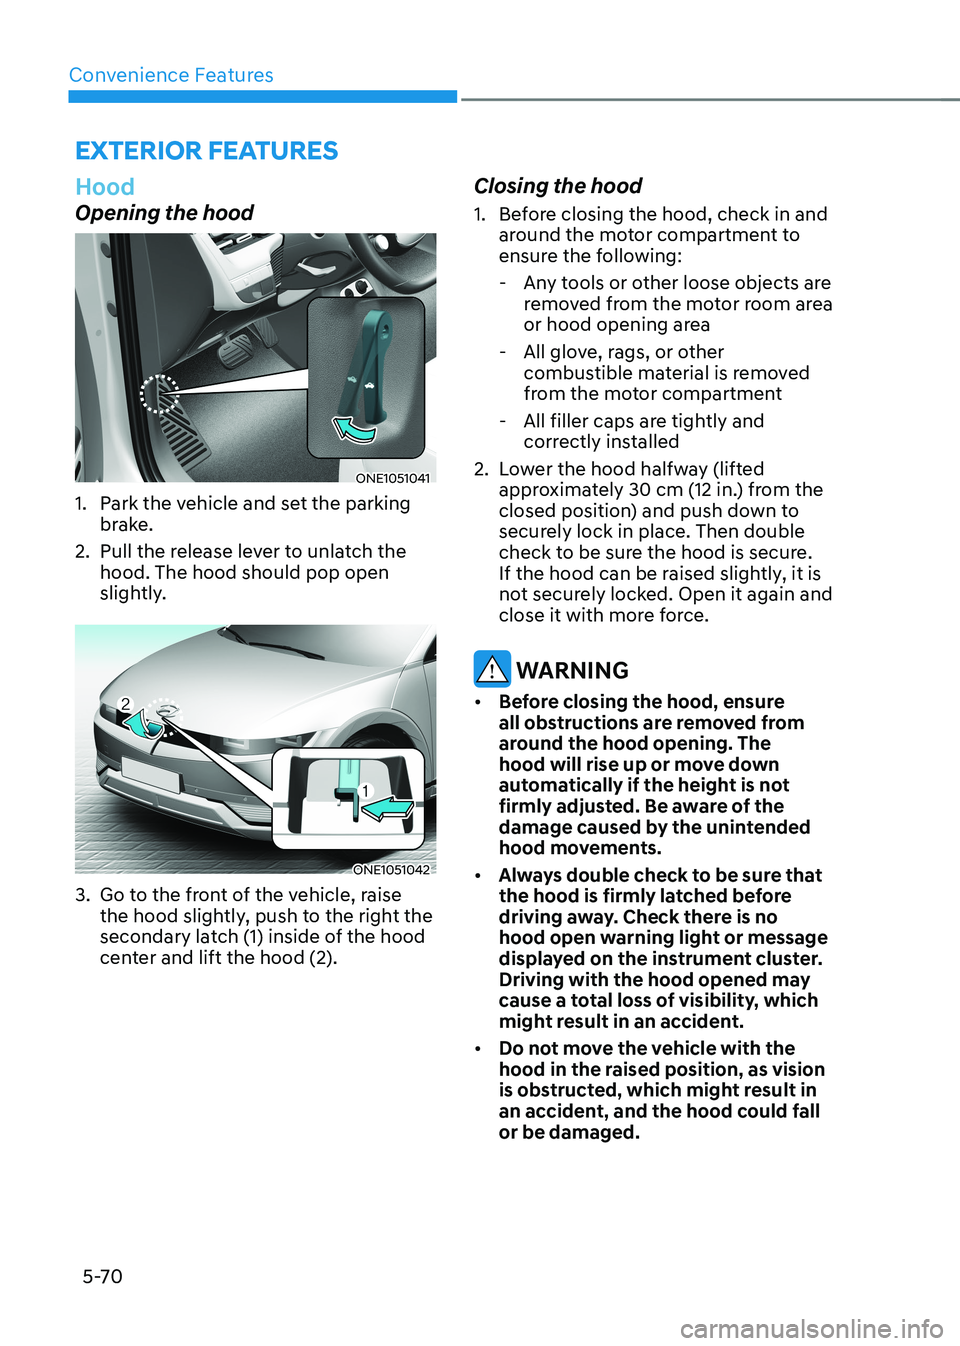
ONE1051041
1. Park the vehicle and set the parking brake.
2. Pull the release lever to unlatch the hood. The hood should pop open
slightly.
ONE1051042
3. Go to the front of the vehicle, raise the hood slightly, push to the right the
secondary latch (1) inside of the hood
center and lift the hood (2). Closing the hood
1. Before closing the hood, check in and
around the motor compartment to
ensure the following:
- Any tools or other loose objects are removed from the motor room area
or hood opening area
- All glove, rags, or other combustible material is removed
from the motor compartment
- All filler caps are tightly and correctly installed
2. Lower the hood halfway (lifted approximately 30 cm (12 in.) from the
closed position) and push down to
securely lock in place. Then double
check to be sure the hood is secure.
If the hood can be raised slightly, it is
not securely locked. Open it again and
close it with more force.
WARNING
• Before closing the hood, ensure
all obstructions are removed from
around the hood opening. The
hood will rise up or move down
automatically if the height is not
firmly adjusted. Be aware of the
damage caused by the unintended
hood movements.
• Always double check to be sure that
the hood is firmly latched before
driving away. Check there is no
hood open warning light or message
displayed on the instrument cluster.
Driving with the hood opened may
cause a total loss of visibility, which
might result in an accident.
• Do not move the vehicle with the
hood in the raised position, as vision
is obstructed, which might result in
an accident, and the hood could fall or be damaged.
Page 277 of 680
05
5-85
Exterior Lights
Lighting control
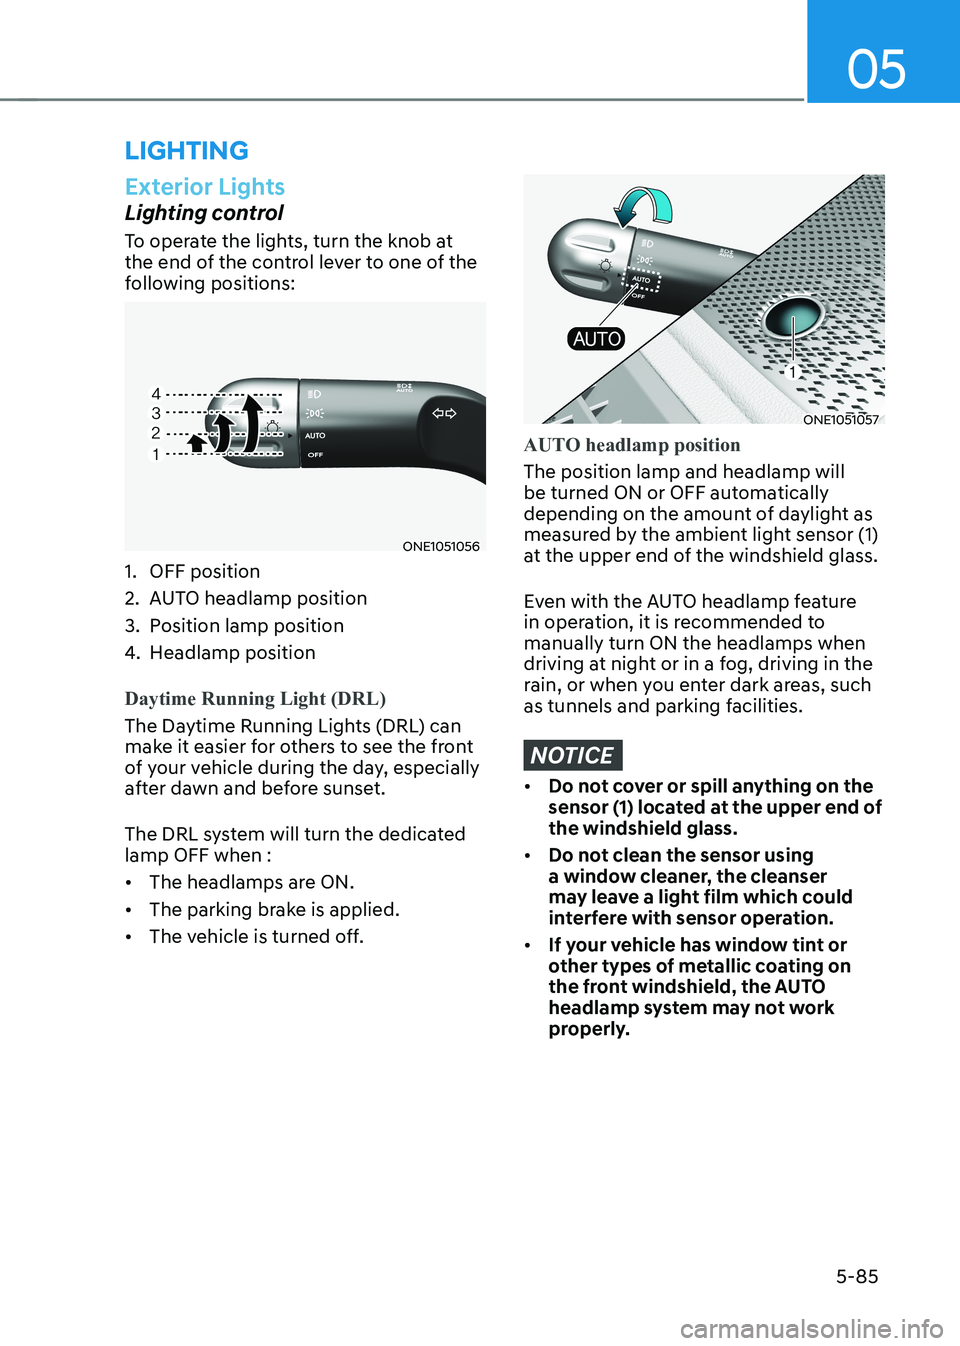
To operate the lights, turn the knob at
the end of the control lever to one of the
following positions:
ONE1051056
1. OFF position
2. AUTO headlamp position
3. Position lamp position
4. Headlamp position
Daytime Running Light (DRL)
The Daytime Running Lights (DRL) can
make it easier for others to see the front
of your vehicle during the day, especially
after dawn and before sunset.
The DRL system will turn the dedicated lamp OFF when : • The headlamps are ON.
• The parking brake is applied.
• The vehicle is turned off.
ONE1051057
AUTO headlamp position
The position lamp and headlamp will
be turned ON or OFF automatically
depending on the amount of daylight as
measured by the ambient light sensor (1)
at the upper end of the windshield glass.
Even with the AUTO headlamp feature
in operation, it is recommended to manually turn ON the headlamps when
driving at night or in a fog, driving in the
rain, or when you enter dark areas, such
as tunnels and parking facilities.
NOTICE
• Do not cover or spill anything on the
sensor (1) located at the upper end of the windshield glass.
• Do not clean the sensor using
a window cleaner, the cleanser
may leave a light film which could
interfere with sensor operation.
• If your vehicle has window tint or
other types of metallic coating on
the front windshield, the AUTO
headlamp system may not work
properly.
lighting
Page 327 of 680
6
6. Driving Your Vehicle
Before Driving ................................................................................................... 6-3
Before Entering the Vehicle ......................................................................................... 6-3
Before Starting ............................................................................................................. 6-3
Start/Stop Button .............................................................................................. 6-4
Start/Stop Button Positions ......................................................................................... 6-5
Starting the Vehicle ..................................................................................................... 6-6
Turning Off the Vehicle ................................................................................................ 6 -7
Remote Start ................................................................................................................ 6-8
Reduction Gear ................................................................................................. 6-9
Reduction Gear Operation .......................................................................................... 6-9
LCD Display Messages (Cluster) ................................................................................ 6-13
Good Driving Practices .............................................................................................. 6-15
Regenerative Braking System ......................................................................... 6-16
One Pedal Driving........................................................................................................6-17 i-Pedal ......................................................................................................................... 6-18
Smart Recuperation System ........................................................................... 6-19
Smart Recuperation System Setting ......................................................................... 6-19
To Activate Smart Recuperation System .................................................................. 6-19
Ready to Operate ...................................................................................................... 6-20
How to Operate .......................................................................................................... 6-21
Smart Recuperation System Will Be Temporarily Cancelled When: .......................6-21
To Resume Smart Recuperation System .................................................................. 6-21
Vehicle-to-Vehicle Distance Recognition Sensor (Front Radar) .............................6-22
System Malfunction ................................................................................................... 6-23
Limitations of the System .......................................................................................... 6-23
Braking System ............................................................................................... 6-26
Power-Assist Brakes ................................................................................................... 6-26
Disc Brakes Wear Indicator........................................................................................ 6-27
Electronic Parking Brake (EPB) .................................................................................. 6-27
Auto Hold .................................................................................................................... 6-32
Anti-Lock Brake System (ABS) ................................................................................... 6-35
Electronic Stability Control (ESC) ............................................................................. 6-37
Vehicle Stability Management (VSM) ...................................................................... 6-40
Hill-Start Assist Control (HAC) ................................................................................... 6-41
Good Braking Practices ............................................................................................ 6-42
Page 330 of 680
Driving Your Vehicle
6-4
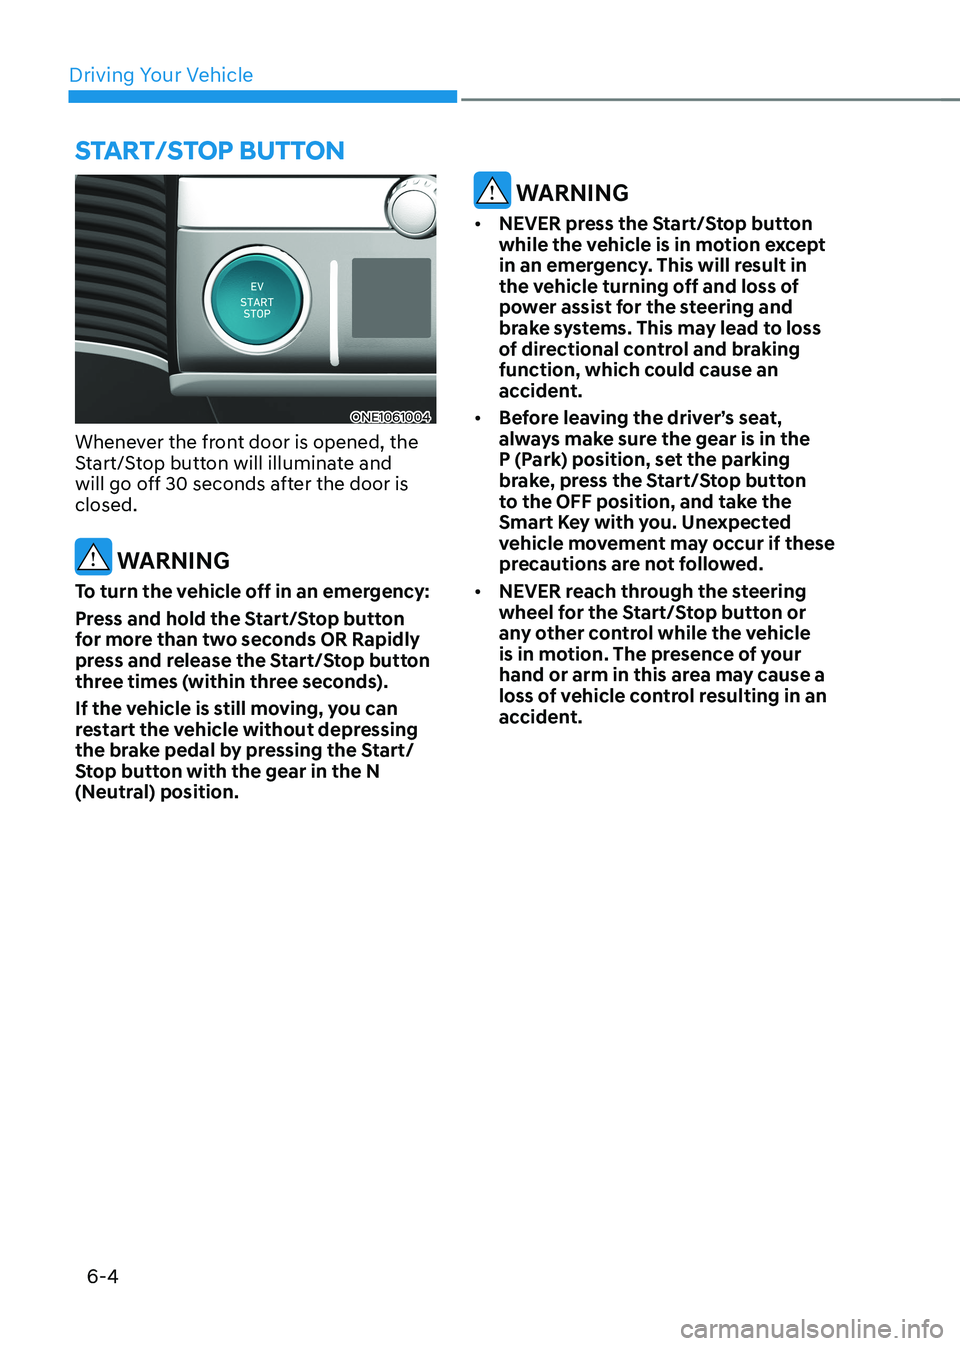
ONE1061004
Whenever the front door is opened, the
Start/Stop button will illuminate and
will go off 30 seconds after the door is closed.
WARNING
To turn the vehicle off in an emergency:
Press and hold the Start/Stop button
for more than two seconds OR Rapidly
press and release the Start/Stop button
three times (within three seconds).
If the vehicle is still moving, you can
restart the vehicle without depressing
the brake pedal by pressing the Start/
Stop button with the gear in the N
(Neutral) position.
WARNING
• NEVER press the Start/Stop button
while the vehicle is in motion except
in an emergency. This will result in
the vehicle turning off and loss of
power assist for the steering and
brake systems. This may lead to loss
of directional control and braking
function, which could cause an
accident.
• Before leaving the driver’s seat,
always make sure the gear is in the
P (Park) position, set the parking
brake, press the Start/Stop button
to the OFF position, and take the
Smart Key with you. Unexpected
vehicle movement may occur if these
precautions are not followed.
• NEVER reach through the steering
wheel for the Start/Stop button or
any other control while the vehicle
is in motion. The presence of your
hand or arm in this area may cause a
loss of vehicle control resulting in an
accident.
Start/Stop Button
Page 332 of 680
Driving Your Vehicle
6-6
Starting the Vehicle
WARNING
• Always wear appropriate shoes when
operating your vehicle. Unsuitable
shoes, such as high heels, ski boots,
sandals, flipflops, etc., may interfere
with your ability to use the brake and
accelerator pedals.
• Do not start the vehicle with the
accelerator pedal depressed.
The vehicle can move which can lead
to an accident.
Information
• The vehicle will start by pressing the Start/Stop button, only when the smart key is in the vehicle.
• Even if the smart key is in the vehicle,
and when it is far away from the driver, the vehicle may not start.
• When the Start/Stop button is in the
ACC or ON position, if any door is
open, the system checks for the smart
key. When the smart key is not in the
vehicle, the “
” indicator will
blink and the warning 'Key not in
vehicle' will come on. When all doors
are closed, the chime will also sound for about 5 seconds. Keep the smart key in
the vehicle when in the ACC position
or if the vehicle is in the ready (
)
mode.
Starting the vehicle
1. Always carry the smart key with you.
2. Make sure the parking brake is applied.
3. Make sure the gear is in P (Park).
4. Depress the brake pedal.
5. Press the START/STOP button. If the vehicle starts, the "
" indicator
will come on.
Information
• Always start the vehicle with your foot
on the brake pedal. Do not depress the
accelerator while starting the vehicle.
Do not race the motor while warming it up.
• If ambient temperature is low, the “
” indicator may remain
illuminated longer than the normal amount of time.
NOTICE
To prevent damage to the vehicle: • If the (
) indicator turns off
while you are in motion, do not
attempt to shift the gear to the P
(Park) position.
If traffic and road conditions permit,
you may put the gear in N (Neutral)
while the vehicle is still moving and
press the Start/Stop button in an
attempt to restart the vehicle.
• Do not push or tow your vehicle to
start the vehicle.