Replace HYUNDAI IONIQ 5 2023 Owner's Manual
[x] Cancel search | Manufacturer: HYUNDAI, Model Year: 2023, Model line: IONIQ 5, Model: HYUNDAI IONIQ 5 2023Pages: 680, PDF Size: 48.22 MB
Page 276 of 680
Convenience Features
5-84
Precautions while Using the
Head-up display
• It may sometimes be difficult to read
information on the Head-Up Display in
the following situations.
- The driver is improperly positioned in the driver’s seat
- The driver wears polarizing-filter sunglasses
- An object is located above the head-up display cover
- The vehicle is driven on a wet road
- Any improper lighting accessory is installed inside the vehicle, or there
is incoming light from outside of the
vehicle
- The driver wears glasses
- The driver wears contact lenses
When it is difficult to read the Head-
up display information, adjust the
image position, brightness level or
AR matching information from the
Settings menu in the infotainment
system screen.
• The AR mode display information may
be difficult to recognize when the
vehicle is driven under severe weather
condition, such as heavy rain, heavy
snow, low visibility, etc.
• Since the information displayed on
the head-up display partially overlaps
with the road ahead, you may feel
fatigue and discomfort while driving.
If you feel tired or uncomfortable,
adjust the image, and if the symptoms
persist, turn off the head-up display
before driving.
• When the direct flash light or
sunlight hits the front windshield, a
warning message will appear. If the
temperature of the front windshield
keep rises, Head-up display will be
deactivated temporarily to protect
Head-up display from the high
temperature. When the temperature
drops, Head-up display will be
reactivated. •
For your safety, make sure to stop the
vehicle before adjusting the settings.
• Do not tint the front windshield glass
or add other types of metallic coating.
Otherwise, the Head-Up Display
image may be invisible.
• Do not place any accessories on the
crash pad or attach any objects on the windshield glass.
• When replacing the front windshield
glass, replace it with a windshield
glass designed for Head-Up Display
operation. Otherwise, duplicated
images may be displayed on the windshield glass.
WARNING
• The warning information of Blind-
Spot Safety on the Head-Up Display
are supplemental. Do not solely
depend on them to change lanes.
Always take a look around before changing lanes.
The driving route guidance display
in the augmented reality mode is an
auxiliary function. Be sure to check
the navigation screen together.
• ALWAYS pay attention on the road
while driving when the Head-Up
Display is on.
Information
Head-Up Display includes GPL, LGPL,
MPL and other open source license
softwares. All license notices including
related source code are provided at http://
www.mobis.co.kr/opensource/list.do.
If the driver requests on-board
software open source code via MOBIS_
[email protected] within 3 years
after buying this product, a CD-ROM or
other storage device will be sent with the minimum cost covering storage device cost and delivery cost.
Page 279 of 680
05
5-87
High beam operation
ONE1051061
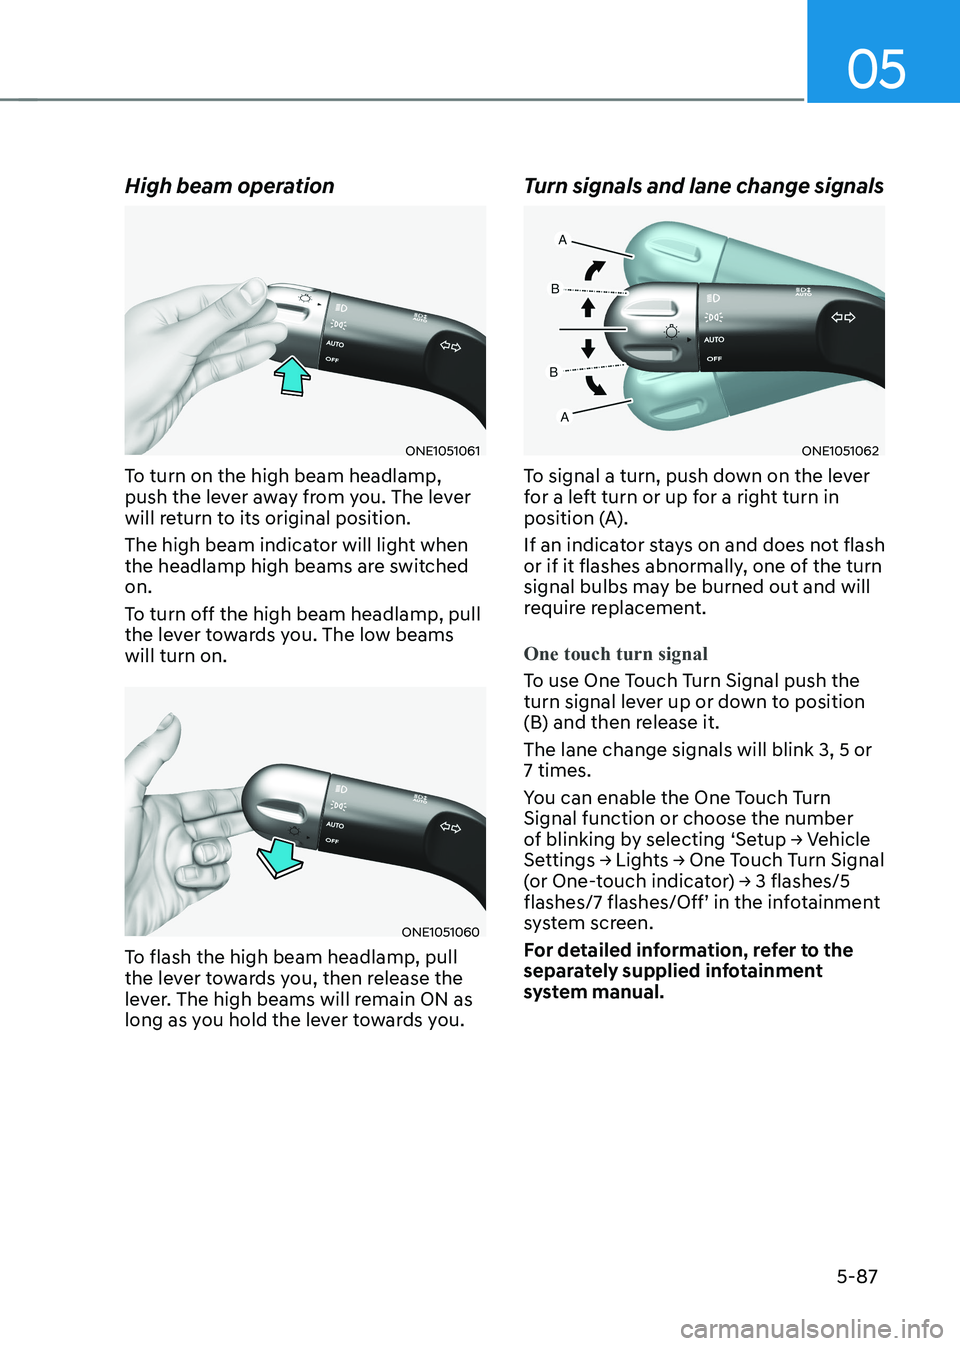
To turn on the high beam headlamp,
push the lever away from you. The lever
will return to its original position.
The high beam indicator will light when
the headlamp high beams are switched on.
To turn off the high beam headlamp, pull
the lever towards you. The low beams will turn on.
ONE1051060
To flash the high beam headlamp, pull
the lever towards you, then release the
lever. The high beams will remain ON as
long as you hold the lever towards you. Turn signals and lane change signals
ONE1051062
To signal a turn, push down on the lever
for a left turn or up for a right turn in
position (A).
If an indicator stays on and does not flash
or if it flashes abnormally, one of the turn
signal bulbs may be burned out and will
require replacement.
One touch turn signal
To use One Touch Turn Signal push the
turn signal lever up or down to position
(B) and then release it. The lane change signals will blink 3, 5 or 7 times.
You can enable the One Touch Turn Signal function or choose the number
of blinking by selecting ‘Setup → Vehicle
Settings → Lights → One Touch Turn Signal
(or One-touch indicator) → 3 flashes/5
flashes/7 flashes/Off’ in the infotainment
system screen.
For detailed information, refer to the
separately supplied infotainment
system manual.
Page 303 of 680
![HYUNDAI IONIQ 5 2023 Owners Manual 05
5-111
System Maintenance
Climate control air filter
OHI048581L
[A] : Outside air, [B] : Recirculated air
[C] : Climate control air filter, [D] : Blower
[E] : Evaporator core, [F] : PTC & Inner con](/img/35/56168/w960_56168-302.png "HYUNDAI IONIQ 5 2023 Owners Manual 05
5-111
System Maintenance
Climate control air filter
OHI048581L
[A] : Outside air, [B] : Recirculated air
[C] : Climate control air filter, [D] : Blower
[E] : Evaporator core, [F] : PTC & Inner con")
05
5-111
System Maintenance
Climate control air filter
OHI048581L
[A] : Outside air, [B] : Recirculated air
[C] : Climate control air filter, [D] : Blower
[E] : Evaporator core, [F] : PTC & Inner condenser
The cabin air filter is installed behind the
front trunk. It filters the dust or other
pollutants that enter the vehicle through
the heating and air conditioning system.
Have the cabin air filter replaced by an
authorized HYUNDAI dealer according to
the maintenance schedule. If the vehicle
is being driven in severe conditions such
as dusty or rough roads, more frequent
cabin air filter inspections and changes
are required.
If the air flow rate suddenly decreases,
have the system inspected at an
authorized HYUNDAI dealer.
Checking the amount of air
conditioner refrigerant and
compressor lubricant
When the amount of refrigerant is low,
the performance of the air conditioning
is reduced. Overfilling also reduces the
performance of the air conditixoning
system.
Therefore, if abnormal operation is
found, have the system inspected by an
authorized HYUNDAI dealer.
NOTICE
It is important that the correct type and
amount of oil and refrigerant is used.
Otherwise, damage to the compressor
and abnormal system operation may
occur. To prevent damage, the air
conditioning system in your vehicle
should only be serviced by trained and
certified technicians.
NOTICE
The refrigerant system should only
be serviced by trained and certified
technicians to insure proper and safe
operation.
The refrigerant system should be
serviced in a well-ventilated place.
The air conditioning evaporator (cooling
coil) shall never be repaired or replaced
with one removed from a used or
salvaged vehicle and new replacement
MAC evaporators shall be certified
(and labeled) as meeting SAE Standard J2842.
Page 333 of 680
06
6 -7
NOTICE
To prevent damage to the vehicle:
Do not press the Start/Stop button for
more than 10 seconds except when the
stop lamp fuse is blown.
When the stop lamp fuse is blown,
you cannot normally start the vehicle.
Replace the fuse with a new one. If you
are not able to replace the fuse, you
can start the vehicle by pressing and
holding the Start/Stop button for 10
seconds with the Start/Stop button in
the ACC position.
Pressing the brake pedal many times while “
” indicator light is off will
increase the possibility of discharging
the 12V battery.
For your safety always depress the
brake pedal before starting the vehicle.
Information
Virtual Engine Sound System(VESS) VESS generates virtual engine sound to
make pedestrians to aware. VESS operates
when the vehicle can be driven. When the
vehicle in P(parking) gear status, VESS doesn't work.
CAUTION
• Because the vehicle doesn't make
the engine sound, pay attention to
the surrounding environment and
drive carefully.
• After parking or waiting for a traffic
light, please check around(children,
obstacle, etc.) before departure.
• When reversing, check directly
behind you before driving.
Pedestrians may not be able to
recognize vehicle sounds.
ONE1061005
Information
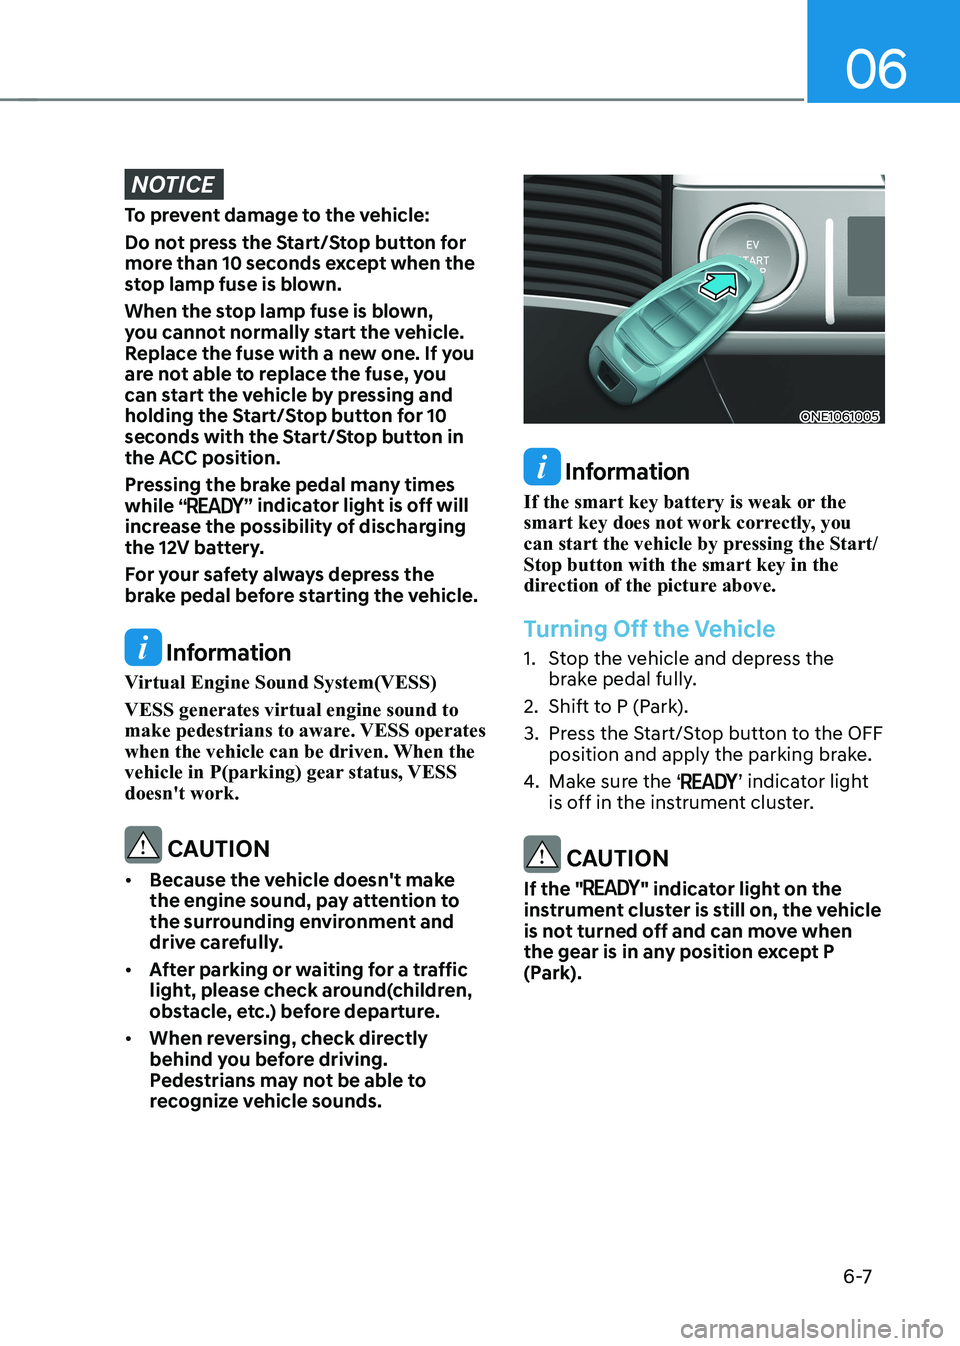
If the smart key battery is weak or the
smart key does not work correctly, you
can start the vehicle by pressing the Start/Stop button with the smart key in the
direction of the picture above.
Turning Off the Vehicle
1. Stop the vehicle and depress the brake pedal fully.
2. Shift to P (Park).
3. Press the Start/Stop button to the OFF position and apply the parking brake.
4. Make sure the ‘
’ indicator light
is off in the instrument cluster.
CAUTION
If the "
" indicator light on the
instrument cluster is still on, the vehicle
is not turned off and can move when
the gear is in any position except P
(Park).
Page 347 of 680
06
6-21
How to Operate
ONE1041017
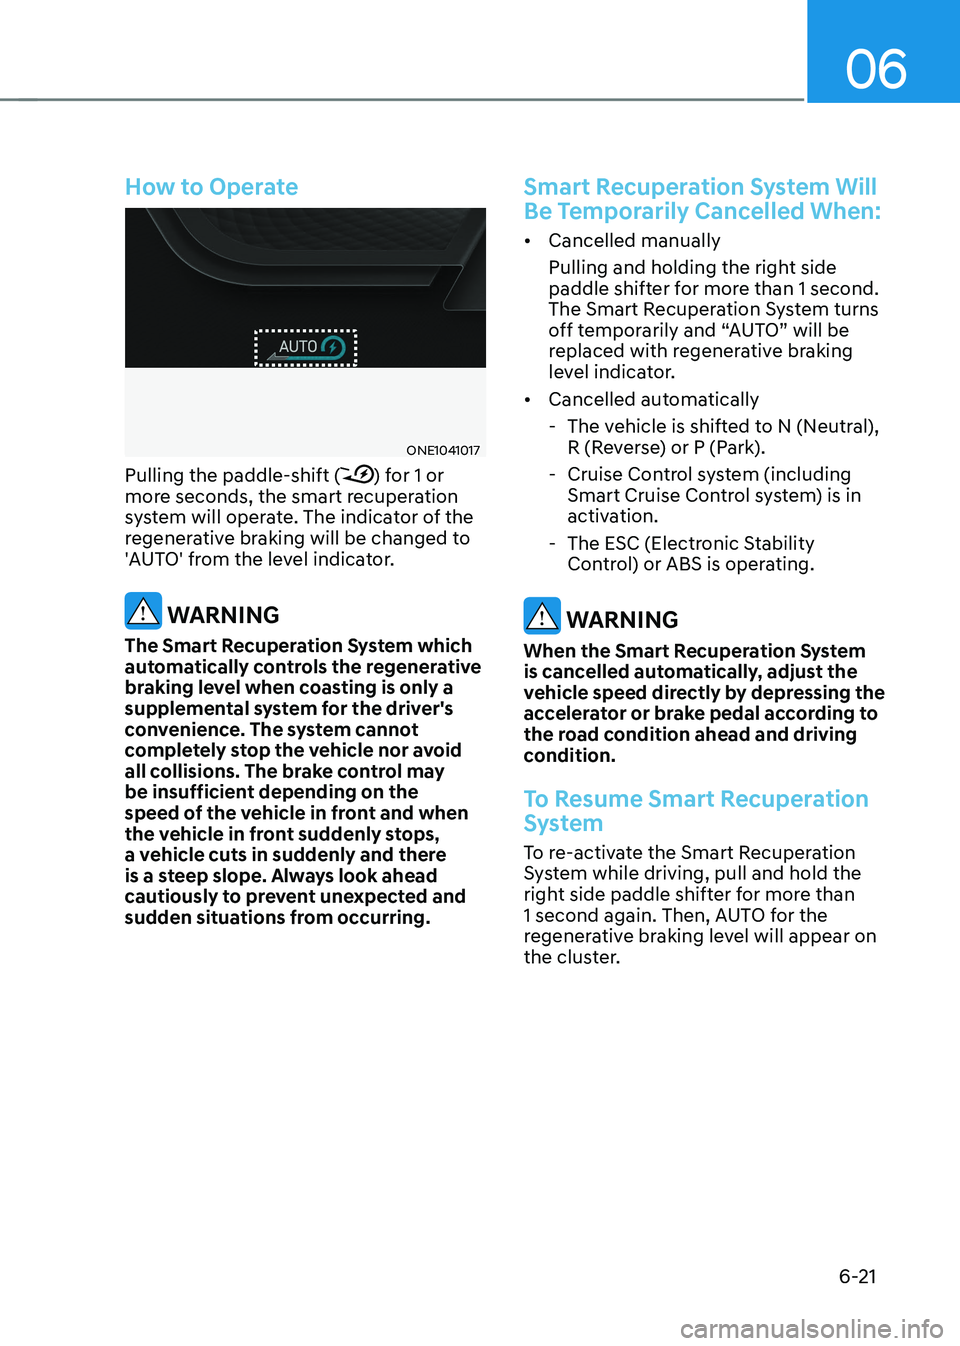
Pulling the paddle-shift (
) for 1 or
more seconds, the smart recuperation
system will operate. The indicator of the
regenerative braking will be changed to
'AUTO' from the level indicator.
WARNING
The Smart Recuperation System which
automatically controls the regenerative
braking level when coasting is only a
supplemental system for the driver's
convenience. The system cannot
completely stop the vehicle nor avoid
all collisions. The brake control may
be insufficient depending on the
speed of the vehicle in front and when
the vehicle in front suddenly stops,
a vehicle cuts in suddenly and there
is a steep slope. Always look ahead
cautiously to prevent unexpected and
sudden situations from occurring.
Smart Recuperation System Will
Be Temporarily Cancelled When:
• Cancelled manually
Pulling and holding the right side
paddle shifter for more than 1 second.
The Smart Recuperation System turns
off temporarily and “AUTO” will be
replaced with regenerative braking
level indicator.
• Cancelled automatically
- The vehicle is shifted to N (Neutral), R (Reverse) or P (Park).
- Cruise Control system (including Smart Cruise Control system) is in
activation.
- The ESC (Electronic Stability Control) or ABS is operating.
WARNING
When the Smart Recuperation System
is cancelled automatically, adjust the
vehicle speed directly by depressing the
accelerator or brake pedal according to
the road condition ahead and driving
condition.
To Resume Smart Recuperation
System
To re-activate the Smart Recuperation
System while driving, pull and hold the
right side paddle shifter for more than
1 second again. Then, AUTO for the
regenerative braking level will appear on
the cluster.
Page 348 of 680
![HYUNDAI IONIQ 5 2023 Owners Manual Driving Your Vehicle
6-22
Vehicle-to-Vehicle Distance
Recognition Sensor (Front
Radar)
ONE1071018
[2] : Front radar For detail location of sensor, refer to the picture
above.
In order for the](/img/35/56168/w960_56168-347.png "HYUNDAI IONIQ 5 2023 Owners Manual Driving Your Vehicle
6-22
Vehicle-to-Vehicle Distance
Recognition Sensor (Front
Radar)
ONE1071018
[2] : Front radar For detail location of sensor, refer to the picture
above.
In order for the")
Driving Your Vehicle
6-22
Vehicle-to-Vehicle Distance
Recognition Sensor (Front
Radar)
ONE1071018
[2] : Front radar For detail location of sensor, refer to the picture
above.
In order for the Smart Recuperation
System to operate properly, always make
sure the radar sensor cover is clean and
free of dirt, snow, and debris. Dirt, snow,
or foreign substances on the lens may
adversely affect the sensing performance
of the sensor. In this case, the system
operation may stop temporarily and not
operate normally.
CAUTION
• Do not apply license plate frame or
foreign objects such as a bumper
sticker or a bumper guard near the
radar sensor. Doing so may adversely
affect the sensing performance of
the radar.
• Always keep the radar sensor and
lens cover clean and free of dirt and debris.
• Use only a soft cloth to wash the
vehicle. Do not spray pressurized
water directly on the sensor or
sensor cover.
• Be careful not to apply unnecessary
force on the radar sensor or sensor
cover. If the sensor is forcibly
moved out of proper alignment,
the Smart Recuperation System
may not operate correctly. In this
case, a warning message may not
be displayed. Have the vehicle
inspected by an authorized HYUNDAI
dealer.
• If the front bumper becomes
damaged in the area around the
radar sensor, the Smart Recuperation
System may not operate properly.
Have the vehicle authorized
HYUNDAI dealer.
• Use only genuine parts or the
equivalent specified for your vehicle
to repair or replace a damaged
sensor or sensor cover. Do not apply
paint to the sensor cover.
Page 353 of 680
06
6-27
Disc Brakes Wear Indicator
When your brake pads are worn and new
pads are required, you will hear a high
pitched warning sound from your front
or rear brakes. You may hear this sound
come and go or it may occur whenever
you depress the brake pedal.
Note that some driving conditions or
climates may cause a brake squeal
when you first apply (or lightly apply)
the brakes. This is normal and does not
indicate a problem with your brakes.
NOTICE
To avoid costly brake repairs, do not
continue to drive with worn brake pads.
Information
Always replace brake pads as complete
front or rear axle sets.
WARNING
Frequent braking may deform
components and worn the disc brake
causing vibration when braking.
Observe the speed limit to prevent
brake damage from excessive braking.
Brake wear, noise, vibration from
excessive braking or deformation of the
brakes caused by repeatedly braking in
high speed, racing on tracks, etc. can be
excluded from warranty coverage.
Electronic Parking Brake (EPB)
Applying the parking brake
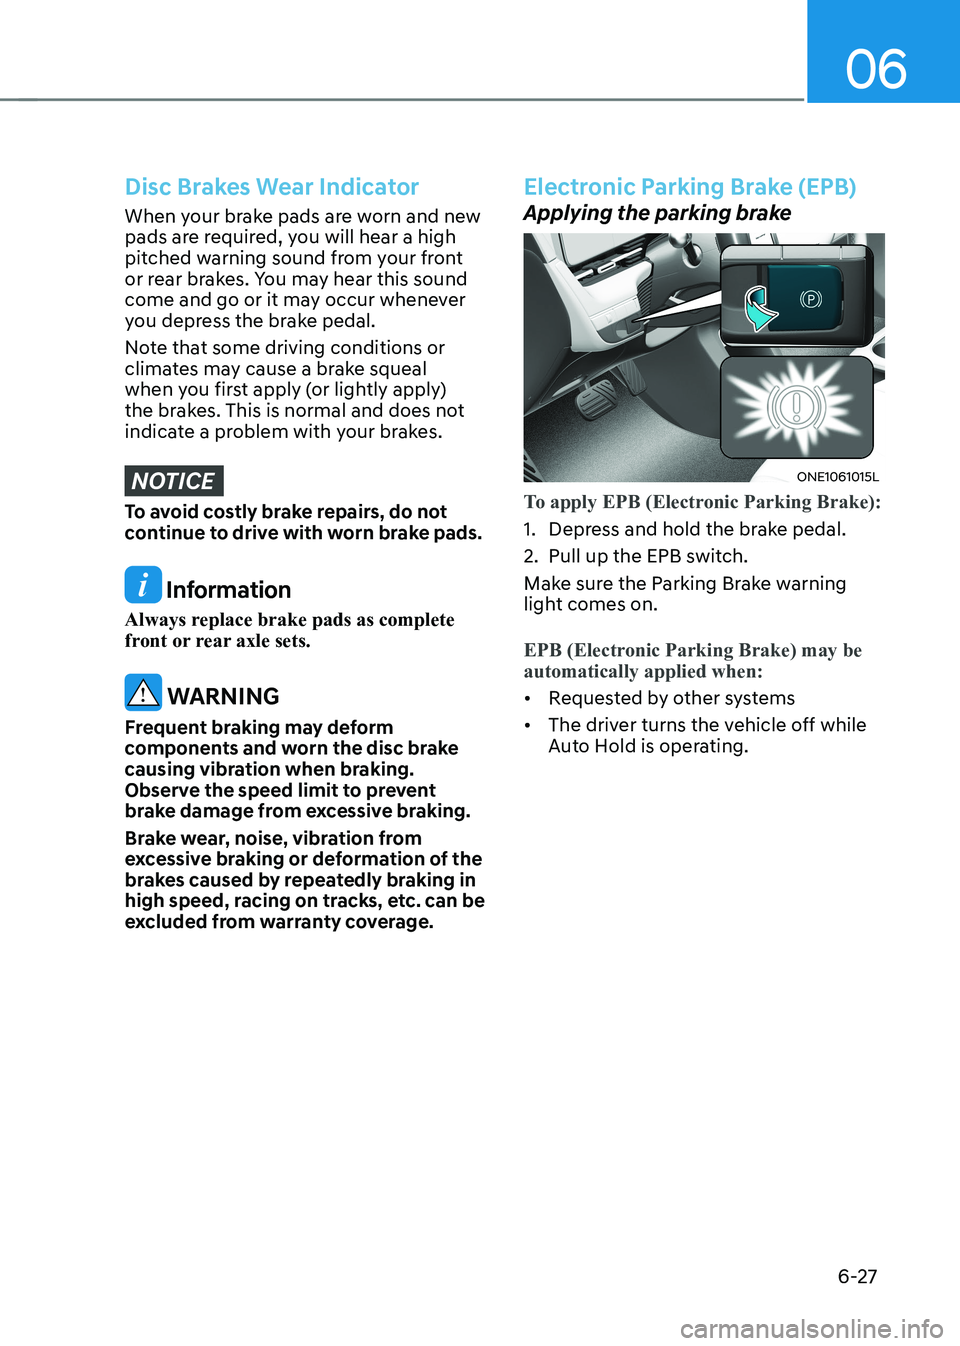
ONE1061015L
To apply EPB (Electronic Parking Brake):
1. Depress and hold the brake pedal.
2. Pull up the EPB switch.
Make sure the Parking Brake warning
light comes on.
EPB (Electronic Parking Brake) may be automatically applied when:
• Requested by other systems
• The driver turns the vehicle off while
Auto Hold is operating.
Page 380 of 680
Driving Your Vehicle
6-54
Information
The ESC system must be turned OFF
before rocking the vehicle.
NOTICE
If you are still stuck after rocking the
vehicle a few times, have the vehicle
pulled out by a tow vehicle to avoid
motor overheating, possible damage
to the reduction gear, and tire damage.
See “Towing” section in chapter 8.
Smooth Cornering
Avoid braking or gear changing in
corners, especially when roads are wet.
Ideally, corners should always be taken
under gentle acceleration.
Driving at Night
Night driving presents more hazards than
driving in the daylight. Here are some
important tips to remember: • Slow down and keep more distance
between you and other vehicles, as it
may be more difficult to see at night,
especially in areas where there may
not be any street lights.
• Adjust your mirrors to reduce the glare
from other drivers’ headlamps.
• Keep your headlamps clean and
properly aimed. Dirty or improperly
aimed headlamps will make it much
more difficult to see at night.
• Avoid staring directly at the
headlamps of oncoming vehicles. You
could be temporarily blinded, and it
will take several seconds for your eyes
to readjust to the darkness.
Driving in the Rain
Rain and wet roads can make driving
dangerous. Here are a few things to
consider when driving in the rain or on
slick pavement: • Slow down and allow extra following
distance. A heavy rainfall makes
it harder to see and increases the
distance needed to stop your vehicle.
• Turn OFF your Cruise Control. (if equipped)
• Replace your windshield wiper blades
when they show signs of streaking or
missing areas on the windshield.
• Be sure your tires have enough tread.
If your tires do not have enough tread,
making a quick stop on wet pavement
can cause a skid and possibly lead to
an accident. See “Tire Tread” section
in chapter 9 .
• Turn on your headlamps to make it
easier for others to see you.
• Driving too fast through large puddles
can affect your brakes. If you must go
through puddles, try to drive through
them slowly.
• If you believe your brakes may be wet,
apply them lightly while driving until
normal braking operation returns.
Page 406 of 680
![HYUNDAI IONIQ 5 2023 Owners Manual Driver Assistance System
7-4
Detecting sensor
ONE1071002K
ONE1071003
ONE1071004N
[1]: Front view camera, [2]: Front radar,
[3]: Front corner radar (if equipped),
[4]: Rear corner radar (if equipped](/img/35/56168/w960_56168-405.png "HYUNDAI IONIQ 5 2023 Owners Manual Driver Assistance System
7-4
Detecting sensor
ONE1071002K
ONE1071003
ONE1071004N
[1]: Front view camera, [2]: Front radar,
[3]: Front corner radar (if equipped),
[4]: Rear corner radar (if equipped")
Driver Assistance System
7-4
Detecting sensor
ONE1071002K
ONE1071003
ONE1071004N
[1]: Front view camera, [2]: Front radar,
[3]: Front corner radar (if equipped),
[4]: Rear corner radar (if equipped)
Refer to the picture above for the
detailed location of the detecting
sensors.
CAUTION
Take the following precautions to
maintain optimal performance of the
detecting sensor: • Never disassemble the detecting
sensor or sensor assembly, or cause
any damage to it.
• If the detecting sensors have
been replaced or repaired, have
the vehicle be inspected by an
authorized HYUNDAI dealer.
• Never install any accessories or
stickers on the front windshield, or
tint the front windshield.
• Pay extreme caution to keep the
front view camera dry.
• Never place any reflective objects
(for example, white paper, mirror)
over the dashboard.
• Do not place any objects near the
front windshield or install any
accessories on the front windshield.
It can affect the performance of the
defogging and defrosting function
of the climate control system, which
may prevent the Driver Assistance
systems from operating
• Do not place objects or mount
structures near the windshield.
When operating the air conditioner,
moisture and defrost performance
may be poor, and driver assistance
functions may not work.
• Do not apply license plate frame or
objects, such as a bumper sticker,
film or a bumper guard, near the
front radar cover.
• Always keep the front radar and
cover clean and free of dirt and debris.
Use only a soft cloth to wash the
vehicle. Do not spray pressurized
water directly on the sensor or
sensor cover.
Page 407 of 680
07
7-5
•
If unnecessary force has been
applied to the radar or around the
radar, Forward Collision-Avoidance
Assist may not properly operate
even though a warning message
does not appear on the cluster.
Have the vehicle be inspected by an
authorized HYUNDAI dealer.
• Use only genuine parts to repair or
replace a damaged front radar cover.
Do not apply paint to the front radar
cover.
• Vehicles equipped with front corner
radar and/or rear corner radar
- Do not apply license plate frame or
objects, such as a bumper sticker,
film or a bumper guard, near the
front corner radar or rear corner
radar.
- The function may not work
properly when the bumper has
been replaced, or the surroundings
of the front corner radar or rear
corner radar has been damaged or
paint has been applied.
- If a trailer, carrier, etc., is installed,
it may adversely affect the
performance of the rear corner
radar or Forward Collision-
Avoidance Assist may not operate
properly.
Forward Collision-Avoidance
Assist Settings
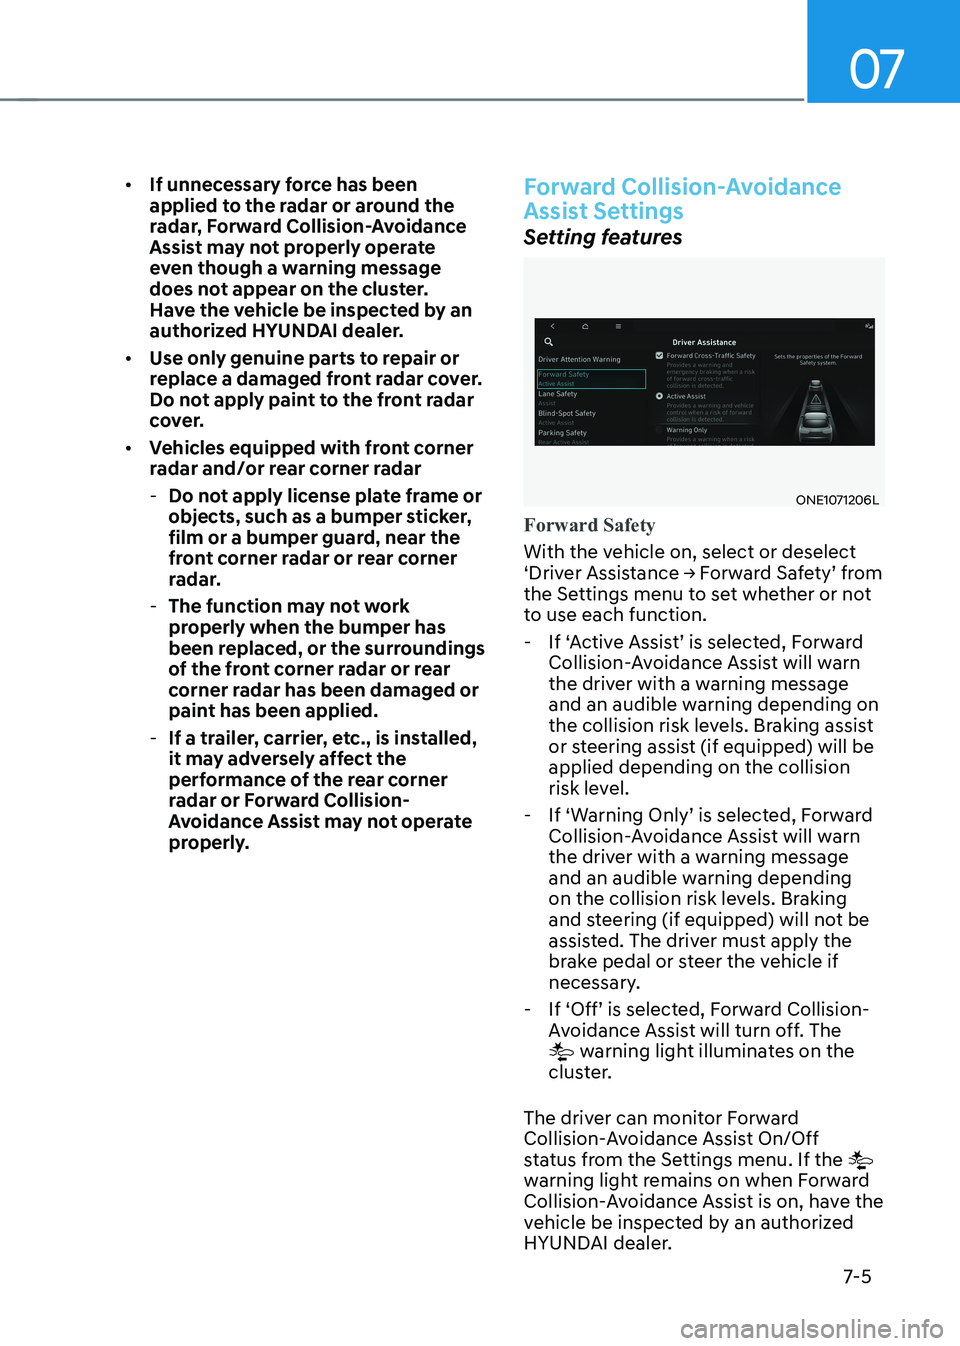
Setting features
ONE1071206L
Forward Safety
With the vehicle on, select or deselect
‘Driver Assistance → Forward Safety’ from
the Settings menu to set whether or not
to use each function.
- If ‘Active Assist’ is selected, Forward Collision-Avoidance Assist will warn
the driver with a warning message
and an audible warning depending on
the collision risk levels. Braking assist
or steering assist (if equipped) will be applied depending on the collision
risk level.
- If ‘Warning Only’ is selected, Forward Collision-Avoidance Assist will warn
the driver with a warning message
and an audible warning depending
on the collision risk levels. Braking
and steering (if equipped) will not be
assisted. The driver must apply the
brake pedal or steer the vehicle if
necessary.
- If ‘Off’ is selected, Forward Collision- Avoidance Assist will turn off. The
warning light illuminates on the
cluster.
The driver can monitor Forward
Collision-Avoidance Assist On/Off
status from the Settings menu. If the
warning light remains on when Forward
Collision-Avoidance Assist is on, have the
vehicle be inspected by an authorized
HYUNDAI dealer.