Schedule HYUNDAI IONIQ 6 2023 Owners Manual
[x] Cancel search | Manufacturer: HYUNDAI, Model Year: 2023, Model line: IONIQ 6, Model: HYUNDAI IONIQ 6 2023Pages: 582, PDF Size: 10.77 MB
Page 7 of 582
1
1. Introduction/Getting Started with Your Electric Vehicle
Introduction ...................................................................................................................... 1-3
HYUNDAI Motor America................................................................................................. 1-3
Guide to HYUNDAI Genuine Parts ...................................................................................1-4
How to Use This Manual .................................................................................................. 1-5
Safety Messages ...............................................................................................................1-6
Vehicle Modifications ....................................................................................................... 1-7
Vehicle Data Collection and Event Data Recorders ....................................................... 1-7
About "Getting Started with Your Electric Vehicle" ...................................................... 1-8
Understanding Your Electric Vehicle ..............................................................................1-9
Characteristics of Your Electric Vehicle ......................................................................1-9Precautions When Using the High Voltage Battery.................................................. 1-10
Other Precautions for Electric Vehicle Management................................................ 1-11
Charging Your Electric Vehicle ...................................................................................... 1-12 Safety Precautions for Charging Your Electric Vehicle ............................................ 1-12
Checking Basic Information on Charging Your Electric Vehicle ............................. 1-15
Using an AC Charger................................................................................................... 1-21
Using a DC Charger.....................................................................................................1-24
Using a Portable Charger (ICCB) ...............................................................................1-26
Using EV Mode Functions ..............................................................................................1-33 Checking the EV Mode Screen Configuration ..........................................................1-33
Checking Energy Information ....................................................................................1-34
Setting the Next Departure Time............................................................................... 1-37
Setting Scheduled Charging and Climate ................................................................ 1-38
Setting a Battery Discharging Limit When Using Vehicle to Load (V2L)................ 1-40
Setting Electric Vehicle Specialized Functions ......................................................... 1-41
Using V2L Function........................................................................................................ 1-46 Safety Precautions When Using the V2L Function .................................................. 1-46
Using Electricity Outside the Vehicle ....................................................................... 1-48
Using Electricity Inside the Vehicle .......................................................................... 1-49
Solving V2L Problems ................................................................................................. 1-51
Aux. Battery Saver+ ........................................................................................................ 1-52
Driving Your Electric Vehicle .........................................................................................1-53 Starting and Stopping the Vehicle .............................................................................1-53
Checking Electric Vehicle Driving Information.........................................................1-54
Hyundai_CE_en_US.book Page 1
Page 29 of 582
1
1-23
WARNING Do not touch the charging connector of the charging cable or the charging inlet on the
vehicle.
5. Remove the charging connector protection cap of the AC charging cable, hold the charging connector handle, and connect it to the AC charging inlet on the vehicle. Push
it until you hear a click.
6. [If using separately purchased charging cable] Remove the charging plug protection
cap of the AC charging cable, hold the charging plug handle, and connect it to the
electric outlet (120 V) of the AC charger.
• This process is required only when using a separately purchased AC charging cable. If you use a charging cable installed in an AC charger, a separate charging plug
connection is not required.
• When charging starts, the estimated charging time will be displayed on the instrument cluster for about one minute.
Information • If you open the driver’s door while charging, the estimated charging time will also be displayed on the instrument cluster for about one minute.
• When scheduled charging is set, a message saying "Waiting to charge at scheduled time" will be displayed.
• When scheduled air conditioner or heater operates while waiting for the scheduled charging, the estimated charging time will be displayed as “-”.
7. [If using a separately purchased charging cable] When charging is complete, hold the
charging plug handle, disconnect the charging plug from the electric outlet (120 V) of
the AC charger, and close the protection cap of the charging plug.
• This process is required only when using an AC charging cable purchased separately. If you use a charging cable installed in an AC charger, a separate charging plug
disconnection is not required.
8. Hold the charging connector handle with the unlock button pressed, and pull the charging connector to disconnect it from the charging inlet.
CAUTION Do not forcibly disconnect the charging connector without pressing the unlock button
on the charging connector. It may damage the charging connector or the charging
inlet on the vehicle.
9. Close the charging inlet cover and press the charging door to completely close it.
Hyundai_CE_en_US.book Page 23
Page 37 of 582
1
1-31
WARNING Do not touch interior of the charging connector of the charging cable or the charging
inlet of the vehicle.
7. Remove the charging connector protection cap of the portable charging cable, hold the charging connector handle, and connect it to the AC charging inlet of the vehicle.
Push it until you hear a click.
• When charging starts, the estimated charging time will be displayed on the instrument cluster for about one minute.
Information • If you open the driver’s door while charging, the estimated charging time will also be displayed on the instrument cluster for about one minute.
• When scheduled charging is set, a message saying “Waiting to charge at scheduled time” will be displayed.
• When scheduled air conditioner or heater operates while waiting for the scheduled charging, the estimated charging time will be displayed as ‘-’.
8. When charging is complete, hold the charging connector handle with the unlock button pressed and pull on the charging connector to disconnect it from the charging
inlet.
Information If you have set the charging connector locking mode as Alwaysor While Charging , unlock the
door by pressing the button on the smart key or the button on the driver’s door, and disconnect
the charging connector from the charging inlet.
• For more information, refer to the “Setting charging connector locking mode” section in this chapter.
9. Close the charging inlet cover.
10.Press the charging door to completely close it.
Using the scheduled charging function
The scheduled charging function allows you to charge your vehicle using low cost, late
night power until the next departure time.
Information You can use the scheduled charging function only when using an AC charger or the portable
charger (ICCB: In-Cable Control Box). For more information about connecting an AC charger and
portable charger, refer to the “Using an AC Charger”and “Using a Portable Charger (ICCB)”
section in this chapter.
Hyundai_CE_en_US.book Page 31
Page 38 of 582
Introduction/Getting Started with Your Electric Vehicle
1-32
On the infotainment system, select EV > Scheduled Charging and Climate > Scheduled
Charging , set the date and time of when to charge the battery, and select an option.
• For more information, refer to the “Setting Scheduled Charging and Climate” section in this chapter.
• When scheduled charging is set and the AC charger or the portable charger (ICCB) is connected for charging, the indicator light gradually illuminates for three minutes to
indicate that scheduled charging is set.
• When scheduled charging is set, charging is not started immediately when the AC charger or portable charger (ICCB) is connected. To charge the vehicle immediately,
select EV > Scheduled Charging and Climate > Scheduled Charging on the screen and
deactivate the scheduled charge setting.
Information • You can set up or cancel scheduled charging using the HYUNDAI BlueLink app on your smartphone. For more information, refer to the user's manual provided in the infotainment
system and the quick reference guide.
• Charging may start immediately after a charger is connected to the vehicle, depending on the charging time calculated when setting up the scheduled charging.
Hyundai_CE_en_US.book Page 32
Page 39 of 582
1
1-33
Using EV Mode Functions
EV mode provides driving information and high voltage battery information. You can set
various electric vehicle functions in EV mode.
Checking the EV Mode Screen Configuration
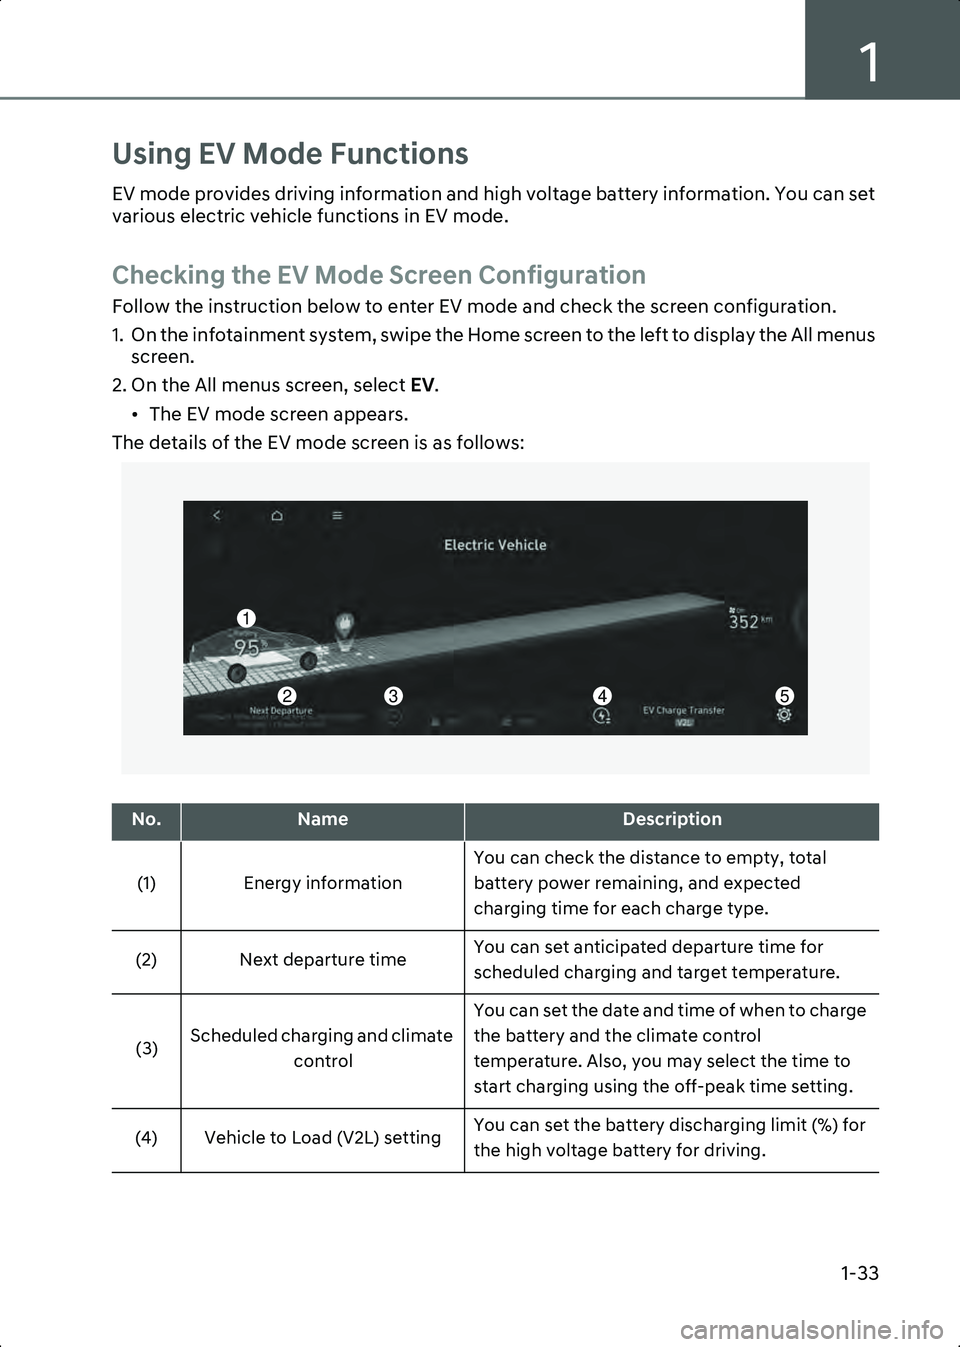
Follow the instruction below to enter EV mode and check the screen configuration.
1. On the infotainment system, swipe the Home screen to the left to display the All menus screen.
2. On the All menus screen, select EV.
• The EV mode screen appears.
The details of the EV mode screen is as follows:
A0001601
No.NameDescription
(1) Energy information You can check the distance to empty, total
battery power remaining, and expected
charging time for each charge type.
(2) Next departure time You can set anticipated departure time for
scheduled charging and target temperature.
(3) Scheduled charging and climate
control You can set the date and time of when to charge
the battery and the climate control
temperature. Also, you may select the time to
start charging using the off-peak time setting.
(4) Vehicle to Load (V2L) setting You can set the battery discharging limit (%) for
the high voltage battery for driving.
1
2345
Hyundai_CE_en_US.book Page 33
Page 43 of 582
1
1-37
Checking the electric energy economy history
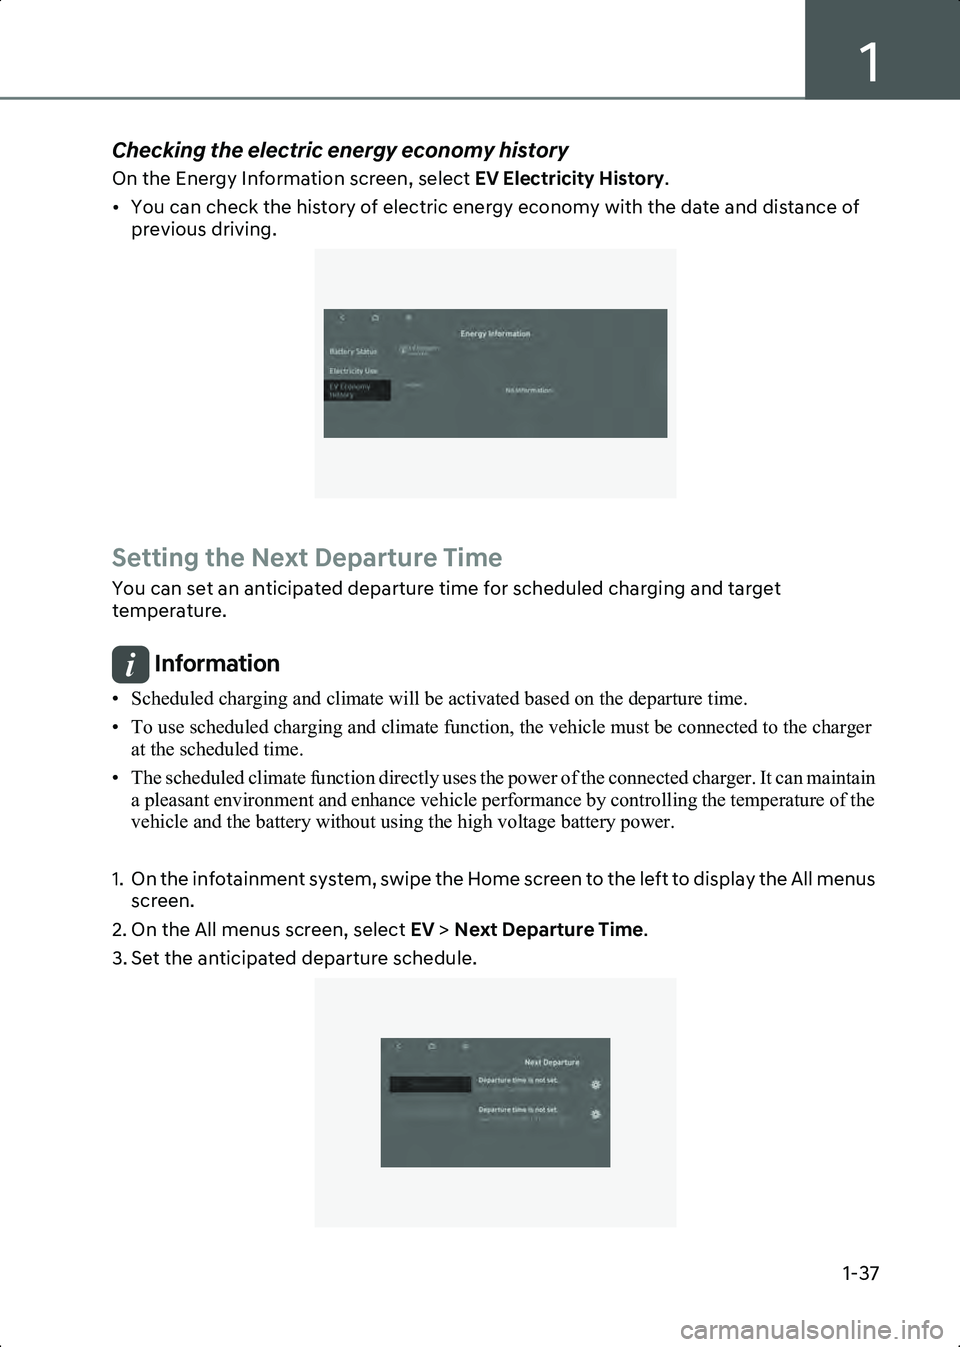
On the Energy Information screen, select EV Electricity History.
• You can check the history of electric energy economy with the date and distance of previous driving.
B0001704
Setting the Next Departure Time
You can set an anticipated departure time for scheduled charging and target
temperature.
Information • Scheduled charging and climate will be activated based on the departure time.
• To use scheduled charging and climate function, the vehicle must be connected to the charger at the scheduled time.
• The scheduled climate function directly uses the power of the connected charger. It can maintain a pleasant environment and enhance vehicle performance by controlling the temperature of the
vehicle and the battery without using the high voltage battery power.
1. On the infotainment system, swipe the Home screen to the left to display the All menus screen.
2. On the All menus screen, select EV > Next Departure Time .
3. Set the anticipated departure schedule.
B0001801
Hyundai_CE_en_US.book Page 37
Page 44 of 582
Introduction/Getting Started with Your Electric Vehicle
1-38
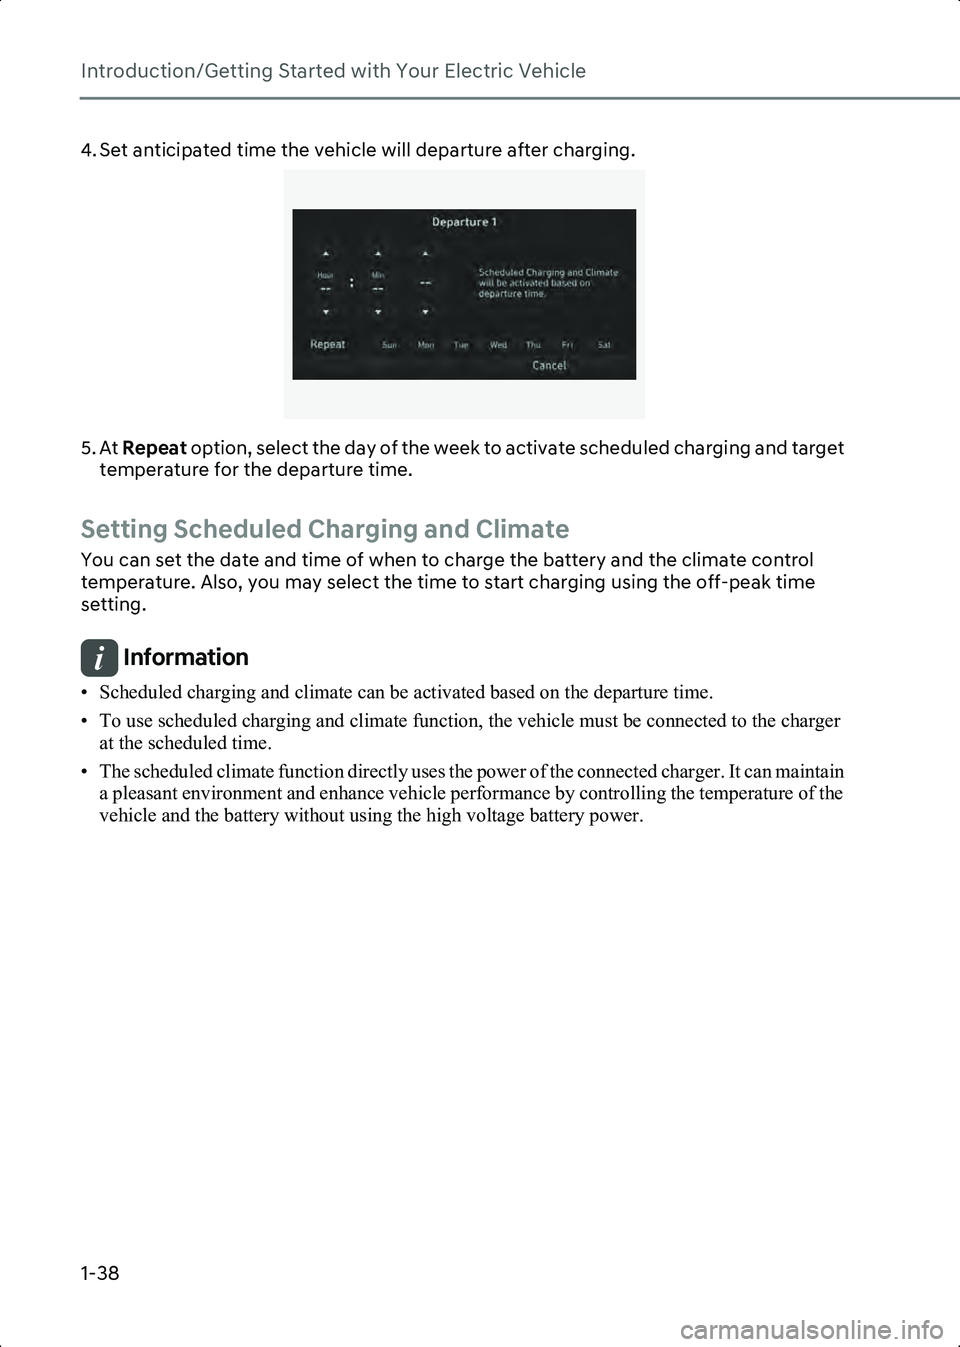
4. Set anticipated time the vehicle will departure after charging.
B0001802
5. At Repeat option, select the day of the week to activate scheduled charging and target
temperature for the departure time.
Setting Scheduled Charging and Climate
You can set the date and time of when to charge the battery and the climate control
temperature. Also, you may select the time to start charging using the off-peak time
setting.
Information • Scheduled charging and climate can be activated based on the departure time.
• To use scheduled charging and climate function, the vehicle must be connected to the charger at the scheduled time.
• The scheduled climate function directly uses the power of the connected charger. It can maintain a pleasant environment and enhance vehicle performance by controlling the temperature of the
vehicle and the battery without using the high voltage battery power.
Hyundai_CE_en_US.book Page 38
Page 45 of 582
1
1-39
Setting scheduled charging
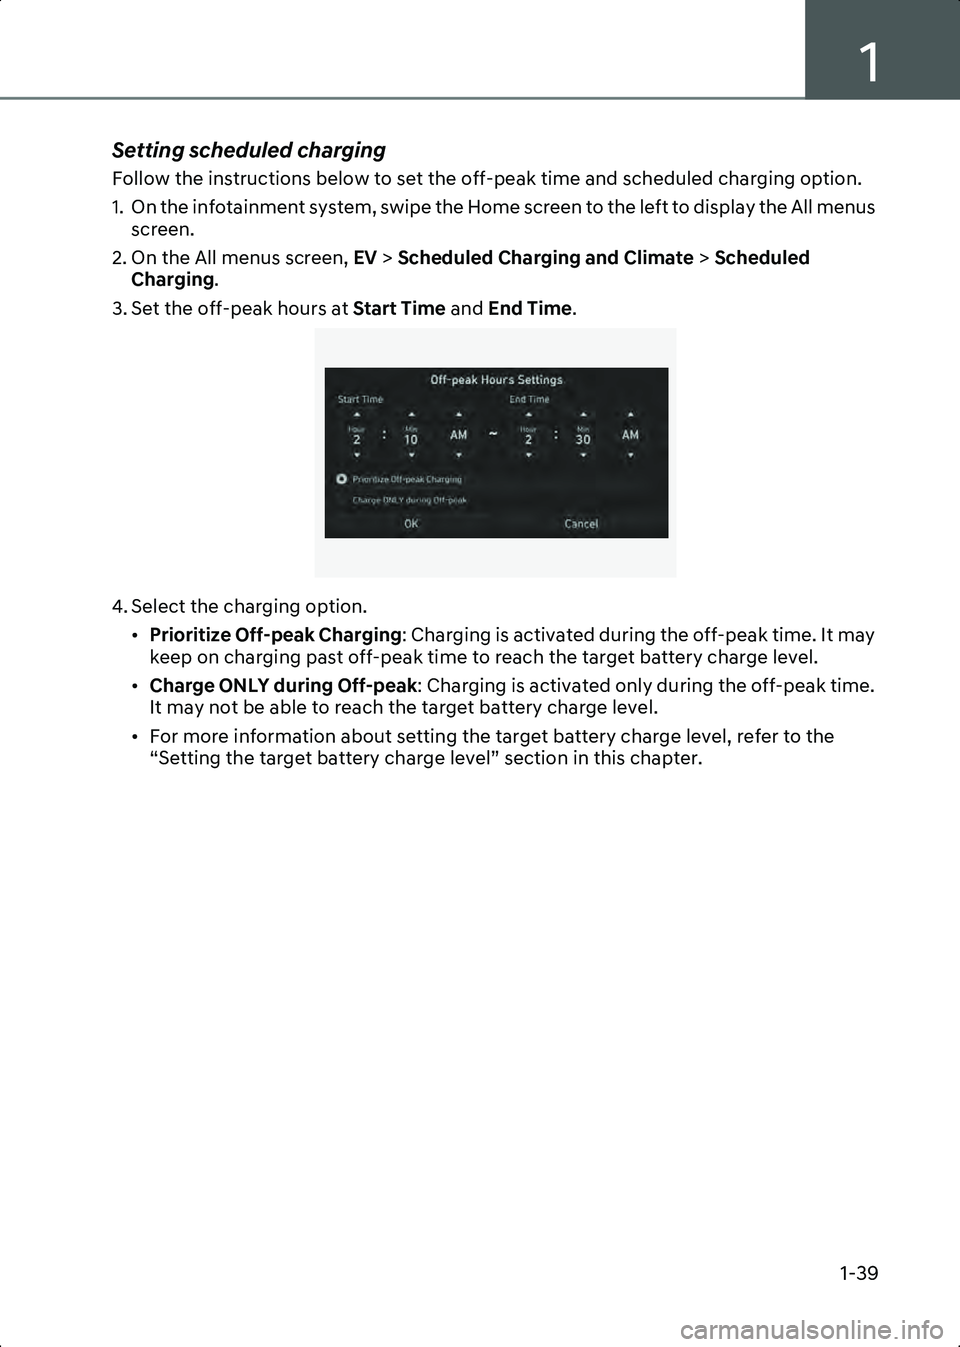
Follow the instructions below to set the off-peak time and scheduled charging option.
1. On the infotainment system, swipe the Home screen to the left to display the All menus screen.
2. On the All menus screen, EV > Scheduled Charging and Climate > Scheduled
Charging .
3. Set the off-peak hours at Start Time and End Time.
B0001901
4. Select the charging option.
•Prioritize Off-peak Charging : Charging is activated during the off-peak time. It may
keep on charging past off-peak time to reach the target battery charge level.
• Charge ONLY during Off-peak : Charging is activated only during the off-peak time.
It may not be able to reach the target battery charge level.
• For more information about setting the target battery charge level, refer to the “Setting the target battery charge level” section in this chapter.
Hyundai_CE_en_US.book Page 39
Page 46 of 582
Introduction/Getting Started with Your Electric Vehicle
1-40
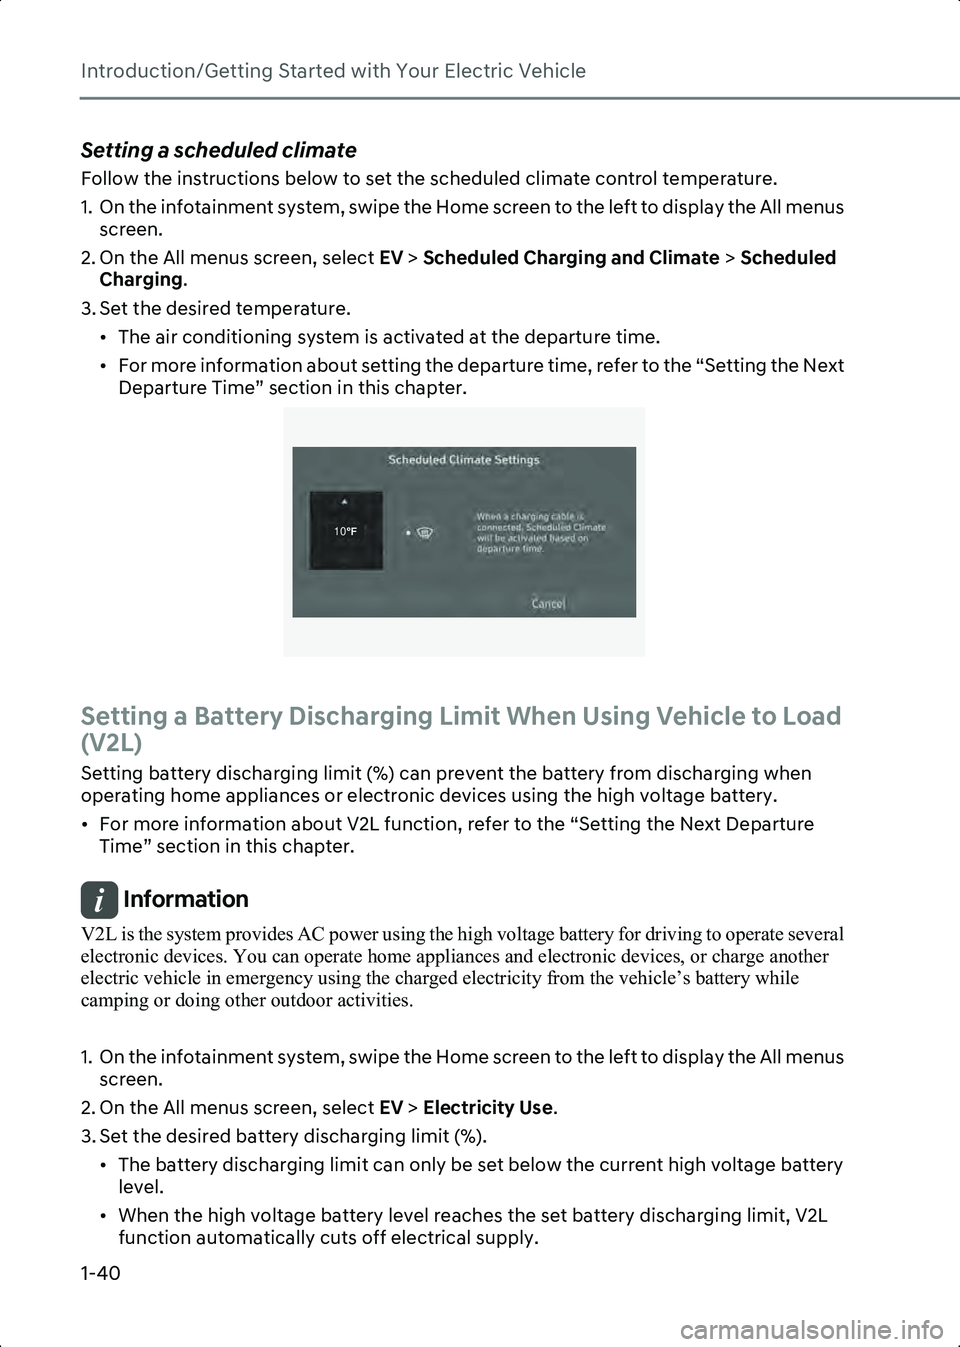
Setting a scheduled climate
Follow the instructions below to set the scheduled climate control temperature.
1. On the infotainment system, swipe the Home screen to the left to display the All menus screen.
2. On the All menus screen, select EV > Scheduled Charging and Climate > Scheduled
Charging .
3. Set the desired temperature. • The air conditioning system is activated at the departure time.
• For more information about setting the departure time, refer to the “Setting the Next Departure Time” section in this chapter.
B0001902
Setting a Battery Discharging Limit When Using Vehicle to Load
(V2L)
Setting battery discharging limit (%) can prevent the battery from discharging when
operating home appliances or electronic devices using the high voltage battery.
• For more information about V2L function, refer to the “Setting the Next Departure Time” section in this chapter.
Information V2L is the system provides AC power using the high voltage battery for driving to operate several
electronic devices. You can operate home appliances and electronic devices, or charge another
electric vehicle in emergency using the charged electricity from the vehicle’s battery while
camping or doing other outdoor activities.
1. On the infotainment system, swipe the Home screen to the left to display the All menus screen.
2. On the All menus screen, select EV > Electricity Use .
3. Set the desired battery discharging limit (%). • The battery discharging limit can only be set below the current high voltage battery level.
• When the high voltage battery level reaches the set battery discharging limit, V2L function automatically cuts off electrical supply.
10�×
Hyundai_CE_en_US.book Page 40
Page 49 of 582
1
1-43
Information Be aware of the followings when using battery conditioning mode.
• The driving distance may be reduced as energy is required to increase the battery temperature.
• If the battery temperature is low during driving or when the scheduled air conditioner/heater is activated, the battery conditioning mode is operated to improve driving performance. To ensure
driving distance the battery conditioning mode will not be operated when the battery level is too
low.
• If you set the DC charging station as your destination while using the battery conditioning mode, the battery temperature is optimized for charging and you can shorten the charging time after
you arrive and start charging.
• Battery conditioning mode is available for vehicles equipped with the battery heater.
Setting Utility Mode
Utility mode allows the high voltage battery to be used instead of the 12 V auxiliary
battery for purposes other than driving. You can use the audio and lights of the vehicle
without discharging the 12 V auxiliary battery and even use the indoor V2L feature.
Information • You cannot drive the vehicle while the utility mode is activated, and the gear can only be shifted to P (Park).
• You can use every electric device in the vehicle while the utility mode is activated.
• When the utility mode is activated, the Electronic Parking Brake (EPB) is applied automatically.
Follow the instructions below to set the utility mode.
1. Check the operation conditions of the utility mode. • The (ready indicator) is displayed on the instrument cluster.
• The gear is shifted to P (Park).
2. On the infotainment system, swipe the Home screen to the left to display the All menus screen.
3. On the All menus screen, select EV > (EV Settings) > Utility mode and select Activate
Utility mode to activate the function (Utility Mode: ON).
Hyundai_CE_en_US.book Page 43