display Hyundai Ioniq Electric 2018 User Guide
[x] Cancel search | Manufacturer: HYUNDAI, Model Year: 2018, Model line: Ioniq Electric, Model: Hyundai Ioniq Electric 2018Pages: 541, PDF Size: 19.83 MB
Page 111 of 541
3-26
Convenient features of your vehicle
Erasing HomeLink®buttons
Individual buttons cannot be erased.
However, to erase all three pro-
grammed buttons:
1. Press and hold the two outerHomeLink
®buttons until the indi-
cator light begins to flash after 10
seconds.
2. Release both buttons. Do not hold for longer than 20 seconds.
The Integrated HomeLink
®Wireless
Control System is now in the training
(learn) mode and can be pro-
grammed at any time following the
appropriate steps in the
Programming chapters above.
NVS
®is a registered trademark and
Z-Nav™ is a trademark of the Gentex
Corporation, Zeeland, Michigan.
HomeLink
®is a registered trademark
owned by Johnson Controls,
Incorporated, Milwaukee, Wisconsin.
FCC ID: NZLTLMHL4
IC: 4112A-TLMHL4
Information
This device complies with Part 15 of
the FCC Rules.
Operation is subject to the following
three conditions:
1. This device may not cause harmful interference, and
2. This device must accept any inter- ference received, including interfer-
ence that may cause undesired
operation.
3. The transceiver has been tested and complies with FCC and Industry
Canada rules. Changes or modifica-
tions not expressly approved by the
party responsible for compliance
could void the user's authority to
operate the device.
Electric chromic mirror (ECM)with compass and HomeLink®
system (for Canada)
Your vehicle may be equipped with a
Gentex Automatic-Dimming Mirror
with a Z-Nav™ Electronic Compass
Display and an Integrated HomeLink
®
Wireless Control System.
During nighttime driving, this feature
will automatically detect and reduce
rearview mirror glare while the com-
pass indicates the direction the vehi-
cle is pointed. The HomeLink
®
Universal Transceiver allows you to
activate your garage door(s), electric
gate, home lighting, etc.
i
Page 112 of 541
3-27
Convenient features of your vehicle
3
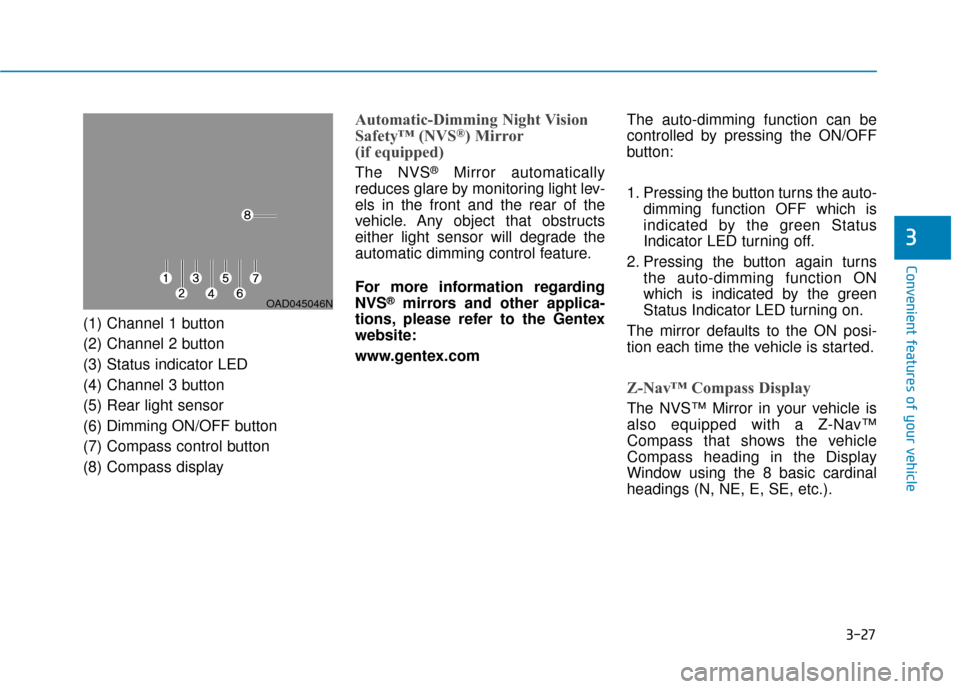
(1) Channel 1 button
(2) Channel 2 button
(3) Status indicator LED
(4) Channel 3 button
(5) Rear light sensor
(6) Dimming ON/OFF button
(7) Compass control button
(8) Compass display
Automatic-Dimming Night Vision
Safety™ (NVS®) Mirror
(if equipped)
The NVS®Mirror automatically
reduces glare by monitoring light lev-
els in the front and the rear of the
vehicle. Any object that obstructs
either light sensor will degrade the
automatic dimming control feature.
For more information regarding
NVS
®mirrors and other applica-
tions, please refer to the Gentex
website:
www.gentex.com The auto-dimming function can be
controlled by pressing the ON/OFF
button:
1. Pressing the button turns the auto-
dimming function OFF which is
indicated by the green Status
Indicator LED turning off.
2. Pressing the button again turns the auto-dimming function ON
which is indicated by the green
Status Indicator LED turning on.
The mirror defaults to the ON posi-
tion each time the vehicle is started.
Z-Nav™ Compass Display
The NVS™ Mirror in your vehicle is
also equipped with a Z-Nav™
Compass that shows the vehicle
Compass heading in the Display
Window using the 8 basic cardinal
headings (N, NE, E, SE, etc.).
OAD045046N
Page 113 of 541
3-28
Convenient features of your vehicle
B520C05NF
Compass function
The Compass can be turned ON and
OFF and will remember the last state
when the vehicle is cycled. To turn
the display feature ON/OFF:
1. Press and release the button toturn the display feature OFF.
2. Press and release the button again to turn the display back ON.
Additional options can be set with
press and hold sequences of the but-
ton and are detailed below.
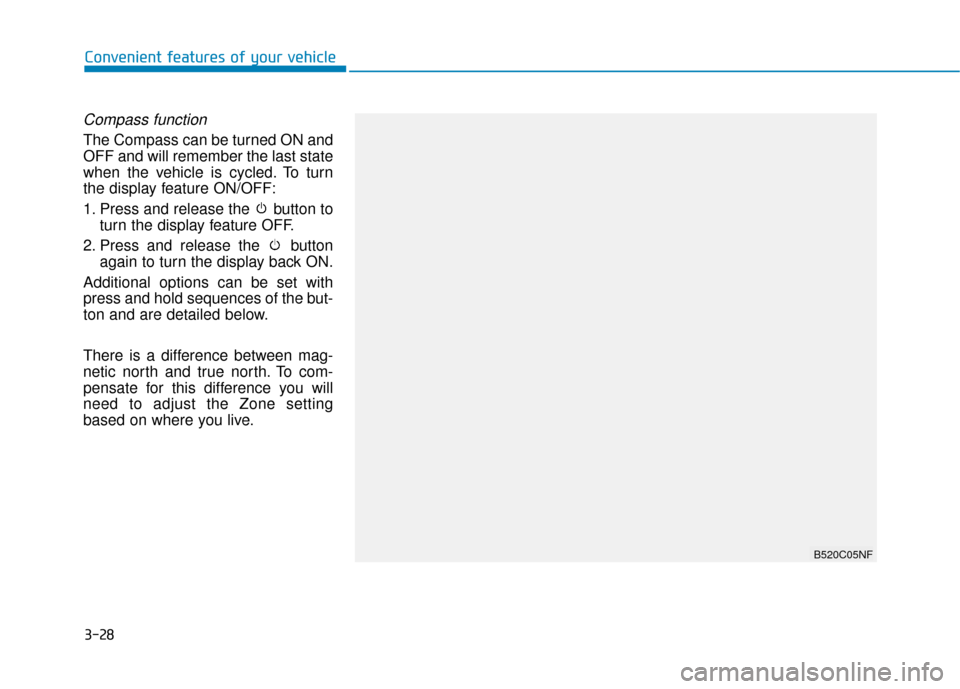
There is a difference between mag-
netic north and true north. To com-
pensate for this difference you will
need to adjust the Zone setting
based on where you live.
Page 114 of 541
3-29
Convenient features of your vehicle
3
To adjust the Zone setting:
1. Determine the desired ZoneNumber based upon your current
location on the Zone Map.
2. Press and hold the button for more than 3 but less than 6 sec-
onds, the current Zone Number
will appear on the display.
3. Pressing and holding the button again will cause the numbers to
increment (Note: they will repeat
…13, 14, 15, 1, 2, …). Releasing
the button when the desired Zone
Number appears on the display
will set the new Zone.
4. Within about 5 seconds the com- pass will start displaying a com-
pass heading again. There are some conditions that can
cause changes to the vehicle mag-
nets, such as installing a ski rack or
a CB antenna. Body repair work on
the vehicle can also cause changes
to the vehicle’s magnetic field. In
these situations, the compass will
need to be re-calibrated to quickly
correct these changes.
If you need to recalibrate the com-
pass:
1. Press and hold the button for
more than 6 seconds. When the
compass memory is cleared a "C"
will appear in the display.
2. Drive the vehicle in 2 complete cir- cles at less than 5 mph (8 km/h).
Page 136 of 541
3-51
Convenient features of your vehicle
I
IN
N S
ST
T R
R U
U M
M E
EN
N T
T
C
C L
LU
U S
ST
T E
ER
R
3
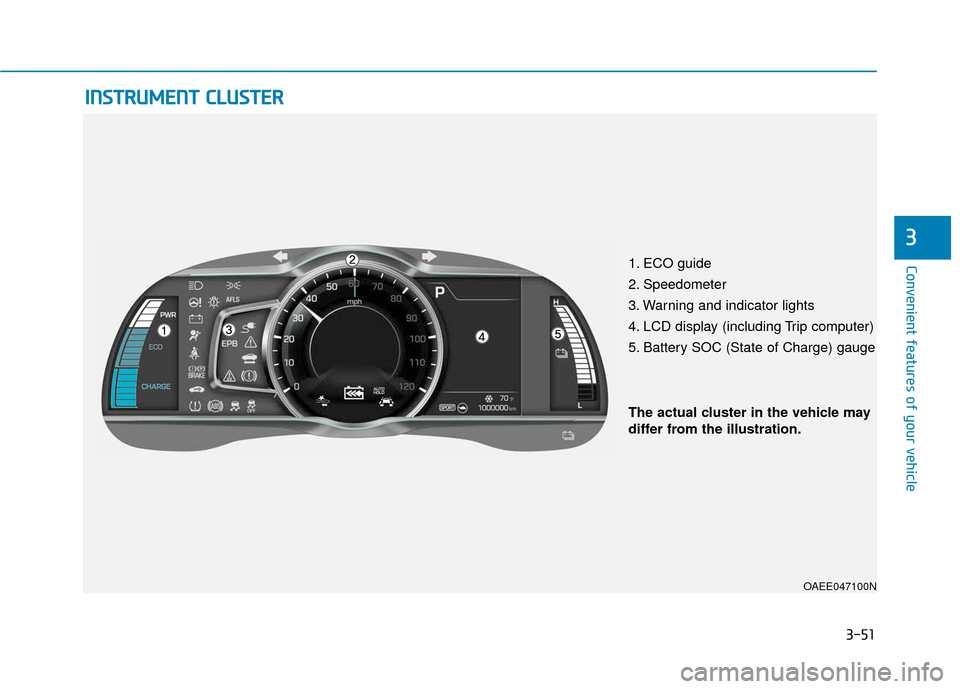
1. ECO guide
2. Speedometer
3. Warning and indicator lights
4. LCD display (including Trip computer)
5. Battery SOC (State of Charge) gauge
OAEE047100N
The actual cluster in the vehicle may
differ from the illustration.
Page 137 of 541
3-52
Convenient features of your vehicle
Instrument Cluster Control
Adjusting instrument clusterillumination
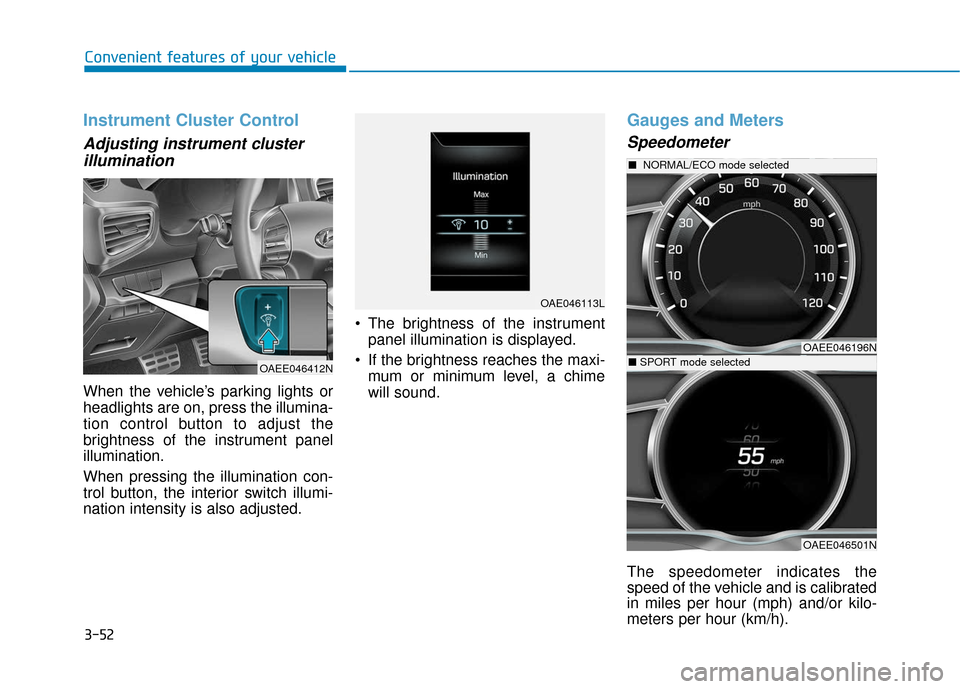
When the vehicle’s parking lights or
headlights are on, press the illumina-
tion control button to adjust the
brightness of the instrument panel
illumination.
When pressing the illumination con-
trol button, the interior switch illumi-
nation intensity is also adjusted. The brightness of the instrument
panel illumination is displayed.
If the brightness reaches the maxi- mum or minimum level, a chime
will sound.
Gauges and Meters
Speedometer
The speedometer indicates the
speed of the vehicle and is calibrated
in miles per hour (mph) and/or kilo-
meters per hour (km/h).
OAE046113L
OAEE046412N
OAEE046196N
■ NORMAL/ECO mode selected
OAEE046501N
■SPORT mode selected
Page 138 of 541
3-53
Convenient features of your vehicle
3
The speedometer is displayed differ-
ently according to the selected drive
mode in the Drive Mode Integrated
Control System.
For more information, refer to
“Drive Mode Integrated Control
System” in chapter 5.ECO guide
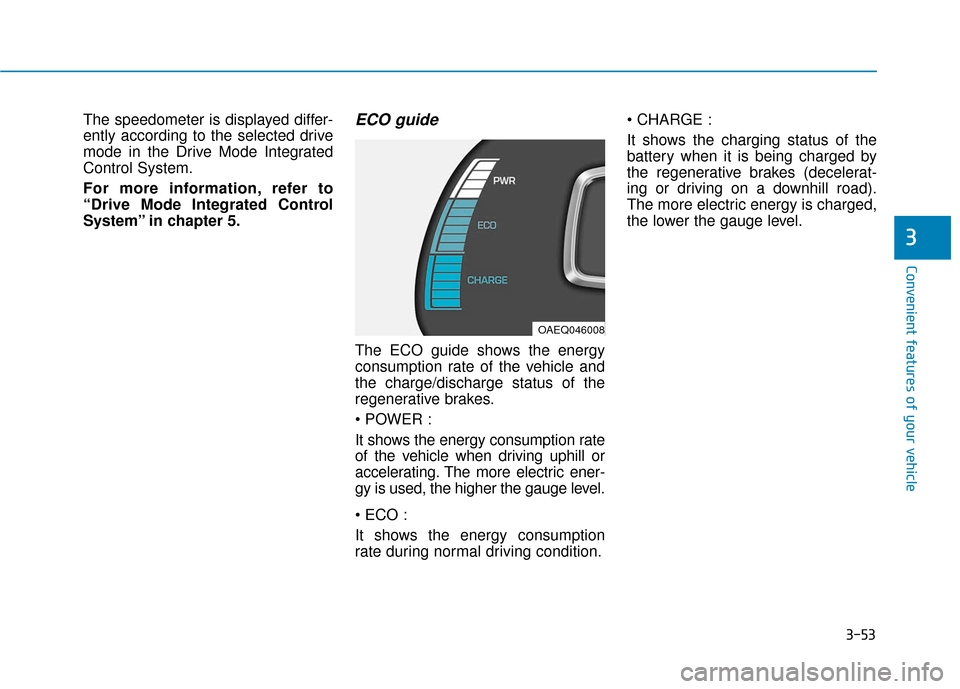
The ECO guide shows the energy
consumption rate of the vehicle and
the charge/discharge status of the
regenerative brakes.
It shows the energy consumption rate
of the vehicle when driving uphill or
accelerating. The more electric ener-
gy is used, the higher the gauge level.
It shows the energy consumption
rate during normal driving condition.
It shows the charging status of the
battery when it is being charged by
the regenerative brakes (decelerat-
ing or driving on a downhill road).
The more electric energy is charged,
the lower the gauge level.
OAEQ046008
Page 140 of 541
3-55
Convenient features of your vehicle
3
Odometer
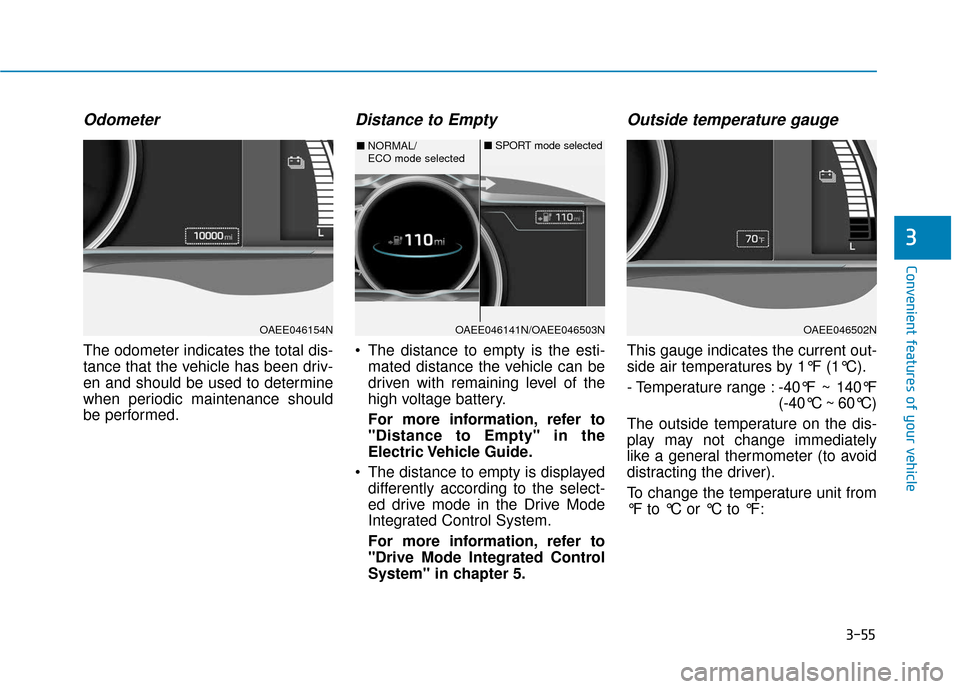
The odometer indicates the total dis-
tance that the vehicle has been driv-
en and should be used to determine
when periodic maintenance should
be performed.
Distance to Empty
The distance to empty is the esti-mated distance the vehicle can be
driven with remaining level of the
high voltage battery.
For more information, refer to
"Distance to Empty" in the
Electric Vehicle Guide.
The distance to empty is displayed differently according to the select-
ed drive mode in the Drive Mode
Integrated Control System.
For more information, refer to
"Drive Mode Integrated Control
System" in chapter 5.
Outside temperature gauge
This gauge indicates the current out-
side air temperatures by 1°F (1°C).
- Temperature range : -40°F ~ 140°F
(-40°C ~ 60°C)
The outside temperature on the dis-
play may not change immediately
like a general thermometer (to avoid
distracting the driver).
To change the temperature unit from
°F to °C or °C to °F:
OAEE046154NOAEE046141N/OAEE046503N
■ NORMAL/
ECO mode selected ■
SPORT mode selected
OAEE046502N
Page 141 of 541
3-56
Convenient features of your vehicle
- Go to User Settings Mode ➝Other
Features ➝Temperature Unit.
- Press the AUTO button for 3 sec- onds while pressing the OFF button.
Both the temperature unit on the
cluster LCD display and climate con-
trol screen will change.
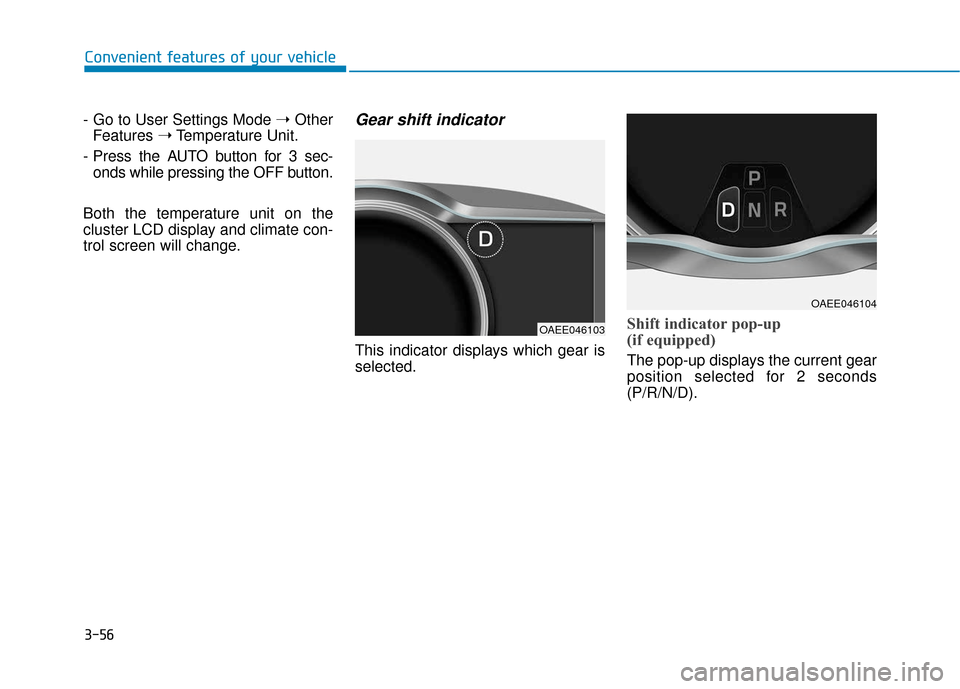
Gear shift indicator
This indicator displays which gear is
selected.
Shift indicator pop-up
(if equipped)
The pop-up displays the current gear
position selected for 2 seconds
(P/R/N/D).
OAEE046103
OAEE046104
Page 147 of 541
3-62
Convenient features of your vehicle
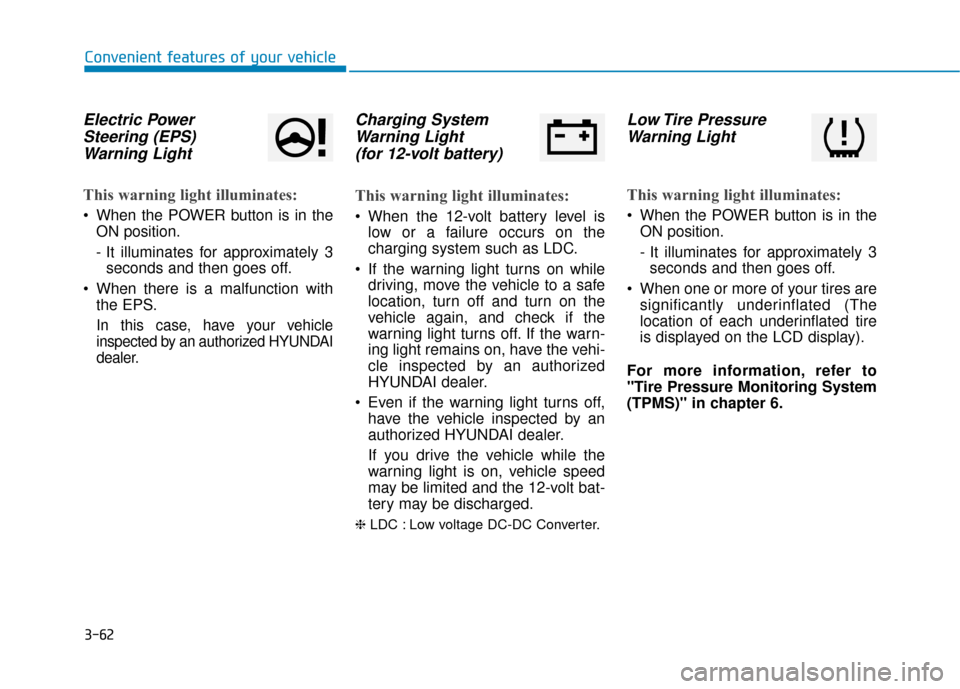
Electric PowerSteering (EPS)Warning Light
This warning light illuminates:
When the POWER button is in the
ON position.
- It illuminates for approximately 3seconds and then goes off.
When there is a malfunction with the EPS.
In this case, have your vehicle
inspected by an authorized HYUNDAI
dealer.
Charging SystemWarning Light(for 12-volt battery)
This warning light illuminates:
When the 12-volt battery level is
low or a failure occurs on the
charging system such as LDC.
If the warning light turns on while driving, move the vehicle to a safe
location, turn off and turn on the
vehicle again, and check if the
warning light turns off. If the warn-
ing light remains on, have the vehi-
cle inspected by an authorized
HYUNDAI dealer.
Even if the warning light turns off, have the vehicle inspected by an
authorized HYUNDAI dealer.
If you drive the vehicle while the
warning light is on, vehicle speed
may be limited and the 12-volt bat-
tery may be discharged.
❈ LDC : Low voltage DC-DC Converter.
Low Tire Pressure
Warning Light
This warning light illuminates:
When the POWER button is in the
ON position.
- It illuminates for approximately 3seconds and then goes off.
When one or more of your tires are significantly underinflated (The
location of each underinflated tire
is displayed on the LCD display).
For more information, refer to
"Tire Pressure Monitoring System
(TPMS)" in chapter 6.