stop start Hyundai Ioniq Electric 2018 User Guide
[x] Cancel search | Manufacturer: HYUNDAI, Model Year: 2018, Model line: Ioniq Electric, Model: Hyundai Ioniq Electric 2018Pages: 541, PDF Size: 19.83 MB
Page 270 of 541
5-9
Driving your vehicle
5
To prevent damage to the vehicle:
If the " " indicator turns off
while you are in motion, do not
attempt to shift to the P (Park)
position.
To prevent damage to the vehicle:
When the stop lamp fuse is blown,
you cannot normally start the
vehicle. Replace the fuse with a
new one. If you are not able to
replace the fuse, you can start the
vehicle by pressing and holding
the POWER button for 10 seconds
with the POWER button in the ACC
position.
Do not press the POWER button
for more than 10 seconds except
when the stop lamp fuse is blown.
For your safety always depress
the brake pedal before starting the
vehicle.
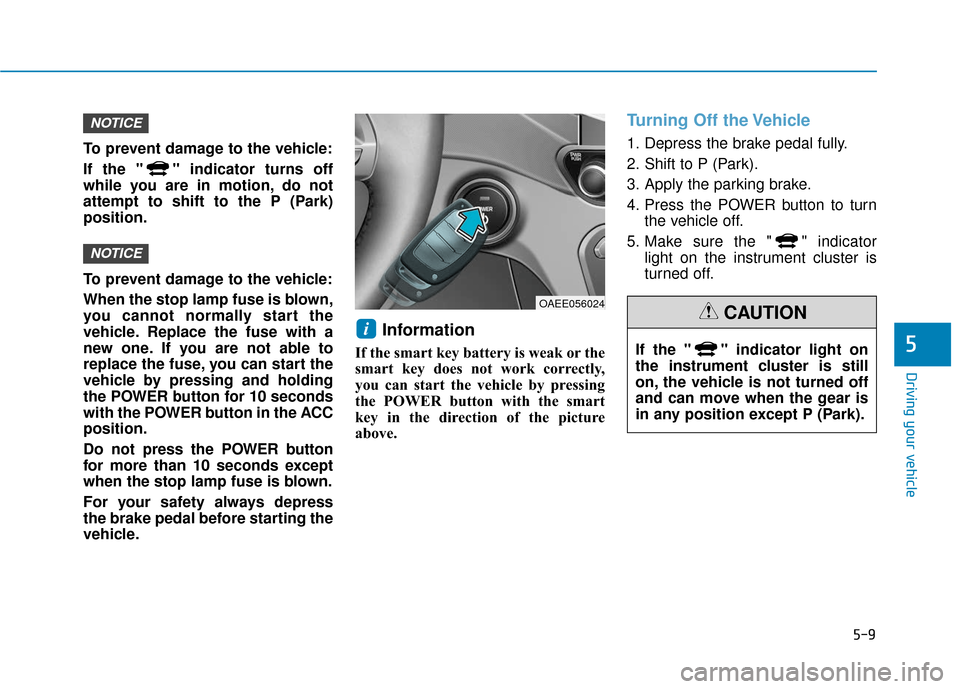
Information
If the smart key battery is weak or the
smart key does not work correctly,
you can start the vehicle by pressing
the POWER button with the smart
key in the direction of the picture
above.
Turning Off the Vehicle
1. Depress the brake pedal fully.
2. Shift to P (Park).
3. Apply the parking brake.
4. Press the POWER button to turnthe vehicle off.
5. Make sure the " " indicator light on the instrument cluster is
turned off.
i
NOTICE
NOTICE
OAEE056024
If the " " indicator light on
the instrument cluster is still
on, the vehicle is not turned off
and can move when the gear is
in any position except P (Park).
CAUTION
Page 273 of 541
5-12
Driving your vehicle
Shift-lock system
For your safety, your vehicle has a
shift-lock system which prevents
shifting the gear from P (Park) or N
(Neutral) into R (Reverse) or D
(Drive) unless the brake pedal is
depressed.
To shift from P (Park) or N (Neutral)
into R (Reverse) or D (Drive) :
1. Depress and hold the brake pedal.
2. Start the vehicle or place thePOWER button in the ON position.
3. Press the R (Reverse) or D (Drive) button.
When the battery (12 V) is dis-charged
You cannot shift the gear when the
battery is discharged.
Jump start your vehicle (refer to
“Jump Starting” in chapter 6) or con-
tact an authorized HYUNDAI dealer.
Parking
Always come to a complete stop and
continue to depress the brake pedal.
Shift to the P (Park) position, apply
the parking brake, and place the
POWER button in the OFF position.
Take the Key with you when exiting
the vehicle.
LCD Display Messages
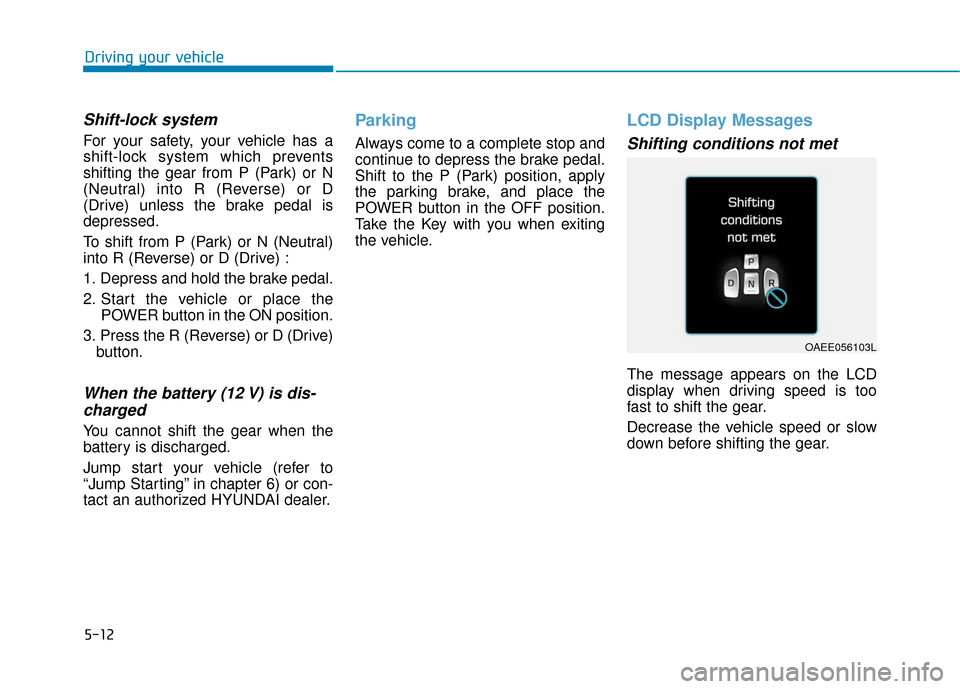
Shifting conditions not met
The message appears on the LCD
display when driving speed is too
fast to shift the gear.
Decrease the vehicle speed or slow
down before shifting the gear.
OAEE056103L
Page 285 of 541
![Hyundai Ioniq Electric 2018 User Guide 5-24
Driving your vehicle
Set up
1. With the drivers door and hoodclosed, fasten the drivers seat
belt or depress the brake pedal
and then press the [AUTO HOLD]
switch. The white AUTO HOLD
indicator Hyundai Ioniq Electric 2018 User Guide 5-24
Driving your vehicle
Set up
1. With the drivers door and hoodclosed, fasten the drivers seat
belt or depress the brake pedal
and then press the [AUTO HOLD]
switch. The white AUTO HOLD
indicator](/img/35/14904/w960_14904-284.png)
5-24
Driving your vehicle
Set up
1. With the driver's door and hoodclosed, fasten the driver's seat
belt or depress the brake pedal
and then press the [AUTO HOLD]
switch. The white AUTO HOLD
indicator will come on and the sys-
tem will be in the standby position. 2. When you stop the vehicle com-
pletely by depressing the brake
pedal, the AUTO HOLD indicator
changes from white to green.
3. The vehicle will remain stationary even if you release the brake
pedal.
4. If EPB is applied, Auto Hold will be released.
Leaving
If you press the accelerator pedalwith the gear in D (Drive) or N
(Neutral), the Auto Hold will be
released automatically and the
vehicle will start to move. The
AUTO HOLD indicator changes
from green to white.
If the vehicle is restarted using the cruise control toggle switch (RES+
or SET-) while Auto Hold and cruise
control is operating, the Auto Hold
will be released regardless of
accelerator pedal operation. The
AUTO HOLD indicator changes
from green to white. (if equipped
with cruise control system)
When driving off from Auto
Hold by depressing the acceler-
ator pedal, always check the
surrounding area near your
vehicle.
Slowly depress the accelerator
pedal for a smooth start.
WARNING
OAEE056007
OAEE056008
W
W
W
W
h
h
h
h
i
i
i
i
t
t
t
t
e
e
e
e W
W
W
W
h
h
h
h
i
i
i
i
t
t
t
t
e
e
e
e
G
G
G
G
r
r
r
r
e
e
e
e
e
e
e
e
n
n
n
n
Page 295 of 541
5-34
Driving your vehicle
VSM OFF condition
To cancel VSM operation, press the
ESC OFF button. ESC OFF indicator
light ( ) will illuminate.
To turn on VSM, press the ESC OFF
button again. The ESC OFF indicator
light will go out.Driving with wheels and tires with
different sizes may cause the VSM
system to malfunction. Before
replacing tires, make sure all four
tires and wheels are the same
size. Never drive the vehicle with
different sized tires and wheels
installed.
Hill-Start Assist Control (HAC)
The Hill-Start Assist Control (HAC)
helps prevent the vehicle from rolling
backwards when starting a vehicle
from a stop on a hill. The system
operates the brakes automatically for
approximately 2 seconds and releas-
es the brake after 2 seconds or when
the accelerator pedal is depressed.
Information
• The HAC does not operate when the
gear is in P (Park) or N (Neutral).
• The HAC activates even when the ESC (Electronic Stability Control) is
off. However, it does not activate,
when the ESC does not operate nor-
mally.
i
NOTICE
If the ESC indicator light ( ) or
EPS warning light ( ) stays
on or blinks, your vehicle may
have a malfunction with the
VSM system. When the warning
light illuminates, have the vehi-
cle checked by an authorized
HYUNDAI dealer as soon as
possible.
WARNING
Always be ready to depress the
accelerator pedal when starting
off on a incline. The HAC acti-
vates only for approximately 2
seconds.
WARNING
Page 337 of 541
5-76
Driving your vehicle
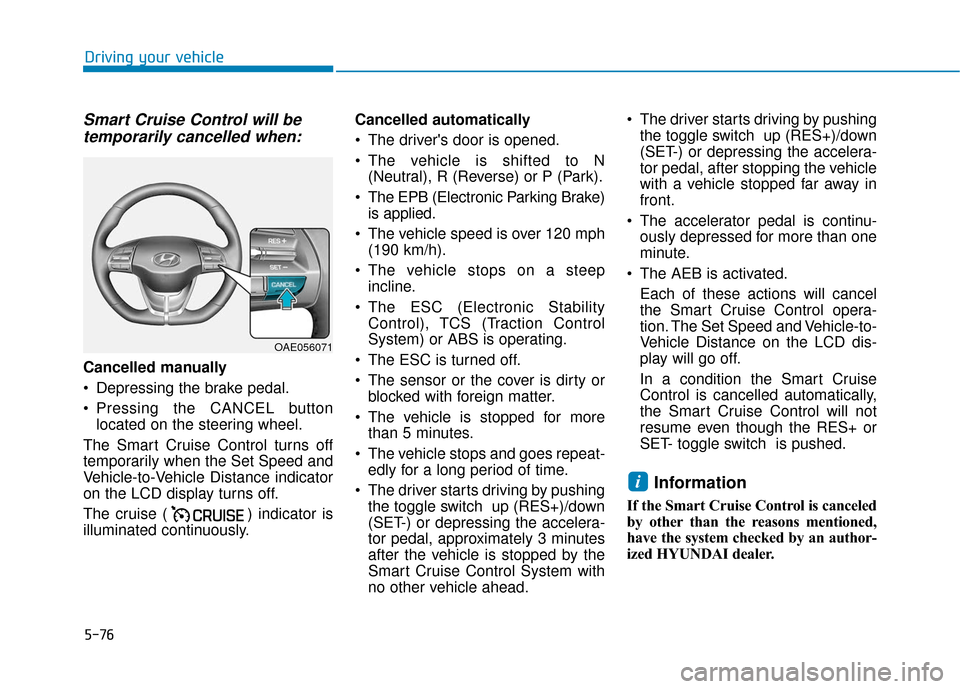
Smart Cruise Control will betemporarily cancelled when:
Cancelled manually
Depressing the brake pedal.
Pressing the CANCEL button
located on the steering wheel.
The Smart Cruise Control turns off
temporarily when the Set Speed and
Vehicle-to-Vehicle Distance indicator
on the LCD display turns off.
The cruise ( ) indicator is
illuminated continuously. Cancelled automatically
The driver's door is opened.
The vehicle is shifted to N
(Neutral), R (Reverse) or P (Park).
The EPB (Electronic Parking Brake) is applied.
The vehicle speed is over 120 mph (190 km/h).
The vehicle stops on a steep incline.
The ESC (Electronic Stability Control), TCS (Traction Control
System) or ABS is operating.
The ESC is turned off.
The sensor or the cover is dirty or blocked with foreign matter.
The vehicle is stopped for more than 5 minutes.
The vehicle stops and goes repeat- edly for a long period of time.
The driver starts driving by pushing the toggle switch up (RES+)/down
(SET-) or depressing the accelera-
tor pedal, approximately 3 minutes
after the vehicle is stopped by the
Smart Cruise Control System with
no other vehicle ahead. The driver starts driving by pushing
the toggle switch up (RES+)/down
(SET-) or depressing the accelera-
tor pedal, after stopping the vehicle
with a vehicle stopped far away in
front.
The accelerator pedal is continu- ously depressed for more than one
minute.
The AEB is activated. Each of these actions will cancel
the Smart Cruise Control opera-
tion. The Set Speed and Vehicle-to-
Vehicle Distance on the LCD dis-
play will go off.
In a condition the Smart Cruise
Control is cancelled automatically,
the Smart Cruise Control will not
resume even though the RES+ or
SET- toggle switch is pushed.
Information
If the Smart Cruise Control is canceled
by other than the reasons mentioned,
have the system checked by an author-
ized HYUNDAI dealer.
i
OAE056071
Page 341 of 541
5-80
Driving your vehicle
In traffic situation
Use switch or pedal to accelerate
In traffic, your vehicle will stop if thevehicle ahead of you stops. Also, if
the vehicle ahead of you starts
moving, your vehicle will start as
well. However, if the vehicle stops
for more than 3 seconds, you must
depress the accelerator pedal or
push up the toggle switch (RES+)
to start driving. If you push the advanced smart
cruise control toggle switch (RES+
or SET-) while Auto Hold and
advanced smart cruise control is
operating the Auto Hold will be
released regardless of accelerator
pedal operation and the vehicle will
start to move. The AUTO HOLD
indicator changes from green to
white.
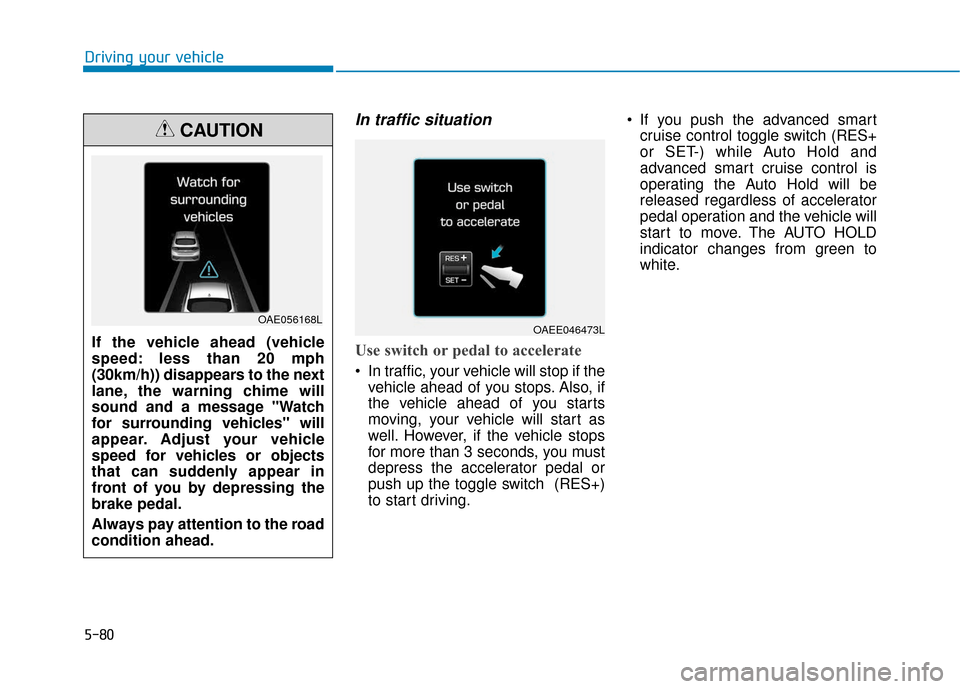
If the vehicle ahead (vehicle
speed: less than 20 mph
(30km/h)) disappears to the next
lane, the warning chime will
sound and a message "Watch
for surrounding vehicles" will
appear. Adjust your vehicle
speed for vehicles or objects
that can suddenly appear in
front of you by depressing the
brake pedal.
Always pay attention to the road
condition ahead.
CAUTION
OAE056168LOAEE046473L
Page 363 of 541
6-2
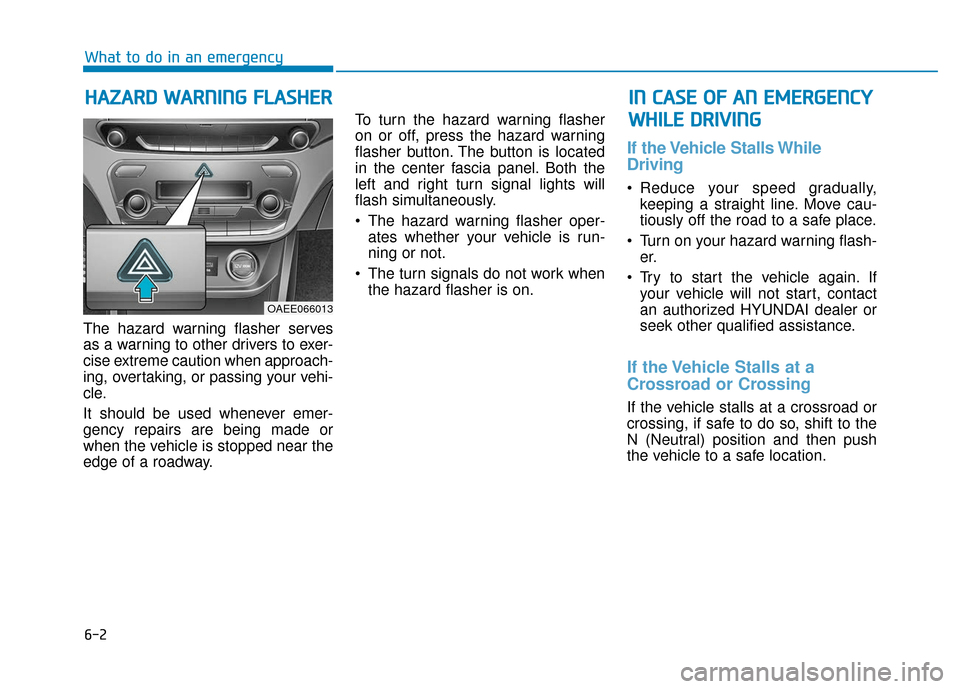
The hazard warning flasher serves
as a warning to other drivers to exer-
cise extreme caution when approach-
ing, overtaking, or passing your vehi-
cle.
It should be used whenever emer-
gency repairs are being made or
when the vehicle is stopped near the
edge of a roadway.To turn the hazard warning flasher
on or off, press the hazard warning
flasher button. The button is located
in the center fascia panel. Both the
left and right turn signal lights will
flash simultaneously.
• The hazard warning flasher oper-
ates whether your vehicle is run-
ning or not.
The turn signals do not work when the hazard flasher is on.
If the Vehicle Stalls While
Driving
Reduce your speed gradually,keeping a straight line. Move cau-
tiously off the road to a safe place.
Turn on your hazard warning flash- er.
Try to start the vehicle again. If your vehicle will not start, contact
an authorized HYUNDAI dealer or
seek other qualified assistance.
If the Vehicle Stalls at a
Crossroad or Crossing
If the vehicle stalls at a crossroad or
crossing, if safe to do so, shift to the
N (Neutral) position and then push
the vehicle to a safe location.
H HA
AZ
ZA
A R
RD
D
W
W A
AR
RN
N I
IN
N G
G
F
F L
LA
A S
SH
H E
ER
R
What to do in an emergency
I
IN
N
C
C A
A S
SE
E
O
O F
F
A
A N
N
E
E M
M E
ER
R G
G E
EN
N C
CY
Y
W
W H
HI
IL
L E
E
D
D R
RI
IV
V I
IN
N G
G
OAEE066013
Page 364 of 541
6-3
What to do in an emergency
If you Have a Flat Tire While
Driving
If a tire goes flat while you are driving:
Take your foot off the acceleratorpedal and let the vehicle slow down
while driving straight ahead. Do not
apply the brakes immediately to
slow down the vehicle, but use the
paddle shifter (left side lever) to
increase regenerative braking con-
trol. Also, do not or attempt to pull
off the road as this may cause loss
of vehicle control resulting in an
accident. When the vehicle has
slowed to such a speed that it is
safe to do so, brake carefully and
pull off the road. Drive off the road
as far as possible and park on firm,
level ground. If you are on a divided
highway, do not park in the median
area between the two traffic lanes.
When the vehicle is stopped, press the hazard warning flasher button,
shift to P(Park), apply the parking
brake, and place the POWER but-
ton in the OFF position. Have all passengers get out of the
vehicle. Be sure they all get out on
the side of the vehicle that is away
from traffic.
When changing a flat tire, follow the instructions provided later in
this chapter.
Confirm the EV Battery Is Not
Low on the Charge Gauge
Be sure the gear is in P (Park). The
vehicle starts only when the gear is
in P (Park).
Check the 12-volt battery connec- tions to be sure they are clean and
tight.
Turn on the interior light. If the light dims or goes out when you operate
the starter, the battery is drained.
Do not push or pull the vehicle to
start it. This could cause damage to
your vehicle. See instructions for
"Jump Starting" provided in this
chapter.
6
I I F
F
T
T H
H E
E
V
V E
EH
H I
IC
C L
LE
E
W
W I
IL
L L
L
N
N O
O T
T
S
S T
T A
A R
RT
T
Page 367 of 541
6-6
What to do in an emergency
7. Connect the other end of the sec- ond jumper cable to the black,
negative (-) chassis ground of
your vehicle (4).
Do not allow the jumper cables to
contact anything except the cor-
rect battery or jumper terminals or
the correct ground. Do not lean
over the battery when making
connections.
8. Start the engine of the assisting vehicle and let it run at approxi-
mately 2,000 rpm for a few min-
utes. Then start your vehicle.
9. After your vehicle starts allow it to operate at least 30 minutes with-
out shutting it down, this will help
charge back the 12V battery.
If your vehicle will not start after a
few attempts, it probably requires
servicing. In this event please seek
qualified assistance. If the cause of
your battery discharging is not
apparent, have your vehicle checked
by an authorized HYUNDAI dealer. Disconnect the jumper cables in the
exact reverse order you connected
them:
1. Disconnect the jumper cable from
the black, negative (-) chassis
ground of your vehicle (4).
2. Disconnect the other end of the jumper cable from the black, neg-
ative (-) battery/chassis ground of
the assisting vehicle (3).
3. Disconnect the second jumper cable from the red, positive (+)
battery/jumper terminal of the
assisting vehicle (2).
4. Disconnect the other end of the jumper cable from the red, positive
(+) jumper terminal of your vehicle
(1). 1. Pull off the road and stop as soon
as it is safe to do so.
2. Shift to P (Park) and set the park- ing brake. If the air conditioning is
on, turn it off.
3. If coolant is running out under the vehicle or steam is coming out
from the hood, stop the vehicle.
Do not open the hood until the
coolant has stopped running or
the steaming has stopped. If there
is no visible loss of coolant and no
steam, leave the vehicle running
and check to be sure the vehicle
cooling fan is operating. If the fan
is not running, turn the vehicle off.
I IF
F
T
T H
H E
E
V
V E
EH
H I
IC
C L
LE
E
O
O V
VE
ER
R H
H E
EA
A T
TS
S
Page 369 of 541
6-8
What to do in an emergency
T
TI
IR
R E
E
P
P R
R E
ES
SS
SU
U R
RE
E
M
M O
ON
NI
IT
T O
O R
RI
IN
N G
G
S
S Y
Y S
ST
T E
EM
M
(
( T
T P
P M
M S
S)
)
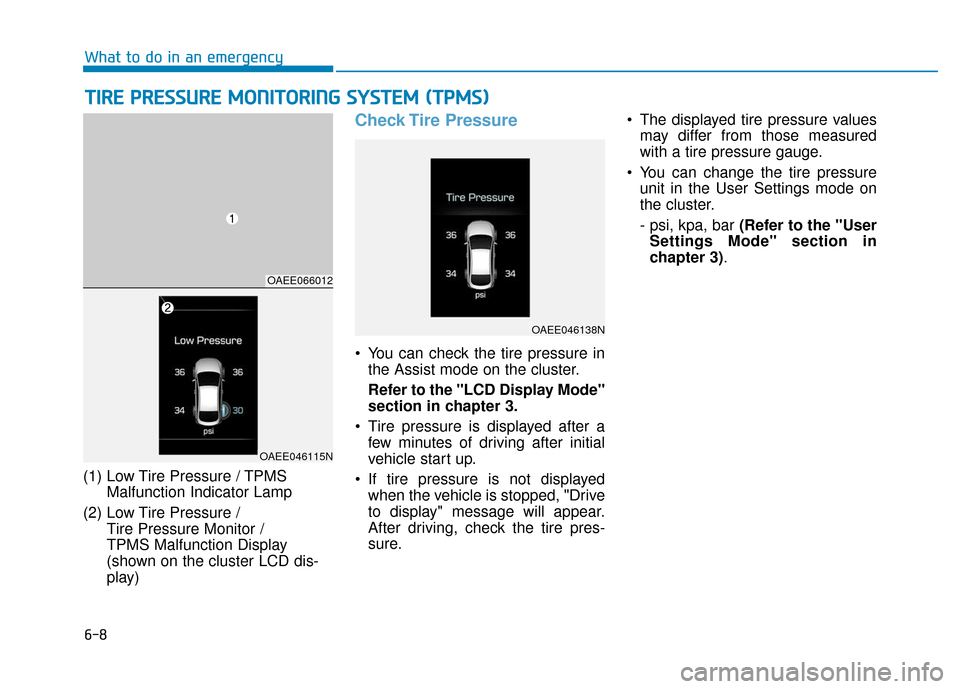
(1) Low Tire Pressure / TPMS
Malfunction Indicator Lamp
(2) Low Tire Pressure / Tire Pressure Monitor /
TPMS Malfunction Display
(shown on the cluster LCD dis-
play)
Check Tire Pressure
You can check the tire pressure inthe Assist mode on the cluster.
Refer to the "LCD Display Mode"
section in chapter 3.
Tire pressure is displayed after a few minutes of driving after initial
vehicle start up.
If tire pressure is not displayed when the vehicle is stopped, "Drive
to display" message will appear.
After driving, check the tire pres-
sure. The displayed tire pressure values
may differ from those measured
with a tire pressure gauge.
You can change the tire pressure unit in the User Settings mode on
the cluster.
- psi, kpa, bar (Refer to the "User
Settings Mode" section in
chapter 3).
OAEE066012
OAEE046138N
OAEE046115N