Hyundai Ioniq Electric 2018 Owner's Manual
Manufacturer: HYUNDAI, Model Year: 2018, Model line: Ioniq Electric, Model: Hyundai Ioniq Electric 2018Pages: 541, PDF Size: 19.83 MB
Page 521 of 541
H39
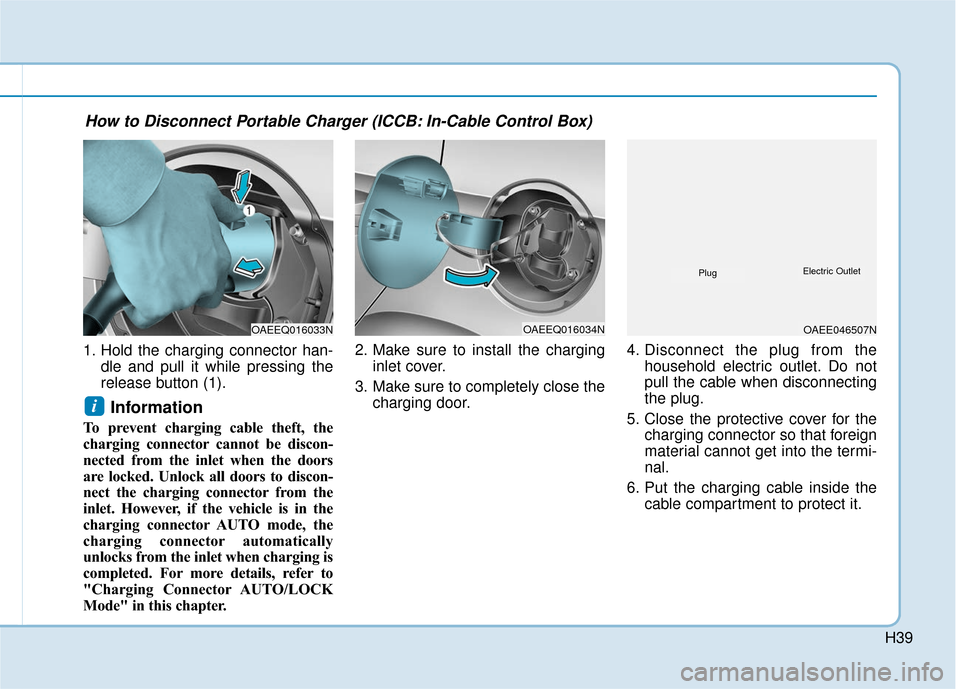
1. Hold the charging connector han-dle and pull it while pressing the
release button (1).
Information
To prevent charging cable theft, the
charging connector cannot be discon-
nected from the inlet when the doors
are locked. Unlock all doors to discon-
nect the charging connector from the
inlet. However, if the vehicle is in the
charging connector AUTO mode, the
charging connector automatically
unlocks from the inlet when charging is
completed. For more details, refer to
"Charging Connector AUTO/LOCK
Mode" in this chapter. 2. Make sure to install the charging
inlet cover.
3. Make sure to completely close the charging door. 4. Disconnect the plug from the
household electric outlet. Do not
pull the cable when disconnecting
the plug.
5. Close the protective cover for the charging connector so that foreign
material cannot get into the termi-
nal.
6. Put the charging cable inside the cable compartment to protect it.
i
OAEEQ016033NOAEEQ016034NOAEE046507N
PlugElectric Outlet
How to Disconnect Portable Charger (ICCB: In-Cable Control Box)
Page 522 of 541
H40
C
CH
H A
AR
RG
G I
IN
N G
G
E
E L
LE
E C
CT
T R
R I
IC
C
V
V E
EH
H I
IC
C L
LE
E
(
( T
T R
R I
IC
C K
K L
LE
E
C
C H
H A
AR
RG
G E
E)
)
(
( C
C O
O N
NT
T.
.)
)
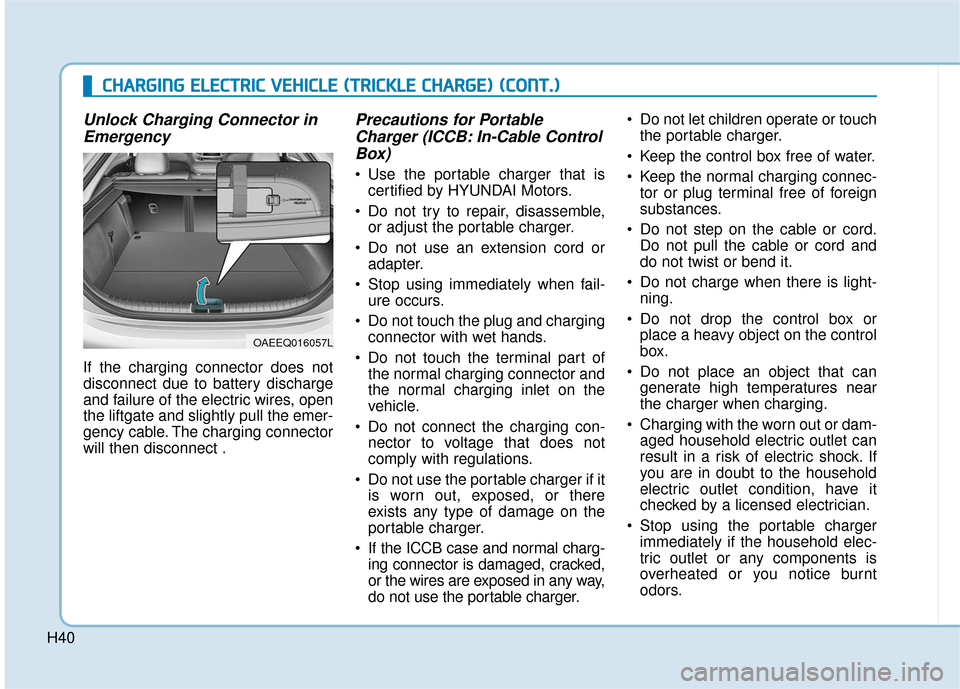
Unlock Charging Connector in
Emergency
If the charging connector does not
disconnect due to battery discharge
and failure of the electric wires, open
the liftgate and slightly pull the emer-
gency cable. The charging connector
will then disconnect .
Precautions for PortableCharger (ICCB: In-Cable ControlBox)
Use the portable charger that is
certified by HYUNDAI Motors.
Do not try to repair, disassemble, or adjust the portable charger.
Do not use an extension cord or adapter.
Stop using immediately when fail- ure occurs.
Do not touch the plug and charging connector with wet hands.
Do not touch the terminal part of the normal charging connector and
the normal charging inlet on the
vehicle.
Do not connect the charging con- nector to voltage that does not
comply with regulations.
Do not use the portable charger if it is worn out, exposed, or there
exists any type of damage on the
portable charger.
If the ICCB case and normal charg- ing connector is damaged, cracked,
or the wires are exposed in any way,
do not use the portable charger. Do not let children operate or touch
the portable charger.
Keep the control box free of water.
Keep the normal charging connec- tor or plug terminal free of foreign
substances.
Do not step on the cable or cord. Do not pull the cable or cord and
do not twist or bend it.
Do not charge when there is light- ning.
Do not drop the control box or place a heavy object on the control
box.
Do not place an object that can generate high temperatures near
the charger when charging.
Charging with the worn out or dam- aged household electric outlet can
result in a risk of electric shock. If
you are in doubt to the household
electric outlet condition, have it
checked by a licensed electrician.
Stop using the portable charger immediately if the household elec-
tric outlet or any components is
overheated or you notice burnt
odors.
OAEEQ016057L
Page 523 of 541
H41
How to Start the Vehicle
1. Holding the smart key, sit in thedriver's seat.
2. Fasten the seat belt before start- ing the vehicle.
3. Make sure to engage the parking brake.
4. Turn OFF all electrical devices.
5. Make sure to depress and hold the brake pedal.
6. While depressing the brake pedal, shift to P (Park).
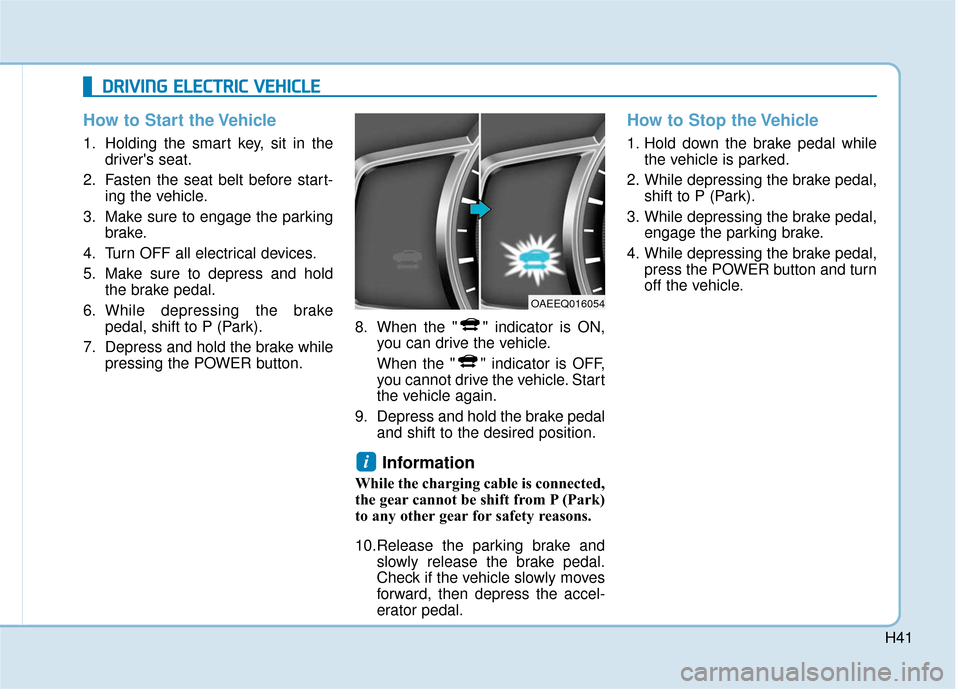
7. Depress and hold the brake while pressing the POWER button. 8. When the " " indicator is ON,
you can drive the vehicle.
When the " " indicator is OFF,
you cannot drive the vehicle. Start
the vehicle again.
9. Depress and hold the brake pedal and shift to the desired position.
Information
While the charging cable is connected,
the gear cannot be shift from P (Park)
to any other gear for safety reasons.
10.Release the parking brake andslowly release the brake pedal.
Check if the vehicle slowly moves
forward, then depress the accel-
erator pedal.
How to Stop the Vehicle
1. Hold down the brake pedal whilethe vehicle is parked.
2. While depressing the brake pedal, shift to P (Park).
3. While depressing the brake pedal, engage the parking brake.
4. While depressing the brake pedal, press the POWER button and turn
off the vehicle.
i
D
DR
RI
IV
V I
IN
N G
G
E
E L
LE
E C
CT
T R
R I
IC
C
V
V E
EH
H I
IC
C L
LE
E
OAEEQ016054
Page 524 of 541
H42
D
DR
RI
IV
V I
IN
N G
G
E
E L
LE
E C
CT
T R
R I
IC
C
V
V E
EH
H I
IC
C L
LE
E
(
( C
C O
O N
NT
T.
.)
)
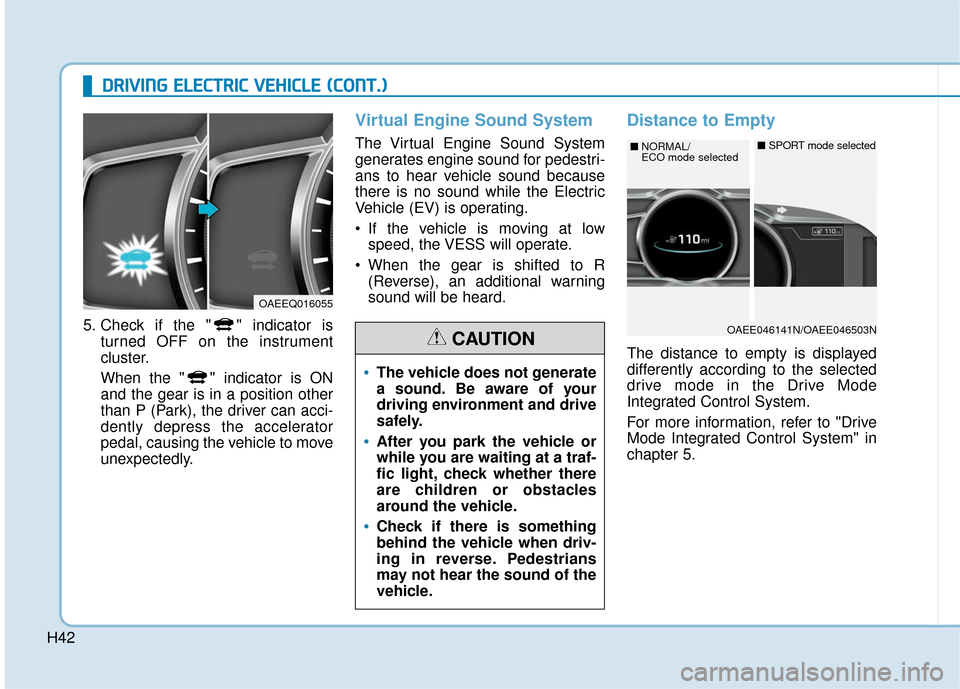
5. Check if the " " indicator is
turned OFF on the instrument
cluster.
When the " " indicator is ON
and the gear is in a position other
than P (Park), the driver can acci-
dently depress the accelerator
pedal, causing the vehicle to move
unexpectedly.
Virtual Engine Sound System
The Virtual Engine Sound System
generates engine sound for pedestri-
ans to hear vehicle sound because
there is no sound while the Electric
Vehicle (EV) is operating.
If the vehicle is moving at lowspeed, the VESS will operate.
When the gear is shifted to R (Reverse), an additional warning
sound will be heard.
Distance to Empty
The distance to empty is displayed
differently according to the selected
drive mode in the Drive Mode
Integrated Control System.
For more information, refer to "Drive
Mode Integrated Control System" in
chapter 5.
OAEEQ016055
The vehicle does not generate
a sound. Be aware of your
driving environment and drive
safely.
After you park the vehicle or
while you are waiting at a traf-
fic light, check whether there
are children or obstacles
around the vehicle.
Check if there is something
behind the vehicle when driv-
ing in reverse. Pedestrians
may not hear the sound of the
vehicle.
CAUTIONOAEE046141N/OAEE046503N
■ NORMAL/
ECO mode selected■SPORT mode selected
Page 525 of 541
H43
When destination is not set
On average, a vehicle can driveabout 120 miles (191 km). Under
certain circumstances where the
air conditioner/heater is ON, the
distance to empty is impacted,
resulting in a possible distance
range from 80~180 miles
(130~290 km). When using the
heater during cold weather or driv-
ing at high speed, the high voltage
battery consumes a lot more elec-
tricity. This may reduce the dis-
tance to empty significantly.
After "---" has been displayed, the vehicle can drive an additional 2~5
miles (3~8 km) depending on driv-
ing speed, heater/air conditioner,
weather, driving style, and other
factors. Distance to empty that is displayed
on the instrument cluster after
completing a recharge may vary
significantly depending on previ-
ous operating patterns.
When previous driving patterns
include high speed driving, result-
ing in the high voltage battery
using more electricity than usual,
the estimated distance to empty is
reduced. When the high voltage
battery uses little electricity in ECO
mode, the estimated distance to
empty increases.
Distance to empty may depend on many factors such as the charge
amount of the high voltage battery,
weather, temperature, durability of
the battery, geographical features,
and driving style.
Natural degradation may occur with the high voltage battery
depending on the number of years
the vehicle is used. This may
reduce the distance to empty.
When destination is set
When the destination is set, the dis-
tance to empty may change. The dis-
tance to empty is recalculated using
the information of the destination.
However, the distance to empty may
vary significantly based on traffic
conditions, driving habits, and condi-
tion of the vehicle.
Page 526 of 541
H44
D
DR
RI
IV
V I
IN
N G
G
E
E L
LE
E C
CT
T R
R I
IC
C
V
V E
EH
H I
IC
C L
LE
E
(
( C
C O
O N
NT
T.
.)
)
Tips for Improving Distance to
Empty
If you operate the air conditioner /heater too much, the driving battery
uses too much electricity. This may
reduce the distance to empty.
Therefore, it is recommended that
you set the cabin temperature to
73°F (23°C) AUTO. This setting that
has been certified by various
assessment tests to maintain opti-
mal energy consumption rates while
keeping the temperature fresh.
Turn OFF the heater and air condi-
tioner if you do not need them.
Depress and hold the accelerator pedal to maintain speed and drive
economically.
Gradually depress and release the accelerator pedal when accelerat-
ing or decelerating.
Always maintain specified tire pressures.
Do not use unnecessary electrical components while driving.
Do not load unnecessary items in the vehicle.
Do not mount parts that may increase air resistance.
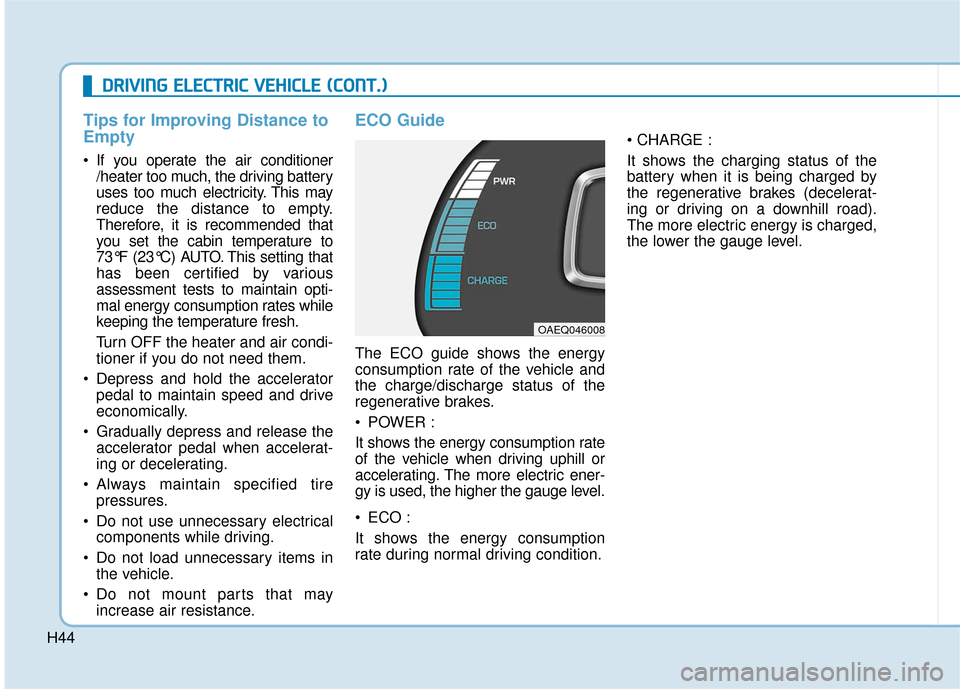
ECO Guide
The ECO guide shows the energy
consumption rate of the vehicle and
the charge/discharge status of the
regenerative brakes.
POWER :
It shows the energy consumption rate
of the vehicle when driving uphill or
accelerating. The more electric ener-
gy is used, the higher the gauge level.
ECO :
It shows the energy consumption
rate during normal driving condition.
It shows the charging status of the
battery when it is being charged by
the regenerative brakes (decelerat-
ing or driving on a downhill road).
The more electric energy is charged,
the lower the gauge level.
OAEQ046008
Page 527 of 541
H45
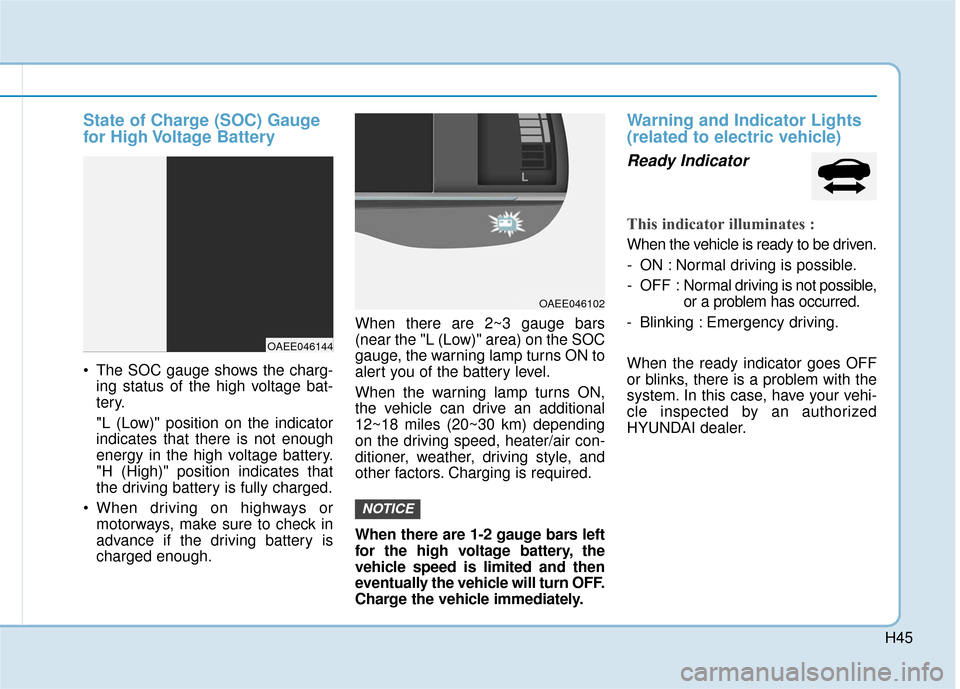
State of Charge (SOC) Gauge
for High Voltage Battery
The SOC gauge shows the charg-ing status of the high voltage bat-
tery.
"L (Low)" position on the indicator
indicates that there is not enough
energy in the high voltage battery.
"H (High)" position indicates that
the driving battery is fully charged.
When driving on highways or motorways, make sure to check in
advance if the driving battery is
charged enough. When there are 2~3 gauge bars
(near the "L (Low)" area) on the SOC
gauge, the warning lamp turns ON to
alert you of the battery level.
When the warning lamp turns ON,
the vehicle can drive an additional
12~18 miles (20~30 km) depending
on the driving speed, heater/air con-
ditioner, weather, driving style, and
other factors. Charging is required.
When there are 1-2 gauge bars left
for the high voltage battery, the
vehicle speed is limited and then
eventually the vehicle will turn OFF.
Charge the vehicle immediately.
Warning and Indicator Lights
(related to electric vehicle)
Ready Indicator
This indicator illuminates :
When the vehicle is ready to be driven.
- ON : Normal driving is possible.
- OFF : Nor
mal driving is not possible,
or a problem has occurred.
- Blinking : Emergency driving.
When the ready indicator goes OFF
or blinks, there is a problem with the
system. In this case, have your vehi-
cle inspected by an authorized
HYUNDAI dealer.
NOTICE
OAEE046144
OAEE046102
Page 528 of 541
H46
D
DR
RI
IV
V I
IN
N G
G
E
E L
LE
E C
CT
T R
R I
IC
C
V
V E
EH
H I
IC
C L
LE
E
(
( C
C O
O N
NT
T.
.)
)
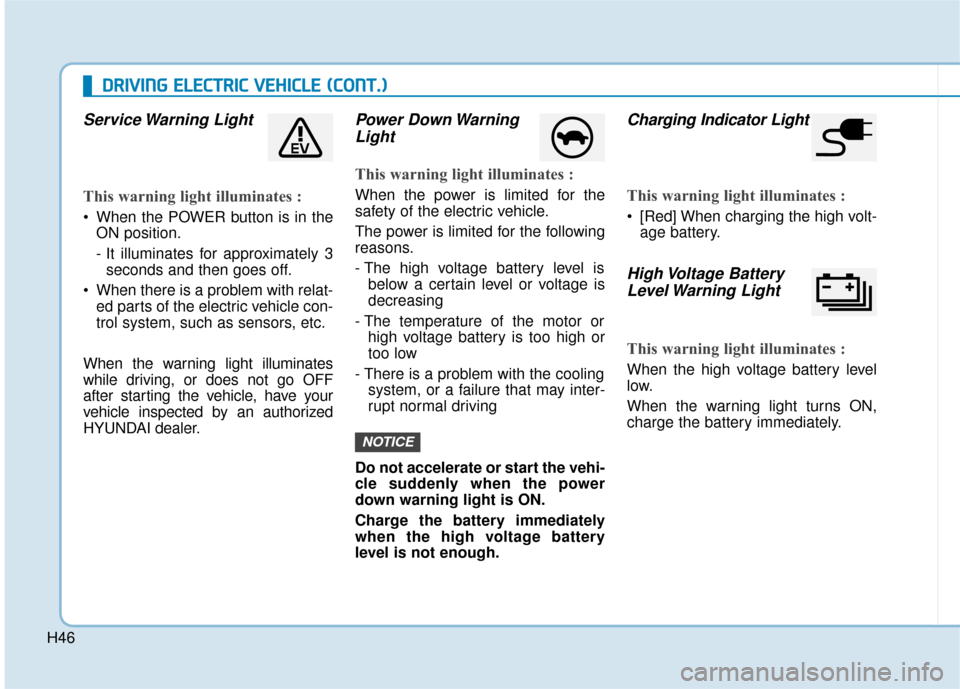
Service Warning Light
This warning light illuminates :
When the POWER button is in the
ON position.
- It illuminates for approximately 3seconds and then goes off.
When there is a problem with relat- ed parts of the electric vehicle con-
trol system, such as sensors, etc.
When the warning light illuminates
while driving, or does not go OFF
after starting the vehicle, have your
vehicle inspected by an authorized
HYUNDAI dealer.
Power Down Warning Light
This warning light illuminates :
When the power is limited for the
safety of the electric vehicle.
The power is limited for the following
reasons.
- The high voltage battery level is
below a certain level or voltage is
decreasing
- The temperature of the motor or high voltage battery is too high or
too low
- There is a problem with the cooling system, or a failure that may inter-
rupt normal driving
Do not accelerate or start the vehi-
cle suddenly when the power
down warning light is ON.
Charge the battery immediately
when the high voltage battery
level is not enough.
Charging Indicator Light
This warning light illuminates :
[Red] When charging the high volt- age battery.
High Voltage BatteryLevel Warning Light
This warning light illuminates :
When the high voltage battery level
low.
When the warning light turns ON,
charge the battery immediately.
NOTICE
Page 529 of 541
H47
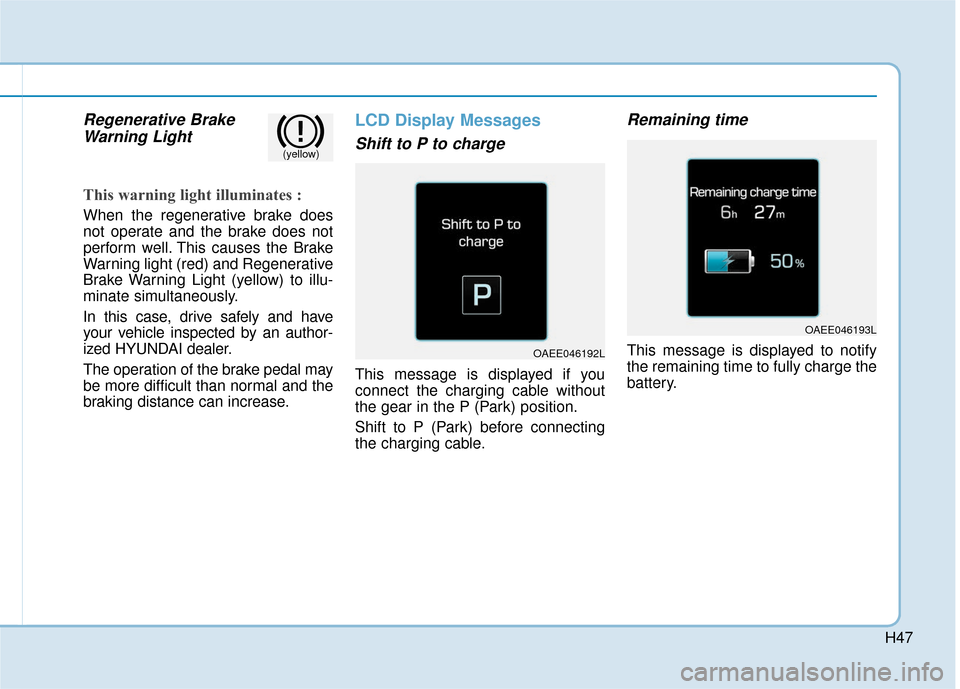
Regenerative BrakeWarning Light
This warning light illuminates :
When the regenerative brake does
not operate and the brake does not
perform well. This causes the Brake
Warning light (red) and Regenerative
Brake Warning Light (yellow) to illu-
minate simultaneously.
In this case, drive safely and have
your vehicle inspected by an author-
ized HYUNDAI dealer.
The operation of the brake pedal may
be more difficult than normal and the
braking distance can increase.
LCD Display Messages
Shift to P to charge
This message is displayed if you
connect the charging cable without
the gear in the P (Park) position.
Shift to P (Park) before connecting
the charging cable.
Remaining time
This message is displayed to notify
the remaining time to fully charge the
battery.
(yellow)
OAEE046192L
OAEE046193L
Page 530 of 541
H48
D
DR
RI
IV
V I
IN
N G
G
E
E L
LE
E C
CT
T R
R I
IC
C
V
V E
EH
H I
IC
C L
LE
E
(
( C
C O
O N
NT
T.
.)
)
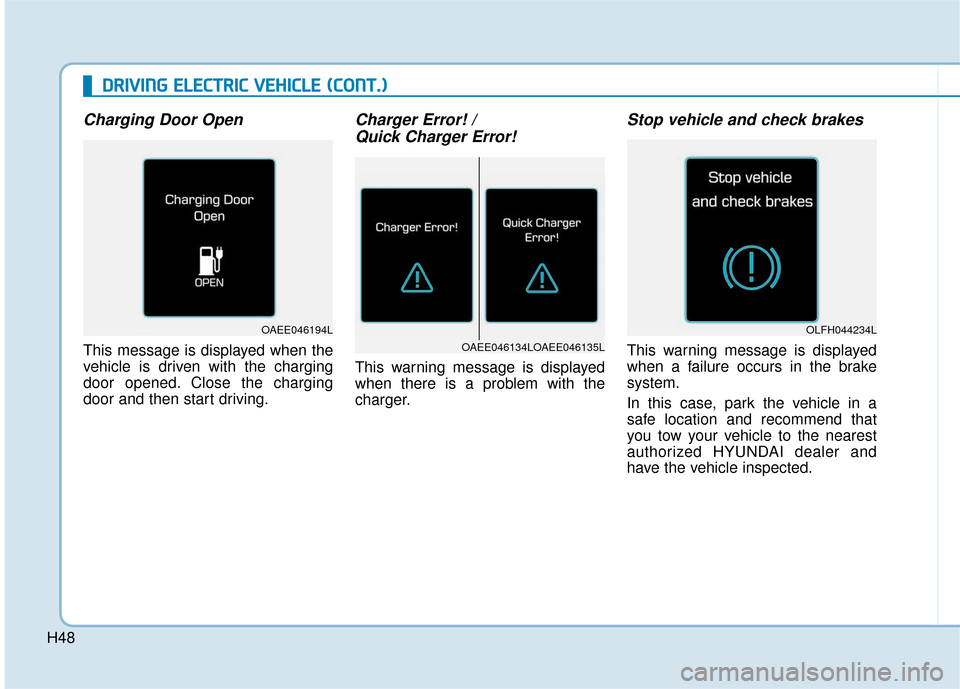
Charging Door Open
This message is displayed when the
vehicle is driven with the charging
door opened. Close the charging
door and then start driving.
Charger Error! /
Quick Charger Error!
This warning message is displayed
when there is a problem with the
charger.
Stop vehicle and check brakes
This warning message is displayed
when a failure occurs in the brake
system.
In this case, park the vehicle in a
safe location and recommend that
you tow your vehicle to the nearest
authorized HYUNDAI dealer and
have the vehicle inspected.OAEE046134LOAEE046135L
OAEE046194LOLFH044234L