start stop button Hyundai Ioniq Electric 2018 Owner's Manual
[x] Cancel search | Manufacturer: HYUNDAI, Model Year: 2018, Model line: Ioniq Electric, Model: Hyundai Ioniq Electric 2018Pages: 541, PDF Size: 19.83 MB
Page 100 of 541
3-15
Convenient features of your vehicle
3
Recalling positions from mem-
ory
1. Shift to P (Park) while the POWERbutton is in the ON position.
2. Press the desired memory button (1 or 2). The system will beep
once, and then the driver’s seat
position, side view mirror position
and instrument panel illumination
intensity will automatically adjust
to the stored positions.
3. "Driver 1(or 2) settings is applied" will appear on the LCD display. While recalling the "1" memory
position, pressing the SET or 1
button temporarily stops the
adjustment of the recalled memo-
ry position. Pressing the 2 button
recalls the "2" memory position.
While recalling the "2" memory position, pressing the SET or 2
button temporarily stops the
adjustment of the recalled memo-
ry position. Pressing the 1 button
recalls the "1" memory position.
While recalling the stored posi- tions, pressing one of the con-
trol buttons for the driver’s seat,
side view mirror or instrument
panel illumination will cause the
movement of that component to
stop and move in the direction
that the control button is
pressed.
Easy Access Function
When exiting the vehicle the driver’s
seat will move rearward when the
vehicle is turned off, and the gear in
P (Park).
When entering the vehicle the dri-
ver's seat will move forward when the
smart key is detected with the
POWER button in the ACC/ON/
START position.
You can activate or deactivate the
Easy Access Function from the User
Settings mode on the LCD display.
For more information, refer to the
"LCD Display" section in this
chapter.
NOTICE
Page 130 of 541
3-45
Convenient features of your vehicle
3
Resetting the sunroof
Sunroof needs to be reset if the fol-
lowing occurs :
- Battery is discharged or discon-nected or the related fuse has been
replaced or disconnected
- The one-touch sliding function of the sunroof does not normally oper-
ate
Reset procedure :
1. Place the POWER button to the ON position or start the vehicle
( indicator ON). It is recom-
mended to reset the sunroof while
the vehicle is in the ready ( )
mode.
2. Push the control lever forward. The sunroof will close completely or tilt
depending on the condition of the
sunroof.
3. Release the control lever when the sunroof stops moving. 4. Push the control lever forward
about 10 seconds.
- When the sunroof is in the closed position :
The glass will tilt and slightly move up and down.
- When the sunroof is in the tilt position:
The glass will slightly move up and down.
Do not release the lever until the
operation is completed.
If you release the lever during opera-
tion, start the procedure again from
step 2.
5. Within 3 seconds, push and hold the control lever forward until the
sunroof operates as follows:
Tilt down → Slide Open → Slide
Close. Do not release the lever until the
operation is completed.
If you release the lever during opera-
tion, start the procedure again from
step 2.
6. Release the sunroof control lever
after all steps have completed. (The
sunroof system has been reset.)
Information
• If the sunroof is not reset when thevehicle battery is disconnected or
discharged, or the sunroof fuse is
blown, the sunroof may not operate
normally.
• For more detailed information, con- tact an authorized HYUNDAI deal-
er.
i
Page 150 of 541
3-65
Convenient features of your vehicle
3
Adaptive Front LightingSystem (AFLS) WarningLight (if equipped)
This warning light blinks:
When the POWER button is in the
ON position.
- It illuminates for approximately 3seconds and then goes off.
When there is a malfunction with the AFLS.
If there is a malfunction with the
AFLS:
1. Drive carefully to the nearest safe location and stop your vehicle.
2. Turn the vehicle off and restart the vehicle ( indicator ON). If the
warning light remains on, have your
vehicle inspected by an authorized
HYUNDAI dealer.
Master Warning Light
This indicator light illuminates:
When there is a malfunction in oper-
ation in any of the following systems:
- Autonomous Emergency Braking(AEB) malfunction (if equipped)
- Advanced Smart Cruise Control malfunction (if equipped)
- Blind Spot Detection (BSD) mal- function (if equipped)
- Tire Pressure Monitoring System (TPMS) malfunction
- Service reminder
To identify the details of the warning,
look at the LCD display.
Electronic Stability Control (ESC) IndicatorLight
This indicator light illuminates:
When the POWER button is in the
ON position.
- It illuminates for approximately 3seconds and then goes off.
When there is a malfunction with the ESC system.
In this case, have your vehicle
inspected by an authorized HYUNDAI
dealer.
This indicator light blinks:
While the ESC is operating.
For more information, refer to
"Electronic Stability Control (ESC)"
in chapter 5.
AFLS
Page 177 of 541
3-92
Convenient features of your vehicle
Tripmeter (1)
The tripmeter is the total drivingdistance since the last tripmeter
reset.
To reset the tripmeter, press the OK button on the steering wheel
for more than 1 second when the
tripmeter is displayed.
Average Vehicle Speed (2)
The average vehicle speed is cal-culated by the total driving dis-
tance and driving time since the
last average vehicle speed reset.
To reset the average vehicle speed, press the OK button on the steering
wheel for more than 1 second when
the average vehicle speed is dis-
played.
Information
• The average vehicle speed is not dis-played if the driving distance is less
than 0.19 miles (300 meters) or the
driving time is less than 10 seconds,
after resetting the vehicle speed.
• The average vehicle speed will con- tinue to be calculated and will start
to decrease if the vehicle is stopped
while the vehicle is in the ready
( ) mode.
Timer (3)
The timer is the total driving timesince the last timer reset.
To reset the timer, press the OK button on the steering wheel for
more than 1 second when the timer
is displayed.
Information
The timer will continue to be counted
while the vehicle is in the ready ( )
mode.
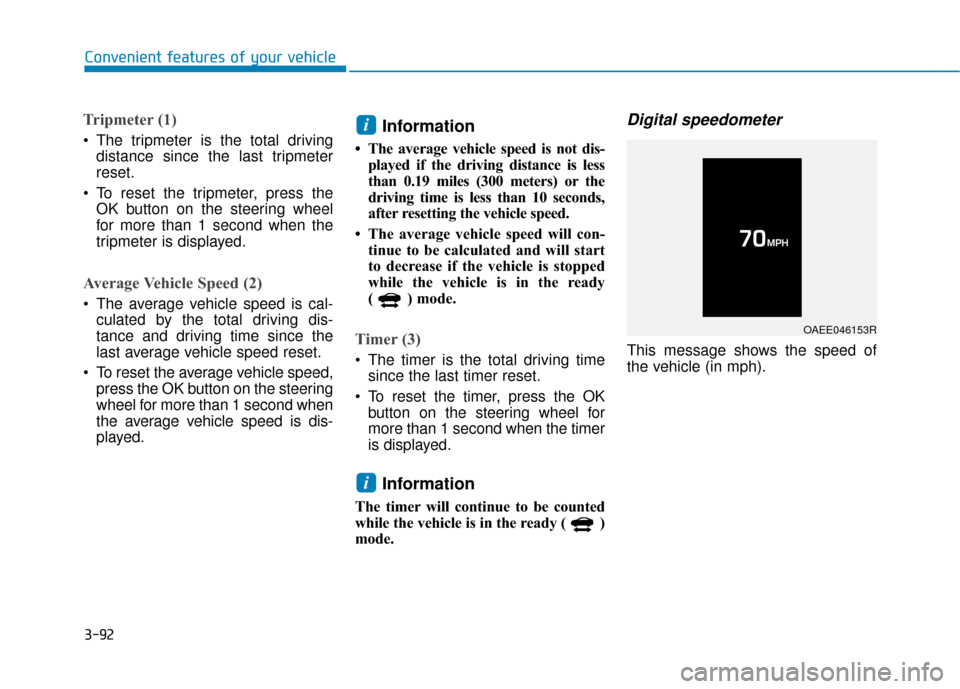
Digital speedometer
This message shows the speed of
the vehicle (in mph).
i
i
OAEE046153R
Page 213 of 541
3-128
Convenient features of your vehicle
Wireless Cellular Phone
Charging System (if equipped)
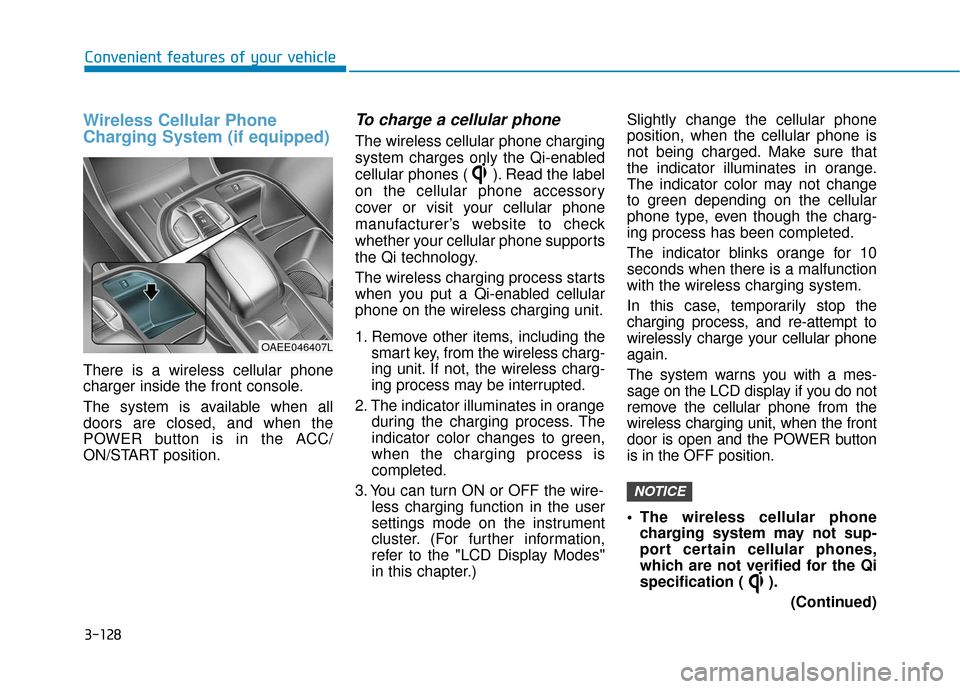
There is a wireless cellular phone
charger inside the front console.
The system is available when all
doors are closed, and when the
POWER button is in the ACC/
ON/START position.
To charge a cellular phone
The wireless cellular phone charging
system charges only the Qi-enabled
cellular phones ( ). Read the label
on the cellular phone accessory
cover or visit your cellular phone
manufacturer’s website to check
whether your cellular phone supports
the Qi technology.
The wireless charging process starts
when you put a Qi-enabled cellular
phone on the wireless charging unit.
1. Remove other items, including thesmart key, from the wireless charg-
ing unit. If not, the wireless charg-
ing process may be interrupted.
2. The indicator illuminates in orange during the charging process. The
indicator color changes to green,
when the charging process is
completed.
3. You can turn ON or OFF the wire- less charging function in the user
settings mode on the instrument
cluster. (For further information,
refer to the "LCD Display Modes"
in this chapter.) Slightly change the cellular phone
position, when the cellular phone is
not being charged. Make sure that
the indicator illuminates in orange.
The indicator color may not change
to green depending on the cellular
phone type, even though the charg-
ing process has been completed.
The indicator blinks orange for 10
seconds when there is a malfunction
with the wireless charging system.
In this case, temporarily stop the
charging process, and re-attempt to
wirelessly charge your cellular phone
again.
The system warns you with a mes-
sage on the LCD display if you do not
remove the cellular phone from the
wireless charging unit, when the front
door is open and the POWER button
is in the OFF position.
The wireless cellular phone
charging system may not sup-
port certain cellular phones,
which are not verified for the Qi
specification ( ).
(Continued)
NOTICE
OAEE046407L
Page 214 of 541
3-129
Convenient features of your vehicle
3
(Continued)
Locate your cell phone well inthe middle of the wireless cellu-
lar phone charging system.
Even when your cell phone
locates slightly to one side, the
charging speed may decrease.
The wireless charging process may temporarily stop, when a
smart key function operates (i.e.
starting the vehicle, opening the
doors, closing the doors).
For certain cell phones, the indi- cator color may not change to
green, even when the wireless
charging process is properly
completed.
The wireless charging process may temporarily stop, when tem-
perature abnormally increases
inside the wireless cellular phone
charging system. The wireless
charging process restarts, when
temperature falls to a proper level.
The wireless charging process may temporarily stop when
there is any metallic item, such
as a coin, between the wireless
cellular phone charging system
and a cellular phone.ClockVehicles with Audio system
Select the [SETUP] button on the
audio system ➟ Select [Date/Time].
Set time : Set the time displayed on the audio screen.
Time format : Choose between 12- hour and 24-hour time formats.
Vehicles with Navigation system
Select the Settings menu on the
Navigation system ➟Select
[Date/Time].
GPS time : Displays time according to the received GNSS time.
24-hour : Switches to 12 hour or 24 hour.
Do not adjust the clock while
driving, you may lose your
steering control and cause an
accident that results in severe
personal injury or death.
WARNING
Page 257 of 541
![Hyundai Ioniq Electric 2018 Owners Manual 4-40
Multimedia System
Dial
Press the [PHONE]button on the
audio ➟Select [Dial].
(1) Phone number entry window: The phone number entered using the
keypad is displayed.
(2) Clear - Press to delete i](/img/35/14904/w960_14904-256.png "Hyundai Ioniq Electric 2018 Owners Manual 4-40
Multimedia System
Dial
Press the [PHONE]button on the
audio ➟Select [Dial].
(1) Phone number entry window: The phone number entered using the
keypad is displayed.
(2) Clear - Press to delete i")
4-40
Multimedia System
Dial
Press the [PHONE]button on the
audio ➟Select [Dial].
(1) Phone number entry window: The phone number entered using the
keypad is displayed.
(2) Clear - Press to delete individual digits.
- Press and hold to delete theentire phone number.
(3) Keypad: Enter phone number.
(4)
Bluetooth®Wireless Technology
Phone name
- The name of the connected
Bluetooth®Wireless Technology
device is displayed.
- Contacts matching the keypad number/letter input are displayed.(5) Call
- Enter and select a phone num-ber to call.
- Select without entering a phone number to see the most recent
dialed call.
Settings
Press the [PHONE]button on the
audio ➟Select [Settings].
- For phone Setup, refer to Setup page ➟Select [Bluetooth].
Siri
Information -
Using Siri
• If you want to use Siri, you have to connect your iOS device to multime-
dia system through Bluetooth
®
Wireless Technology. (Please check
whether your iOS device supports
Siri and turning Siri On)
• If the iOS version is changed, the functions and response may be dif-
ferent according to the iOS device
and the latest version.
• Siri automatically stops in the fol- lowing events.
1)Outgoing and incoming phonecalls.
2)Media (USB, etc.) is connected. (Siri mode is maintained when
iPod
®s are connected)
3)Rear camera is activated (option).
4)Vehicle is started or engine is turned off.
5)Screen transition buttons, such as RADIO or MEDIA, are selected.
(Continued)
i
Page 270 of 541
5-9
Driving your vehicle
5
To prevent damage to the vehicle:
If the " " indicator turns off
while you are in motion, do not
attempt to shift to the P (Park)
position.
To prevent damage to the vehicle:
When the stop lamp fuse is blown,
you cannot normally start the
vehicle. Replace the fuse with a
new one. If you are not able to
replace the fuse, you can start the
vehicle by pressing and holding
the POWER button for 10 seconds
with the POWER button in the ACC
position.
Do not press the POWER button
for more than 10 seconds except
when the stop lamp fuse is blown.
For your safety always depress
the brake pedal before starting the
vehicle.
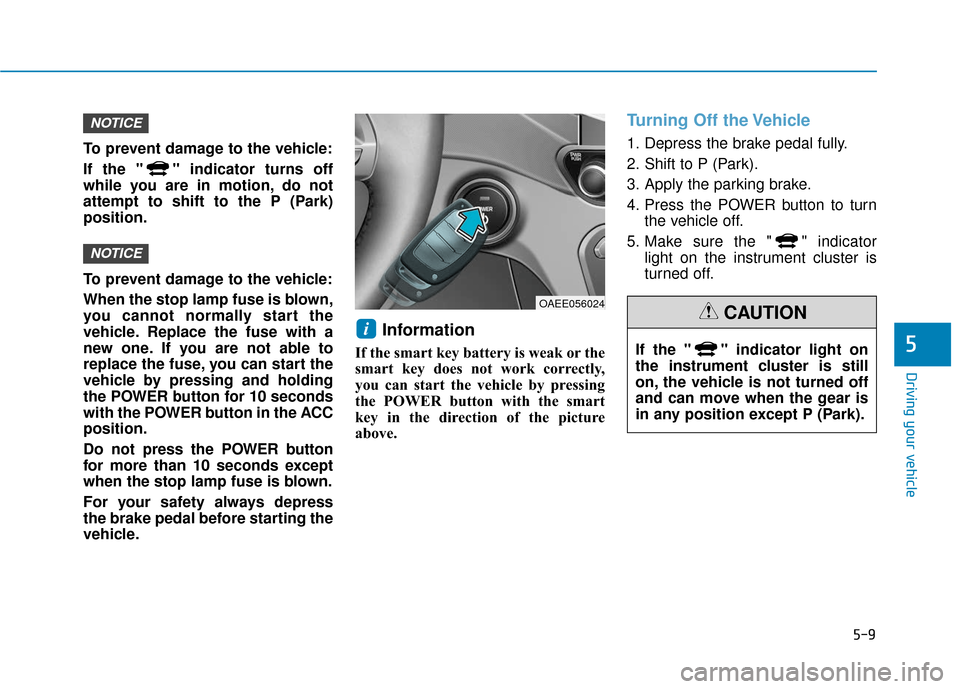
Information
If the smart key battery is weak or the
smart key does not work correctly,
you can start the vehicle by pressing
the POWER button with the smart
key in the direction of the picture
above.
Turning Off the Vehicle
1. Depress the brake pedal fully.
2. Shift to P (Park).
3. Apply the parking brake.
4. Press the POWER button to turnthe vehicle off.
5. Make sure the " " indicator light on the instrument cluster is
turned off.
i
NOTICE
NOTICE
OAEE056024
If the " " indicator light on
the instrument cluster is still
on, the vehicle is not turned off
and can move when the gear is
in any position except P (Park).
CAUTION
Page 273 of 541
5-12
Driving your vehicle
Shift-lock system
For your safety, your vehicle has a
shift-lock system which prevents
shifting the gear from P (Park) or N
(Neutral) into R (Reverse) or D
(Drive) unless the brake pedal is
depressed.
To shift from P (Park) or N (Neutral)
into R (Reverse) or D (Drive) :
1. Depress and hold the brake pedal.
2. Start the vehicle or place thePOWER button in the ON position.
3. Press the R (Reverse) or D (Drive) button.
When the battery (12 V) is dis-charged
You cannot shift the gear when the
battery is discharged.
Jump start your vehicle (refer to
“Jump Starting” in chapter 6) or con-
tact an authorized HYUNDAI dealer.
Parking
Always come to a complete stop and
continue to depress the brake pedal.
Shift to the P (Park) position, apply
the parking brake, and place the
POWER button in the OFF position.
Take the Key with you when exiting
the vehicle.
LCD Display Messages
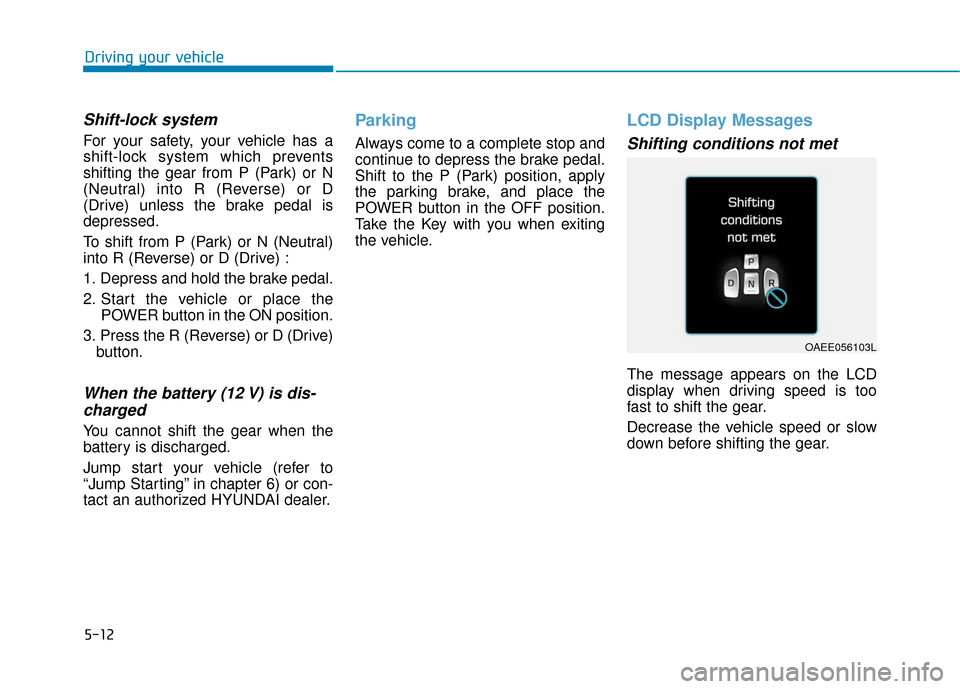
Shifting conditions not met
The message appears on the LCD
display when driving speed is too
fast to shift the gear.
Decrease the vehicle speed or slow
down before shifting the gear.
OAEE056103L
Page 295 of 541
5-34
Driving your vehicle
VSM OFF condition
To cancel VSM operation, press the
ESC OFF button. ESC OFF indicator
light ( ) will illuminate.
To turn on VSM, press the ESC OFF
button again. The ESC OFF indicator
light will go out.Driving with wheels and tires with
different sizes may cause the VSM
system to malfunction. Before
replacing tires, make sure all four
tires and wheels are the same
size. Never drive the vehicle with
different sized tires and wheels
installed.
Hill-Start Assist Control (HAC)
The Hill-Start Assist Control (HAC)
helps prevent the vehicle from rolling
backwards when starting a vehicle
from a stop on a hill. The system
operates the brakes automatically for
approximately 2 seconds and releas-
es the brake after 2 seconds or when
the accelerator pedal is depressed.
Information
• The HAC does not operate when the
gear is in P (Park) or N (Neutral).
• The HAC activates even when the ESC (Electronic Stability Control) is
off. However, it does not activate,
when the ESC does not operate nor-
mally.
i
NOTICE
If the ESC indicator light ( ) or
EPS warning light ( ) stays
on or blinks, your vehicle may
have a malfunction with the
VSM system. When the warning
light illuminates, have the vehi-
cle checked by an authorized
HYUNDAI dealer as soon as
possible.
WARNING
Always be ready to depress the
accelerator pedal when starting
off on a incline. The HAC acti-
vates only for approximately 2
seconds.
WARNING