mirror Hyundai Ioniq Electric 2019 Owner's Manual - RHD (UK, Australia)
[x] Cancel search | Manufacturer: HYUNDAI, Model Year: 2019, Model line: Ioniq Electric, Model: Hyundai Ioniq Electric 2019Pages: 526, PDF Size: 16.63 MB
Page 74 of 526
1-2
Your vehicle at a glance
E
EX
X T
TE
ER
R I
IO
O R
R
O
O V
VE
ER
R V
V I
IE
E W
W
(
( F
F R
R O
O N
NT
T
V
V I
IE
E W
W )
)
OAEE016001L
The actual shape may differ from the illustration.
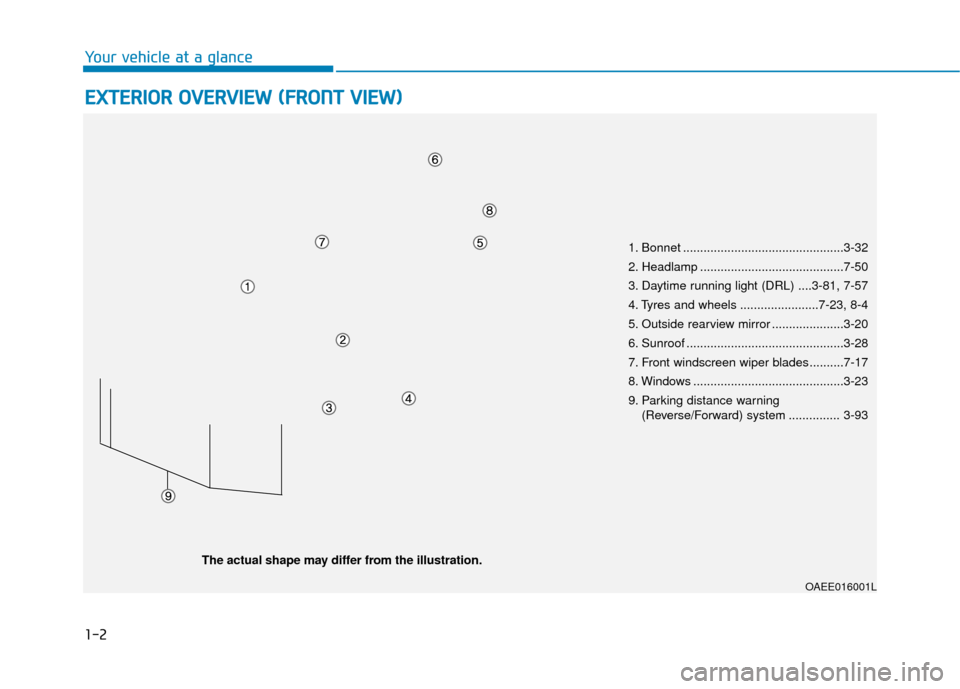
1. Bonnet ...............................................3-32
2. Headlamp ..........................................7-50
3. Daytime running light (DRL) ....3-81, 7-57
4. Tyres and wheels .......................7-23, 8-4
5. Outside rearview mirror .....................3-20
6. Sunroof ..............................................3-28
7. Front windscreen wiper blades ..........7-17
8. Windows ............................................3-23
9. Parking distance warning
(Reverse/Forward) system ............... 3-93
Page 76 of 526
1-4
Your vehicle at a glance
I
IN
N T
TE
ER
R I
IO
O R
R
O
O V
VE
ER
R V
V I
IE
E W
W
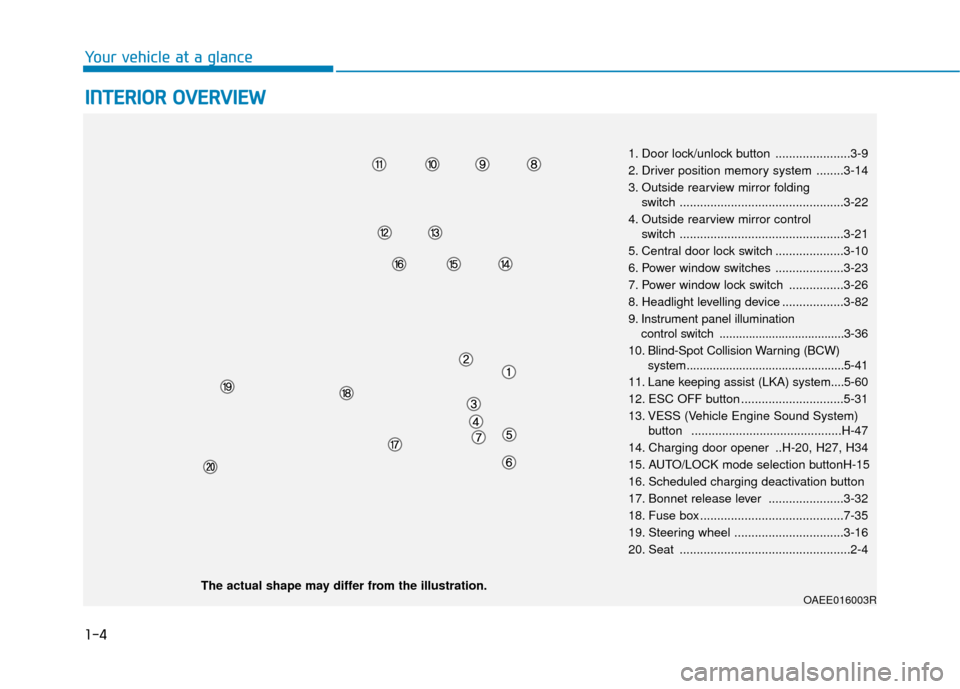
1. Door lock/unlock button ......................3-9
2. Driver position memory system ........3-14
3. Outside rearview mirror folding
switch ................................................3-22
4. Outside rearview mirror control switch ................................................3-21
5. Central door lock switch ....................3-10
6. Power window switches ....................3-23
7. Power window lock switch ................3-26
8. Headlight levelling device ..................3-82
9. Instrument panel illumination control switch ......................................3-36
10. Blind-Spot Collision Warning (BCW) system................................................5-41
11. Lane keeping assist (LKA) system....5-60
12. ESC OFF button ..............................5-31
13. VESS (Vehicle Engine Sound System) button ............................................H-47
14. Charging door opener ..H-20, H27, H34
15. AUTO/LOCK mode selection buttonH-15
16. Scheduled charging deactivation button
17. Bonnet release lever ......................3-32
18. Fuse box ..........................................7-35
19. Steering wheel ................................3-16
20. Seat ..................................................2-4
OAEE016003RThe actual shape may differ from the illustration.
Page 130 of 526
2-52
Safety system of your vehicle
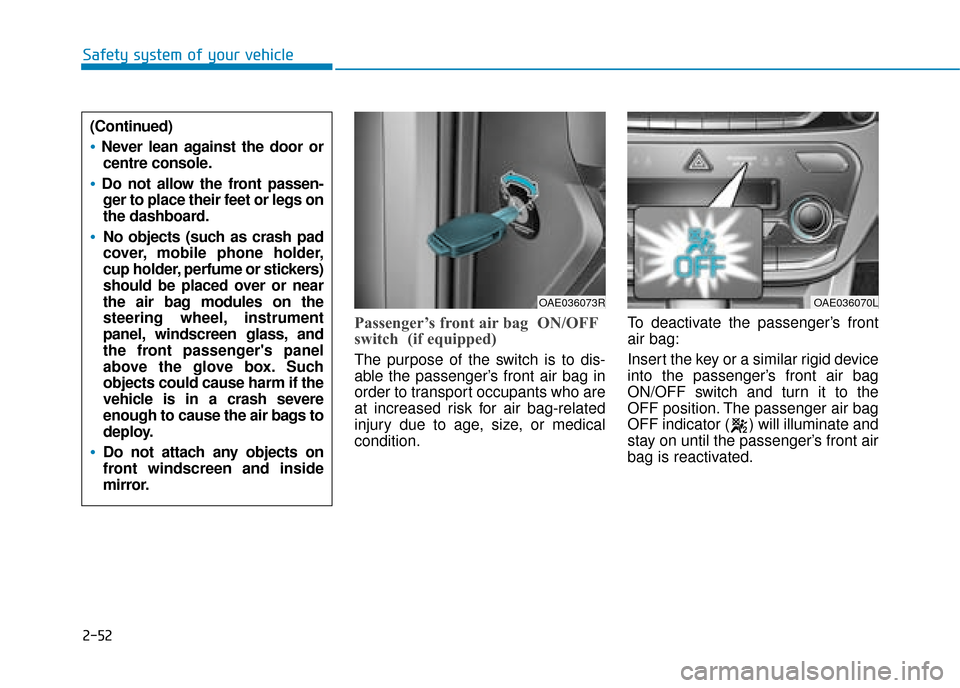
Passenger’s front air bag ON/OFF
switch (if equipped)
The purpose of the switch is to dis-
able the passenger’s front air bag in
order to transport occupants who are
at increased risk for air bag-related
injury due to age, size, or medical
condition.To deactivate the passenger’s front
air bag:
Insert the key or a similar rigid device
into the passenger’s front air bag
ON/OFF switch and turn it to the
OFF position. The passenger air bag
OFF indicator ( ) will illuminate and
stay on until the passenger’s front air
bag is reactivated.
OAE036073ROAE036070L
(Continued)
Never lean against the door or
centre console.
Do not allow the front passen-ger to place their feet or legs on
the dashboard.
No objects (such as crash pad
cover, mobile phone holder,
cup holder, perfume or stickers)
should be placed over or near
the air bag modules on the
steering wheel, instrument
panel, windscreen glass, and
the front passenger's panel
above the glove box. Such
objects could cause harm if the
vehicle is in a crash severe
enough to cause the air bags to
deploy.
Do not attach any objects on
front windscreen and inside
mirror.
Page 148 of 526
Convenient features of your vehicle
Accessing your vehicle .........................................3-3
Smart key ........................................................................\
....3-3
Immobiliser system............................................................3-7
Door locks ...............................................................3-8
Operating door locks from outside the vehicle.........3-8
Operating door locks from inside the vehicle ...........3-9
Deadlocks ........................................................................\
..3-11
Auto door lock/unlock features..................................3-11
Child-protector rear door locks ..................................3-12
Theft-alarm system.............................................3-13
Driver position memory system .........................3-14
Storing memory positions .............................................3-14
Easy access function .....................................................3-15
Steering wheel......................................................3-16
Electric power steering (EPS) ......................................3-16
Tilt steering / Telescope steering...............................3-17
Heated steering wheel ...................................................3-17
Horn ........................................................................\
............3-18
Mirrors ...................................................................3-18
Inside rearview mirror....................................................3-18
Outside rearview mirror ................................................3-20
Windows ................................................................3-23
Power windows................................................................3-23
Sunroof..................................................................3-28
Sunroof opening and closing .......................................3-29
Sliding the sunroof .........................................................3-29
Tilting the sunroof ..........................................................3-30
Sunshade ........................................................................\
...3-30
Resetting the sunroof ....................................................3-31
Exterior features .................................................3-32
Bonnet........................................................................\
........3-32
Tailgate.....................................................................\
..........3-33
Instrument cluster................................................3-35
Instrument cluster control ............................................3-36
Gauges and meters .........................................................3-37
Warning and indicator lights ........................................3-41
LCD display messages ..................................................3-52
LCD display ...........................................................3-65
LCD display control.........................................................3-65
LCD display modes ........................................................3-66
Trip computer .......................................................3-73
Light .......................................................................3\
-77
Exterior lights ..................................................................3-77
Welcome system..............................................................3-83
Interior lights ....................................................................3-84\
3
Page 150 of 526
3-3
Convenient features of your vehicle
Smart key
Your HYUNDAI uses a Smart Key,
which you can use to lock or unlock
a door (and tailgate) and even start
the vehicle.
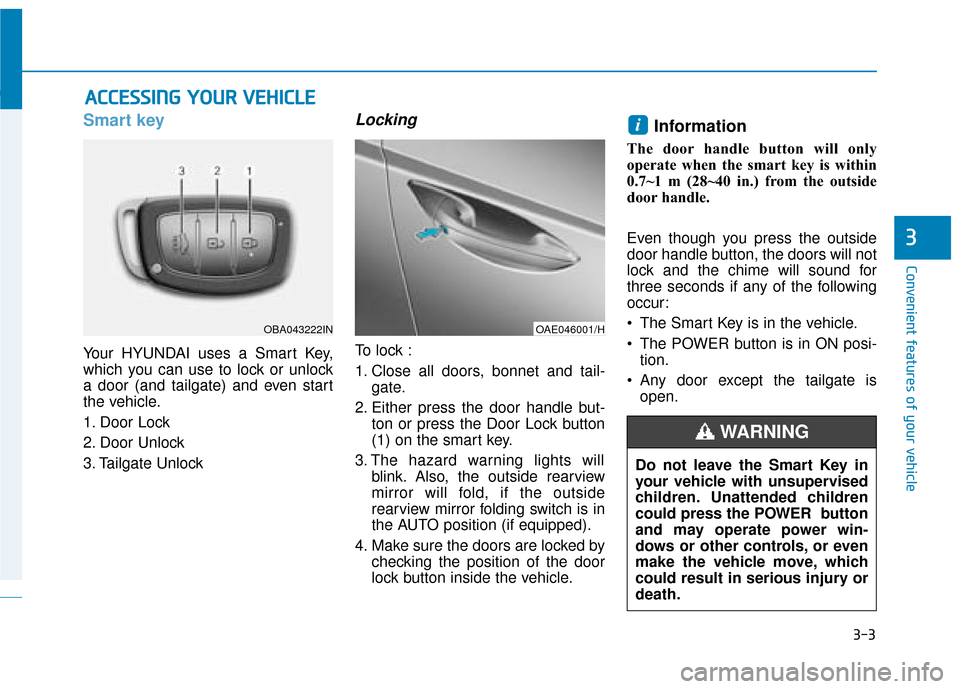
1. Door Lock
2. Door Unlock
3. Tailgate Unlock
Locking
To lock :
1. Close all doors, bonnet and tail-gate.
2. Either press the door handle but- ton or press the Door Lock button
(1) on the smart key.
3. The hazard warning lights will blink. Also, the outside rearview
mirror will fold, if the outside
rearview mirror folding switch is in
the AUTO position (if equipped).
4. Make sure the doors are locked by checking the position of the door
lock button inside the vehicle.
Information
The door handle button will only
operate when the smart key is within
0.7~1 m (28~40 in.) from the outside
door handle.
Even though you press the outside
door handle button, the doors will not
lock and the chime will sound for
three seconds if any of the following
occur:
• The Smart Key is in the vehicle.
The POWER button is in ON posi-tion.
Any door except the tailgate is open.
i
A AC
CC
CE
E S
SS
SI
IN
N G
G
Y
Y O
O U
UR
R
V
V E
EH
H I
IC
C L
LE
E
3
OBA043222INOAE046001/H
Do not leave the Smart Key in
your vehicle with unsupervised
children. Unattended children
could press the POWER button
and may operate power win-
dows or other controls, or even
make the vehicle move, which
could result in serious injury or
death.
WARNING
Page 151 of 526
3-4
Unlocking
To unlock:
1. Carry the Smart Key.
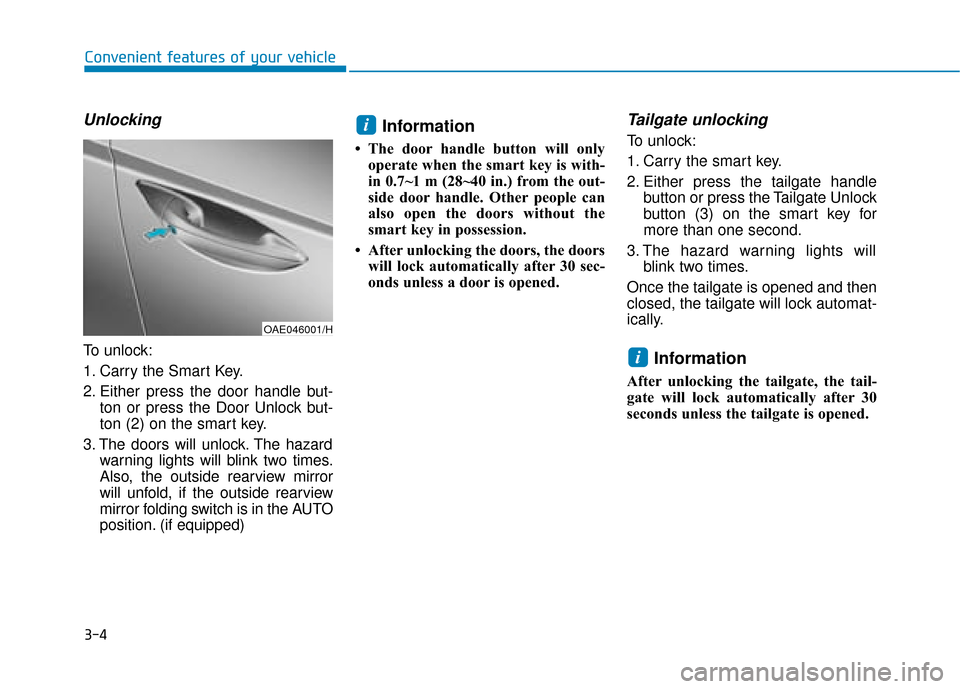
2. Either press the door handle but-ton or press the Door Unlock but-
ton (2) on the smart key.
3. The doors will unlock. The hazard warning lights will blink two times.
Also, the outside rearview mirror
will unfold, if the outside rearview
mirror folding switch is in the AUTO
position. (if equipped)
Information
• The door handle button will onlyoperate when the smart key is with-
in 0.7~1 m (28~40 in.) from the out-
side door handle. Other people can
also open the doors without the
smart key in possession.
• After unlocking the doors, the doors will lock automatically after 30 sec-
onds unless a door is opened.
Tailgate unlocking
To unlock:
1. Carry the smart key.
2. Either press the tailgate handle button or press the Tailgate Unlock
button (3) on the smart key for
more than one second.
3. The hazard warning lights will blink two times.
Once the tailgate is opened and then
closed, the tailgate will lock automat-
ically.
Information
After unlocking the tailgate, the tail-
gate will lock automatically after 30
seconds unless the tailgate is opened.
i
i
Convenient features of your vehicle
OAE046001/H
Page 161 of 526
3-14
Convenient features of your vehicle
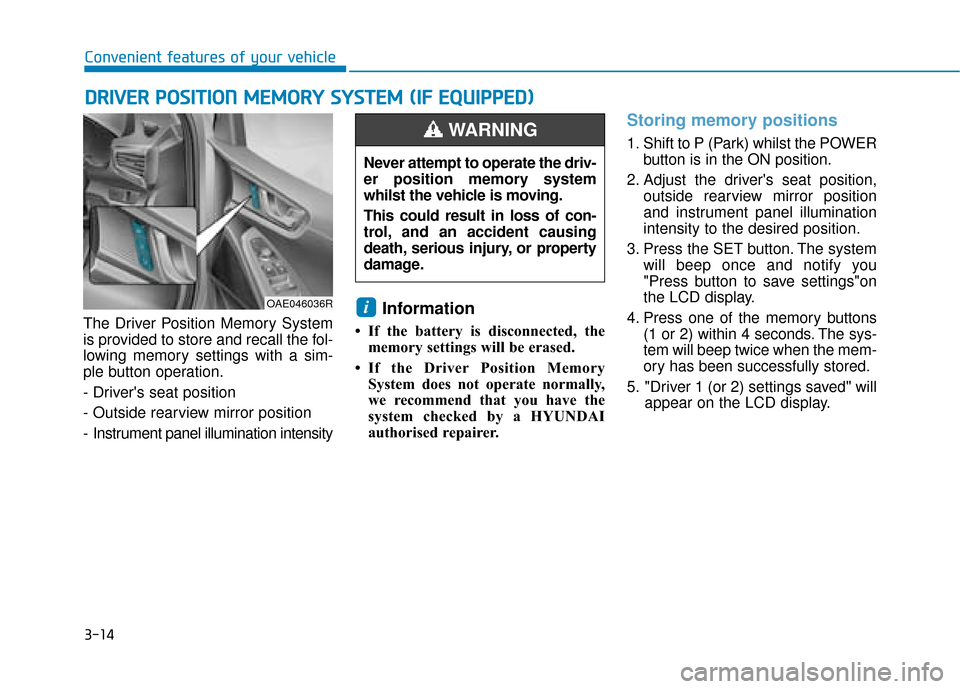
The Driver Position Memory System
is provided to store and recall the fol-
lowing memory settings with a sim-
ple button operation.
- Driver's seat position
- Outside rearview mirror position
- Instrument panel illumination intensity
Information
• If the battery is disconnected, the memory settings will be erased.
• If the Driver Position Memory System does not operate normally,
we recommend that you have the
system checked by a HYUNDAI
authorised repairer.
Storing memory positions
1. Shift to P (Park) whilst the POWER button is in the ON position.
2. Adjust the driver's seat position, outside rearview mirror position
and instrument panel illumination
intensity to the desired position.
3. Press the SET button. The system will beep once and notify you
"Press button to save settings"on
the LCD display.
4. Press one of the memory buttons (1 or 2) within 4 seconds. The sys-
tem will beep twice when the mem-
ory has been successfully stored.
5. "Driver 1 (or 2) settings saved" will appear on the LCD display.
i
D DR
RI
IV
V E
ER
R
P
P O
O S
SI
IT
T I
IO
O N
N
M
M E
EM
M O
OR
RY
Y
S
S Y
Y S
ST
T E
EM
M
(
( I
IF
F
E
E Q
Q U
UI
IP
P P
PE
ED
D )
)
OAE046036R
Never attempt to operate the driv-
er position memory system
whilst the vehicle is moving.
This could result in loss of con-
trol, and an accident causing
death, serious injury, or property
damage.
WARNING
Page 162 of 526
3-15
Convenient features of your vehicle
3
Recalling memory positions
1. Shift to P (Park) whilst the POWER
button is in the ON position.
2. Press the desired memory button (1 or 2). The system will beep
once, then the driver’s seat posi-
tion, outside rearview mirror and
instrument panel illumination will
automatically adjust to the stored
position (if equipped).
3. "Driver 1(or 2) settings is applied" will appear on the LCD display.Information
• Whilst recalling the "1" memoryposition, pressing the SET or 1 but-
ton temporarily stops the adjust-
ment of the recalled memory posi-
tion. Pressing the 2 button recalls
the "2" memory position.
• Whilst recalling the "2" memory position, pressing the SET or 2 but-
ton temporarily stops the adjust-
ment of the recalled memory posi-
tion. Pressing the 1 button recalls
the "1" memory position.
• Whilst recalling the stored positions, pressing one of the control buttons
for the driver's seat, outside
rearview mirror, or instrument
panel illumination will cause the
movement of that component to stop
and move in the direction that the
control button is pressed.
Easy access function
(if equipped)
The system will move the driver's
seat automatically as follows:
The gear is in P (Park)
- It will move the driver’s seat rear-ward when the POWER button is in
the OFF position and the driver’s
door is opened.
- It will move the driver’s seat forward when the vehicle is turned ON or
the driver’s door is closed with the
smart key with you.
You can activate or deactivate the
Easy Access Function from the User
Settings Mode on the LCD display.
For more details, refer to "LCD
Display" in this chapter.
i
Page 165 of 526
3-18
Convenient features of your vehicle
Information
The heated steering wheel will turn off
automatically approximately 30 min-
utes after the heated steering wheel is
turned on.
When the vehicle is turned off during
the heated steering wheel is on, the
timer function of heated steering
wheel will be reset.
To reuse heated steering wheel, press
button again.
Do not install any cover or acces-
sory on the steering wheel. This
cover or accessory could cause
damage to the heated steering
wheel system.
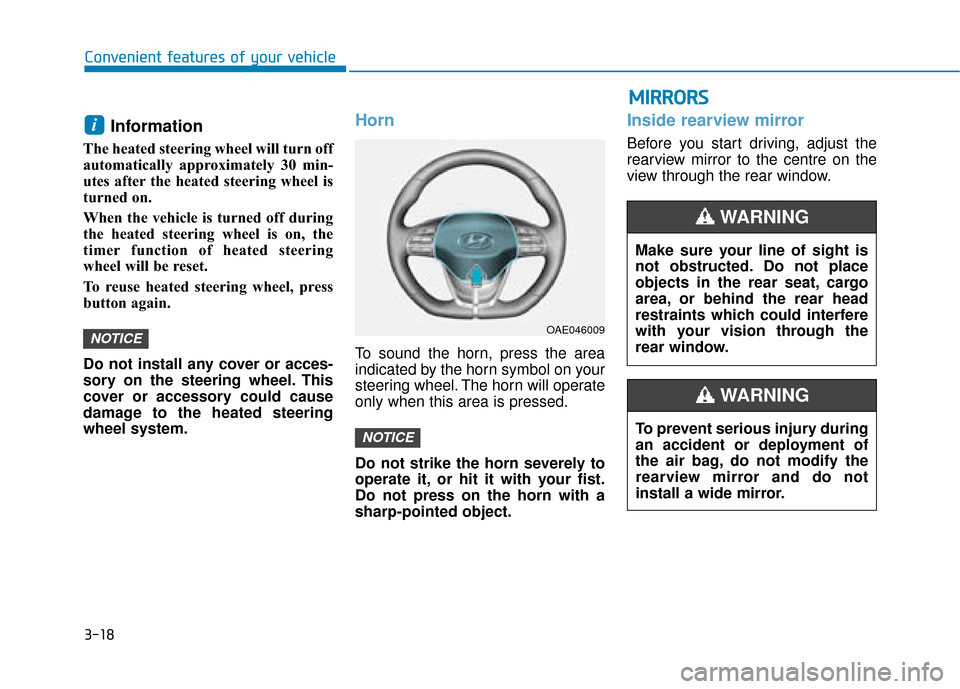
Horn
To sound the horn, press the area
indicated by the horn symbol on your
steering wheel. The horn will operate
only when this area is pressed.
Do not strike the horn severely to
operate it, or hit it with your fist.
Do not press on the horn with a
sharp-pointed object.
Inside rearview mirror
Before you start driving, adjust the
rearview mirror to the centre on the
view through the rear window.
NOTICE
NOTICE
i
OAE046009
M
MI
IR
R R
RO
O R
RS
S
Make sure your line of sight is
not obstructed. Do not place
objects in the rear seat, cargo
area, or behind the rear head
restraints which could interfere
with your vision through the
rear window.
WARNING
To prevent serious injury during
an accident or deployment of
the air bag, do not modify the
rearview mirror and do not
install a wide mirror.
WARNING
Page 166 of 526
3-19
Convenient features of your vehicle
3
When cleaning the mirror, use a
paper towel or similar material
dampened with glass cleaner. Do
not spray glass cleaner directly on
the mirror as that may cause the
liquid cleaner to enter the mirror
housing.
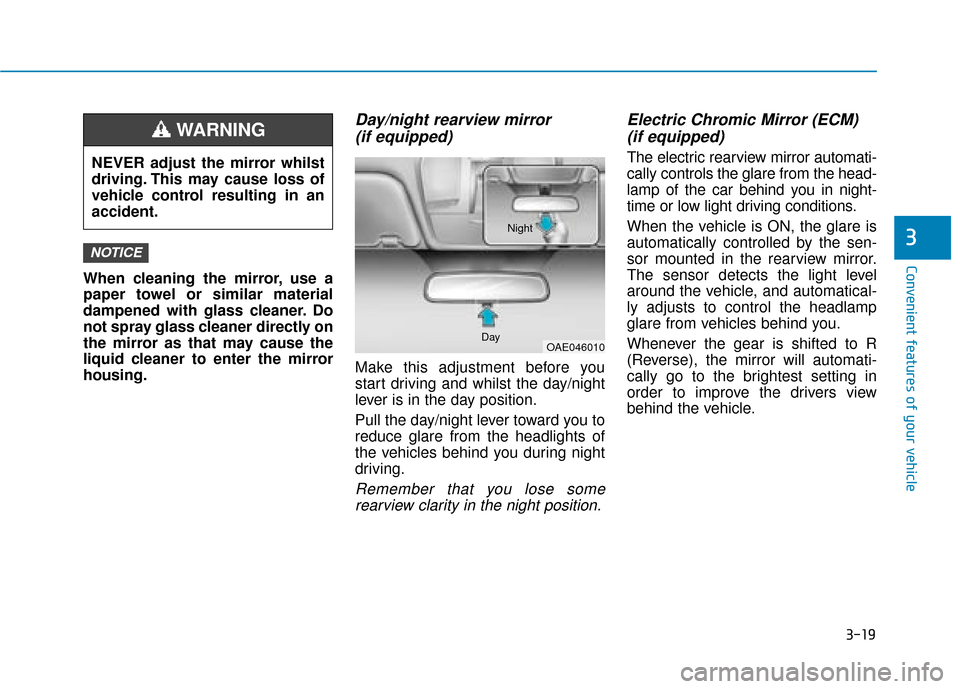
Day/night rearview mirror (if equipped)
Make this adjustment before you
start driving and whilst the day/night
lever is in the day position.
Pull the day/night lever toward you to
reduce glare from the headlights of
the vehicles behind you during night
driving.
Remember that you lose some
rearview clarity in the night position.
Electric Chromic Mirror (ECM) (if equipped)
The electric rearview mirror automati-
cally controls the glare from the head-
lamp of the car behind you in night-
time or low light driving conditions.
When the vehicle is ON, the glare is
automatically controlled by the sen-
sor mounted in the rearview mirror.
The sensor detects the light level
around the vehicle, and automatical-
ly adjusts to control the headlamp
glare from vehicles behind you.
Whenever the gear is shifted to R
(Reverse), the mirror will automati-
cally go to the brightest setting in
order to improve the drivers view
behind the vehicle.
NOTICE
NEVER adjust the mirror whilst
driving. This may cause loss of
vehicle control resulting in an
accident.
WARNING
OAE046010
Day Night