Hyundai Ioniq Electric 2020 Owner's Manual
Manufacturer: HYUNDAI, Model Year: 2020, Model line: Ioniq Electric, Model: Hyundai Ioniq Electric 2020Pages: 561, PDF Size: 41.18 MB
Page 201 of 561
3-116
Convenient features of your vehicle
R RE
EA
AR
R
V
VI
IE
EW
W
M
MO
ON
NI
IT
TO
OR
R
(
(R
RV
VM
M)
)
(
(I
IF
F
E
EQ
QU
UI
IP
PP
PE
ED
D)
)
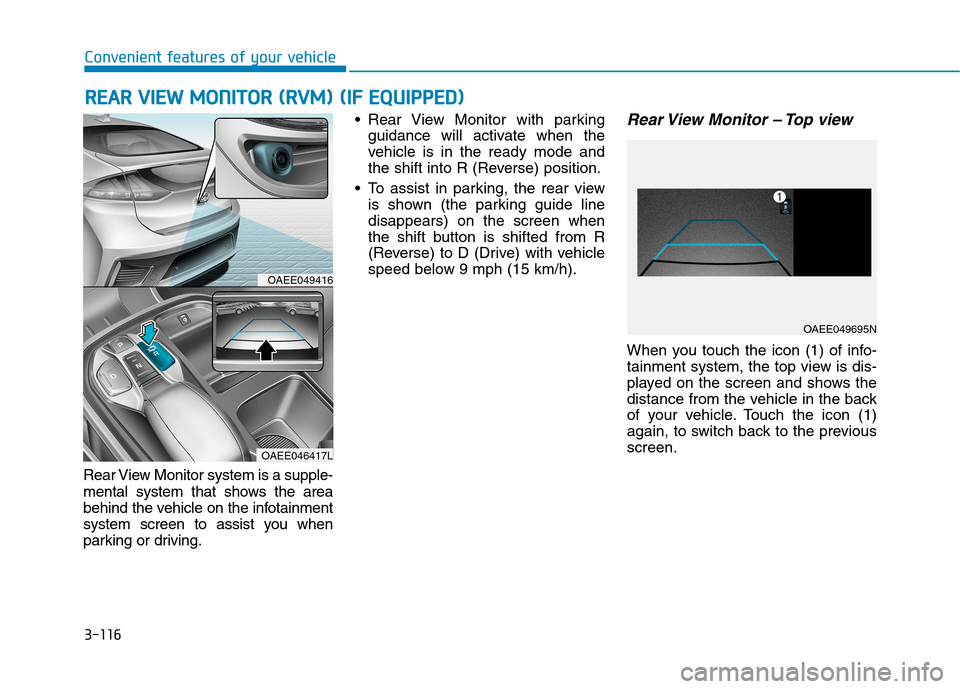
Rear View Monitor system is a supple-
mental system that shows the area
behind the vehicle on the infotainment
system screen to assist you when
parking or driving. Rear View Monitor with parking
guidance will activate when the
vehicle is in the ready mode and
the shift into R (Reverse) position.
To assist in parking, the rear view
is shown (the parking guide line
disappears) on the screen when
the shift button is shifted from R
(Reverse) to D (Drive) with vehicle
speed below 9 mph (15 km/h).
Rear View Monitor – Top view
When you touch the icon (1) of info-
tainment system, the top view is dis-
played on the screen and shows the
distance from the vehicle in the back
of your vehicle. Touch the icon (1)
again, to switch back to the previous
screen.
OAEE049416
OAEE046417L
OAEE049695N
Page 202 of 561
3-117
Convenient features of your vehicle
3
Rear View Monitor is not a
safety device. It only serves to
assist the driver in identifying
objects directly behind the
middle of the vehicle. The
camera does not cover the
complete area behind the
vehicle.
Never rely solely on the rear
view monitor. As there are
blind spots that do not appear
on the camera while backing
up and parking, You must
always use methods of view-
ing the area behind you
including looking over both
shoulders as well as continu-
ously checking all three rear
view mirrors.
Always look around your vehi-
cle to make sure there are no
objects or obstacles before
moving the vehicle in any
direction to prevent a collision.
(Continued)
CAUTION(Continued)
Always pay close attention
when the vehicle is driven
close to objects, particularly
pedestrians, and especially
children.
Always keep the camera lens
clean. If lens is covered with
foreign matter, the camera
may not operate normally.
When stopping for a long time
in winter or parking in an
indoor parking lot, the image
may temporarily be blurry due
to exhaust gas.
Page 203 of 561
3-118
Convenient features of your vehicle
D DE
EF
FR
RO
OS
ST
TE
ER
R
To prevent damage to the conduc-
tors bonded to the inside surface
of the rear window, never use
sharp instruments or window
cleaners containing abrasives to
clean the window.
If you want to defrost and defog
the front windshield, refer to
the "Windshield Defrosting and
Defogging" section in this chapter.
Rear Window Defroster
The defroster heats the window to
remove frost, fog and thin ice from
the interior and exterior of the rear
window while the vehicle is in the
ready ( ) mode.
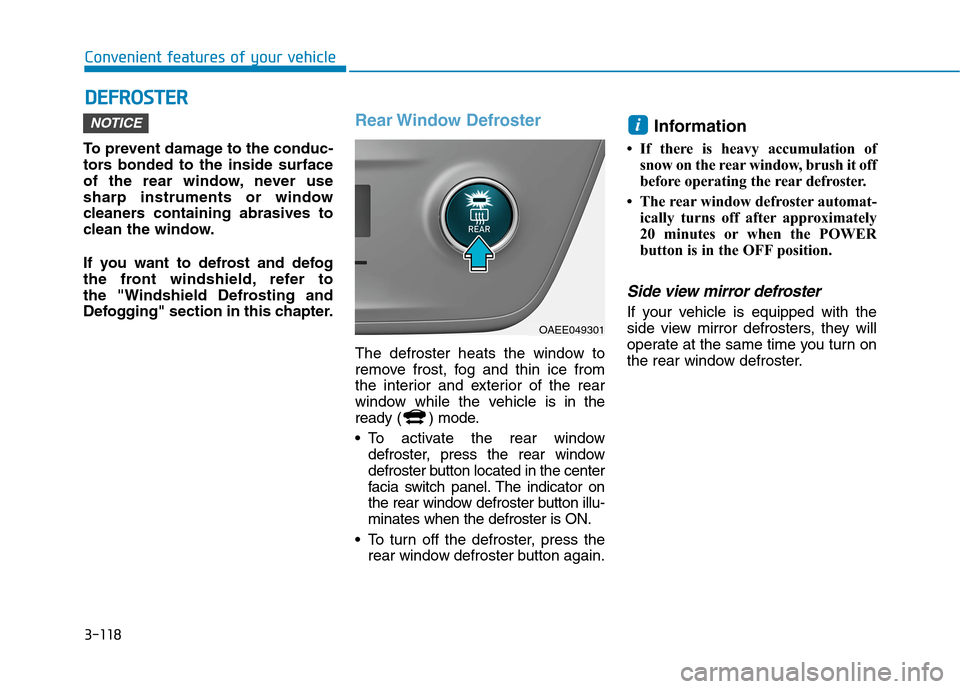
To activate the rear window
defroster, press the rear window
defroster button located in the center
facia switch panel. The indicator on
the rear window defroster button illu-
minates when the defroster is ON.
To turn off the defroster, press the
rear window defroster button again.
Information
• If there is heavy accumulation of
snow on the rear window, brush it off
before operating the rear defroster.
• The rear window defroster automat-
ically turns off after approximately
20 minutes or when the POWER
button is in the OFF position.
Side view mirror defroster
If your vehicle is equipped with the
side view mirror defrosters, they will
operate at the same time you turn on
the rear window defroster.
iNOTICE
OAEE049301
Page 204 of 561
3-119
Convenient features of your vehicle
3
A AU
UT
TO
OM
MA
AT
TI
IC
C
C
CL
LI
IM
MA
AT
TE
E
C
CO
ON
NT
TR
RO
OL
L
S
SY
YS
ST
TE
EM
M
OAEE049500N
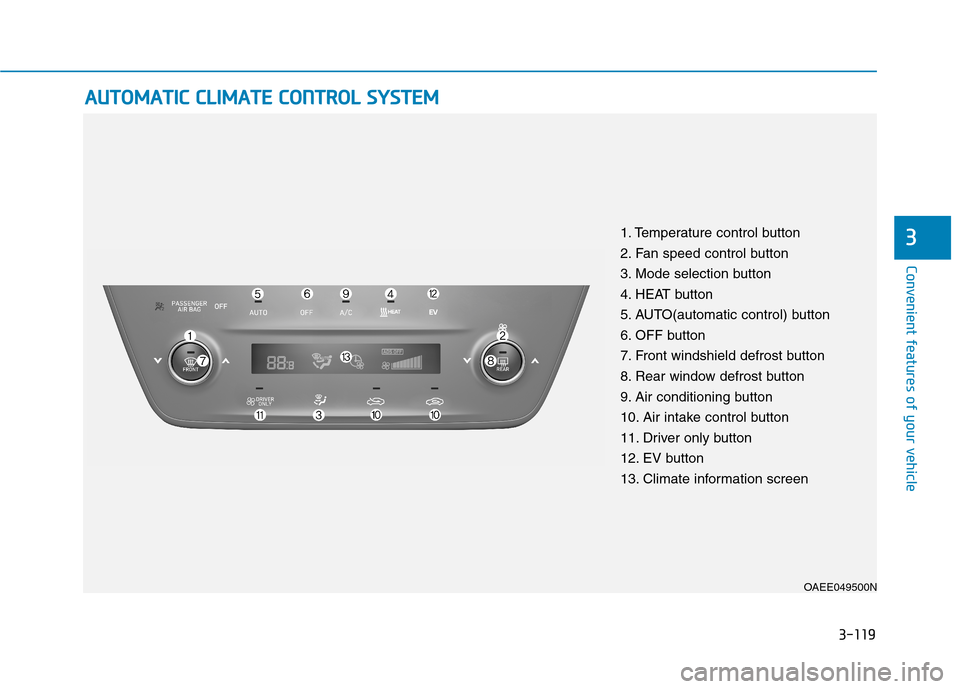
1. Temperature control button
2. Fan speed control button
3. Mode selection button
4. HEAT button
5. AUTO(automatic control) button
6. OFF button
7. Front windshield defrost button
8. Rear window defrost button
9. Air conditioning button
10. Air intake control button
11. Driver only button
12. EV button
13. Climate information screen
Page 205 of 561
3-120
Convenient features of your vehicle
Automatic Heating and Air
Conditioning
The Automatic Climate Control
System is controlled by setting the
desired temperature.
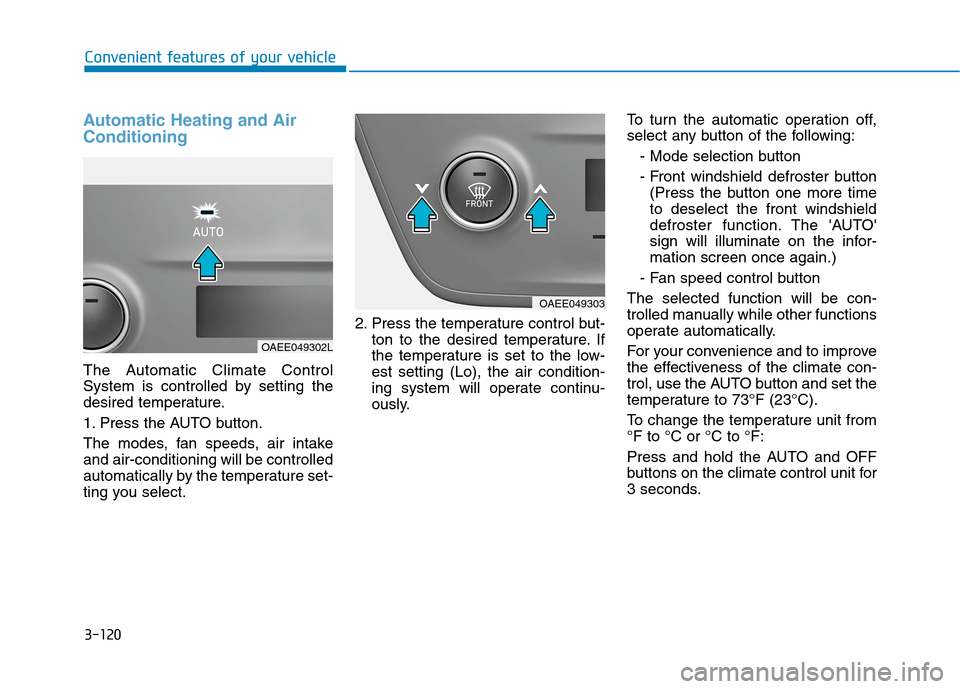
1. Press the AUTO button.
The modes, fan speeds, air intake
and air-conditioning will be controlled
automatically by the temperature set-
ting you select.2. Press the temperature control but-
ton to the desired temperature. If
the temperature is set to the low-
est setting (Lo), the air condition-
ing system will operate continu-
ously.To turn the automatic operation off,
select any button of the following:
- Mode selection button
- Front windshield defroster button
(Press the button one more time
to deselect the front windshield
defroster function. The 'AUTO'
sign will illuminate on the infor-
mation screen once again.)
- Fan speed control button
The selected function will be con-
trolled manually while other functions
operate automatically.
For your convenience and to improve
the effectiveness of the climate con-
trol, use the AUTO button and set the
temperature to 73°F (23°C).
To change the temperature unit from
°F to °C or °C to °F:
Press and hold the AUTO and OFF
buttons on the climate control unit for
3 seconds.
OAEE049303
OAEE049302L
Page 206 of 561
3-121
Convenient features of your vehicle
3
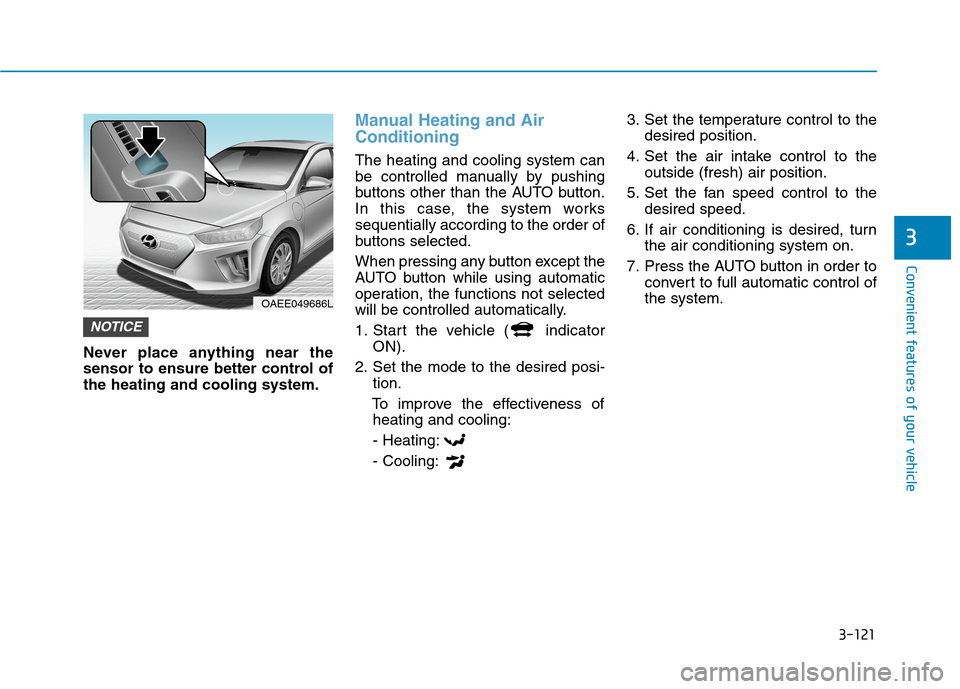
Never place anything near the
sensor to ensure better control of
the heating and cooling system.
Manual Heating and Air
Conditioning
The heating and cooling system can
be controlled manually by pushing
buttons other than the AUTO button.
In this case, the system works
sequentially according to the order of
buttons selected.
When pressing any button except the
AUTO button while using automatic
operation, the functions not selected
will be controlled automatically.
1. Start the vehicle ( indicator
ON).
2. Set the mode to the desired posi-
tion.
To improve the effectiveness of
heating and cooling:
- Heating:
- Cooling:3. Set the temperature control to the
desired position.
4. Set the air intake control to the
outside (fresh) air position.
5. Set the fan speed control to the
desired speed.
6. If air conditioning is desired, turn
the air conditioning system on.
7. Press the AUTO button in order to
convert to full automatic control of
the system.
NOTICE
OAEE049686L
Page 207 of 561
3-122
Convenient features of your vehicle
Mode selection
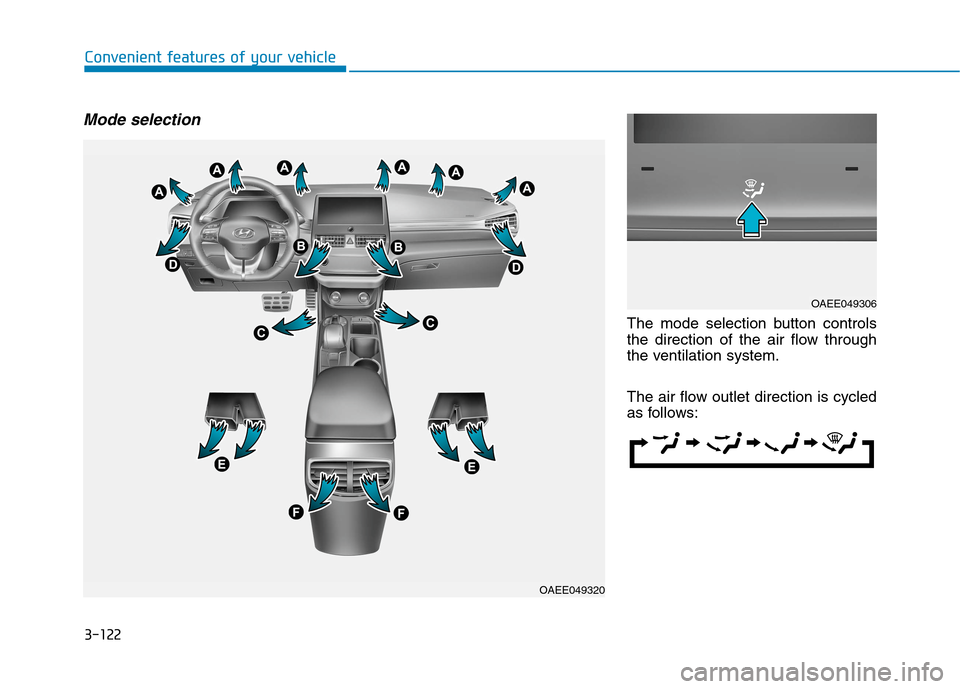
The mode selection button controls
the direction of the air flow through
the ventilation system.
The air flow outlet direction is cycled
as follows:
OAEE049320
OAEE049306
Page 208 of 561
3-123
Convenient features of your vehicle
3
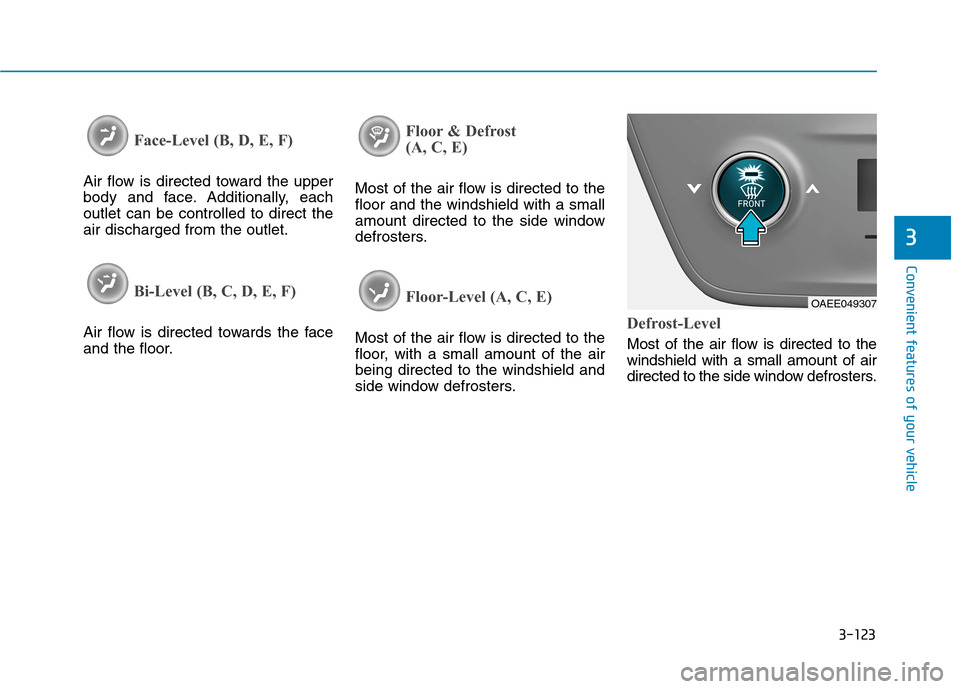
Face-Level (B, D, E, F)
Air flow is directed toward the upper
body and face. Additionally, each
outlet can be controlled to direct the
air discharged from the outlet.
Bi-Level (B, C, D, E, F)
Air flow is directed towards the face
and the floor.
Floor & Defrost
(A, C, E)
Most of the air flow is directed to the
floor and the windshield with a small
amount directed to the side window
defrosters.
Floor-Level (A, C, E)
Most of the air flow is directed to the
floor, with a small amount of the air
being directed to the windshield and
side window defrosters.Defrost-Level
Most of the air flow is directed to the
windshield with a small amount of air
directed to the side window defrosters.
OAEE049307
Page 209 of 561
3-124
Convenient features of your vehicle
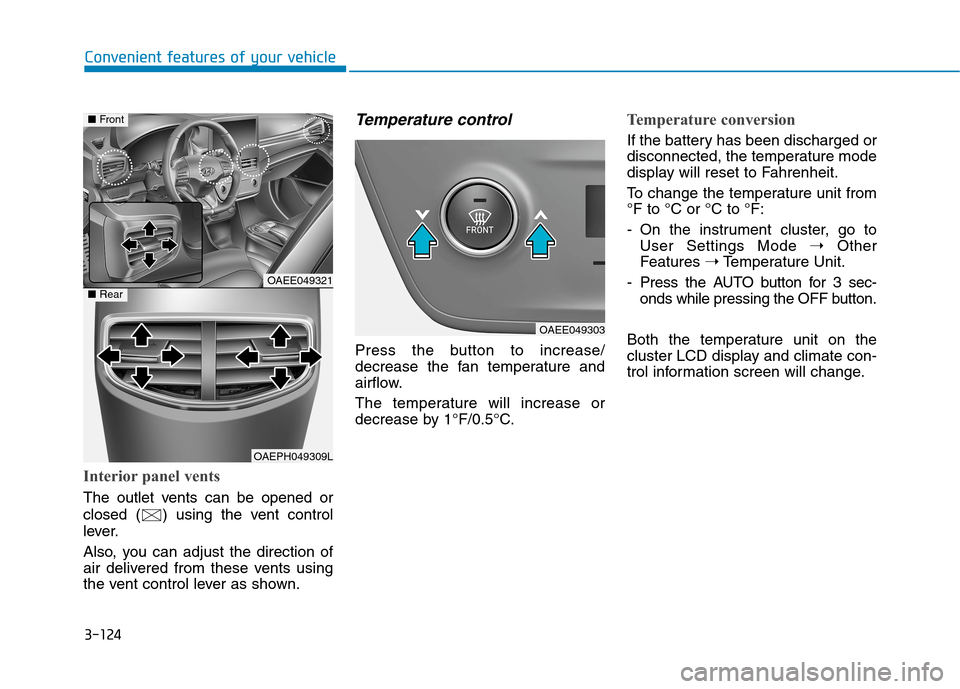
Interior panel vents
The outlet vents can be opened or
closed ( ) using the vent control
lever.
Also, you can adjust the direction of
air delivered from these vents using
the vent control lever as shown.
Temperature control
Press the button to increase/
decrease the fan temperature and
airflow.
The temperature will increase or
decrease by 1°F/0.5°C.
Temperature conversion
If the battery has been discharged or
disconnected, the temperature mode
display will reset to Fahrenheit.
To change the temperature unit from
°F to °C or °C to °F:
- On the instrument cluster, go to
User Settings Mode ➝Other
Features ➝Temperature Unit.
- Press the AUTO button for 3 sec-
onds while pressing the OFF button.
Both the temperature unit on the
cluster LCD display and climate con-
trol information screen will change.
OAEE049321
OAEPH049309L
■Front
■Rear
OAEE049303
Page 210 of 561
3-125
Convenient features of your vehicle
3
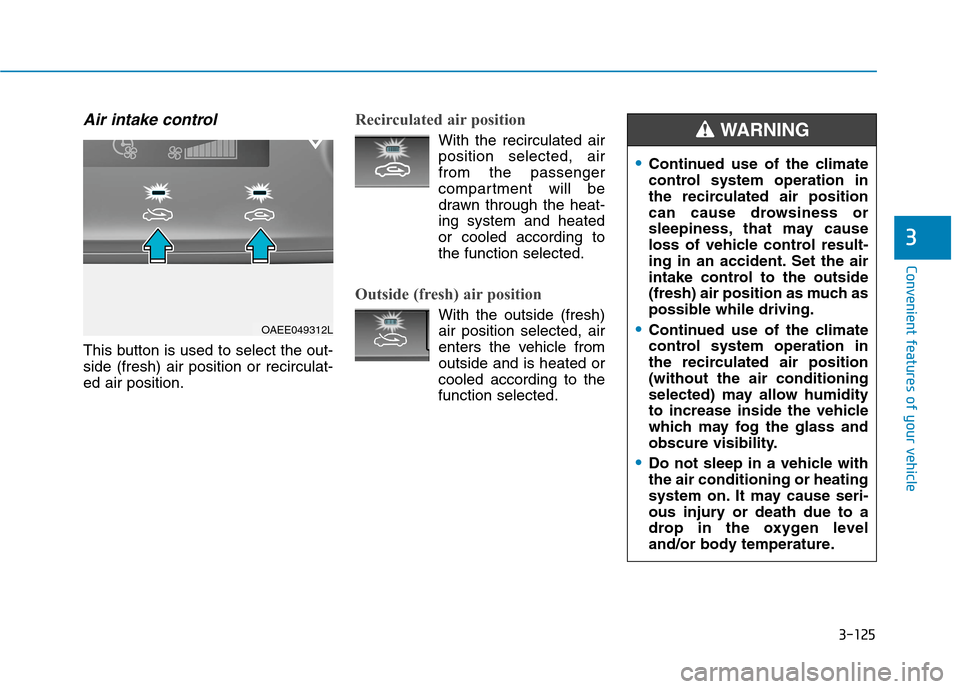
Air intake control
This button is used to select the out-
side (fresh) air position or recirculat-
ed air position.
Recirculated air position
With the recirculated air
position selected, air
from the passenger
compartment will be
drawn through the heat-
ing system and heated
or cooled according to
the function selected.
Outside (fresh) air position
With the outside (fresh)
air position selected, air
enters the vehicle from
outside and is heated or
cooled according to the
function selected.OAEE049312L
Continued use of the climate
control system operation in
the recirculated air position
can cause drowsiness or
sleepiness, that may cause
loss of vehicle control result-
ing in an accident. Set the air
intake control to the outside
(fresh) air position as much as
possible while driving.
Continued use of the climate
control system operation in
the recirculated air position
(without the air conditioning
selected) may allow humidity
to increase inside the vehicle
which may fog the glass and
obscure visibility.
Do not sleep in a vehicle with
the air conditioning or heating
system on. It may cause seri-
ous injury or death due to a
drop in the oxygen level
and/or body temperature.
WARNING