window Hyundai Ioniq Electric 2020 Owner's Manual
[x] Cancel search | Manufacturer: HYUNDAI, Model Year: 2020, Model line: Ioniq Electric, Model: Hyundai Ioniq Electric 2020Pages: 561, PDF Size: 41.18 MB
Page 11 of 561
1-2
E EX
XT
TE
ER
RI
IO
OR
R
O
OV
VE
ER
RV
VI
IE
EW
W
Your vehicle at a glance
OAEE019014N
■ ■
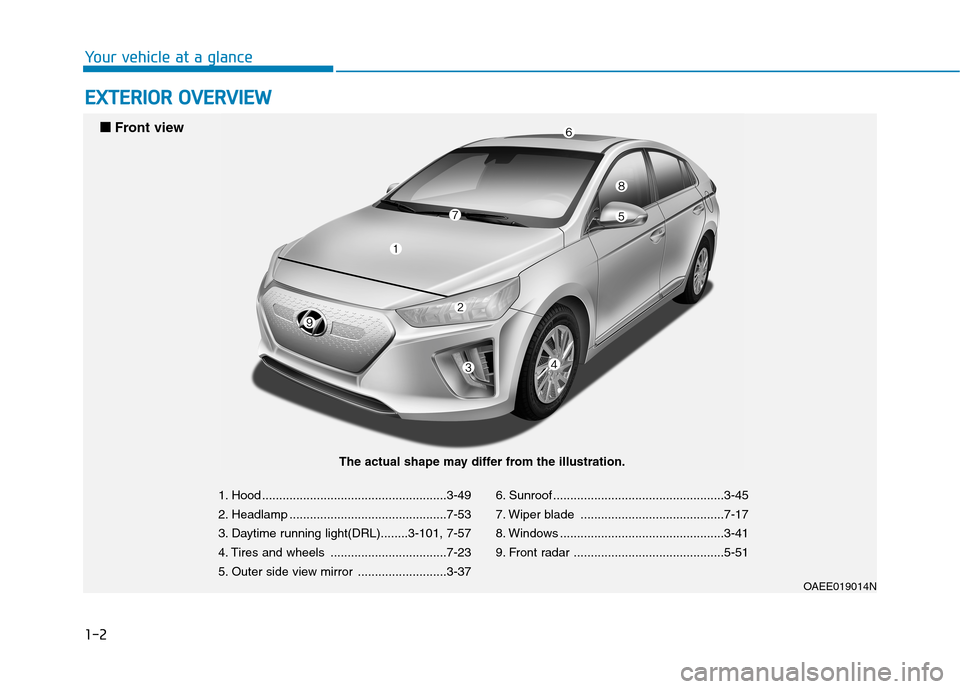
Front view
The actual shape may differ from the illustration.
1. Hood ......................................................3-49
2. Headlamp ..............................................7-53
3. Daytime running light(DRL)........3-101, 7-57
4. Tires and wheels ..................................7-23
5. Outer side view mirror ..........................3-376. Sunroof ..................................................3-45
7. Wiper blade ..........................................7-17
8. Windows ................................................3-41
9. Front radar ............................................5-51
Page 13 of 561
1-4
Your vehicle at a glance
I IN
NT
TE
ER
RI
IO
OR
R
O
OV
VE
ER
RV
VI
IE
EW
W
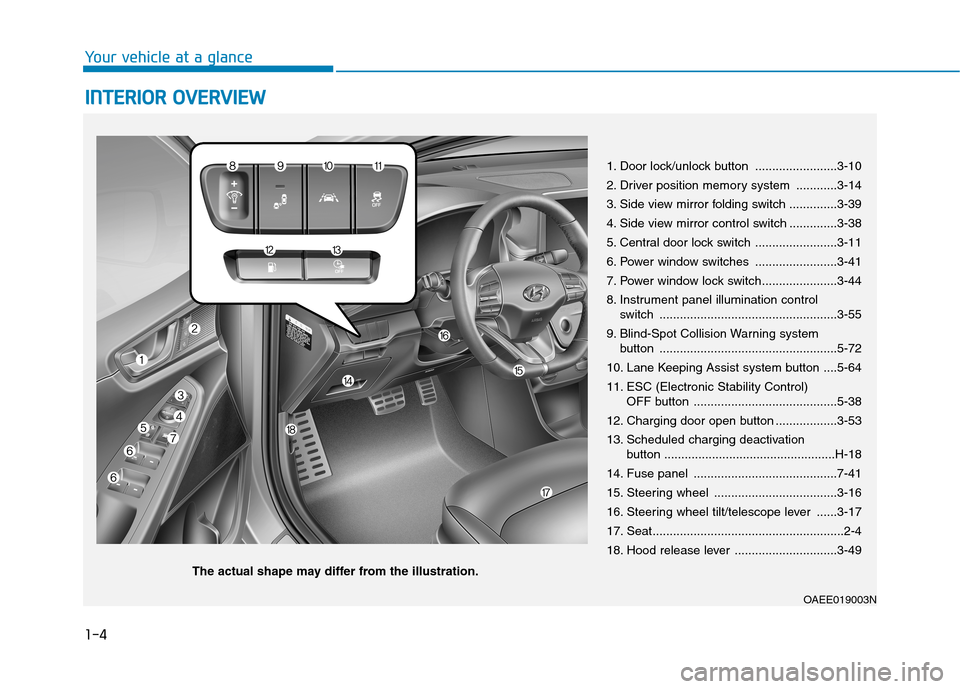
1. Door lock/unlock button ........................3-10
2. Driver position memory system ............3-14
3. Side view mirror folding switch ..............3-39
4. Side view mirror control switch ..............3-38
5. Central door lock switch ........................3-11
6. Power window switches ........................3-41
7. Power window lock switch......................3-44
8. Instrument panel illumination control
switch ....................................................3-55
9. Blind-Spot Collision Warning system
button ....................................................5-72
10. Lane Keeping Assist system button ....5-64
11. ESC (Electronic Stability Control)
OFF button ..........................................5-38
12. Charging door open button ..................3-53
13. Scheduled charging deactivation
button ..................................................H-18
14. Fuse panel ..........................................7-41
15. Steering wheel ....................................3-16
16. Steering wheel tilt/telescope lever ......3-17
17. Seat........................................................2-4
18. Hood release lever ..............................3-49
OAEE019003N
The actual shape may differ from the illustration.
Page 66 of 561
2-51
Safety system of your vehicle
2
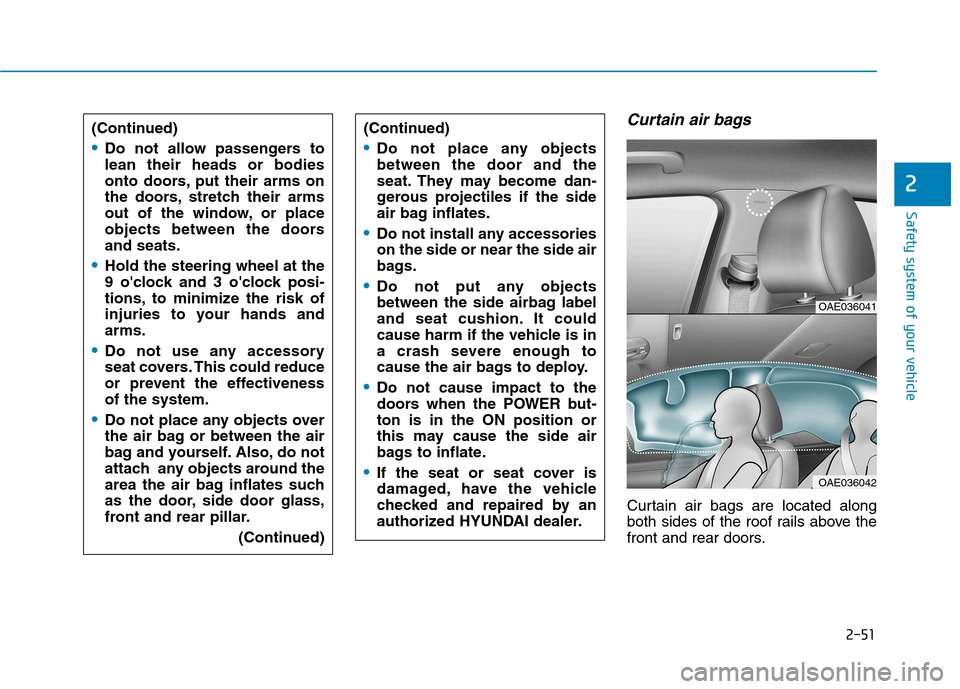
Curtain air bags
Curtain air bags are located along
both sides of the roof rails above the
front and rear doors. (Continued)
Do not allow passengers to
lean their heads or bodies
onto doors, put their arms on
the doors, stretch their arms
out of the window, or place
objects between the doors
and seats.
Hold the steering wheel at the
9 o'clock and 3 o'clock posi-
tions, to minimize the risk of
injuries to your hands and
arms.
Do not use any accessory
seat covers. This could reduce
or prevent the effectiveness
of the system.
Do not place any objects over
the air bag or between the air
bag and yourself. Also, do not
attach any objects around the
area the air bag inflates such
as the door, side door glass,
front and rear pillar.
(Continued)
(Continued)
Do not place any objects
between the door and the
seat. They may become dan-
gerous projectiles if the side
air bag inflates.
Do not install any accessories
on the side or near the side air
bags.
Do not put any objects
between the side airbag label
and seat cushion. It could
cause harm if the vehicle is in
a crash severe enough to
cause the air bags to deploy.
Do not cause impact to the
doors when the POWER but-
ton is in the ON position or
this may cause the side air
bags to inflate.
If the seat or seat cover is
damaged, have the vehicle
checked and repaired by an
authorized HYUNDAI dealer.
OAE036041
OAE036042
Page 67 of 561
2-52
Safety system of your vehicle
They are designed to help protect the
heads of the front seat occupants
and the rear outboard seat occupants
in certain side impact collisions.
The curtain air bags are designed to
deploy only during certain side
impact collisions, depending on the
crash severity.
The side and curtain air bags on
both sides of the vehicle may deploy
if a rollover or possible rollover is
detected.
The curtain air bags are not designed
to deploy in all side impact or rollover
situations.
To reduce the risk of serious
injury or death from an inflating
curtain air bags, take the follow-
ing precautions:
All seat occupants must wear
seat belts at all times to help
keep occupants positioned
properly.
(Continued)
(Continued)
Properly secure child
restraints as far away from the
door as possible.
Do not place any objects over
the air bag. Also, do not attach
any objects around the area
the air bag inflates such as
the door, side door glass,
front and rear pillar, roof side
rail.
Do not hang other objects
except clothes, especially
hard or breakable objects. In
an accident, it may cause
vehicle damage or personal
injury.
Do not allow passengers to
lean their heads or bodies
onto doors, put their arms on
the doors, stretch their arms
out of the window, or place
objects between the doors
and seats.
(Continued)
(Continued)
Do not open or repair the side
curtain air bags.
WARNING
Page 72 of 561
2-57
Safety system of your vehicle
2
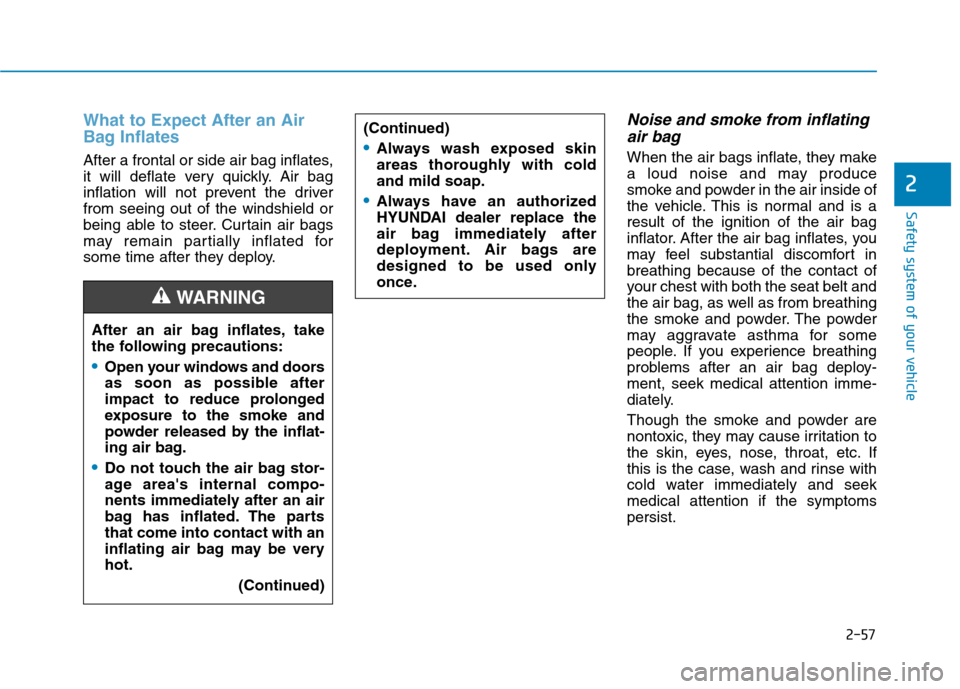
What to Expect After an Air
Bag Inflates
After a frontal or side air bag inflates,
it will deflate very quickly. Air bag
inflation will not prevent the driver
from seeing out of the windshield or
being able to steer. Curtain air bags
may remain partially inflated for
some time after they deploy.
Noise and smoke from inflating
air bag
When the air bags inflate, they make
a loud noise and may produce
smoke and powder in the air inside of
the vehicle. This is normal and is a
result of the ignition of the air bag
inflator. After the air bag inflates, you
may feel substantial discomfort in
breathing because of the contact of
your chest with both the seat belt and
the air bag, as well as from breathing
the smoke and powder. The powder
may aggravate asthma for some
people. If you experience breathing
problems after an air bag deploy-
ment, seek medical attention imme-
diately.
Though the smoke and powder are
nontoxic, they may cause irritation to
the skin, eyes, nose, throat, etc. If
this is the case, wash and rinse with
cold water immediately and seek
medical attention if the symptoms
persist. (Continued)Always wash exposed skin
areas thoroughly with cold
and mild soap.
Always have an authorized
HYUNDAI dealer replace the
air bag immediately after
deployment. Air bags are
designed to be used only
once.
After an air bag inflates, take
the following precautions:
Open your windows and doors
as soon as possible after
impact to reduce prolonged
exposure to the smoke and
powder released by the inflat-
ing air bag.
Do not touch the air bag stor-
age area's internal compo-
nents immediately after an air
bag has inflated. The parts
that come into contact with an
inflating air bag may be very
hot.
(Continued)
WARNING
Page 86 of 561
Convenient features of your vehicle
Accessing your vehicle .........................................3-3
Smart Key ..........................................................................3-3
Immobilizer System ...........................................................3-8
Door locks ...............................................................3-9
Operating Door Locks from Outside the Vehicle .....3-9
Operating Door Locks from Inside the Vehicle ......3-10
Auto Door Lock/Unlock Features ...............................3-12
Child-Protector Rear Door locks ................................3-12
Theft-alarm system.............................................3-13
Driver position memory system .........................3-14
Storing Positions into Memory ..................................3-14
Recalling positions from memory ...............................3-15
Easy Access Function ....................................................3-15
Steering wheel......................................................3-16
Electric Power Steering (EPS) .....................................3-16
Tilt Steering / Telescope Steering ..............................3-17
Horn ....................................................................................3-18
Heated Steering Wheel (for Canada) .........................3-18
Mirrors ...................................................................3-19
Inside Rearview Mirror ..................................................3-19
Side View Mirrors .........................................................3-37
Reverse Parking Aid Function ....................................3-40
Windows ................................................................3-41
Power Windows ...............................................................3-42
Sunroof..................................................................3-45
Sunroof opening and closing .......................................3-46
Sliding the sunroof .........................................................3-46
Tilting the sunroof ..........................................................3-47
Sunshade ...........................................................................3-47
Resetting the sunroof ....................................................3-48
Exterior features .................................................3-49
Hood ...................................................................................3-49
Liftgate ..............................................................................3-51
Charging Door ..................................................................3-53
Instrument cluster................................................3-54
Instrument Cluster Control............................................3-55
Gauges and Meters ........................................................3-56
Warning and Indicator lights ........................................3-60
LCD Display Messages ..................................................3-72
LCD Display ..........................................................3-83
LCD Display Control ........................................................3-83
LCD display modes ..........................................................3-84
TRIP Computer .....................................................3-96
Trip modes ........................................................................3-96
Light .....................................................................3-101
Exterior Lights ...............................................................3-101
Interior Lights ................................................................3-109
Welcome System ..........................................................3-112
3
Page 87 of 561
Wipers and washers .........................................3-114
Windshield Wipers .......................................................3-114
Windshield Washers ....................................................3-115
Rear View Monitor (RVM) ................................3-116
Defroster .............................................................3-118
Rear Window Defroster ..............................................3-118
Automatic climate control system ...................3-119
Automatic Heating and Air Conditioning.................3-120
Manual Heating and Air Conditioning......................3-121
System Operation .........................................................3-128
System Maintenance....................................................3-130
Windshield defrosting and defogging ............3-132
To Defog Inside Windshield ........................................3-132
To Defrost Outside Windshield ..................................3-133
Defogging Logic ............................................................3-133
Auto Defogging System .............................................3-134
Climate control additional features.................3-135
Automatic Ventilation ...................................................3-135
Storage compartment ........................................3-136
Center Console Storage ..............................................3-136
Glove Box ........................................................................3-136
Sunglass Holder.............................................................3-137
Multi Box .........................................................................3-137
Interior features ...............................................3-138
Cup Holder ......................................................................3-138
Sunvisor ...........................................................................3-139
Power Outlet ..................................................................3-139
Wireless Cellular Phone Charging System ............3-140
Clock .................................................................................3-142
Clothes Hanger .............................................................3-143
Floor Mat Anchor(s).....................................................3-144
Cargo Security Screen .................................................3-144
3
Page 95 of 561
3-10
Convenient features of your vehicle
Once the doors are unlocked, they
may be opened by pulling the door
handle.
When closing the door, push the
door by hand. Make sure that doors
are closed securely.
Information
• In cold and wet climates, door lock
and door mechanisms may not work
properly due to freezing conditions.
• If the door is locked/unlocked multi-
ple times in rapid succession with
either the vehicle key or door lock
switch, the system may stop operat-
ing temporarily in order to protect
the circuit and prevent damage to
system components.
• Two press unlock setting can be
changed with the smart key or in the
User Settings mode on the cluster.
Operating Door Locks from
Inside the Vehicle
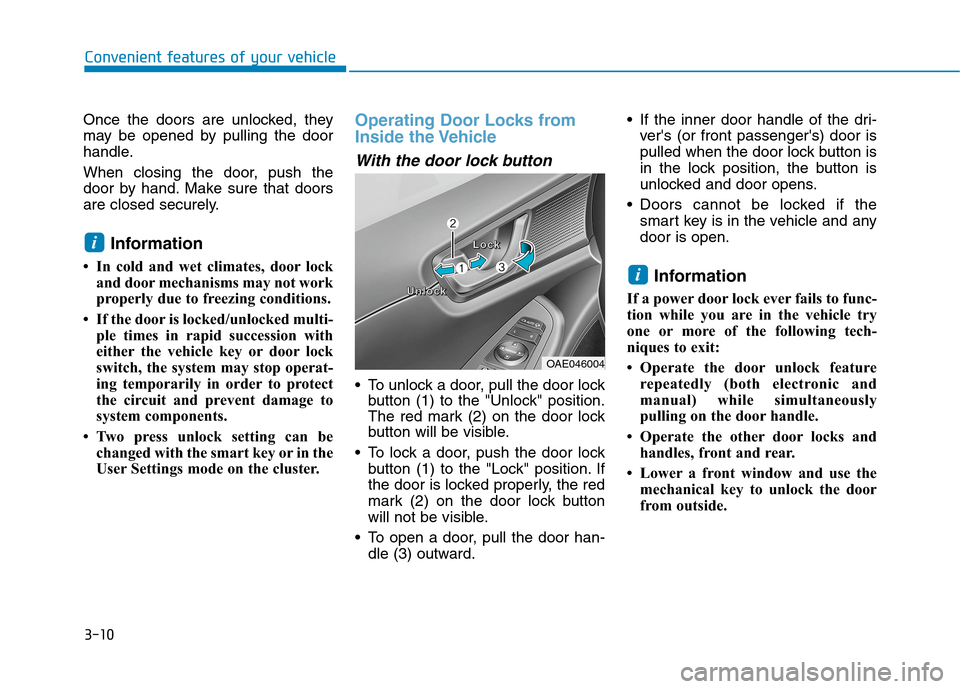
With the door lock button
To unlock a door, pull the door lock
button (1) to the "Unlock" position.
The red mark (2) on the door lock
button will be visible.
To lock a door, push the door lock
button (1) to the "Lock" position. If
the door is locked properly, the red
mark (2) on the door lock button
will not be visible.
To open a door, pull the door han-
dle (3) outward. If the inner door handle of the dri-
ver's (or front passenger's) door is
pulled when the door lock button is
in the lock position, the button is
unlocked and door opens.
Doors cannot be locked if the
smart key is in the vehicle and any
door is open.
Information
If a power door lock ever fails to func-
tion while you are in the vehicle try
one or more of the following tech-
niques to exit:
• Operate the door unlock feature
repeatedly (both electronic and
manual) while simultaneously
pulling on the door handle.
• Operate the other door locks and
handles, front and rear.
• Lower a front window and use the
mechanical key to unlock the door
from outside.
i
i
OAE046004
U U U U
n n n n
l l l l
o o o o
c c c c
k k k kL L L L
o o o o
c c c c
k k k k
Page 96 of 561

3-11
Convenient features of your vehicle
3
With the central door lock
switch
When pressing the ( ) switch (1), all
vehicle doors will lock.
When pressing the ( ) switch (2), all
vehicle doors will unlock.
If the smart key is in the vehicle and
any door is opened, the doors will
not lock even though the lock button
(1) of the central door lock switch is
pressed.
■Driver’s door
OAE046005/OAEE046509N
■Passenger’s doorThe doors should always be
fully closed and locked while
the vehicle is in motion. If the
doors are unlocked, the risk of
being thrown from the vehicle
in a crash is increased.
Do not pull the inner door
handle of driver's or passen-
ger's door while the vehicle is
moving.
WARNING
Do not leave children or animals
unattended in your vehicle. An
enclosed vehicle can become
extremely hot, causing death or
serious injury to unattended
children or animals who cannot
escape the vehicle. Children
might operate features of the
vehicle that could injure them,
or they could encounter other
harm, possibly from someone
gaining entry to the vehicle.
WARNING
Always secure your vehicle.
Leaving your vehicle unlocked
increases the potential risk to
you or others from someone
hiding in your vehicle.
To secure your vehicle, while
depressing the brake, shift to
the P (Park) position, engage
the parking brake, and place the
POWER button in the OFF posi-
tion, close all windows, lock all
doors, and always take the key
with you.
WARNING
If you stay in the vehicle for a
long time while the weather is
very hot or cold, there are risks
of injuries or danger to life. Do
not lock the vehicle from the
outside when someone is in the
vehicle.
WARNING
Page 104 of 561
3-19
Convenient features of your vehicle
3
Inside Rearview Mirror
Before you start driving, adjust the
rearview mirror to the center on the
view through the rear window.
When cleaning the mirror, use a
paper towel or similar material
dampened with glass cleaner. Do
not spray glass cleaner directly on
the mirror as that may cause the
liquid cleaner to enter the mirror
housing.
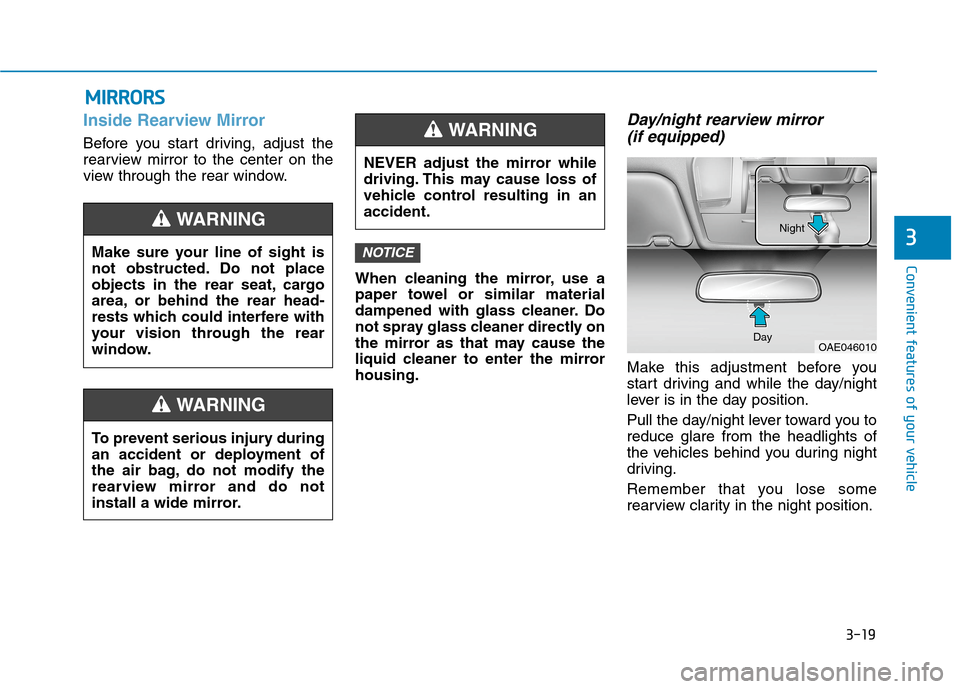
Day/night rearview mirror
(if equipped)
Make this adjustment before you
start driving and while the day/night
lever is in the day position.
Pull the day/night lever toward you to
reduce glare from the headlights of
the vehicles behind you during night
driving.
Remember that you lose some
rearview clarity in the night position.
NOTICE
M MI
IR
RR
RO
OR
RS
S
Make sure your line of sight is
not obstructed. Do not place
objects in the rear seat, cargo
area, or behind the rear head-
rests which could interfere with
your vision through the rear
window.
WARNING
NEVER adjust the mirror while
driving. This may cause loss of
vehicle control resulting in an
accident.
WARNING
To prevent serious injury during
an accident or deployment of
the air bag, do not modify the
rearview mirror and do not
install a wide mirror.
WARNING
OAE046010 DayNight