brake HYUNDAI IONIQ ELECTRIC 2021 Owners Manual
[x] Cancel search | Manufacturer: HYUNDAI, Model Year: 2021, Model line: IONIQ ELECTRIC, Model: HYUNDAI IONIQ ELECTRIC 2021Pages: 546, PDF Size: 34.82 MB
Page 8 of 546
F8
Introduction
This vehicle is equipped with an
event data recorder (EDR). Themain purpose of an EDR is to
record, in certain crash or near
crash-like situations, such as an
air bag deployment or hitting a
road obstacle, data that will assist
in understanding how a vehicle’s
systems performed. The EDR is
designed to record data related to
vehicle dynamics and safety sys-
tems for a short period of time,
typically 30 seconds or less. The
EDR in this vehicle is designed to
record such data as:
vehicle were operating;
passenger safety belts were
buckled/ fastened;
depressing the accelerator
and/or brake pedal; and,
ing. These data can help provide a bet-
ter understanding of the circum-
stances in which crashes and
injuries occur. NOTE: EDR data
are recorded by your vehicle onlyif a non-trivial crash situation
occurs; no data are recorded bythe EDR under normal driving
conditions and no personal data
(e.g., name, gender, age, and
crash location) are recorded.
However, other parties, such as
law enforcement, could combinethe EDR data with the type of per-
sonally identifying data routinely
acquired during a crash investiga-tion.
To read data recorded by an EDR,
special equipment is required, and
access to the vehicle or the EDR is
needed. In addition to the vehicle
manufacturer, other parties, such
as law enforcement, that have the
special equipment, can read the
information if they have access to
the vehicle or the EDR.
VV
EEHH IICC LLEE DD AA TTAA CC OO LLLLEE CCTT IIOO NN AA NN DD EE VV EENN TT DD AA TTAA RR EECCOO RRDD EERR SS
Page 11 of 546
How to Disconnect Portable Charger
(ICCB: In-Cable Control Box) ..........................................H43Unlock Charging Connector in Emergency ................H44
Precautions for Portable Charger
(ICCB: In-Cable Control Box) ..........................................H44
EV Charging Troubleshooting
- Steps to Consider ...............................................H45
How to Start the Vehicle ......................................H46
How to Stop the Vehicle.......................................H47
Virtual Engine Sound System ..............................H47
Distance to Empty .................................................H48 When destination is not set ...........................................H48
When destination is set...................................................H49
Tips for Improving Distance to Empty ...............H49
Power/Charge Gauge............................................H49
State of Charge (SOC) Gauge for
High Voltage Battery ...........................................H50
Warning and Indicator Lights
(related to electric vehicle) .................................H51 Ready Indicator ................................................................H51
Service Warning Light .....................................................H51
Power Down Warning Light ...........................................H52
Charging Indicator Light..................................................H52
High Voltage Battery Level Warning Light .................H52
Regenerative Brake Warning Light ..............................H53
LCD Display Messages ..........................................H53 Shift to P to charge .........................................................H53 Remaining Time .................................................................H53
Charging Door Open ........................................................H54
Charging Stopped. Check the AC/DC charger ...........H54
Charging Stopped. Check the cable connection .......H55
Check regenerative brakes/ Stop vehicle and
check regenerative brakes .............................................H55 Low Battery........................................................................H55
Charge immediately. Power limited ..............................H56
Low outside temperature may limit power output.
Charge EV battery/Low EV battery temperature.
Power limited .....................................................................H56 Battery Overheated! Stop safety .................................H57
Power limited .....................................................................H57
Stop vehicle and check power supply .........................H58
Check Virtual Engine Sound System............................H58
Check electric vehicle system .......................................H58
Energy Flow ..........................................................H59 Vehicle Stop........................................................................H59
EV Propulsion ....................................................................H59
Regeneration ......................................................................H59
Aux. Battery Saver+ .............................................H60 Mode ....................................................................................H60
System Setting...................................................................H61
Utility Mode ............................................................H61 System Setting and Activation ......................................H61
System Deactivation.........................................................H62
If an Accident Occurs ...........................................H62
Other Precautions for Electric Vehicle ..............H64
Service Plug ...........................................................H65
Page 30 of 546
H21
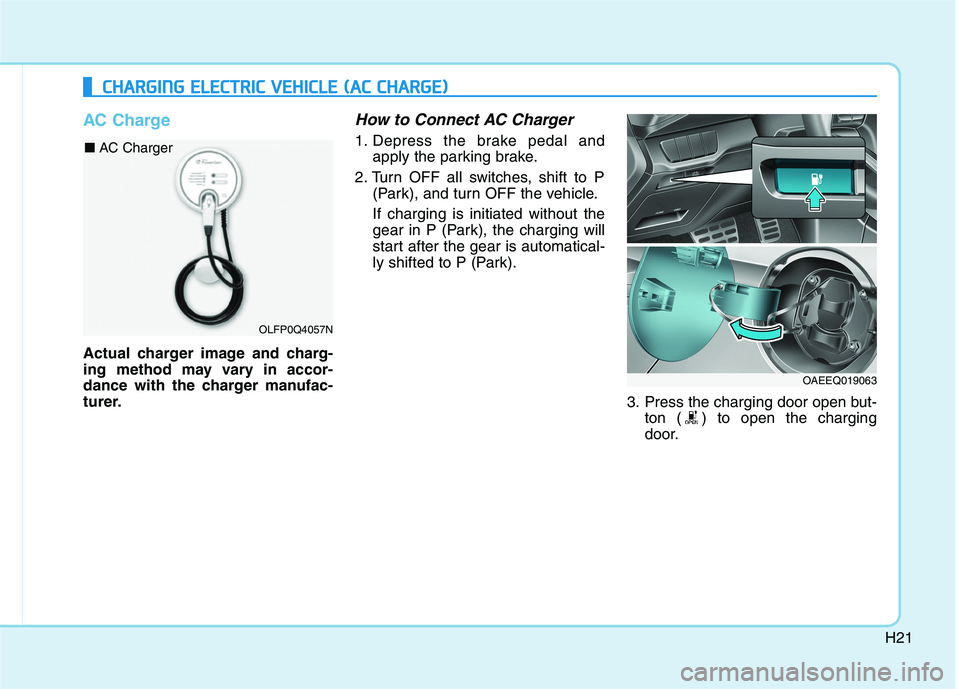
AC Charge
Actual charger image and charg-
ing method may vary in accor-
dance with the charger manufac-
turer.
How to Connect AC Charger
1. Depress the brake pedal andapply the parking brake.
2. Turn OFF all switches, shift to P (Park), and turn OFF the vehicle. If charging is initiated without the
gear in P (Park), the charging will
start after the gear is automatical-
ly shifted to P (Park).
3. Press the charging door open but-ton ( ) to open the charging
door.
CCHH AARRGG IINN GG EE LLEE CCTT RR IICC VV EEHH IICC LLEE (( AA CC CC HH AARRGG EE))
OLFP0Q4057N
■
AC Charger
OAEEQ019063
Page 37 of 546
H28
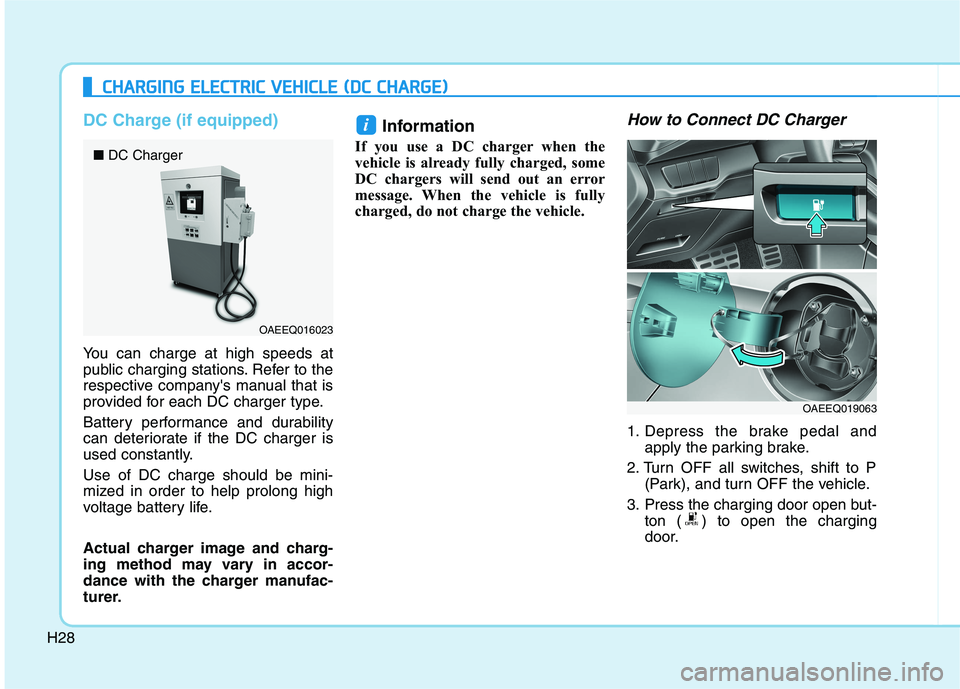
DC Charge (if equipped)
You can charge at high speeds at
public charging stations. Refer to the
respective company's manual that is
provided for each DC charger type.
Battery performance and durability
can deteriorate if the DC charger is
used constantly. Use of DC charge should be mini-
mized in order to help prolong high
voltage battery life.
Actual charger image and charg-
ing method may vary in accor-
dance with the charger manufac-
turer.Information
If you use a DC charger when the
vehicle is already fully charged, some
DC chargers will send out an error
message. When the vehicle is fully
charged, do not charge the vehicle.
How to Connect DC Charger
1. Depress the brake pedal and apply the parking brake.
2. Turn OFF all switches, shift to P (Park), and turn OFF the vehicle.
3. Press the charging door open but- ton ( ) to open the charging
door.
i
CCHH AARRGG IINN GG EE LLEE CCTT RR IICC VV EEHH IICC LLEE (( DD CC CC HH AARRGG EE))
OAEEQ016023
■
DC Charger
OAEEQ019063
Page 44 of 546
H35
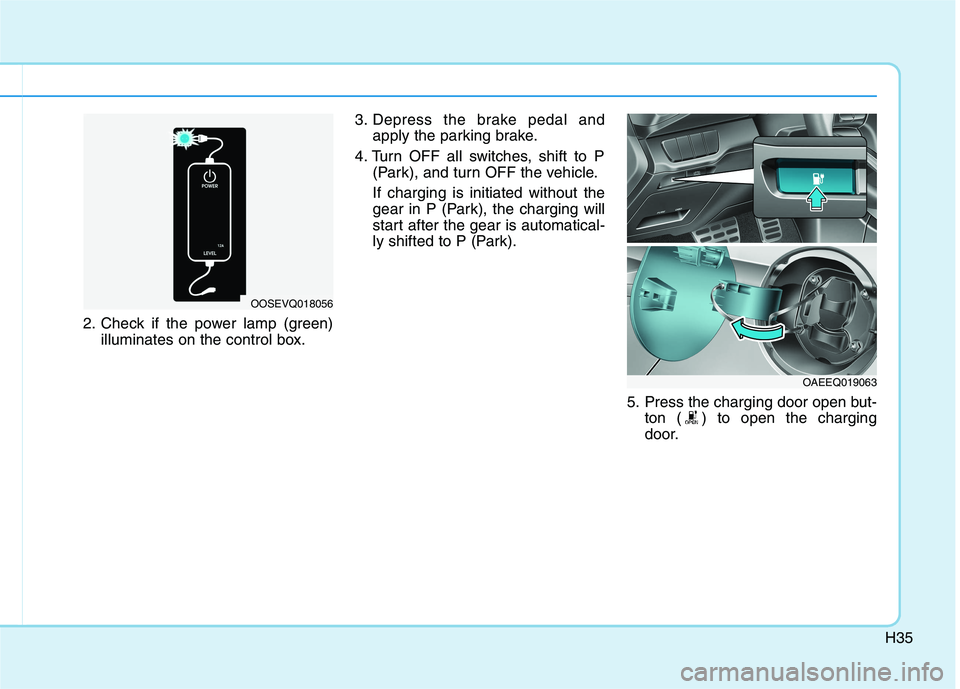
2. Check if the power lamp (green)illuminates on the control box. 3. Depress the brake pedal and
apply the parking brake.
4. Turn OFF all switches, shift to P (Park), and turn OFF the vehicle. If charging is initiated without the
gear in P (Park), the charging will
start after the gear is automatical-
ly shifted to P (Park).
5. Press the charging door open but-ton ( ) to open the charging
door.
OOSEVQ018056
OAEEQ019063
Page 55 of 546
H46
How to Start the Vehicle
1. Holding the smart key, sit in thedriver's seat.
2. Fasten the seat belt before start- ing the vehicle.
3. Make sure to engage the parking brake.
4. Turn OFF all electrical devices.
5. Make sure to depress and hold the brake pedal.
6. While depressing the brake pedal, shift to P (Park).
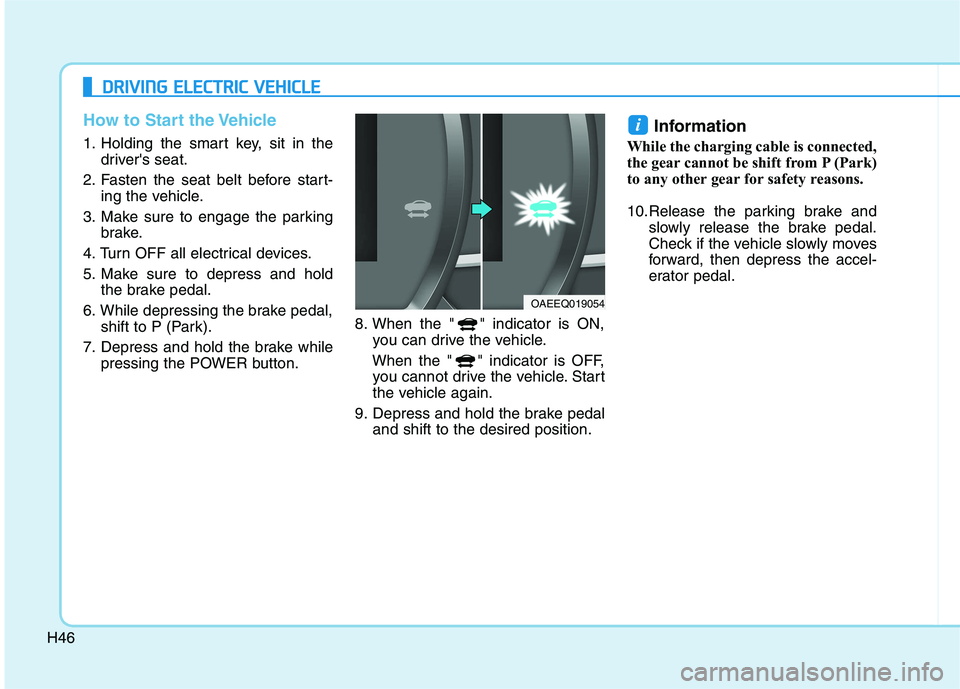
7. Depress and hold the brake while pressing the POWER button. 8. When the " " indicator is ON,
you can drive the vehicle.
When the " " indicator is OFF, you cannot drive the vehicle. Start
the vehicle again.
9. Depress and hold the brake pedal and shift to the desired position. Information
While the charging cable is connected,
the gear cannot be shift from P (Park)
to any other gear for safety reasons.
10.Release the parking brake and slowly release the brake pedal.
Check if the vehicle slowly moves
forward, then depress the accel-
erator pedal.
i
DDRRIIVV IINN GG EE LLEE CCTT RR IICC VV EEHH IICC LLEE
OAEEQ019054
Page 56 of 546
H47
How to Stop the Vehicle
1. Hold down the brake pedal whilethe vehicle is parked.
2. While depressing the brake pedal, shift to P (Park).
3. While depressing the brake pedal, engage the parking brake.
4. While depressing the brake pedal, press the POWER button and turn
off the vehicle.
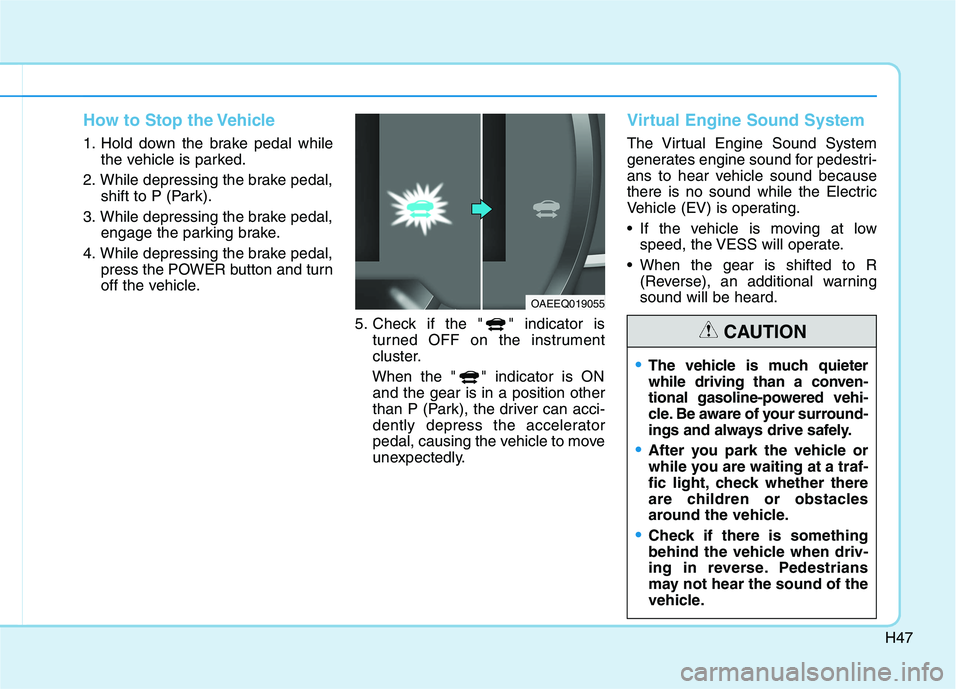
5. Check if the " " indicator isturned OFF on the instrument
cluster.
When the " " indicator is ON and the gear is in a position other
than P (Park), the driver can acci-
dently depress the accelerator
pedal, causing the vehicle to move
unexpectedly.
Virtual Engine Sound System
The Virtual Engine Sound System
generates engine sound for pedestri-
ans to hear vehicle sound because
there is no sound while the Electric
Vehicle (EV) is operating.
If the vehicle is moving at low speed, the VESS will operate.
When the gear is shifted to R (Reverse), an additional warning sound will be heard.
OAEEQ019055
The vehicle is much quieter
while driving than a conven-
tional gasoline-powered vehi-
cle. Be aware of your surround-
ings and always drive safely.
After you park the vehicle or
while you are waiting at a traf-
fic light, check whether there
are children or obstacles
around the vehicle.
Check if there is something
behind the vehicle when driv-
ing in reverse. Pedestrians
may not hear the sound of the
vehicle.
CAUTION
Page 58 of 546
H49
When destination is set
When the destination is set, the dis-
tance to empty may change. The dis-tance to empty is recalculated using
the information of the destination.
However, the distance to empty may
vary significantly based on traffic
conditions, driving habits, and condi-
tion of the vehicle.
Tips for Improving Distance to Empty
If you operate the air conditioner/heater too much, the driving battery
uses too much electricity. This may
reduce the distance to empty.
Therefore, it is recommended that
you set the cabin temperature to
23°C (73°F) AUTO. This setting that
has been certified by variousassessment tests to maintain opti-
mal energy consumption rates while
keeping the temperature fresh.
Turn OFF the heater and air condi-
tioner if you do not need them.
Depress and hold the accelerator pedal to maintain speed and drive
economically.
Gradually depress and release the accelerator pedal when accelerat-
ing or decelerating.
Always maintain specified tire pressures.
Do not use unnecessary electrical components while driving.
Do not load unnecessary items in the vehicle.
Do not mount parts that may increase air resistance.
Power/Charge Gauge
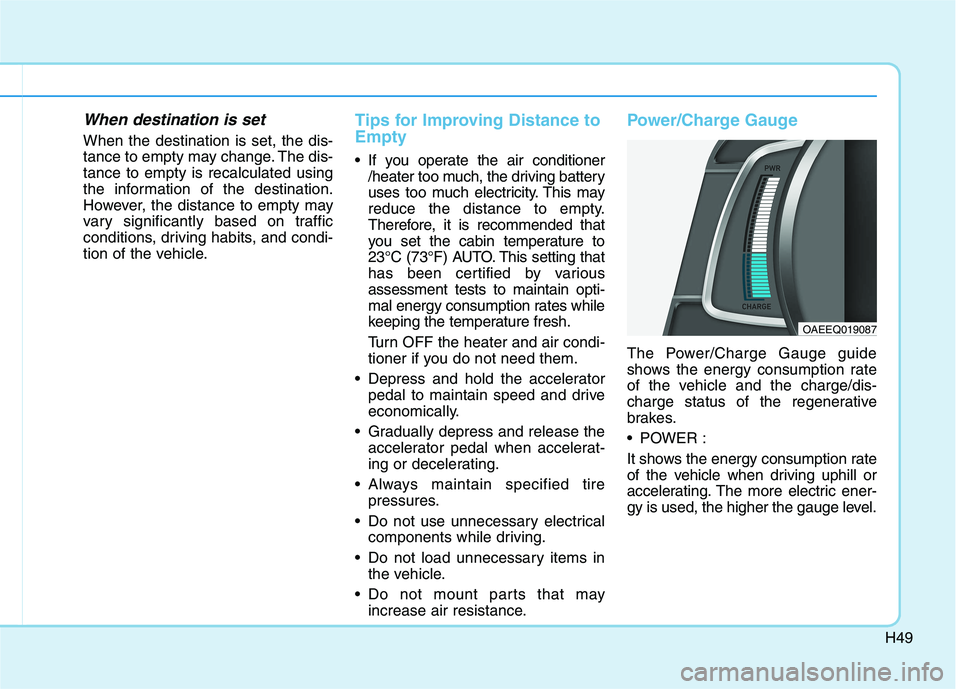
The Power/Charge Gauge guide
shows the energy consumption rate
of the vehicle and the charge/dis-
charge status of the regenerative
brakes.
POWER :
It shows the energy consumption rate
of the vehicle when driving uphill or
accelerating. The more electric ener-
gy is used, the higher the gauge level.
OAEEQ019087
Page 59 of 546
H50
DDRRIIVV IINN GG EE LLEE CCTT RR IICC VV EEHH IICC LLEE (( CC OO NNTT..))
It shows the charging status of the
battery when it is being charged by
the regenerative brakes (decelerat-
ing or driving on a downhill road).
The more electric energy is charged,
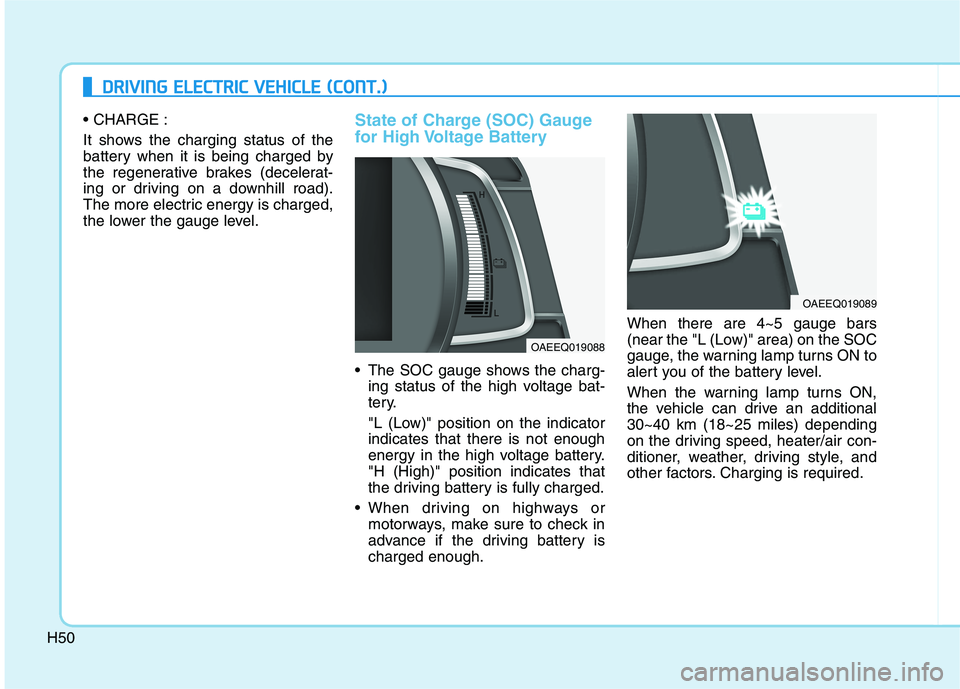
the lower the gauge level.State of Charge (SOC) Gauge
for High Voltage Battery
The SOC gauge shows the charg-
ing status of the high voltage bat-
tery.
"L (Low)" position on the indicator indicates that there is not enough
energy in the high voltage battery."H (High)" position indicates that
the driving battery is fully charged.
When driving on highways or motorways, make sure to check in
advance if the driving battery ischarged enough. When there are 4~5 gauge bars
(near the "L (Low)" area) on the SOC
gauge, the warning lamp turns ON to
alert you of the battery level.
When the warning lamp turns ON,
the vehicle can drive an additional30~40 km (18~25 miles) depending
on the driving speed, heater/air con-
ditioner, weather, driving style, and
other factors. Charging is required.
OAEEQ019088
OAEEQ019089
Page 62 of 546
H53
Regenerative BrakeWarning Light
This warning light illuminates :
When the regenerative brake does
not operate and the brake does not
perform well. This causes the Brake
Warning light (red) and Regenerative
Brake Warning Light (yellow) to illu-
minate simultaneously.
In this case, drive safely and have
your vehicle inspected by an author-
ized HYUNDAI dealer.
The operation of the brake pedal may
be more difficult than normal and the
braking distance can increase.
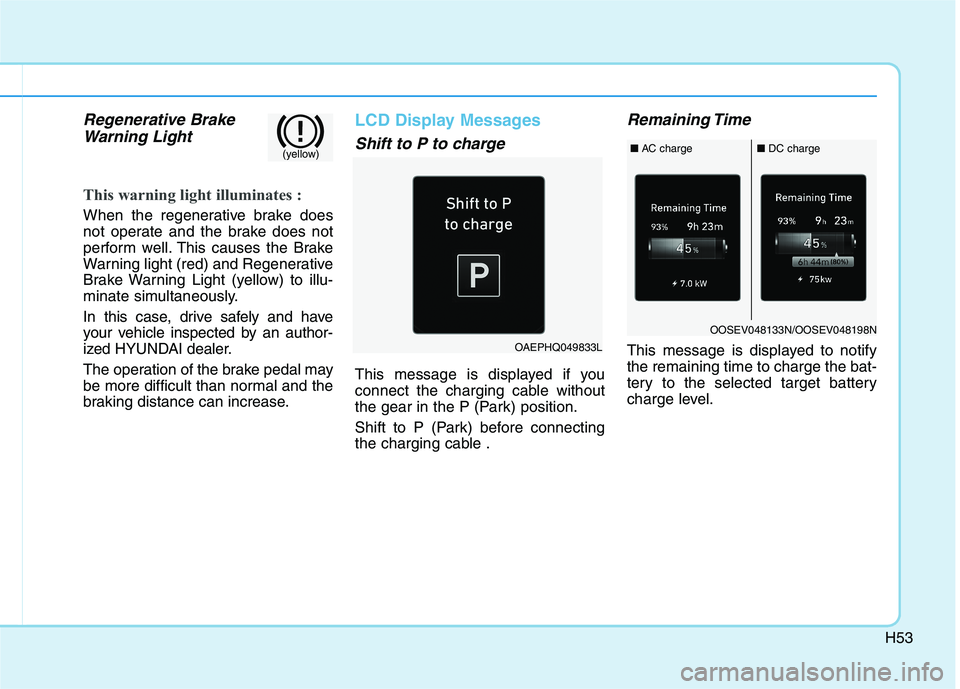
LCD Display Messages
Shift to P to charge
This message is displayed if you
connect the charging cable without
the gear in the P (Park) position.
Shift to P (Park) before connecting
the charging cable .
Remaining Time
This message is displayed to notifythe remaining time to charge the bat-
tery to the selected target battery
charge level.OAEPHQ049833L
(yellow)
OOSEV048133N/OOSEV048198N
■ AC charge■DC charge