warning lights Hyundai Ioniq Hybrid 2018 Owner's Manual
[x] Cancel search | Manufacturer: HYUNDAI, Model Year: 2018, Model line: Ioniq Hybrid, Model: Hyundai Ioniq Hybrid 2018Pages: 642, PDF Size: 16.33 MB
Page 11 of 642
HEV (Hybrid Electric Vehicle) System ................H2
Hybrid Vehicle ......................................................................H2
Plug-in Hybrid Vehicle .....................................................H3
Charging the Plug-in Hybrid Vehicle....................H4
Charging Information .........................................................H4
Charging Time .....................................................................H4
Charging Types ...................................................................H4
Charging Status ...................................................................H5
Scheduled Charging ............................................................H6
Charging Connector AUTO/ LOCK Mode ......................H7
Charging Precautions .........................................................H8
Normal Charge ...................................................................H10
Trickle Charge ....................................................................H16
Driving the Hybrid/Plug-in Hybrid Vehicle .......H26
Starting the Vehicle ..........................................................H26
Special Features ..............................................................H27
Hybrid System Gauge ......................................................H29
Plug-in Hybrid Mode (Plug-in hybrid vehicle)..........H30
Aux. Battery Saver+ (Plug-in hybrid vehicle) ..........H31
Warning and Indicator Lights ........................................H33
LCD Display Messages.....................................................H35
Energy Flow ......................................................................H43
Safety Precautions for Hybrid System ..............H47
Hybrid Vehicle Components Safety Precautions ......H47
Service Plug .......................................................................H50
Hybrid Battery Cooling Duct ........................................H51
If an Accident Occurs ......................................................H52
When the Hybrid Vehicle Shuts Off ............................H53
Hybrid system overview
Page 43 of 642
H33
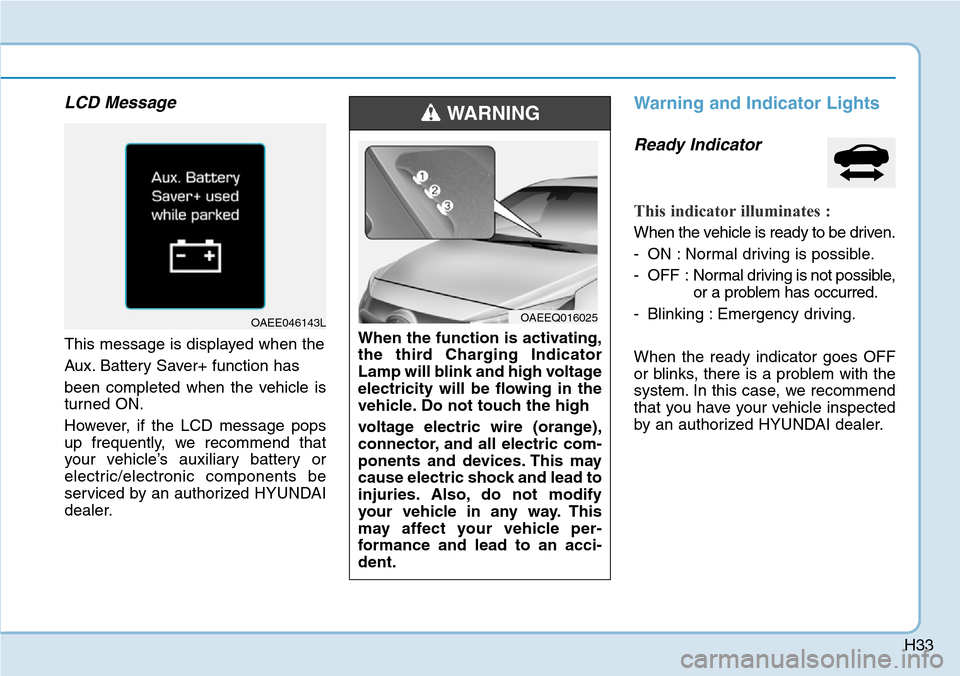
LCD Message
This message is displayed when the
Aux. Battery Saver+ function has
been completed when the vehicle is
turned ON.
However, if the LCD message pops
up frequently, we recommend that
your vehicle’s auxiliary battery or
electric/electronic components be
serviced by an authorized HYUNDAI
dealer.
Warning and Indicator Lights
Ready Indicator
This indicator illuminates :
When the vehicle is ready to be driven.
- ON : Normal driving is possible.
- OFF : Normal driving is not possible,
or a problem has occurred.
- Blinking : Emergency driving.
When the ready indicator goes OFF
or blinks, there is a problem with the
system. In this case, we recommend
that you have your vehicle inspected
by an authorized HYUNDAI dealer.
OAEE046143L
When the function is activating,
the third Charging Indicator
Lamp will blink and high voltage
electricity will be flowing in the
vehicle. Do not touch the high
voltage electric wire (orange),
connector, and all electric com-
ponents and devices. This may
cause electric shock and lead to
injuries. Also, do not modify
your vehicle in any way. This
may affect your vehicle per-
formance and lead to an acci-
dent.
WARNING
OAEEQ016025
Page 105 of 642
2-27
Safety system of your vehicle
2
If you start to drive without fastening
the seatbelt, warning light will contin-
ue to illumiante until you fasten the
seatbelt.
If you continue not to fasten the seat
belt and you drive over 20km/h the
seat belt warning chime will sound
for approximately 100 seconds and
the corresponding warning light will
blink. (if equipped)
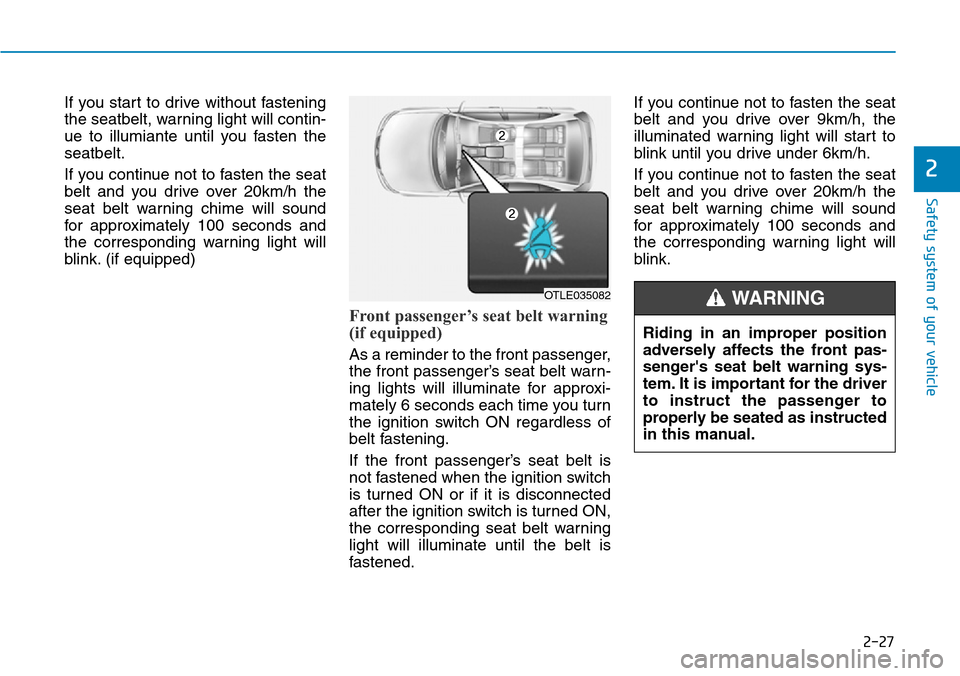
Front passenger’s seat belt warning
(if equipped)
As a reminder to the front passenger,
the front passenger’s seat belt warn-
ing lights will illuminate for approxi-
mately 6 seconds each time you turn
the ignition switch ON regardless of
belt fastening.
If the front passenger’s seat belt is
not fastened when the ignition switch
is turned ON or if it is disconnected
after the ignition switch is turned ON,
the corresponding seat belt warning
light will illuminate until the belt is
fastened.If you continue not to fasten the seat
belt and you drive over 9km/h, the
illuminated warning light will start to
blink until you drive under 6km/h.
If you continue not to fasten the seat
belt and you drive over 20km/h the
seat belt warning chime will sound
for approximately 100 seconds and
the corresponding warning light will
blink.
Riding in an improper position
adversely affects the front pas-
senger's seat belt warning sys-
tem. It is important for the driver
to instruct the passenger to
properly be seated as instructed
in this manual.
WARNING OTLE035082
Page 151 of 642
Convenient features of your vehicle
Accessing your vehicle .........................................3-4
Remote key .......................................................................3-4
Smart key ...........................................................................3-7
Immobilizer system ........................................................3-11
Door locks .............................................................3-12
Operating door locks from outside the vehicle .....3-12
Operating door locks from inside the vehicle ........3-14
Auto door lock/unlock features ................................3-16
Child-protector rear door locks ..................................3-16
Theft-alarm system.............................................3-17
Driver position memory system ........................3-18
Storing memory positions .............................................3-18
Recalling memory positions..........................................3-19
Easy access function ....................................................3-19
Steering wheel......................................................3-20
Electric power steering (EPS) ......................................3-20
Tilt steering / Telescopic steering ..............................3-21
Heated steering wheel .................................................3-21
Horn ....................................................................................3-22
Mirrors ...................................................................3-22
Inside rearview mirror....................................................3-22
Outside rearview mirror ..............................................3-24
Windows ................................................................3-27
Power windows ..............................................................3-27
Sunroof..................................................................3-32
Sunroof opening and closing .......................................3-33
Sliding the sunroof .........................................................3-33
Tilting the sunroof ..........................................................3-34
Sunshade ...........................................................................3-35
Resetting the sunroof ....................................................3-35
Exterior features .................................................3-36
Hood ...................................................................................3-36
Tailgate...............................................................................3-38
Fuel filler door (Hybrid vehicle) ..................................3-39
Fuel filler door (Plug-in hybrid vehicle) ...................3-42
Instrument cluster................................................3-45
Instrument cluster control ............................................3-47
Gauges and meters .........................................................3-47
Warning and indicator lights ........................................3-54
LCD display messages ..................................................3-66
LCD display ...........................................................3-81
LCD display control.........................................................3-81
LCD display modes (for cluster type A) ....................3-82
LCD display modes (for cluster type B) ....................3-89
3
Page 154 of 642
3-4
Convenient features of your vehicle
Remote key (if equipped)
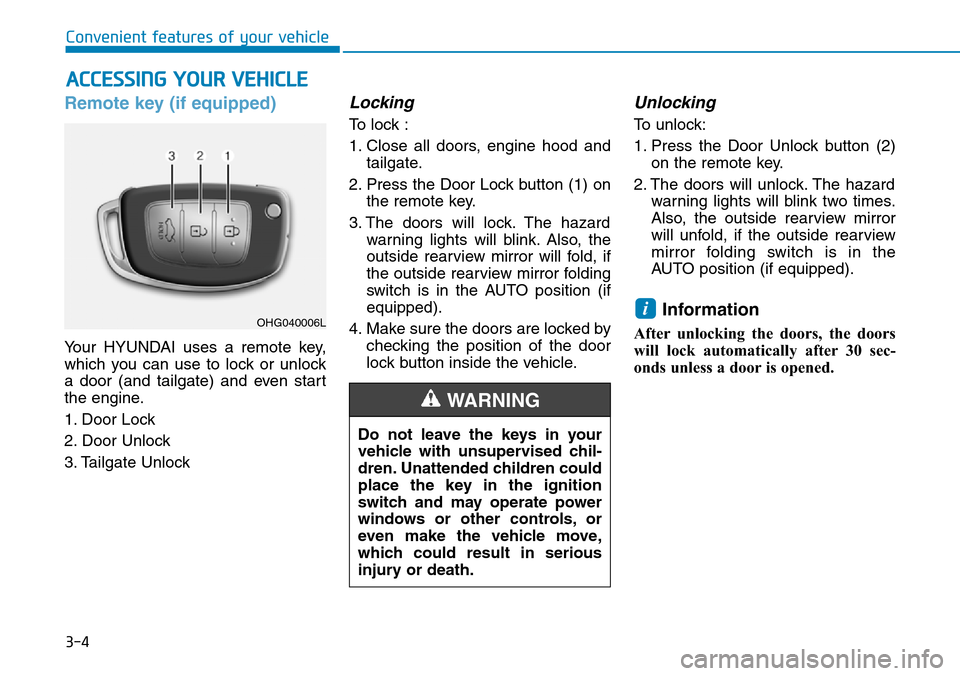
Your HYUNDAI uses a remote key,
which you can use to lock or unlock
a door (and tailgate) and even start
the engine.
1. Door Lock
2. Door Unlock
3. Tailgate Unlock
Locking
To lock :
1. Close all doors, engine hood and
tailgate.
2. Press the Door Lock button (1) on
the remote key.
3. The doors will lock. The hazard
warning lights will blink. Also, the
outside rearview mirror will fold, if
the outside rearview mirror folding
switch is in the AUTO position (if
equipped).
4. Make sure the doors are locked by
checking the position of the door
lock button inside the vehicle.
Unlocking
To unlock:
1. Press the Door Unlock button (2)
on the remote key.
2. The doors will unlock. The hazard
warning lights will blink two times.
Also, the outside rearview mirror
will unfold, if the outside rearview
mirror folding switch is in the
AUTO position (if equipped).
Information
After unlocking the doors, the doors
will lock automatically after 30 sec-
onds unless a door is opened.
i
ACCESSING YOUR VEHICLE
Do not leave the keys in your
vehicle with unsupervised chil-
dren. Unattended children could
place the key in the ignition
switch and may operate power
windows or other controls, or
even make the vehicle move,
which could result in serious
injury or death.
WARNING
OHG040006L
Page 155 of 642
3-5
Convenient features of your vehicle
Tailgate unlocking
To unlock:
1. Press the Tailgate Unlock button
(3) on the remote key for more
than one second.
2. The hazard warning lights will
blink two times. Once the tailgate
is opened and then closed, the
tailgate will lock automatically.
Information
• After unlocking the tailgate, the tail-
gate will lock automatically.
• The word "HOLD" is written on the
button to inform you that you must
press and hold the button for more
than one second.
Start-up
For detailed information refer to “Key
Ignition Switch” in chapter 5.
To prevent damaging the remote
key:
• Keep the remote key away from
water or any liquid and fire. If the
inside of the remote key gets
damp (due to drinks or mois-
ture), or is heated, internal cir-
cuit may malfunction and may
void the vehicle warranty.
• Avoid dropping or throwing the
remote key.
• Protect the remote key from
extreme temperatures.
Mechanical key
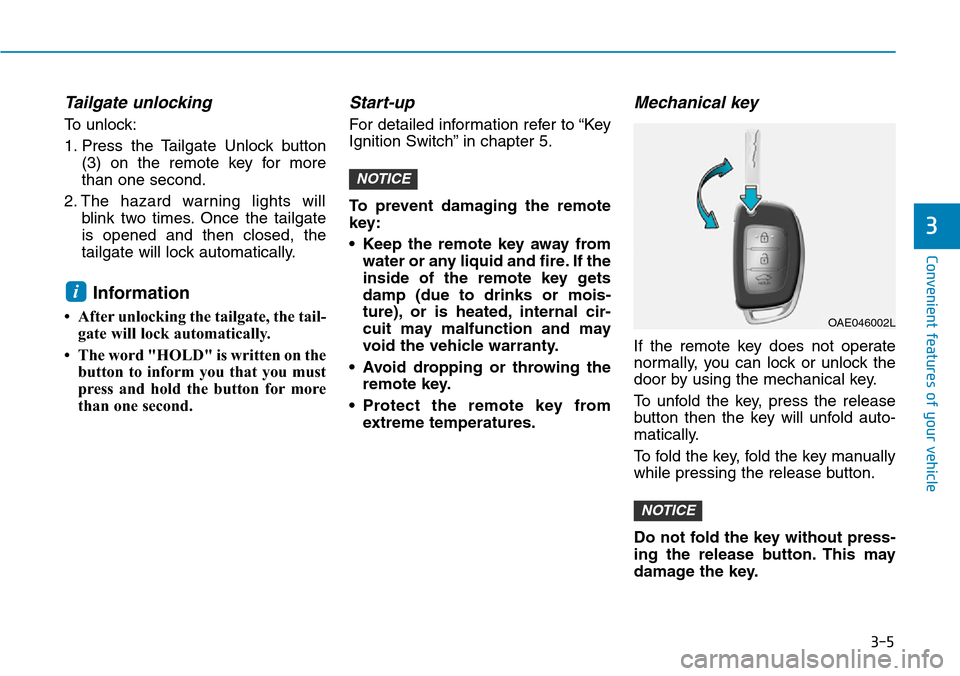
If the remote key does not operate
normally, you can lock or unlock the
door by using the mechanical key.
To unfold the key, press the release
button then the key will unfold auto-
matically.
To fold the key, fold the key manually
while pressing the release button.
Do not fold the key without press-
ing the release button. This may
damage the key.
NOTICE
NOTICE
i
3
OAE046002L
Page 157 of 642
3-7
Convenient features of your vehicle
If you suspect your remote key might
have sustained some damage, or
you feel your remote key is not work-
ing correctly, it is recommended that
you contact an authorized HYUNDAI
dealer.
Information
An inappropriately disposed
battery can be harmful to the
environment and human
health. Dispose of the battery
according to your local law(s)
or regulations.
Smart key (if equipped)
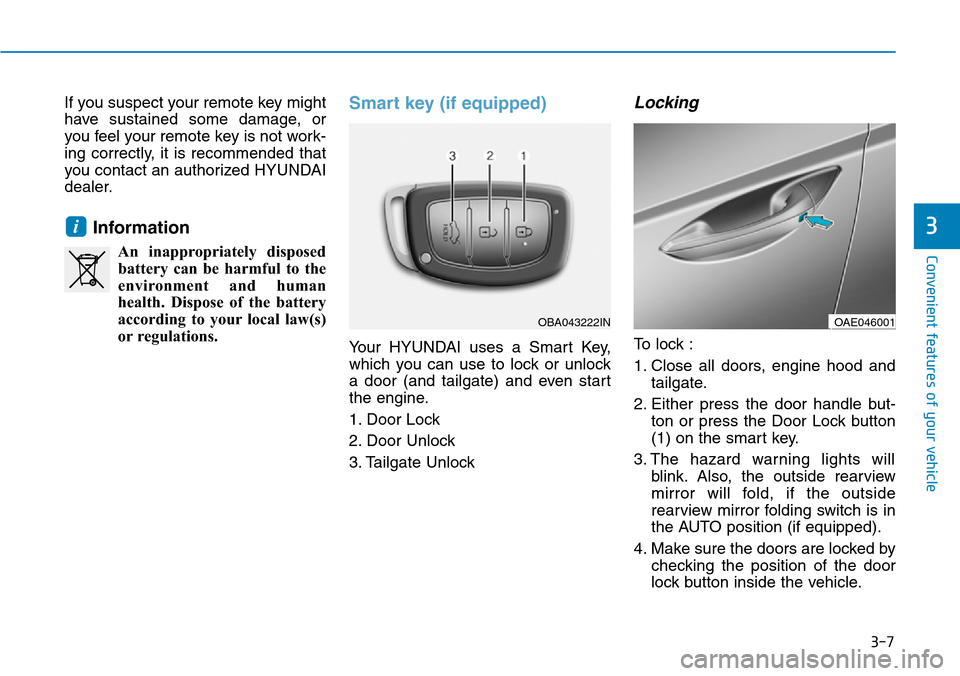
Your HYUNDAI uses a Smart Key,
which you can use to lock or unlock
a door (and tailgate) and even start
the engine.
1. Door Lock
2. Door Unlock
3. Tailgate Unlock
Locking
To lock :
1. Close all doors, engine hood and
tailgate.
2. Either press the door handle but-
ton or press the Door Lock button
(1) on the smart key.
3. The hazard warning lights will
blink. Also, the outside rearview
mirror will fold, if the outside
rearview mirror folding switch is in
the AUTO position (if equipped).
4. Make sure the doors are locked by
checking the position of the door
lock button inside the vehicle.
i3
OBA043222INOAE046001
Page 158 of 642
3-8
Information
The door handle button will only
operate when the smart key is within
0.7~1 m (28~40 in.) from the outside
door handle.
Even though you press the outside
door handle button, the doors will not
lock and the chime will sound for
three seconds if any of the following
occur:
• The Smart Key is in the vehicle.
• The Engine Start/Stop button is in
ACC or ON position.
• Any door except the tailgate is
open.
Unlocking
To unlock:
1. Carry the Smart Key.
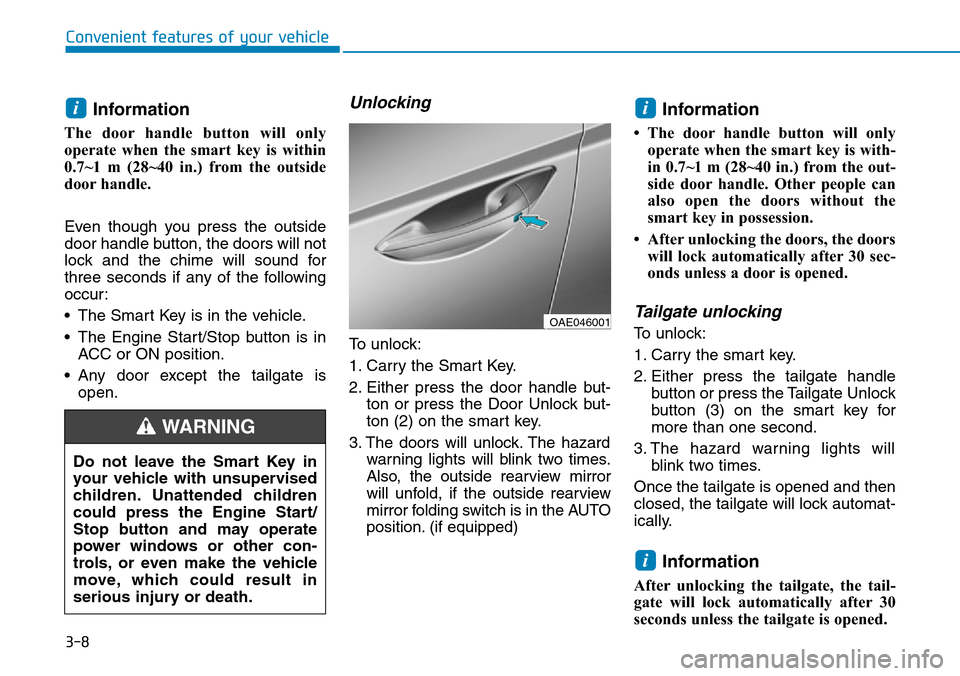
2. Either press the door handle but-
ton or press the Door Unlock but-
ton (2) on the smart key.
3. The doors will unlock. The hazard
warning lights will blink two times.
Also, the outside rearview mirror
will unfold, if the outside rearview
mirror folding switch is in the AUTO
position. (if equipped)
Information
• The door handle button will only
operate when the smart key is with-
in 0.7~1 m (28~40 in.) from the out-
side door handle. Other people can
also open the doors without the
smart key in possession.
• After unlocking the doors, the doors
will lock automatically after 30 sec-
onds unless a door is opened.
Tailgate unlocking
To unlock:
1. Carry the smart key.
2. Either press the tailgate handle
button or press the Tailgate Unlock
button (3) on the smart key for
more than one second.
3. The hazard warning lights will
blink two times.
Once the tailgate is opened and then
closed, the tailgate will lock automat-
ically.
Information
After unlocking the tailgate, the tail-
gate will lock automatically after 30
seconds unless the tailgate is opened.
i
ii
Convenient features of your vehicle
Do not leave the Smart Key in
your vehicle with unsupervised
children. Unattended children
could press the Engine Start/
Stop button and may operate
power windows or other con-
trols, or even make the vehicle
move, which could result in
serious injury or death.
WARNING
OAE046001
Page 167 of 642
3-17
Convenient features of your vehicle
This system helps to protect your
vehicle and valuables. The horn will
sound and the hazard warning lights
will blink continuously if any of the
following occur:
- A door is opened without using the
remote key or smart key.
- The tailgate is opened without
using the remote key or smart key.
- The engine hood is opened.
The alarm continues for 30 seconds,
then the system resets. To turn off
the alarm, unlock the doors with the
remote key or smart key.
The Theft Alarm System automati-
cally sets 30 seconds after you lock
the doors and the tailgate. For the
system to activate, you must lock the
doors and the tailgate from outside
the vehicle with the remote key or
smart key or by pressing the button
on the outside of the door handles
with the smart key in your posses-
sion.
The hazard warning lights will blink
once to indicate the system is
armed.Once the security system is set, open-
ing any door, the tailgate, or the hood
without using the remote key or smart
key will cause the alarm to activate.
The Theft Alarm System will not set if
the hood, the tailgate, or any door is
not fully closed. If the system will not
set, check the hood, the tailgate, or
the doors are fully closed.
Do not attempt to alter this system or
add other devices to it.
Information
• Do not lock the doors until all pas-
sengers have left the vehicle. If the
remaining passenger leaves the
vehicle when the system is armed,
the alarm will be activated.
• If the vehicle is not disarmed with
the remote key or smart key, open
the doors by using the mechanical
key and place the ignition switch in
the ON position (for remote key) or
start the engine (for smart key) and
wait for 30 seconds.
• When the system is disarmed but a
door or tailgate is not opened within
30 seconds, the system will be
rearmed.
Information
Vehicles equipped with a theft alarm
system will have a label attached to
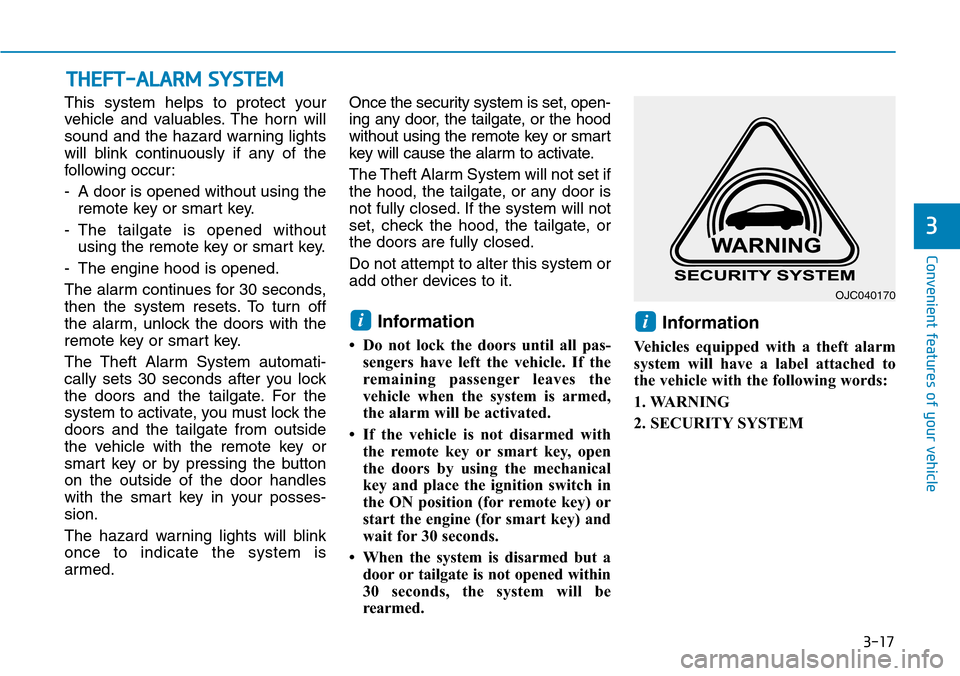
the vehicle with the following words:
1. WARNING
2. SECURITY SYSTEM
ii
THEFT-ALARM SYSTEM
3
OJC040170
Page 171 of 642
3-21
Convenient features of your vehicle
3
Tilt steering /
Telescopic steering
Information
After adjustment, sometimes the lock-
release lever may not lock the steering
wheel.
It is not a malfunction. This occurs
when two gears are not engaged cor-
rectly. In this case, adjust the steering
wheel again and then lock the steering
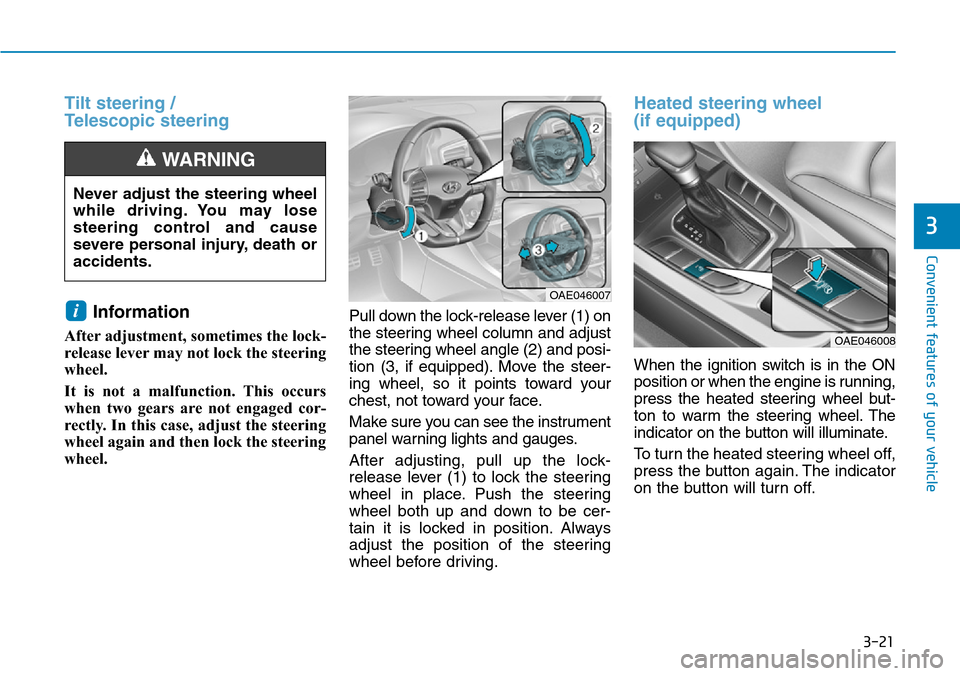
wheel.Pull down the lock-release lever (1) on
the steering wheel column and adjust
the steering wheel angle (2) and posi-
tion (3, if equipped). Move the steer-
ing wheel, so it points toward your
chest, not toward your face.
Make sure you can see the instrument
panel warning lights and gauges.
After adjusting, pull up the lock-
release lever (1) to lock the steering
wheel in place. Push the steering
wheel both up and down to be cer-
tain it is locked in position. Always
adjust the position of the steering
wheel before driving.
Heated steering wheel
(if equipped)
When the ignition switch is in the ON
position or when the engine is running,
press the heated steering wheel but-
ton to warm the steering wheel. The
indicator on the button will illuminate.
To turn the heated steering wheel off,
press the button again. The indicator
on the button will turn off.
i
Never adjust the steering wheel
while driving. You may lose
steering control and cause
severe personal injury, death or
accidents.
WARNING
OAE046007
OAE046008