tyre Hyundai Ioniq Plug-in Hybrid 2019 - RHD (UK, Australia) Owner's Guide
[x] Cancel search | Manufacturer: HYUNDAI, Model Year: 2019, Model line: Ioniq Plug-in Hybrid, Model: Hyundai Ioniq Plug-in Hybrid 2019Pages: 599, PDF Size: 17.32 MB
Page 455 of 599
5-111
Driving your vehicle
Trailer towing equipment
Towbars
Information
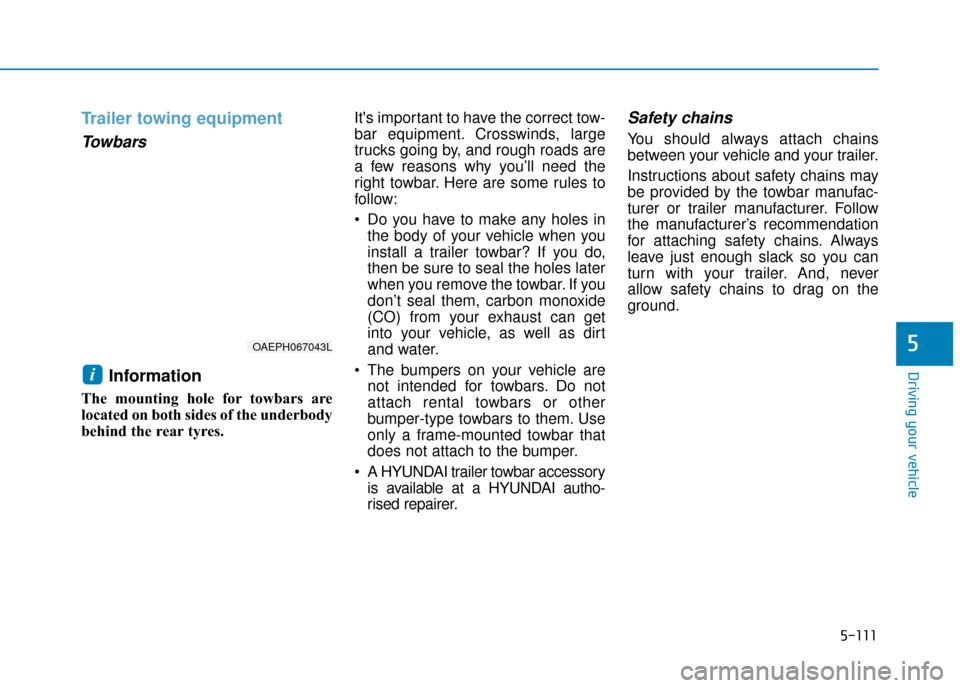
The mounting hole for towbars are
located on both sides of the underbody
behind the rear tyres.It's important to have the correct tow-
bar equipment. Crosswinds, large
trucks going by, and rough roads are
a few reasons why you’ll need the
right towbar. Here are some rules to
follow:
Do you have to make any holes in
the body of your vehicle when you
install a trailer towbar? If you do,
then be sure to seal the holes later
when you remove the towbar. If you
don’t seal them, carbon monoxide
(CO) from your exhaust can get
into your vehicle, as well as dirt
and water.
The bumpers on your vehicle are not intended for towbars. Do not
attach rental towbars or other
bumper-type towbars to them. Use
only a frame-mounted towbar that
does not attach to the bumper.
A HYUNDAI trailer towbar accessory is available at a HYUNDAI autho-
rised repairer.
Safety chains
You should always attach chains
between your vehicle and your trailer.
Instructions about safety chains may
be provided by the towbar manufac-
turer or trailer manufacturer. Follow
the manufacturer’s recommendation
for attaching safety chains. Always
leave just enough slack so you can
turn with your trailer. And, never
allow safety chains to drag on the
ground.
i
5OAEPH067043L
Page 456 of 599
5-112
Trailer brakes
If your trailer is equipped with a brak-
ing system, make sure it conforms to
your country’s regulations and that it
is properly installed and operating
correctly.
If your trailer weighs more than the
maximum trailer weight without trail-
er brakes loaded, then it needs its
own brakes and they must be ade-
quate. Be sure to read and follow the
instructions for the trailer brakes so
you’ll be able to install, adjust and
maintain them properly. Be sure not
to modify your vehicle's brake sys-
tem.
Driving with a trailer
Towing a trailer requires a certain
amount of experience. Before setting
out for the open road, you must get
to know your trailer. Acquaint your-
self with the feel of handling and
braking with the added weight of the
trailer. And always keep in mind that
the vehicle you are driving is now
longer and not nearly as responsive
as your vehicle is by itself.
Before you start, check the trailer
towbar and platform, safety chains,
electrical connector(s), lights, tyres
and brakes.
During your trip, occasionally check
to be sure that the load is secure,
and that the lights and trailer brakes
are still working.
Distance
Stay at least twice as far behind the
vehicle ahead as you would when
driving your vehicle without a trailer.
This can help you avoid situations
that require heavy braking and sud-
den turns.
Passing
You will need more passing distance
up ahead when you’re towing a trail-
er. And, because of the increased
vehicle length, you’ll need to go
much farther beyond the passed
vehicle before you can return to your
lane.
Driving your vehicleDo not use a trailer with its own
brakes unless you are absolute-
ly certain that you have proper-
ly set up the brake system. This
is not a task for amateurs. Use
an experienced, competent trail-
er shop for this work.
WARNING
Page 461 of 599
5-117
Driving your vehicle
5
Two labels on your driver’s door sill
show how much weight your vehicle
was designed to carry: the Tyre and
Loading Information Label and the
Certification Label.
Before loading your vehicle, familiar-
ize yourself with the following terms
for determining your vehicle's weight
ratings, from the vehicle's specifica-
tions and the Certification Label:
Base Kerb Weight
This is the weight of the vehicle
including a full tank of fuel and all
standard equipment. It does not
include passengers, cargo, or option-
al equipment.
Vehicle Kerb Weight
This is the weight of your new vehicle
when you picked it up from your deal-
er plus any aftermarket equipment.
Cargo Weight
This figure includes all weight added
to the Base Kerb Weight, including
cargo and optional equipment.GAW (Gross Axle Weight)
This is the total weight placed on
each axle (front and rear) - including
vehicle kerb weight and all payload.
GAWR (Gross Axle Weight Rating)
This is the maximum allowable
weight that can be carried by a single
axle (front or rear). These numbers
are shown on the Certification Label.
The total load on each axle must
never exceed its GAWR.
GVW (Gross Vehicle Weight)
This is the Base Kerb Weight plus
actual Cargo Weight plus passen-
gers.
GVWR (Gross Vehicle Weight
Rating)
This is the maximum allowable
weight of the fully loaded vehicle
(including all options, equipment,
passengers and cargo). The GVWR
is shown on the Certification Label
located on the driver’s door sill.Overloading
V V
E
EH
H I
IC
C L
LE
E
W
W E
EI
IG
G H
H T
T
The Gross Axle Weight Rating
(GAWR) and the Gross Vehicle
Weight Rating (GVWR) for your
vehicle are on the Certification
Label attached to the driver's
(or front passenger’s) door.
Exceeding these ratings can
cause an accident or vehicle
damage. You can calculate the
weight of your load by weighing
the items (and people) before
putting them in the vehicle. Be
careful not to overload your
vehicle.
WARNING
Page 462 of 599
What to do in an emergency
Hazard warning flasher ........................................6-2
In case of an emergency whilst driving .............6-2
If the engine stalls whilst driving ..................................6-2
If the engine stalls at a crossroad or crossing .........6-2
If you have a flat tyre whilst driving ..........................6-3
If the engine will not start ...................................6-4
If the 12 volt battery is discharged
(hybrid vehicle) ......................................................6-5
Before jump starting ........................................................6-5
Jump starting ......................................................................6-\
6
If the 12 volt battery is discharged
(plug-in hybrid vehicle) ........................................6-9
Jump starting ......................................................................6-\
9
If the engine overheats ......................................6-12
Tyre Pressure Monitoring System (TPMS) ......6-14
Check tyre pressure ......................................................6-14
Tyre pressure monitoring system ...............................6-15
Low tyre pressure telltale.............................................6-16
Low tyre pressure position and
tyre pressure telltale ......................................................6-16
TPMS (Tyre Pressure Monitoring System)
malfunction indicator .....................................................6-17
Changing a tyre with TPMS .........................................6-18
If you have a flat tyre (with spare tyre) .........6-20
Jack and tools .................................................................6-20
Changing tyres .................................................................6-21
Jack label ........................................................................\
...6-26
EC Declaration of conformity for Jack......................6-27
If you have a flat tyre (with tyre mobility kit)6-28
Type A ........................................................................\
........6-28
Type B ........................................................................\
........6-34
Towing ...................................................................6-43
Towing service .................................................................6-43
Removable towing hook ................................................6-44
Emergency towing ..........................................................6-45
Emergency commodity ........................................6-47
Fire extinguisher ............................................................6-47
First aid kit ......................................................................6-\
47
Triangle reflector ...........................................................6-47
Tyre pressure gauge ......................................................6-47
6
Page 464 of 599
6-3
What to do in an emergency
If you have a flat tyre whilst
driving
If a tyre goes flat whilst you are driv-
ing:
Take your foot off the acceleratorpedal and let the vehicle slow
down whilst driving straight ahead.
Do not apply the brakes immedi-
ately or attempt to pull off the road
as this may cause loss of vehicle
control resulting in an accident.
When the vehicle has slowed to
such a speed that it is safe to do
so, brake carefully and pull off the
road. Drive off the road as far as
possible and park on firm, level
ground. If you are on a divided
highway, do not park in the median
area between the two traffic lanes.
When the vehicle is stopped, press the hazard warning flasher button,
move the shift lever into P (Park),
apply the parking brake, and place
the ignition switch in the LOCK/
OFF position. Have all passengers get out of the
vehicle. Be sure they all get out on
the side of the vehicle that is away
from traffic.
When changing a flat tyre, follow the instructions provided later in
this chapter.
6
Page 475 of 599
6-14
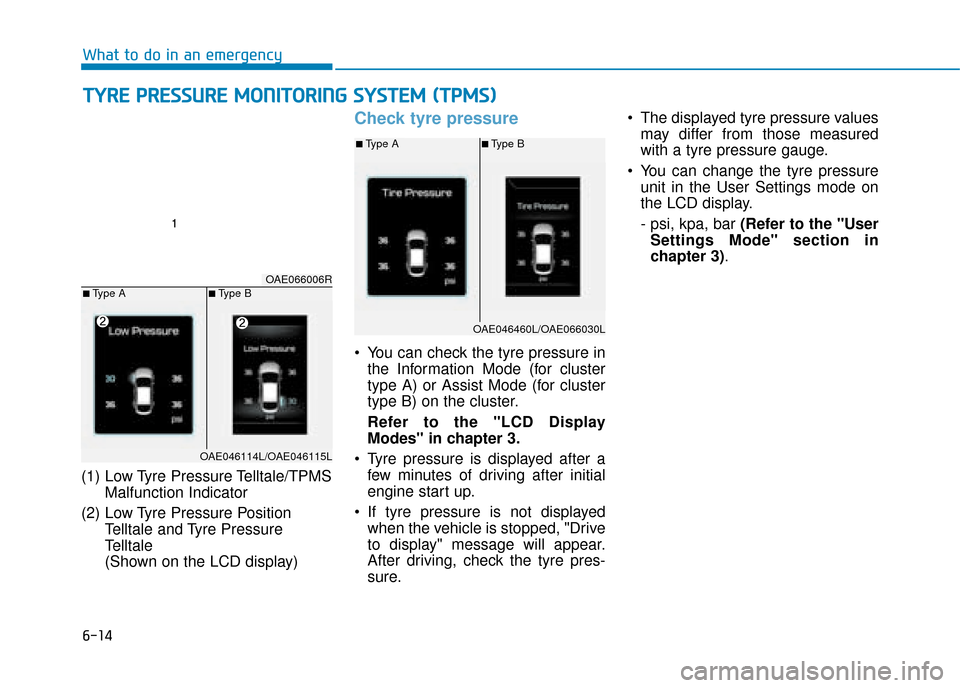
(1) Low Tyre Pressure Telltale/TPMSMalfunction Indicator
(2) Low Tyre Pressure Position Telltale and Tyre Pressure
Telltale
(Shown on the LCD display)
Check tyre pressure
You can check the tyre pressure inthe Information Mode (for cluster
type A) or Assist Mode (for cluster
type B) on the cluster.
Refer to the "LCD Display
Modes" in chapter 3.
Tyre pressure is displayed after a few minutes of driving after initial
engine start up.
If tyre pressure is not displayed when the vehicle is stopped, "Drive
to display" message will appear.
After driving, check the tyre pres-
sure. The displayed tyre pressure values
may differ from those measured
with a tyre pressure gauge.
You can change the tyre pressure unit in the User Settings mode on
the LCD display.
- psi, kpa, bar (Refer to the "User
Settings Mode" section in
chapter 3).
T T Y
Y R
RE
E
P
P R
R E
ES
SS
SU
U R
RE
E
M
M O
ON
NI
IT
T O
O R
RI
IN
N G
G
S
S Y
Y S
ST
T E
EM
M
(
( T
T P
P M
M S
S)
)
What to do in an emergency
OAE066006R■Type A
■Type A■Type B
■Type B
OAE046114L/OAE046115L
OAE046460L/OAE066030L
Page 476 of 599
6-15
What to do in an emergency
Tyre pressure monitoring sys-
tem
Each tyre, including the spare (if pro-
vided), should be checked monthly
when cold and inflated to the inflation
pressure recommended by the vehi-
cle manufacturer on the vehicle plac-
ard or tyre inflation pressure label. (If
your vehicle has tyres of a different
size than the size indicated on the
vehicle placard or tyre inflation pres-
sure label, you should determine the
proper tyre inflation pressure for
those tyres.)As an added safety feature, your
vehicle has been equipped with a
tyre pressure monitoring system
(TPMS) that illuminates a low tyre
pressure telltale when one or more
of your tyres is significantly under-
inflated. Accordingly, when the low
tyre pressure telltale illuminates, you
should stop and check your tyres as
soon as possible, and inflate them to
the proper pressure. Driving on a sig-
nificantly under-inflated tyre causes
the tyre to overheat and can lead to
tyre failure.
Under-inflation also reduces fuel effi-
ciency and tyre tread life, and may
affect the vehicle’s handling and
stopping ability.
Please note that the TPMS is not a
substitute for proper tyre mainte-
nance, and it is the driver’s responsi-
bility to maintain correct tyre pres-
sure, even if under-inflation has not
reached the level to trigger illumina-
tion of the TPMS low tyre pressure
telltale.Your vehicle has also been equipped
with a TPMS malfunction indicator to
indicate when the system is not
operating properly. The TPMS mal-
function indicator is combined with
the low tyre pressure telltale. When
the system detects a malfunction,
the telltale will flash for approximate-
ly one minute and then remain con-
tinuously illuminated. This sequence
will continue upon subsequent vehi-
cle start-ups as long as the malfunc-
tion exists.
When the malfunction indicator is illu-
minated, the system may not be able
to detect or signal low tyre pressure
as intended. TPMS malfunctions may
occur for a variety of reasons, includ-
ing the installation of replacement or
alternate tyres or wheels on the vehi-
cle that prevent the TPMS from func-
tioning properly.
Always check the TPMS malfunction
telltale after replacing one or more
tyres or wheels on your vehicle to
ensure that the replacement or alter-
nate tyres and wheels allow the
TPMS to continue to function proper-
ly.
6
Over-inflation or under-inflation
can reduce tyre life, adversely
affect vehicle handling, and
lead to sudden tyre failure that
may cause loss of vehicle con-
trol resulting in an accident.
WARNING
Page 477 of 599
6-16
If any of the below happens, have
the system checked by a
HYUNDAI authorised repairer.
1. The Low Tyre Pressure Telltale/TPMS Malfunction Indicator
does not illuminate for 3 sec-
onds when the ignition switch
is placed to the ON position or
engine is running.
2. The TPMS Malfunction Indicator remains illuminated after blink-
ing for approximately 1 minute.
3. The Low Tyre Pressure Position Telltale remains illuminated.
Low tyre pressure
telltale
Low tyre pressure position and
tyre pressure telltale
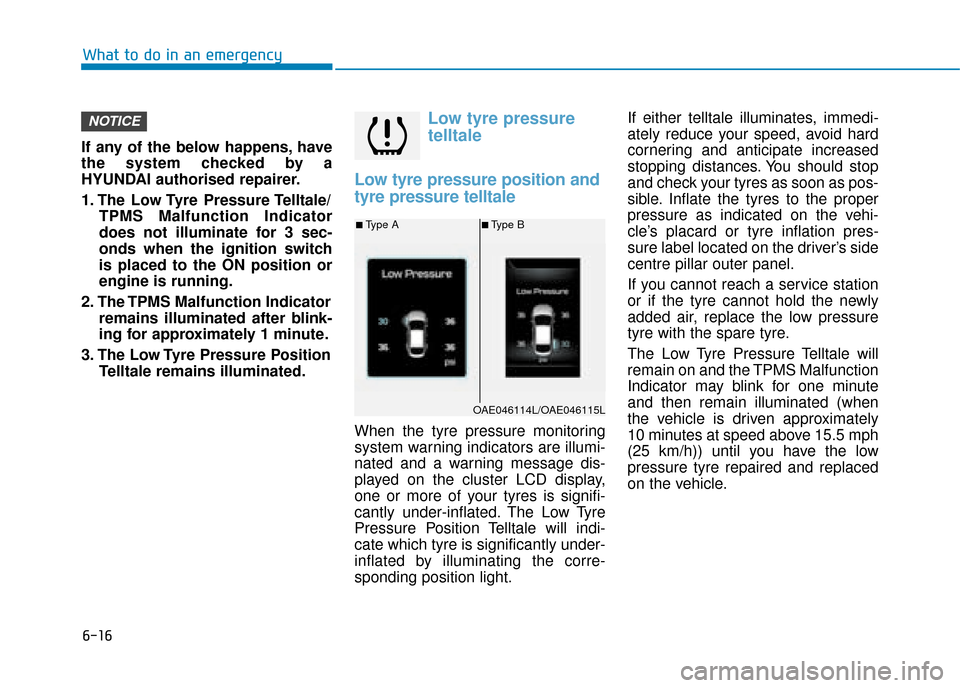
When the tyre pressure monitoring
system warning indicators are illumi-
nated and a warning message dis-
played on the cluster LCD display,
one or more of your tyres is signifi-
cantly under-inflated. The Low Tyre
Pressure Position Telltale will indi-
cate which tyre is significantly under-
inflated by illuminating the corre-
sponding position light. If either telltale illuminates, immedi-
ately reduce your speed, avoid hard
cornering and anticipate increased
stopping distances. You should stop
and check your tyres as soon as pos-
sible. Inflate the tyres to the proper
pressure as indicated on the vehi-
cle’s placard or tyre inflation pres-
sure label located on the driver’s side
centre pillar outer panel.
If you cannot reach a service station
or if the tyre cannot hold the newly
added air, replace the low pressure
tyre with the spare tyre.
The Low Tyre Pressure Telltale will
remain on and the TPMS Malfunction
Indicator may blink for one minute
and then remain illuminated (when
the vehicle is driven approximately
10 minutes at speed above 15.5 mph
(25 km/h)) until you have the low
pressure tyre repaired and replaced
on the vehicle.
NOTICE
What to do in an emergency
■Type A■Type B
OAE046114L/OAE046115L
Page 478 of 599
6-17
What to do in an emergency
TPMS (Tyre Pressure
Monitoring System)
malfunction indicator
The TPMS Malfunction Indicator will
illuminate after it blinks for approxi-
mately one minute when there is a
problem with the Tyre Pressure
Monitoring System.
We recommend that the system be
checked by a HYUNDAI authorised
repairer as soon as possible.
If there is a malfunction with the
TPMS, the Low Tyre Pressure
Position Telltale will not be dis-
played even though the vehicle
has an under-inflated tyre.
NOTICE
6
In winter or cold weather, the
Low Tyre Pressure Telltale may
be illuminated if the tyre pres-
sure was adjusted to the recom-
mended tyre inflation pressure
in warm weather. It does not
mean your TPMS is malfunc-
tioning because the decreased
temperature leads to a propor-
tional lowering of tyre pressure.
When you drive your vehicle
from a warm area to a cold area
or from a cold area to a warm
area, or the outside temperature
is greatly higher or lower, you
should check the tyre inflation
pressure and adjust the tyres to
the recommended tyre inflation
pressure.
CAUTION
Low pressure damage
Significantly low tyre pressure
makes the vehicle unstable and
can contribute to loss of vehicle
control and increased braking
distances.
Continued driving on low pres-
sure tyres can cause the tyres
to overheat and fail.
WARNING
Page 479 of 599
6-18
The TPMS Malfunction Indicator
may illuminate after blinking for
one minute if the vehicle is near
electric power supply cables or
radio transmitters such as police
stations, government and public
offices, broadcasting stations,
military installations, airports,
transmitting towers, etc.
Additionally, the TPMS Malfunction
Indicator may illuminate if snow
chains are used or electronic
devices such as computers, charg-
ers, remote starters, navigation,
etc. This may interfere with normal
operation of the TPMS.
Changing a tyre with TPMS
If you have a flat tyre, the Low Tyre
Pressure and Position telltales will
come on. We recommend that the
flat tire be repaired by a HYUNDAI
authorised repairer as soon as pos-
sible or replace the flat tyre with the
spare tyre.
The spare tyre (if equipped) does not
come with a tyre pressure monitoring
sensor. When the low pressure tyre
or the flat tyre is replaced with the
spare tyre, the Low Tyre Pressure
Telltale will remain on. Also, the
TPMS Malfunction Indicator will illu-
minate after blinking for one minute if
the vehicle is driven at speed above
15.5 mph (25 km/h) for approximate-
ly 10 minutes.Once the original tyre equipped with
a tyre pressure monitoring sensor is
reinflated to the recommended pres-
sure and reinstalled on the vehicle,
the Low Tyre Pressure Telltale and
TPMS Malfunction Indicator will go
off within a few minutes of driving.
If the indicators do not extinguish
after a few minutes, please visit a
HYUNDAI authorised repairer.
Each wheel is equipped with a tyre
pressure sensor mounted inside the
tyre behind the valve stem (except
for the spare tyre). You must use
TPMS specific wheels. It is recom-
mended that you always have your
tyres serviced by a HYUNDAI autho-
rised repairer.
You may not be able to identify a tyre
with low pressure by simply looking
at it. Always use a good quality tyre
pressure gauge to measure. Please
note that a tyre that is hot (from
being driven) will have a higher pres-
sure measurement than a tyre that is
cold.
NOTICE
What to do in an emergency
It is recommended that you do
not use a puncture-repairing
agent not approved by a
HYUNDAI dealer to repair and/or
inflate a low pressure tyre. Tyre
sealant not approved by a
HYUNDAI dealer may damage
the tyre pressure sensor.
CAUTION