Hyundai Ioniq Plug-in Hybrid 2019 Owner's Manual - RHD (UK, Australia)
Manufacturer: HYUNDAI, Model Year: 2019, Model line: Ioniq Plug-in Hybrid, Model: Hyundai Ioniq Plug-in Hybrid 2019Pages: 599, PDF Size: 17.32 MB
Page 501 of 599
6-40
7. Switch off the compressor.
8. Detach the hoses from the sealantbottle connector and from the tyre
valve.
Return the Tyre Mobility Kit to its
storage location in the vehicle.
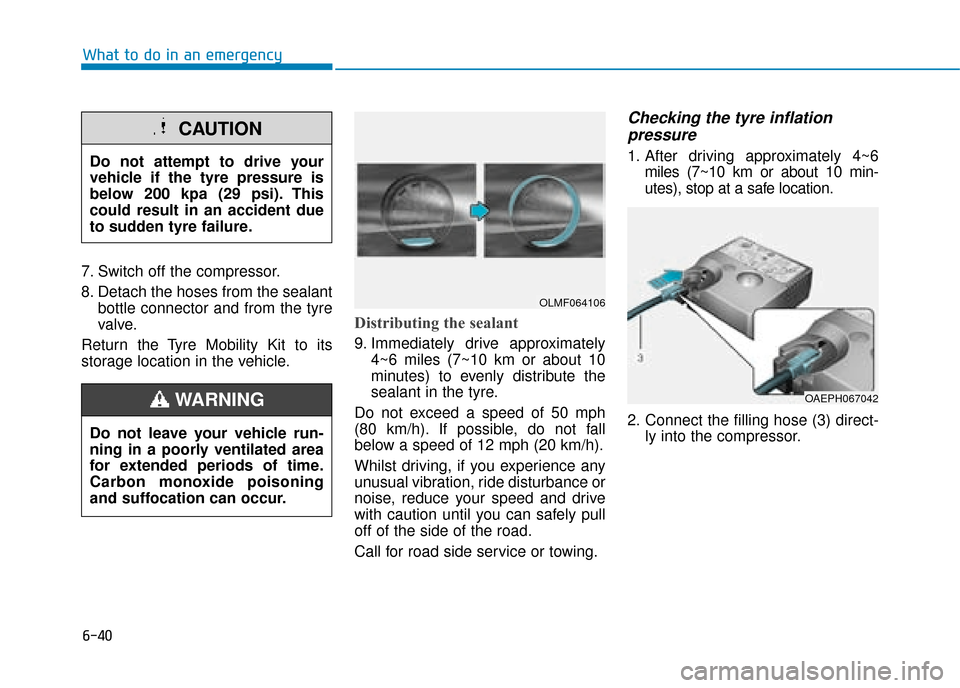
Distributing the sealant
9. Immediately drive approximately 4~6 miles (7~10 km or about 10
minutes) to evenly distribute the
sealant in the tyre.
Do not exceed a speed of 50 mph
(80 km/h). If possible, do not fall
below a speed of 12 mph (20 km/h).
Whilst driving, if you experience any
unusual vibration, ride disturbance or
noise, reduce your speed and drive
with caution until you can safely pull
off of the side of the road.
Call for road side service or towing.
Checking the tyre inflation pressure
1. After driving approximately 4~6
miles (7~10 km or about 10 min-
utes), stop at a safe location.
2. Connect the filling hose (3) direct- ly into the compressor.
What to do in an emergency
Do not attempt to drive your
vehicle if the tyre pressure is
below 200 kpa (29 psi). This
could result in an accident due
to sudden tyre failure.
CAUTION
Do not leave your vehicle run-
ning in a poorly ventilated area
for extended periods of time.
Carbon monoxide poisoning
and suffocation can occur.
WARNING
OLMF064106
OAEPH067042
Page 502 of 599
6-41
What to do in an emergency
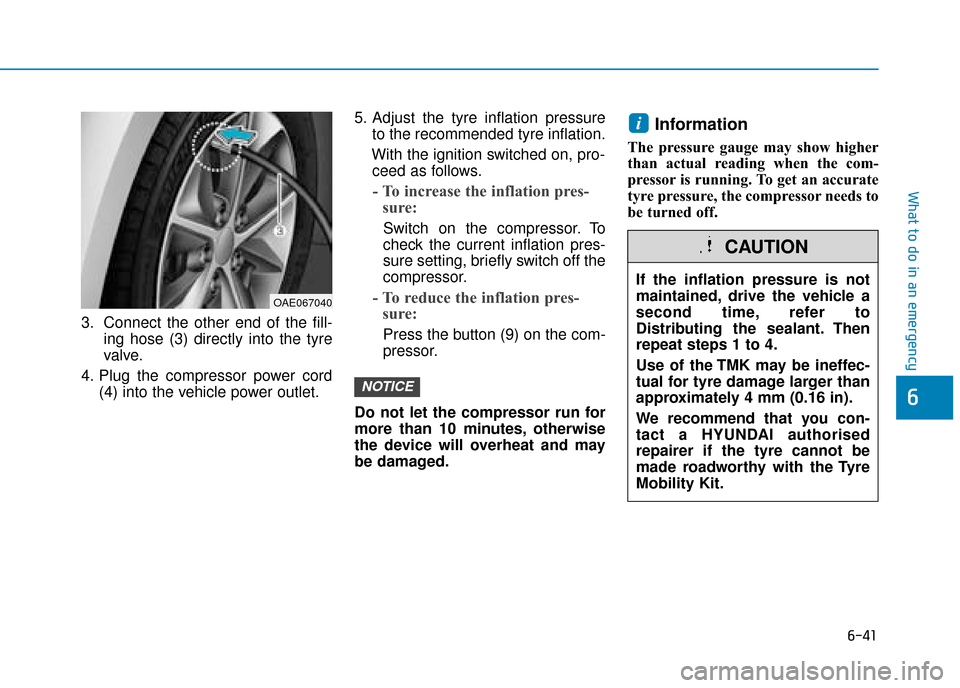
3. Connect the other end of the fill-ing hose (3) directly into the tyre
valve.
4. Plug the compressor power cord (4) into the vehicle power outlet. 5. Adjust the tyre inflation pressure
to the recommended tyre inflation.
With the ignition switched on, pro- ceed as follows.
- To increase the inflation pres- sure:
Switch on the compressor. To
check the current inflation pres-
sure setting, briefly switch off the
compressor.
- To reduce the inflation pres- sure:
Press the button (9) on the com-
pressor.
Do not let the compressor run for
more than 10 minutes, otherwise
the device will overheat and may
be damaged.
Information
The pressure gauge may show higher
than actual reading when the com-
pressor is running. To get an accurate
tyre pressure, the compressor needs to
be turned off.
i
NOTICE6
If the inflation pressure is not
maintained, drive the vehicle a
second time, refer to
Distributing the sealant. Then
repeat steps 1 to 4.
Use of the TMK may be ineffec-
tual for tyre damage larger than
approximately 4 mm (0.16 in).
We recommend that you con-
tact a HYUNDAI authorised
repairer if the tyre cannot be
made roadworthy with the Tyre
Mobility Kit.
CAUTION
OAE067040
Page 503 of 599
6-42
Information
When reinstalling the repaired or
replaced tyre and wheel on the vehi-
cle, tighten the wheel lug nut to 11~13
kgf·m (79~94 lbf·ft).
i
What to do in an emergencyTyre pressure sensor
(if equipped with TPMS)
The sealant on the tyre pres-
sure sensor and wheel should
be removed when you replace
the tyre with a new one and
inspect the tyre pressure sen-
sors at an authorised repairer.
CAUTION
The tyre inflation pressure must
be at least 220 kPa (32 psi). If it
is not, do not continue driving.
Call for road side service or
towing.
WARNING
Page 504 of 599
6-43
What to do in an emergency
6
Towing service
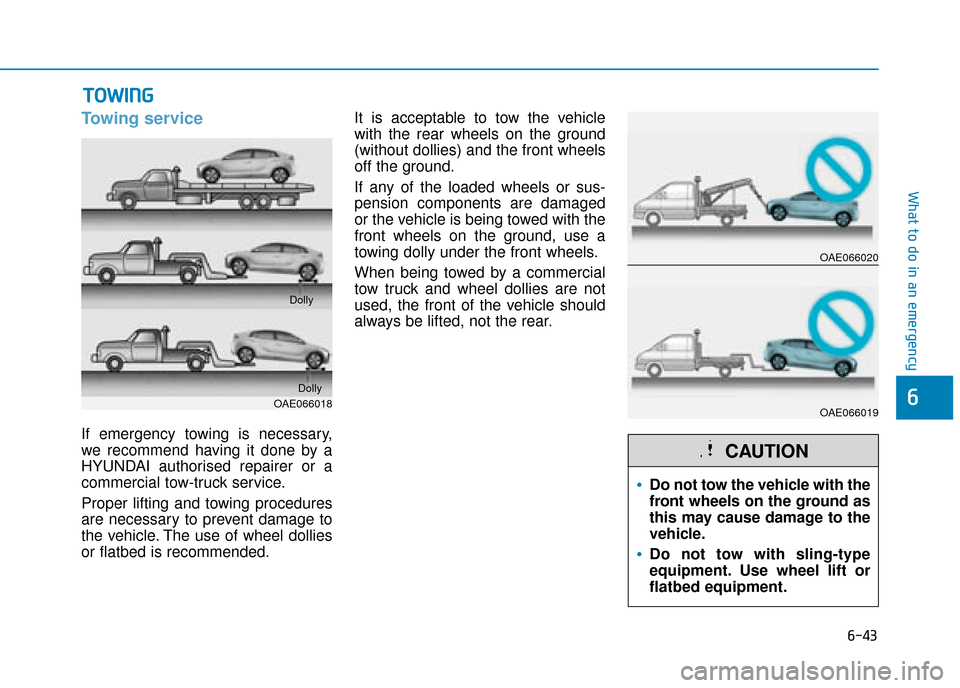
If emergency towing is necessary,
we recommend having it done by a
HYUNDAI authorised repairer or a
commercial tow-truck service.
Proper lifting and towing procedures
are necessary to prevent damage to
the vehicle. The use of wheel dollies
or flatbed is recommended.It is acceptable to tow the vehicle
with the rear wheels on the ground
(without dollies) and the front wheels
off the ground.
If any of the loaded wheels or sus-
pension components are damaged
or the vehicle is being towed with the
front wheels on the ground, use a
towing dolly under the front wheels.
When being towed by a commercial
tow truck and wheel dollies are not
used, the front of the vehicle should
always be lifted, not the rear.
T T
O
O W
W I
IN
N G
G
OAE066018 Dolly
Dolly
Do not tow the vehicle with the
front wheels on the ground as
this may cause damage to the
vehicle.
Do not tow with sling-type
equipment. Use wheel lift or
flatbed equipment.
CAUTION
OAE066020
OAE066019
Page 505 of 599
6-44
What to do in an emergency
When towing your vehicle in an
emergency without wheel dollies:
1. Place the ignition switch in the ACC position.
2. Place the shift lever in N (Neutral).
3. Release the parking brake.
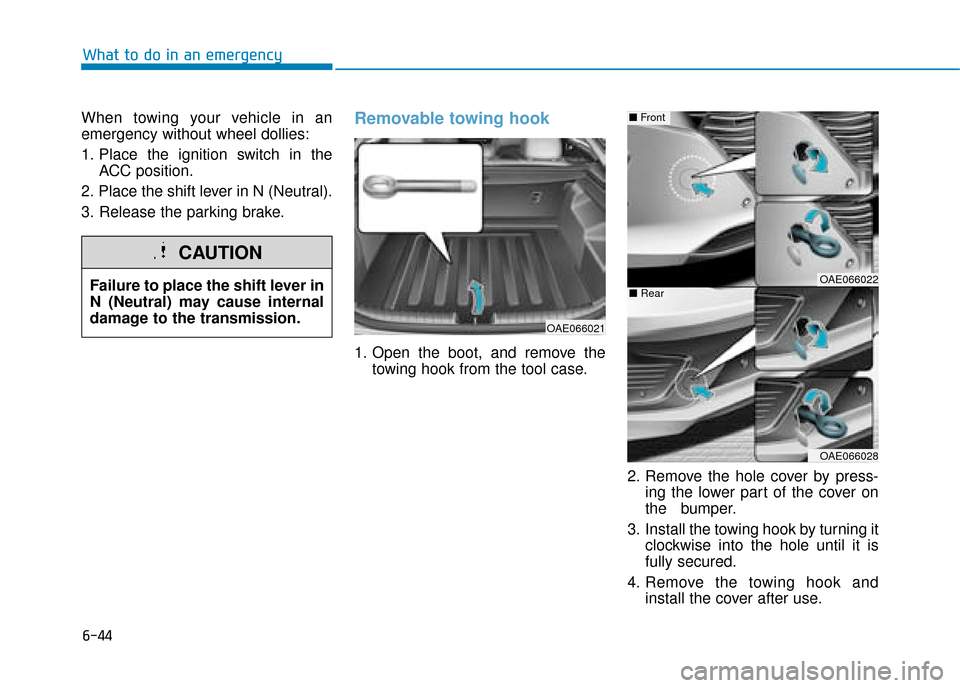
Removable towing hook
1. Open the boot, and remove the towing hook from the tool case.
2. Remove the hole cover by press-ing the lower part of the cover on
the bumper.
3. Install the towing hook by turning it clockwise into the hole until it is
fully secured.
4. Remove the towing hook and install the cover after use.
Failure to place the shift lever in
N (Neutral) may cause internal
damage to the transmission.
CAUTION
OAE066021
OAE066022
OAE066028
■
Front
■Rear
Page 506 of 599
6-45
What to do in an emergency
6
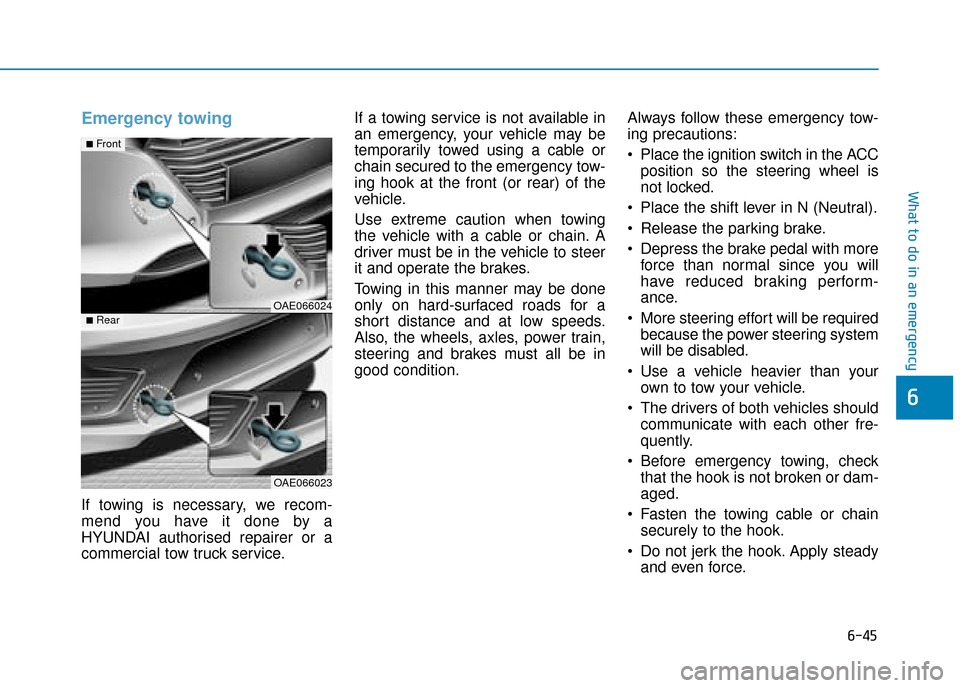
Emergency towing
If towing is necessary, we recom-
mend you have it done by a
HYUNDAI authorised repairer or a
commercial tow truck service.If a towing service is not available in
an emergency, your vehicle may be
temporarily towed using a cable or
chain secured to the emergency tow-
ing hook at the front (or rear) of the
vehicle.
Use extreme caution when towing
the vehicle with a cable or chain. A
driver must be in the vehicle to steer
it and operate the brakes.
Towing in this manner may be done
only on hard-surfaced roads for a
short distance and at low speeds.
Also, the wheels, axles, power train,
steering and brakes must all be in
good condition.
Always follow these emergency tow-
ing precautions:
Place the ignition switch in the ACC
position so the steering wheel is
not locked.
Place the shift lever in N (Neutral).
Release the parking brake.
Depress the brake pedal with more force than normal since you will
have reduced braking perform-
ance.
More steering effort will be required because the power steering system
will be disabled.
Use a vehicle heavier than your own to tow your vehicle.
The drivers of both vehicles should communicate with each other fre-
quently.
Before emergency towing, check that the hook is not broken or dam-
aged.
Fasten the towing cable or chain securely to the hook.
Do not jerk the hook. Apply steady and even force.
OAE066024
OAE066023
■Front
■Rear
Page 507 of 599
6-46
What to do in an emergency
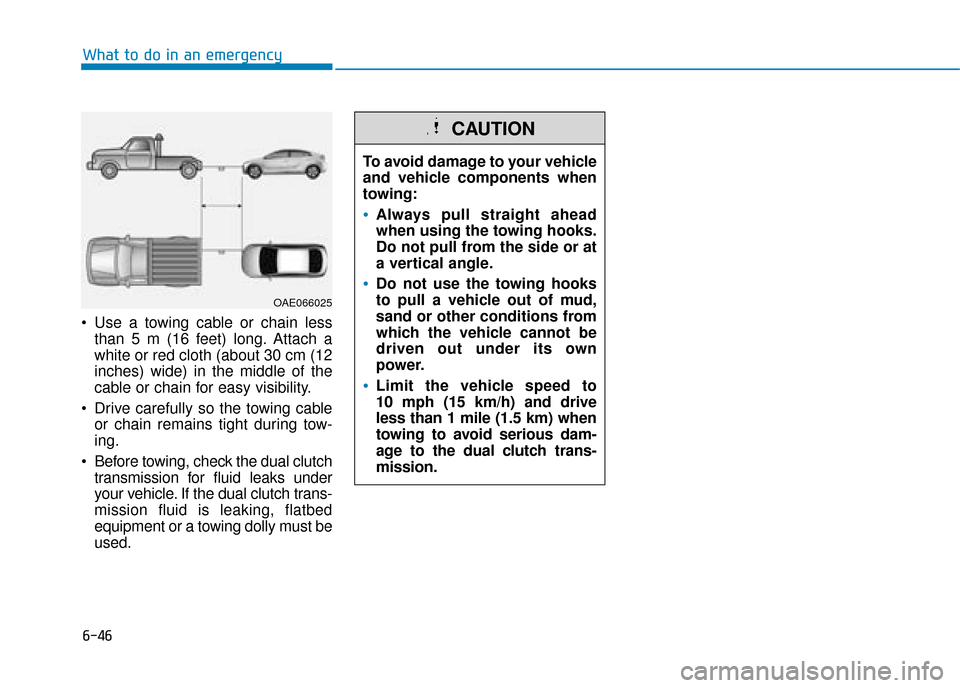
Use a towing cable or chain less than 5 m (16 feet) long. Attach a
white or red cloth (about 30 cm (12
inches) wide) in the middle of the
cable or chain for easy visibility.
Drive carefully so the towing cable or chain remains tight during tow-
ing.
Before towing, check the dual clutch transmission for fluid leaks under
your vehicle. If the dual clutch trans-
mission fluid is leaking, flatbed
equipment or a towing dolly must be
used. To avoid damage to your vehicle
and vehicle components when
towing:
Always pull straight ahead
when using the towing hooks.
Do not pull from the side or at
a vertical angle.
Do not use the towing hooks
to pull a vehicle out of mud,
sand or other conditions from
which the vehicle cannot be
driven out under its own
power.
Limit the vehicle speed to
10 mph (15 km/h) and drive
less than 1 mile (1.5 km) when
towing to avoid serious dam-
age to the dual clutch trans-
mission.
CAUTION
OAE066025
Page 508 of 599
6-47
What to do in an emergency
6
Your vehicle is equipped with emer-
gency commodities to help you
respond to emergency situation.
Fire extinguisher
If there is small fire and you know
how to use the fire extinguisher, fol-
low these steps carefully.
1. Pull out the safety pin at the top ofthe extinguisher that keeps the
handle from being accidentally
pressed.
2. Aim the nozzle towards the base of the fire.
3. Stand approximately 2.5 m (8 ft) away from the fire and squeeze
the handle to discharge the extin-
guisher. If you release the handle,
the discharge will stop.
4. Sweep the nozzle back and forth at the base of the fire. After the fire
appears to be out, watch carefully
since it may re-ignite.
First aid kit
Supplies for use in giving first aid
such as scissors, bandage and
adhesive tape, etc. are provided.
Triangle reflector
Place the triangle reflector on the
road to warn oncoming vehicles dur-
ing emergencies, such as when the
vehicle is parked by the roadside due
to problems.
Tyre pressure gauge
(if equipped)
Tyres normally lose some air in day-
to-day use, and you may have to add
a air periodically and usually it is not
a sign of a leaking tyre, but of normal
wear. Always check tyre pressure
when the tyres are cold because tyre
pressure increases with temperature. To check the tyre pressure, take the
following steps:
1. Unscrew the inflation valve cap
that is located on the rim of the
tyre.
2. Press and hold the gauge against the tyre valve. Some air will leak
as you begin and more will leak if
you don't press the gauge in firm-
ly.
3. A firm non-leaking push will acti- vate the gauge.
4. Read the tyre pressure on the gauge to see whether the tyre
pressure is low or high.
5. Adjust the tyre pressure to the specified pressure. Refer to "Tyres
and Wheels" in chapter 8.
6. Reinstall the inflation valve cap.
E E M
M E
ER
R G
G E
EN
N C
CY
Y
C
C O
O M
M M
MO
OD
DI
IT
T Y
Y
(
( I
IF
F
E
E Q
Q U
UI
IP
P P
PE
ED
D )
)
Page 509 of 599
7
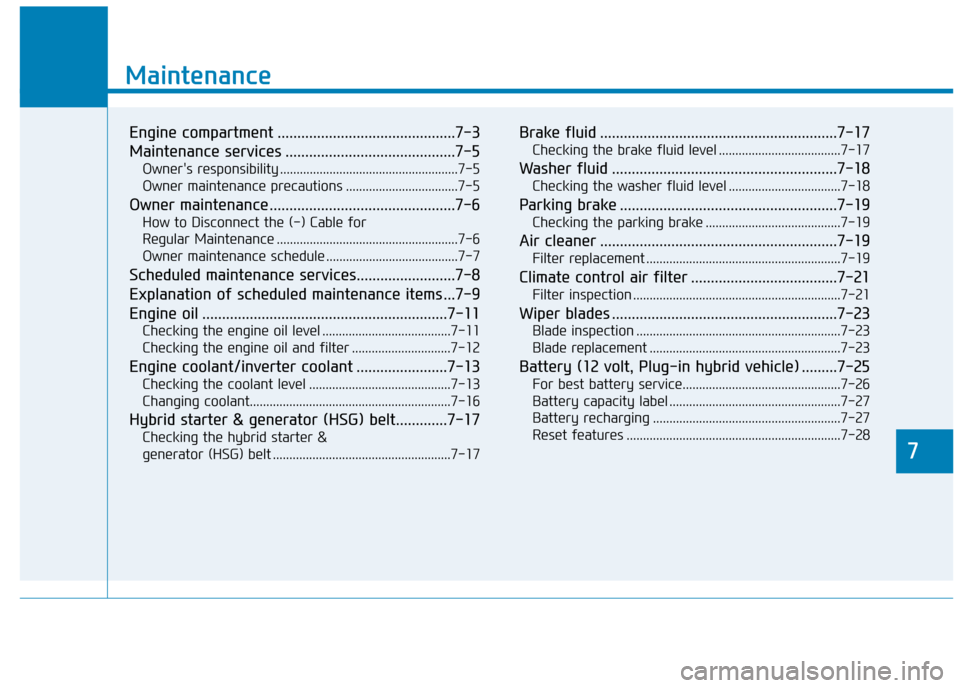
Maintenance
7
Maintenance
Engine compartment .............................................7-3
Maintenance services ...........................................7-5
Owner's responsibility ......................................................7-5
Owner maintenance precautions ..................................7-5
Owner maintenance ...............................................7-6
How to Disconnect the (-) Cable for
Regular Maintenance .......................................................7-6
Owner maintenance schedule ........................................7-7
Scheduled maintenance services.........................7-8
Explanation of scheduled maintenance items ...7-9
Engine oil ..............................................................7-11
Checking the engine oil level .......................................7-11
Checking the engine oil and filter ..............................7-12
Engine coolant/inverter coolant .......................7-13
Checking the coolant level ...........................................7-13
Changing coolant........................................................\
.....7-16
Hybrid starter & generator (HSG) belt.............7-17
Checking the hybrid starter &
generator (HSG) belt ......................................................7-17
Brake fluid ............................................................7-17
Checking the brake fluid level .....................................7-17
Washer fluid .........................................................7-18
Checking the washer fluid level ..................................7-18
Parking brake .......................................................7-19
Checking the parking brake .........................................7-19
Air cleaner ............................................................7-19
Filter replacement ...........................................................7-19
Climate control air filter .....................................7-21
Filter inspection ...............................................................7-21
Wiper blades .........................................................7-23
Blade inspection ..............................................................7-23
Blade replacement ..........................................................7-23
Battery (12 volt, Plug-in hybrid vehicle) .........7-25
For best battery service................................................7-26
Battery capacity label ....................................................7-27
Battery recharging .........................................................7-27
Reset features .................................................................7-28
7
Page 510 of 599
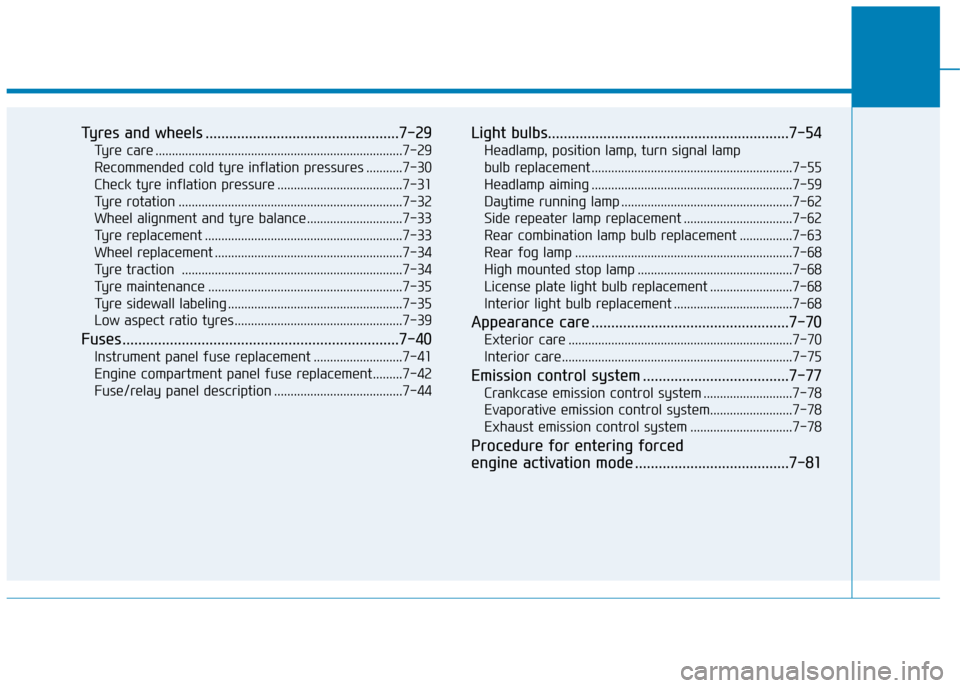
Tyres and wheels .................................................7-29
Tyre care ........................................................................\
...7-29
Recommended cold tyre inflation pressures ...........7-30
Check tyre inflation pressure ......................................7-31
Tyre rotation ....................................................................7-32\
Wheel alignment and tyre balance.............................7-33
Tyre replacement ............................................................7-33
Wheel replacement .........................................................7-34
Tyre traction ...................................................................7-34
Tyre maintenance ...........................................................7-35
Tyre sidewall labeling .....................................................7-35
Low aspect ratio tyres...................................................7-39
Fuses ......................................................................7-\
40
Instrument panel fuse replacement ...........................7-41
Engine compartment panel fuse replacement.........7-42
Fuse/relay panel description .......................................7-44
Light bulbs.............................................................7-54
Headlamp, position lamp, turn signal lamp
bulb replacement .............................................................7-55
Headlamp aiming .............................................................7-59
Daytime running lamp ....................................................7-62
Side repeater lamp replacement .................................7-62
Rear combination lamp bulb replacement ................7-63
Rear fog lamp ..................................................................7-68
High mounted stop lamp ...............................................7-68
License plate light bulb replacement .........................7-68
Interior light bulb replacement ....................................7-68
Appearance care ..................................................7-70
Exterior care ....................................................................7-70\
Interior care......................................................................7-\
75
Emission control system .....................................7-77
Crankcase emission control system ...........................7-78
Evaporative emission control system.........................7-78
Exhaust emission control system ...............................7-78
Procedure for entering forced
engine activation mode .......................................7-81