charging Hyundai Ioniq Plug-in Hybrid 2019 - RHD (UK, Australia) Workshop Manual
[x] Cancel search | Manufacturer: HYUNDAI, Model Year: 2019, Model line: Ioniq Plug-in Hybrid, Model: Hyundai Ioniq Plug-in Hybrid 2019Pages: 599, PDF Size: 17.32 MB
Page 325 of 599
4-23
Multimedia System
4
(Continued)
• Some USB devices are not recog-nised due to compatibility issues.
• Do not touch the USB connections.
• Connecting and disconnecting USB devices rapidly over a short period
of time can cause equipment failure.
• Abnormal sounds may be audible when the USB device is disconnected.
• Turn the audio off before connecting or disconnecting external USB
devices.
• Recognition may take longer depending on the type, capacity or
file format of the external USB
device. This is not a product mal-
function.
• Use of USB devices for purposes other than playing music files is pro-
hibited.
• Image display and video playback are not supported.
(Continued)(Continued)
• Use of USB accessories, including
charge and heat though the USB I/F,
can lead to reduced product per-
formance or malfunctions. Do not
use USB devices or accessories for
these purposes.
• Use of aftermarket USB hubs and extension cables can result in the
vehicle’s audio system failing to
recognise your USB device. Connect
the USB device directly to the multi-
media port of your vehicle.
• When using high-capacity USB devices with logical drive divisions,
only files saved on the highest level
logical drive can be played.
If applications are loaded on a USB
drive, file playback may fail.
• Some MP3 players, cell phones, dig- ital cameras, etc. (USB devices that
are not recognised as mobile stor-
age) may not operate normally
when connected.
• USB charging may not be supported by some mobile devices.
(Continued)(Continued)
• Operation is guaranteed only for
standard (Metal Cover Type) USB
Memory drives.
• Operation of HDD, CF, SD and memory stick devices is not guaran-
teed.
• DRM (Digital Rights Management) files cannot be played.
• SD-type USB memory, CF-type USB memory, and other USB mem-
ory devices that require adapters
for connection are not supported.
• Proper operation of USB HDDs or USB drives with connectors that
loosen due to vehicle vibrations is
not guaranteed. (iStick, etc.)
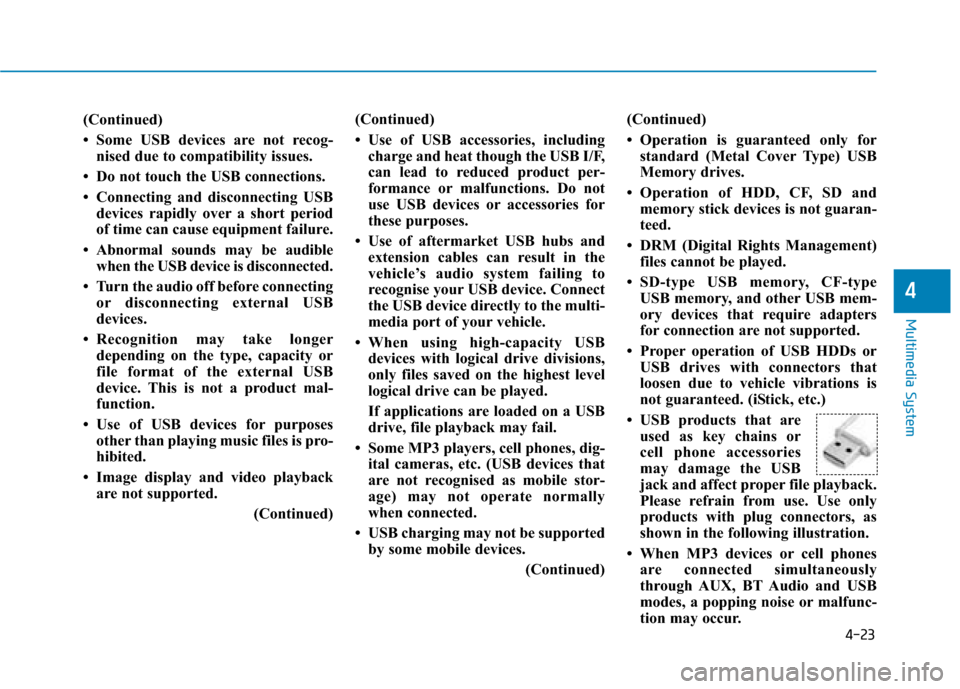
• USB products that are used as key chains or
cell phone accessories
may damage the USB
jack and affect proper file playback.
Please refrain from use. Use only
products with plug connectors, as
shown in the following illustration.
• When MP3 devices or cell phones are connected simultaneously
through AUX, BT Audio and USB
modes, a popping noise or malfunc-
tion may occur.
Page 328 of 599
4-26
Multimedia System
Information
- Using the iPod®Devices
• To use the audio system’s iPod
®con-
trol function, use the dedicated
cable provided with your iPod
®.
• Connecting the iPod
®to the vehicle
during play may result in a loud
noise that lasts about one to two sec-
onds. Connect the iPod
®to the vehi-
cle after stopping or pausing play.
• Connect the iPod
®with the vehicle in
the ACC ON state to begin charging.
• When connecting the iPod
®cable,
be sure to fully push the cable into
the port.
• When EQ effects are enabled simul- taneously on external devices, such
as iPod
®s and the audio system, the
EQ effects may overlap, causing
sound quality deterioration or dis-
tortion. Deactivate the EQ function
for all external devices, if possible.
• Noise may occur when your iPod
®
or the AUX port is connected.
Disconnect and store separately
when not in use. (Continued)(Continued)
• There may be noise if the audio sys-
tem is used with an iPod
®or AUX
external device connected to the
power jack. In these cases, discon-
nect the iPod
®or external device
from the power jack.
• Play may be interrupted, or device malfunctions may occur depending
on the characteristics of your
iPod
®/iPhone®.
• Play may fail if your iPhone
®is con-
nected through both Bluetooth®and
USB. In this case, select Dock con-
nector or Bluetooth
®on your
iPhone®to change the sound output
settings.
• If your software version does not support the communication proto-
col or your iPod
®is not recognised
due to device failure, anomalies or
defects, iPod
®mode cannot be used.
• iPod
®nano (5th generation) devices
may not be recognised if the battery is
low. Charge sufficiently before use.
(Continued)(Continued)
• The search and song play order in
the iPod
®device may be different
from the search order in the audio
system.
• If the iPod
®has failed due to an
internal defect, please reset the
iPod
®(consult your iPod®manual).
• Depending on the software version, the iPod
®may fail to sync with the
system. If the media is removed or
disconnected before recognition, the
previous mode may not be restored
(iPad
®cannot be charged).
• Cables other than the 1-meter cable provided with iPod
®/iPhone®prod-
ucts may not be recognised.
• When other music apps are used on your iPod
®, the system sync func-
tion may fail due to malfunction of
the iPod
®application.
i
Page 351 of 599
5-7
Driving your vehicle
5
Key ignition switch positions
Switch
PositionActionNotes
LOCK
To turn the ignition switch to the LOCK position, put the key in at
the ACC position and turn the key towards the LOCK position.
The ignition key can be removed in the LOCK position.
The steering wheel locks to protect the vehicle from theft.
(if equipped)
ACC
Electrical accessories are usable.
The steering wheel unlocks.If difficulty is experienced turning the ignition
switch to the ACC position, turn the key
whilst turning the steering wheel right and
left to release.
ON
This is the normal key position when the vehicle has started.
All features and accessories are usable.
The warning lights can be checked when you turn the ignition
switch from ACC to ON.Do not leave the ignition switch in the ON
position when the vehicle is not running to
prevent the battery from discharging.
STARTTo start the vehicle, turn the ignition switch to the START position.
The switch returns to the ON position when you let go of the key.The engine will crank until you release the
key.
Page 354 of 599
5-10
Driving your vehicle
Engine Stop/Start button positions
Button PositionAction Notice
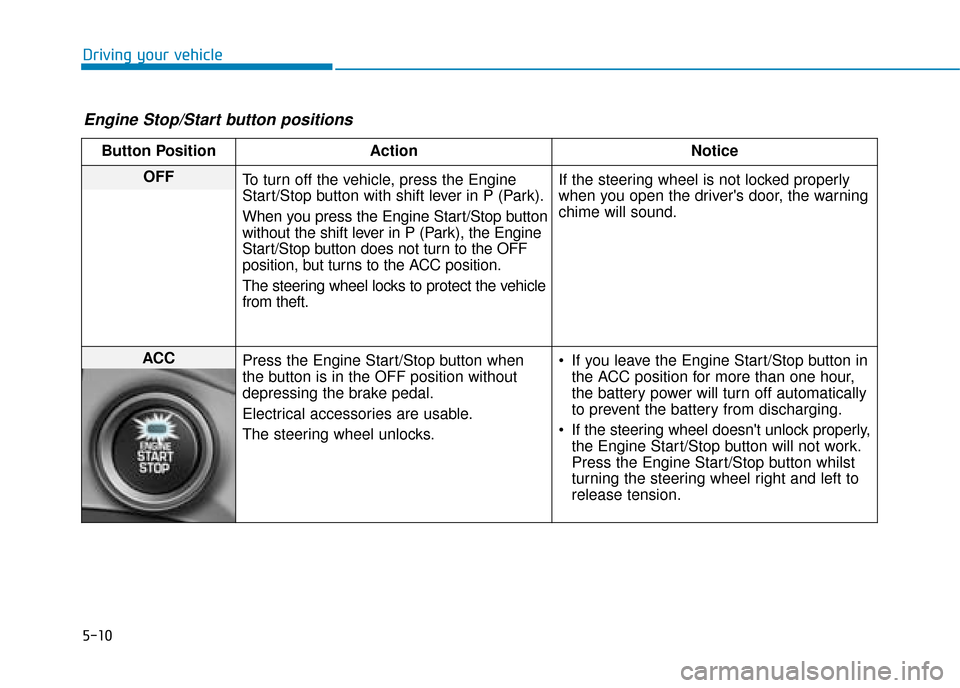
OFF
To turn off the vehicle, press the Engine
Start/Stop button with shift lever in P (Park).
When you press the Engine Start/Stop button
without the shift lever in P (Park), the Engine
Start/Stop button does not turn to the OFF
position, but turns to the ACC position.
The steering wheel locks to protect the vehicle
from theft. If the steering wheel is not locked properly
when you open the driver's door, the warning
chime will sound.
ACC
Press the Engine Start/Stop button when
the button is in the OFF position without
depressing the brake pedal.
Electrical accessories are usable.
The steering wheel unlocks. If you leave the Engine Start/Stop button in
the ACC position for more than one hour,
the battery power will turn off automatically
to prevent the battery from discharging.
If the steering wheel doesn't unlock properly, the Engine Start/Stop button will not work.
Press the Engine Start/Stop button whilst
turning the steering wheel right and left to
release tension.
Page 355 of 599
5-11
Driving your vehicle
5
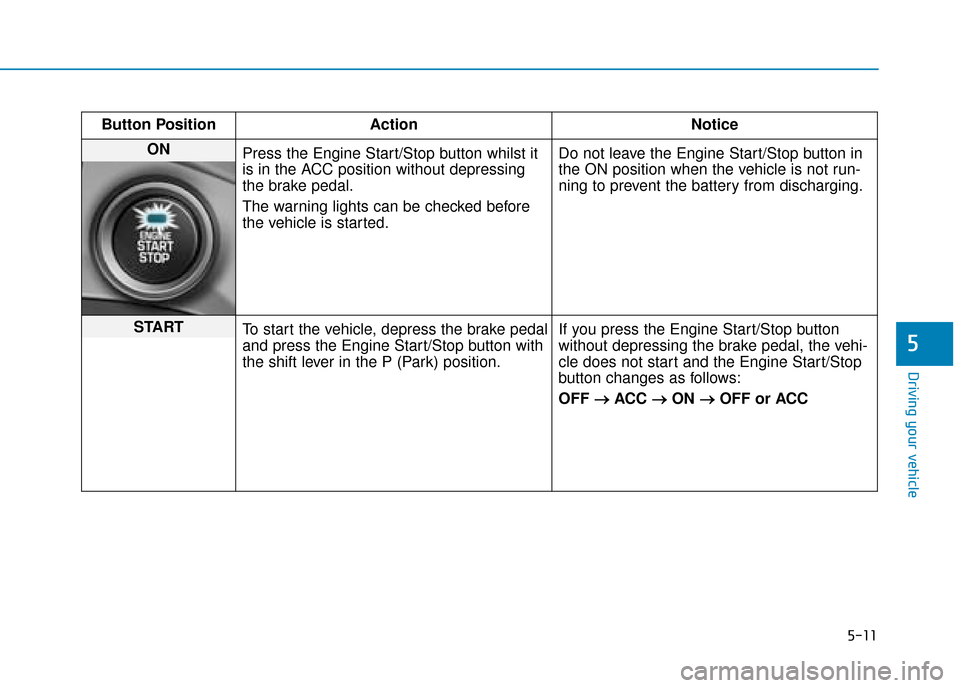
Button PositionAction Notice
ON
Press the Engine Start/Stop button whilst it
is in the ACC position without depressing
the brake pedal.
The warning lights can be checked before
the vehicle is started. Do not leave the Engine Start/Stop button in
the ON position when the vehicle is not run-
ning to prevent the battery from discharging.
START
To start the vehicle, depress the brake pedal
and press the Engine Start/Stop button with
the shift lever in the P (Park) position. If you press the Engine Start/Stop button
without depressing the brake pedal, the vehi-
cle does not start and the Engine Start/Stop
button changes as follows:
OFF
→ →
ACC →
→
ON →
→
OFF or ACC
Page 450 of 599
5-106
Driving your vehicle
Check battery and cables
Winter temperatures affect battery
performance. Inspect the battery
and cables, as specified in the
chapter 7. The battery charging level
can be checked by a HYUNDAI
authorised repairer or in a service
station.
Change to "winter weight" oil if
necessary
In some regions during winter, it is
recommended to use the "winter
weight" oil with lower viscosity. For
further information, refer to the chap-
ter 8. When you are not sure about a
type of winter weight oil, we recom-
mend that you consult a HYUNDAI
authorised repairer. Check spark plugs and ignition
system
Inspect the spark plugs, as speci-
fied in the chapter 7.
If necessary,
replace them. Also check all ignition
wirings and components for any
cracks, wear-out, and damage.
To prevent locks from freezing
To prevent the locks from being
frozen, spray approved de-icing fluid
or glycerin into key holes. When a
lock opening is already covered with
ice, spray approved de-icing fluid
over the ice to remove it. When an
internal part of a lock freezes, try to
thaw it with a heated key. Carefully
use the heated key to avoid an injury. Use approved window washer
anti-freeze solution in system
To prevent the window washer from
being frozen, add authorised window
washer anti-freeze solution, as spec-
ified on the window washer contain-
er. Window washer anti-freeze solu-
tion is available from a HYUNDAI
authorised repairer, and most vehicle
accessory outlets. Do not use engine
coolant or other types of anti-freeze
solution, to prevent any damage to
the vehicle paint.
Page 469 of 599
6-8
If your vehicle will not start after a
few attempts, it probably requires
servicing. In this event please seek
qualified assistance. If the cause of
your battery discharging is not
apparent, we recommend that you
have your vehicle checked by a
HYUNDAI authorised repairer.
Disconnect the jumper cables in the
exact reverse order you connected
them:
1. Disconnect the jumper cable fromthe black, negative (-) chassis
ground of your vehicle (4).
2. Disconnect the other end of the jumper cable from the black, neg-
ative (-) battery/chassis ground of
the assisting vehicle (3).
3. Disconnect the second jumper cable from the red, positive (+)
battery/jumper terminal of the
assisting vehicle (2).
4. Disconnect the other end of the jumper cable from the red, positive
(+) jumper terminal of your vehicle
(1).Information
The voltage range of the charger
should be 13.3~14V and its current
range should be less than 60A. (13.8V
is recommended).
Information
An inappropriately disposedbattery can be harmful to the
environment and human
health. Dispose the battery
according to your local law(s)
or regulations.
To prevent damage to your vehi-
cle:
• Only use a 12-volt power supply (battery or jumper system) to
jump start your vehicle.
Do not attempt to jump start your vehicle by push-starting.
NOTICE
ii
What to do in an emergency
The use of an improper charg-
er with a voltage and current
range higher than specified
may cause overheating and
damage to the 12V battery.
The use of an incorrect charg-
er will lead to a power shut-off
to save the 12V battery. Stop
using the incorrect charger
once the power of the vehicle
is shut off.
CAUTION
Pb
Page 472 of 599
6-11
What to do in an emergency
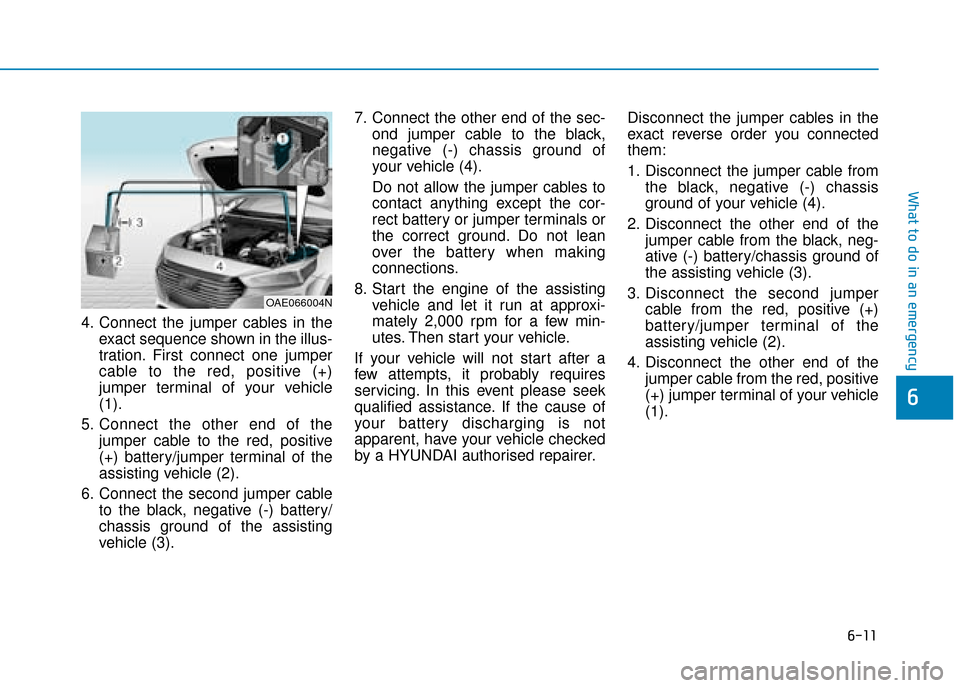
4. Connect the jumper cables in theexact sequence shown in the illus-
tration. First connect one jumper
cable to the red, positive (+)
jumper terminal of your vehicle
(1).
5. Connect the other end of the jumper cable to the red, positive
(+) battery/jumper terminal of the
assisting vehicle (2).
6. Connect the second jumper cable to the black, negative (-) battery/
chassis ground of the assisting
vehicle (3). 7. Connect the other end of the sec-
ond jumper cable to the black,
negative (-) chassis ground of
your vehicle (4).
Do not allow the jumper cables to
contact anything except the cor-
rect battery or jumper terminals or
the correct ground. Do not lean
over the battery when making
connections.
8. Start the engine of the assisting vehicle and let it run at approxi-
mately 2,000 rpm for a few min-
utes. Then start your vehicle.
If your vehicle will not start after a
few attempts, it probably requires
servicing. In this event please seek
qualified assistance. If the cause of
your battery discharging is not
apparent, have your vehicle checked
by a HYUNDAI authorised repairer. Disconnect the jumper cables in the
exact reverse order you connected
them:
1. Disconnect the jumper cable from
the black, negative (-) chassis
ground of your vehicle (4).
2. Disconnect the other end of the jumper cable from the black, neg-
ative (-) battery/chassis ground of
the assisting vehicle (3).
3. Disconnect the second jumper cable from the red, positive (+)
battery/jumper terminal of the
assisting vehicle (2).
4. Disconnect the other end of the jumper cable from the red, positive
(+) jumper terminal of your vehicle
(1).
6
OAE066004N
Page 509 of 599
7
Maintenance
7
Maintenance
Engine compartment .............................................7-3
Maintenance services ...........................................7-5
Owner's responsibility ......................................................7-5
Owner maintenance precautions ..................................7-5
Owner maintenance ...............................................7-6
How to Disconnect the (-) Cable for
Regular Maintenance .......................................................7-6
Owner maintenance schedule ........................................7-7
Scheduled maintenance services.........................7-8
Explanation of scheduled maintenance items ...7-9
Engine oil ..............................................................7-11
Checking the engine oil level .......................................7-11
Checking the engine oil and filter ..............................7-12
Engine coolant/inverter coolant .......................7-13
Checking the coolant level ...........................................7-13
Changing coolant........................................................\
.....7-16
Hybrid starter & generator (HSG) belt.............7-17
Checking the hybrid starter &
generator (HSG) belt ......................................................7-17
Brake fluid ............................................................7-17
Checking the brake fluid level .....................................7-17
Washer fluid .........................................................7-18
Checking the washer fluid level ..................................7-18
Parking brake .......................................................7-19
Checking the parking brake .........................................7-19
Air cleaner ............................................................7-19
Filter replacement ...........................................................7-19
Climate control air filter .....................................7-21
Filter inspection ...............................................................7-21
Wiper blades .........................................................7-23
Blade inspection ..............................................................7-23
Blade replacement ..........................................................7-23
Battery (12 volt, Plug-in hybrid vehicle) .........7-25
For best battery service................................................7-26
Battery capacity label ....................................................7-27
Battery recharging .........................................................7-27
Reset features .................................................................7-28
7
Page 535 of 599
7-27
7
Maintenance
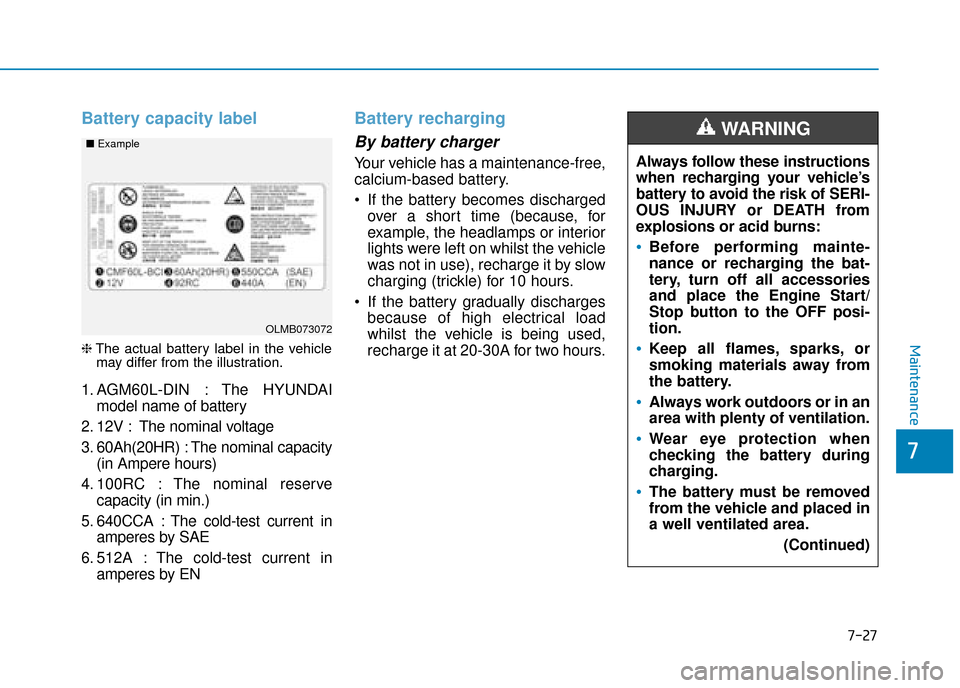
Battery capacity label
❈The actual battery label in the vehicle
may differ from the illustration.
1. AGM60L-DIN : The HYUNDAI
model name of battery
2. 12V : The nominal voltage
3. 60Ah(20HR) : The nominal capacity (in Ampere hours)
4. 100RC : The nominal reserve capacity (in min.)
5. 640CCA : The cold-test current in amperes by SAE
6. 512A : The cold-test current in amperes by EN
Battery recharging
By battery charger
Your vehicle has a maintenance-free,
calcium-based battery.
If the battery becomes dischargedover a short time (because, for
example, the headlamps or interior
lights were left on whilst the vehicle
was not in use), recharge it by slow
charging (trickle) for 10 hours.
If the battery gradually discharges because of high electrical load
whilst the vehicle is being used,
recharge it at 20-30A for two hours. Always follow these instructions
when recharging your vehicle’s
battery to avoid the risk of SERI-
OUS INJURY or DEATH from
explosions or acid burns:
Before performing mainte-
nance or recharging the bat-
tery, turn off all accessories
and place the Engine Start/
Stop button to the OFF posi-
tion.
Keep all flames, sparks, or
smoking materials away from
the battery.
Always work outdoors or in an
area with plenty of ventilation.
Wear eye protection when
checking the battery during
charging.
The battery must be removed
from the vehicle and placed in
a well ventilated area.
(Continued)
WARNING
OLMB073072
■
Example