ignition Hyundai Ioniq Plug-in Hybrid 2020 Owner's Guide
[x] Cancel search | Manufacturer: HYUNDAI, Model Year: 2020, Model line: Ioniq Plug-in Hybrid, Model: Hyundai Ioniq Plug-in Hybrid 2020Pages: 635, PDF Size: 52.13 MB
Page 345 of 635
5-79
Driving your vehicle
5
LKA operation
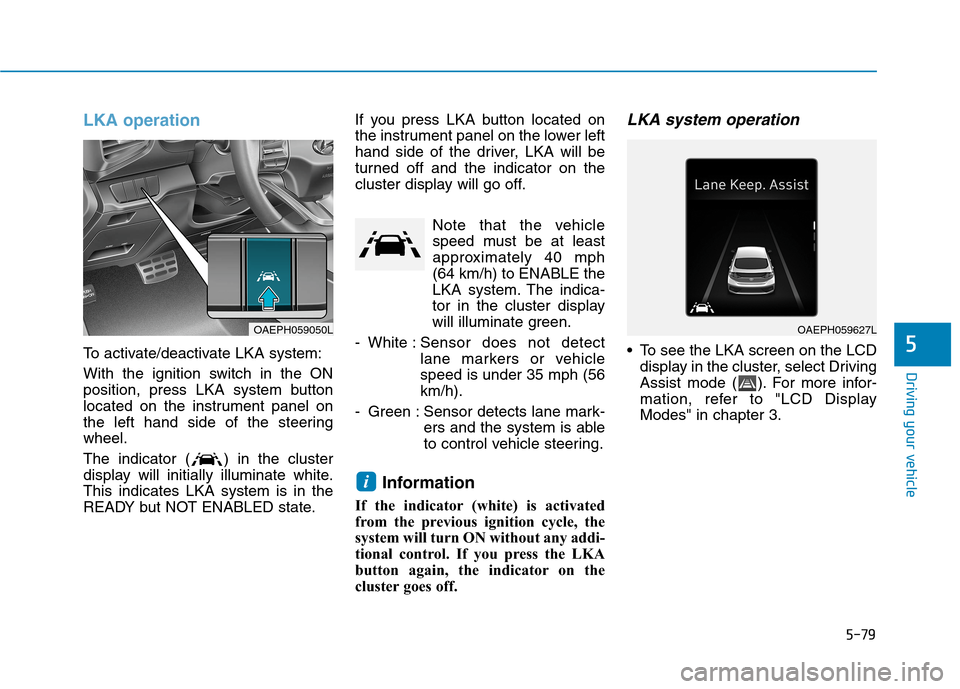
To activate/deactivate LKA system:
With the ignition switch in the ON
position, press LKA system button
located on the instrument panel on
the left hand side of the steering
wheel.
The indicator ( ) in the cluster
display will initially illuminate white.
This indicates LKA system is in the
READY but NOT ENABLED state.If you press LKA button located on
the instrument panel on the lower left
hand side of the driver, LKA will be
turned off and the indicator on the
cluster display will go off.
Note that the vehicle
speed must be at least
approximately 40 mph
(64 km/h) to ENABLE the
LKA system. The indica-
tor in the cluster display
will illuminate green.
- White :Sensor does not detect
lane markers or vehicle
speed is under 35 mph (56
km/h).
- Green : Sensor detects lane mark-
ers and the system is able
to control vehicle steering.
Information
If the indicator (white) is activated
from the previous ignition cycle, the
system will turn ON without any addi-
tional control. If you press the LKA
button again, the indicator on the
cluster goes off.
LKA system operation
To see the LKA screen on the LCD
display in the cluster, select Driving
Assist mode ( ). For more infor-
mation, refer to "LCD Display
Modes" in chapter 3.
i
OAEPH059627LOAEPH059050L
Page 348 of 635
5-82
Driving your vehicle
Information
• Even though the steering is assisted
by the system, the driver can still
steer to control the steering wheel.
• The steering wheel may feel heavier
or lighter when the steering wheel is
assisted by the system than when it
is not.
Warning light and message
Check Lane Keeping Assist (LKA)
system
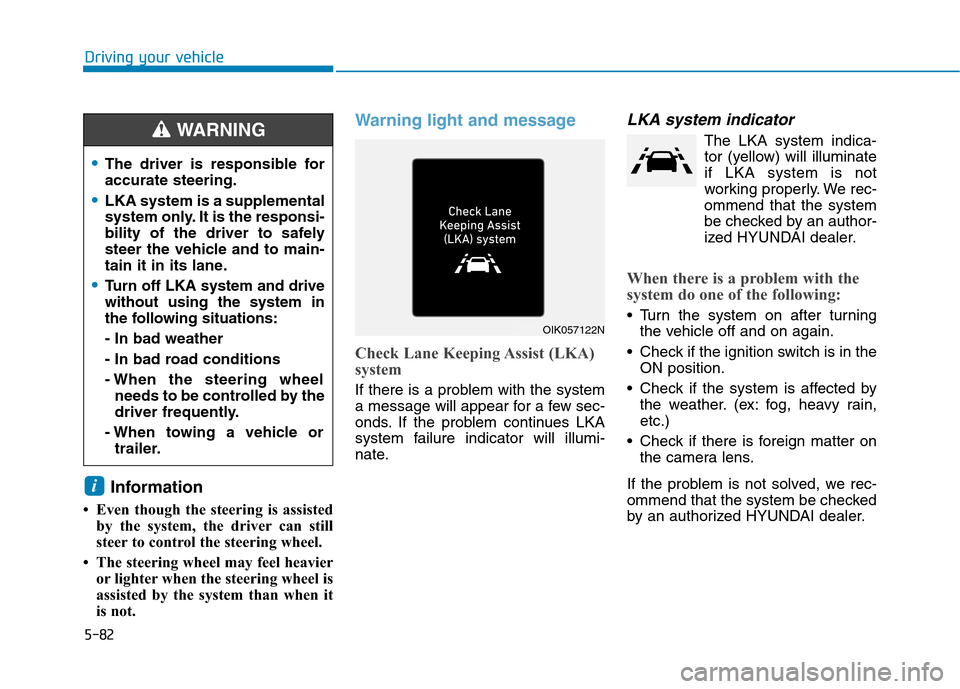
If there is a problem with the system
a message will appear for a few sec-
onds. If the problem continues LKA
system failure indicator will illumi-
nate.
LKA system indicator
The LKA system indica-
tor (yellow) will illuminate
if LKA system is not
working properly. We rec-
ommend that the system
be checked by an author-
ized HYUNDAI dealer.
When there is a problem with the
system do one of the following:
Turn the system on after turning
the vehicle off and on again.
Check if the ignition switch is in the
ON position.
Check if the system is affected by
the weather. (ex: fog, heavy rain,
etc.)
Check if there is foreign matter on
the camera lens.
If the problem is not solved, we rec-
ommend that the system be checked
by an authorized HYUNDAI dealer.
i
OIK057122N
The driver is responsible for
accurate steering.
LKA system is a supplemental
system only. It is the responsi-
bility of the driver to safely
steer the vehicle and to main-
tain it in its lane.
Turn off LKA system and drive
without using the system in
the following situations:
- In bad weather
- In bad road conditions
- When the steering wheel
needs to be controlled by the
driver frequently.
- When towing a vehicle or
trailer.
WARNING
Page 353 of 635
5-87
Driving your vehicle
5
System setting and operation
System setting
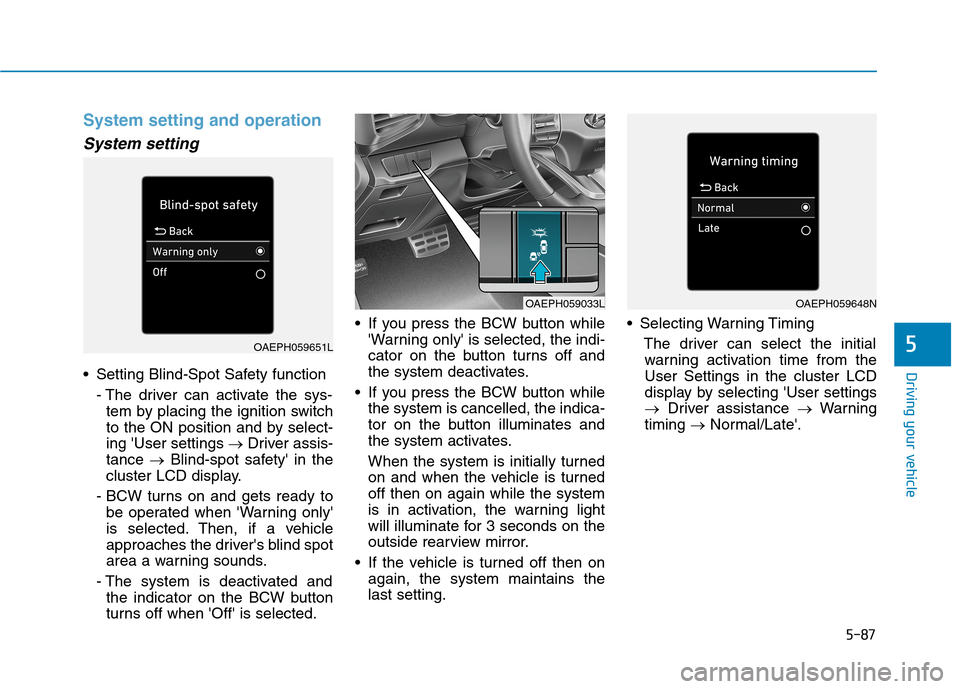
Setting Blind-Spot Safety function
- The driver can activate the sys-
tem by placing the ignition switch
to the ON position and by select-
ing 'User settings →Driver assis-
tance →Blind-spot safety' in the
cluster LCD display.
- BCW turns on and gets ready to
be operated when 'Warning only'
is selected. Then, if a vehicle
approaches the driver's blind spot
area a warning sounds.
- The system is deactivated and
the indicator on the BCW button
turns off when 'Off' is selected. If you press the BCW button while
'Warning only' is selected, the indi-
cator on the button turns off and
the system deactivates.
If you press the BCW button while
the system is cancelled, the indica-
tor on the button illuminates and
the system activates.
When the system is initially turned
on and when the vehicle is turned
off then on again while the system
is in activation, the warning light
will illuminate for 3 seconds on the
outside rearview mirror.
If the vehicle is turned off then on
again, the system maintains the
last setting. Selecting Warning Timing
The driver can select the initial
warning activation time from the
User Settings in the cluster LCD
display by selecting 'User settings
→Driver assistance →Warning
timing →Normal/Late'.
OAEPH059651L
OAEPH059033LOAEPH059648N
Page 365 of 635
5-99
Driving your vehicle
5
Driver Attention Warning system dis-
plays the level of the driver’s fatigue
and inattention, considering the driv-
ing pattern, etc.
System setting and operation
System setting
Driver Attention Warning can be
activated from the Users Settings
mode in the cluster LCD display by
following the procedure below.
1. Set the ignition switch to the ON
position.
2. Select 'User settings →Driver
assistance →Driver Attention
Warning' in the cluster LCD dis-
play. Deselect the setting to turn
off the system.
If the vehicle is turned off then on
again, the system maintains the
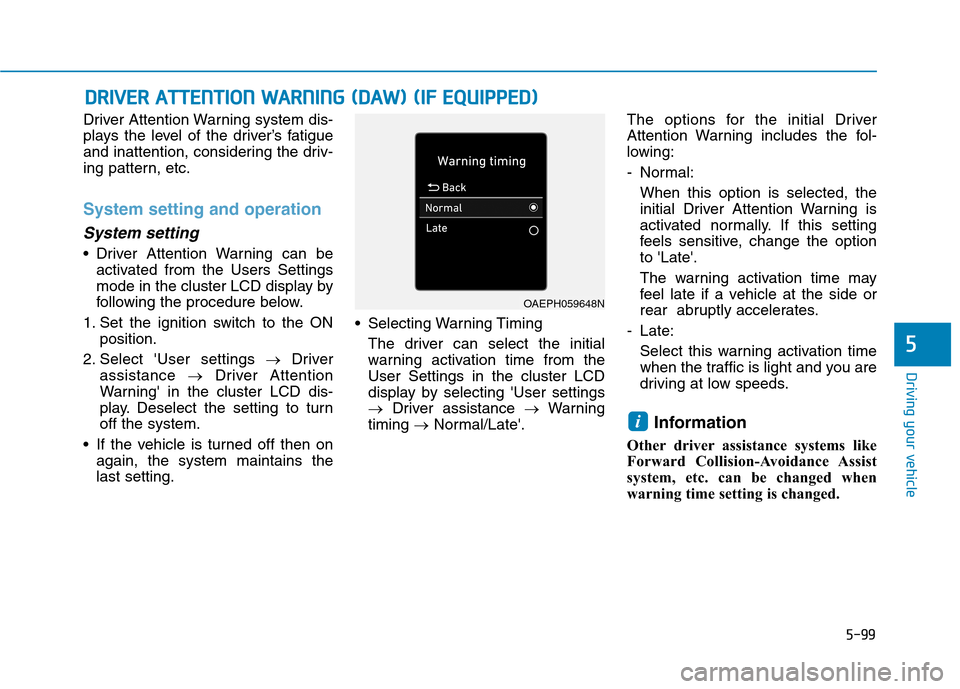
last setting. Selecting Warning Timing
The driver can select the initial
warning activation time from the
User Settings in the cluster LCD
display by selecting 'User settings
→Driver assistance →Warning
timing →Normal/Late'.The options for the initial Driver
Attention Warning includes the fol-
lowing:
- Normal:
When this option is selected, the
initial Driver Attention Warning is
activated normally. If this setting
feels sensitive, change the option
to 'Late'.
The warning activation time may
feel late if a vehicle at the side or
rear abruptly accelerates.
- Late:
Select this warning activation time
when the traffic is light and you are
driving at low speeds.
Information
Other driver assistance systems like
Forward Collision-Avoidance Assist
system, etc. can be changed when
warning time setting is changed.
i
D DR
RI
IV
VE
ER
R
A
AT
TT
TE
EN
NT
TI
IO
ON
N
W
WA
AR
RN
NI
IN
NG
G
(
(D
DA
AW
W)
)
(
(I
IF
F
E
EQ
QU
UI
IP
PP
PE
ED
D)
)
OAEPH059648N
Page 371 of 635
5-105
Driving your vehicle
5
Leading Vehicle Departure
Alert (if equipped)
Leading Vehicle Departure Alert
function provides an alert on whether
the leading vehicle drives away or
not, while at a stop.
Function setting and operating
conditions
System setting
Selecting Driver Attention Warning
function
The Leading Vehicle Departure
Alert can be activated from Users
Settings mode in the cluster LCD
display by following the procedure
below.
1. Set the ignition switch to the ON
position.
2. Select 'User Settings →Driving
Assistance →Driver Attention
Warning →Leading Vehicle
Departure Alert' in cluster LCD
display. Deselect the setting to
turn off the system.
If the vehicle is turned off then on
again, the system maintains the
last setting.
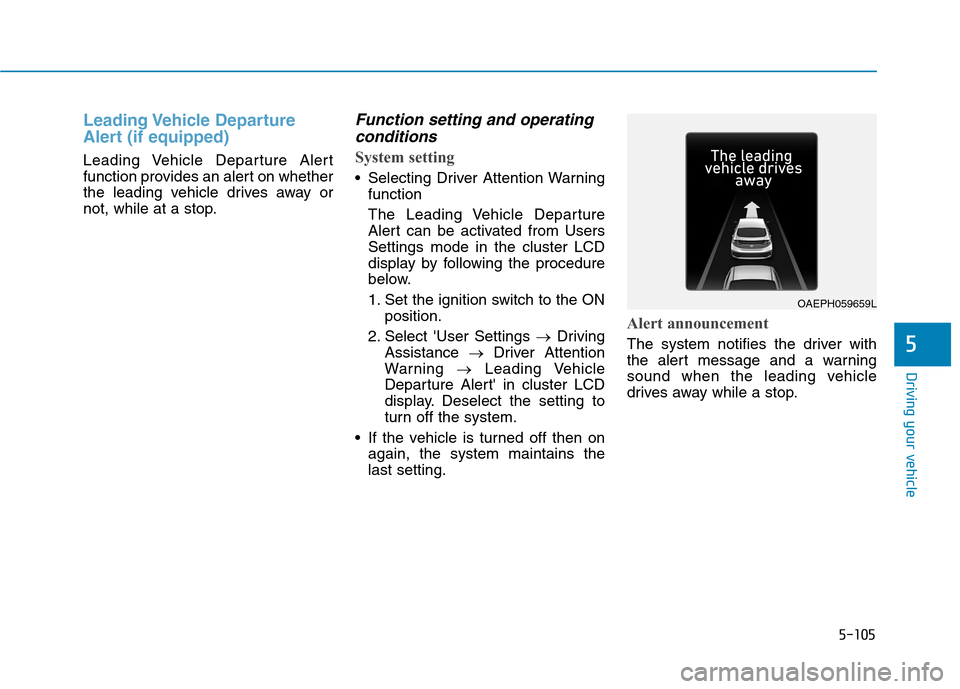
Alert announcement
The system notifies the driver with
the alert message and a warning
sound when the leading vehicle
drives away while a stop.
OAEPH059659L
Page 402 of 635
5-136
Driving your vehicle
LFA operation
System setting
With the ignition switch is in the ON
position, Lane Following Assist can
be activated by selecting 'User set-
tings →Driver assistance →
Driving assist →Lane following
assist' in the cluster LCD display.
Deselect the setting to turn off the
system.
If the vehicle is turned off then on
again, the system maintains the
last setting. (Continued)
Please refer to "Limitations of
the System".
Do not remove or damage the
related parts of LFA system.
You may not hear a warning
sound of LFA system if the
audio volume is high.
Do not place objects on the
dashboard that reflects light
such as mirrors, white paper,
etc. This may prevent LFA sys-
tem from functioning proper-
ly.
Always have your hands on
the steering wheel while LFA
system is activated. If you
continue to drive with your
hands off the steering wheel
after the "Keep hands on
steering wheel" warning mes-
sage appears, the system will
turn off automatically.
However, if the driver has their
hands on the steering wheel
again, the system will start
controlling the steering wheel.
(Continued)
(Continued)
The steering wheel is not con-
tinuously controlled so if the
vehicle speed is at a higher
rate when leaving a lane the
vehicle may not be controlled
by the system. The driver
must always follow the speed
limit when using the system.
If you attach objects to the
steering wheel, the system
may not assist steering or the
hands off alarm may not work
properly.
When you tow a trailer, make
sure that you turn off LFA sys-
tem.
Page 414 of 635
5-148
Driving your vehicle
System description
Rear Cross-Traffic Collision
Warning System
Rear Cross-Traffic Collision Warning
system uses radar sensors to moni-
tor the approaching cross traffic from
the left and right side of the vehicle
when your vehicle is in reverse.
The blind spot detection range varies
relative to the approaching vehicle
speed.
System setting and operation
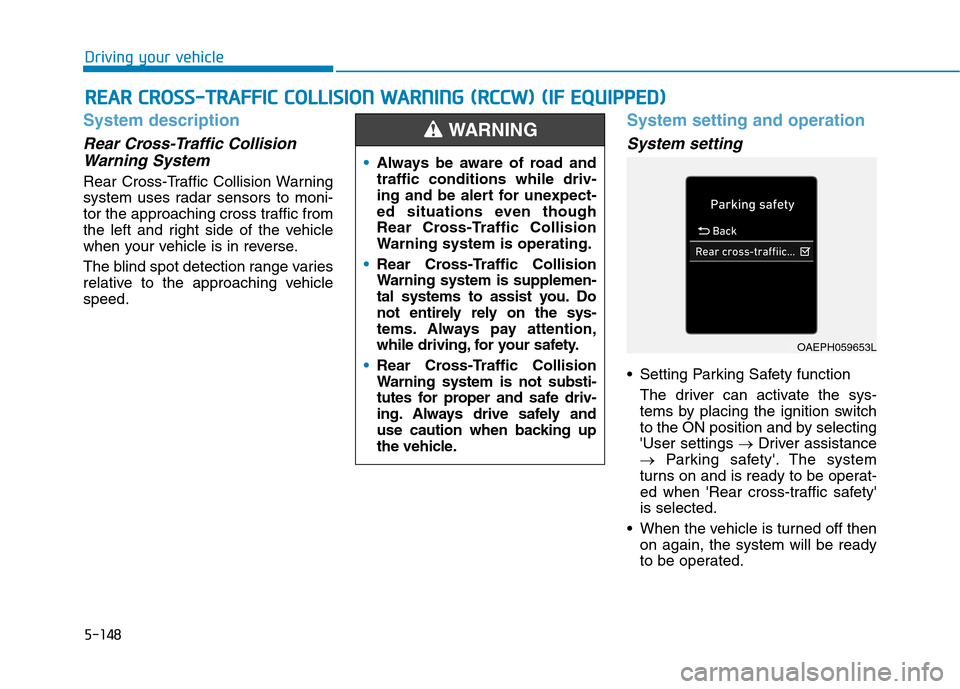
System setting
Setting Parking Safety function
The driver can activate the sys-
tems by placing the ignition switch
to the ON position and by selecting
'User settings →Driver assistance
→Parking safety'. The system
turns on and is ready to be operat-
ed when 'Rear cross-traffic safety'
is selected.
When the vehicle is turned off then
on again, the system will be ready
to be operated.
R RE
EA
AR
R
C
CR
RO
OS
SS
S-
-T
TR
RA
AF
FF
FI
IC
C
C
CO
OL
LL
LI
IS
SI
IO
ON
N
W
WA
AR
RN
NI
IN
NG
G
(
(R
RC
CC
CW
W)
)
(
(I
IF
F
E
EQ
QU
UI
IP
PP
PE
ED
D)
)
Always be aware of road and
traffic conditions while driv-
ing and be alert for unexpect-
ed situations even though
Rear Cross-Traffic Collision
Warning system is operating.
Rear Cross-Traffic Collision
Warning system is supplemen-
tal systems to assist you. Do
not entirely rely on the sys-
tems. Always pay attention,
while driving, for your safety.
Rear Cross-Traffic Collision
Warning system is not substi-
tutes for proper and safe driv-
ing. Always drive safely and
use caution when backing up
the vehicle.
WARNING
OAEPH059653L
Page 430 of 635
5-164
Driving your vehicle
Check spark plugs and ignition
system
Inspect your spark plugs as
described in chapter 7 and replace
them if necessary. Also check all
ignition wiring and components to be
sure they are not cracked, worn or
damaged in any way.
Use approved window washer
anti-freeze in system
To keep the water in the window
washer system from freezing, add an
approved window washer anti-freeze
solution in accordance with instruc-
tions on the container. Window wash-
er anti-freeze is available from an
authorized HYUNDAI dealer and
most auto parts outlets. Do not use
engine coolant or other types of anti-
freeze as these may damage the
paint finish.
Do not let your parking brake
freeze
Under some conditions your parking
brake can freeze in the engaged
position. This is most likely to happen
when there is an accumulation of
snow or ice around or near the rear
brakes or if the brakes are wet. If
there is a risk the parking brake may
freeze, apply it only temporarily while
you put the gear selector lever in P
and block the rear wheels so the car
cannot roll. Then release the parking
brake.
Do not let ice and snow accu-
mulate underneath
Under some conditions, snow and
ice can build up under the fenders
and interfere with the steering. When
driving in severe winter conditions
where this may happen, you should
periodically check underneath the
car to be sure the movement of the
front wheels and the steering com-
ponents is not obstructed.
Don't place foreign objects or
materials in the engine com-
partment
Placement of foreign object or mate-
rials which prevent cooling of the
engine, in the engine compartment,
may cause a failure or combustion.
The manufacturer is not responsible
for the damage caused by such
placement.
To keep locks from freezing
To keep the locks from freezing,
squirt an approved de-icer fluid or
glycerine into the key opening. If a
lock is covered with ice, squirt it with
an approved de-icing fluid to remove
the ice. If the lock is frozen internally,
you may be able to thaw it out by
using a heated key. Handle the heat-
ed key with care to avoid injury.
Page 446 of 635
6-10
Information
An inappropriately disposed
battery can be harmful to the
environment and human
health. Dispose of the battery
according to your local law(s)
or regulations.
To prevent damage to your vehicle:
Only use a 12-volt power supply
(battery or jumper system) to
jump start your vehicle.
Do not attempt to jump start
your vehicle by push-starting.
Jump starting procedure
1. Position the vehicles close enough
that the jumper cables will reach,
but do not allow the vehicles to
touch.
2. Avoid fans or any moving parts in
the engine compartment at all
times, even when the vehicles are
turned off.
3. Turn off all electrical devices such
as radios, lights, air conditioning,
etc. Put the vehicles in P (Park)
and set the parking brake. Turn
both vehicles OFF.
Information
Your vehicle has a battery in the lug-
gage compartment, but when you
jump start your vehicle, use the
jumper terminal in the engine com-
partment.
i
NOTICE
i
What to do in an emergency
(Continued)
NEVER attempt to recharge
the battery when the vehicle's
battery cables are connected
to the battery.
The electrical ignition system
works with high voltage.
NEVER touch these compo-
nents with the engine running
or when the Engine Start/Stop
button is in the ON position.
Page 468 of 635
6-32
What to do in an emergency
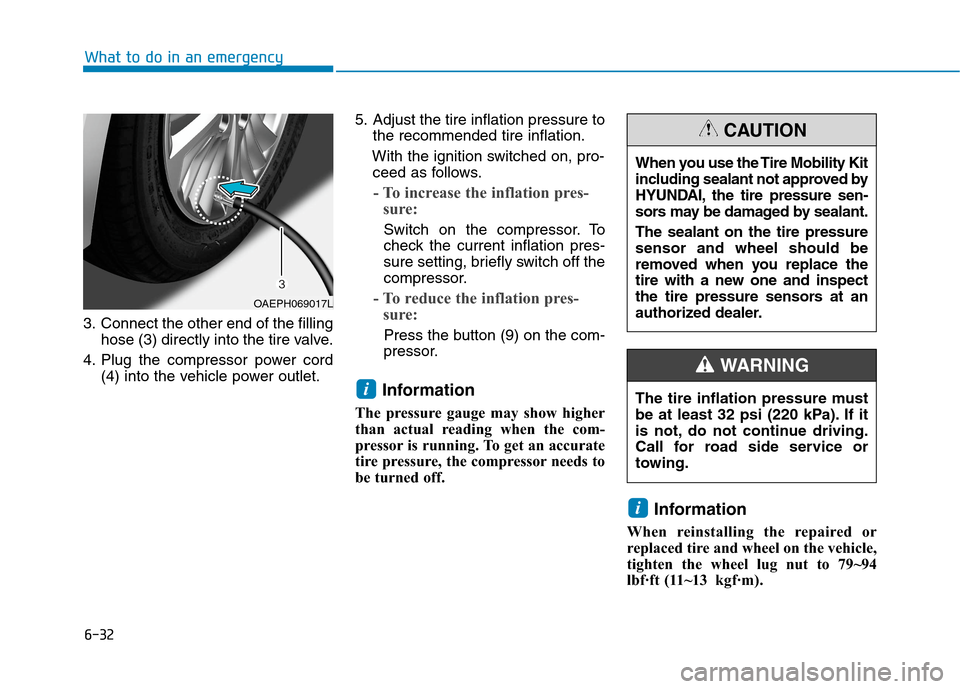
3. Connect the other end of the filling
hose (3) directly into the tire valve.
4. Plug the compressor power cord
(4) into the vehicle power outlet.5. Adjust the tire inflation pressure to
the recommended tire inflation.
With the ignition switched on, pro-
ceed as follows.
- To increase the inflation pres-
sure:
Switch on the compressor. To
check the current inflation pres-
sure setting, briefly switch off the
compressor.
- To reduce the inflation pres-
sure:
Press the button (9) on the com-
pressor.
Information
The pressure gauge may show higher
than actual reading when the com-
pressor is running. To get an accurate
tire pressure, the compressor needs to
be turned off.
Information
When reinstalling the repaired or
replaced tire and wheel on the vehicle,
tighten the wheel lug nut to 79~94
lbf·ft (11~13kgf·m).
i
i
When you use the Tire Mobility Kit
including sealant not approved by
HYUNDAI, the tire pressure sen-
sors may be damaged by sealant.
The sealant on the tire pressure
sensor and wheel should be
removed when you replace the
tire with a new one and inspect
the tire pressure sensors at an
authorized dealer.
CAUTION
The tire inflation pressure must
be at least 32 psi (220 kPa). If it
is not, do not continue driving.
Call for road side service or
towing.
WARNING
OAEPH069017L