battery HYUNDAI IX20 2015 Owner's Guide
[x] Cancel search | Manufacturer: HYUNDAI, Model Year: 2015, Model line: IX20, Model: HYUNDAI IX20 2015Pages: 385, PDF Size: 13.67 MB
Page 239 of 385
521
Driving your vehicle
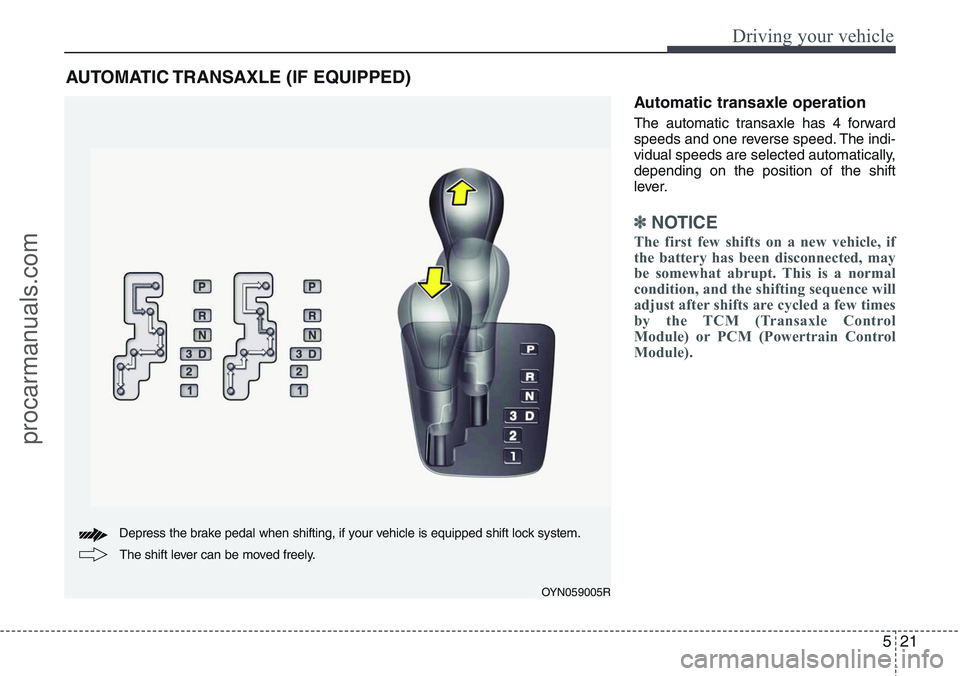
Automatic transaxle operation
The automatic transaxle has 4 forward
speeds and one reverse speed. The indi-
vidual speeds are selected automatically,
depending on the position of the shift
lever.
✽NOTICE
The first few shifts on a new vehicle, if
the battery has been disconnected, may
be somewhat abrupt. This is a normal
condition, and the shifting sequence will
adjust after shifts are cycled a few times
by the TCM (Transaxle Control
Module) or PCM (Powertrain Control
Module).
AUTOMATIC TRANSAXLE (IF EQUIPPED)
OYN059005R
Depress the brake pedal when shifting, if your vehicle is equipped shift lock system.
The shift lever can be moved freely.
procarmanuals.com
Page 248 of 385
Driving your vehicle
30 5
✽NOTICE
A click sound may be heard in the
engine compartment when the vehicle
begins to move after the engine is start-
ed. These conditions are normal and
indicate that the anti-lock brake system
is functioning properly.
• Even with the anti-lock brake system,
your vehicle still requires sufficient
stopping distance. Always maintain a
safe distance from the vehicle in front
of you.
• Always slow down when cornering.
The anti-lock brake system cannot pre-
vent accidents resulting from exces-
sive speeds.
• On loose or uneven road surfaces,
operation of the anti-lock brake system
may result in a longer stopping dis-
tance than for vehicles equipped with a
conventional brake system.
✽NOTICE
When you jump start your vehicle
because of a drained battery, the engine
may not run as smoothly and the ABS
warning light may turn on at the same
time. This happens because of low bat-
tery voltage. It does not mean your ABS
is malfunctioning.
• Do not pump your brakes!
• Have the battery recharged before
driving the vehicle.
W-78
CAUTION
• If the ABS warning light is on and
stays on, you may have a problem
with the ABS. In this case, howev-
er, your regular brakes will work
normally.
• The ABS warning light will stay
on for approximately 3 seconds
after the ignition switch is ON.
During that time, the ABS will go
through self-diagnosis and the
light will go off if everything is
normal. If the light stays on, you
may have a problem with your
ABS. Contact a HYUNDAI autho-
rised repairer as soon as possi-
ble.
CAUTION
• When you drive on a road having
poor traction, such as an icy road,
and operate your brakes continu-
ously, the ABS will be active con-
tinuously and the ABS warning
light may illuminate. Pull your
vehicle over to a safe place and
stop the engine.
• Restart the engine. If the ABS
warning light is off, then your
ABS system is normal.
Otherwise, you may have a prob-
lem with the ABS. Contact a
HYUNDAI authorised repairer as
soon as possible.
procarmanuals.com
Page 251 of 385
533
Driving your vehicle
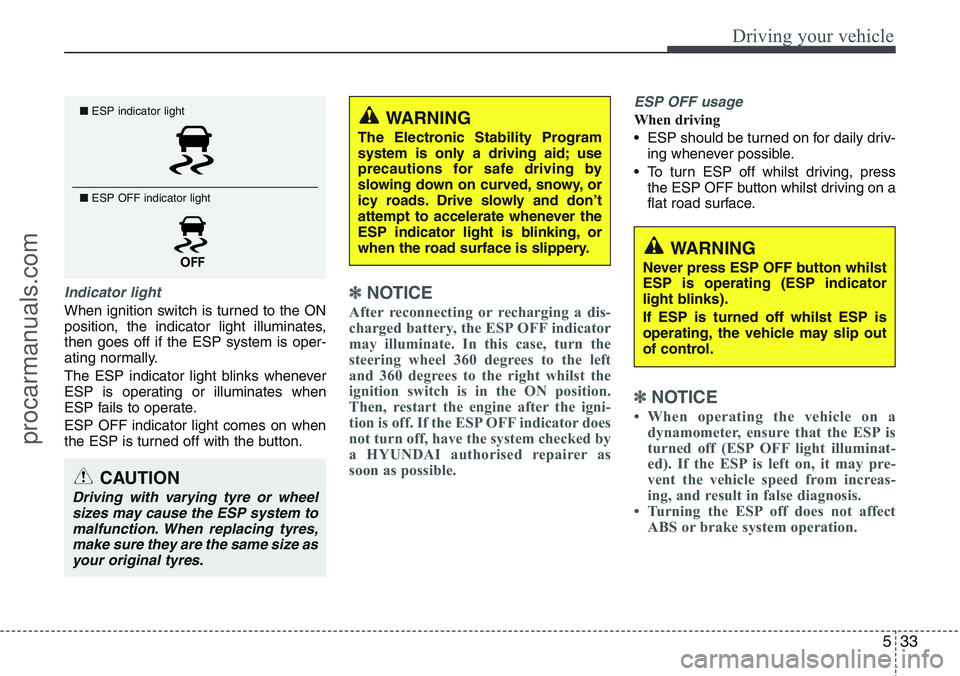
Indicator light
When ignition switch is turned to the ON
position, the indicator light illuminates,
then goes off if the ESP system is oper-
ating normally.
The ESP indicator light blinks whenever
ESP is operating or illuminates when
ESP fails to operate.
ESP OFF indicator light comes on when
the ESP is turned off with the button.
✽NOTICE
After reconnecting or recharging a dis-
charged battery, the ESP OFF indicator
may illuminate. In this case, turn the
steering wheel 360 degrees to the left
and 360 degrees to the right whilst the
ignition switch is in the ON position.
Then, restart the engine after the igni-
tion is off. If the ESP OFF indicator does
not turn off, have the system checked by
a HYUNDAI authorised repairer as
soon as possible.
ESP OFF usage
When driving
• ESP should be turned on for daily driv-
ing whenever possible.
• To turn ESP off whilst driving, press
the ESP OFF button whilst driving on a
flat road surface.
✽NOTICE
• When operating the vehicle on a
dynamometer, ensure that the ESP is
turned off (ESP OFF light illuminat-
ed). If the ESP is left on, it may pre-
vent the vehicle speed from increas-
ing, and result in false diagnosis.
• Turning the ESP off does not affect
ABS or brake system operation.
■ESP indicator light
■ ESP OFF indicator light
CAUTION
Driving with varying tyre or wheel
sizes may cause the ESP system to
malfunction. When replacing tyres,
make sure they are the same size as
your original tyres.
WARNING
The Electronic Stability Program
system is only a driving aid; use
precautions for safe driving by
slowing down on curved, snowy, or
icy roads. Drive slowly and don’t
attempt to accelerate whenever the
ESP indicator light is blinking, or
when the road surface is slippery.
WARNING
Never press ESP OFF button whilst
ESP is operating (ESP indicator
light blinks).
If ESP is turned off whilst ESP is
operating, the vehicle may slip out
of control.
procarmanuals.com
Page 270 of 385
Driving your vehicle
52 5
Use high quality ethylene glycol
coolant
Your vehicle is delivered with high quality
ethylene glycol coolant in the cooling
system. It is the only type of coolant that
should be used because it helps prevent
corrosion in the cooling system, lubri-
cates the water pump and prevents
freezing. Be sure to replace or replenish
your coolant in accordance with the
maintenance schedule. Before winter,
have your coolant tested to assure that
its freezing point is sufficient for the tem-
peratures anticipated during the winter.
Check battery and cables
Winter puts additional burdens on the
battery system. Visually inspect the bat-
tery and cables as described in section
7. The level of charge in your battery can
be checked by a HYUNDAI authorised
repairer or a service station.
Change to "winter weight" oil if
necessary
In some climates it is recommended that
a lower viscosity "winter weight" oil be
used during cold weather. See section 8
for recommendations. If you aren't sure
what weight oil you should use, consult a
HYUNDAI authorised repairer.
Check spark plugs and ignition
system
Inspect your spark plugs and replace
them if necessary. Also check all ignition
wiring and components to be sure they
are not cracked, worn or damaged in any
way.
WARNING- Tyre chains
• The use of chains may adversely
affect vehicle handling.
• Do not exceed 20 mph (30 km/h)
or the chain manufacturer’s rec-
ommended speed limit, whichev-
er is lower.
• Drive carefully and avoid bumps,
holes, sharp turns, and other
road hazards, which may cause
the vehicle to bounce.
• Avoid sharp turns or locked-
wheel braking.
CAUTION
• Chains that are the wrong size or
improperly installed can damage
your vehicle's brake lines, sus-
pension, body and wheels.
• Stop driving and retighten the
chains any time you hear them
hitting the vehicle.
procarmanuals.com
Page 284 of 385
What to do in an emergency
4 6
IF THE ENGINE WILL NOT START
If engine doesn't turn over or
turns over slowly
1. If your vehicle has an automatic
transaxle, be sure the shift lever is in N
(Neutral) or P (Park) and the emer-
gency brake is set.
2. Check the battery connections to be
sure they are clean and tight.
3. Turn on the interior light. If the light
dims or goes out when you operate the
starter, the battery is discharged.
4. Check the starter connections to be
sure they are securely tightened.
5. Do not push or pull the vehicle to start
it. See instructions for "Jump starting".
If engine turns over normally but
does not start
1. Check the fuel level.
2. With the ignition switch in the LOCK/
OFF position, check all connectors at
the ignition coils and spark plugs.
Reconnect any that may be discon-
nected or loose.
3. Check the fuel line in the engine com-
partment.
4. If the engine still does not start, call a
HYUNDAI authorised repairer or seek
other qualified assistance.
WARNING
If the engine refuses to start, no
attempt should be made to push or
tow start the vehicle. Vehicles with
automatic transaxle or fuel injec-
tion will not be able to be started in
this manner since no drive is trans-
mitted through the automatic
transaxle whilst the engine is not
running, and in the case of fuel
injected derivatives, the fuel pump
will not operate under tow start
conditions. In addition, if the vehi-
cle is equipped with an exhaust cat-
alyst, damage to the catalyst may
result if the vehicle is tow started.
procarmanuals.com
Page 285 of 385
65
What to do in an emergency
EMERGENCY STARTING
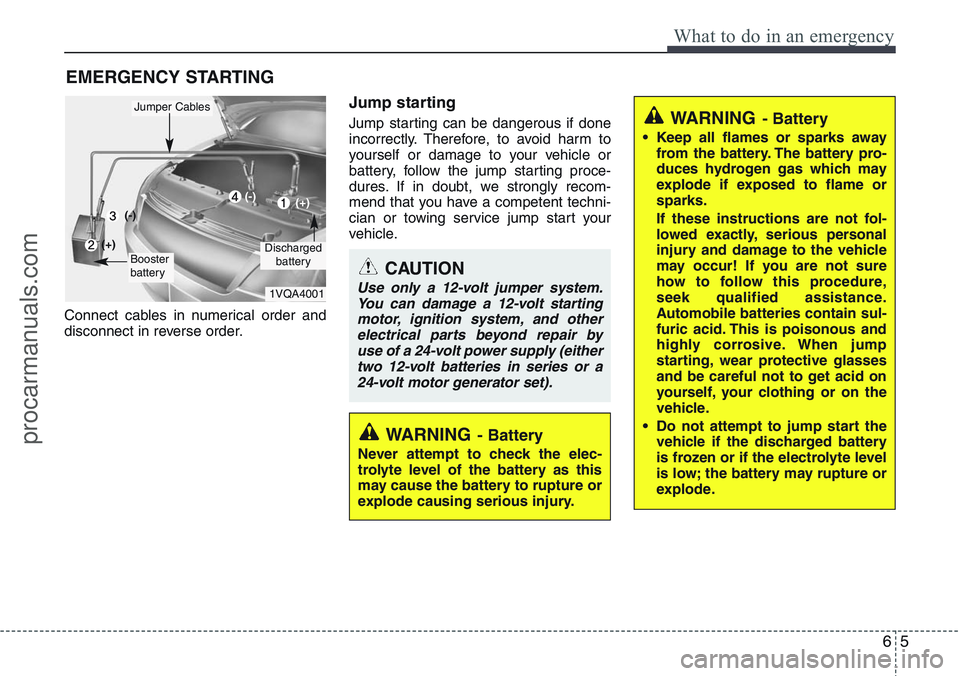
Connect cables in numerical order and
disconnect in reverse order.
Jump starting
Jump starting can be dangerous if done
incorrectly. Therefore, to avoid harm to
yourself or damage to your vehicle or
battery, follow the jump starting proce-
dures. If in doubt, we strongly recom-
mend that you have a competent techni-
cian or towing service jump start your
vehicle.
CAUTION
Use only a 12-volt jumper system.
You can damage a 12-volt starting
motor, ignition system, and other
electrical parts beyond repair by
use of a 24-volt power supply (either
two 12-volt batteries in series or a
24-volt motor generator set).
WARNING- Battery
• Keep all flames or sparks away
from the battery. The battery pro-
duces hydrogen gas which may
explode if exposed to flame or
sparks.
If these instructions are not fol-
lowed exactly, serious personal
injury and damage to the vehicle
may occur! If you are not sure
how to follow this procedure,
seek qualified assistance.
Automobile batteries contain sul-
furic acid. This is poisonous and
highly corrosive. When jump
starting, wear protective glasses
and be careful not to get acid on
yourself, your clothing or on the
vehicle.
• Do not attempt to jump start the
vehicle if the discharged battery
is frozen or if the electrolyte level
is low; the battery may rupture or
explode.
WARNING- Battery
Never attempt to check the elec-
trolyte level of the battery as this
may cause the battery to rupture or
explode causing serious injury.
1VQA4001
Discharged
battery
Jumper Cables
Booster
battery
(-)
(+)
(+)(-)
procarmanuals.com
Page 286 of 385
What to do in an emergency
6 6
Jump starting procedure 1. Make sure the booster battery is 12-
volt and that its negative terminal is
grounded.
2. If the booster battery is in another
vehicle, do not allow the vehicles come
in contact.
3. Turn off all unnecessary electrical
loads.
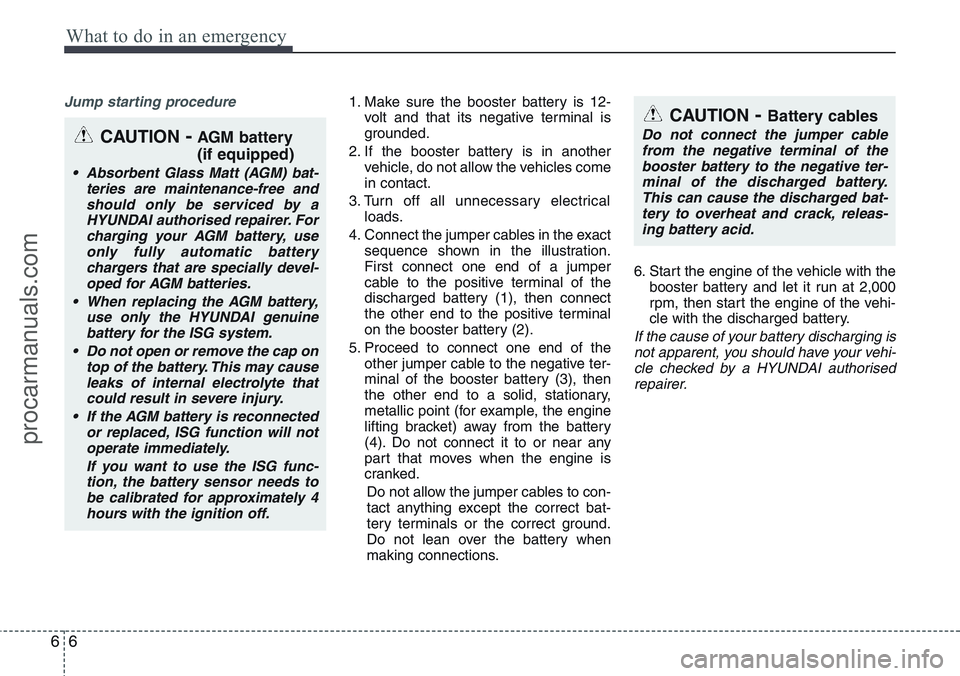
4. Connect the jumper cables in the exact
sequence shown in the illustration.
First connect one end of a jumper
cable to the positive terminal of the
discharged battery (1), then connect
the other end to the positive terminal
on the booster battery (2).
5. Proceed to connect one end of the
other jumper cable to the negative ter-
minal of the booster battery (3), then
the other end to a solid, stationary,
metallic point (for example, the engine
lifting bracket) away from the battery
(4). Do not connect it to or near any
part that moves when the engine is
cranked.
Do not allow the jumper cables to con-
tact anything except the correct bat-
tery terminals or the correct ground.
Do not lean over the battery when
making connections.6. Start the engine of the vehicle with the
booster battery and let it run at 2,000
rpm, then start the engine of the vehi-
cle with the discharged battery.
If the cause of your battery discharging is
not apparent, you should have your vehi-
cle checked by a HYUNDAI authorised
repairer.
CAUTION- Battery cables
Do not connect the jumper cable
from the negative terminal of the
booster battery to the negative ter-
minal of the discharged battery.
This can cause the discharged bat-
tery to overheat and crack, releas-
ing battery acid.CAUTION-AGM battery
(if equipped)
• Absorbent Glass Matt (AGM) bat-
teries are maintenance-free and
should only be serviced by a
HYUNDAI authorised repairer. For
charging your AGM battery, use
only fully automatic battery
chargers that are specially devel-
oped for AGM batteries.
• When replacing the AGM battery,
use only the HYUNDAI genuine
battery for the ISG system.
• Do not open or remove the cap on
top of the battery. This may cause
leaks of internal electrolyte that
could result in severe injury.
• If the AGM battery is reconnected
or replaced, ISG function will not
operate immediately.
If you want to use the ISG func-
tion, the battery sensor needs to
be calibrated for approximately 4
hours with the ignition off.
procarmanuals.com
Page 301 of 385
621
What to do in an emergency
Notes on the safe use of the
TyreMobilityKit
• Park your car at the side of the
road so that you can work with the
TyreMobilityKit away from moving
traffic. Place your warning triangle
in a prominent place to make pass-
ing vehicles aware of your location.
• To be sure your vehicle won't
move, even when you're on fairly
level ground, always set your park-
ing brake.
• Only use the TyreMobilityKit for
sealing/inflation passenger car
tyres. Do not use on motorcycles,
bicycles or any other type of tyres.
• Do not remove any foreign objects-
such as nails or screws -that have
penetrated the tyre.
• Before using the TyreMobilityKit,
read the precautionary advice
printed on the sealant bottle!
• Provided the car is outdoors, leave
the engine running. Otherwise
operating the compressor may
eventually drain the car battery.• Never leave the TyreMobilityKit
unattended whilst it is being used.
• Do not leave the compressor run-
ning for more than 10 min. at a time
or it may overheat.
• Do not use the TyreMobilityKit if the
ambient temperature is below -30°C
(-22°F).
• Do not use the sealing compound
after its expiration date which can
be found on the label of the bottle.
• Keep away from children.Technical Data
System voltage: DC 12 V
Working voltage: DC 10 - 15 V
Amperage rating: max. 15 A
Suitable for use at temperatures:
-30 ~ +70°C (-22 ~ +158°F)
Max. working pressure:
87 psi (6 bar)
Size
Compressor: 6.7 x 5.9 x 2.4 in.
(170 x 150 x 60 mm)
Sealant bottle: 3.3 x 3.0 ø in.
(85 x 77 ø mm)
Compressor weight:
1.8 lbs (0.8 kg)
Sealant volume:
12.2 cu. in. (200 ml)
❈Sealing compound and spare
parts can be obtained and
replaced at an authorized vehicle
or tyre dealer. Empty sealing com-
pound bottles may be disposed of
at home. Liquid residue from the
sealing compound should be dis-
posed of by your vehicle or tyre
dealer or in accordance with local
waste disposal regulations.
procarmanuals.com
Page 312 of 385
7
Engine compartment / 7-2
Maintenance services / 7-3
Owner maintenance / 7-5
Scheduled maintenance service / 7-7
Explanation of scheduled maintenance items / 7-8
Engine oil / 7-12
Engine coolant / 7-13
Brake/clutch fluid / 7-16
Automatic transaxle fluid / 7-17
Washer fluid / 7-19
Parking brake / 7-19
Fuel filter / 7-20
Air cleaner / 7-21
Wiper blades / 7-22
Battery / 7-25
Tyres and wheels / 7-28
Fuses / 7-38
Light bulbs / 7-49
Appearance care / 7-57
Emission control system / 7-63
Maintenance
procarmanuals.com
Page 313 of 385
Maintenance
2 7
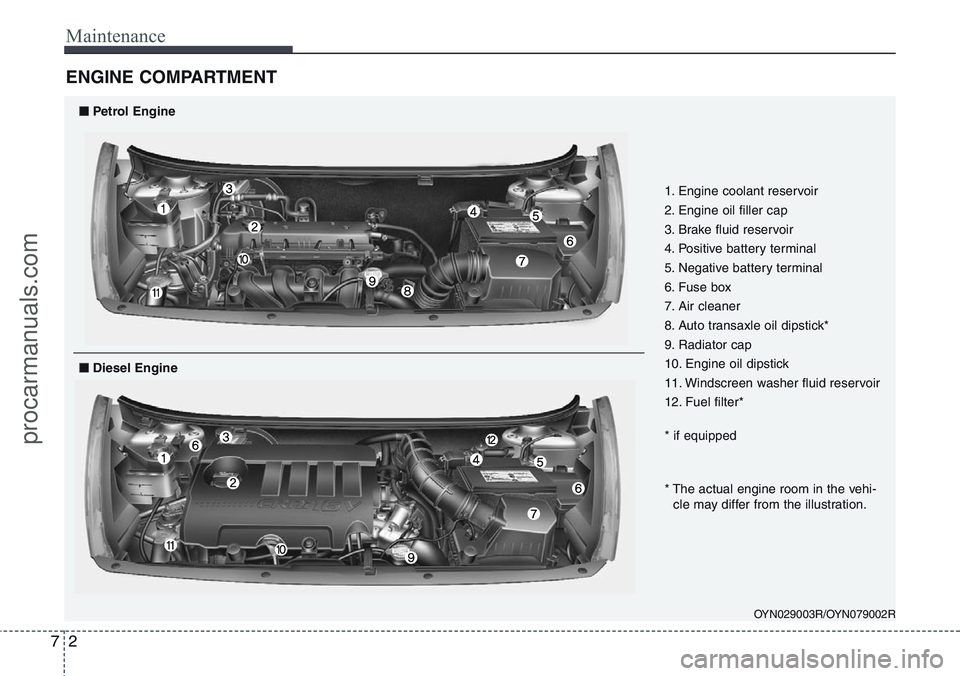
ENGINE COMPARTMENT
OYN029003R/OYN079002R
1. Engine coolant reservoir
2. Engine oil filler cap
3. Brake fluid reservoir
4. Positive battery terminal
5. Negative battery terminal
6. Fuse box
7. Air cleaner
8. Auto transaxle oil dipstick*
9. Radiator cap
10. Engine oil dipstick
11. Windscreen washer fluid reservoir
12. Fuel filter*
* if equipped
■Petrol Engine
* The actual engine room in the vehi-
cle may differ from the illustration.
■Diesel Engine
procarmanuals.com