tow HYUNDAI IX35 2014 User Guide
[x] Cancel search | Manufacturer: HYUNDAI, Model Year: 2014, Model line: IX35, Model: HYUNDAI IX35 2014Pages: 1534, PDF Size: 39.76 MB
Page 152 of 1534
Features of your vehicle
80
4
When more than two objects are sensed
at the same time, the closest one will be recognised first.
Types of warning sound
When an object is 120 cm to 61 cm (47 in. to 24 in.) from the rear bumper: Buzzer beeps intermittently.
When an object is 60 cm to 31 cm (23 in. to 12 in.) from the rear bumper: Buzzerbeeps more frequently.
When an object is within 30 cm (11 in.) of the rear bumper: Buzzer sounds continuously.
Non-operational conditions of rear parking assist system
The rear parking assist system may
not operate properly when:
1. Moisture is frozen to the sensor. (It will operate normally when the moisture has been cleared.)
2. The sensor is covered with foreign matter, such as snow or water, or the
sensor cover is blocked. (It will operate
normally when the material is removed
or the sensor is no longer blocked.)
3. Driving on uneven road surfaces such as unpaved roads, gravel, bumps, or
gradients.
4. Objects generating excessive noise such as vehicle horns, loud motorcycle
engines, or truck air brakes may be
interfering with the sensor.
5. There is heavy rain or water spray.
6. There are wireless transmitters or mobile phones present near the sen-
sor.
7. The sensor is covered with snow.
8. Trailer towing.
9. The place light the fluorescent lamp.
The detecting range may decrease when:
1. The sensor is stained with foreign mat- ter such as snow or water. (The sens-
ing range will return to normal when
removed.)
2. Outside air temperature is extremely hot or cold.
The following objects may not be
recognised by the sensor:
1. Sharp or slim objects such as ropes, chains or small poles.
2. Objects which tend to absorb the sen- sor frequency such as clothes, spongy
material or snow.
3. There are undetectable objects small- er than 1 m (40 in.) in height and nar-
rower than 14 cm (6 in.) in diameter.
EL(FL) Aust 4a.QXP 7/26/2013 2:35 PM Page 80
Page 163 of 1534
491
Features of your vehicle
Flashing headlights
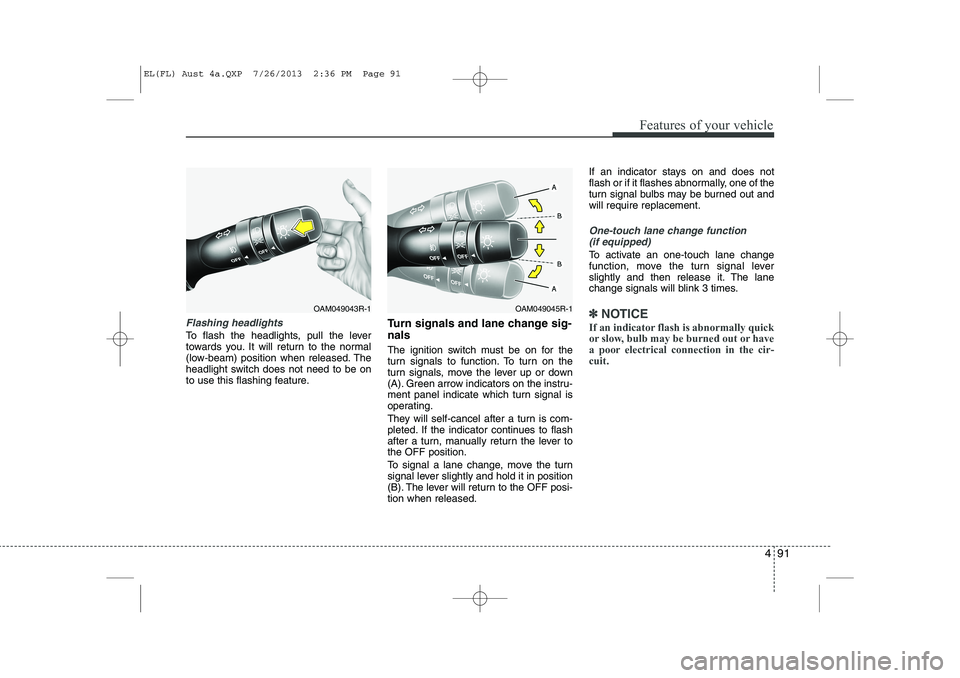
To flash the headlights, pull the lever
towards you. It will return to the normal
(low-beam) position when released. The
headlight switch does not need to be on
to use this flashing feature.Turn signals and lane change sig- nals
The ignition switch must be on for the
turn signals to function. To turn on the
turn signals, move the lever up or down
(A). Green arrow indicators on the instru-
ment panel indicate which turn signal is
operating.
They will self-cancel after a turn is com-
pleted. If the indicator continues to flash
after a turn, manually return the lever tothe OFF position.
To signal a lane change, move the turn
signal lever slightly and hold it in position
(B). The lever will return to the OFF posi-tion when released.If an indicator stays on and does not
flash or if it flashes abnormally, one of the
turn signal bulbs may be burned out andwill require replacement.
One-touch lane change function
(if equipped)
To activate an one-touch lane change
function, move the turn signal lever
slightly and then release it. The lane
change signals will blink 3 times.
✽✽ NOTICE
If an indicator flash is abnormally quick
or slow, bulb may be burned out or have
a poor electrical connection in the cir-cuit.OAM049045R-1OAM049043R-1
EL(FL) Aust 4a.QXP 7/26/2013 2:36 PM Page 91
Page 169 of 1534
497
Features of your vehicle
Windscreen washers
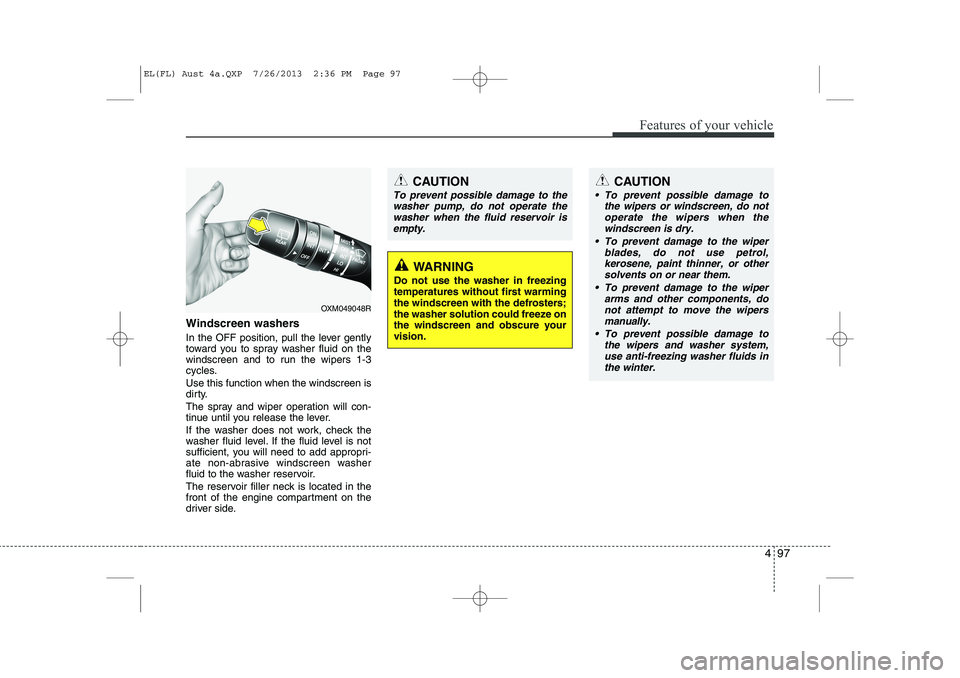
In the OFF position, pull the lever gently
toward you to spray washer fluid on the
windscreen and to run the wipers 1-3
cycles. Use this function when the windscreen is
dirty.
The spray and wiper operation will con-
tinue until you release the lever.
If the washer does not work, check the
washer fluid level. If the fluid level is not
sufficient, you will need to add appropri-
ate non-abrasive windscreen washer
fluid to the washer reservoir.
The reservoir filler neck is located in the
front of the engine compartment on the
driver side.
CAUTION
To prevent possible damage tothe wipers or windscreen, do not
operate the wipers when thewindscreen is dry.
To prevent damage to the wiper blades, do not use petrol,
kerosene, paint thinner, or othersolvents on or near them.
To prevent damage to the wiper arms and other components, donot attempt to move the wipers
manually.
To prevent possible damage to the wipers and washer system,use anti-freezing washer fluids in
the winter.
CAUTION
To prevent possible damage to thewasher pump, do not operate the
washer when the fluid reservoir isempty.
WARNING
Do not use the washer in freezing
temperatures without first warming
the windscreen with the defrosters;
the washer solution could freeze on
the windscreen and obscure yourvision.
OXM049048R
EL(FL) Aust 4a.QXP 7/26/2013 2:36 PM Page 97
Page 178 of 1534
Features of your vehicle
106
4
Mode selection
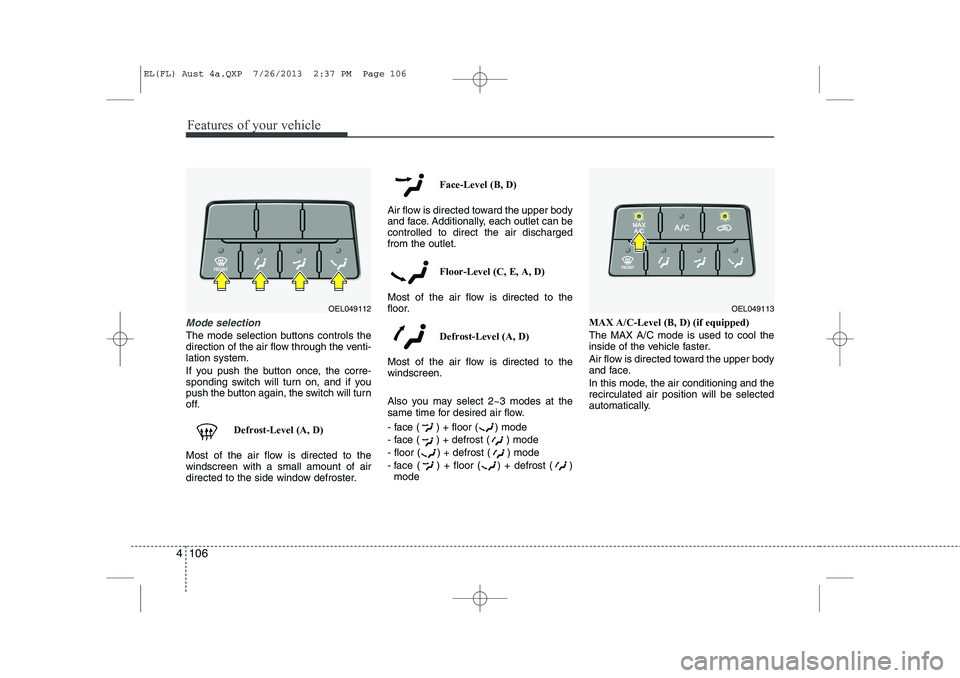
The mode selection buttons controls the
direction of the air flow through the venti-lation system.
If you push the button once, the corre-
sponding switch will turn on, and if you
push the button again, the switch will turn
off.
Defrost-Level (A, D)
Most of the air flow is directed to thewindscreen with a small amount of air
directed to the side window defroster. Face-Level (B, D)
Air flow is directed toward the upper body
and face. Additionally, each outlet can becontrolled to direct the air dischargedfrom the outlet.
Floor-Level (C, E, A, D)
Most of the air flow is directed to the
floor.
Defrost-Level (A, D)
Most of the air flow is directed to thewindscreen.
Also you may select 2~3 modes at the
same time for desired air flow.
- face ( ) + floor ( ) mode
- face ( ) + defrost ( ) mode
- floor ( ) + defrost ( ) mode
- face ( ) + floor ( ) + defrost ( ) mode MAX A/C-Level (B, D) (if equipped)The MAX A/C mode is used to cool the
inside of the vehicle faster.
Air flow is directed toward the upper body
and face.
In this mode, the air conditioning and the recirculated air position will be selected
automatically.
OEL049112OEL049113
EL(FL) Aust 4a.QXP 7/26/2013 2:37 PM Page 106
Page 187 of 1534
4 115
Features of your vehicle
Manual heating and air condition- ing The heating and cooling system can be
controlled manually by pressing buttons
or turning knob(s) other than the AUTO
button. In this case, the system workssequentially according to the order of
buttons or knob(s) selected.
1. Start the engine.
2. Set the mode to the desired position.For improving the effectiveness of heating and cooling;- Heating: - Cooling:
3. Set the temperature control to the desired position.
4. Set the air intake control to the outside (fresh) air position.
5. Set the fan speed control to the desired speed.
6. If air conditioning is desired, turn the air conditioning system on.
Press the AUTO button in order to con-
vert to full automatic control of the sys-tem.
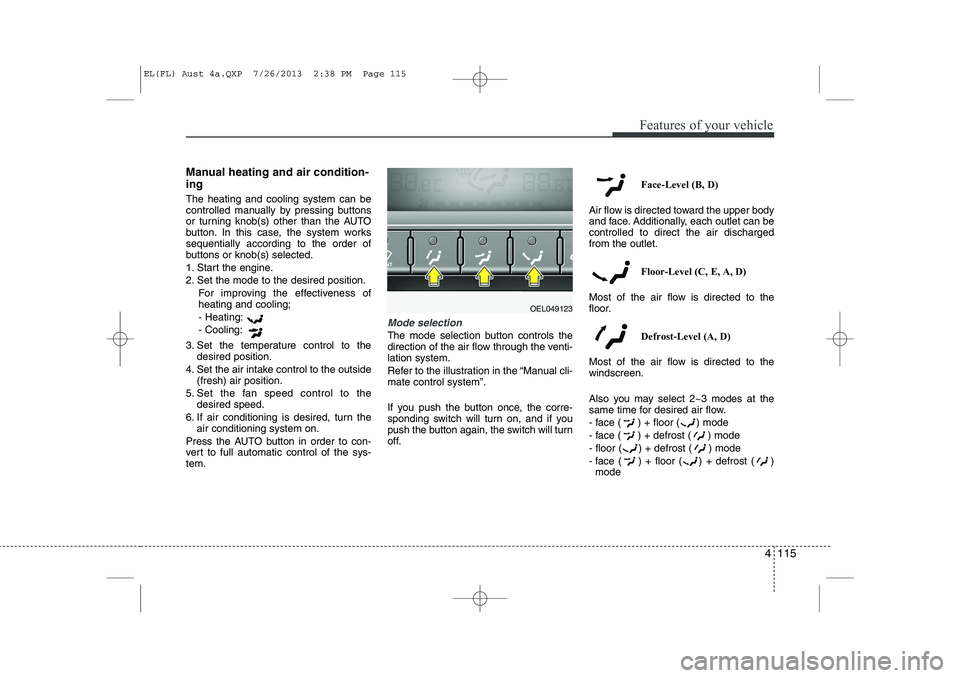
Mode selection
The mode selection button controls the
direction of the air flow through the venti-lation system.
Refer to the illustration in the “Manual cli- mate control system”.
If you push the button once, the corre-
sponding switch will turn on, and if you
push the button again, the switch will turn
off. Face-Level (B, D)
Air flow is directed toward the upper body
and face. Additionally, each outlet can becontrolled to direct the air dischargedfrom the outlet.
Floor-Level (C, E, A, D)
Most of the air flow is directed to the
floor.
Defrost-Level (A, D)
Most of the air flow is directed to thewindscreen.
Also you may select 2~3 modes at the
same time for desired air flow.
- face ( ) + floor ( ) mode
- face ( ) + defrost ( ) mode
- floor ( ) + defrost ( ) mode
- face ( ) + floor ( ) + defrost ( ) mode
OEL049123
EL(FL) Aust 4a.QXP 7/26/2013 2:38 PM Page 115
Page 211 of 1534
Driving your vehicle
6
5
Ignition switch position
LOCK
The steering wheel locks to protect
against theft. The ignition key can be
removed only in the LOCK position.
When turning the ignition switch to the
LOCK position, push the key inward at
the ACC position and turn the key towardthe LOCK position.
ACC (Accessory)
The steering wheel is unlocked and elec-
trical accessories are operative.
✽✽
NOTICE
If difficulty is experienced turning the
ignition switch to the ACC position, turnthe key whilst turning the steering wheel
right and left to release the tension.
ON
The warning lights can be checked
before the engine is started. This is the
normal running position after the engine
is started.
Do not leave the ignition switch ON if the engine is not running to prevent battery discharge.
START
Turn the ignition key to the START posi-
tion to start the engine. The engine will
crank until you release the key; then it
returns to the ON position. The brake
warning lamp can be checked in thisposition.
WARNING - Ignition key
Never turn the ignition switch to LOCK or ACC whilst the vehicle is
moving. This would result in loss
of directional control and braking
function, which could cause anaccident.
The anti-theft steering column lock is not a substitute for the parking
brake. Before leaving the driver’s
seat, always make sure the shift
lever is engaged in 1 st
gear for the
manual transaxle or P (Park) for
the automatic transaxle, set the
parking brake fully and shut the
engine off. Unexpected and sud-
den vehicle movement may occurif these precautions are not taken.
Never reach for the ignition switch, or any other controls through the
steering wheel whilst the vehicle is
in motion. The presence of yourhand or arm in this area could
cause a loss of vehicle control, an
accident and serious bodily injuryor death.
Do not place any movable objects around the driver’s seat as they
may move whilst driving, interferewith the driver and lead to an acci-dent.
EL(FL) Aust 5.QXP 7/26/2013 2:08 PM Page 6
Page 258 of 1534
553
Driving your vehicle
Hazardous driving conditions
When hazardous driving conditions are
encountered such as water, snow, ice,
mud, sand, or similar hazards, followthese suggestions:
Drive cautiously and allow extra dis-tance for braking.
Avoid sudden braking or steering.
When braking with non-ABS brakes pump the brake pedal with a light up-
and-down motion until the vehicle isstopped.
If stalled in snow, mud, or sand, use second gear. Accelerate slowly to
avoid spinning the drive wheels.
Use sand, rock salt, tyre chains, or other non-slip material under the drive
wheels to provide traction when stalled
in ice, snow, or mud. Rocking the vehicle
If it is necessary to rock the vehicle to
free it from snow, sand, or mud, first turn
the steering wheel right and left to clear
the area around your front wheels. Then,
shift back and forth between 1st (First)
and R (Reverse) in vehicles equipped
with a manual transaxle or R (Reverse)
and any forward gear in vehicles
equipped with an automatic transaxle.
Do not race the engine, and spin the
wheels as little as possible. If you are still
stuck after a few tries, have the vehicle
pulled out by a tow vehicle to avoid
engine overheating and possible dam-
age to the transaxle.
SPECIAL DRIVING CONDITIONS
WARNING
- Downshifting
Downshifting with an automatic
transaxle, whilst driving on slipperysurfaces can cause an accident.
The sudden change in tyre speed
could cause the tyres to skid. Be
careful when downshifting on slip-
pery surfaces.
WARNING - ABS
Do not pump the brake pedal on a
vehicle equipped with ABS.
CAUTION
Prolonged rocking may cause engine over-heating, transaxle dam-age or failure, and tyre damage.
EL(FL) Aust 5.QXP 7/26/2013 2:10 PM Page 53
Page 265 of 1534
Driving your vehicle
60
5
To keep locks from freezing
To keep the locks from freezing, squirt an
approved de-icer fluid or glycerine into
the key opening. If a lock is covered with
ice, squirt it with an approved de-icing
fluid to remove the ice. If the lock is
frozen internally, you may be able to thaw
it out by using a heated key. Handle the
heated key with care to avoid injury.
Use approved window washer
anti-freeze in system
To keep the water in the window washer
system from freezing, add an approved
window washer anti-freeze solution in
accordance with instructions on the con-
tainer. Window washer anti-freeze is
available from an authorised HYUNDAI
dealer and most auto parts outlets. Donot use engine coolant or other types of
anti-freeze as these may damage thepaint finish. Don't let your parking brake
freeze
Under some conditions your parking
brake can freeze in the engaged position.
This is most likely to happen when there
is an accumulation of snow or ice around
or near the rear brakes or if the brakes
are wet. If there is a risk the parking
brake may freeze, apply it only temporar-
ily whilst you put the shift lever in P (auto-
matic transaxle) or in first or reverse gear
(manual transaxle) and block the rear
wheels so the vehicle cannot roll. Then
release the parking brake.
Don't let ice and snow accumu- late underneath
Under some conditions, snow and ice
can build up under the fenders and inter-
fere with the steering. When driving in
severe winter conditions where this may
happen, you should periodically check
underneath the vehicle to be sure the
movement of the front wheels and the
steering components is not obstructed.Carry emergency equipment
Depending on the severity of the weath-
er, you should carry appropriate emer-
gency equipment. Some of the items you
may want to carry include tyre chains,
tow straps or chains, flashlight, emer-
gency flares, sand, a shovel, jumper
cables, a window scraper, gloves, ground
cloth, coveralls, a blanket, etc.
EL(FL) Aust 5.QXP 7/26/2013 2:10 PM Page 60
Page 266 of 1534
561
Driving your vehicle
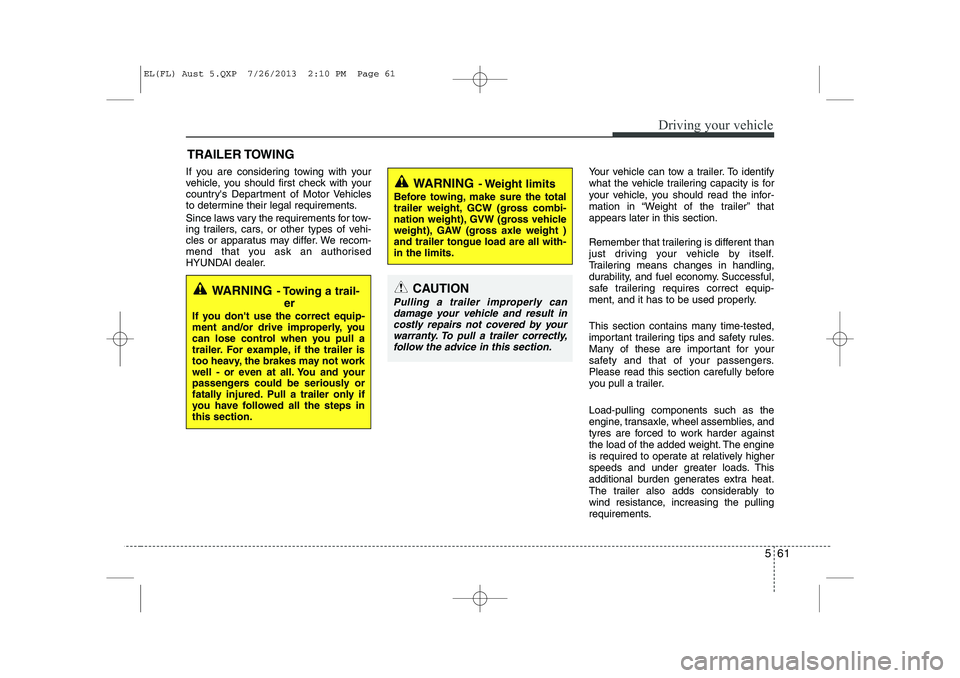
If you are considering towing with your
vehicle, you should first check with your
country's Department of Motor Vehicles
to determine their legal requirements.
Since laws vary the requirements for tow-
ing trailers, cars, or other types of vehi-
cles or apparatus may differ. We recom-
mend that you ask an authorised
HYUNDAI dealer.Your vehicle can tow a trailer. To identify
what the vehicle trailering capacity is for
your vehicle, you should read the infor-
mation in “Weight of the trailer” thatappears later in this section.
Remember that trailering is different than
just driving your vehicle by itself.
Trailering means changes in handling,
durability, and fuel economy. Successful,
safe trailering requires correct equip-
ment, and it has to be used properly.
This section contains many time-tested,
important trailering tips and safety rules.
Many of these are important for your
safety and that of your passengers.
Please read this section carefully before
you pull a trailer. Load-pulling components such as the
engine, transaxle, wheel assemblies, and
tyres are forced to work harder against
the load of the added weight. The engine
is required to operate at relatively higher
speeds and under greater loads. This
additional burden generates extra heat.
The trailer also adds considerably to
wind resistance, increasing the pulling
requirements.
TRAILER TOWING
CAUTION
Pulling a trailer improperly can
damage your vehicle and result in costly repairs not covered by your warranty. To pull a trailer correctly,
follow the advice in this section.WARNING - Towing a trail-
er
If you don't use the correct equip-
ment and/or drive improperly, you
can lose control when you pull a
trailer. For example, if the trailer is
too heavy, the brakes may not work
well - or even at all. You and your
passengers could be seriously or
fatally injured. Pull a trailer only if
you have followed all the steps inthis section.
WARNING - Weight limits
Before towing, make sure the total
trailer weight, GCW (gross combi-
nation weight), GVW (gross vehicle
weight), GAW (gross axle weight )and trailer tongue load are all with-in the limits.
EL(FL) Aust 5.QXP 7/26/2013 2:10 PM Page 61
Page 267 of 1534
Driving your vehicle
62
5
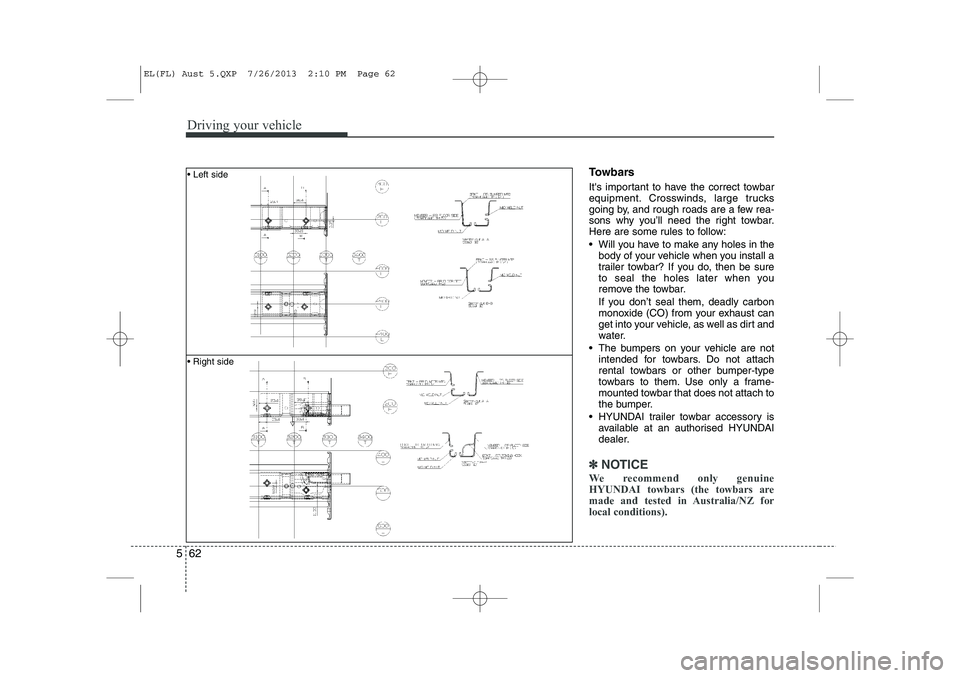
Towbars
It's important to have the correct towbar
equipment. Crosswinds, large trucks
going by, and rough roads are a few rea-
sons why you’ll need the right towbar.
Here are some rules to follow:
Will you have to make any holes in the
body of your vehicle when you install a
trailer towbar? If you do, then be sure
to seal the holes later when you
remove the towbar.
If you don’t seal them, deadly carbon
monoxide (CO) from your exhaust can
get into your vehicle, as well as dirt and
water.
The bumpers on your vehicle are not intended for towbars. Do not attach
rental towbars or other bumper-type
towbars to them. Use only a frame-
mounted towbar that does not attach to
the bumper.
HYUNDAI trailer towbar accessory is available at an authorised HYUNDAI
dealer.
✽✽ NOTICE
We recommend only genuine
HYUNDAI towbars (the towbars are
made and tested in Australia/NZ forlocal conditions).
Left side
Right side
EL(FL) Aust 5.QXP 7/26/2013 2:10 PM Page 62