check engine HYUNDAI IX35 2015 Service Manual
[x] Cancel search | Manufacturer: HYUNDAI, Model Year: 2015, Model line: IX35, Model: HYUNDAI IX35 2015Pages: 550, PDF Size: 9.92 MB
Page 412 of 550
Driving your vehicle64
5To keep locks from freezingTo keep the locks from freezing, squirt an
approved de-icer fluid or glycerine into
the key opening. If a lock is covered with
ice, squirt it with an approved de-icing
fluid to remove the ice. If the lock is
frozen internally, you may be able to thaw
it out by using a heated key. Handle the
heated key with care to avoid injury.Use approved window washer
anti-freeze in systemTo keep the water in the window washer
system from freezing, add an approved
window washer anti-freeze solution in
accordance with instructions on the con-
tainer. Window washer anti-freeze is
available from a HYUNDAI authorised
repairer and most auto parts outlets. Do
not use engine coolant or other types of
anti-freeze as these may damage the
paint finish.
Don't let your parking brake
freezeUnder some conditions your parking
brake can freeze in the engaged position.
This is most likely to happen when there
is an accumulation of snow or ice around
or near the rear brakes or if the brakes
are wet. If there is a risk the parking
brake may freeze, apply it only temporar-
ily whilst you put the shift lever in P (auto-
matic transaxle) or in first or reverse gear
(manual transaxle) and block the rear
wheels so the vehicle cannot roll. Then
release the parking brake.
Do not park a vehicle on a public road
without the parking brake applied.Don't let ice and snow accumu-
late underneathUnder some conditions, snow and ice
can build up under the fenders and inter-
fere with the steering. When driving in
severe winter conditions where this may
happen, you should periodically check
underneath the vehicle to be sure the
movement of the front wheels and the
steering components is not obstructed.
Carry emergency equipmentDepending on the severity of the weath-
er, you should carry appropriate emer-
gency equipment. Some of the items you
may want to carry include tyre chains,
tow straps or chains, flashlight, emer-
gency flares, sand, a shovel, jumper
cables, a window scraper, gloves, ground
cloth, coveralls, a blanket, etc.Don’t place foreign objects or
materials in the engine compart-
mentPlacement of foreign object or materials
which prevent cooling of the engine, in
the engine compartment, may cause a
failure or combustion. The manufacturer
is not responsible for the damage caused
by such placement.
EL(FL) UK 5.QXP 12/16/2014 8:10 PM Page 64
Page 413 of 550
565
Driving your vehicle
If you are considering towing with your
vehicle, you should first check with your
Local Laws to determine their legal
requirements.
Since laws vary the requirements for tow-
ing trailers, cars, or other types of vehi-
cles or apparatus may differ. We recom-
mend that you ask a HYUNDAI autho-
rised repairer.
✽ ✽NOTICE -
For Europe
• The technically permissible maximum
load on the rear axle(s) may be
exceeded by not more than 15 % and
the technically permissible maximum
laden mass of the vehicle may be
exceeded by not more than 10 % or
220.4 lbs (100 kg), whichever value is
lower. In this case, do not exceed 62.1
mph (100 km/h) for vehicle of catego-
ry M1 or 49.7 mph (80 km/h) for vehi-
cle of category N1.
• When a vehicle of category M1 is tow- ing a trailer, the additional load
imposed at the trailer coupling device
may cause the tyre maximum load
ratings to be exceeded, but not by
more than 15 %. In this case, do not
exceed 100 km/h (62.1 mph) and
increase the tyre inflation pressure by
at least 0.2 bar.
Your vehicle can tow a trailer. To identify
what the vehicle trailering capacity is for
your vehicle, you should read the infor-
mation in “Weight of the trailer” that
appears later in this section.
Remember that trailering is different than
just driving your vehicle by itself.
Trailering means changes in handling,
durability, and fuel economy. Successful,
safe trailering requires correct equip-
ment, and it has to be used properly.
This section contains many time-tested,
important trailering tips and safety rules.
Many of these are important for your
safety and that of your passengers.
Please read this section carefully before
you pull a trailer.
Load-pulling components such as the
engine, transaxle, wheel assemblies, and
tyres are forced to work harder against
the load of the added weight. The engine
is required to operate at relatively higher
speeds and under greater loads. This
additional burden generates extra heat.
The trailer also adds considerably to
wind resistance, increasing the pulling
requirements.
TRAILER TOWING
CAUTION
Pulling a trailer improperly can
damage your vehicle and result in costly repairs not covered by yourwarranty. To pull a trailer correctly, follow the advice in this section.
WARNING
- Towing a trail- er
If you don't use the correct equip-
ment and/or drive improperly, you
can lose control when you pull a
trailer. For example, if the trailer is
too heavy, the brakes may not work
well - or even at all. You and your
passengers could be seriously or
fatally injured. Pull a trailer only if
you have followed all the steps in
this section.
WARNING
- Weight limits
Before towing, make sure the total
trailer weight, GCW (gross combi-
nation weight), GVW (gross vehicle
weight), GAW (gross axle weight )
and trailer nose weight are all with-
in the limits.
EL(FL) UK 5.QXP 12/16/2014 8:10 PM Page 65
Page 419 of 550
571
Driving your vehicle
When you are ready to leave after park-
ing on a hill
1. With the manual transaxle in Neutralor automatic transaxle in P (Park),
apply your brakes and hold the brake
pedal down whilst you:
Start your engine;
Shift into gear; and
Release the parking brake.
2. Slowly remove your foot from the brake pedal.
3. Drive slowly until the trailer is clear of the chocks.
4. Stop and have someone pick up and store the chocks.
Maintenance when trailer towing Your vehicle will need service more often
when you regularly pull a trailer.
Important items to pay particular atten-
tion to include engine oil, automatic
transaxle fluid, axle lubricant and cooling
system fluid. Brake condition is another
important item to frequently check. Each
item is covered in this manual, and the
Index will help you find them quickly. If
you’re trailering, it’s a good idea to review
these sections before you start your trip.
Don’t forget to also maintain your trailer
and towbar. Follow the maintenance
schedule that accompanied your trailer
and check it periodically. Preferably, con-
duct the check at the start of each day’s
driving. Most importantly, all towbar nuts
and bolts should be tight.
CAUTION
Due to higher load during trailer usage, overheating might occurin hot days or during uphill driv-ing. If the coolant gauge indicatesover-heating, switch off the A/C and stop the vehicle in a safe areato cool down the engine.
When towing check transaxle fluid more frequently.
If your vehicle is not equipped with the air conditioner, youshould install a condenser fan toimprove engine performance when towing a trailer.
EL(FL) UK 5.QXP 12/16/2014 8:10 PM Page 71
Page 426 of 550
What to do in an emergency46IF THE ENGINE WILL NOT STARTIf engine cannot be cranked1. If your vehicle has an automatictransaxle, be sure the shift lever is in N
(Neutral) or P (Park) and the emer-
gency brake is set.
2. Check the battery terminals and con- nections to ensure that these are clean
and also tight.
3. If the interior lights dim when the engine is cranked and the battery ter-
minals have been checked, a dis-
charged battery is indicated.
4. Do not attempt to push or tow start the vehicle, refer to "Jump Starting" for
information regarding engine starting
when the battery is discharged.
If engine turns over normally but
does not start1. Check fuel level.
2. With the ignition switch in the LOCK/OFF position, check all connectors at
ignition, coil and spark plugs.
Reconnect any that may be discon-
nected or loose.
3. Check the fuel line in the engine com- partment.
4. If the engine still does not start, we recommend that you call a HYUNDAI
authorised repairer.
WARNING
If the engine refuses to start, no
attempt should be made to push or
tow start the vehicle. Vehicles with
automatic transaxle or fuel injec-
tion will not be able to be started in
this manner since no drive is trans-
mitted through the automatic
transaxle whilst the engine is not
running, and in the case of fuel
injected derivatives, the fuel pump
will not operate under tow start
conditions. In addition, if the vehi-
cle is equipped with an exhaust cat-
alyst, damage to the catalyst may
result if the vehicle is tow started.
EL(FL) UK 6.QXP 12/16/2014 8:12 PM Page 4
Page 428 of 550
What to do in an emergency66Jump starting procedure
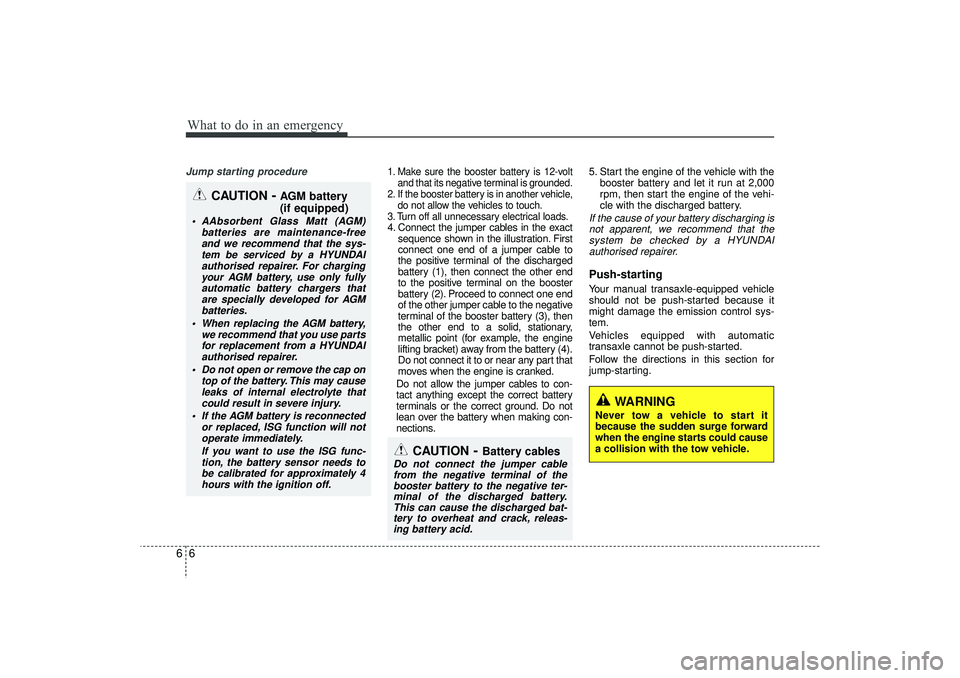
1. Make sure the booster battery is 12-voltand that its negative terminal is grounded.
2. If the booster battery is in another vehicle, do not allow the vehicles to touch.
3. Turn off all unnecessary electrical loads.4. Connect the jumper cables in the exact sequence shown in the illustration. First
connect one end of a jumper cable to
the positive terminal of the discharged
battery (1), then connect the other end
to the positive terminal on the booster
battery (2). Proceed to connect one end
of the other jumper cable to the negative
terminal of the booster battery (3), then
the other end to a solid, stationary,
metallic point (for example, the engine
lifting bracket) away from the battery (4).
Do not connect it to or near any part that
moves when the engine is cranked.
Do not allow the jumper cables to con-
tact anything except the correct battery
terminals or the correct ground. Do not
lean over the battery when making con-
nections. 5. Start the engine of the vehicle with the
booster battery and let it run at 2,000
rpm, then start the engine of the vehi-
cle with the discharged battery.
If the cause of your battery discharging isnot apparent, we recommend that the system be checked by a HYUNDAIauthorised repairer.Push-starting Your manual transaxle-equipped vehicle
should not be push-started because it
might damage the emission control sys-
tem.
Vehicles equipped with automatic
transaxle cannot be push-started.
Follow the directions in this section for
jump-starting.
WARNING
Never tow a vehicle to start it
because the sudden surge forward
when the engine starts could cause
a collision with the tow vehicle.
CAUTION
- Battery cables
Do not connect the jumper cablefrom the negative terminal of thebooster battery to the negative ter-minal of the discharged battery.This can cause the discharged bat-tery to overheat and crack, releas-ing battery acid.
CAUTION
-AGM battery
(if equipped)
AAbsorbent Glass Matt (AGM)
batteries are maintenance-freeand we recommend that the sys-tem be serviced by a HYUNDAIauthorised repairer. For chargingyour AGM battery, use only fully automatic battery chargers thatare specially developed for AGM batteries.
When replacing the AGM battery, we recommend that you use partsfor replacement from a HYUNDAIauthorised repairer.
Do not open or remove the cap on top of the battery. This may causeleaks of internal electrolyte thatcould result in severe injury.
If the AGM battery is reconnected or replaced, ISG function will notoperate immediately.
If you want to use the ISG func-tion, the battery sensor needs to be calibrated for approximately 4hours with the ignition off.
EL(FL) UK 6.QXP 12/16/2014 8:12 PM Page 6
Page 429 of 550
67
What to do in an emergency
IF THE ENGINE OVERHEATSIf your temperature gauge indicates over-
heating, you experience a loss of power,
or hear loud pinging or knocking, the
engine is probably too hot. If this hap-
pens, you should:
1. Pull off the road and stop as soon as itis safe to do so.
2. Place the shift lever in P (automatic transaxle) or neutral (manual
transaxle) and set the parking brake. If
the air conditioning is on, turn it off.
3. If engine coolant is running out under the vehicle or steam is coming out
from the bonnet, stop the engine. Do
not open the bonnet until the coolant
has stopped running or the steaming
has stopped. If there is no visible loss
of engine coolant and no steam, leave
the engine running and check to be
sure the engine cooling fan is operat-
ing. If the fan is not running, turn the
engine off.
4. Check to see if the water pump drive belt is missing. If it is not missing,
check to see that it is tight. If the drive
belt seems to be satisfactory, check
for coolant leaking from the radiator,
hoses or under the vehicle. (If the air
conditioning had been in use, it is nor-
mal for cold water to be draining from
it when you stop). 5. If the water pump drive belt is broken
or engine coolant is leaking out, stop
the engine immediately and we recom-
mend that you call a HYUNDAI autho-
rised repairer. 6. If the cause of the overheating cannot
be found, wait until the engine temper-
ature has returned to normal. Then, if
coolant has been lost, carefully add
coolant to the reservoir to bring the
fluid level in the reservoir up to the
base of the radiator fill opening. Fill the
coolant expansion tank to the halfway
mark. To ensure the correct water to
coolant mix is obtained after top up,
testing by a HYUNDAI authorised
repairer is required.
7. Proceed with caution, keeping alert for further signs of overheating. If over-
heating happens again, we recom-
mend that you call a HYUNDAI autho-
rised repairer.
CAUTION
Serious loss of coolant indicates there is a leak in the cooling sys-tem and we recommend that the system be checked by a HYUNDAIauthorised repairer.
When the engine overheats from low engine coolant, suddenlyadding engine coolant may causecracks in the engine. To prevent damage, add engine coolantslowly in small quantities.
WARNING
Whilst the engine is running, keep
hair, hands and clothing away from
moving parts such as the fan and
drive belts to prevent injury.
WARNING
Do not remove the radiator cap
when the engine is hot. This can
allow coolant to be blown out of the
opening and cause serious burns.
EL(FL) UK 6.QXP 12/16/2014 8:12 PM Page 7
Page 431 of 550
69
What to do in an emergency
✽
✽NOTICEIf the TPMS indicator does not illu-
minate for 3 seconds when the igni-
tion switch is turned to the ON posi-
tion or engine is running, or if it
comes on after blinking for approxi-
mately one minute, we recommend
that you contact a HYUNDAI
authorised repairer.
Low tyre pressure tell-
tale
When the tyre pressure monitoring
system warning indicator is illuminat-
ed, one or more of your tyres is sig-
nificantly under-inflated.
If the telltale illuminates, immediately
reduce your speed, avoid hard cor-
nering and anticipate increased stop-
ping distances. You should stop and
check your tyres as soon as possi-
ble. Inflate the tyres to the proper
pressure as indicated on the vehi-
cle’s placard or tyre inflation pres-
sure label located on the driver’s side
centre pillar outer panel. If you can-
not reach a service station or if the
tyre cannot hold the newly added air,
replace the low pressure tyre with
the spare tyre.
Then the Low Tyre Pressure telltale
may flash for approximately one
minute and then remain continuously
illuminated after restarting and about
20 minutes of continuous driving
before you have the low pressure
tyre repaired and replaced on the
vehicle.
CAUTION
In winter or cold weather, the low tyre pressure telltale may beilluminated if the tyre pressurewas adjusted to the recom-mended tyre inflation pressurein warm weather. It does notmean your TPMS is malfunction-ing because the decreased tem-perature leads to a proportionallowering of tyre pressure.
When you drive your vehiclefrom a warm area to a cold areaor from a cold area to a warmarea, or the outside temperatureis greatly higher or lower, youshould check the tyre inflationpressure and adjust the tyres tothe recommended tyre inflationpressure.
EL(FL) UK 6.QXP 12/16/2014 8:12 PM Page 9
Page 436 of 550
What to do in an emergency14
6Always check the TPMS malfunction
telltale after replacing one or more
tyres or wheels on your vehicle to
ensure that the replacement or alter-
nate tyres and wheels allow the
TPMS to continue to function proper-
ly.✽ ✽
NOTICEIf the TPMS, Low Tyre Pressure and
Position indicators do not illuminate
for 3 seconds when the ignition
switch is turned to the ON position
or engine is running, or if they
remain illuminated after coming on
for approximately 3 seconds, we rec-
ommend that the system be checked
by a HYUNDAI authorised repairer.
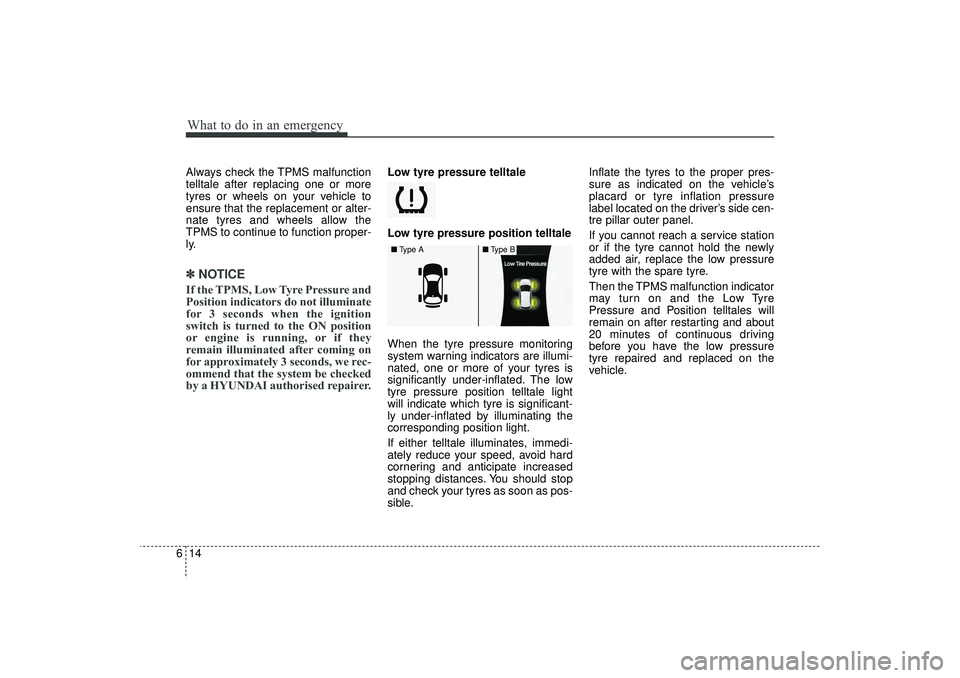
Low tyre pressure telltale
Low tyre pressure position telltale
When the tyre pressure monitoring
system warning indicators are illumi-
nated, one or more of your tyres is
significantly under-inflated. The low
tyre pressure position telltale light
will indicate which tyre is significant-
ly under-inflated by illuminating the
corresponding position light.
If either telltale illuminates, immedi-
ately reduce your speed, avoid hard
cornering and anticipate increased
stopping distances. You should stop
and check your tyres as soon as pos-
sible. Inflate the tyres to the proper pres-
sure as indicated on the vehicle’s
placard or tyre inflation pressure
label located on the driver’s side cen-
tre pillar outer panel.
If you cannot reach a service station
or if the tyre cannot hold the newly
added air, replace the low pressure
tyre with the spare tyre.
Then the TPMS malfunction indicator
may turn on and the Low Tyre
Pressure and Position telltales will
remain on after restarting and about
20 minutes of continuous driving
before you have the low pressure
tyre repaired and replaced on the
vehicle.■
Type A
■Type B
EL(FL) UK 6.QXP 12/16/2014 8:12 PM Page 14
Page 453 of 550
631
What to do in an emergency
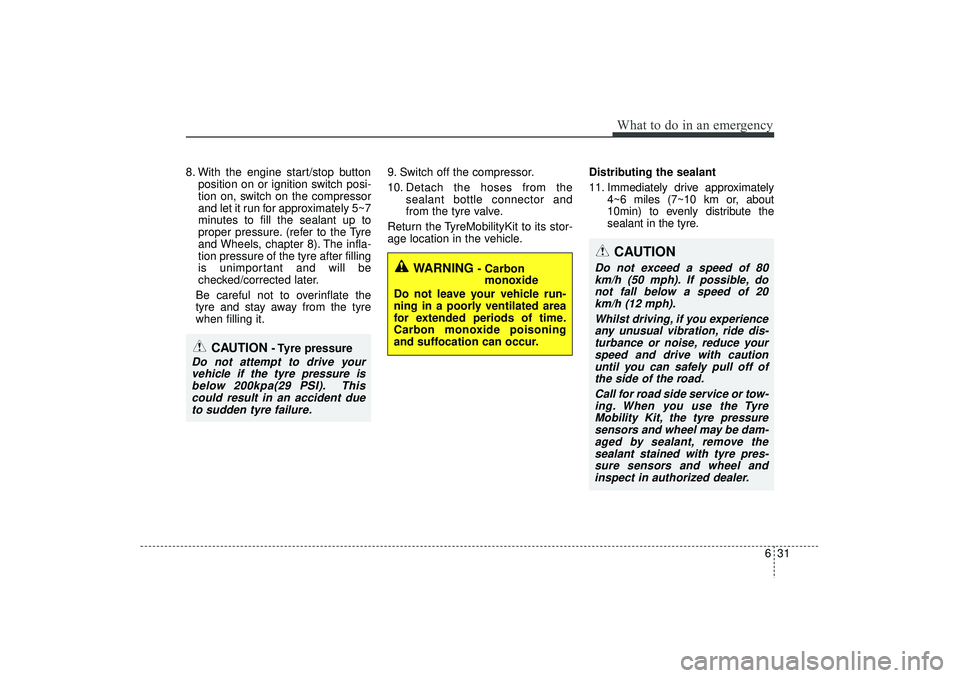
8. With the engine start/stop buttonposition on or ignition switch posi-
tion on, switch on the compressor
and let it run for approximately 5~7
minutes to fill the sealant up to
proper pressure. (refer to the Tyre
and Wheels, chapter 8). The infla-
tion pressure of the tyre after filling
is unimportant and will be
checked/corrected later.
Be careful not to overinflate the
tyre and stay away from the tyre
when filling it. 9. Switch off the compressor.
10. Detach the hoses from the
sealant bottle connector and
from the tyre valve.
Return the TyreMobilityKit to its stor-
age location in the vehicle. Distributing the sealant
11. Immediately drive approximately
4~6 miles (7~10 km or, about
10min) to evenly distribute the
sealant in the tyre.
WARNING
- Carbonmonoxide
Do not leave your vehicle run-
ning in a poorly ventilated area
for extended periods of time.
Carbon monoxide poisoning
and suffocation can occur.
CAUTION
- Tyre pressure
Do not attempt to drive your vehicle if the tyre pressure isbelow 200kpa(29 PSI). Thiscould result in an accident dueto sudden tyre failure.
CAUTION
Do not exceed a speed of 80km/h (50 mph). If possible, donot fall below a speed of 20km/h (12 mph).
Whilst driving, if you experienceany unusual vibration, ride dis-turbance or noise, reduce yourspeed and drive with cautionuntil you can safely pull off ofthe side of the road.
Call for road side service or tow-ing. When you use the TyreMobility Kit, the tyre pressuresensors and wheel may be dam-aged by sealant, remove thesealant stained with tyre pres-sure sensors and wheel andinspect in authorized dealer.
EL(FL) UK 6.QXP 12/16/2014 8:13 PM Page 31
Page 461 of 550
Maintenance
7
Engine compartment . . . . . . . . . . . . . . . . . . . . . . . . 7-3
Maintenance services . . . . . . . . . . . . . . . . . . . . . . . . 7-7• Owner’s responsibility . . . . . . . . . . . . . . . . . . . . . . . . 7-7
• Owner maintenance precautions . . . . . . . . . . . . . . . . 7-7
• Engine compartment precautions (Diesel engine) . . . 7-8Owner maintenance . . . . . . . . . . . . . . . . . . . . . . . . . 7-9• Owner maintenance schedule. . . . . . . . . . . . . . . . . . . . 7-9Scheduled maintenance service . . . . . . . . . . . . . . . 7-11
Explanation of scheduled maintenance items . . . 7-12
Engine oil. . . . . . . . . . . . . . . . . . . . . . . . . . . . . . . . . 7-15• Checking the engine oil level . . . . . . . . . . . . . . . . . . . 7-15
• Changing the engine oil and filter . . . . . . . . . . . . . . . 7-16Engine coolant . . . . . . . . . . . . . . . . . . . . . . . . . . . . 7-16• Checking the coolant level . . . . . . . . . . . . . . . . . . . . . 7-17
• Changing the coolant . . . . . . . . . . . . . . . . . . . . . . . . . 7-18Brake/clutch fluid . . . . . . . . . . . . . . . . . . . . . . . . . . 7-19• Checking the brake/clutch fluid level . . . . . . . . . . . 7-19Washer fluid . . . . . . . . . . . . . . . . . . . . . . . . . . . . . . 7-20• Checking the washer fluid level . . . . . . . . . . . . . . . . 7-20Parking brake . . . . . . . . . . . . . . . . . . . . . . . . . . . . . 7-20• Check the parking brake . . . . . . . . . . . . . . . . . . . . . . 7-20Fuel Filter (For Diesel). . . . . . . . . . . . . . . . . . . . . . 7-21• Draining water from fuel filter . . . . . . . . . . . . . . . . . 7-21
• Extracting air from the fuel filter . . . . . . . . . . . . . . . 7-21
• Fuel filter cartridge replacement . . . . . . . . . . . . . . . . 7-22
Air cleaner. . . . . . . . . . . . . . . . . . . . . . . . . . . . . . . . 7-23• Filter replacement . . . . . . . . . . . . . . . . . . . . . . . . . . . 7-23Climate control air filter . . . . . . . . . . . . . . . . . . . . 7-25• Filter inspection . . . . . . . . . . . . . . . . . . . . . . . . . . . . . . 7-25
• Filter replacement . . . . . . . . . . . . . . . . . . . . . . . . . . . . 7-25Wiper blades . . . . . . . . . . . . . . . . . . . . . . . . . . . . . . 7-27• Blade inspection . . . . . . . . . . . . . . . . . . . . . . . . . . . . . . 7-27
• Blade replacement . . . . . . . . . . . . . . . . . . . . . . . . . . . 7-27Battery . . . . . . . . . . . . . . . . . . . . . . . . . . . . . . . . . . . 7-\
30• For best battery service . . . . . . . . . . . . . . . . . . . . . . . 7-30
• Battery capacity label . . . . . . . . . . . . . . . . . . . . . . . . 7-31
• Battery recharging . . . . . . . . . . . . . . . . . . . . . . . . . . 7-32
• Reset items . . . . . . . . . . . . . . . . . . . . . . . . . . . . . . . . . . 7-32\
Tyres and wheels . . . . . . . . . . . . . . . . . . . . . . . . . . 7-33• Tyre care . . . . . . . . . . . . . . . . . . . . . . . . . . . . . . . . . . . 7-\
33
• Recommended cold tyre inflation pressures . . . . . . 7-33
• Checking tyre inflation pressure . . . . . . . . . . . . . . . . 7-35
• Tyre rotation . . . . . . . . . . . . . . . . . . . . . . . . . . . . . . . . 7-36
• Wheel alignment and tyre balance . . . . . . . . . . . . . 7-37
• Tyre replacement . . . . . . . . . . . . . . . . . . . . . . . . . . . . . 7-37
• Wheel replacement . . . . . . . . . . . . . . . . . . . . . . . . . . . 7-39
• Tyre traction. . . . . . . . . . . . . . . . . . . . . . . . . . . . . . . . \
. 7-39
• Tyre maintenance . . . . . . . . . . . . . . . . . . . . . . . . . . . . 7-39
• Tyre sidewall labeling . . . . . . . . . . . . . . . . . . . . . . . . . 7-39
• Low aspect ratio tyre . . . . . . . . . . . . . . . . . . . . . . . . . 7-43
EL(FL) UK 7.QXP 3/4/2015 9:04 PM Page 1