climate control HYUNDAI KONA EV 2021 Owners Manual
[x] Cancel search | Manufacturer: HYUNDAI, Model Year: 2021, Model line: KONA EV, Model: HYUNDAI KONA EV 2021Pages: 478, PDF Size: 32.83 MB
Page 14 of 478
I IN
NS
ST
TR
RU
UM
ME
EN
NT
T
P
PA
AN
NE
EL
L
O
OV
VE
ER
RV
VI
IE
EW
W
The actual shape may differ from the illustration.
1-5
Your vehicle at a glance
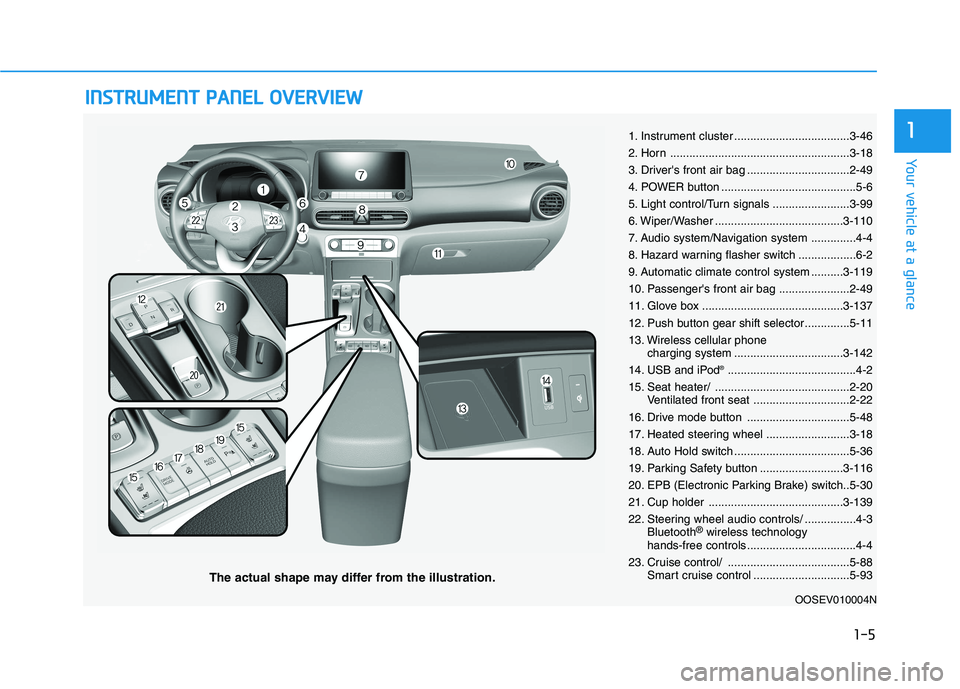
11. Instrument cluster ....................................3-46
2. Horn ........................................................3-18
3. Driver's front air bag ................................2-49
4. POWER button ..........................................5-6
5. Light control/Turn signals ........................3-99
6. Wiper/Washer ........................................3-110
7. Audio system/Navigation system ..............4-4
8. Hazard warning flasher switch ..................6-2
9. Automatic climate control system ..........3-119
10. Passenger's front air bag ......................2-49
11. Glove box ............................................3-137
12. Push button gear shift selector..............5-11
13. Wireless cellular phone
charging system ..................................3-142
14. USB and iPod
®........................................4-2
15. Seat heater/ ..........................................2-20
Ventilated front seat ..............................2-22
16. Drive mode button ................................5-48
17. Heated steering wheel ..........................3-18
18. Auto Hold switch ....................................5-36
19. Parking Safety button ..........................3-116
20. EPB (Electronic Parking Brake) switch..5-30
21. Cup holder ..........................................3-139
22. Steering wheel audio controls/ ................4-3
Bluetooth
®wireless technology
hands-free controls ..................................4-4
23. Cruise control/ ......................................5-88
Smart cruise control ..............................5-93
OOSEV010004N
Page 37 of 478
2-22
Safety system of your vehicle
Ventilated front seats
(if equipped)
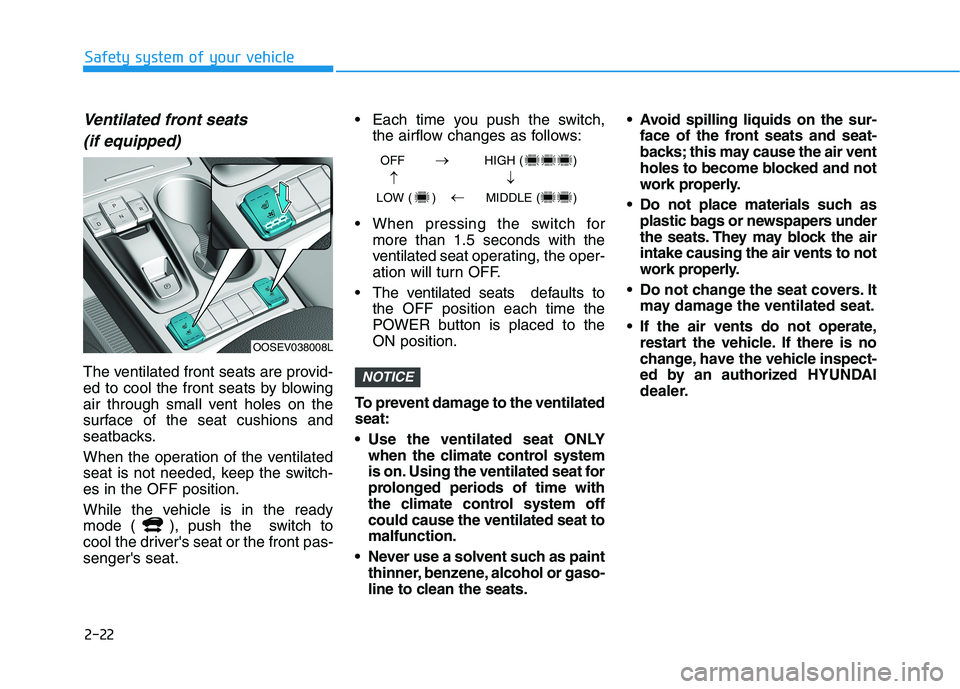
The ventilated front seats are provid-
ed to cool the front seats by blowing
air through small vent holes on the
surface of the seat cushions and
seatbacks.
When the operation of the ventilated
seat is not needed, keep the switch-
es in the OFF position.
While the vehicle is in the ready
mode ( ), push the switch to
cool the driver's seat or the front pas-
senger's seat. Each time you push the switch,
the airflow changes as follows:
When pressing the switch for
more than 1.5 seconds with the
ventilated seat operating, the oper-
ation will turn OFF.
The ventilated seats defaults to
the OFF position each time the
POWER button is placed to the
ON position.
To prevent damage to the ventilated
seat:
Use the ventilated seat ONLY
when the climate control system
is on. Using the ventilated seat for
prolonged periods of time with
the climate control system off
could cause the ventilated seat to
malfunction.
Never use a solvent such as paint
thinner, benzene, alcohol or gaso-
line to clean the seats. Avoid spilling liquids on the sur-
face of the front seats and seat-
backs; this may cause the air vent
holes to become blocked and not
work properly.
Do not place materials such as
plastic bags or newspapers under
the seats. They may block the air
intake causing the air vents to not
work properly.
Do not change the seat covers. It
may damage the ventilated seat.
If the air vents do not operate,
restart the vehicle. If there is no
change, have the vehicle inspect-
ed by an authorized HYUNDAI
dealer.NOTICE
OOSEV038008L
OFF HIGH ( )
LOW ( ) MIDDLE ( )
→→
→
→
Page 86 of 478
Rear view monitor (RVM) ...............................3-114
Reverse parking distance warning (PDW) .....3-115
Operation of Reverse Parking Distance
Warning system .............................................................3-115
To Turn OFF Reverse Parking Distance
Warning system .............................................................3-116
Conditions Where Reverse Parking Distance
Warning system May Not Operate...........................3-117
Reverse Parking Distance Warning system
Precautions.....................................................................3-118
Automatic Climate Control System ..................3-119
Automatic Temperature Control Mode ....................3-120
Manual Temperature Control Mode .........................3-121
System Operation .........................................................3-128
System Maintenance....................................................3-130
Windshield Defrosting and Defogging ............3-132
To Defog Inside Windshield ........................................3-132
To Defrost Outside Windshield ..................................3-133
Defogging logic..............................................................3-133
Auto Defogging System ..............................................3-133
Rear Window Defroster ..............................................3-135
Climate Control Additional Features ...............3-136
Cluster ionizer ................................................................3-136
Automatic Ventilation ...................................................3-136
Storage Compartment .......................................3-137
Center Console Storage ..............................................3-137
Glove Box ........................................................................3-137
Sunglass Holder.............................................................3-137
Interior Features ................................................3-139
Cup Holder ......................................................................3-139
Sunvisor ...........................................................................3-140
Power Outlet ..................................................................3-141
USB Charger ...................................................................3-142
Wireless Cellular Phone Charging System..............3-142
Clock .................................................................................3-144
Coat Hook .......................................................................3-145
Floor Mat Anchor(s).....................................................3-145
Luggage Net Holder .....................................................3-146
Cargo Area Cover..........................................................3-147
3
Page 117 of 478
3-33
Convenient features of your vehicle
3
Power Windows
The POWER button must be in the
ON position to be able to raise or
lower the windows. Each door has a
Power Window switch to control that
door’s window. The driver has a
Power Window Lock switch which can
block the operation of passenger win-
dows. The power windows will oper-
ate for approximately 10 minutes after
the POWER button is placed in the
ACC or OFF position.
However, as soon as the front doors
are opened, electrical power to the
windows will be turned off, so the 10-
minute period where power to the win-
dows is available will be cancelled.
Information
• In cold and wet climates, power
windows may not work properly
due to freezing conditions.
• While driving with the rear win-
dows down or with the sunroof (if
equipped) opened (or partially
opened), your vehicle may demon-
strate a wind buffeting or pulsation
noise. This noise is normal and can
be reduced or eliminated by taking
the following actions. If the noise
occurs with one or both of the rear
windows down, partially lower both
front windows approximately one
inch. If you experience the noise
with the sunroof open, slightly close
the sunroof.
Window opening and closing
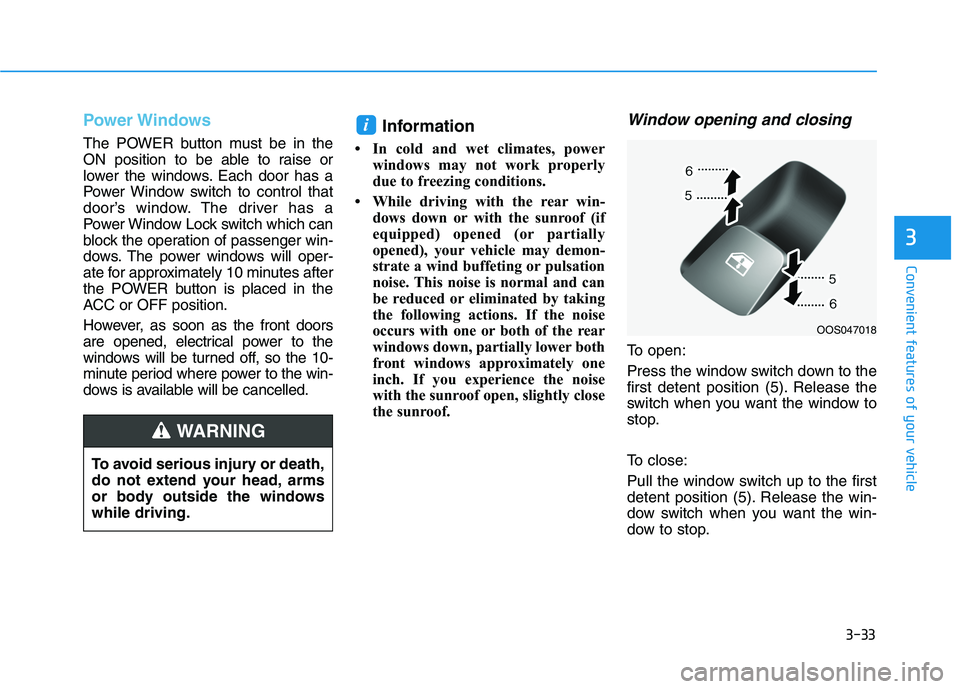
To open:
Press the window switch down to the
first detent position (5). Release the
switch when you want the window to
stop.
To close:
Pull the window switch up to the first
detent position (5). Release the win-
dow switch when you want the win-
dow to stop.
i
OOS047018
To avoid serious injury or death,
do not extend your head, arms
or body outside the windows
while driving.
WARNING
Page 120 of 478
3-36
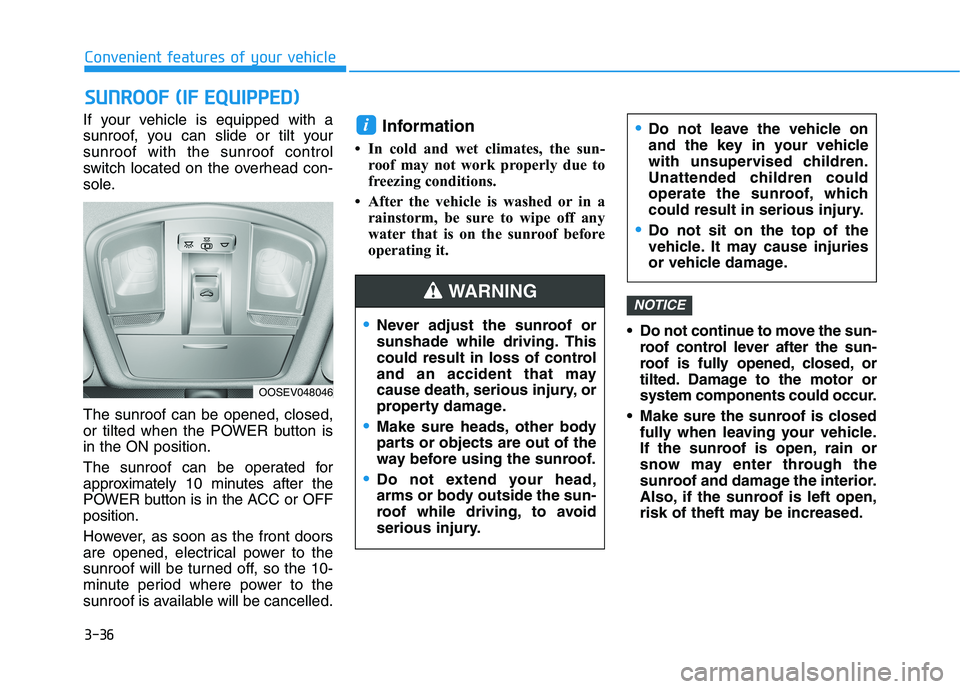
If your vehicle is equipped with a
sunroof, you can slide or tilt your
sunroof with the sunroof control
switch located on the overhead con-
sole.
The sunroof can be opened, closed,
or tilted when the POWER button is
in the ON position.
The sunroof can be operated for
approximately 10 minutes after the
POWER button is in the ACC or OFF
position.
However, as soon as the front doors
are opened, electrical power to the
sunroof will be turned off, so the 10-
minute period where power to the
sunroof is available will be cancelled.Information
• In cold and wet climates, the sun-
roof may not work properly due to
freezing conditions.
• After the vehicle is washed or in a
rainstorm, be sure to wipe off any
water that is on the sunroof before
operating it.
Do not continue to move the sun-
roof control lever after the sun-
roof is fully opened, closed, or
tilted. Damage to the motor or
system components could occur.
Make sure the sunroof is closed
fully when leaving your vehicle.
If the sunroof is open, rain or
snow may enter through the
sunroof and damage the interior.
Also, if the sunroof is left open,
risk of theft may be increased.
NOTICE
i
S SU
UN
NR
RO
OO
OF
F
(
(I
IF
F
E
EQ
QU
UI
IP
PP
PE
ED
D)
)
Convenient features of your vehicle
Never adjust the sunroof or
sunshade while driving. This
could result in loss of control
and an accident that may
cause death, serious injury, or
property damage.
Make sure heads, other body
parts or objects are out of the
way before using the sunroof.
Do not extend your head,
arms or body outside the sun-
roof while driving, to avoid
serious injury.
Do not leave the vehicle on
and the key in your vehicle
with unsupervised children.
Unattended children could
operate the sunroof, which
could result in serious injury.
Do not sit on the top of the
vehicle. It may cause injuries
or vehicle damage.
WARNING
OOSEV048046
Page 122 of 478
3-38
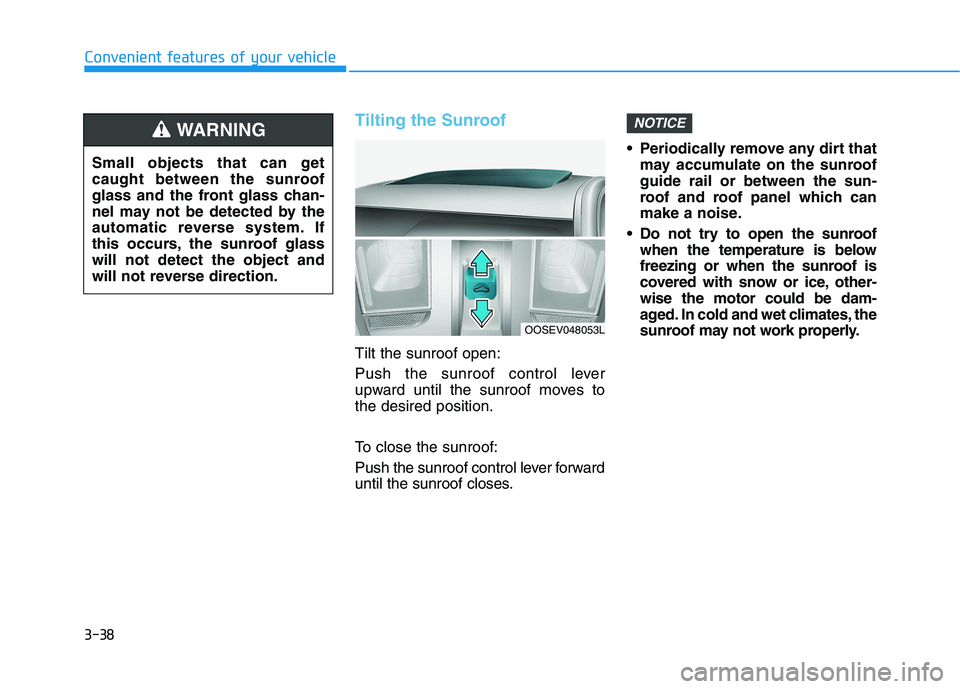
Tilting the Sunroof
Tilt the sunroof open:
Push the sunroof control lever
upward until the sunroof moves to
the desired position.
To close the sunroof:
Push the sunroof control lever forward
until the sunroof closes. Periodically remove any dirt that
may accumulate on the sunroof
guide rail or between the sun-
roof and roof panel which can
make a noise.
Do not try to open the sunroof
when the temperature is below
freezing or when the sunroof is
covered with snow or ice, other-
wise the motor could be dam-
aged. In cold and wet climates, the
sunroof may not work properly.
NOTICE
Convenient features of your vehicle
Small objects that can get
caught between the sunroof
glass and the front glass chan-
nel may not be detected by the
automatic reverse system. If
this occurs, the sunroof glass
will not detect the object and
will not reverse direction.
WARNING
OOSEV048053L
Page 134 of 478
3-50
Convenient features of your vehicle
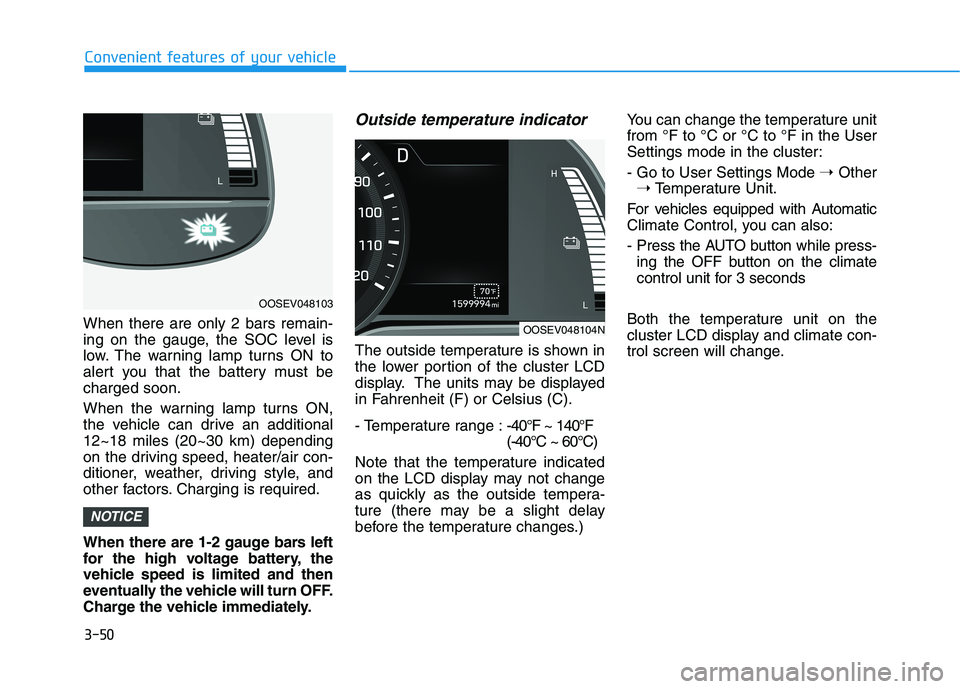
When there are only 2 bars remain-
ing on the gauge, the SOC level is
low. The warning lamp turns ON to
alert you that the battery must be
charged soon.
When the warning lamp turns ON,
the vehicle can drive an additional
12~18 miles (20~30 km) depending
on the driving speed, heater/air con-
ditioner, weather, driving style, and
other factors. Charging is required.
When there are 1-2 gauge bars left
for the high voltage battery, the
vehicle speed is limited and then
eventually the vehicle will turn OFF.
Charge the vehicle immediately.
Outside temperature indicator
The outside temperature is shown in
the lower portion of the cluster LCD
display. The units may be displayed
in Fahrenheit (F) or Celsius (C).
- Temperature range :-40°F ~ 140°F
(-40°C ~ 60°C)
Note that the temperature indicated
on the LCD display may not change
as quickly as the outside tempera-
ture (there may be a slight delay
before the temperature changes.) You can change the temperature unit
from °F to °C or °C to °F in the User
Settings mode in the cluster:
- Go to User Settings Mode ➝Other
➝Temperature Unit.
For vehicles equipped with Automatic
Climate Control, you can also:
- Press the AUTO button while press-
ing the OFF button on the climate
control unit for 3 seconds
Both the temperature unit on the
cluster LCD display and climate con-
trol screen will change.
NOTICE
OOSEV048103
OOSEV048104N
Page 203 of 478
3-119
Convenient features of your vehicle
3
A AU
UT
TO
OM
MA
AT
TI
IC
C
C
CL
LI
IM
MA
AT
TE
E
C
CO
ON
NT
TR
RO
OL
L
S
SY
YS
ST
TE
EM
M
OOSEV048300
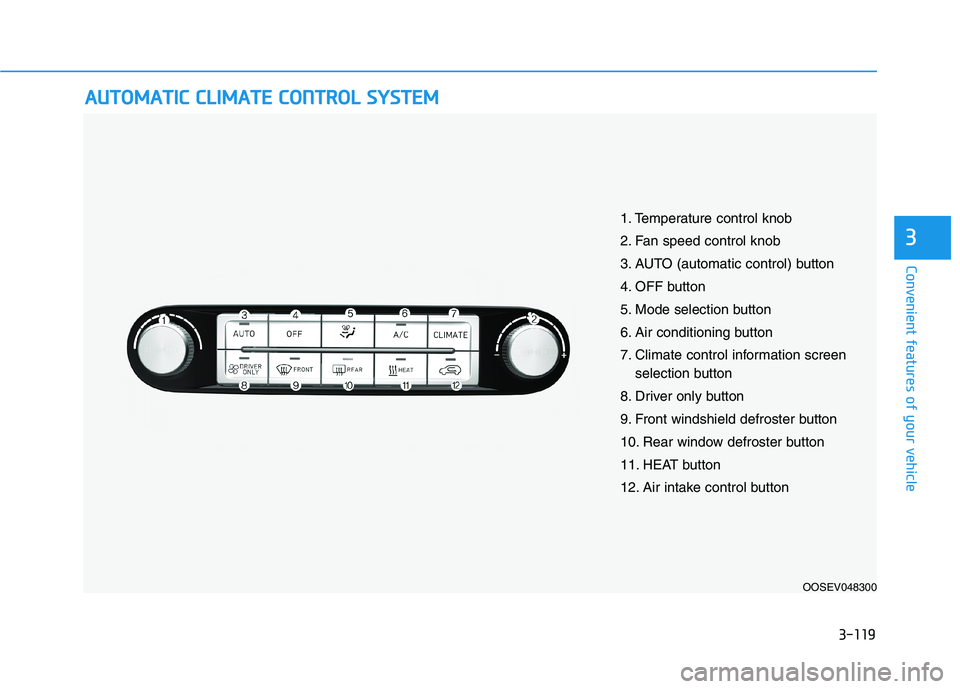
1. Temperature control knob
2. Fan speed control knob
3. AUTO (automatic control) button
4. OFF button
5. Mode selection button
6. Air conditioning button
7. Climate control information screen
selection button
8. Driver only button
9. Front windshield defroster button
10. Rear window defroster button
11. HEAT button
12. Air intake control button
Page 204 of 478
3-120
Convenient features of your vehicle
Automatic Temperature
Control Mode
The Automatic Climate Control
System is controlled by setting the
desired temperature.
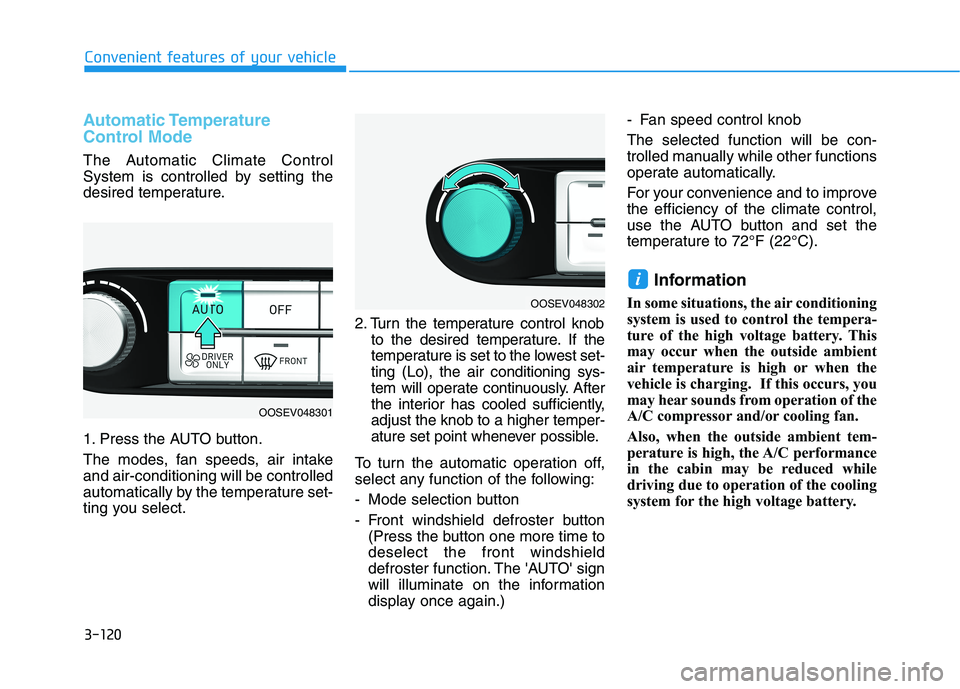
1. Press the AUTO button.
The modes, fan speeds, air intake
and air-conditioning will be controlled
automatically by the temperature set-
ting you select.2. Turn the temperature control knob
to the desired temperature. If the
temperature is set to the lowest set-
ting (Lo), the air conditioning sys-
tem will operate continuously. After
the interior has cooled sufficiently,
adjust the knob to a higher temper-
ature set point whenever possible.
To turn the automatic operation off,
select any function of the following:
- Mode selection button
- Front windshield defroster button
(Press the button one more time to
deselect the front windshield
defroster function. The 'AUTO' sign
will illuminate on the information
display once again.)- Fan speed control knob
The selected function will be con-
trolled manually while other functions
operate automatically.
For your convenience and to improve
the efficiency of the climate control,
use the AUTO button and set the
temperature to 72°F (22°C).
Information
In some situations, the air conditioning
system is used to control the tempera-
ture of the high voltage battery. This
may occur when the outside ambient
air temperature is high or when the
vehicle is charging. If this occurs, you
may hear sounds from operation of the
A/C compressor and/or cooling fan.
Also, when the outside ambient tem-
perature is high, the A/C performance
in the cabin may be reduced while
driving due to operation of the cooling
system for the high voltage battery.
i
OOSEV048302
OOSEV048301
Page 208 of 478
3-124
Convenient features of your vehicle
Instrument panel vents
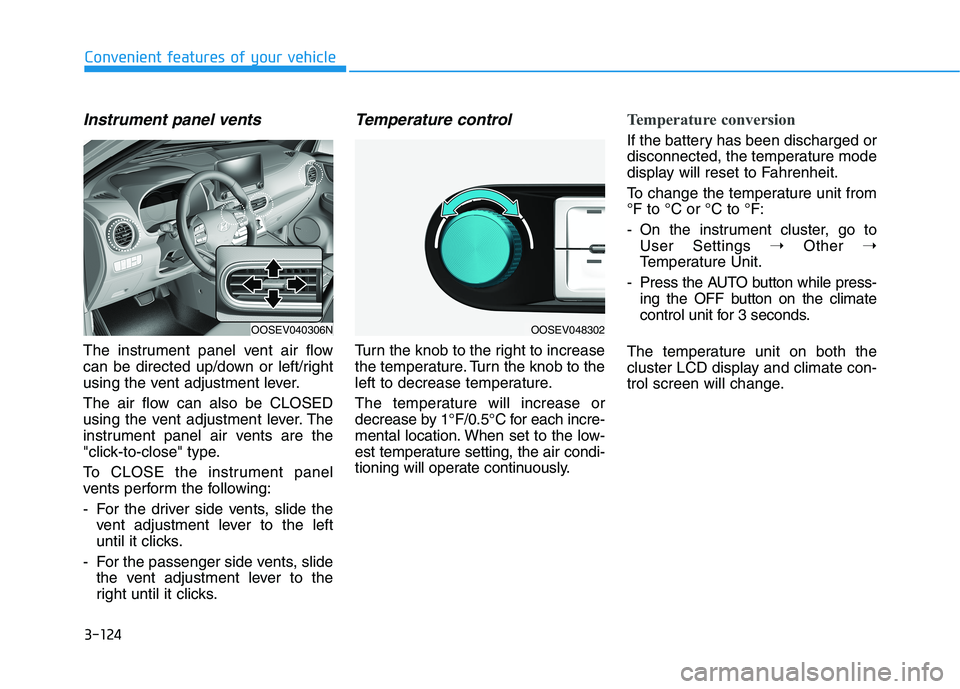
The instrument panel vent air flow
can be directed up/down or left/right
using the vent adjustment lever.
The air flow can also be CLOSED
using the vent adjustment lever. The
instrument panel air vents are the
"click-to-close" type.
To CLOSE the instrument panel
vents perform the following:
- For the driver side vents, slide the
vent adjustment lever to the left
until it clicks.
- For the passenger side vents, slide
the vent adjustment lever to the
right until it clicks.
Temperature control
Turn the knob to the right to increase
the temperature. Turn the knob to the
left to decrease temperature.
The temperature will increase or
decrease by 1°F/0.5°C for each incre-
mental location. When set to the low-
est temperature setting, the air condi-
tioning will operate continuously.
Temperature conversion
If the battery has been discharged or
disconnected, the temperature mode
display will reset to Fahrenheit.
To change the temperature unit from
°F to °C or °C to °F:
- On the instrument cluster, go to
User Settings ➝Other ➝
Temperature Unit.
- Press the AUTO button while press-
ing the OFF button on the climate
control unit for 3 seconds.
The temperature unit on both the
cluster LCD display and climate con-
trol screen will change.
OOSEV040306NOOSEV048302