key Hyundai Matrix 2006 Owner's Guide
[x] Cancel search | Manufacturer: HYUNDAI, Model Year: 2006, Model line: Matrix, Model: Hyundai Matrix 2006Pages: 490, PDF Size: 11.58 MB
Page 67 of 490
1
FEATURES OF YOUR HYUNDAI
53
B900A01A-GAT LIGHTS ON WARNING SOUND (If Installed) The warning chime sounds when the tail lights are on and the driver sidedoor is open. This prevents the battery from discharging by warning you when the car is left with the tail lights on. Thechime sounds until the tail lights are turned off. B270B02O-GAT PARKING START WARNING SOUND (If installed) If the vehicle is driven at 10km/h(6mph) for more than 2~3 seconds, the warn- ing chime will sound continuously when the parking brake engaged. B270A01A-AAT BRAKE PAD WEAR WARNING SOUND The front disc brake pads have wear indicators that should make a high-pitched squealing or scraping noise when new pads are needed. The sound may come and go or be heard all thetime when the vehicle is moving. It may also be heard when the brake pedal is pushed down firmly. Exces-sive rotor damage will result if the worn pads are not replaced. See your Hyundai dealer immediately.
B950A01E-GAT REAR FOG AUDIBLE WARNING SOUND (If Installed) The rear fog audible warning chime sounds when the rear fog lights are onand the door in driver side is open.
B260S01B-GAT
Diesel Pre-heat Indicator
Light (Diesel Engine)
The indicator light illuminates amberwhen the ignition switch is placed atthe "ON" position. The engine can be started after the pre-heat indicator light goes off. The illuminating time varieswith the water temperature, air tem- perature and battery condition. NOTE: If the engine were not started 10 seconds after the preheating is com- pleted, turn the ignition key once more to the "LOCK" position, andthen to the "ON" position, in order to preheat again.
Page 74 of 490
1FEATURES OF YOUR HYUNDAI
60
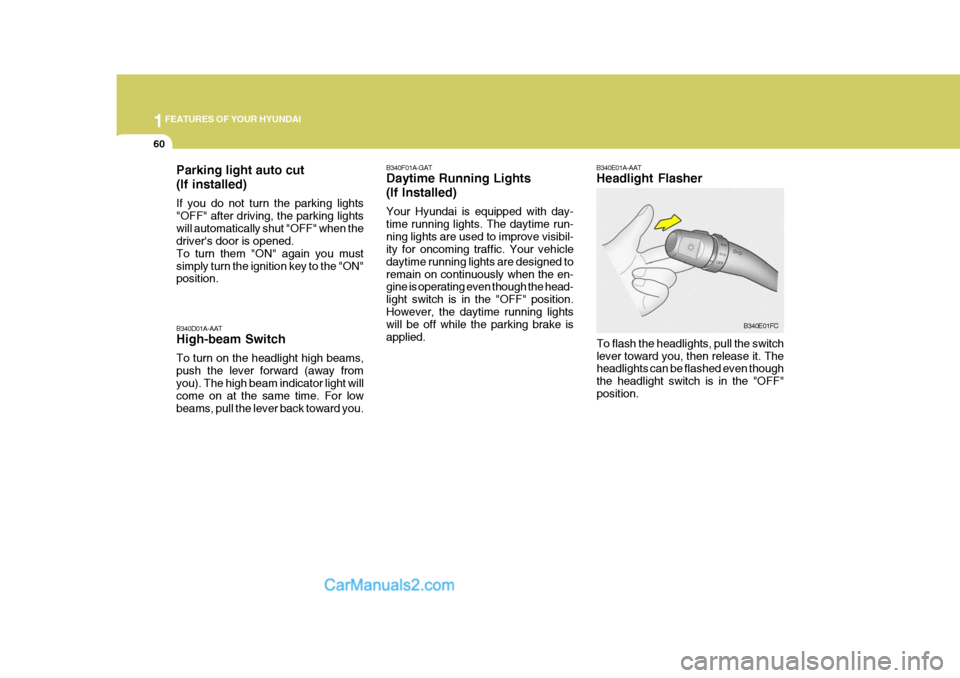
B340E01A-AAT Headlight Flasher
To flash the headlights, pull the switch lever toward you, then release it. The headlights can be flashed even though the headlight switch is in the "OFF"position. B340E01FC
B340D01A-AAT High-beam Switch To turn on the headlight high beams, push the lever forward (away fromyou). The high beam indicator light will come on at the same time. For low beams, pull the lever back toward you. B340F01A-GAT Daytime Running Lights (If Installed) Your Hyundai is equipped with day- time running lights. The daytime run-ning lights are used to improve visibil- ity for oncoming traffic. Your vehicle daytime running lights are designed toremain on continuously when the en- gine is operating even though the head- light switch is in the "OFF" position.However, the daytime running lights will be off while the parking brake is applied.
Parking light auto cut (If installed) If you do not turn the parking lights "OFF" after driving, the parking lightswill automatically shut "OFF" when the driver's door is opened. To turn them "ON" again you mustsimply turn the ignition key to the "ON" position.
Page 76 of 490

1FEATURES OF YOUR HYUNDAI
62
B350A01O-AAT Tail Gate Wiper And Washer Switch
1. :The washer fluid will be sprayed
onto the rear window and the wiper operates while the rearwindow wiper barrel is placed in this position.
2.OFF
3.INT : To use the intermittent wiper
feature, place the rear windowwiper barrel in the "INT" posi-tion.
4.ON : When the point indicates "ON",
the rear window wiper operatescontinuously.
B350D01FC
B370A01A-AAT The hazard warning system should be used whenever you find it necessary to stop the car in a hazardous location.When you must make such an emer- gency stop, always pull off the road as far as possible.The hazard warning lights are turned on by pushing in the hazard switch. This causes all turn signal lights toblink. The hazard warning lights will operate even though the key is not in the ignition.To turn the hazard warning lights off, push the switch a second time. HFC2078
HAZARD WARNING SYS- TEM
B350C01FC-GAT Adjustable Intermittent Wiper Operation (If installed) To use the intermittent wiper feature, place the wiper switch in the "INT" position. With the switch in this posi- tion, the interval between wipes can bevaried from approximately 1 to 18 sec- onds by turning the interval adjuster barrel. B350C01FC
Page 78 of 490
1FEATURES OF YOUR HYUNDAI
64
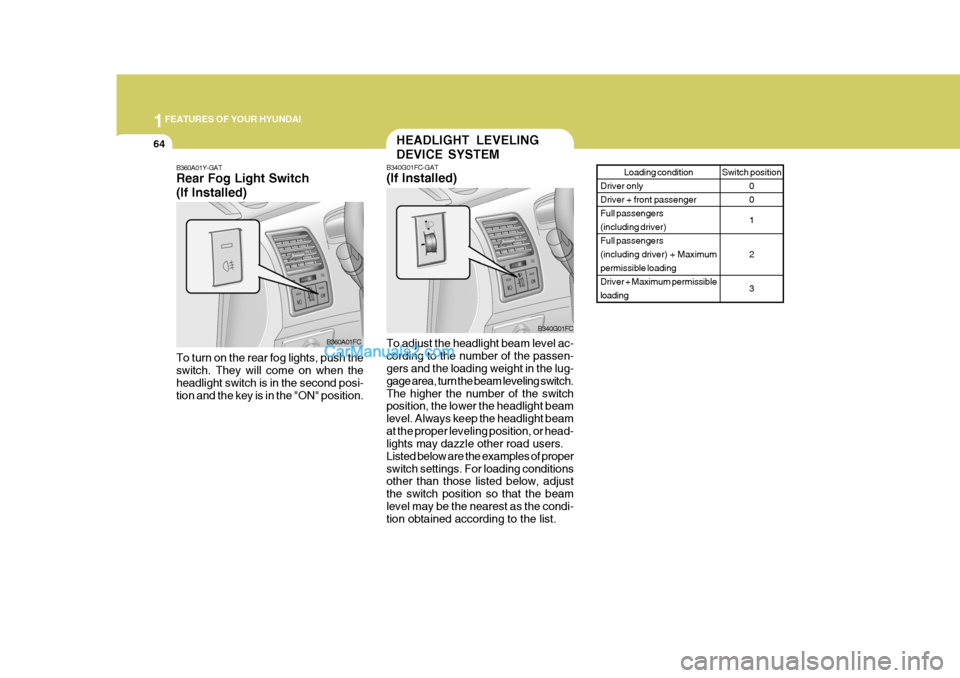
B360A01Y-GAT Rear Fog Light Switch (If Installed) To turn on the rear fog lights, push the switch. They will come on when the headlight switch is in the second posi- tion and the key is in the "ON" position. B360A01FC
HEADLIGHT LEVELING DEVICE SYSTEM
B340G01FC-GAT (If Installed) To adjust the headlight beam level ac- cording to the number of the passen- gers and the loading weight in the lug- gage area, turn the beam leveling switch.The higher the number of the switch position, the lower the headlight beam level. Always keep the headlight beamat the proper leveling position, or head- lights may dazzle other road users. Listed below are the examples of properswitch settings. For loading conditions other than those listed below, adjust the switch position so that the beamlevel may be the nearest as the condi- tion obtained according to the list. Loading condition
Driver only Driver + front passengerFull passengers(including driver)Full passengers(including driver) + Maximumpermissible loadingDriver + Maximum permissibleloading
B340G01FC
Switch position 0 0 1 23
Page 79 of 490
1
FEATURES OF YOUR HYUNDAI
65CIGARETTE LIGHTER
B420A02A-AAT For the cigarette lighter to work, the key must be in the "ACC" position or the "ON" position. To use the cigarette lighter, push it allthe way into its socket. When the element has heated, the lighter will pop out to the "ready" position.Do not hold the cigarette lighter pressed in. This can damage the heating ele- ment and create a fire hazard.If it is necessary to replace the ciga- rette lighter, use only a genuine Hyundai replacement or its approved equiva-lent. B420A01FC
CAUTION:
Do not use electric accessories orequipment other than the Hyundai genuine parts in the socket.
!
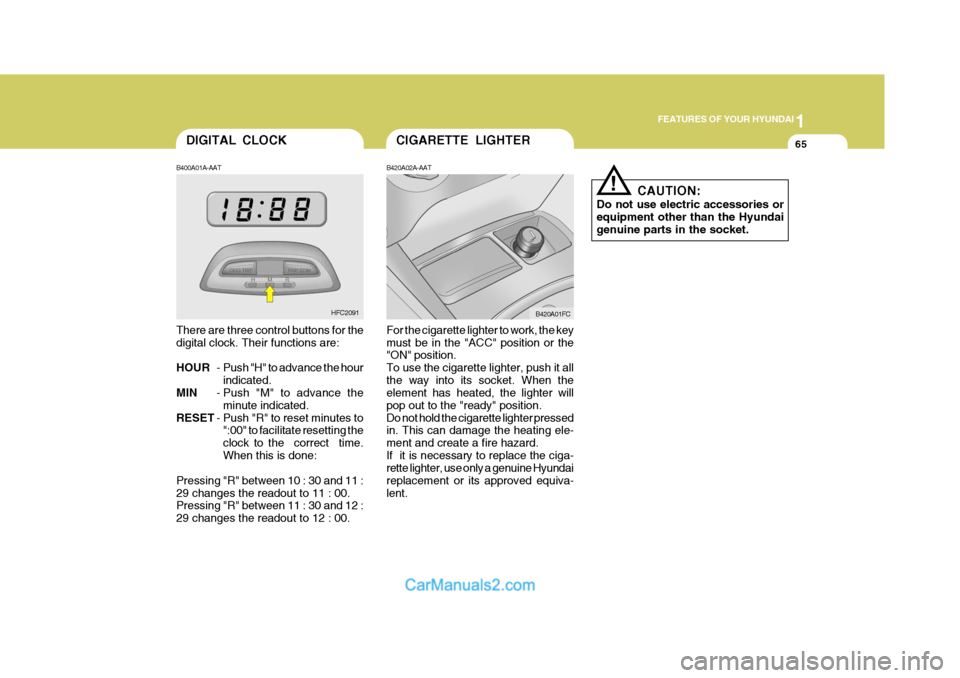
B400A01A-AAT There are three control buttons for the digital clock. Their functions are: HOUR - Push "H" to advance the hour
indicated.
MIN - Push "M" to advance the
minute indicated.
RESET - Push "R" to reset minutes to
":00" to facilitate resetting the clock to the correct time.When this is done:
Pressing "R" between 10 : 30 and 11 :29 changes the readout to 11 : 00. Pressing "R" between 11 : 30 and 12 : 29 changes the readout to 12 : 00. DIGITAL CLOCK
HFC2091
Page 80 of 490
1FEATURES OF YOUR HYUNDAI
66POWER OUTLETASHTRAY
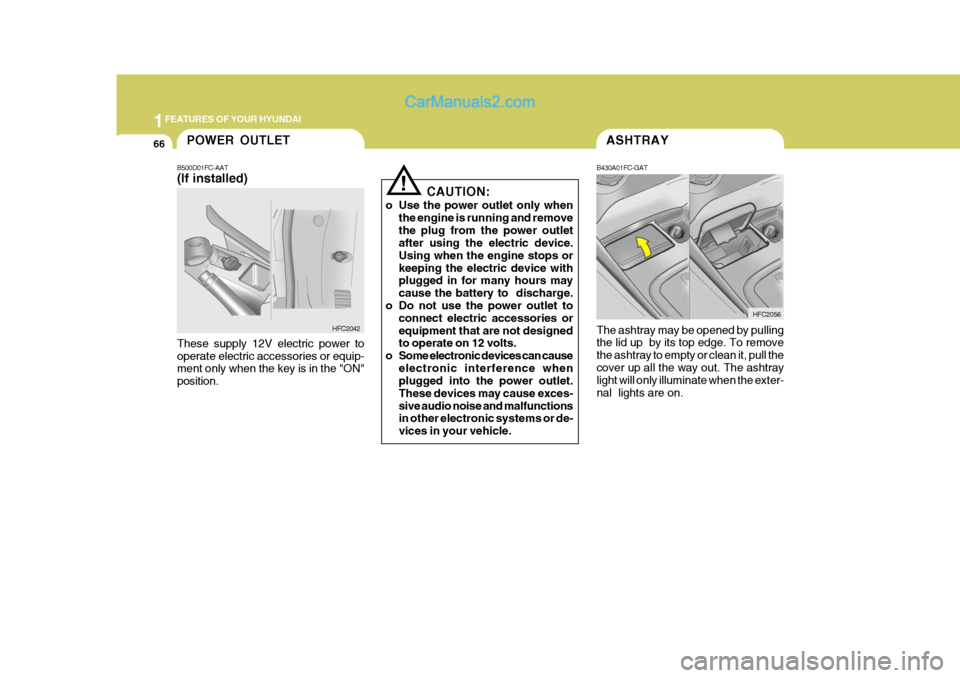
B430A01FC-GAT The ashtray may be opened by pulling the lid up by its top edge. To remove the ashtray to empty or clean it, pull thecover up all the way out. The ashtray light will only illuminate when the exter- nal lights are on. HFC2056
B500D01FC-AAT (If installed) These supply 12V electric power to operate electric accessories or equip- ment only when the key is in the "ON" position.
HFC2042
!
CAUTION:
o Use the power outlet only when the engine is running and remove the plug from the power outlet after using the electric device. Using when the engine stops orkeeping the electric device with plugged in for many hours may cause the battery to discharge.
o Do not use the power outlet to connect electric accessories orequipment that are not designed to operate on 12 volts.
o Some electronic devices can cause electronic interference whenplugged into the power outlet. These devices may cause exces-sive audio noise and malfunctions in other electronic systems or de- vices in your vehicle.
Page 82 of 490
1FEATURES OF YOUR HYUNDAI
68
!
PARKING BRAKE
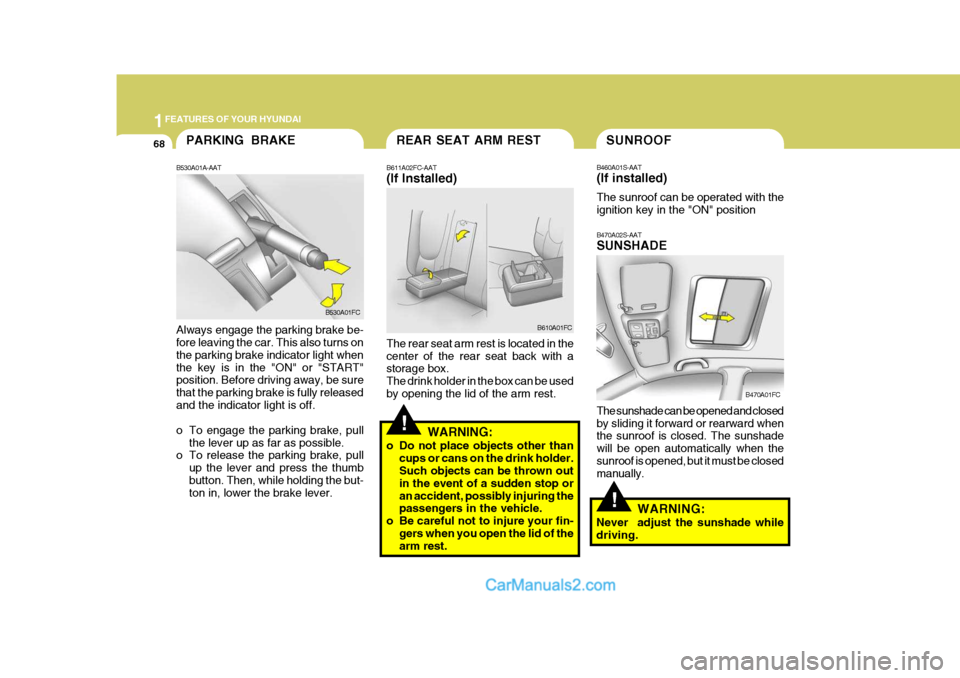
B530A01A-AAT Always engage the parking brake be- fore leaving the car. This also turns on the parking brake indicator light whenthe key is in the "ON" or "START" position. Before driving away, be sure that the parking brake is fully releasedand the indicator light is off.
o To engage the parking brake, pull
the lever up as far as possible.
o To release the parking brake, pull
up the lever and press the thumb button. Then, while holding the but- ton in, lower the brake lever. B530A01FC
SUNROOF
B470A02S-AAT SUNSHADE The sunshade can be opened and closed by sliding it forward or rearward when the sunroof is closed. The sunshade will be open automatically when thesunroof is opened, but it must be closed manually.
B460A01S-AAT (If installed) The sunroof can be operated with the ignition key in the "ON" position
B470A01FCREAR SEAT ARM REST
B611A02FC-AAT (If Installed) The rear seat arm rest is located in the center of the rear seat back with a storage box. The drink holder in the box can be usedby opening the lid of the arm rest. B610A01FC
WARNING:
o Do not place objects other than cups or cans on the drink holder. Such objects can be thrown out in the event of a sudden stop oran accident, possibly injuring the passengers in the vehicle.
o Be careful not to injure your fin-
gers when you open the lid of thearm rest.
!
WARNING:
Never adjust the sunshade while driving.
Page 85 of 490

1
FEATURES OF YOUR HYUNDAI
71
oON In the "ON" position, the light stays on at all times.
CAUTION:
Do not leave the switch in this posi-tion for an extended period time when the vehicle is not running.
o OFF In the "OFF" position, the light stays off at all times even though a door is open.
!
B490A02E-AAT Interior Light The interior courtesy light has a switch of three positions. The three positions are:
oDR In the "DR" position, the interior cour- tesy light comes on when any door isopened regardless of the ignition key position. The light goes out when the door is closed. HFC490
With Sunroof Without Sunroof
B480A01E-AAT FRONT INTERIOR LIGHT Map Light The two map light switches are located on both sides of the front overheadconsole. Push in the map light switch to turn the light on or off. This light produces a spot beam for convenientuse as a map light at night or as a personal light for the driver and the passenger.With Sunroof
HFC480
Without Sunroof
INTERIOR LIGHT
Page 93 of 490

1
FEATURES OF YOUR HYUNDAI
79CD AUTO CHANGER
B800A02FC-GAT (If Installed) The CD Auto Changer is located under the front passenger seat. This system can store up to 8 CDs. You may select music without chang-ing discs. First, open the CD Auto Changer door, remore the CD "maga- zine" and insert up to 8 CDs. Then,push the magazine into the CD Auto Changer. The CD may be operated with the passenger compartment au-dio system controls. HFC2105
B540A01FC-GAT
B540A02FC
TAIL GATE
LOCK UNLOCK
!WARNING:
The tail gate should always be kept completely closed while the vehicle is in motion. If it is left open or ajar,poisonous exhaust gases may en- ter the car resulting in serious ill- ness or death to the occupants. Seeadditional warnings concerning exhaust gases on page 2-2. o The tail gate can be locked or un-
locked with a key.
o The tail gate is opened by pulling the outside handle up, raising the tail gate manually.
o To close, lower the tail gate, then press down on it until it is closed. Tobe sure the tail gate is fully closed,always try to pull it up again without using the outside handle.
Page 117 of 490
1
FEATURES OF YOUR HYUNDAI
103
1
FEATURES OF YOUR HYUNDAI
103
H210B03O-AAT
1. POWER ON-OFF/VOLUME
Control Knob
The radio unit may be operated when the ignition key is in the "ACC" or "ON"position. Rotate the knob clockwise to switch the radio unit on and to increase the volume.The LCD shows the radio frequency in the radio mode. Turn the knob counter- clockwise to reduce the volume and toswitch the radio unit off. BAL (Balance Control) Knob Pull and turn the control knob clockwise to emphasize right speaker sound (left speaker sound will be attenuated). When the control knob is turned counterclock-wise, left speaker sound will be empha- sized (right speaker soundwill be at- tenuated).After adjusting the balance, push the knob again to use the other function. 4. BAND Selector Pressing the button changes the AM, FM1 and FM2 bands. The modeselected is displayed on LCD. 5. TUNE (Manual) Select Button Press the ( ) side or ( ) side to increase or to decrease the frequency. With the button held down for 1 sec. or more, thestop signal (broadcasting radio wave) is ignored and channel selection contin- ues. SEEK Operation (Automatic Channel Selection) Press the TUNE select button for 1 sec. or more. When the ( ) side is pressed,the unit will automatically tune to the next higher frequency and when the ( ) side is pressed, it will automaticallytune to the next lower frequency.
SCAN Knob When the scan knob is pressed, the frequency will increase and the receiv-able stations will be tuned in one after another, receiving each station for 5 seconds. To stop scanning, press thescan knob again.
2. FAD (Fader Control) Knob Turn the control knob counterclockwise to emphasize front speaker sound (rear speaker sound will be attenuated). Whenthe control knob is turned clockwise, rear speaker sound will be emphasized (front speaker sound will be attenu-ated). 3. BASS Control Knob Press to pop the knob out and turn to the left or right for the desired bass tone. TREBLE Control Knob. Further pull-lock position of popped-up knob. Turn to the left or right for thedesired treble tone.
FM
AM