reset Hyundai Matrix 2006 Owner's Guide
[x] Cancel search | Manufacturer: HYUNDAI, Model Year: 2006, Model line: Matrix, Model: Hyundai Matrix 2006Pages: 490, PDF Size: 11.58 MB
Page 333 of 490

1
CONTROLS AND EQUIPMENT
53
1. Distance to empty
HFC2052
o This mode indicates the estimated distance to empty from the current fuel in the fuel tank and distance to empty symbol.
o When refueling with more than 6.3 quarts, the trip computer will recog-nize refueling.
o When the battery has been rein- stalled after being discharged or dis-connected, drive more than 20 miles for an accurate distance to empty.
B400B02FC
HFC2054
NOTE:
o If the distance to empty is indi-
cated "- -", have the trip computer system checked by your Hyundaiauthorised repairer.
o The distance to empty can differ
from the actual tripmeter accord-ing to driving conditions.
o The distance to empty can vary
according to the driving condi-tions, driving pattern or vehicle speed.
2. Average speed
o This mode indicates the average speed travelled since the last aver- age speed reset. o Pressing the reset switch for more
than 1 second, when the averagespeed is being displayed, clears the average speed to zero.
3. Drive time
o This mode indicates the drive time travelled since the last drive time reset.
o Pressing the reset switch for more than 1 second, when the drive time isbeing displayed, clears the drive timeto zero.
Distance to empty symbol
Distance to empty (mile)Average speed symbol Average speed (mph)
Drive time symbol
Drive time
Page 339 of 490

1
CONTROLS AND EQUIPMENT
59
B340G01FC-EAT To adjust the headlight beam level ac- cording to the number of the passen- gers and the loading weight in the lug- gage area, turn the beam leveling switch.The higher the number of the switch position, the lower the headlight beam level. Always keep the headlight beamat the proper leveling position, or head- lights may dazzle other road users. Listed below are the examples of rec-ommended switch settings. For loading conditions other than those listed be- low, adjust the switch position so thatthe beam level may be the nearest as the condition obtained according to the list.
HEADLIGHT LEVELING DEVICE
SYSTEM
Switch
PositionLoading Condition
Driver only Driver + front passengerFull passengers (including driver) Full passengers (including driver) + Maximum
permissible loading
Driver + Maximum permis-
sible loading 0 0 1 2 3
B340G01FC-D
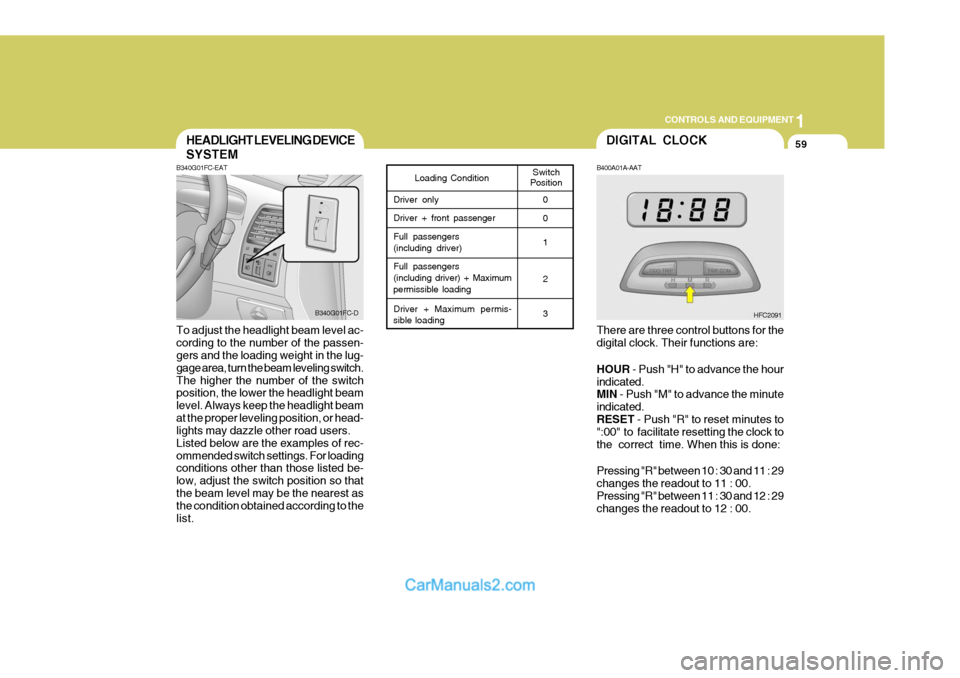
DIGITAL CLOCK
HFC2091
B400A01A-AAT There are three control buttons for the digital clock. Their functions are: HOUR
- Push "H" to advance the hour
indicated. MIN - Push "M" to advance the minute
indicated. RESET - Push "R" to reset minutes to
":00" to facilitate resetting the clock tothe correct time. When this is done: Pressing "R" between 10 : 30 and 11 : 29 changes the readout to 11 : 00.Pressing "R" between 11 : 30 and 12 : 29 changes the readout to 12 : 00.
Page 355 of 490

1
CONTROLS AND EQUIPMENT
75AUTO FUEL CUT SWITCH
!
To adjust the steering wheel:
1. Push the lever downward to unlock.
2. Raise or lower the steering wheel to
the desired position.
3. After adjustment, securely tighten the lever by pulling it upward
SB520A1-F
STEERING WHEEL TILT LEVER
HORN
HFC2041
WARNING:
Do not attempt to adjust the steering wheel whilst driving as this mayresult in loss of control of the vehicle and result in death or serious injury. B610A01S-EATHFC2099
Press the pad of the steering wheel to sound the horn.
!
B560B01O-GAT (Petrol Engine)
The auto fuel cut switch is located on the driver's side of the engine compartment. In the event of a collision or suddenimpact, the auto fuel cut device cuts off the fuel supply. If this device is acti- vated, it must be reset by pressing in onthe top of the switch before the engine can be restarted.
HFC4001
WARNING:
Before resetting the auto fuel cut switch, the fuel line should be checked for fuel leaks. With Airbag
Page 366 of 490

1CONTROLS AND EQUIPMENT
86
B970C01NF-EAT Automatic Operation The FATC (Full Automatic Tempera- ture Control) system automatically con- trols the heating and cooling by doing as follows:
1. Push the "AUTO" switch. The indi-
cator light will illuminate confirming that the Face, Floor and/or Bi-Level modes as well as the blower speed and air conditioner will be controlledautomatically. 2. Turn the "TEMP" knob to set the
desired temperature.The temperature will increase to the maximum 90°F(32°C) by turning the knob clockwise.The temperature will decrease to the minimum 62°F(17°C) by turning the knob counterclockwise.
NOTE:
o If the battery has been discharged or disconnected, the temperature mode will reset to Centigrade de- gree. This is a normal condition andyou can adjust the temperature mode from Centigrade to Fahren- heit as follows; Press the "OFF" and "AUTO" but-ton simultaneously for 3 seconds.The display shows that the unit of temperature is adjusted to Centi- grade or Fahrenheit.(°C
��
��
� °F or °F
��
��
� °C)
HFC227 HFC229
B970C01FC-D
Photo Sensor
o Never place anything covering the photo sensor which is located inthe car on the instrument panel toensure better control of the heat- ing and cooling system.