stop start Hyundai Matrix 2007 User Guide
[x] Cancel search | Manufacturer: HYUNDAI, Model Year: 2007, Model line: Matrix, Model: Hyundai Matrix 2007Pages: 490, PDF Size: 12.81 MB
Page 164 of 490
2 DRIVING YOUR HYUNDAI
18
your foot resting on the brake pedal may cause the brakes to overheat,which reduces their effectiveness and may lead to more serious con- sequences.
o Take care of your tires. Keep them inflated to the recommended pres-sure. Incorrect inflation, either toomuch or too little, results in unnec- essary tire wear. Check the tire pres- sures at least once a month.
o Be sure that the wheels are aligned correctly. Improper alignment canresult from hitting curbs or drivingtoo fast over irregular surfaces. Poor alignment causes faster tire wear and may also result in other prob-lems as well as greater fuel con- sumption.
o Keep your car in good condition. For better fuel economy and reducedmaintenance costs, maintain your car in accordance with the mainte-nance schedule in Section 5. If you drive your car in severe conditions, more frequent maintenance is re-quired (see Section 5 for details).DRIVING FOR ECONOMY
C140A02A-AAT You can save fuel and get more kilo- meters from your car if you follow these suggestions:
o Drive smoothly. Accelerate at a moderate rate. Don't make "jack- rabbit" starts or full-throttle shiftsand maintain a steady cruising speed. Don't race between stop- lights. Try to adjust your speed tothat of the other traffic so you don't have to change speeds unneces- sarily. Avoid heavy traffic wheneverpossible. Always maintain a safe distance from other vehicles so you can avoidunnecessary braking. This also re- duces brake wear.
o Drive at a moderate speed. The faster you drive, the more fuel yourcar uses. Driving at a moderate speed, especially on the highway, isone of the most effective ways to reduce fuel consumption.
o Don't "ride" the brake or clutch pedal. This can increase fuel consumptionand also increase wear on these components. In addition, driving with
If your car is facing downhill, turn thefront wheels into the curb to helpkeep the car from rolling. If your car is facing uphill, turn the front wheels away from the curb to help keep thecar from rolling. If there is no curb or if it is required by other conditions to keep the car fromrolling, block the wheels.
o Under some conditions your park-
ing brake can freeze in the engagedposition. This is most likely to hap- pen when there is an accumulation of snow or ice around or near therear brakes or if the brakes are wet. If there is a risk that the parking brake may freeze, apply it only tem-porarily while you put the gear se- lector lever in "P" (automatic) or in first or reverse gear (manualtransaxle) and block the rear wheels so the car cannot roll. Then release the parking brake.
o Do not hold the vehicle on the up- grade with the accelerator pedal.This can cause the transmission tooverheat. Always use the brake pedal or parking brake.
Page 172 of 490

2 DRIVING YOUR HYUNDAI
26
CAUTION:
If overheating should occur when towing, (temperature gauge reads near the red zone), taking the follow- ing actions may reduce or eliminatethe problem.
1. Turn off the air conditioner.
2. Reduce highway speed.
3. Select a lower gear when going uphill.
4. While in stop and go traffic, place the gear selection in park or neu- tral and idle the engine at a higherspeed.
!
8. When parking your vehicle and
trailer, especially on a hill, be sure to follow all the normal precautions. Turn your front wheel into the curb, set the parking brake firmly, and putthe transaxle in 1st or Reverse (manual) or Park (automatic). In addition, place wheel chocks ateach of the trailer's tires.
9. If the trailer has electric brakes,
start your vehicle and trailer mov-ing, and then apply the trailer brake controller by hand to be sure the brakes are working. This lets youcheck your electrical connection at the same time.
10.During your trip, check occasion- ally to be sure that the load issecure, and that the lights and any trailer brakes are still working.
11.Avoid jerky starts, sudden accel- eration or sudden stops.
12.Avoid sharp turns and rapid lane changes.
13.Avoid holding the brake pedal down
too long or too frequently. This couldcause the brakes to overheat, re- sulting in reduced braking efficiency. 14. When going down a hill, shift into a
lower gear and use the engine brak- ing effect. When ascending a long grade, downshift the transaxle to a lowergear and reduce speed to reduce chances of engine overloading and/ or overheating.
15.If you have to stop while going uphill, do not hold the vehicle inplace by pressing on the accelera-tor. This can cause the automatic transaxle to overheat. Use the park- ing brake or footbrake.
NOTE: When towing check transaxle fluid more frequently.
Page 176 of 490

3 WHAT TO DO IN AN EMERGENCY
4IF THE ENGINE OVERHEATS
D030A02A-AAT If your temperature gauge indicates overheating, you experience a loss of power, or hear loud pinging or knock- ing, the engine is probably too hot. Ifthis happens to you, you should:
1. Pull off the road and stop as soon as it is safe to do so.
2. Place the gear selector lever in "P"
(automatic) or neutral (manual transaxle) and set the parking brake. If the air conditioning is on, turn it off.
3. If engine coolant is running out un- der the car or steam is coming outfrom the hood, stop the engine. Donot open the hood until the engine coolant has stopped running or the steaming has stopped. If there is novisible loss of engine coolant and no steam, leave the engine running and check to be sure the enginecooling fan is operating. If the fan is not running, turn the engine off.
4. Check to see if the water pump drive belt is missing. If it is not missing,check to see that it is tight. If the drive belt seems to be satisfactory,
3. Attach the clamps of the jumper
cable in the exact location shown.First, attach one clamp of the jumper cable to the positive (+) post or cable of the discharged battery. Thenattach the other end of the same cable to the positive (+) post or cable of the booster battery. Next,using the other cable, attach one clamp to the negative (-) post or cable of the booster battery. Thenattach the other end of that cable to a solid metal part of the engine away from the battery. Do not con-nect the cable to any moving part.
4. Start the engine in the car with the
booster battery and let it run for afew minutes. This will help to as- sure that the booster battery is fully charged. During the jumping opera-tion, run the engine in this vehicle at about 2,000 rpm.
5. Start the engine in the car with the discharged battery using the nor-mal starting procedure. After the engine starts, leave the jumpercables connected and let the engine run at fast idle or about 2,000 rpm for several minutes. 6. Carefully remove the jumper cables
in the reverse order of attachment.
If you do not know why your batterybecame discharged (because the lightswere left on, etc.), have the charging system checked by your Hyundai dealer.
Page 201 of 490
5VEHICLE MAINTENANCE REQUIREMENTS
8EXPLANATION OF SCHEDULED MAINTENANCE ITEMS
!
F060M01A-AAT o Engine Oil and Filter The engine oil and filter should be changed at the intervals specified in the maintenance schedule. If the car is being driven in severe conditions,more frequent oil and filter changes are required. F060B01A-AAT
o Drive Belts Inspect all drive belts for evidence of cuts, cracks, excessive wear or oil saturation and replace if necessary. Drive belts should be checked periodi-cally for proper tension and adjusted as necessary. F060C01A-AAT
o Fuel Filter
A clogged filter can limit the speed at
which the vehicle may be driven, dam-age the emission system and cause hard starting. If an excessive amountof foreign matter accumulates in the fuel tank, the filter may require re- placement more frequently. After installing a new filter, run the
engine for several minutes, and checkfor leaks at the connections. Fuel fil- ters should be installed by trained technicians. WARNING (Diesel only):
Never work on injection system with engine running or within 30 sec- onds after shutting off engine. Highpressure pump, rail, injectors and high pressure pipes are subject to high pressure even after the enginestopped. The fuel jet produced by fuel leaks may cause serious injury, if it touch the body. People usingpacemakers should not move than 30cm closer to the ECU or wiring harness within the engine roomwhile engine is running, since the high currents in the Common Rail system produce considerable mag-netic fields.
F060D01TB-AAT
o Fuel Lines, Fuel Hoses and Connections
Check the fuel lines, fuel hoses and
connections for leakage and damage.Replace any damaged or leaking partsimmediately.
Page 204 of 490

5
VEHICLE MAINTENANCE REQUIREMENTS
11
F070L01A-AAT
o Suspension Mounting Bolts
Check the suspension connections for looseness or damage. Retighten to thespecified torque.F070J01A-AAT
o Brake Pads, Calipers and
Rotors
Check the pads for excessive wear,
discs for run out and wear, and cali- pers for fluid leakage.
F070K01A-AAT
o Exhaust Pipe and Muffler
Visually inspect the exhaust pipes,
muffler and hangers for cracks, dete- rioration, or damage. Start the engineand listen carefully for any exhaust gas leakage. Tighten connections or replace parts as necessary. F070M01A-AAT
o Steering Gear Box, Linkage &
Boots/Lower arm Ball Joint
With the vehicle stopped and engine
off, check for excessive free-play in the steering wheel. Check the linkage for bends or damage. Check the dustboots and ball joints for deterioration, cracks, or damage. Replace any dam- aged parts.
F070N01A-AAT
o Power Steering Pump, Belt
and Hoses
Check the power steering pump and
hoses for leakage and damage. Re- place any damaged or leaking parts immediately. Inspect the power steer-ing belt for evidence of cuts, cracks, excessive wear, oiliness and proper tension. Replace or adjust it if neces-sary. F070P01A-AAT
o Driveshafts and Boots
Check the drive shafts, boots andclamps for cracks, deterioration, or damage. Replace any damaged parts and, if necessary, repack the grease. F070Q01A-AAT
o Air Conditioning Refrigerant
Check the air conditioning lines and connections for leakage and damage.Check air conditioning performance according to the relevant shop manual if necessary.
Page 214 of 490
6 DO-IT-YOURSELF MAINTENANCE
10
CAUTION:
Slowly pour the recommended oil into a funnel. Do not overfill not todamage engine.
!
NOTE: Always dispose of used engine oil in an environmentally acceptablemanner. It is suggested that it be placed in a sealed container and taken to a service station for maybereclaimation. Do not pour the oil on the ground or put it in with the household trash.
Be sure that the mounting surfaceon the engine is clean and that theold gasket is removed completely. Lubricate the new gasket on the filter with clean engine oil beforeinstallation.
7. Remove the engine oil level dip- stick.
8. Refill the crankcase with the rec-
ommended engine oil. Refer tothe specification in chapter 9 for engine oil capacity.
!
9. Start the engine and check to be sure no oil is leaking from the drain plug or oil filter.
10.Shut off the engine and recheck the oil level. WARNING:
Used motor oil may cause irrita-
tion or cancer of the skin if left in contact with the skin for prolongedperiods of time. Wash your hands thoroughly with soap and warm water as soon as possible afterhandling used oil.
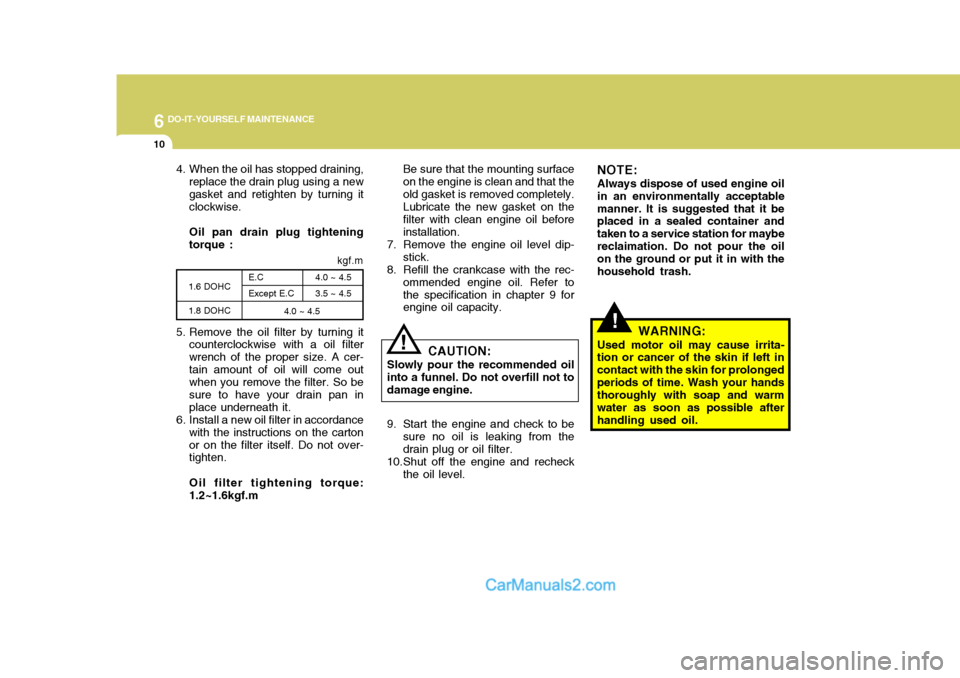
4. When the oil has stopped draining,
replace the drain plug using a newgasket and retighten by turning it clockwise. Oil pan drain plug tightening torque :
1.6 DOHC 1.8 DOHC 4.0 ~ 4.5 3.5 ~ 4.5
E.CExcept E.C
4.0 ~ 4.5 kgf.m
5. Remove the oil filter by turning it counterclockwise with a oil filter wrench of the proper size. A cer-tain amount of oil will come out when you remove the filter. So be sure to have your drain pan inplace underneath it.
6. Install a new oil filter in accordance with the instructions on the cartonor on the filter itself. Do not over- tighten. Oil filter tightening torque: 1.2~1.6kgf.m
Page 215 of 490
6
DO-IT-YOURSELF MAINTENANCE
11
G040B04FC-GAT
Diesel Engine
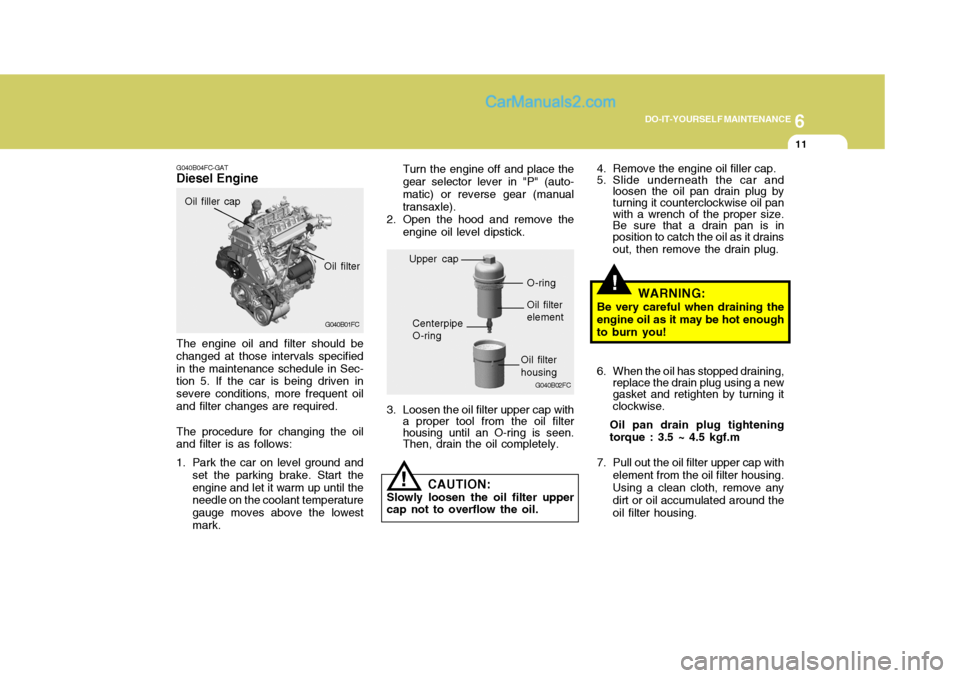
Oil filter
G040B01FC
Oil filler cap
The engine oil and filter should be changed at those intervals specifiedin the maintenance schedule in Sec- tion 5. If the car is being driven in severe conditions, more frequent oiland filter changes are required. The procedure for changing the oil and filter is as follows:
1. Park the car on level ground and set the parking brake. Start the engine and let it warm up until the needle on the coolant temperature gauge moves above the lowestmark.
!
Centerpipe O-ring
G040B02FC
Upper capO-ring
Oil filter element
Oil filter housing
Turn the engine off and place the gear selector lever in "P" (auto-matic) or reverse gear (manual transaxle).
2. Open the hood and remove the engine oil level dipstick.
3. Loosen the oil filter upper cap with a proper tool from the oil filter housing until an O-ring is seen.Then, drain the oil completely. 4. Remove the engine oil filler cap.
5. Slide underneath the car and
loosen the oil pan drain plug by turning it counterclockwise oil pan with a wrench of the proper size. Be sure that a drain pan is inposition to catch the oil as it drains out, then remove the drain plug.
WARNING:
Be very careful when draining the engine oil as it may be hot enoughto burn you!
6. When the oil has stopped draining, replace the drain plug using a new gasket and retighten by turning it clockwise.
Oil pan drain plug tightening torque : 3.5 ~ 4.5 kgf.m
7. Pull out the oil filter upper cap with element from the oil filter housing. Using a clean cloth, remove any dirt or oil accumulated around the oil filter housing.
! CAUTION:
Slowly loosen the oil filter upper cap not to overflow the oil.
Page 236 of 490
6 DO-IT-YOURSELF MAINTENANCE
32
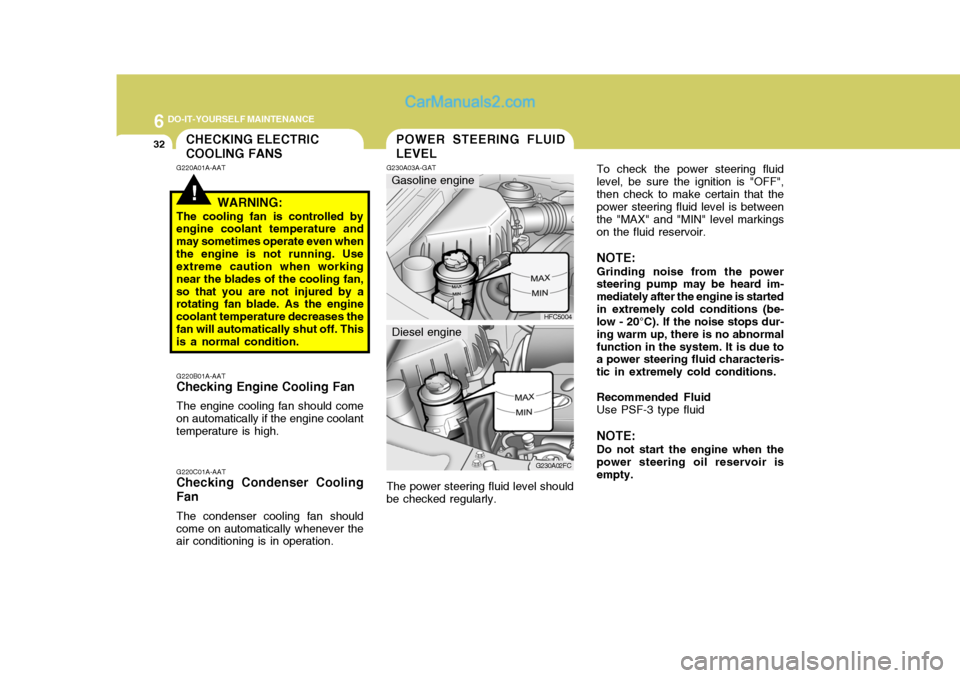
To check the power steering fluid level, be sure the ignition is "OFF",then check to make certain that the power steering fluid level is between the "MAX" and "MIN" level markingson the fluid reservoir. NOTE: Grinding noise from the power steering pump may be heard im- mediately after the engine is startedin extremely cold conditions (be- low - 20°C). If the noise stops dur- ing warm up, there is no abnormalfunction in the system. It is due to a power steering fluid characteris- tic in extremely cold conditions. Recommended Fluid Use PSF-3 type fluid NOTE: Do not start the engine when the power steering oil reservoir is empty.
!
CHECKING ELECTRIC COOLING FANS
G220A01A-AAT
WARNING:
The cooling fan is controlled by engine coolant temperature and may sometimes operate even whenthe engine is not running. Use extreme caution when working near the blades of the cooling fan,so that you are not injured by a rotating fan blade. As the engine coolant temperature decreases thefan will automatically shut off. This is a normal condition.POWER STEERING FLUID LEVEL
G220B01A-AAT
Checking Engine Cooling Fan
The engine cooling fan should come on automatically if the engine coolant temperature is high. G220C01A-AAT
Checking Condenser Cooling Fan
The condenser cooling fan should come on automatically whenever the air conditioning is in operation. G230A03A-GAT
HFC5004
G230A02FC
Gasoline engine
Diesel engine
The power steering fluid level should be checked regularly.
Page 243 of 490

6
DO-IT-YOURSELF MAINTENANCE
39FUSE PANEL DESCRIPTION
G200C03FC-GAT
Engine Compartment (Gasoline Engine)
G200C03FC
NOTE: Not all fuse panel descriptions in this manual may be applicable to your vehicle. It is accurate at the time of printing. When you inspect the fuse box on your vehicle, refer to the fuse box label.
PROTECTED COMPONENTS
Generator (A/CON, RR HTD, STOP, D/LOCK, HAZARD) Fuse Generator, Engine control relay, ECM Radiator fan relay Start relay, Ignition switch Blower relay Power window relay Condenser fan relay #1 ABS control module, ABS bleeding connector, ESP ABS control module, ABS bleeding connector, ESP Fuel pump relay Injector, lgnition coil MAP sensor, Oxygen sensor, CP sensor, Knock sensor, Throttle position sensor Audio, Room lamp, Overhead console lamp, lnstrument cluster DRL control module Horn relay A/C relay Front fog lamp relay ECM, TCM Tail lamp relay Left rear combi lamp, Left position lamp, Left License lamp Right rear combi lamp, Right position lamp, Right License lamp Left head lamp Right head lamp, (H/LP IND) Fuse
FUSE RATING
120A
40A 30A 20A 40A 40A 30A 20A 40A 40A 10A 15A 10A10A 15A 10A 10A 15A 10A 20A 10A 10A 15A 15A
DESCRIPTION
ALTB+
ECU RAD IGN
BLR
P/WIN
COND
ABSABS
F/PUMP INJ
SNSR
ROOM LP DRL
HORN
A/CON
FR FOG ECU
LP
TAIL LH
TAIL RH H/LP LH
H/LP RH
Page 245 of 490

6
DO-IT-YOURSELF MAINTENANCE
41
ALT B+
ECU RAD
IGN
BLR
P/WIN
COND ABSABS
F/PUMP ECU ECU
SNSR
ROOM LP DRL
HORN
A/CON
FR FOG ECU
LP
TAIL LH
TAIL RH H/LP LH
H/LP RH
PTC HTR 1
GLOW
PTC HTR 2 FFHS
PTC HTR 3 PROTECTED COMPONENTS
Generator (A/CON, RR HTD, STOP, D/LOCK, HAZARD) Fuse, Deicer Generator, Engine control relay, ECM Radiator fan relayStart relay, Ignition switchBlower relayPower window relayCondenser fan relay #1 ABS control module, ABS bleeding connector, ESP ABS control module, ABS bleeding connector, ESPFuel pump relayECM No.5 (Batt+)ECM No.4 (Batt+), Stop lamp switch, PTC heater relay #1Glow plug relay, Assistor heater relay 1/2, Stop lamp switch, TDC sensor, EGR act, Throttle plate act, VGT vacuum Audio, Room lamp, Overhead console lamp, lnstrument cluster, ETACM, Luggage lampDRL control moduleHorn relayA/C relayFront fog lamp relay ECM, TCM Tail lamp relayLeft rear combi lamp, Left position lamp, Left License lampRight rear combi lamp, Right position lamp, Right License lampLeft head lampRight head lamp, (H/LP IND) Fuse PTC heater relay #1 GLOW relayPTC heater relay #2FFHS relayPTC heater relay #3
FUSE RATING
140A40A30A30A40A40A 30A 30A40A40A10A30A 10A 15A 10A 15A10A10A 15A 10A20A10A10A15A 15A 40A80A40A30A40A
FUSE
FUSIBLE LINK DESCRIPTION