tow Hyundai Matrix 2007 Owner's Manual
[x] Cancel search | Manufacturer: HYUNDAI, Model Year: 2007, Model line: Matrix, Model: Hyundai Matrix 2007Pages: 490, PDF Size: 12.81 MB
Page 16 of 490
1FEATURES OF YOUR HYUNDAI
4
B030A01A-AAT
B030A01B
o Use moderate acceleration. Don't
start, depress the accelerator pedal fully.
o For the first 300 km (200 miles), try
to avoid hard braking.
o Don't lug the engine (in other words, don't drive so slowly in too-high agear that the engine "bucks": shift toa lower gear).
o Whether going fast or slow, vary
your speed from time to time.
o Don't let the engine idle longer than 3 minutes at one time.
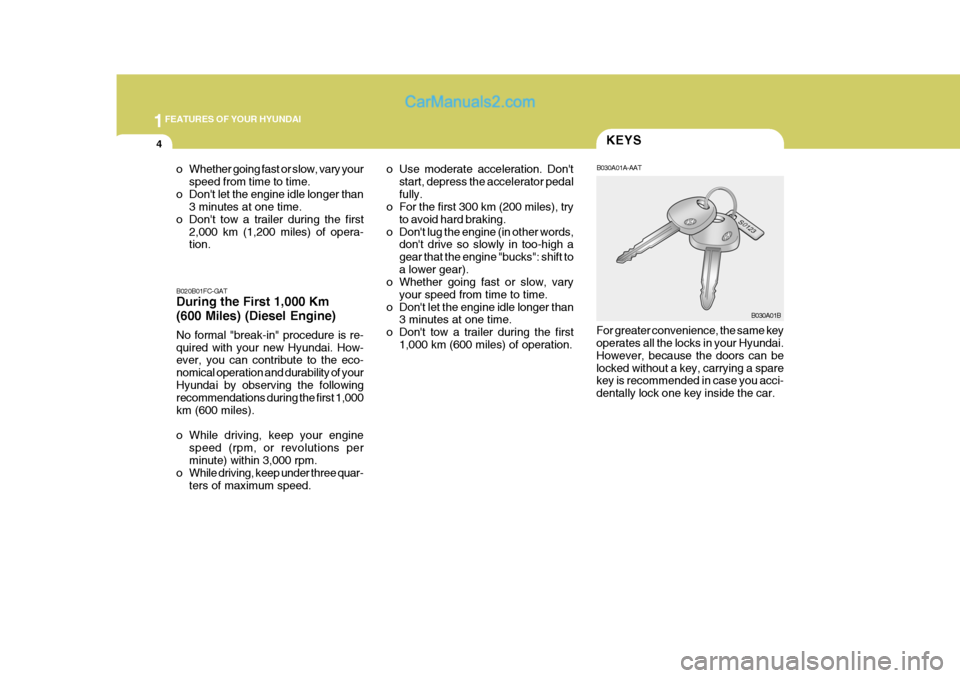
o Don't tow a trailer during the first 1,000 km (600 miles) of operation. For greater convenience, the same key operates all the locks in your Hyundai. However, because the doors can belocked without a key, carrying a spare key is recommended in case you acci- dentally lock one key inside the car.
o Whether going fast or slow, vary your
speed from time to time.
o Don't let the engine idle longer than 3 minutes at one time.
o Don't tow a trailer during the first 2,000 km (1,200 miles) of opera- tion. KEYS
B020B01FC-GAT During the First 1,000 Km (600 Miles) (Diesel Engine) No formal "break-in" procedure is re- quired with your new Hyundai. How- ever, you can contribute to the eco- nomical operation and durability of yourHyundai by observing the following recommendations during the first 1,000 km (600 miles).
o While driving, keep your engine speed (rpm, or revolutions per minute) within 3,000 rpm.
o While driving, keep under three quar-
ters of maximum speed.
Page 19 of 490
1
FEATURES OF YOUR HYUNDAI
7
NOTE: If the engine dies while driving after limp home procedure, you can start your engine within 8 seconds with-out limp home procedure again.
5. If the immobilizer indicator blinks for
five seconds, you have to try the limp home procedure again from the beginning.
After doing the limp home procedure,you have to consult with your autho-rized Hyundai dealer as soon as pos- sible.
! CAUTION:
o If you fail to try the limp home procedure with the sequence of three times, you have to wait for about one hour to do the limphome procedure again.
o If you cannot start your engine in
spite of limp home procedure,have your vehicle towed by an authorized Hyundai dealer.
!
DOOR
B040A02Y-AAT DOOR LOCKS
WARNING:
o Unlocked doors can be danger- ous. Before you drive away (es- pecially if there are children in the car), be sure that all the doorsare securely closed and locked so that the doors cannot be inad- vertently opened from the inside.This helps ensure that the doors will not be opened accidentally. Also, when combined with theproper use of seat belts, locking the doors helps keep occupants from being ejected from the carin case of an accident.
o Before opening the door, always
look for and avoid oncoming traf-fic.
o In case of accident the door is
unlocked automatically (If in-stalled) UNLOCK
LOCK
HFC2004
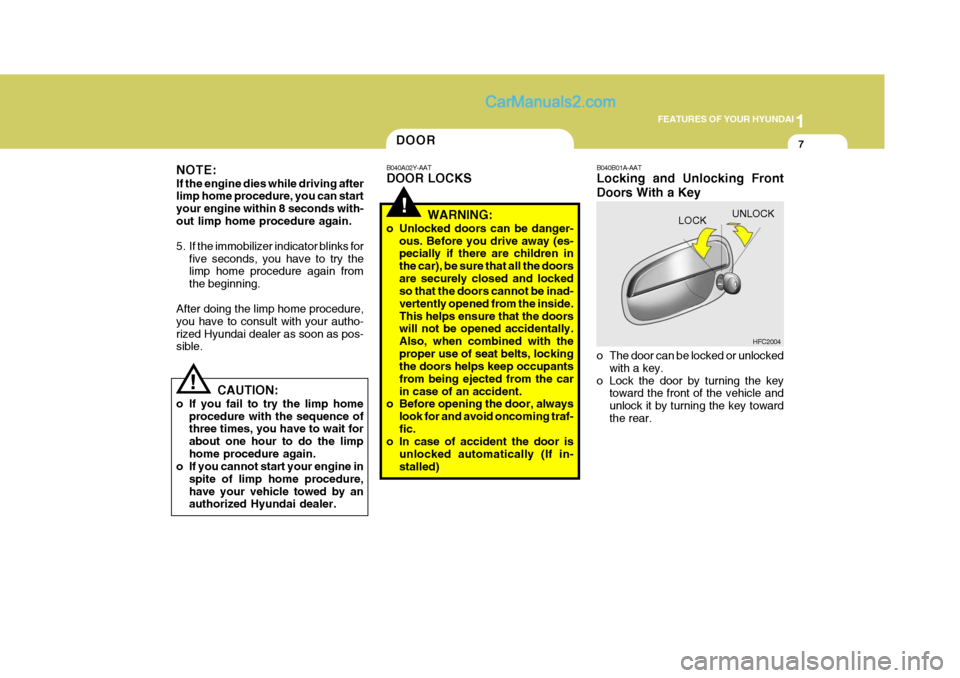
B040B01A-AAT Locking and Unlocking Front Doors With a Key
o The door can be locked or unlocked
with a key.
o Lock the door by turning the key toward the front of the vehicle and unlock it by turning the key towardthe rear.
Page 21 of 490
1
FEATURES OF YOUR HYUNDAI
9
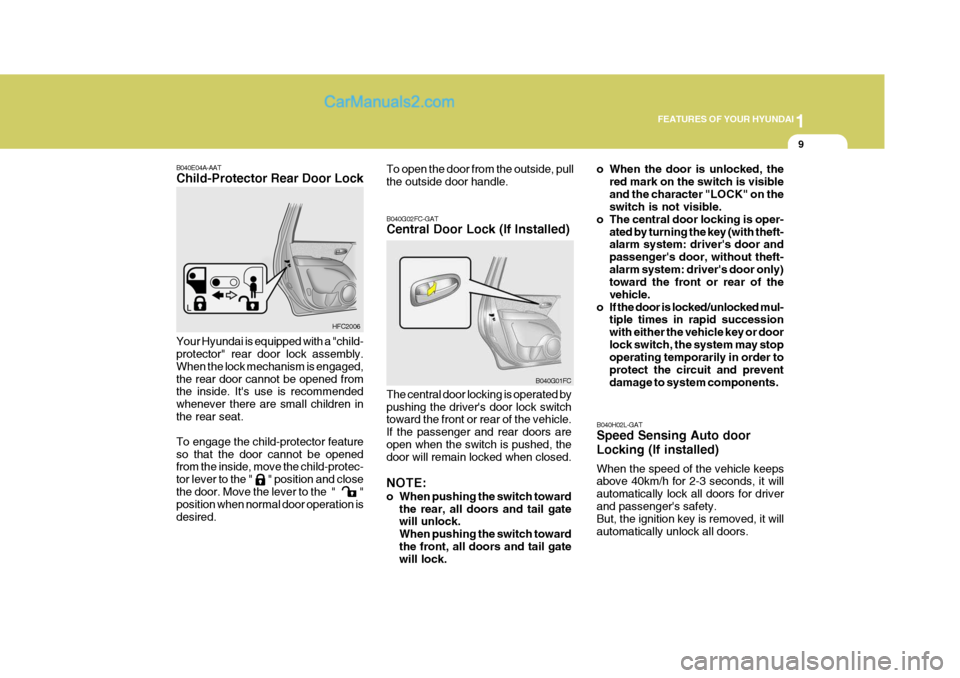
Your Hyundai is equipped with a "child- protector" rear door lock assembly. When the lock mechanism is engaged,the rear door cannot be opened from the inside. It's use is recommended whenever there are small children inthe rear seat. To engage the child-protector feature so that the door cannot be opened from the inside, move the child-protec- tor lever to the " " position and closethe door. Move the lever to the " " position when normal door operation is desired. HFC2006
B040E04A-AAT Child-Protector Rear Door Lock
To open the door from the outside, pull the outside door handle. B040G02FC-GAT Central Door Lock (If Installed) The central door locking is operated by pushing the driver's door lock switch toward the front or rear of the vehicle. If the passenger and rear doors areopen when the switch is pushed, the door will remain locked when closed. NOTE:
o When pushing the switch toward
the rear, all doors and tail gate will unlock. When pushing the switch towardthe front, all doors and tail gate will lock. B040G01FCo When the door is unlocked, the
red mark on the switch is visible and the character "LOCK" on the switch is not visible.
o The central door locking is oper-
ated by turning the key (with theft-alarm system: driver's door and passenger's door, without theft-alarm system: driver's door only) toward the front or rear of the vehicle.
o If the door is locked/unlocked mul- tiple times in rapid successionwith either the vehicle key or doorlock switch, the system may stop operating temporarily in order to protect the circuit and preventdamage to system components.
B040H02L-GAT Speed Sensing Auto door Locking (If installed) When the speed of the vehicle keeps above 40km/h for 2-3 seconds, it will automatically lock all doors for driverand passenger's safety. But, the ignition key is removed, it will automatically unlock all doors.
Page 26 of 490

1FEATURES OF YOUR HYUNDAI
14
!
!
SEAT
WARNING:
1) Be careful that someone's head, hands or body are not trapped by a closing window.
2) Never try to operate the main switch on the driver's door andthe individual door window switch in opposing directions atthe same time. If this is done, the window will stop and cannot be opened or closed.
3) Do not leave children alone in the car. Always remove the ignitionkey for their safety. HFC2024
B080B02FC-GAT FRONT SEATS Adjusting Seat Forward andRearward
B080A01FC-GAT ADJUSTABLE FRONT SEATS
WARNING:
Never attempt to adjust the seat while the vehicle is moving. This could result in loss of control, or an accident which may cause death,serious injury, or property damage.
To move the seat toward the front orrear, pull the lock release lever up- ward. This will release the seat on its track so you can move it forward orrearward to the desired position. When you find the position you want, release the lever and slide the seat forward orrearward on its track until it locks into the desired position and cannot be moved further.
Auto-Down Window (Driver's Side) The Auto-Down window is moved to its fully open position by pushing theswitch. To stop at the desired loction, the switch must be pulled up.
Page 28 of 490
1FEATURES OF YOUR HYUNDAI
16
!
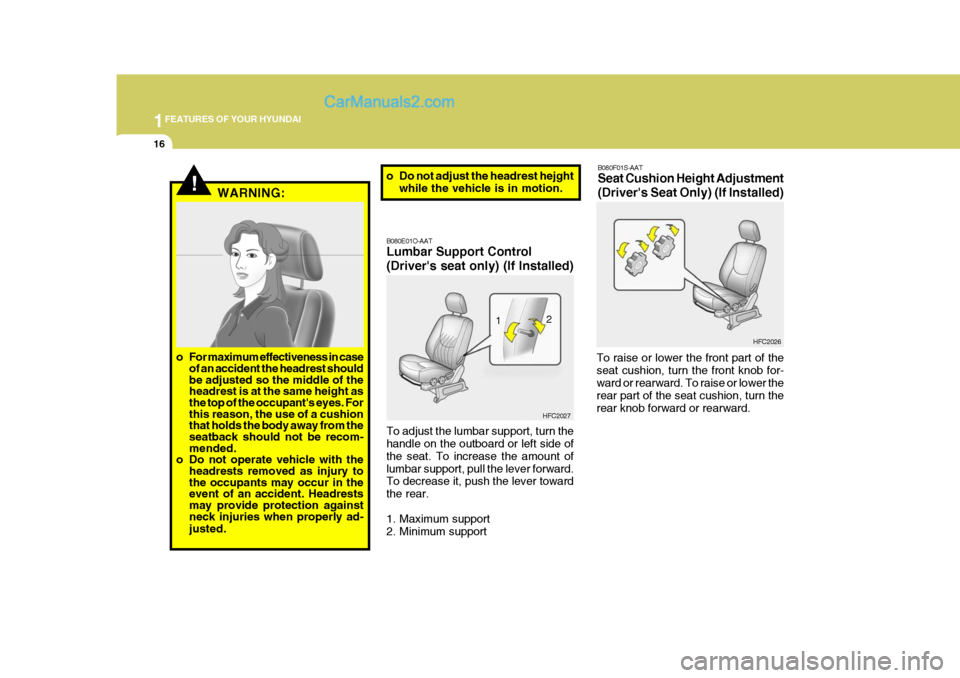
B080E01O-AAT Lumbar Support Control (Driver's seat only) (If Installed) To adjust the lumbar support, turn the handle on the outboard or left side of the seat. To increase the amount oflumbar support, pull the lever forward. To decrease it, push the lever toward the rear.
1. Maximum support
2. Minimum support HFC2027
WARNING:
B080F01S-AAT Seat Cushion Height Adjustment (Driver's Seat Only) (If Installed)
To raise or lower the front part of the seat cushion, turn the front knob for- ward or rearward. To raise or lower the rear part of the seat cushion, turn therear knob forward or rearward. HFC2026
1
2
B080D01JM
o For maximum effectiveness in case of an accident the headrest should be adjusted so the middle of the headrest is at the same height asthe top of the occupant's eyes. For this reason, the use of a cushion that holds the body away from theseatback should not be recom- mended.
o Do not operate vehicle with the headrests removed as injury tothe occupants may occur in the event of an accident. Headrestsmay provide protection against neck injuries when properly ad- justed. o Do not adjust the headrest hejght
while the vehicle is in motion.
Page 29 of 490

1
FEATURES OF YOUR HYUNDAI
17
!
HFC2059
B080G01FC-GAT UNDER TRAY (If installed)
The tray is located under the front passenger seat. It is opened by up and pulling forward. WARNING:
To avoid the possibility of injury in case of an accident or a suddenstop, the tray should be kept closed when the car is in motion. B080H01FC-GAT REAR SEAT Adjusting Seat Forward andRearward To move the seat toward the front or rear, pull the lock release lever up- ward. This will release the seat on itstrack so you can move it forward or rearward to the desired position. When you find the position you want, releasethe lever and slide the seat forward or rearward on its track until it locks into the desired position and cannot bemoved further.
HFC2060B080I01FC-BAT Adjusting Seatback Angle To recline the seatback, push the seatback folding lever toward the head- rest, and release it after the desired seatback angle is achieved.When you recline the seatback to de- sired position, always be sure it has locked into position.
Seatback folding lever
CAUTION:
When reclining the seatback angle, you should be adjust the seatback folding lever with standing.
! HFC2061
Page 42 of 490
1FEATURES OF YOUR HYUNDAI
30
!
If you need to tighten the belt, pull more webbing toward the retractor. When youunbuckle the seat belt and allow it to retract, the retractor will automatically revert back to its normal seated pas-senger emergency locking usage con- dition. NOTE:
o Before installing the child re-
straint system, read the instruc- tions supplied by the child re- straint system manufacturer.
o If the seat belt does not operate as described, have the systemchecked immediately by yourauthorized Hyundai dealer.
WARNING:
Do not install any child restraint sys-tem in the front passenger seat.Should an accident occur and cause the passenger's side airbag to de- ploy, it could severely injure or killan infant or child seated in an infant or child seat. Therefore, only use a child restraint system in the rearseat of your vehicle.
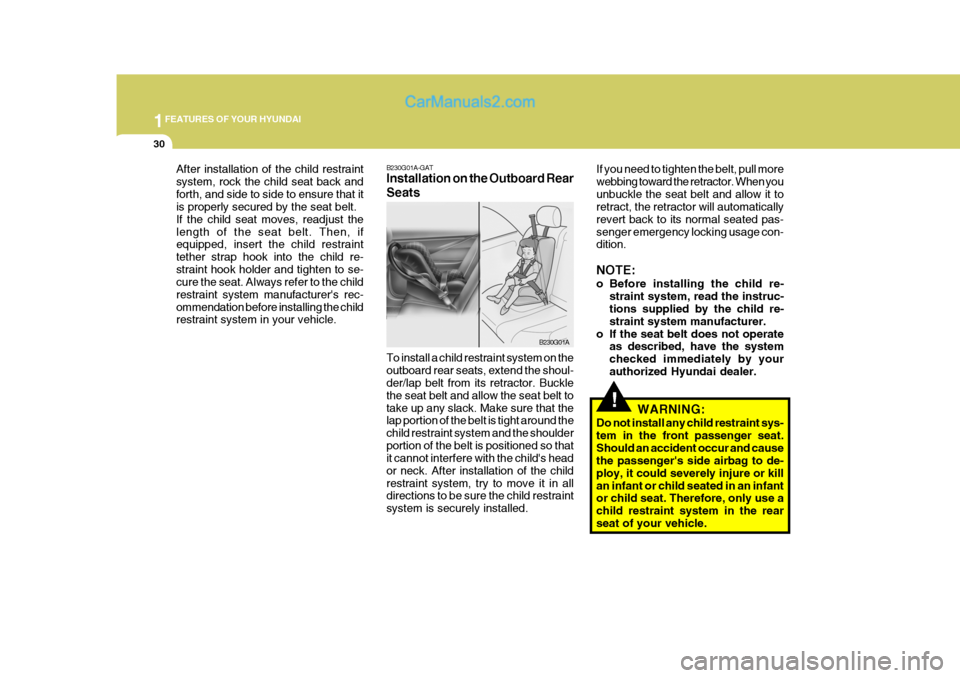
B230G01A-GAT Installation on the Outboard Rear Seats To install a child restraint system on the outboard rear seats, extend the shoul- der/lap belt from its retractor. Buckle the seat belt and allow the seat belt totake up any slack. Make sure that the lap portion of the belt is tight around the child restraint system and the shoulderportion of the belt is positioned so that it cannot interfere with the child's head or neck. After installation of the childrestraint system, try to move it in all directions to be sure the child restraint system is securely installed.
B230G01A
After installation of the child restraintsystem, rock the child seat back andforth, and side to side to ensure that it is properly secured by the seat belt. If the child seat moves, readjust thelength of the seat belt. Then, if equipped, insert the child restraint tether strap hook into the child re-straint hook holder and tighten to se- cure the seat. Always refer to the child restraint system manufacturer's rec-ommendation before installing the child restraint system in your vehicle.
Page 55 of 490
1
FEATURES OF YOUR HYUNDAI
43
B240C01HP
!
o Modification to SRS components
or wiring, including the addition of any kind of badges to the pad covers or modifications to the body structure, can adverselyaffect SRS performance and lead to possible injury.
o For cleaning the airbag pad cov- ers, use only a soft, dry cloth orone which has been moistened with plain water. Solvents orcleaners could adversely affect the airbag covers and proper deployment of the system.
o No objects should be placed over or near the airbag modules onthe steering wheel, instrumentpanel, and the front passenger's panel above the glove box, be- cause any such object couldcause harm if the vehicle is in a crash severe enough to cause the airbags to inflate.
o If the airbags inflate, they must be replaced by an authorizedHyundai dealer.
o Do not tamper with or discon- nect SRS wiring, or other com-ponents of the SRS system.
WARNING:
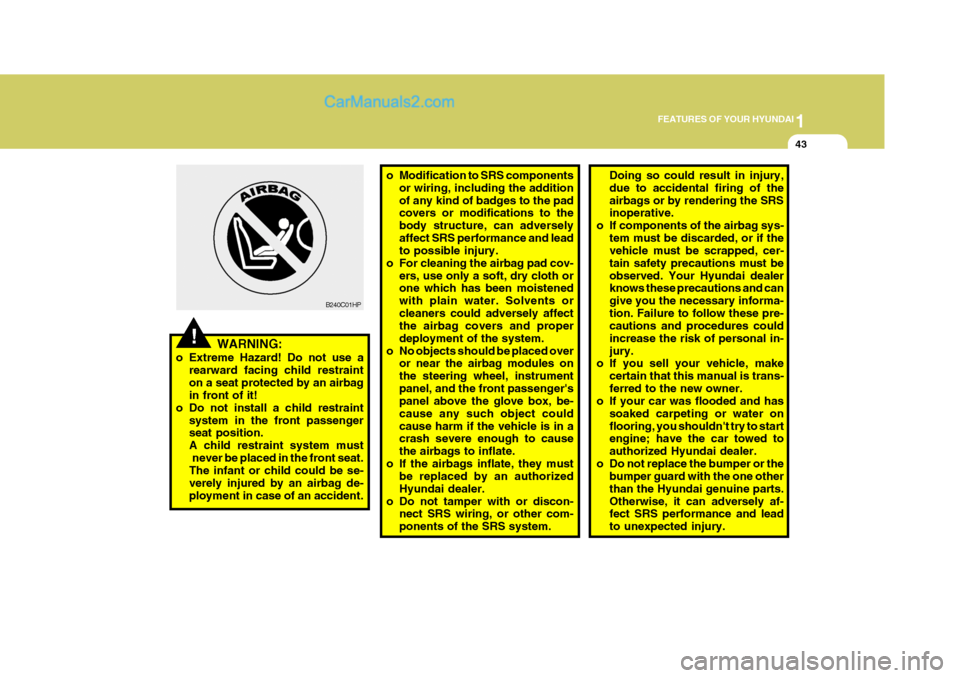
o Extreme Hazard! Do not use a rearward facing child restrainton a seat protected by an airbag in front of it!
o Do not install a child restraint system in the front passengerseat position. A child restraint system must
never be placed in the front seat. The infant or child could be se- verely injured by an airbag de-ployment in case of an accident. Doing so could result in injury,due to accidental firing of theairbags or by rendering the SRS inoperative.
o If components of the airbag sys-
tem must be discarded, or if thevehicle must be scrapped, cer- tain safety precautions must beobserved. Your Hyundai dealer knows these precautions and can give you the necessary informa-tion. Failure to follow these pre- cautions and procedures could increase the risk of personal in-jury.
o If you sell your vehicle, make
certain that this manual is trans-ferred to the new owner.
o If your car was flooded and has
soaked carpeting or water onflooring, you shouldn't try to start engine; have the car towed to authorized Hyundai dealer.
o Do not replace the bumper or the bumper guard with the one otherthan the Hyundai genuine parts.Otherwise, it can adversely af- fect SRS performance and lead to unexpected injury.
Page 61 of 490
1
FEATURES OF YOUR HYUNDAI
49
B260C01A-AAT O/D OFF Indicator Light (If installed)
When the overdrive switch is turned on, the overdrive off indicator will goout. This amber indicator will be illumi- nated when the overdrive switch is turned off. (Auto T/A only)
B265C01LZ-AAT Electronic Stability Program IndicatorLights (If installed)
The electronic stability program indica- tors change operation according to the ignition switch position and whether thesystem is in operation or not. They will illuminate when the ignition key is turned to the "ON" position, butshould go out after three seconds. If the ESP or ESP-OFF indicator stays on, take your car to your authorized Hyundaidealer and have the system checked. See section 2 for more information about the ESP.
!
B260H03A-AAT Parking Brake/Low Brake
Fluid Level Warning Light other time, you should slow the vehicle and bring it to a complete stop in a safelocation off the roadway. The brake warning light indicates that the brake fluid level in the brake mas-ter cylinder is low and hydraulic brake fluid conforming to DOT 3 or DOT 4 specifications should be added. Afteradding fluid, if no other trouble is found, the car should be immediately and carefully driven to a Hyundai dealer forinspection. If further trouble is experi- enced, the vehicle should not be driven at all but taken to a dealer by aprofessional towing service. Your Hyundai is equipped with dual- diagonal braking systems. This meansyou still have braking on two wheels even if one of the dual systems should fail. With only one of the dual systemsworking, more than normal pedal travel and greater pedal pressure are re- quired to stop the car. Also, the car willnot stop in as short a distance with only half of the brake system working. If the brakes fail while you are driving, shiftto a lower gear for additional engine braking and stop the car as soon as it is safe to do so.
WARNING:
If you suspect brake trouble, have your brakes checked by a Hyundaidealer as soon as possible. Driving your car with a problem in either the brake electrical system or brakehydraulic system is dangerous, and could result in a serious injury or death. Warning Light Operation The parking brake / low brake fluid level warning light should come on when the parking brake is applied and the igni-tion switch is turned to "ON" or "START". After the engine is started, the light should go out when the park-ing brake is released. If the parking brake is not applied, the warning light should come on when theignition switch is turned to "ON" or "START", then go out when the engine starts. If the light comes on at any
Page 72 of 490
1FEATURES OF YOUR HYUNDAI
60
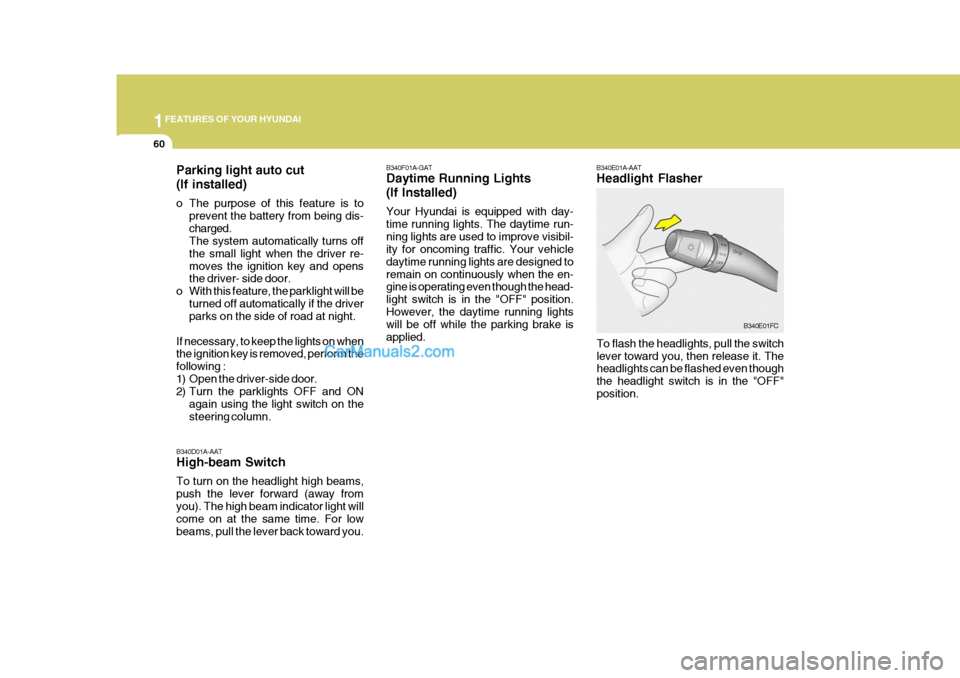
B340E01A-AAT Headlight Flasher
To flash the headlights, pull the switch lever toward you, then release it. The headlights can be flashed even though the headlight switch is in the "OFF"position. B340E01FC
B340D01A-AAT High-beam Switch To turn on the headlight high beams, push the lever forward (away fromyou). The high beam indicator light will come on at the same time. For low beams, pull the lever back toward you. B340F01A-GAT Daytime Running Lights (If Installed) Your Hyundai is equipped with day- time running lights. The daytime run-ning lights are used to improve visibil- ity for oncoming traffic. Your vehicle daytime running lights are designed toremain on continuously when the en- gine is operating even though the head- light switch is in the "OFF" position.However, the daytime running lights will be off while the parking brake is applied.
Parking light auto cut (If installed)
o The purpose of this feature is to
prevent the battery from being dis- charged. The system automatically turns off the small light when the driver re-moves the ignition key and opens the driver- side door.
o With this feature, the parklight will be turned off automatically if the driverparks on the side of road at night.
If necessary, to keep the lights on whenthe ignition key is removed, perform the following :
1) Open the driver-side door.
2) Turn the parklights OFF and ON again using the light switch on the steering column.