navigation Hyundai Nexo 2019 Owner's Manual
[x] Cancel search | Manufacturer: HYUNDAI, Model Year: 2019, Model line: Nexo, Model: Hyundai Nexo 2019Pages: 560, PDF Size: 24.2 MB
Page 14 of 560
I
IN
N S
ST
T R
R U
U M
M E
EN
N T
T
P
P A
A N
N E
EL
L
O
O V
VE
ER
R V
V I
IE
E W
W
The actual shape may differ from the illustration.
1-5
Your vehicle at a glance
1
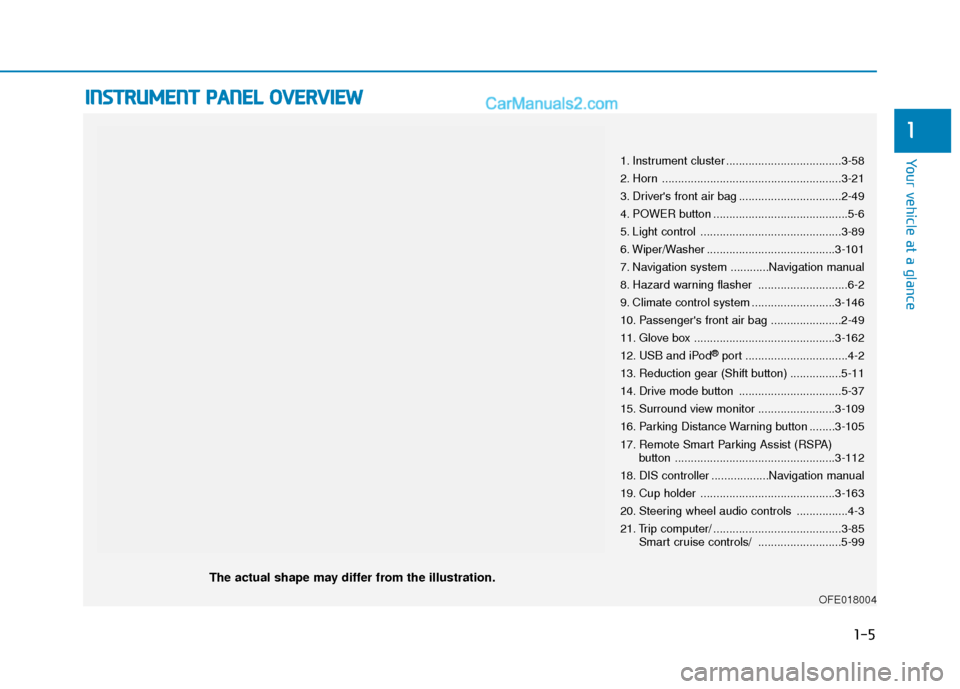
1. Instrument cluster ....................................3-58
2. Horn ........................................................3-21
3. Driver's front air bag ................................2-49
4. POWER button ..........................................5-6
5. Light control ............................................3-89
6. Wiper/Washer ........................................3-101
7. Navigation system ............Navigation manual
8. Hazard warning flasher ............................6-2
9. Climate control system ..........................3-146
10. Passenger's front air bag ......................2-49
11. Glove box ............................................3-162
12. USB and iPod
®port ................................4-2
13. Reduction gear (Shift button) ................5-11
14. Drive mode button ................................5-37
15. Surround view monitor ........................3-109
16. Parking Distance Warning button ........3-105
17. Remote Smart Parking Assist (RSPA) button ..................................................3-112
18. DIS controller ..................Navigation manual
19. Cup holder ..........................................3-163
20. Steering wheel audio controls ................4-3
21. Trip computer/ ........................................3-85 Smart cruise controls/ ..........................5-99
OFE018004
Page 17 of 560
2-2
You will find many safety precautions
and recommendations throughout
this section, and throughout this
manual. The safety precautions in
this section are among the most
important.
Always Wear Your Seat Belt
A seat belt is your best protection in
all types of accidents. Air bags are
designed to supplement seat belts,
not replace them. So even though
your vehicle is equipped with air
bags, ALWAYS make sure you and
your passengers wear your seat
belts, and wear them properly.
Restrain All Children
All children under age 13 should ride
in your vehicle properly restrained in
a rear seat, not the front seat. Infants
and small children should be
restrained in an appropriate child
restraint. Larger children should use
a booster seat with the lap/shoulder
belt until they can use the seat belt
properly without a booster seat.
Air Bag Hazards
While air bags can save lives, they
can also cause serious or fatal
injuries to occupants who sit too
close to them, or who are not prop-
erly restrained. Infants, young chil-
dren, and shorter adults are at the
greatest risk of being injured by an
inflating air bag. Follow all instruc-
tions and warnings in this manual.
Driver Distraction
Driver distraction presents a serious
and potentially deadly danger, espe-
cially for inexperienced drivers.
Safety should be the first concern
when behind the wheel and drivers
need to be aware of the wide array of
potential distractions, such as
drowsiness, reaching for objects,
eating, personal grooming, other
passengers, and using cellular
phones.
Drivers can become distracted when
they take their eyes and attention off
the road or their hands off the wheel
to focus on activities other than driv-
ing. To reduce your risk of distraction
or getting into an accident:
• ALWAYS set up your mobiledevices (i.e., MP3 players, phones,
navigation units, etc.) when your
vehicle is parked or safely stopped.
I IM
M P
PO
O R
RT
TA
A N
N T
T
S
S A
A F
FE
E T
T Y
Y
P
P R
R E
EC
CA
A U
U T
TI
IO
O N
NS
S
Safety system of your vehicle
Page 132 of 560
3-45
Convenient features of your vehicle
3
Power Liftgate (if equipped)
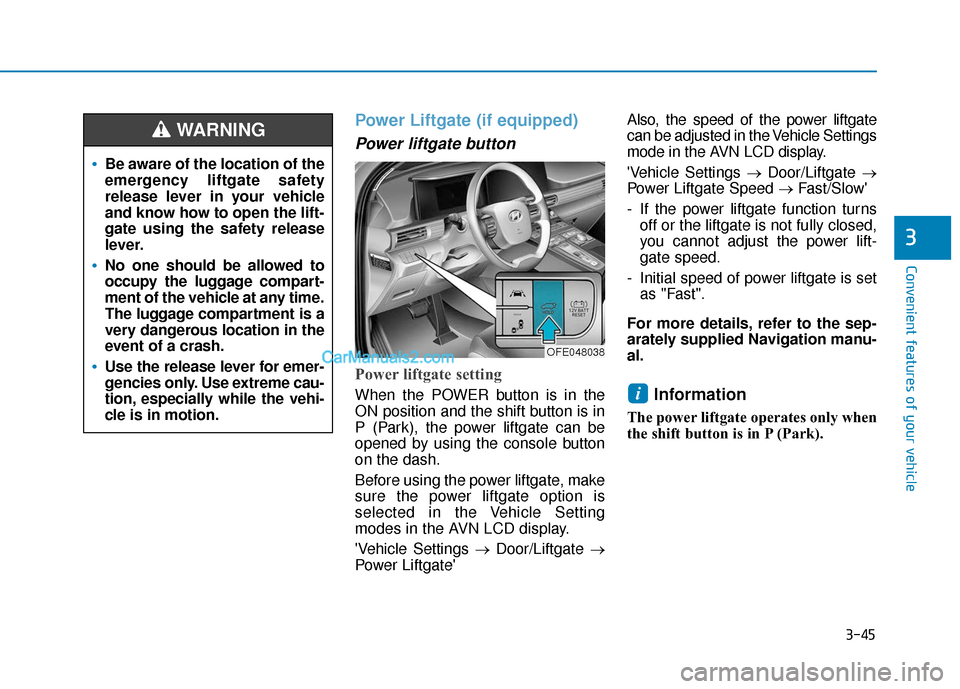
Power liftgate button
Power liftgate setting
When the POWER button is in the
ON position and the shift button is in
P (Park), the power liftgate can be
opened by using the console button
on the dash.
Before using the power liftgate, make
sure the power liftgate option is
selected in the Vehicle Setting
modes in the AVN LCD display.
'Vehicle Settings →Door/Liftgate →
Power Liftgate' Also, the speed of the power liftgate
can be adjusted in the Vehicle Settings
mode in the AVN LCD display.
'Vehicle Settings →
Door/Liftgate →
Power Liftgate Speed → Fast/Slow'
- If the power liftgate function turns off or the liftgate is not fully closed,
you cannot adjust the power lift-
gate speed.
- Initial speed of power liftgate is set as "Fast".
For more details, refer to the sep-
arately supplied Navigation manu-
al.Information
The power liftgate operates only when
the shift button is in P (Park).
i
Be aware of the location of the
emergency liftgate safety
release lever in your vehicle
and know how to open the lift-
gate using the safety release
lever.
No one should be allowed to
occupy the luggage compart-
ment of the vehicle at any time.
The luggage compartment is a
very dangerous location in the
event of a crash.
Use the release lever for emer-
gencies only. Use extreme cau-
tion, especially while the vehi-
cle is in motion.
WARNING
OFE048038
Page 139 of 560
3-52
Convenient features of your vehicle
How to use the Smart Liftgate
The hands-free smart liftgate system
can be opened automatically when
the following conditions are met:
The Smart Liftgate option isenabled in the User Settings in the
AVN screen.
The Smart Liftgate is activated and ready 15 seconds after all the
doors are closed and locked
The Smart Liftgate will open when the smart key is detected in the
area behind the vehicle for 3 sec-
ondsInformation
The Smart Liftgate will NOT operate
when:
• Any door is open, or all doors areclosed but not locked
• The smart key is detected within 15 seconds from when the doors were
closed and locked
• For vehicles equipped with illumi- nated exterior front door handles, if
the smart key is detected within 15
seconds from when the doors were
closed and locked or if the smart key
is within 60 inches (1.5m) from the
front door handles
• The smart key is in the vehicle. 1. Setting
To activate the Smart Liftgate, go to
"Vehicle settings →
Door/Tailgate"
and select Smart Tailgate (Liftgate)
on the AVN screen.
For more information refer to the
separately supplied Navigation
manual.
2.Detect and Alert
The Smart Liftgate detecting area
extends approximately 20-40 in (50-
100 cm) behind the vehicle. If you
are positioned in the detecting area
and are carrying the smart key, the
hazard warning lights will blink and
the chime will sound to alert you that
the smart liftgate will open.
Information
Do not approach the detecting area if
you do not want the liftgate to open. If
you have unintentionally entered the
detecting area and the hazard warn-
ing lights and chime starts to operate,
move away from the area behind the
vehicle with the smart key. The lift-
gate will remain closed.
i
i
Page 170 of 560
3-83
Convenient features of your vehicle
3
Trip computer mode
The trip computer mode displays
information related to vehicle driving
parameters including fuel economy,
tripmeter information and vehicle
speed.
For more details, refer to "Trip
Computer" in this chapter.
Turn By Turn (TBT) mode
This mode displays the state of the
navigation.
Information mode
Tire Pressure
This mode displays information relat-
ed to Tire Pressure.
For more details, refer to "Tire
Pressure Monitoring System
(TPMS)" in chapter 6.
OFE048154NOFE048119NOFE048155L
Page 182 of 560
3-95
Convenient features of your vehicle
3
One-touch turn signal function
To activate the One Touch Turn
Signal function, push the turn signal
lever up or down to position (B) and
then release it.
The lane change signals will blink 3,
5 or 7 times.
You can activate or deactivate the
One Touch Turn Signal function or
choose the number of blinks (3, 5, or
7) from the Vehicle Settings mode in
the AVN screen.
For more details, refer to the sepa-
rately supplied Navigation manual.
Battery saver function
The purpose of this feature is to pre-
vent the battery from being dis-
charged. The system automatically
turns off the parking lamp when the
driver turns the vehicle off and opens
the driver-side door.
With this feature, the parking lamps
will turn off automatically if the driver
parks on the side of road at night.
If necessary, to keep the lamps on
when the vehicle is turned off, perform
the following:
1) Open the driver-side door.
2) Turn the parking lamps OFF andON again using the headlamp
switch on the steering column.
Headlight time-out function (if equipped)
If the POWER button is placed in the
ACC position or the OFF position
with the headlamps ON, the head-
lamps (and/or parking lamps) remain
on for about 5 minutes. However, if
the driver's door is opened and
closed, the headlights are turned off
after 15 seconds. Also, with the vehi-
cle off if the driver's door is opened
and closed, the headlamps (and/or
parking lamps) are turned off after 15
seconds.
The headlamps (and/or parking
lamps) can be turned off by pressing
the lock button on the smart key
twice or turning the light switch to the
OFF or AUTO position.
You can activate or deactivate the
Headlamp Delay function from the
Vehicle Settings mode (Light) on the
AVN screen.
For more details, refer to the sepa-
rately supplied Navigation manual.
Page 186 of 560
3-99
Convenient features of your vehicle
3
Escort light
When the vehicle is turned OFF and
the driver's door is opened, the pud-
dle lamp will come on for 30 sec-
onds. If the driver's door is closed
within the 30 seconds, the puddle
lamp will turn off after 15 seconds. If
the driver's door is closed and
locked, the puddle lamp will turn off
immediately.
The Puddle Lamp Escort Light will
turn on only the first time the driver's
door is opened after the vehicle is
turned off.
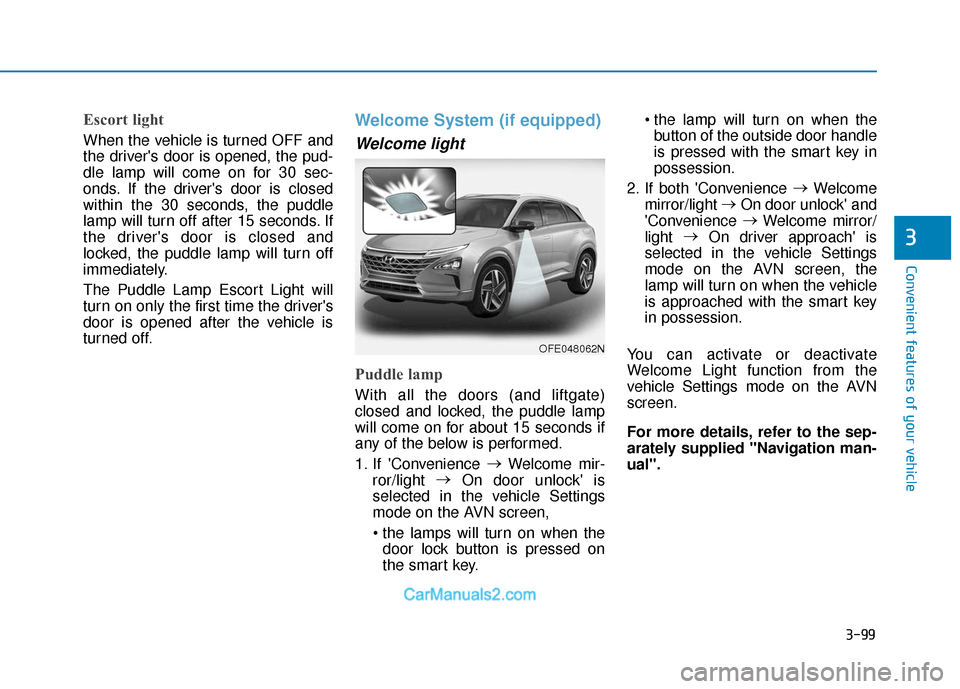
Welcome System (if equipped)
Welcome light
Puddle lamp
With all the doors (and liftgate)
closed and locked, the puddle lamp
will come on for about 15 seconds if
any of the below is performed.
1. If 'Convenience →
Welcome mir-
ror/light →
On door unlock' is
selected in the vehicle Settings
mode on the AVN screen,
door lock button is pressed on
the smart key. the lamp will turn on when the
button of the outside door handle
is pressed with the smart key in
possession.
2. If both 'Convenience →
Welcome
mirror/light →
On door unlock' and
'Convenience →
Welcome mirror/
light →
On driver approach' is
selected in the vehicle Settings
mode on the AVN screen, the
lamp will turn on when the vehicle
is approached with the smart key
in possession.
You can activate or deactivate
Welcome Light function from the
vehicle Settings mode on the AVN
screen.
For more details, refer to the sep-
arately supplied "Navigation man-
ual".
OFE048062N
Page 206 of 560
3-119
Convenient features of your vehicle
3
How the System Works
(Smart Parking)
Smart Parking is available with the
driver on board. Make sure the con-
ditions available before activating the
Smart parking function.
1. Select Smart Parking:Press the RSPA button with the
shift lever placed in D (Drive) or N
(Neutral) position.
❈However, the Smart Exit is
selected if you press the RSPA
button when the gear is in N
(Neutral) position after the initial
startup.
2. Search for parking space: Slowly move forward below 12 mph (20
km/h)
3. Search complete: Automatic search by sensor.
However, check the actual parking
environment before parking the
vehicle.
4. Select parking type: Reverse (left/right), parallel (left/right)
5. Operating instructions: Smart Parking/Remote Smart Parking 6. Smart Parking assist: Steering
wheel, gear shift and vehicle
speed control (reverse parking).
7. Parking complete: Smart Parking complete after reaching the park-
ing position
❈ After the parking is complete,
arrange the vehicle position manu-
ally, if necessary.
❈ You can use Smart Parking after
navigation or home screen display
on AVN (You cannot use Smart
Parking if you don't choose
"Confirm" on AVN booting)
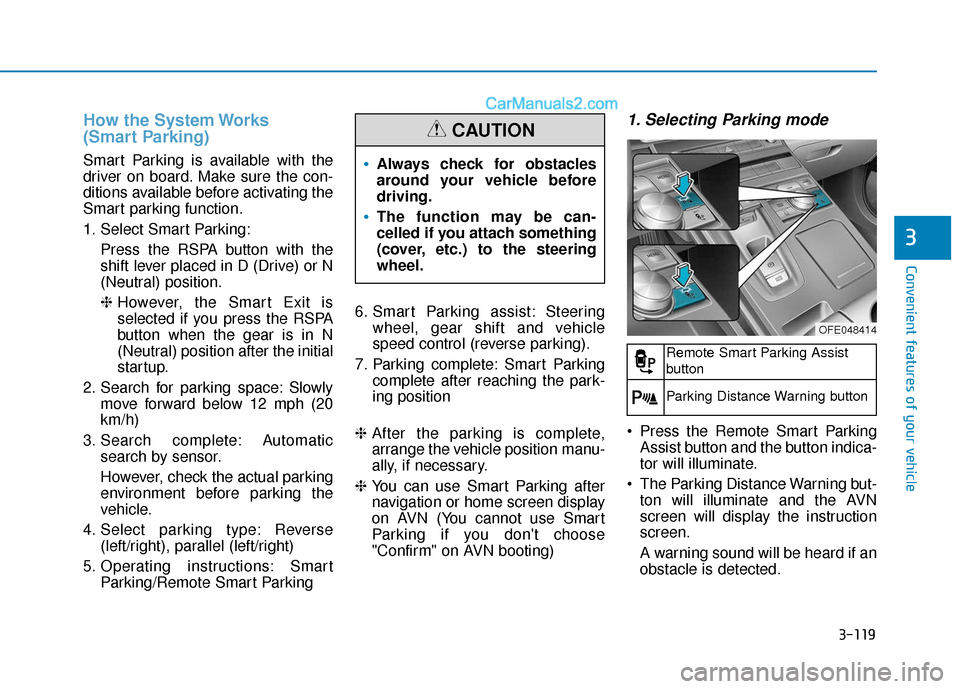
1. Selecting Parking mode
Press the Remote Smart Parking
Assist button and the button indica-
tor will illuminate.
The Parking Distance Warning but- ton will illuminate and the AVN
screen will display the instruction
screen.
A warning sound will be heard if an
obstacle is detected.
Always check for obstacles
around your vehicle before
driving.
The function may be can-
celled if you attach something
(cover, etc.) to the steering
wheel.
CAUTION
OFE048414
Remote Smart Parking Assist
button
Parking Distance Warning button
Page 214 of 560
3-127
Convenient features of your vehicle
3
❈ You can use Smart Parking after
navigation or home screen display
on AVN(You cannot use Smart
Parking if you don't choose
"Confirm" on AVN booting)
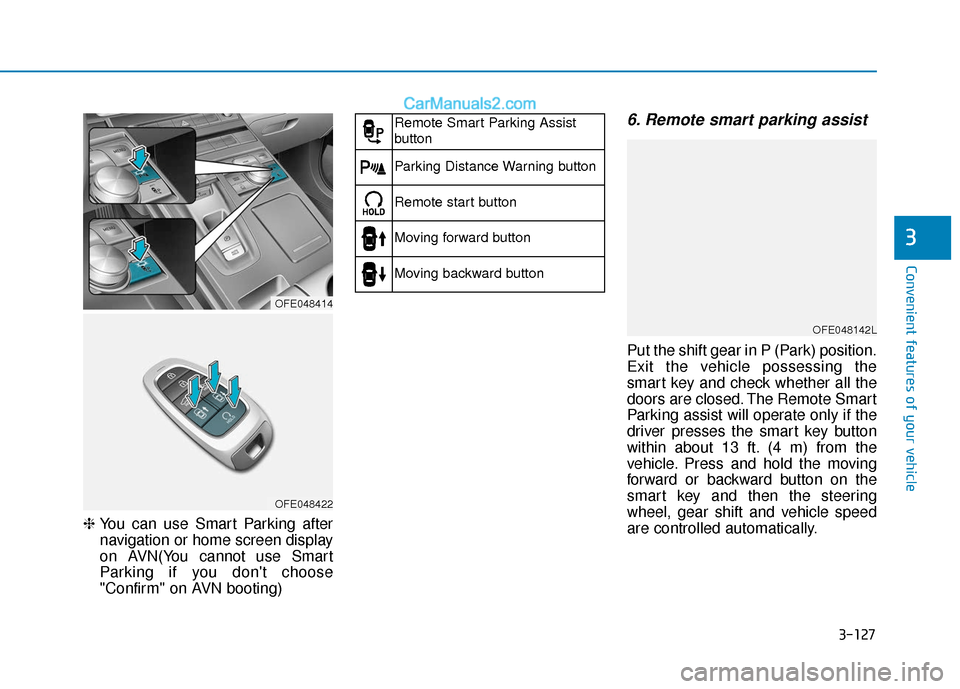
6. Remote smart parking assist
Put the shift gear in P (Park) position.
Exit the vehicle possessing the
smart key and check whether all the
doors are closed. The Remote Smart
Parking assist will operate only if the
driver presses the smart key button
within about 13 ft. (4 m) from the
vehicle. Press and hold the moving
forward or backward button on the
smart key and then the steering
wheel, gear shift and vehicle speed
are controlled automatically.
OFE048414
OFE048422
Remote Smart Parking Assist
button
Parking Distance Warning button
Remote start button
Moving forward button
Moving backward button
OFE048142L
Page 218 of 560
3-131
Convenient features of your vehicle
3
❈ You can use Smart Parking after
navigation or home screen display
on AVN(You cannot use Smart
Parking if you don't choose
"Confirm" on AVN booting)1. Selecting smart exit mode
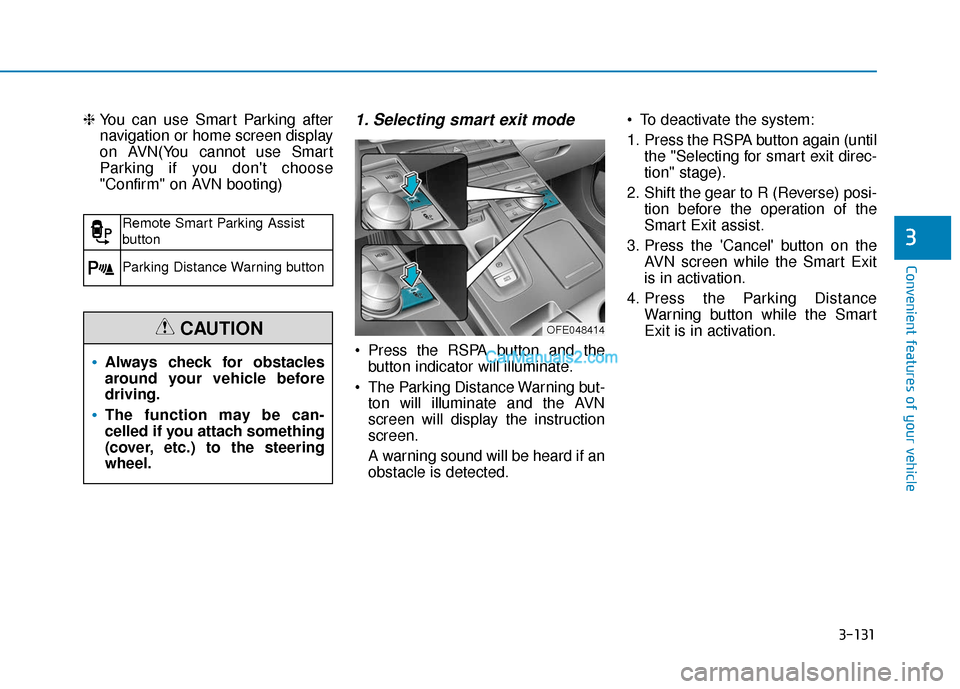
Press the RSPA button and the
button indicator will illuminate.
The Parking Distance Warning but- ton will illuminate and the AVN
screen will display the instruction
screen.
A warning sound will be heard if an
obstacle is detected. To deactivate the system:
1. Press the RSPA button again (until
the "Selecting for smart exit direc-
tion" stage).
2. Shift the gear to R (Reverse) posi- tion before the operation of the
Smart Exit assist.
3. Press the 'Cancel' button on the AVN screen while the Smart Exit
is in activation.
4. Press the Parking Distance Warning button while the Smart
Exit is in activation.
Remote Smart Parking Assist
button
Parking Distance Warning button
Always check for obstacles
around your vehicle before
driving.
The function may be can-
celled if you attach something
(cover, etc.) to the steering
wheel.
CAUTIONOFE048414