sensor Hyundai Palisade 2020 User Guide
[x] Cancel search | Manufacturer: HYUNDAI, Model Year: 2020, Model line: Palisade, Model: Hyundai Palisade 2020Pages: 611, PDF Size: 18.86 MB
Page 120 of 611
3-24
Convenient features of your vehicle
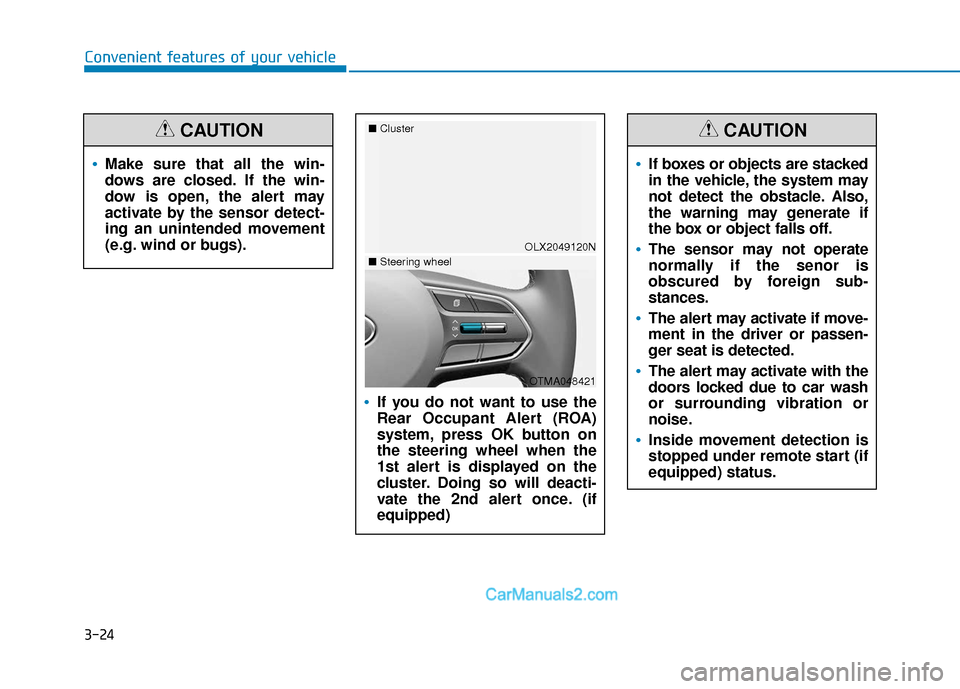
If you do not want to use the
Rear Occupant Alert (ROA)
system, press OK button on
the steering wheel when the
1st alert is displayed on the
cluster. Doing so will deacti-
vate the 2nd alert once. (if
equipped)
OLX2049120N
■
Cluster
OTMA048421
■Steering wheel
If boxes or objects are stacked
in the vehicle, the system may
not detect the obstacle. Also,
the warning may generate if
the box or object falls off.
The sensor may not operate
normally if the senor is
obscured by foreign sub-
stances.
The alert may activate if move-
ment in the driver or passen-
ger seat is detected.
The alert may activate with the
doors locked due to car wash
or surrounding vibration or
noise.
Inside movement detection is
stopped under remote start (if
equipped) status.
CAUTION
Make sure that all the win-
dows are closed. If the win-
dow is open, the alert may
activate by the sensor detect-
ing an unintended movement
(e.g. wind or bugs).
CAUTION
Page 130 of 611
3-34
Convenient features of your vehicle
Electrochromatic Mirror (ECM)(if equipped)
Some vehicles come equipped with
an electrochromic mirror that helps
control glare while driving at night or
under low light driving conditions.
When the engine is running, the
glare is automatically controlled by
the sensor mounted in the rearview
mirror. The sensor detects the light
level around the vehicle, and auto-
matically adjusts to control the head-
lamp glare from vehicles behind you.
Whenever the shift button is placed
in R (Reverse), the mirror will auto-
matically go to the brightest setting in
order to improve the driver’s view
behind the vehicle.
[A] : Indicator
When cleaning the mirror, use a
paper towel or similar material
dampened with glass cleaner. Do
not spray glass cleaner directly on
the mirror as that may cause the
liquid cleaner to enter the mirror
housing.
Electrochromatic Mirror (ECM)with homelink system (if equipped)
To operate the electric rearview
mirror
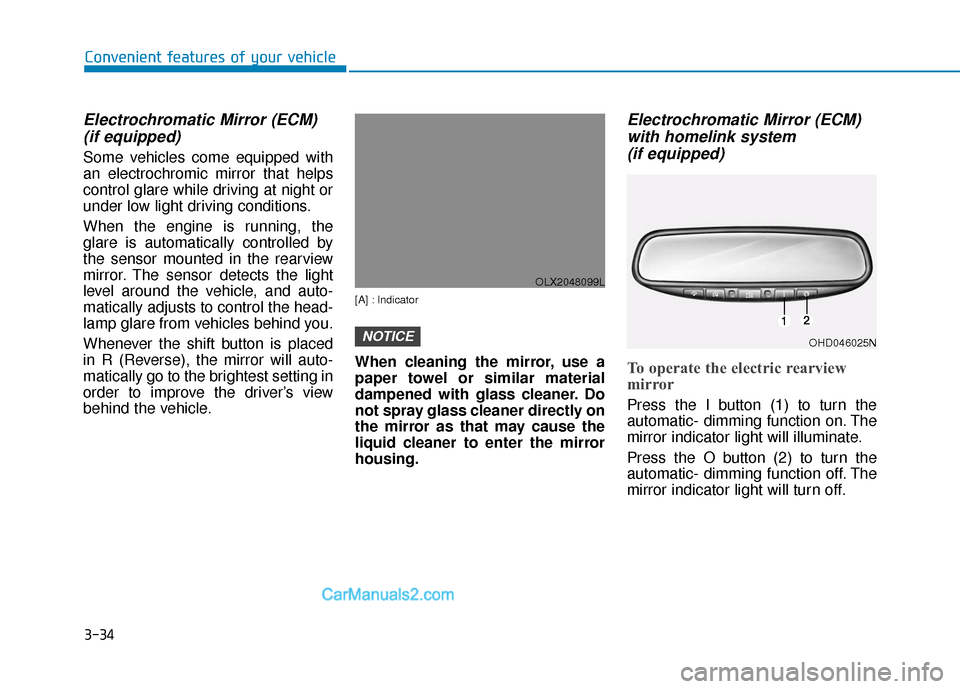
Press the I button (1) to turn the
automatic- dimming function on. The
mirror indicator light will illuminate.
Press the O button (2) to turn the
automatic- dimming function off. The
mirror indicator light will turn off.
NOTICE
OLX2048099L
OHD046025N
Page 131 of 611
3-35
Convenient features of your vehicle
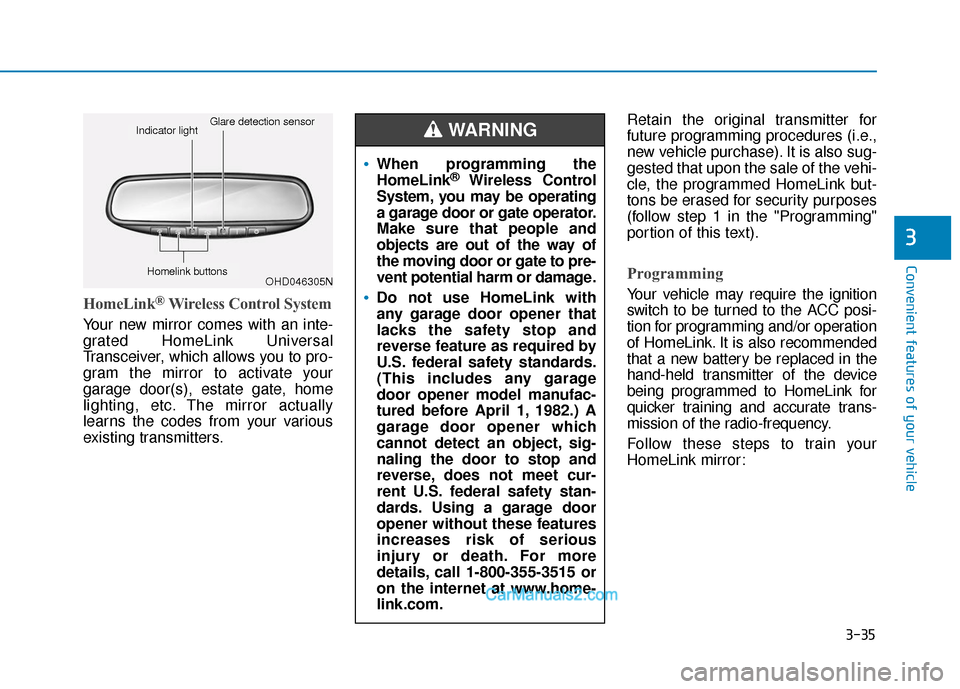
HomeLink®Wireless Control System
Your new mirror comes with an inte-
grated HomeLink Universal
Transceiver, which allows you to pro-
gram the mirror to activate your
garage door(s), estate gate, home
lighting, etc. The mirror actually
learns the codes from your various
existing transmitters.Retain the original transmitter for
future programming procedures (i.e.,
new vehicle purchase). It is also sug-
gested that upon the sale of the vehi-
cle, the programmed HomeLink but-
tons be erased for security purposes
(follow step 1 in the "Programming"
portion of this text).
Programming
Your vehicle may require the ignition
switch to be turned to the ACC posi-
tion for programming and/or operation
of HomeLink. It is also recommended
that a new battery be replaced in the
hand-held transmitter of the device
being programmed to HomeLink for
quicker training and accurate trans-
mission of the radio-frequency.
Follow these steps to train your
HomeLink mirror:
3
OHD046305N
Glare detection sensorIndicator light
Homelink buttons
When programming the
HomeLink®Wireless Control
System, you may be operating
a garage door or gate operator.
Make sure that people and
objects are out of the way of
the moving door or gate to pre-
vent potential harm or damage.
Do not use HomeLink with
any garage door opener that
lacks the safety stop and
reverse feature as required by
U.S. federal safety standards.
(This includes any garage
door opener model manufac-
tured before April 1, 1982.) A
garage door opener which
cannot detect an object, sig-
naling the door to stop and
reverse, does not meet cur-
rent U.S. federal safety stan-
dards. Using a garage door
opener without these features
increases risk of serious
injury or death. For more
details, call 1-800-355-3515 or
on the internet at www.home-
link.com.
WARNING
Page 228 of 611
3-132
Convenient features of your vehicle
L
LI
IG
G H
H T
TI
IN
N G
G
Exterior Lights
Lighting control
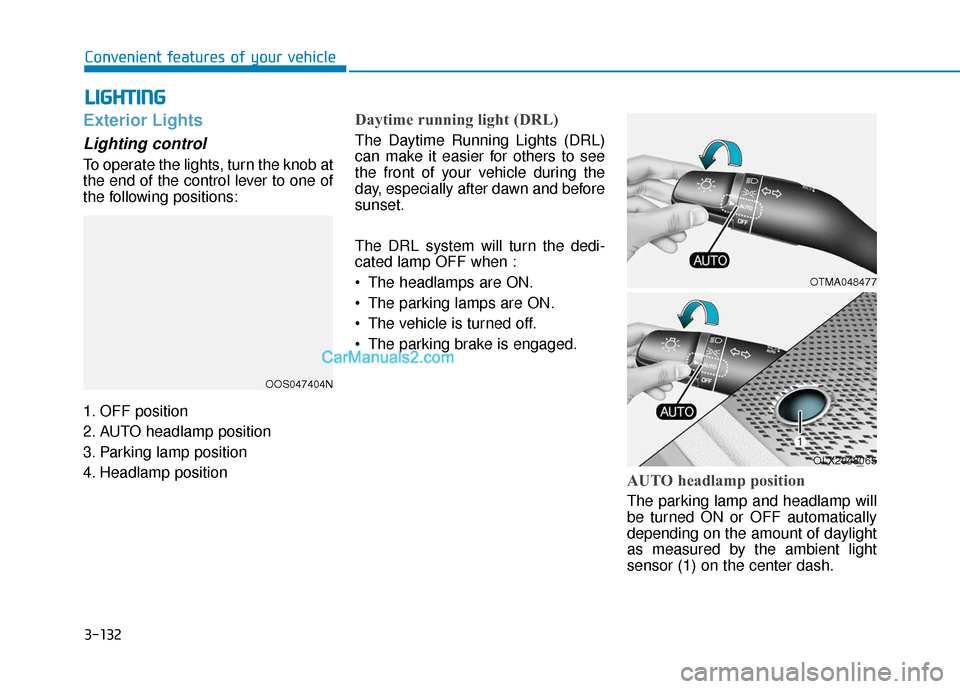
To operate the lights, turn the knob at
the end of the control lever to one of
the following positions:
1. OFF position
2. AUTO headlamp position
3. Parking lamp position
4. Headlamp position
Daytime running light (DRL)
The Daytime Running Lights (DRL)
can make it easier for others to see
the front of your vehicle during the
day, especially after dawn and before
sunset.
The DRL system will turn the dedi-
cated lamp OFF when :
• The headlamps are ON.
The parking lamps are ON.
The vehicle is turned off.
The parking brake is engaged.
AUTO headlamp position
The parking lamp and headlamp will
be turned ON or OFF automatically
depending on the amount of daylight
as measured by the ambient light
sensor (1) on the center dash.
OOS047404N
OTMA048477
OLX2048065
Page 229 of 611
3-133
Convenient features of your vehicle
3
Even with the AUTO headlamp fea-
ture in operation, it is recommended
to manually turn ON the headlamps
when driving at night or in a fog, driv-
ing in the rain, or when you enter
dark areas, such as tunnels and
parking facilities.
• Do not cover or spill anything onthe sensor (1) located in front of
the instrument panel.
Do not clean the sensor using a window cleaner, the cleanser may
leave a light film which could
interfere with sensor operation.
If your vehicle has window tint or other types of metallic coat-
ing on the front windshield, the
AUTO headlamp system may not
work properly.
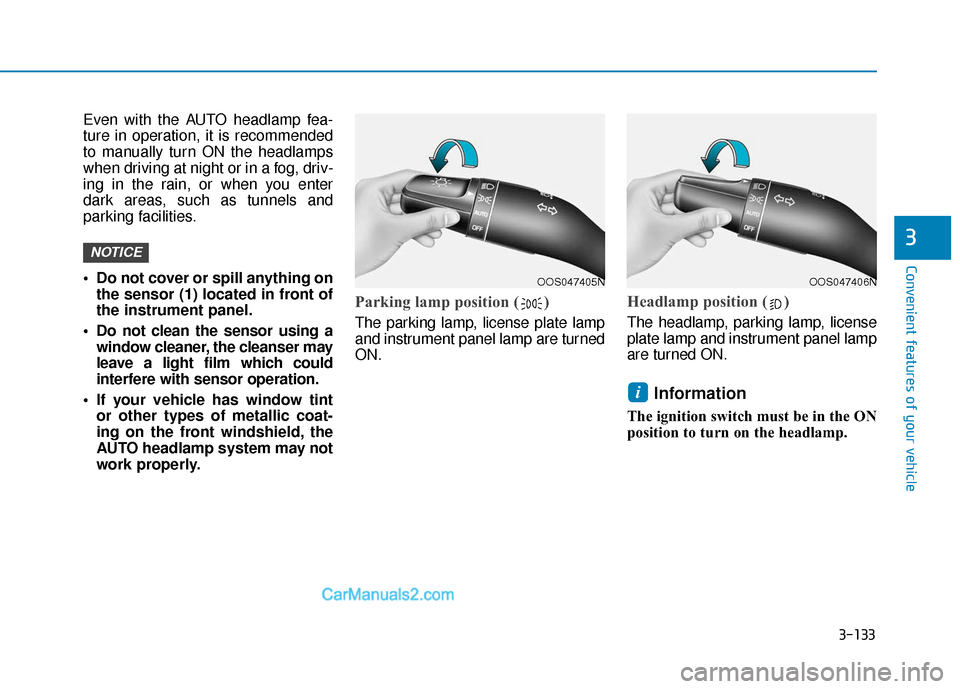
Parking lamp position ( )
The parking lamp, license plate lamp
and instrument panel lamp are turned
ON.
Headlamp position ( )
The headlamp, parking lamp, license
plate lamp and instrument panel lamp
are turned ON.
Information
The ignition switch must be in the ON
position to turn on the headlamp.
i
NOTICE
OOS047405NOOS047406N
Page 240 of 611
3-144
Convenient features of your vehicle
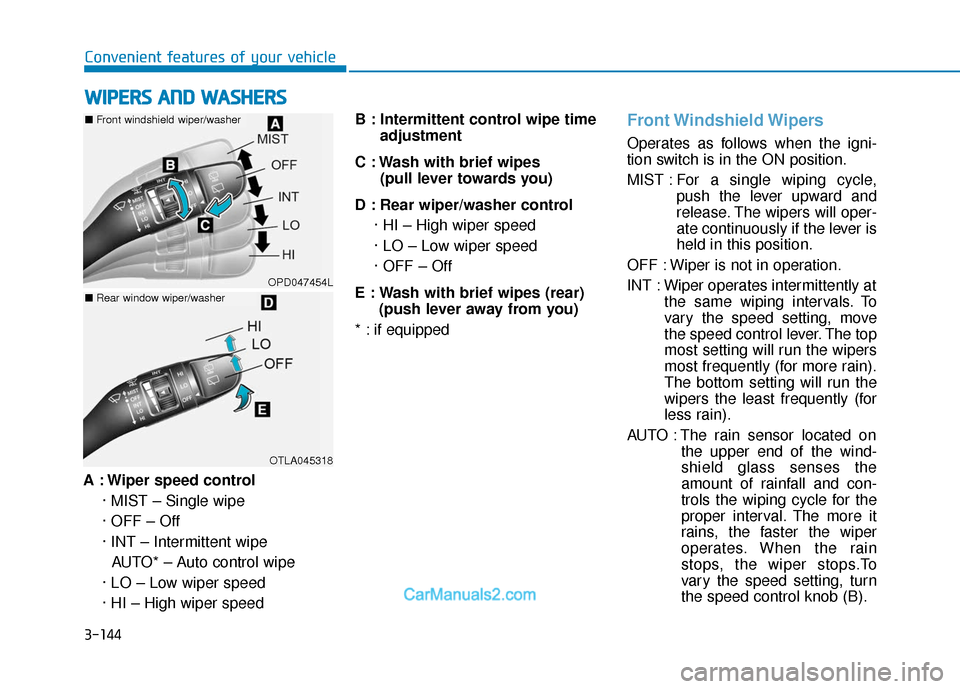
A : Wiper speed control · MIST – Single wipe
· OFF – Off
· INT – Intermittent wipeAUTO* – Auto control wipe
· LO – Low wiper speed
· HI – High wiper speed B : Intermittent control wipe time
adjustment
C : Wash with brief wipes (pull lever towards you)
D : Rear wiper/washer control · HI – High wiper speed
· LO – Low wiper speed
· OFF – Off
E : Wash with brief wipes (rear) (push lever away from you)
* : if equipped
Front Windshield Wipers
Operates as follows when the igni-
tion switch is in the ON position.
MIST : For a single wiping cycle,
push the lever upward and
release. The wipers will oper-
ate continuously if the lever is
held in this position.
OFF : Wiper is not in operation.
INT : Wiper operates intermittently at the same wiping intervals. To
vary the speed setting, move
the speed control lever. The top
most setting will run the wipers
most frequently (for more rain).
The bottom setting will run the
wipers the least frequently (for
less rain).
AUTO : The rain sensor located on the upper end of the wind-
shield glass senses the
amount of rainfall and con-
trols the wiping cycle for the
proper interval. The more it
rains, the faster the wiper
operates. When the rain
stops, the wiper stops.To
vary the speed setting, turn
the speed control knob (B).
W WI
IP
P E
ER
R S
S
A
A N
N D
D
W
W A
AS
SH
H E
ER
R S
S
OPD047454L
OTLA045318
■ Front windshield wiper/washer
■Rear window wiper/washer
Page 241 of 611
3-145
Convenient features of your vehicle
3
LO : The wiper runs at a lower speed.
HI : The wiper runs at a higher speed.
Information
If there is heavy accumulation of snow
or ice on the windshield, defrost the
windshield for about 10 minutes, or
until the snow and/or ice is removed
before using the windshield wipers to
ensure proper operation.
If you do not remove the snow and/or
ice before using the wiper and washer,
it may damage the wiper and washer
system.
AUTO (Automatic) control (if equipped)
The rain sensor located on the upper
end of the windshield glass senses
the amount of rainfall and controls
the wiping cycle for the proper inter-
val.
The wiper operation time will be
automatically controlled depends on
rainfall.
When the rain stops, the wiper stops.
To vary the sensitivity setting, turn
the sensitivity control knob (1).
If the wiper switch is set in AUTO
mode when the ignition switch is in
the ON position, the wiper will oper-
ate once to perform a self-check of
the system. Set the wiper to OFF
position when the wiper is not in use.
i
To avoid personal injury from
the windshield wipers, when the
engine is running and the wind-
shield wiper switch is placed in
the AUTO mode:
Do not touch the upper end of
the windshield glass facing
the rain sensor.
Do not wipe the upper end of
the windshield glass with a
damp or wet cloth.
Do not put pressure on the
windshield glass.
WARNING
Page 242 of 611
3-146
Convenient features of your vehicle
When washing the vehicle, set the wiper switch in the OFF posi-
tion to stop the auto wiper oper-
ation. The wiper may operate
and be damaged if the switch is
set in the AUTO mode while
washing the vehicle.
Do not remove the sensor cover located on the upper end of the
passenger side windshield
glass. Damage to system parts
could occur and may not be cov-
ered by your vehicle warranty.
Because of using a photo sen- sor, temporary malfunction
could occur according to sud-
den ambient light change made
by stone and dust while driving.
Front Windshield Washers
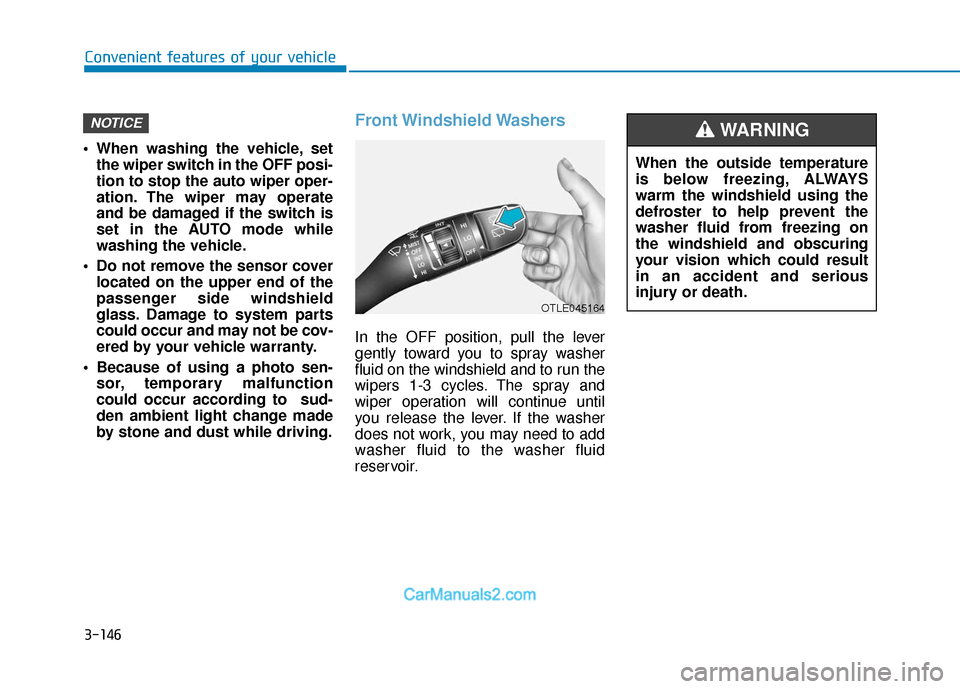
In the OFF position, pull the lever
gently toward you to spray washer
fluid on the windshield and to run the
wipers 1-3 cycles. The spray and
wiper operation will continue until
you release the lever. If the washer
does not work, you may need to add
washer fluid to the washer fluid
reservoir.
NOTICE
When the outside temperature
is below freezing, ALWAYS
warm the windshield using the
defroster to help prevent the
washer fluid from freezing on
the windshield and obscuring
your vision which could result
in an accident and serious
injury or death.
WARNING
OTLE045164
Page 248 of 611
![Hyundai Palisade 2020 User Guide 3-152
Parking Distance Warning
(Reverse) System (if equipped)
[B] : Sensor
The optional Parking Distance
Warning (Reverse) system assists
the driver during reverse movement
of the vehicle by chiming i Hyundai Palisade 2020 User Guide 3-152
Parking Distance Warning
(Reverse) System (if equipped)
[B] : Sensor
The optional Parking Distance
Warning (Reverse) system assists
the driver during reverse movement
of the vehicle by chiming i](/img/35/16309/w960_16309-247.png)
3-152
Parking Distance Warning
(Reverse) System (if equipped)
[B] : Sensor
The optional Parking Distance
Warning (Reverse) system assists
the driver during reverse movement
of the vehicle by chiming if any object
is sensed within approximately 50 in
(120 cm) behind the vehicle.
This system is a supplemental sys-
tem that senses objects within the
range and location of the sensors, it
cannot detect objects in other areas
where sensors are not installed.
Operation of the ParkingDistance Warning (Reverse)system
Operating condition
This system will activate when
backing up with the ignition switch
in the ON position. However, if the
vehicle speed exceeds 3 mph (5
km/h), the system may not detect
objects.
If the vehicle speed exceeds 6 mph (10 km/h), the system will not warn
you even though objects are
detected.
When more than two objects are sensed at the same time, the clos-
est one will be recognized first.
Convenient features of your vehicle
ALWAYS look around your vehi-
cle to make sure there are not
any objects or obstacles before
moving the vehicle in any direc-
tion to prevent a collision.
Always pay close attention
when the vehicle is driven close
to objects, particularly pedestri-
ans, and especially children.
Be aware that some objects
may not be visible on the
screen or be detected by the
sensors, due to the objects
distance, size or material, all of
which can limit the effective-
ness of the sensor.
WARNING
OLX2048053L
Page 249 of 611

3-153
Convenient features of your vehicle
3
Types of warning sound and indicator
The indicator may differ from theillustration as objects or sensors
status. If the indicator blinks,
have your vehicle checked by an
authorized HYUNDAI dealer.
If the audible warning does not sound or if the buzzer sounds
intermittently when shifting into R
(Reverse) position, this may indi-
cate a malfunction with the
Parking Distance Warning
(Reverse) system. If this occurs,
have your vehicle checked by an
authorized HYUNDAI dealer as
soon as possible.
To Turn OFF the ParkingDistance Warning (Reverse)system
Push the button to turn OFF the
Parking Distance Warning (Reverse)
system. The indicator light on the
button will turn on.
NOTICE
Types of warning soundIndicator
When an object is 24 to 47 in
(60 to 120 cm) from the rear
bumper, the warning sound
beeps intermittently.
When an object is 12 to 24 in
(30 to 60 cm) from the rear
bumper, the warning sound
beeps more frequently.
When an object is within 12 in
(30 cm) from the rear bumper,
the warning sound beeps
continuously.OLX2049096N