stop start HYUNDAI PALISADE 2022 Owners Manual
[x] Cancel search | Manufacturer: HYUNDAI, Model Year: 2022, Model line: PALISADE, Model: HYUNDAI PALISADE 2022Pages: 663, PDF Size: 15.74 MB
Page 9 of 663
F9
Introduction
For customers who do not use TOP
Tier Detergent Gasoline regularly,
and have problems starting or the
engine does not run smoothly, deter-
gent-based fuel additives that you
can purchase separately may be
added to the gasoline. If TOP TIER
Detergent Gasoline is not available,
one bottle of additive added to the
fuel tank according to the mainte-
nance schedule is recommended
(refer to the Maintenance Schedule
in chapter 7).
Additives are available from your
authorized HYUNDAI dealer along
with information on how to use them.
Do not mix other additives.
Operation in foreign countries
If you are going to drive your vehicle
in another country, be sure to:
• Observe all regulations regarding registration and insurance.
Determine that acceptable fuel is available. This vehicle should not be modi-
fied. Modification of your vehicle
could affect its performance, safety
or durability and may even violate
governmental safety and emis-
sions regulations.
In addition, damage or perform-
ance problems resulting from any
modification may not be covered
under warranty.
If you use unauthorized electronic devices, it may cause the vehicle to
operate abnormally, wire damage,
battery discharge and fire. For your
safety, do not use unauthorized
electronic devices. By following a few simple precautions
for the first 600 miles (1,000 km) you
may add to the performance, econo-
my and life of your vehicle.
Do not race the engine.
While driving, keep your engine
speed (rpm, or revolutions per
minute) between 2,000 rpm and
4,000 rpm.
Do not maintain a single speed for long periods of time, either fast or
slow. Varying engine speed is need-
ed to properly break-in the engine.
Avoid hard stops, except in emer- gencies, to allow the brakes to seat
properly. Do not tow a trailer during
the first 1,200 miles (2,000 km) of
operation.
Do not tow a trailer during the first 1,200 miles (2,000 km) of opera-
tion.
Fuel economy and engine perform- ance, engine oil consumption may
vary depending on vehicle break-in
process and be stabilized after
driving about 4,000 miles. New
engines may consume more oil
during the vehicle break-in period.
V VE EH H I IC C L LE E B B R RE EA A K K- -I IN N P P R R O O C CE E S SS S
V V E EH H I IC C L LE E M M O OD DI IF F I IC C A A T TI IO O N NS S
Page 16 of 663
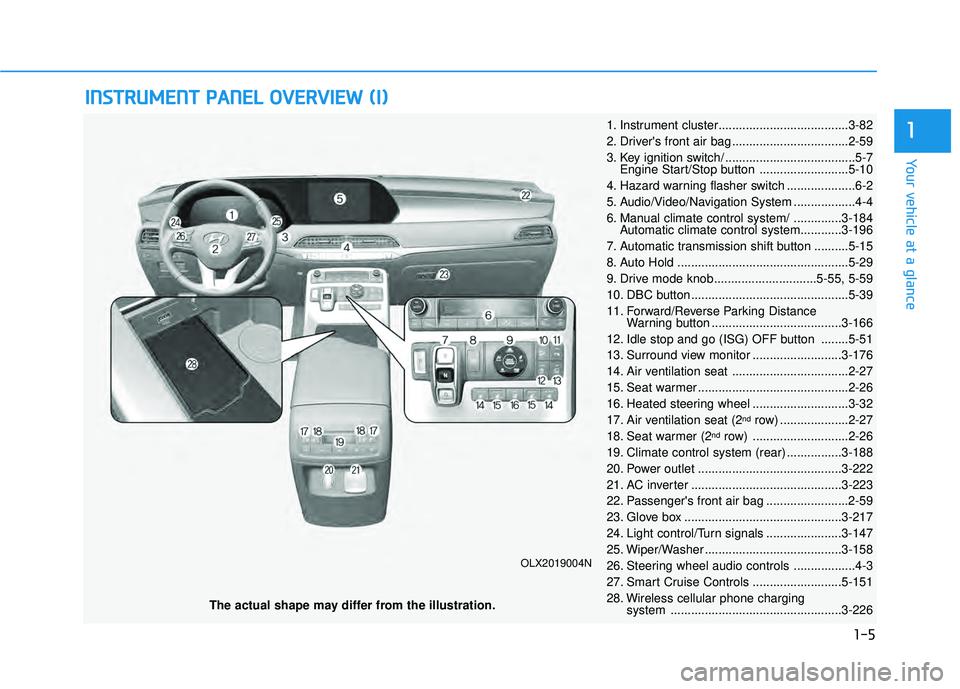
I IN N S ST T R R U U M M E EN N T T P P A A N N E EL L O O V VE ER R V V I IE E W W ( ( I I) )
The actual shape may differ from the illustration.
1-5
Your vehicle at a glance
1
OLX2019004N
1. Instrument cluster......................................3-82
2. Driver's front air bag ..................................2-59
3. Key ignition switch/ ......................................5-7
Engine Start/Stop button ..........................5-10
4. Hazard warning flasher switch ....................6-2
5. Audio/Video/Navigation System ..................4-4
6. Manual climate control system/ ..............3-184 Automatic climate control system............3-196
7. Automatic transmission shift button ..........5-15
8. Auto Hold ..................................................5-29
9. Drive mode knob..............................5-55, 5-59
10. DBC button ..............................................5-39
11. Forward/Reverse Parking Distance Warning button ......................................3-166
12. Idle stop and go (ISG) OFF button ........5-51
13. Surround view monitor ..........................3-176
14. Air ventilation seat ..................................2-27
15. Seat warmer ............................................2-26
16. Heated steering wheel ............................3-32
17. Air ventilation seat (2
ndrow) ....................2-27
18. Seat warmer (2ndrow) ............................2-26
19. Climate control system (rear) ................3-188
20. Power outlet ..........................................3-222
21. AC inverter ............................................3-223
22. Passenger's front air bag ........................2-59
23. Glove box ..............................................3-217
24. Light control/Turn signals ......................3-147
25. Wiper/Washer ........................................3-158
26. Steering wheel audio controls ..................4-3
27. Smart Cruise Controls ..........................5-151
28. Wireless cellular phone charging system ..................................................3-226
Page 22 of 663
Safety system of your vehicle
2
Safety Precautions
Adjusting the seats so that you are
sitting in a safe, comfortable position
plays an important role in driver and
passenger safety together with the
seat belts and air bags in an acci-
dent.
Air bags
You can take steps to reduce the risk
of being injured by an inflating air
bag. Sitting too close to an air bag
greatly increases the risk of injury in
the event the air bag inflates.
The National Highway Traffic Safety
Administration (NHTSA) recom-
mends that drivers allow at least 10
inches (25 cm) between the center of
the steering wheel and their chest.
Seat belts
Always fasten your seat belt before
starting any trip.
At all times, passengers should sit
upright and be properly restrained.
Infants and small children must be
restrained in appropriate child
restraint systems. Adults and chil-
dren who have outgrown a booster
seat must be restrained using the
seat belts.
Do not use a cushion that
reduces friction between the
seat and the passenger. The
passenger's hips may slide
under the lap portion of the seat
belt during an accident or a
sudden stop. Serious or fatal
internal injuries could result
because the seat belt cannot
operate properly.
WARNING
To reduce the risk of serious
injury or death from an inflating
air bag, take the following pre-
cautions:
•Adjust the driver's seat as far
to the rear as possible while
maintaining the ability to
maintain full control of the
vehicle.
Adjust the front passenger
seat as far to the rear as pos-
sible.
Hold the steering wheel by the
rim with hands at the 9 o'clock
and 3 o'clock positions to
minimize the risk of injuries to
your hands and arms.
NEVER place anything or any-
one between the steering
wheel and the air bag.
Do not allow the front passen-
ger to place feet or legs on the
dashboard to minimize the
risk of leg injuries.
WARNING
2-5
Page 35 of 663
2-18
Safety system of your vehicle
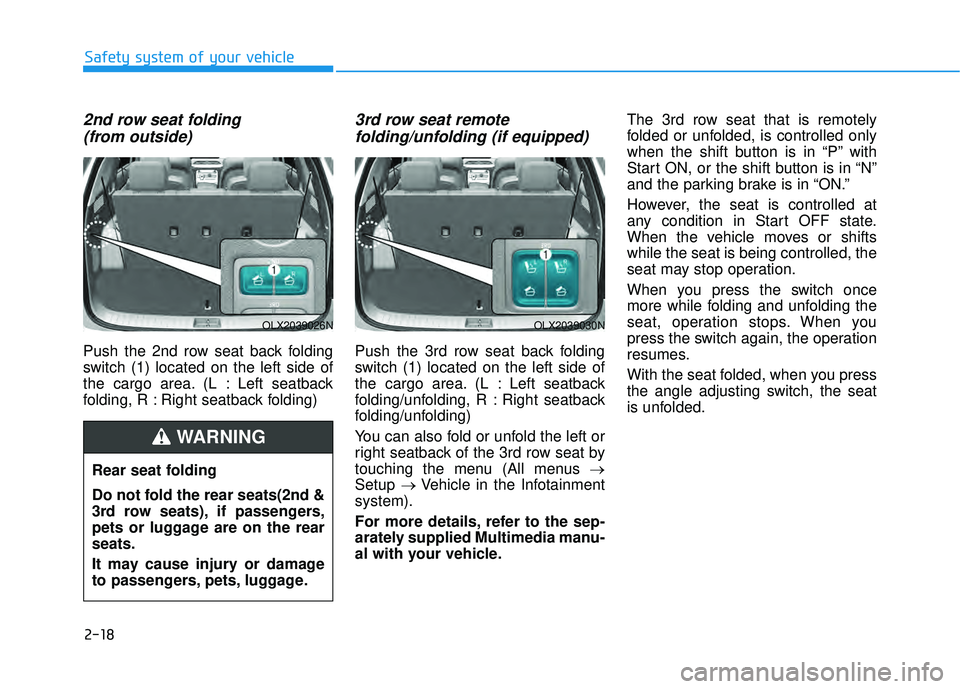
2nd row seat folding (from outside)
Push the 2nd row seat back folding
switch (1) located on the left side of
the cargo area. (L : Left seatback
folding, R : Right seatback folding)
3rd row seat remotefolding/unfolding (if equipped)
Push the 3rd row seat back folding
switch (1) located on the left side of
the cargo area. (L : Left seatback
folding/unfolding, R : Right seatback
folding/unfolding)
You can also fold or unfold the left or
right seatback of the 3rd row seat by
touching the menu (All menus →
Setup →Vehicle in the Infotainment
system).
For more details, refer to the sep-
arately supplied Multimedia manu-
al with your vehicle. The 3rd row seat that is remotely
folded or unfolded, is controlled only
when the shift button is in “P” with
Start ON, or the shift button is in “N”
and the parking brake is in “ON.”
However, the seat is controlled at
any condition in Start OFF state.
When the vehicle moves or shifts
while the seat is being controlled, the
seat may stop operation.
When you press the switch once
more while folding and unfolding the
seat, operation stops. When you
press the switch again, the operation
resumes.
With the seat folded, when you press
the angle adjusting switch, the seat
is unfolded.
OLX2039026NOLX2039030N
Rear seat folding
Do not fold the rear seats(2nd &
3rd row seats), if passengers,
pets or luggage are on the rear
seats.
It may cause injury or damage
to passengers, pets, luggage.
WARNING
Page 36 of 663
2-19
Safety system of your vehicle
2
Detection of object caught
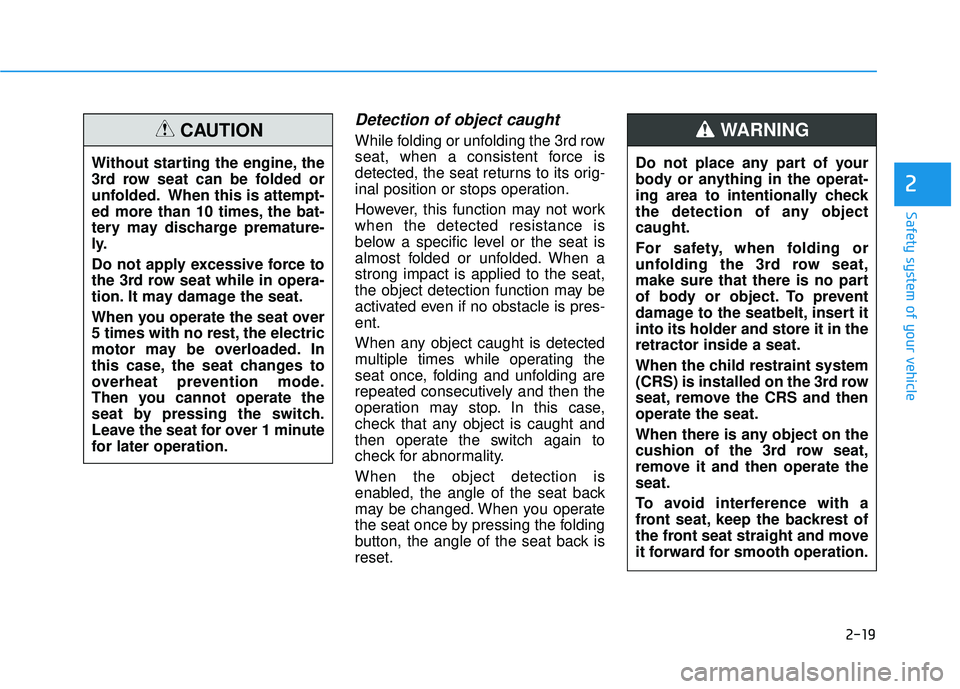
While folding or unfolding the 3rd row
seat, when a consistent force is
detected, the seat returns to its orig-
inal position or stops operation.
However, this function may not work
when the detected resistance is
below a specific level or the seat is
almost folded or unfolded. When a
strong impact is applied to the seat,
the object detection function may be
activated even if no obstacle is pres-
ent.
When any object caught is detected
multiple times while operating the
seat once, folding and unfolding are
repeated consecutively and then the
operation may stop. In this case,
check that any object is caught and
then operate the switch again to
check for abnormality.
When the object detection is
enabled, the angle of the seat back
may be changed. When you operate
the seat once by pressing the folding
button, the angle of the seat back is
reset.Do not place any part of your
body or anything in the operat-
ing area to intentionally check
the detection of any object
caught.
For safety, when folding or
unfolding the 3rd row seat,
make sure that there is no part
of body or object. To prevent
damage to the seatbelt, insert it
into its holder and store it in the
retractor inside a seat.
When the child restraint system
(CRS) is installed on the 3rd row
seat, remove the CRS and then
operate the seat.
When there is any object on the
cushion of the 3rd row seat,
remove it and then operate the
seat.
To avoid interference with a
front seat, keep the backrest of
the front seat straight and move
it forward for smooth operation.WARNING
Without starting the engine, the
3rd row seat can be folded or
unfolded. When this is attempt-
ed more than 10 times, the bat-
tery may discharge premature-
ly.
Do not apply excessive force to
the 3rd row seat while in opera-
tion. It may damage the seat.
When you operate the seat over
5 times with no rest, the electric
motor may be overloaded. In
this case, the seat changes to
overheat prevention mode.
Then you cannot operate the
seat by pressing the switch.
Leave the seat for over 1 minute
for later operation.
CAUTION
Page 81 of 663
2-64
Safety system of your vehicleDuring a frontal collision, sensors will
detect the vehicle's deceleration. If
the rate of deceleration is high
enough, the control unit will inflate
the front air bags.
The front air bags help protect the
driver and front passenger by
responding to frontal impacts in
which seat belts alone cannot pro-
vide adequate restraint. When need-
ed, the side air bags help provide
protection in the event of a side
impact or rollover.
Air bags are activated (able toinflate if necessary) only when the
ignition switch is in the ON posi-
tion.
Air bags inflate in the event of cer- tain frontal or side collisions to
help protect the occupants from
serious physical injury.
Generally, air bags are designed to inflate based upon the severity
of a collision, its direction, etc.
These two factors determine
whether the sensors produce an
electronic deployment/inflation
signal. The front air bags will completely
inflate and deflate in an instant. It is
virtually impossible for you to see
the air bags inflate during an acci-
dent. It is much more likely that you
will simply see the deflated air
bags hanging out of their storage
compartments after the collision.
In addition to inflating in certain side collisions, vehicles equipped
with a rollover sensor, side and
curtain air bags will inflate if the
sensing system detects a rollover.
When a rollover is detected, side
and curtain air bags will remain
inflated longer to help provide pro-
tection from ejection, especially
when used in conjunction with the
seat belts.
To help provide protection, the air bags must inflate rapidly. The
speed of air bag inflation is a con-
sequence of extremely short time
in which to inflate the air bag
between the occupant and the
vehicle structures before the occu-
pant impacts those structures. This
speed of inflation reduces the risk
of serious or life-threatening
injuries and is thus a necessary
part of air bag design.
If your SRS malfunctions, the air
bag may not inflate properly dur-
ing an accident increasing the
risk of serious injury or death.
If any of the following condi-
tions occur, your SRS is mal-
functioning:
The light does not turn on for
approximately six seconds
when the Engine Start/Stop
button is in the ON position.
The light stays on after illumi-
nating for approximately six
seconds.
The light comes on while the
vehicle is in motion.
The light blinks when the
engine is running.
Have an authorized HYUNDAI
dealer inspect the SRS as soon
as possible if any of these con-
ditions occur.
WARNING
Page 89 of 663
2-72
Safety system of your vehicle
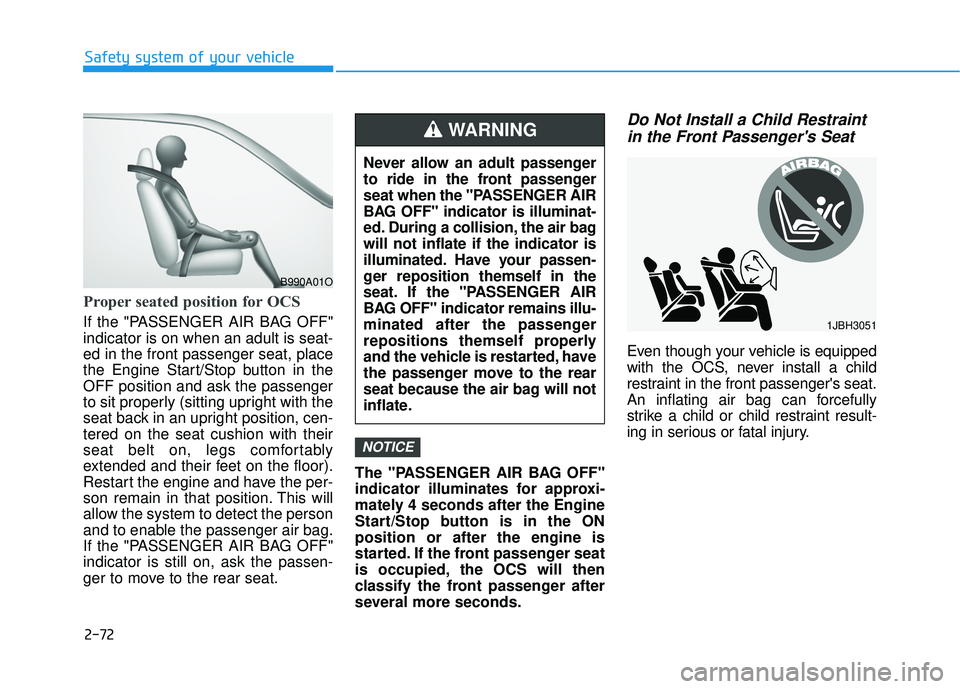
Proper seated position for OCS
If the "PASSENGER AIR BAG OFF"
indicator is on when an adult is seat-
ed in the front passenger seat, place
the Engine Start/Stop button in the
OFF position and ask the passenger
to sit properly (sitting upright with the
seat back in an upright position, cen-
tered on the seat cushion with their
seat belt on, legs comfortably
extended and their feet on the floor).
Restart the engine and have the per-
son remain in that position. This will
allow the system to detect the person
and to enable the passenger air bag.
If the "PASSENGER AIR BAG OFF"
indicator is still on, ask the passen-
ger to move to the rear seat.The "PASSENGER AIR BAG OFF"
indicator illuminates for approxi-
mately 4 seconds after the Engine
Start/Stop button is in the ON
position or after the engine is
started. If the front passenger seat
is occupied, the OCS will then
classify the front passenger after
several more seconds.
Do Not Install a Child Restraint
in the Front Passenger's Seat
Even though your vehicle is equipped
with the OCS, never install a child
restraint in the front passenger's seat.
An inflating air bag can forcefully
strike a child or child restraint result-
ing in serious or fatal injury.
NOTICE
B990A01O
Never allow an adult passenger
to ride in the front passenger
seat when the "PASSENGER AIR
BAG OFF" indicator is illuminat-
ed. During a collision, the air bag
will not inflate if the indicator is
illuminated. Have your passen-
ger reposition themself in the
seat. If the "PASSENGER AIR
BAG OFF" indicator remains illu-
minated after the passenger
repositions themself properly
and the vehicle is restarted, have
the passenger move to the rear
seat because the air bag will not
inflate.
WARNING
1JBH3051
Page 96 of 663
2-79
Safety system of your vehicle
2
Additional Safety Precautions
Passengers should not move out
of or change seats while the vehi-
cle is moving.A passenger who is
not wearing a seat belt during a
crash or emergency stop can be
thrown against the inside of the vehi-
cle, against other occupants, or be
ejected from the vehicle.
Do not use any accessories on
seat belts. Devices claiming to
improve occupant comfort or reposi-
tion the seat belt can reduce the pro-
tection provided by the seat belt and
increase the chance of serious injury
in a crash. Do not modify the front seats.
Modification of the front seats could
interfere with the operation of the
supplemental restraint system sens-
ing components or side air bags.
Do not place items under the front
seats.
Placing items under the front
seats could interfere with the opera-
tion of the supplemental restraint
system sensing components and
wiring harnesses.
Do not cause impact to the doors.
Impact to the doors when the Engine
Start/Stop button is in the ON posi-
tion may cause the air bags to inflate.
Modifications to accommodate
disabilities. If you require modifica-
tion to your vehicle to accommodate
a disability, contact the HYUNDAI
Customer Connect Center at 800-
633-5151.
Adding equipment to or modify- ing your air bag equipped vehicle
If you modify your vehicle by chang-
ing your vehicle's frame, bumper sys-
tem, front end or side sheet metal or
ride height, this may affect the opera-
tion of your vehicle's air bag system.
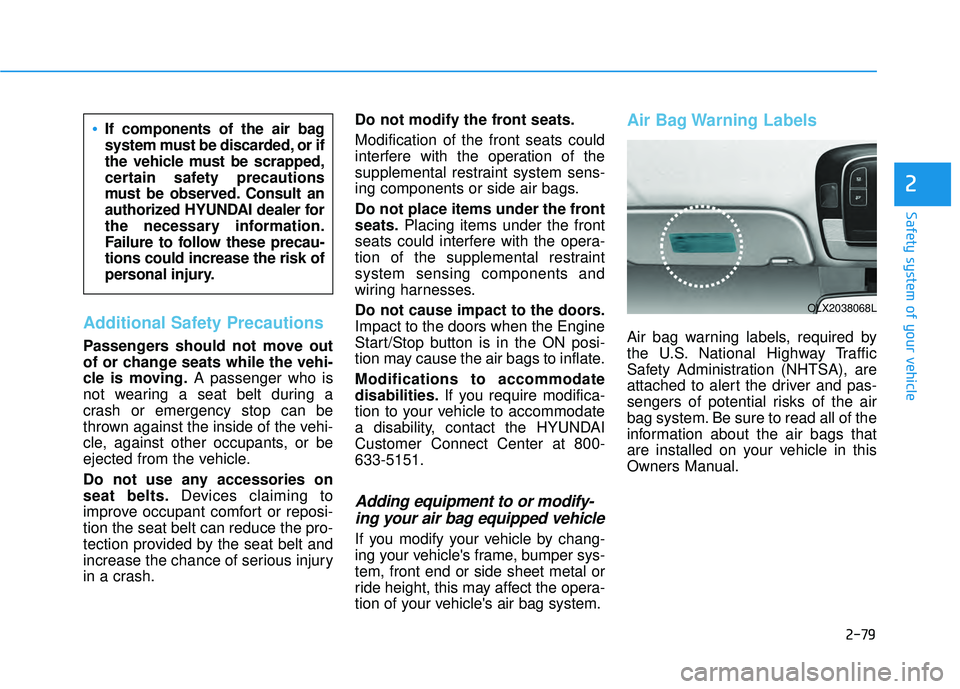
Air Bag Warning Labels
Air bag warning labels, required by
the U.S. National Highway Traffic
Safety Administration (NHTSA), are
attached to alert the driver and pas-
sengers of potential risks of the air
bag system. Be sure to read all of the
information about the air bags that
are installed on your vehicle in this
Owners Manual.
If components of the air bag
system must be discarded, or if
the vehicle must be scrapped,
certain safety precautions
must be observed. Consult an
authorized HYUNDAI dealer for
the necessary information.
Failure to follow these precau-
tions could increase the risk of
personal injury.
OLX2038068L
Page 105 of 663
3-9
Convenience Features
3
3.Press either the button on the doorhandle or the Door Lock button (1)
on the smart key. The chime will
sound once and the hazard warn-
ing lights will blink.
4.Make sure the doors are locked by checking the position of the door
lock button inside the vehicle.
Information
The door handle button will only
operate when the smart key is within
28~40 inches (0.7~1 m) from the out-
side door handle.
Note that you cannot lock your vehi-
cle using the door handle button if
any of the following occur:
The Smart Key is in the vehicle.
The Engine Start/Stop button is inACC or ON position.
Any of the doors are open except for the liftgate.
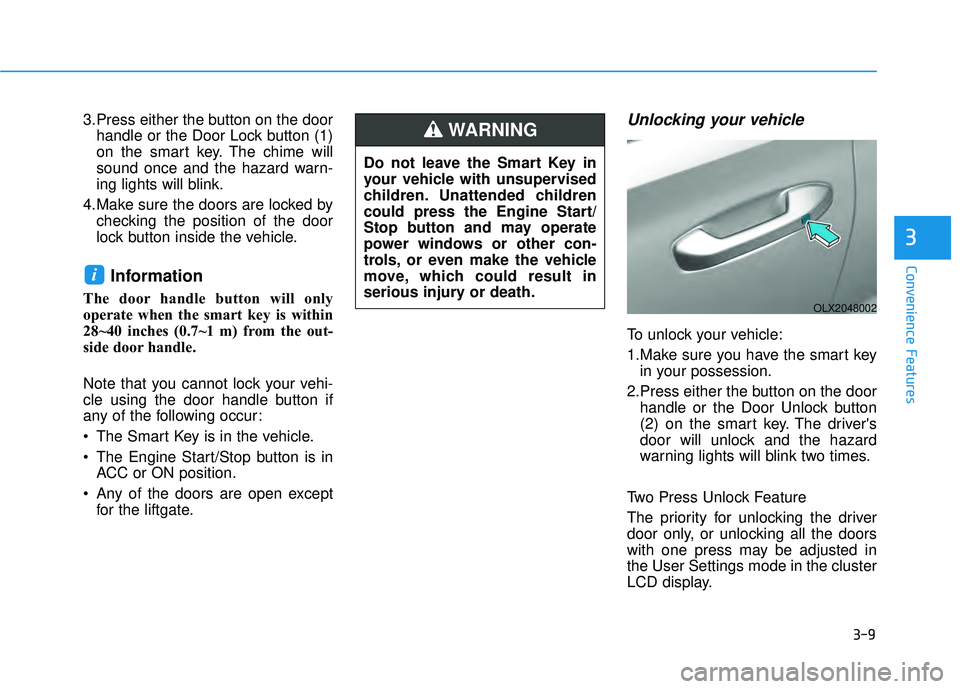
Unlocking your vehicle
To unlock your vehicle:
1.Make sure you have the smart keyin your possession.
2.Press either the button on the door handle or the Door Unlock button
(2) on the smart key. The driver's
door will unlock and the hazard
warning lights will blink two times.
Two Press Unlock Feature
The priority for unlocking the driver
door only, or unlocking all the doors
with one press may be adjusted in
the User Settings mode in the cluster
LCD display.
i
Do not leave the Smart Key in
your vehicle with unsupervised
children. Unattended children
could press the Engine Start/
Stop button and may operate
power windows or other con-
trols, or even make the vehicle
move, which could result in
serious injury or death.
WARNING
OLX2048002
Page 107 of 663
3-11
Convenience Features
3
Opening the liftgate
Non-power liftgate
To unlock and open the liftgate:
1.Make sure you have the smart keyin your possession.
2.Press either the liftgate handle release switch on the vehicle for
more than one second. The hazard
warning lights will blink two times
and the liftgate latch will unlock.
3.Once the liftgate is opened and then closed, the liftgate will auto-
matically re-lock after 30 seconds.
Information
The liftgate handle switch will only
operate when the smart key is within
28 inches (0.7 m) from the liftgate
handle.
Power liftgate
To unlock and open the liftgate:
1.Make sure you have the smart keyin your possession.
2.Press either the liftgate handle release switch on the vehicle or
press and hold the Liftgate Unlock
button (4) on the smart key for
more than one second. The hazard
warning lights will blink two times
and the liftgate latch will open.
3.Once the liftgate is opened and then closed, the liftgate will auto-
matically re-lock after 30 seconds.
Information
The liftgate handle switch will only
operate when the smart key is within
28 inches (0.7 m) from the liftgate
handle.
Panic button
Press and hold the Panic button (5)
for more than one second. The horn
sounds and hazard warning lights
blink for about 30 seconds. To cancel
the panic mode, press any button on
the Smart Key.
Start-up
You can start the vehicle without
inserting the key.
For information, refer to the
"Engine Start/Stop Button" sec-
tion in chapter 5.
Information
Preventing the doors/liftgate from
locking/unlocking
• Activating the feature
With the engine off, press the lock
button on the smart key and immedi-
ately press the unlock button along
with the lock button for more than 4
seconds. When the feature is activat-
ed, the hazard warning lights will
blink four times.
iii