ECO mode Hyundai Santa Fe 2006 Owner's Guide
[x] Cancel search | Manufacturer: HYUNDAI, Model Year: 2006, Model line: Santa Fe, Model: Hyundai Santa Fe 2006Pages: 281, PDF Size: 8.94 MB
Page 161 of 281
2
DRIVING YOUR HYUNDAI
10
CAUTION:
o In sports mode the driver must execute
shifts in accordance with prevailing road
conditions, taking care to keep the en-
gine speed below the red zone. For en-
gine protection, upward shifts are made
automatically when the engine rpm
reaches the red zone.
o By rapidly moving the selector lever
backwards (-) twice, it is possible to skip
one gear, i.e., 3rd to 1st, 4th to 2nd or 5th
to 3rd. Since sudden engine braking
and/or rapid acceleration can cause a
loss of traction, however, downshifts
must be made carefully in accordance
with the vehicle's speed.
!
C090C01A-AATo R(Reverse):Use for backing up the vehicle. Bring the car to
a complete stop before shifting the selector
lever to "R" position.C090D02A-AATo N (Neutral):In the "N" position, the transaxle is in neutral,
which means that no gears are engaged. The
engine can be started with the shift lever in "N"
position, although this is not recommended
except if the engine stalls while the car is
moving.C090E01L-AATo D (Drive):Use for normal driving. This position is used for
most city and highway driving, for starting from
a full stop to maximum speed. The transaxle will
automatically shift through a five gear sequence.
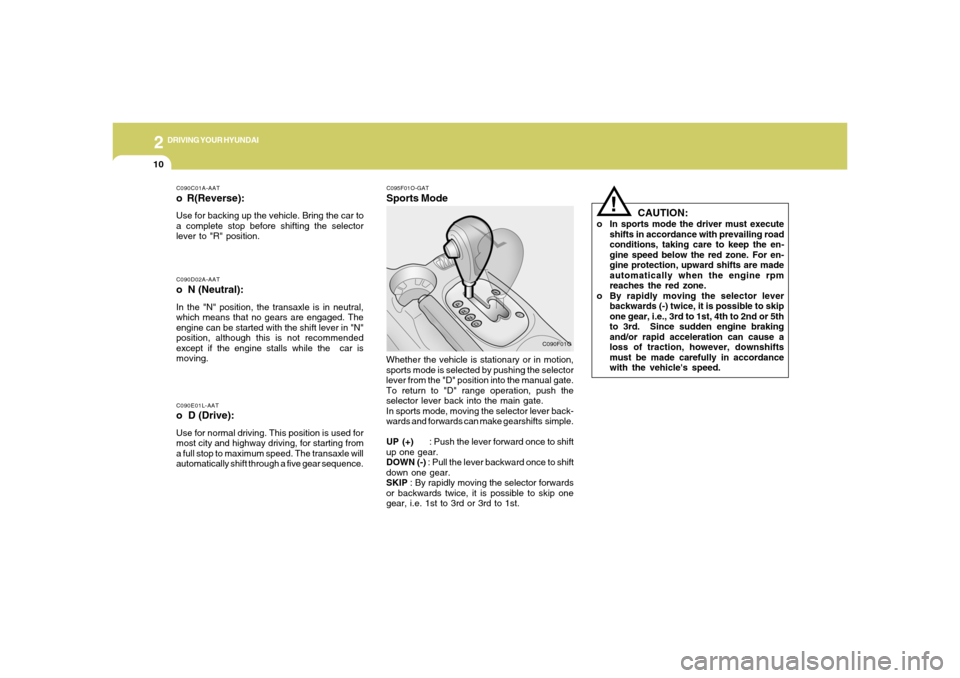
C095F01O-GATSports Mode
C090F01O
Whether the vehicle is stationary or in motion,
sports mode is selected by pushing the selector
lever from the "D" position into the manual gate.
To return to "D" range operation, push the
selector lever back into the main gate.
In sports mode, moving the selector lever back-
wards and forwards can make gearshifts simple.
UP (+) : Push the lever forward once to shift
up one gear.
DOWN (-) : Pull the lever backward once to shift
down one gear.
SKIP : By rapidly moving the selector forwards
or backwards twice, it is possible to skip one
gear, i.e. 1st to 3rd or 3rd to 1st.
Page 162 of 281
2
DRIVING YOUR HYUNDAI
11
NOTE:o In sports mode, only the five forward
gears can be selected. To select reverse
or park, move the selector lever to the
"R" or "P" position as required.
o In sports mode, downward shifts are
made automatically when the vehicle
slows down. When the vehicle stops, 1st
gear is automatically selected.
o To maintain the required levels of ve-
hicle performance and safety, the sys-
tem may not execute certain gearshifts
when the selector lever is operated.
o Before driving away from a stop on a
slippery road, push the selector lever
forward into the +(UP) position. This
causes the transaxle to shift into 2nd
gear which is better for smooth driving
away on a slippery road. Push the selec-
tor lever to the -(DOWN) side to shift
back to 1st gear.
C090H01L-GATNOTE:o For smooth and safe operation, depress
the brake pedal when shifting from "Neu-
tral" position or "Park" position to a
forward or reverse gear.
o The ignition key must be in the "ON"
position and the brake pedal fully de-
pressed in order to move the shift lever
from the "P" (Park) position to any of the
other positions.
o It is always possible to shift from "R",
"N", "D" position to "P" position. The
vehicle must be fully stopped to avoid
transaxle damage.
C090I03L-GAT
CAUTION:
o Shift into "R" and "P" position only when
the vehicle has completely stopped.
o Do not accelerate the engine in reverse
or any of the forward positions with the
brakes applied.
o Always apply the footbrake when shift-
ing from "P" or "N", to "R" or "D" posi-
tion.
o Do not use the "P" (Park) position in
place of the parking brake. Always set
the parking brake, shift the transaxle
into "P" (Park) position and turn off the
ignition when you leave the vehicle, even
momentarily. Never leave the vehicle
unattended while the engine is running.
o When accelerating from a stop on a
steep hill, the vehicle may have a ten-
dency to roll backwards. Shifting the
shift lever into 2nd gear while in Sport
mode will help prevent the vehicle from
rolling backwards.
o Check the automatic transaxle fluid level
regularly, and add fluid as necessary.
o See the maintenance schedule for the
proper fluid recomendation.
!
Page 165 of 281
2
DRIVING YOUR HYUNDAI
14
C300D02O-AATIndicator and WarningThe TCS indicator should illuminate when the
ignition key is turned to ON or START but should
go out after approximately three seconds.
If the indicator does not illuminate, have the
system checked by an authorized dealer.
Should there be any unusual conditions in the
TCS system while driving, TCS illuminates as a
warning.
If TCS illuminates, pull your car to a safe place
and stop the engine. Then, start the engine
again to check if the TCS indicator goes out.
If the indicator remains lit even after the engine
has been started, have your car checked by an
authorized Hyundai dealer.NOTE:When the TCS indicator illuminates, trac-
tion control is automatically deactivated.
C300B01O-AATTCS ON ModeWhen the TCS is operating, the TCS indicator
in the instrument cluster will blink.NOTE:1) The TCS mode will automatically be
turned ON after the engine is turned off
and restarted.
2) When the traction control system is op-
erating properly, you can feel a slight
pulsation in the vehicle. This is only the
effect of the brake control and indicates
nothing unusual.
3) When the engine starts, a click may be
heard from the engine compartment;
however, this is the sound of the traction
control being checked.
4) When moving out of the mud or fresh
snow, pressing the accelerator pedal
may not cause the engine speed to in-
crease due to TCS operation.
!!
CAUTION:
When the TCS indicator blinks, SLIP func-
tion has been activated. It also means that
the road is slippery or your car is accelerat-
ing excessively. In this situation, gently
release foot pressure from the accelerator
pedal and maintain moderate speed.
WARNING:
Traction control is only a driving aid; all
normal precautions for driving in inclement
weather and on slippery road surfaces
should be observed.
Page 171 of 281

2
DRIVING YOUR HYUNDAI
20
DRIVING FOR ECONOMYC140A02A-AATYou can save fuel and get more miles from your
car if you follow these suggestions:
o Drive smoothly. Accelerate at a moderate
rate. Don't make "jack-rabbit" starts or full-
throttle shifts and maintain a steady cruising
speed. Don't race between stoplights. Try to
adjust your speed to that of the other traffic
so you don't have to change speeds unnec-
essarily. Avoid heavy traffic whenever pos-
sible. Always maintain a safe distance from
other vehicles so you can avoid unneces-
sary braking. This also reduces brake wear.
o Drive at a moderate speed. The faster you
drive, the more fuel your car uses. Driving at
a moderate speed, especially on the high-
way, is one of the most effective ways to
reduce fuel consumption.
o Don't "ride" the brake or clutch pedal. This
can increase fuel consumption and also
increase wear on these components. In
addition, driving with your foot resting on the
brake pedal may cause the brakes to over-
heat, which reduces their effectiveness and
may lead to more serious consequences.
o Take care of your tires. Keep them inflated
to the recommended pressure. Incorrect
inflation, either too much or too little, results
in unnecessary tire wear. Check the tire
pressures at least once a month. o Under some conditions your parking brake
can freeze in the engaged position. This is
most likely to happen when there is an ac-
cumulation of snow or ice around or near the
rear brakes or if the brakes are wet. If there
is a risk that the parking brake may freeze,
apply it only temporarily while you put the
gear selector lever in "P" and block the rear
wheels so the car cannot roll. Then release
the parking brake.
o Do not hold the vehicle on the upgrade with
the accelerator pedal. This can cause the
transaxle to overheat. Always use the brake
pedal or parking brake. o Don't coast down hills with the car out of gear.
This is extremely hazardous. Keep the car
in gear at all times, use the brakes to slow
down, then shift to a lower gear so that engine
braking will help you maintain a safe speed.
o Don't "ride" the brake pedal. Resting your
foot on the brake pedal while driving can be
dangerous because it can result in the brakes
overheating and losing their effectiveness. It
also increases the wear of the brake com-
ponents.
o If a tire goes flat while you are driving, apply
the brakes gently and keep the car pointed
straight ahead while you slow down. When
you are moving slowly enough for it to be safe
to do so, pull off the road and stop in a safe
place.
o Don't let your car creep forward. To avoid
creeping forward, keep your foot firmly on
the brake pedal when the car is stopped.
o Use caution when parking on a hill. Firmly
engage the parking brake and place the gear
selector lever in "P". If your car is facing
downhill, turn the front wheels into the curb
to help keep the car from rolling. If your car
is facing uphill, turn the front wheels away
from the curb to help keep the car from
rolling. If there is no curb or if it is required by
other conditions to keep the car from rolling,
block the wheels.
Page 259 of 281

8
CONSUMER INFORMATION, REPORTING SAFETY DEFECTS & BINDING ARBITRATION OF WARRANTY CLAIMS8
Sidewall: The portion of a tire between
the tread and the bead.
Speed Rating: An alphanumeric code
assigned to a tire indicating the maxi-
mum speed at which a tire can operate.
Traction: The friction between the tire
and the road surface. The amount of
grip provided.
Tread: The portion of a tire that comes
into contact with the road.
Treadwear Indicators: Narrow bands,
sometimes called "wear bars," that show
across the tread of a tire when only 2/32
inch of tread remains.
UTQGS: Uniform Tire Quality Grading
Standards, a tire information system
that provides consumers with ratings
for a tire's traction, temperature and
treadwear. Ratings are determined by
tire manufacturers using government
testing procedures. The ratings are
molded into the sidewall of the tire. Intended Outboard Sidewall: The side
of an asymmetrical tire, that must al-
ways face outward when mounted on a
vehicle.
Kilopascal (kPa): The metric unit for
air pressure.
Load Index: An assigned number rang-
ing from 1 to 279 that corresponds to
the load carrying capacity of a tire.
Maximum Inflation Pressure: The
maximum air pressure to which a cold
tire may be inflated. The maximum air
pressure is molded onto the sidewall.
Maximum Load Rating: The load rat-
ing for a tire at the maximum permis-
sible inflation pressure for that tire.
Maximum Loaded Vehicle Weight:
The sum of curb weight; accessory
weight; vehicle capacity weight; and
production options weight.
Normal Occupant Weight: The num-
ber of occupants a vehicle is designed
to seat multiplied by 150 pounds (68
kg).Occupant Distribution: Designated
seating positions.
Outward Facing Sidewall: The side of
an asymmetrical tire that has a particu-
lar side that faces outward when
mounted on a vehicle. The side of the
tire that contains a whitewall, bears
white lettering or bears manufacturer,
brand and or model name molding that
is higher or deeper than the same mold-
ings on the other sidewall of the tire.
Passenger (P-Metric) Tire: A tire used
on passenger cars and some light duty
trucks and multipurpose vehicles.
Recommended Inflation Pressure:
Vehicle manufacturer's recommended
tire inflation pressure as shown on the
tire placard.
Radial Ply tire: A pneumatic tire in
which the ply cords that extend to the
beads are laid at 90 degrees to the
centerline of the tread.
Rim: A metal support for a tire upon
which the tire beads are seated.
Page 260 of 281

8
CONSUMER INFORMATION, REPORTING SAFETY DEFECTS & BINDING ARBITRATION OF WARRANTY CLAIMS
9
Vehicle Capacity Weight: The number
of designated seating positions multi-
plied by 150 lbs. (68 kg) plus the rated
cargo and luggage load.
Vehicle Maximum Load on the Tire:
Load on an individual tire due to curb
and accessory weight plus maximum
occupant and cargo weight.
Vehicle Normal Load on the Tire:
That load on an individual tire that is
determined by distributing to each axle
its share of the curb weight, accessory
weight, and normal occupant weight
and dividing by 2.
Vehicle Placard: A label permanently
attached to a vehicle showing the origi-
nal equipment tire size and recom-
mended inflation pressure.
I040B01JM-AATALL SEASON TIRES
Hyundai specifies all season tires on
some models to provide good perfor-
mance for use all year round, including
snowy and icy road conditions. All sea-
son tires are identified by ALL SEASON
and/or M+S (Mud and Snow) on the tire
sidewall. Snow tires have better snow
traction than all season tires an may be
more appropriate in some areas.I040C01JM-AATSUMMER TIRES
Hyundai specifies summer tires on some
models to provide superior performance
on dry roads. Summer tire performance
is substantially reduced in snow and
ice. Summer tires do not have the tire
traction rating M+S (Mud and Snow) on
the tire side wall. If you plan to operate
your vehicle in snowy or icy conditions,
Hyundai recommends the use of snow
tires or all season tires on all four wheels.
I040A01O-AATSNOW TIRES
If you equip your car with snow tires,
they should be the same size and have
the same load capacity as the original
tires. Snow tires should be installed on
all four wheels; otherwise, poor han-
dling may result.
Snow tires should carry 4 psi (28 kPa)
more air pressure than the pressure
recommended for the standard tires on
the tire label on the driver's side of the
center pillar , or up to the maximum
pressure shown on the tire sidewall,
whichever is less.
Do not drive faster than 75 mph (120
km/h) when your car is equipped with
snow tires.