engine Hyundai Santa Fe 2011 - RHD (UK, Australia) Service Manual
[x] Cancel search | Manufacturer: HYUNDAI, Model Year: 2011, Model line: Santa Fe, Model: Hyundai Santa Fe 2011Pages: 312, PDF Size: 23.92 MB
Page 133 of 312
Features of your vehicle
58
4
LCD display warning (if equipped)
Key is not in vehicle
If the smart key is not in the vehicle and
if any door is opened or closed with the
ENGINE START/STOP button in the
ACC, ON, or START position, the warn-
ing illuminates on the LCD display. Also,
the chime sounds for 5 seconds when
the smart key is not in the vehicle and thedoor is closed.
Always have the smart key with you.
Key is not detected
If the smart key is not in the vehicle or is
not detected and you press the ENGINE
START/STOP button, the warning illumi-
nates on the LCD display for 10 seconds.
Also, the immobiliser indicator and the
key holder light blinks for 10 seconds.
Low key battery
If the ENGINE START/STOP button turns
to the OFF position when the smart key
in the vehicle discharges, the warning
illuminates on the LCD display for about
10 seconds. Also, the warning chime
sounds once.
Replace the battery with a new one. Press brake pedal to start engine
If the ENGINE START/STOP button turns
to the ACC position twice by pressing the
button repeatedly without depressing the
brake pedal, the warning illuminates on
the LCD display for about 10 seconds to
indicate that you should depress the
brake pedal to start the engine.
Shift to "P" position
If you try to turn off the engine without the
shift lever in the P (Park) position, the
ENGINE START/STOP button will turn to
the ACC position. If the button is pressed
once more it will turn to the ON position.
The warning illuminates on the LCD dis-
play for about 10 seconds to indicate that
you should press the ENGINE
START/STOP button with the shift lever
in the P (Park) position to turn off the
engine.
Also, the warning chime sounds for about
10 seconds. (if equipped)
Remove key
When you turn off the engine with the
smart key in the smart key holder, the
warning illuminates on the LCD display
for about 10 seconds. Also, the smart key
holder light blinks for about 10 seconds.
To remove the smart key push the smart
key once and pull it out from the smart
key holder.
Insert key
If you press the ENGINE START/STOP
button whilst "Key is not detected" illumi-
nates on the LCD display, the warning
“Insert key” illuminates for about 10 sec-
onds. Also, the immobiliser indicator and
the key holder light blinks for about 10
seconds.
Page 134 of 312
459
Features of your vehicle
Press start button again
If you can not operate the ENGINE
START/STOP button when there is a
problem with the ENGINE START/STOP
button system, the warning illuminates
for 10 seconds and the chime sounds
continuously to indicate that you could
start the engine by pressing the ENGINE
START/STOP button once more. The chime will stop if the ENGINE
START/STOP button system works nor-
mally or the theft alarm system is armed.
If the warning illuminates each time you
press the ENGINE START/STOP button,
take your vehicle to a HYUNDAI autho-
rised repairer and have the system
checked.
Shift to "P" or "N" to start engine
If you try to start the engine with the shift
lever not in the P(Park) or N(Neutral)
position, the warning illuminates for
about 10 seconds on the LCD display.
You can also start the engine with the
shift lever in the N(Neutral) position, but
for your safety start the engine with the
shift lever in the P(Park) position.Press start button whilst turn steering
If the steering wheel does not unlock nor-
mally when the ENGINE START/STOP
button is pressed, the warning illumi-
nates for 10 seconds on the LCD display.
Also, the warning chime sounds once
and the ENGINE START/STOP button
light blinks for 10 seconds.
When you are warned, press the
ENGINE START/STOP button whilst
turning the steering wheel right and left.
Check steering wheel lock
If the steering wheel does not lock nor-
mally when the ENGINE START/STOP
button turns to the OFF position, the
warning illuminates for 10 seconds on
the LCD display. Also, the warning chime
sounds for 3 seconds and the ENGINE
START/STOP button light blinks for 10
seconds.
Door open !
(if equipped)
This indicator illuminates when a door is
not closed securely.
The indicator displays which door is opened.
Front Left Low Tire pressure
(if equipped)
Front Right Low Tire pressure
Rear Left Low Tire pressure
Rear Right Low Tire pressure
(if equipped)
The low tyre pressure position telltale light will indicate which tyre is significant-ly under-inflated.
Low Fuel ! (if equipped)
This warning light indicates the fuel tank
is nearly empty.
Page 136 of 312
461
Features of your vehicle
D170200AEN Non-operational conditions of rear parking assist system The rear parking assist system may not operate properly when:
1. Moisture is frozen to the sensor. (It willoperate normally when the moisture has been cleared.)
2. The sensor is covered with foreign matter, such as snow or water, or the
sensor cover is blocked. (It will operate
normally when the material is removed
or the sensor is no longer blocked.)
3. Driving on uneven road surfaces (unpaved roads, gravel, bumps, gradi-ent).
4. Objects generating excessive noise (vehicle horns, loud motorcycle
engines, or truck air brakes) are within
range of the sensor.
5. Heavy rain or water spray exists.
6. Wireless transmitters or mobile phones are within range of the sensor.
7. The sensor is covered with snow.
8. Trailer towing The detecting range may decrease when:
1. The sensor is stained with foreign mat-
ter such as snow or water. (The sens-
ing range will return to normal when
removed.)
2. Outside air temperature is extremely hot or cold.
The following objects may not be rec-ognized by the sensor:
1. Sharp or slim objects such as ropes, chains or small poles.
2. Objects which tend to absorb the sen- sor frequency such as clothes, spongy
material or snow.
3. Undetectable objects smaller than 40 in. (1 m) in height and narrower than 6 in.
(14 cm) in diameter. D170300AEN Rear parking assist system pre- cautions
The rear parking assist system may
not sound sequentially depending on the speed and shapes of the objectsdetected.
The rear parking assist system may malfunction if the vehicle bumperheight or sensor installation has been
modified or damaged. Any non-factory
installed equipment or accessories
may also interfere with the sensor per-
formance.
The sensor may not recognize objects less than 15 in. (40 cm) from the sen-
sor, or it may sense an incorrect dis-
tance. Use caution.
When the sensor is frozen or stained with snow, dirt, or water, the sensor
may be inoperative until the stains are
removed using a soft cloth.
Do not push, scratch or strike the sen- sor. Sensor damage could occur.
Page 141 of 312
Features of your vehicle
66
4
D190500AUN High - beam operation
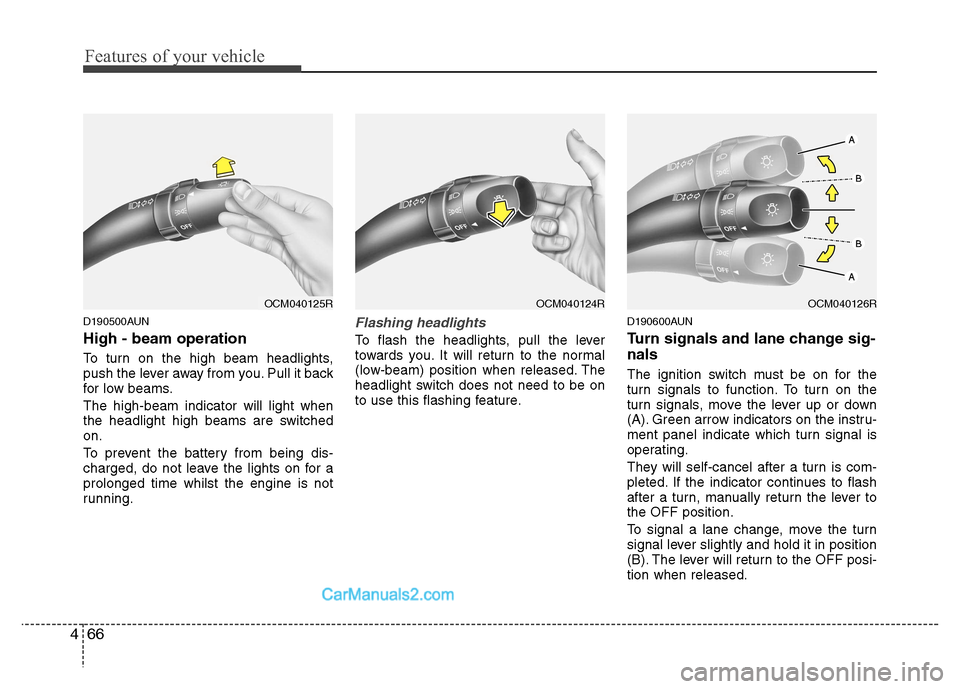
To turn on the high beam headlights,
push the lever away from you. Pull it back
for low beams. The high-beam indicator will light when
the headlight high beams are switchedon.
To prevent the battery from being dis-
charged, do not leave the lights on for aprolonged time whilst the engine is not
running.Flashing headlights
To flash the headlights, pull the lever
towards you. It will return to the normal
(low-beam) position when released. The
headlight switch does not need to be on
to use this flashing feature. D190600AUN
Turn signals and lane change sig- nals
The ignition switch must be on for the
turn signals to function. To turn on the
turn signals, move the lever up or down
(A). Green arrow indicators on the instru-
ment panel indicate which turn signal is
operating.
They will self-cancel after a turn is com-
pleted. If the indicator continues to flash
after a turn, manually return the lever tothe OFF position.
To signal a lane change, move the turn
signal lever slightly and hold it in position
(B). The lever will return to the OFF posi-tion when released.
OCM040125ROCM040124ROCM040126R
Page 143 of 312
Features of your vehicle
68
4
D190800AFD
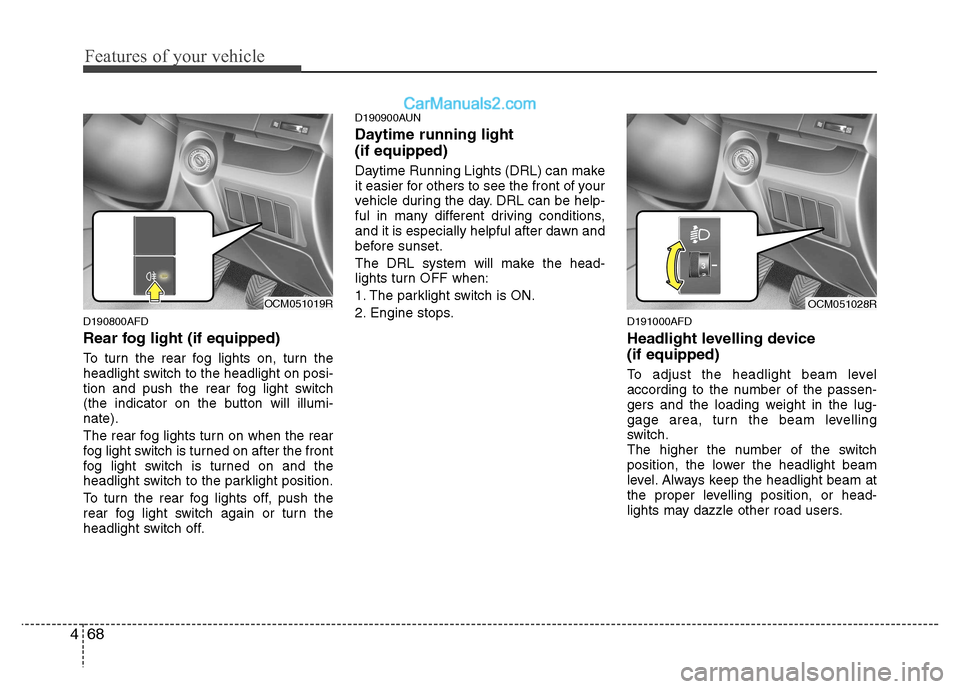
Rear fog light (if equipped)
To turn the rear fog lights on, turn the
headlight switch to the headlight on posi-
tion and push the rear fog light switch
(the indicator on the button will illumi-nate).
The rear fog lights turn on when the rear
fog light switch is turned on after the front
fog light switch is turned on and the
headlight switch to the parklight position.
To turn the rear fog lights off, push the
rear fog light switch again or turn the
headlight switch off. D190900AUN
Daytime running light (if equipped)
Daytime Running Lights (DRL) can make
it easier for others to see the front of your
vehicle during the day. DRL can be help-
ful in many different driving conditions,
and it is especially helpful after dawn and
before sunset.
The DRL system will make the head-
lights turn OFF when:
1. The parklight switch is ON.
2. Engine stops.
D191000AFD
Headlight levelling device (if equipped)
To adjust the headlight beam level
according to the number of the passen-
gers and the loading weight in the lug-
gage area, turn the beam levelling
switch.
The higher the number of the switch
position, the lower the headlight beam
level. Always keep the headlight beam at
the proper levelling position, or head-
lights may dazzle other road users.
OCM051028ROCM051019R
Page 147 of 312
Features of your vehicle
72
4
D200200AFD
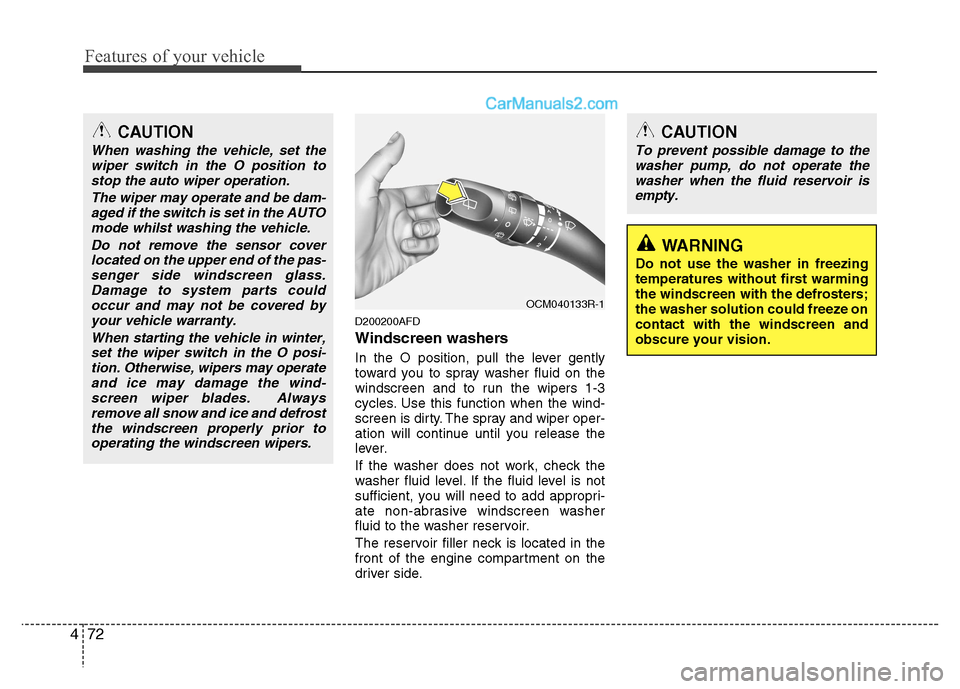
Windscreen washers
In the O position, pull the lever gently
toward you to spray washer fluid on the
windscreen and to run the wipers 1-3
cycles. Use this function when the wind-
screen is dirty. The spray and wiper oper-
ation will continue until you release the
lever.
If the washer does not work, check the
washer fluid level. If the fluid level is not
sufficient, you will need to add appropri-
ate non-abrasive windscreen washer
fluid to the washer reservoir.
The reservoir filler neck is located in the
front of the engine compartment on the
driver side.
CAUTION
When washing the vehicle, set the
wiper switch in the O position to
stop the auto wiper operation.
The wiper may operate and be dam-aged if the switch is set in the AUTO mode whilst washing the vehicle.
Do not remove the sensor coverlocated on the upper end of the pas-senger side windscreen glass.Damage to system parts could occur and may not be covered by
your vehicle warranty.
When starting the vehicle in winter,set the wiper switch in the O posi-tion. Otherwise, wipers may operateand ice may damage the wind-
screen wiper blades. Alwaysremove all snow and ice and defrostthe windscreen properly prior tooperating the windscreen wipers.
OCM040133R-1
CAUTION
To prevent possible damage to the washer pump, do not operate the
washer when the fluid reservoir is empty.
WARNING
Do not use the washer in freezing temperatures without first warmingthe windscreen with the defrosters;the washer solution could freeze oncontact with the windscreen andobscure your vision.
Page 149 of 312
Features of your vehicle
74
4
D210000AUN
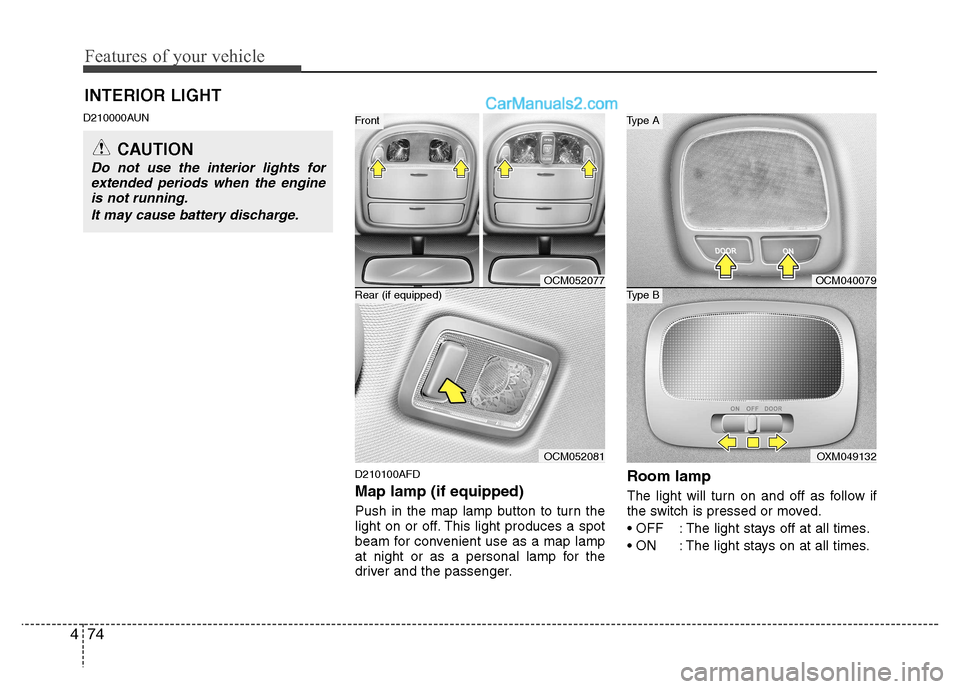
D210100AFD Map lamp (if equipped)
Push in the map lamp button to turn the
light on or off. This light produces a spot
beam for convenient use as a map lamp
at night or as a personal lamp for the
driver and the passenger.Room lamp
The light will turn on and off as follow if
the switch is pressed or moved.
: The light stays off at all times.
: The light stays on at all times.
INTERIOR LIGHT
CAUTION
Do not use the interior lights for
extended periods when the engineis not running.
It may cause battery discharge.
OCM052077
OCM052081
Rear (if equipped)
Front
OCM040079
OXM049132
Type B
Type A
Page 152 of 312
477
Features of your vehicle
D220000AUN
✽✽NOTICE
If you want to defrost and defog on the
front windscreen, refer to “Windscreen
Defrosting and Defogging” in this sec-
tion.
D220100AUN
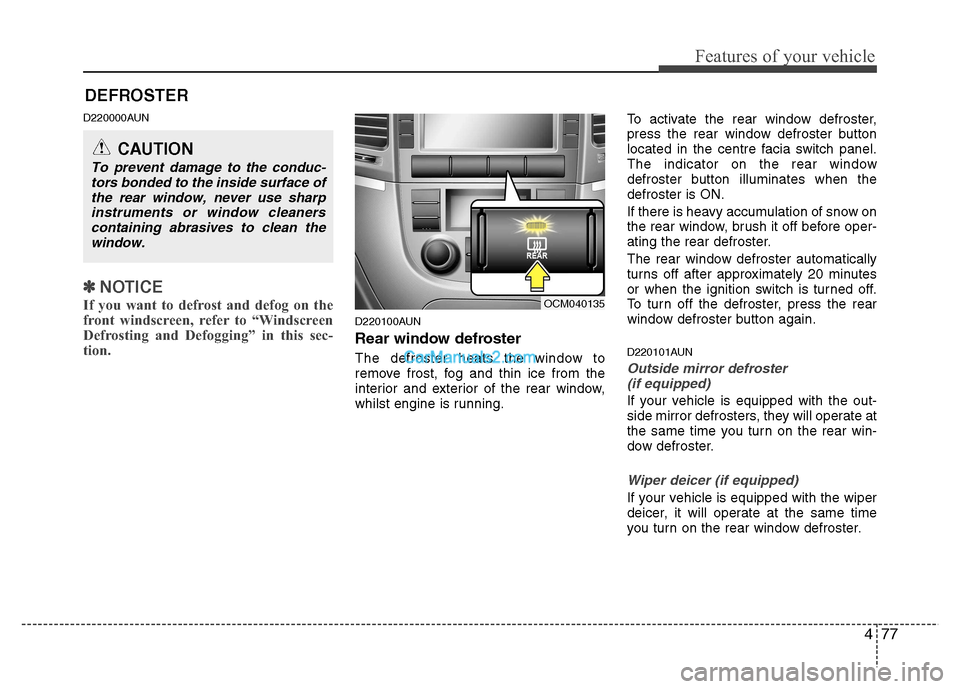
Rear window defroster
The defroster heats the window to
remove frost, fog and thin ice from the
interior and exterior of the rear window,
whilst engine is running. To activate the rear window defroster,
press the rear window defroster button
located in the centre facia switch panel.
The indicator on the rear window
defroster button illuminates when thedefroster is ON.
If there is heavy accumulation of snow on
the rear window, brush it off before oper-
ating the rear defroster.
The rear window defroster automatically
turns off after approximately 20 minutes
or when the ignition switch is turned off.
To turn off the defroster, press the rear
window defroster button again.
D220101AUN
Outside mirror defroster
(if equipped)
If your vehicle is equipped with the out-
side mirror defrosters, they will operate at
the same time you turn on the rear win-
dow defroster.
Wiper deicer (if equipped)
If your vehicle is equipped with the wiper
deicer, it will operate at the same time
you turn on the rear window defroster.
DEFROSTER
CAUTION
To prevent damage to the conduc-
tors bonded to the inside surface of
the rear window, never use sharpinstruments or window cleanerscontaining abrasives to clean thewindow.
OCM040135
Page 154 of 312
479
Features of your vehicle
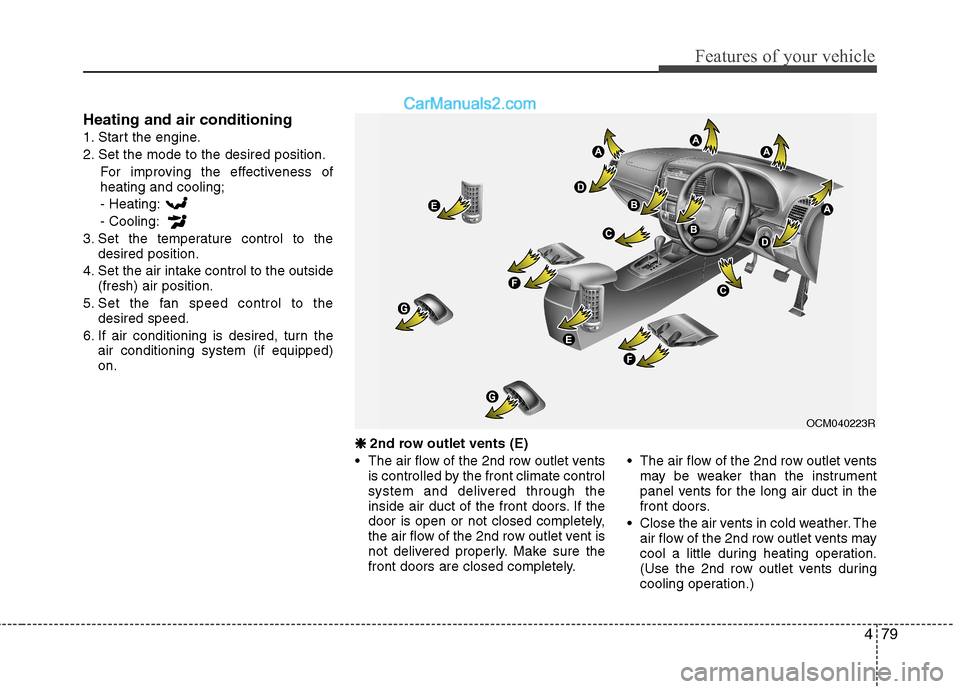
Heating and air conditioning
1. Start the engine.
2. Set the mode to the desired position.For improving the effectiveness of heating and cooling;- Heating: - Cooling:
3. Set the temperature control to the desired position.
4. Set the air intake control to the outside (fresh) air position.
5. Set the fan speed control to the desired speed.
6. If air conditioning is desired, turn the air conditioning system (if equipped) on.
❈
❈
2nd row outlet vents (E)
• The air flow of the 2nd row outlet vents is controlled by the front climate control
system and delivered through the
inside air duct of the front doors. If the
door is open or not closed completely,
the air flow of the 2nd row outlet vent is
not delivered properly. Make sure the
front doors are closed completely. The air flow of the 2nd row outlet vents
may be weaker than the instrument
panel vents for the long air duct in the
front doors.
Close the air vents in cold weather. The air flow of the 2nd row outlet vents may
cool a little during heating operation.
(Use the 2nd row outlet vents during
cooling operation.)
OCM040223R
Page 159 of 312
Features of your vehicle
84
4
D230503AFD
Air conditioning (if equipped)
All HYUNDAI Air Conditioning Systems
are filled with environmentally friendly
R-134a refrigerant which does not dam-
age to the ozone layer.
1. Start the engine. Push the air condi-
tioning button.
2. Set the mode to the position.
3. Set the air intake control to the outside air or recirculated air position.
4. Adjust the fan speed control and tem- perature control to maintain maximum
comfort.
When maximum cooling is desired, set the temperature control to the extreme
left position then set the fan speedcontrol to the highest speed.
✽✽ NOTICE
When using the air conditioning sys- tem, monitor the temperature gauge
closely whilst driving up hills or in
heavy traffic when outside tempera-
tures are high. Air conditioning sys-
tem operation may cause engine over-
heating. Continue to use the blower
fan but turn the air conditioning sys-
tem off if the temperature gauge indi-
cates engine overheating.
When opening the windows in humid weather air conditioning may create
water droplets inside the vehicle.
Since excessive water droplets may
cause damage to electrical equipment,
air conditioning should only be used
with the windows closed.Air conditioning system operation tips
If the vehicle has been parked in direct
sunlight during hot weather, open the
windows for a short time to let the hot
air inside the vehicle escape.
To help reduce moisture inside of the windows on rainy or humid days,
decrease the humidity inside the vehi-
cle by operating the air conditioningsystem.
During air conditioning system opera- tion, you may occasionally notice aslight change in engine speed as the
air conditioning compressor cycles.
This is a normal system operation
characteristic.
Use the air conditioning system every month only for a few minutes to ensure
maximum system performance.