roof Hyundai Santa Fe 2011 Owner's Manual - RHD (UK, Australia)
[x] Cancel search | Manufacturer: HYUNDAI, Model Year: 2011, Model line: Santa Fe, Model: Hyundai Santa Fe 2011Pages: 312, PDF Size: 23.92 MB
Page 64 of 312
347
Safety system of your vehicle
C040700AFD
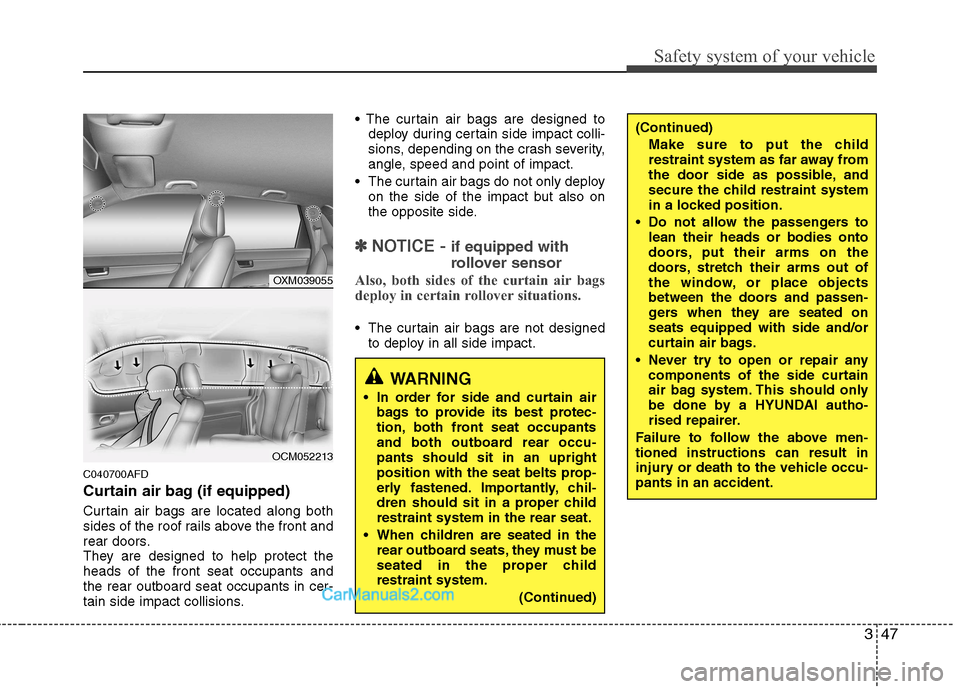
Curtain air bag (if equipped)
Curtain air bags are located along both
sides of the roof rails above the front and
rear doors.
They are designed to help protect theheads of the front seat occupants andthe rear outboard seat occupants in cer-
tain side impact collisions.
deploy during certain side impact colli-
sions, depending on the crash severity,
angle, speed and point of impact.
The curtain air bags do not only deploy on the side of the impact but also on
the opposite side.
✽✽ NOTICE - if equipped with
rollover sensor
Also, both sides of the curtain air bags
deploy in certain rollover situations.
The curtain air bags are not designed to deploy in all side impact.
WARNING
In order for side and curtain air bags to provide its best protec-
tion, both front seat occupants
and both outboard rear occu-pants should sit in an upright
position with the seat belts prop-
erly fastened. Importantly, chil-
dren should sit in a proper childrestraint system in the rear seat.
When children are seated in the rear outboard seats, they must be
seated in the proper childrestraint system.
(Continued)
(Continued)Make sure to put the child
restraint system as far away from
the door side as possible, and
secure the child restraint system
in a locked position.
Do not allow the passengers to lean their heads or bodies onto
doors, put their arms on the
doors, stretch their arms out of
the window, or place objects
between the doors and passen-
gers when they are seated onseats equipped with side and/or
curtain air bags.
Never try to open or repair any components of the side curtain
air bag system. This should only
be done by a HYUNDAI autho-
rised repairer.
Failure to follow the above men-tioned instructions can result in
injury or death to the vehicle occu-pants in an accident.
OXM039055
OCM052213
Page 72 of 312
355
Safety system of your vehicle
C040903AUN
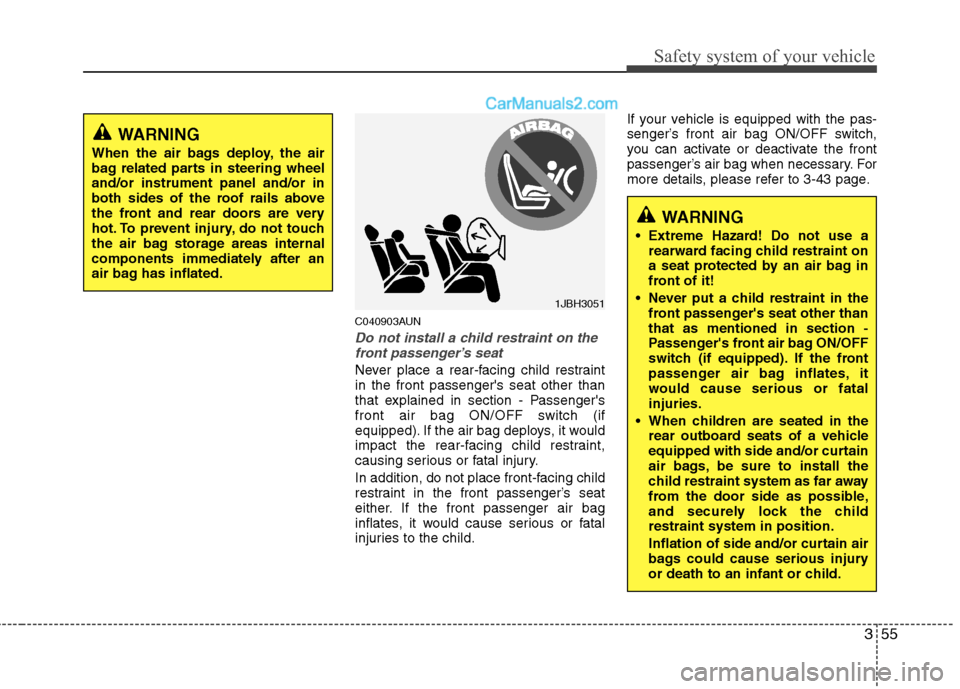
Do not install a child restraint on thefront passenger’s seat
Never place a rear-facing child restraint in the front passenger's seat other than
that explained in section - Passenger's
front air bag ON/OFF switch (if
equipped). If the air bag deploys, it would
impact the rear-facing child restraint,
causing serious or fatal injury.
In addition, do not place front-facing child
restraint in the front passenger’s seat
either. If the front passenger air bag
inflates, it would cause serious or fatal
injuries to the child. If your vehicle is equipped with the pas-
senger’s front air bag ON/OFF switch,
you can activate or deactivate the front
passenger’s air bag when necessary. For
more details, please refer to 3-43 page.
1JBH3051
WARNING
When the air bags deploy, the air
bag related parts in steering wheeland/or instrument panel and/or in
both sides of the roof rails above
the front and rear doors are very
hot. To prevent injury, do not touch
the air bag storage areas internal
components immediately after an
air bag has inflated.
WARNING
Extreme Hazard! Do not use a rearward facing child restraint on
a seat protected by an air bag in
front of it!
Never put a child restraint in the front passenger's seat other thanthat as mentioned in section -
Passenger's front air bag ON/OFF
switch (if equipped). If the front
passenger air bag inflates, it
would cause serious or fatalinjuries.
When children are seated in the rear outboard seats of a vehicle
equipped with side and/or curtain
air bags, be sure to install the
child restraint system as far away
from the door side as possible,
and securely lock the childrestraint system in position.
Inflation of side and/or curtain air
bags could cause serious injury
or death to an infant or child.
Page 76 of 312
4
Keys / 4-2
Remote keyless entry / 4-5
Smart key / 4-7
Theft-alarm system / 4-10
Door locks / 4-12
Tailgate / 4-16
Windows / 4-18
Bonnet / 4-22
Fuel filler lid / 4-24
Sunroof / 4-28
Steering wheel / 4-32
Mirrors / 4-34
Instrument cluster / 4-38
Rear parking assist system / 4-60
Rearview camera / 4-62
Hazard warning flasher / 4-63
Lighting / 4-64
Wipers and washers / 4-70
Interior light / 4-74
Defroster / 4-77
Manual climate control system / 4-78
Automatic climate control system / 4-87
Windscreen defrosting and defogging / 4-95
Storage compartment / 4-98
Interior features / 4-101
Exterior features / 4-110
Audio system / 4-111
Features of your vehicle
Page 94 of 312
419
Features of your vehicle
D080100BFD
Power windows
The ignition switch must be in the ON
position for power windows to operate.
Each door has a power window switch
that controls the door’s window. The driv-
er has a power window lock switch which
can block the operation of rear passen-
ger windows.
The power windows can be operated for
approximately 30 seconds after the igni-
tion key is removed or turned to the ACC
or LOCK position. However, if the front
doors are opened, the power windows
cannot be operated even within the 30
seconds period. The driver’s door has a
master power window switch that con-
trols all the windows in the vehicle.✽✽NOTICE
Whilst driving with the rear windows
down or with the sunroof (if equipped)
in an open (or partially open) position,
your vehicle may demonstrate a wind
buffeting or pulsation noise. This
noise is a normal occurrence and can be
reduced or eliminated by taking the fol-
lowing actions. If the noise occurs with
one or both of the rear windows down,
partially lower both front windows
approximately one inch. If you experi-
ence the noise with the sunroof open,
slightly reduce the size of the sunroof
opening.
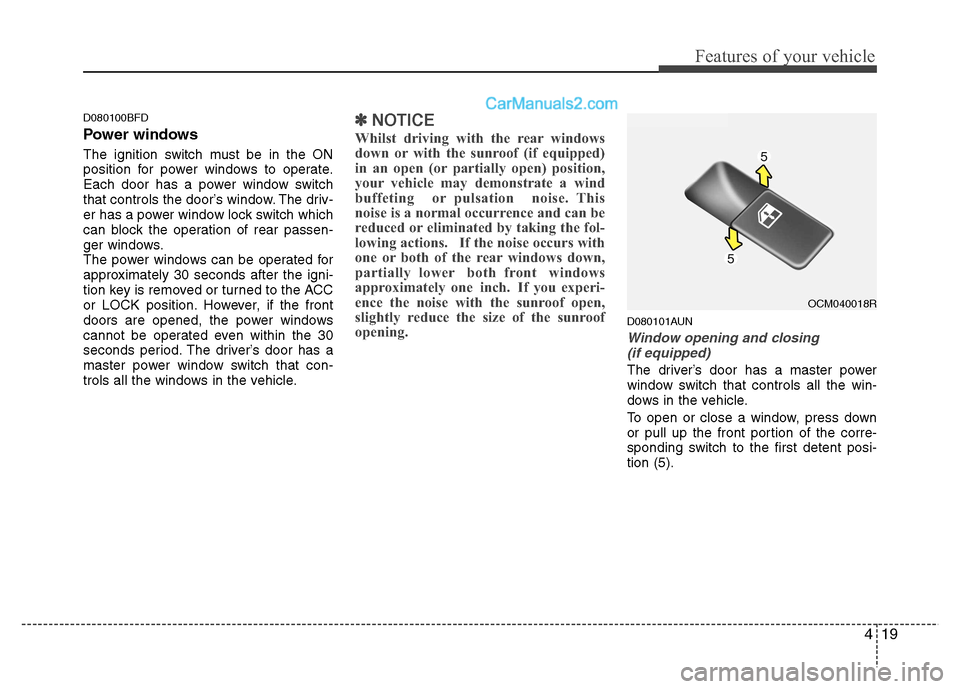
D080101AUN
Window opening and closing (if equipped)
The driver’s door has a master power
window switch that controls all the win-
dows in the vehicle.
To open or close a window, press down
or pull up the front portion of the corre-
sponding switch to the first detent posi-tion (5).
OCM040018R
Page 103 of 312
Features of your vehicle
28
4
D110000AUN
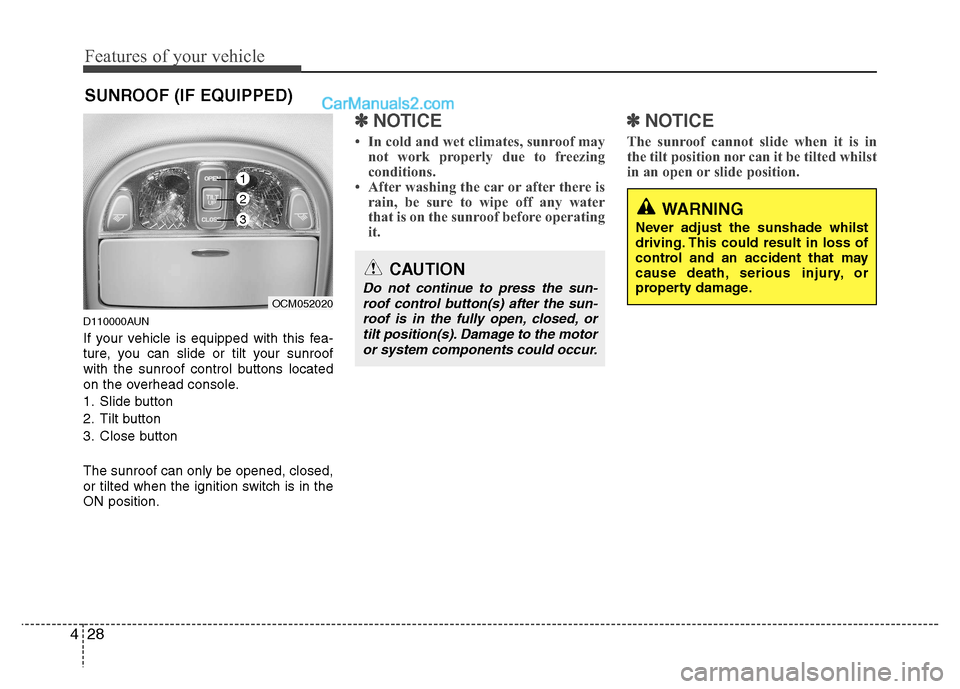
If your vehicle is equipped with this fea-
ture, you can slide or tilt your sunroof
with the sunroof control buttons located
on the overhead console.
1. Slide button
2. Tilt button
3. Close button The sunroof can only be opened, closed,
or tilted when the ignition switch is in theON position.
✽✽
NOTICE
In cold and wet climates, sunroof may not work properly due to freezing
conditions.
After washing the car or after there is
rain, be sure to wipe off any water
that is on the sunroof before operating
it. ✽✽
NOTICE
The sunroof cannot slide when it is in
the tilt position nor can it be tilted whilst
in an open or slide position.
SUNROOF (IF EQUIPPED)
OCM052020
CAUTION
Do not continue to press the sun- roof control button(s) after the sun- roof is in the fully open, closed, ortilt position(s). Damage to the motor
or system components could occur.
WARNING
Never adjust the sunshade whilst
driving. This could result in loss of
control and an accident that may
cause death, serious injury, or
property damage.
1
2
3
Page 104 of 312
429
Features of your vehicle
D110100ACM
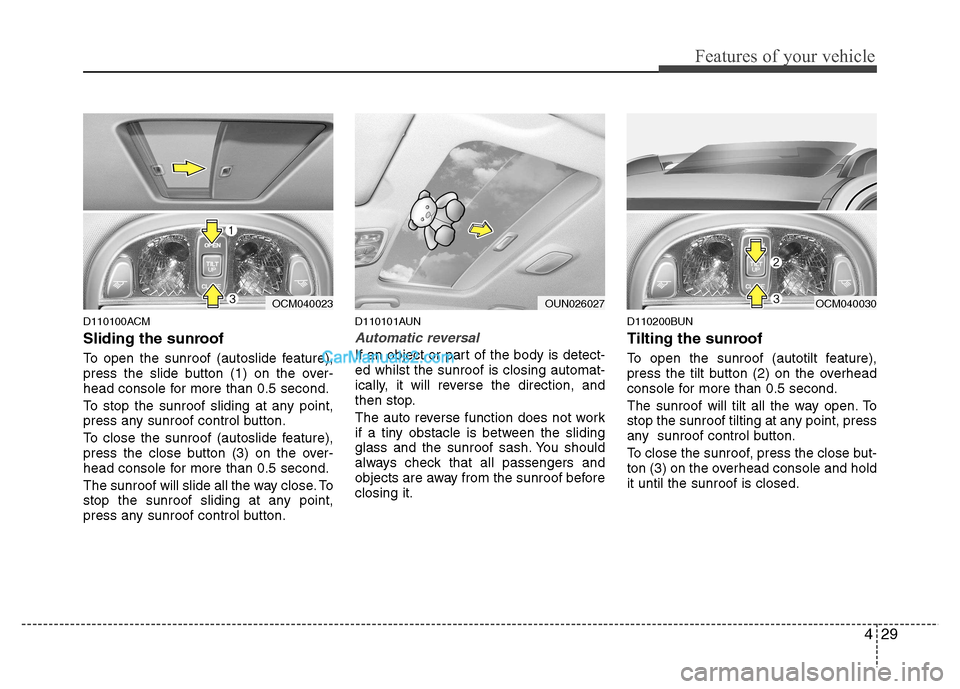
Sliding the sunroof
To open the sunroof (autoslide feature),
press the slide button (1) on the over-
head console for more than 0.5 second.
To stop the sunroof sliding at any point,
press any sunroof control button.
To close the sunroof (autoslide feature),
press the close button (3) on the over-
head console for more than 0.5 second.
The sunroof will slide all the way close. To
stop the sunroof sliding at any point,
press any sunroof control button.D110101AUN
Automatic reversal
If an object or part of the body is detect- ed whilst the sunroof is closing automat-
ically, it will reverse the direction, and
then stop.
The auto reverse function does not work
if a tiny obstacle is between the sliding
glass and the sunroof sash. You should
always check that all passengers and
objects are away from the sunroof beforeclosing it.
D110200BUN
Tilting the sunroof
To open the sunroof (autotilt feature),
press the tilt button (2) on the overhead
console for more than 0.5 second.
The sunroof will tilt all the way open. To
stop the sunroof tilting at any point, press
any sunroof control button.
To close the sunroof, press the close but-
ton (3) on the overhead console and holdit until the sunroof is closed.
OCM040030OUN026027OCM040023
Page 105 of 312
Features of your vehicle
30
4
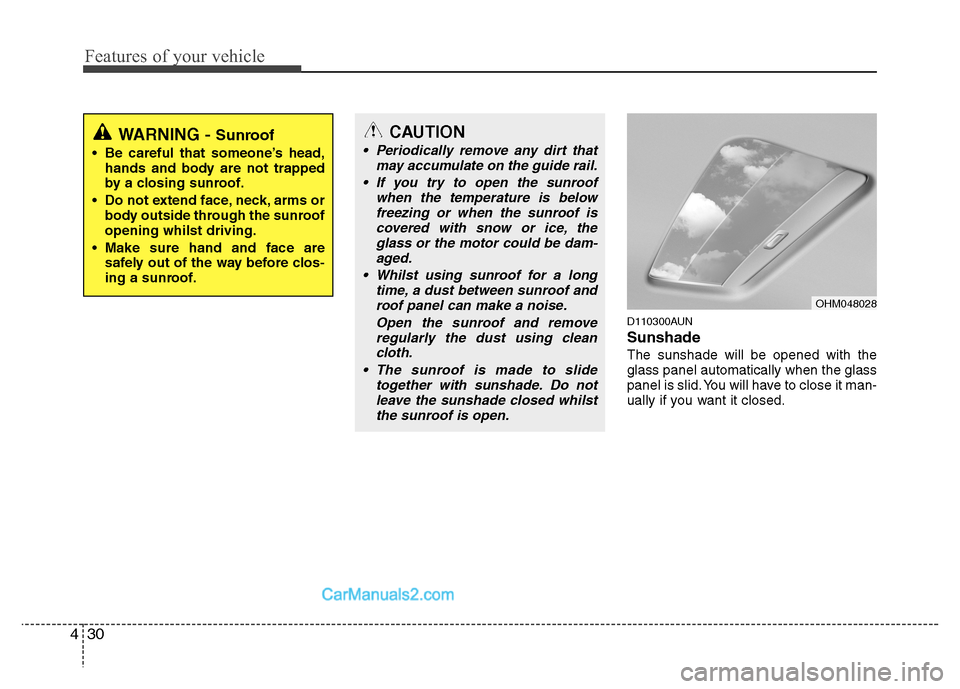
D110300AUN Sunshade The sunshade will be opened with the glass panel automatically when the glass
panel is slid. You will have to close it man-
ually if you want it closed.
OHM048028
WARNING - Sunroof
Be careful that someone’s head, hands and body are not trapped
by a closing sunroof.
Do not extend face, neck, arms or body outside through the sunroofopening whilst driving.
Make sure hand and face are safely out of the way before clos-
ing a sunroof.CAUTION
Periodically remove any dirt that
may accumulate on the guide rail.
If you try to open the sunroof when the temperature is belowfreezing or when the sunroof iscovered with snow or ice, the
glass or the motor could be dam- aged.
Whilst using sunroof for a long time, a dust between sunroof androof panel can make a noise.
Open the sunroof and removeregularly the dust using cleancloth.
The sunroof is made to slide together with sunshade. Do notleave the sunshade closed whilst
the sunroof is open.
Page 106 of 312
431
Features of your vehicle
D110500AFD
Resetting the sunroof
Whenever the vehicle battery is discon- nected or discharged, or related fuse is
blown, you must reset your sunroof sys-
tem as follows:
1. Turn the ignition switch to the ONposition and close the sunroof com-
pletely.
2. Release the control button.
3. Tilt the sunroof by pressing the TILT- UP button.
4. Release the control button.
5. Press and hold the TILT-UP button until the sunroof tilt and slightly moves
up and down. Then, release the but-ton.
6. Press and hold the TILT-UP button until the sunroof is operated as fol-
lows;
TILT DOWN �SLIDE OPEN �
SLIDE CLOSE
Then, release the control button.
When this is complete, the sunroof sys- tem is reset. ❈
For more detailed information, contact
a HYUNDAI authorised repairer.
CAUTION
If the sunroof is not reset when the
vehicle battery is disconnected ordischarged, or related fuse isblown, the sunroof may operate improperly.
Page 185 of 312
Features of your vehicle
110
4
EXTERIOR FEATURES
D290100AFD
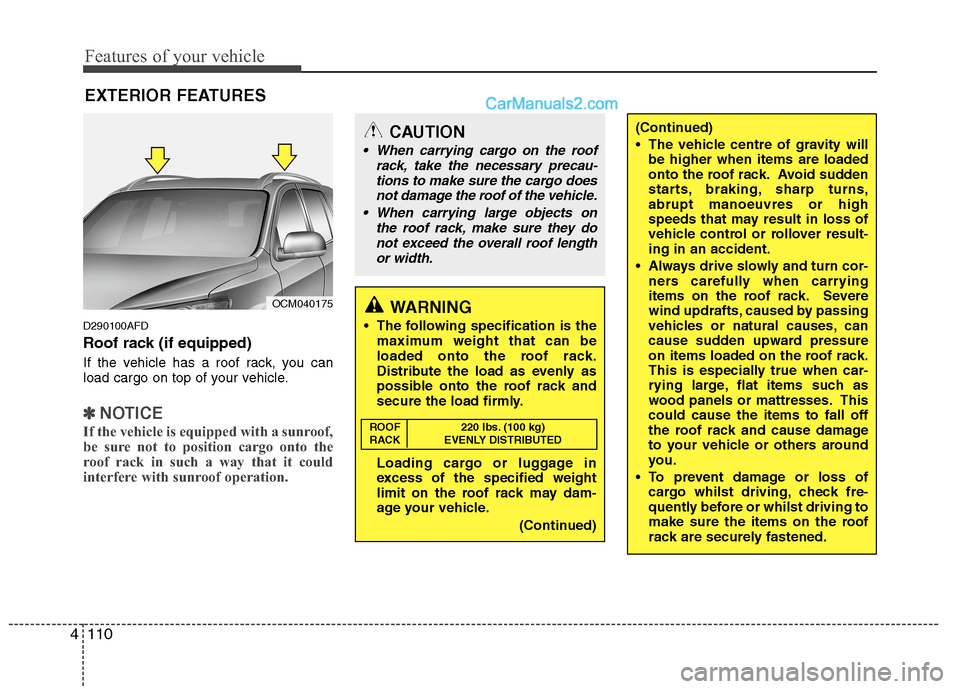
Roof rack (if equipped)
If the vehicle has a roof rack, you can
load cargo on top of your vehicle.
✽✽ NOTICE
If the vehicle is equipped with a sunroof,
be sure not to position cargo onto the
roof rack in such a way that it could
interfere with sunroof operation.
CAUTION
When carrying cargo on the roof rack, take the necessary precau-
tions to make sure the cargo doesnot damage the roof of the vehicle.
When carrying large objects on the roof rack, make sure they do
not exceed the overall roof length or width.
WARNING
The following specification is the maximum weight that can be
loaded onto the roof rack.
Distribute the load as evenly as
possible onto the roof rack and
secure the load firmly.
Loading cargo or luggage in
excess of the specified weight
limit on the roof rack may dam-
age your vehicle.
(Continued)
(Continued)
The vehicle centre of gravity willbe higher when items are loaded
onto the roof rack. Avoid sudden
starts, braking, sharp turns,abrupt manoeuvres or high
speeds that may result in loss of
vehicle control or rollover result-ing in an accident.
Always drive slowly and turn cor- ners carefully when carrying
items on the roof rack. Severe
wind updrafts, caused by passing
vehicles or natural causes, can
cause sudden upward pressure
on items loaded on the roof rack.
This is especially true when car-
rying large, flat items such as
wood panels or mattresses. Thiscould cause the items to fall off
the roof rack and cause damage
to your vehicle or others around
you.
To prevent damage or loss of cargo whilst driving, check fre-
quently before or whilst driving to
make sure the items on the roof
rack are securely fastened.
ROOF 220 lbs. (100 kg)
RACK EVENLY DISTRIBUTED
OCM040175
Page 186 of 312
4111
Features of your vehicle
✽✽NOTICE
If you install an aftermarket HID head
lamp, your vehicle’s audio and electron-
ic device may malfunction.
Antenna D300102BFD
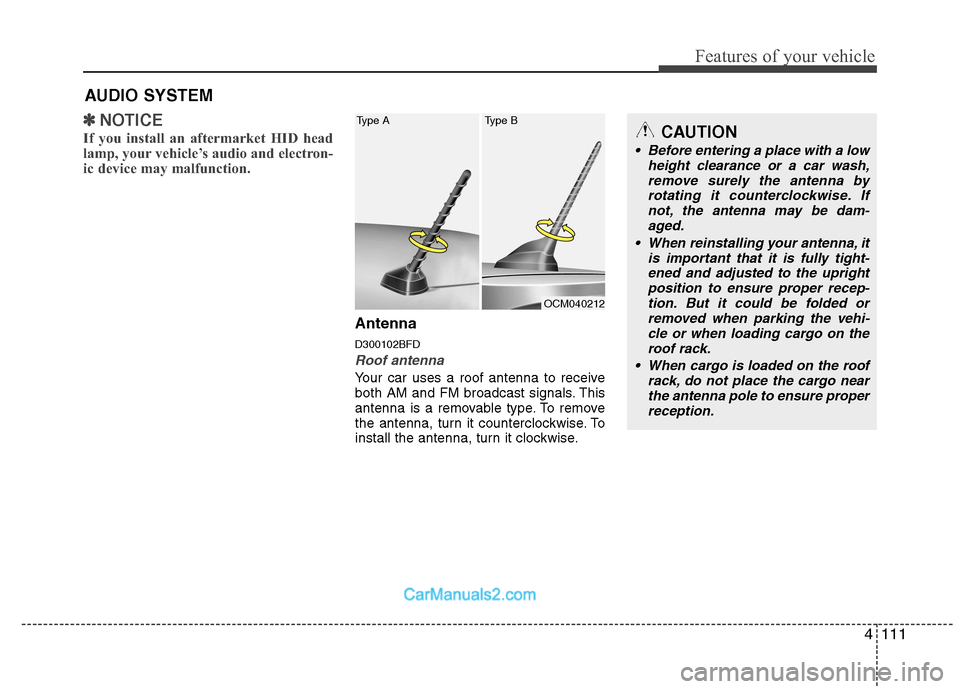
Roof antenna
Your car uses a roof antenna to receive
both AM and FM broadcast signals. This
antenna is a removable type. To remove
the antenna, turn it counterclockwise. To
install the antenna, turn it clockwise.
AUDIO SYSTEM
CAUTION
• Before entering a place with a low
height clearance or a car wash,
remove surely the antenna by rotating it counterclockwise. Ifnot, the antenna may be dam-aged.
When reinstalling your antenna, it is important that it is fully tight-ened and adjusted to the upright position to ensure proper recep-
tion. But it could be folded or removed when parking the vehi-cle or when loading cargo on the roof rack.
When cargo is loaded on the roof rack, do not place the cargo nearthe antenna pole to ensure properreception.
OCM040212
Type A Type B