turn signal Hyundai Santa Fe 2011 Owner's Manual - RHD (UK, Australia)
[x] Cancel search | Manufacturer: HYUNDAI, Model Year: 2011, Model line: Santa Fe, Model: Hyundai Santa Fe 2011Pages: 312, PDF Size: 23.92 MB
Page 13 of 312
Introduction
6
1
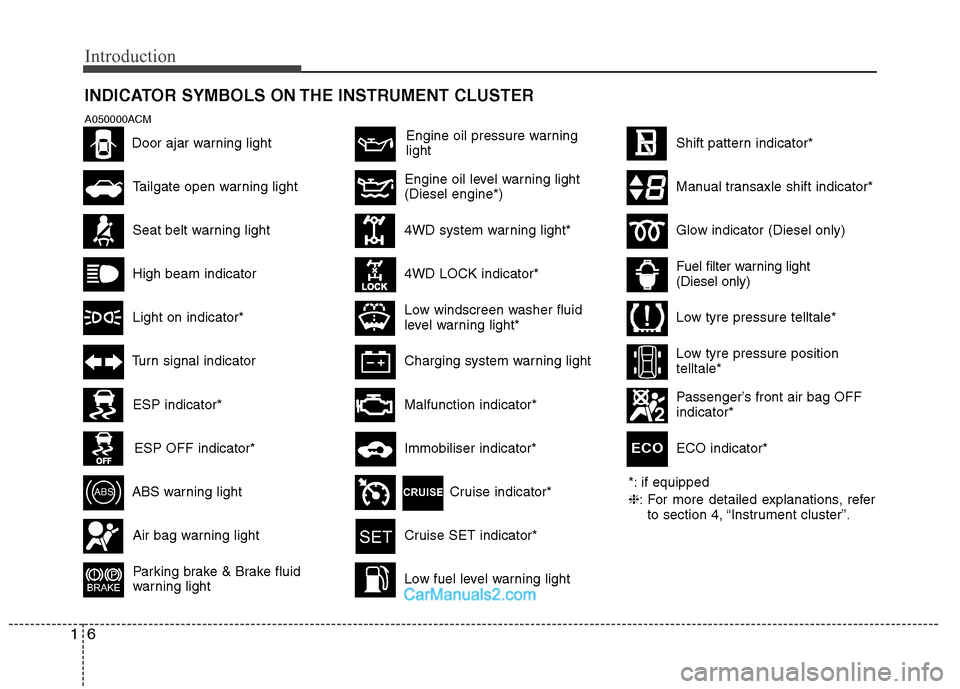
INDICATOR SYMBOLS ON THE INSTRUMENT CLUSTER
Engine oil pressure warning light
*: if equipped ❈: For more detailed explanations, refer
to section 4, “Instrument cluster”.
Passenger’s front air bag OFF indicator*
Seat belt warning light
Tailgate open warning light
High beam indicator
Light on indicator*
Turn signal indicator
ABS warning light
Parking brake & Brake fluid
warning light
4WD system warning light* 4WD LOCK indicator*
Malfunction indicator*
Air bag warning lightCruise SET indicator*
Low fuel level warning light
Shift pattern indicator*
Charging system warning light
Low windscreen washer fluid
level warning light*
Door ajar warning light
Glow indicator (Diesel only)
Fuel filter warning light (Diesel only)
ESP indicator*
ESP OFF indicator*Immobiliser indicator*
Low tyre pressure telltale*
Low tyre pressure position telltale*
A050000ACM
Manual transaxle shift indicator*Engine oil level warning light (Diesel engine*)
ECO indicator*
ECO
Cruise indicator*
Page 16 of 312
23
Your vehicle at a glance
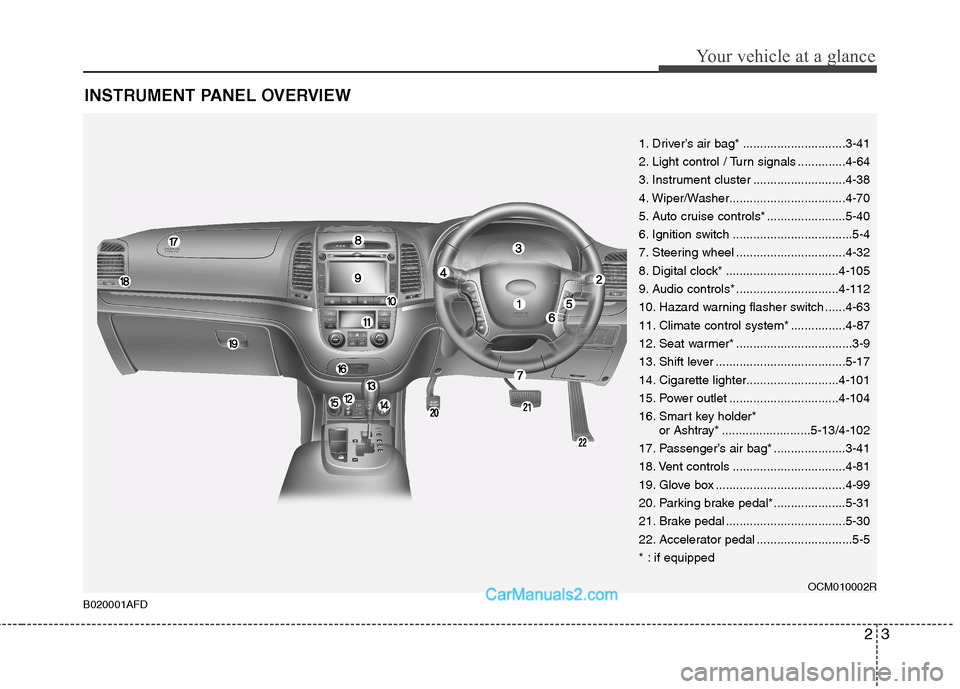
INSTRUMENT PANEL OVERVIEW
1. Driver’s air bag* ..............................3-41
2. Light control / Turn signals ..............4-64
3. Instrument cluster ...........................4-38
4. Wiper/Washer..................................4-70
5. Auto cruise controls* .......................5-40
6. Ignition switch ...................................5-4
7. Steering wheel ................................4-32
8. Digital clock* .................................4-105
9. Audio controls* ..............................4-112
10. Hazard warning flasher switch ......4-63
11. Climate control system* ................4-87
12. Seat warmer* ..................................3-9
13. Shift lever ......................................5-17
14. Cigarette lighter...........................4-101
15. Power outlet ................................4-10416.
Smart key holder*
or Ashtray*..........................5-13/4-102
17. Passenger’s air bag* .....................3-41
18. Vent controls .................................4-81
19. Glove box ......................................4-99
20. Parking brake pedal*.....................5-31
21. Brake pedal ...................................5-30
22. Accelerator pedal ............................5-5
* : if equipped
OCM010002R
B020001AFD
Page 70 of 312
353
Safety system of your vehicle
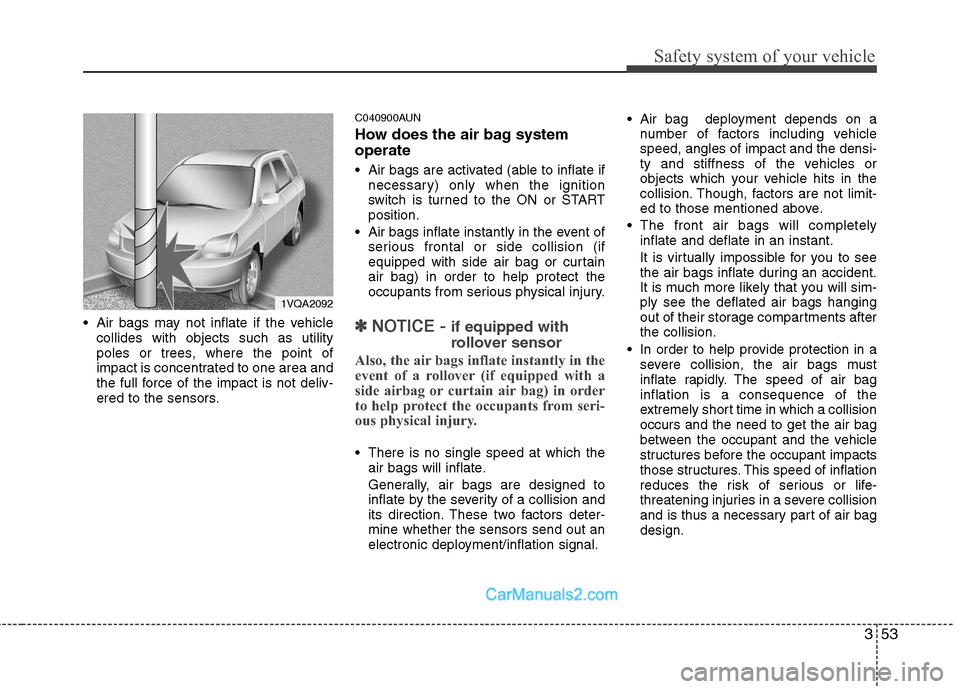
Air bags may not inflate if the vehiclecollides with objects such as utility
poles or trees, where the point of
impact is concentrated to one area and
the full force of the impact is not deliv-
ered to the sensors. C040900AUN
How does the air bag system operate
Air bags are activated (able to inflate if
necessary) only when the ignition
switch is turned to the ON or STARTposition.
Air bags inflate instantly in the event of serious frontal or side collision (if
equipped with side air bag or curtainair bag) in order to help protect the
occupants from serious physical injury.✽✽ NOTICE - if equipped with
rollover sensor
Also, the air bags inflate instantly in the
event of a rollover (if equipped with a
side airbag or curtain air bag) in order
to help protect the occupants from seri-
ous physical injury.
There is no single speed at which the air bags will inflate.
Generally, air bags are designed to
inflate by the severity of a collision and
its direction. These two factors deter-mine whether the sensors send out an
electronic deployment/inflation signal. Air bag deployment depends on a
number of factors including vehiclespeed, angles of impact and the densi-
ty and stiffness of the vehicles or
objects which your vehicle hits in the
collision. Though, factors are not limit-
ed to those mentioned above.
The front air bags will completely inflate and deflate in an instant.
It is virtually impossible for you to see
the air bags inflate during an accident.
It is much more likely that you will sim-ply see the deflated air bags hanging
out of their storage compartments afterthe collision.
In order to help provide protection in a severe collision, the air bags must
inflate rapidly. The speed of air baginflation is a consequence of the
extremely short time in which a collisionoccurs and the need to get the air bag
between the occupant and the vehicle
structures before the occupant impacts
those structures. This speed of inflation
reduces the risk of serious or life-
threatening injuries in a severe collision
and is thus a necessary part of air bagdesign.
1VQA2092
Page 113 of 312
Features of your vehicle
38
4
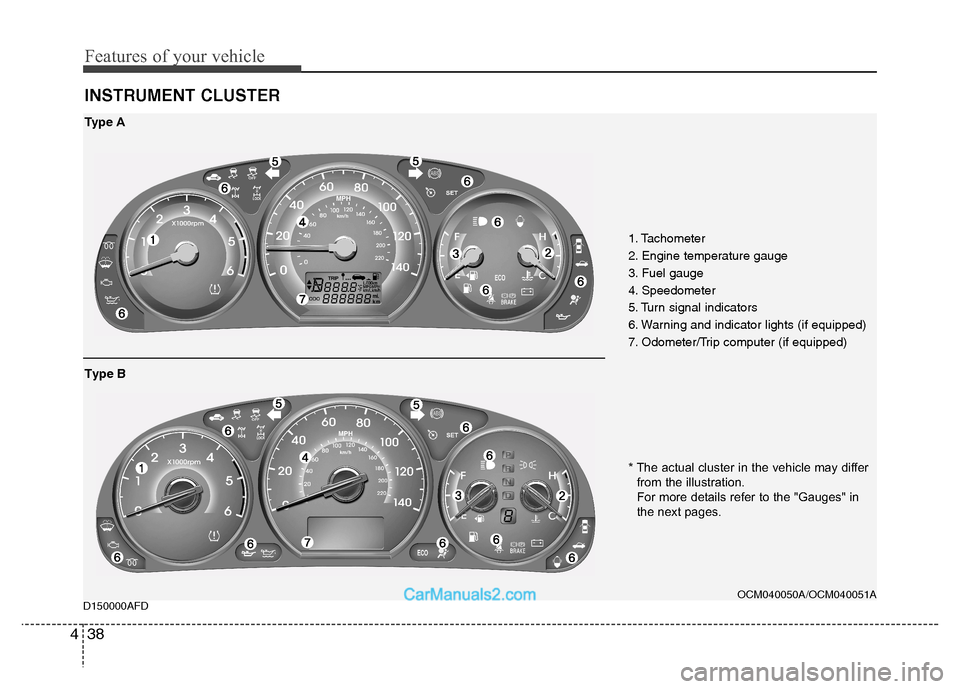
D150000AFD INSTRUMENT CLUSTER
1. Tachometer
2. Engine temperature gauge
3. Fuel gauge
4. Speedometer
5. Turn signal indicators
6. Warning and indicator lights (if equipped)
7. Odometer/Trip computer (if equipped)
OCM040050A/OCM040051A
Type A
* The actual cluster in the vehicle may differ
from the illustration.
For more details refer to the "Gauges" in
the next pages.
Type B
Page 124 of 312
449
Features of your vehicle
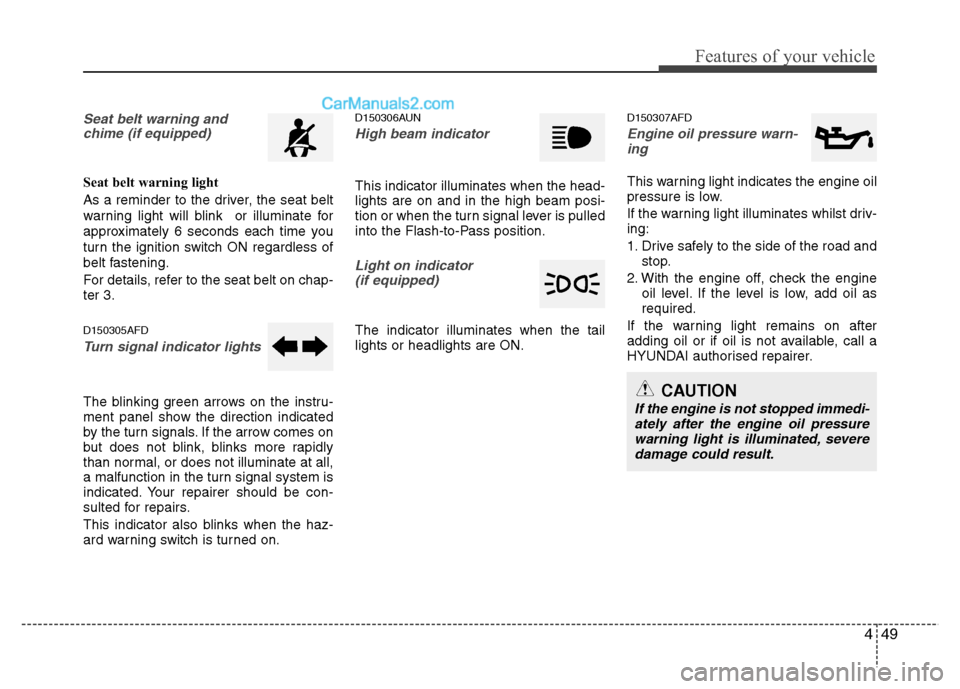
Seat belt warning andchime (if equipped)
Seat belt warning light
As a reminder to the driver, the seat belt
warning light will blink or illuminate for
approximately 6 seconds each time you
turn the ignition switch ON regardless of
belt fastening.
For details, refer to the seat belt on chap- ter 3. D150305AFD
Turn signal indicator lights
The blinking green arrows on the instru-
ment panel show the direction indicated
by the turn signals. If the arrow comes on
but does not blink, blinks more rapidly
than normal, or does not illuminate at all,
a malfunction in the turn signal system is
indicated. Your repairer should be con-
sulted for repairs.
This indicator also blinks when the haz-
ard warning switch is turned on. D150306AUN
High beam indicator
This indicator illuminates when the head- lights are on and in the high beam posi-
tion or when the turn signal lever is pulled
into the Flash-to-Pass position.
Light on indicator
(if equipped)
The indicator illuminates when the tail lights or headlights are ON. D150307AFD
Engine oil pressure warn-
ing
This warning light indicates the engine oil
pressure is low.
If the warning light illuminates whilst driv- ing:
1. Drive safely to the side of the road and stop.
2. With the engine off, check the engine oil level. If the level is low, add oil as required.
If the warning light remains on after
adding oil or if oil is not available, call a
HYUNDAI authorised repairer.
CAUTION
If the engine is not stopped immedi- ately after the engine oil pressurewarning light is illuminated, severe
damage could result.
Page 138 of 312
463
Features of your vehicle
The rearview camera will activate when
the back-up light is ON with the ignition
switch ON and the shift lever in the R
(Reverse) position. This system is a sup-
plemental system that shows behind the
vehicle through the rearview display mir-
ror whilst backing-up.
Type A
The rearview camera may be turned off
by pressing the ON/OFF button when the
rearview camera is activated. To turn the
camera on again, press the ON/OFF but-
ton again when the ignition switch is on
and the shift lever in R (Reverse). Also,
the camera will turn on automatically
whenever the ignition switch is turned offand on again.
Type B (if equipped)
If your vehicle is equipped with AVN
(Audio, Video and Navigation) system,
rearview display will show behind the
vehicle through the AVN monitor whilst
backing-up.D180000AUN
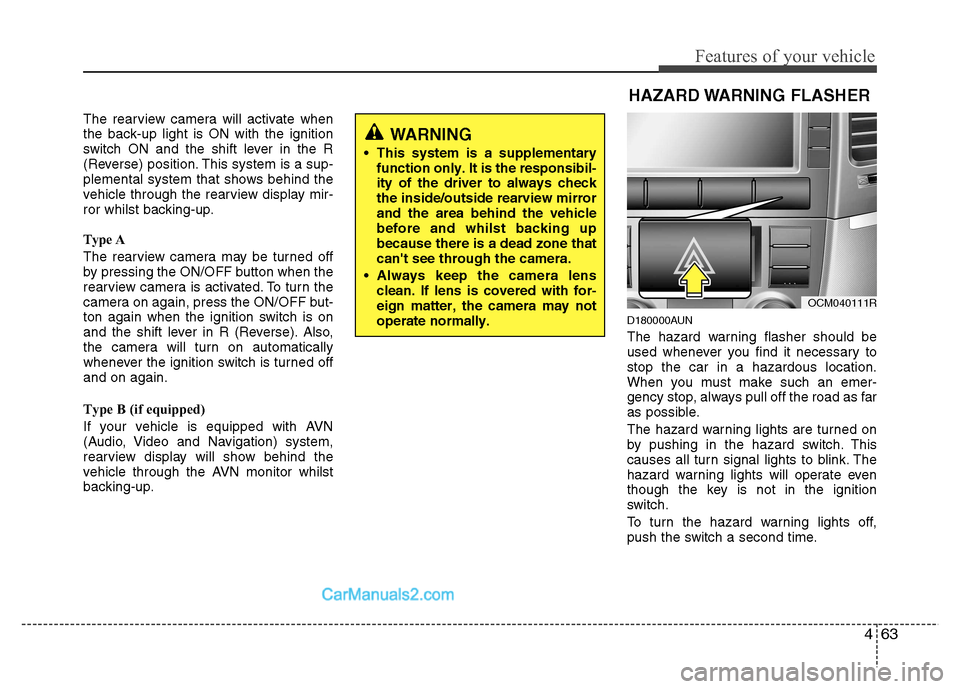
The hazard warning flasher should be
used whenever you find it necessary tostop the car in a hazardous location.
When you must make such an emer-
gency stop, always pull off the road as far
as possible.
The hazard warning lights are turned on
by pushing in the hazard switch. This
causes all turn signal lights to blink. The
hazard warning lights will operate even
though the key is not in the ignition
switch.
To turn the hazard warning lights off,
push the switch a second time.
WARNING
This system is a supplementary function only. It is the responsibil- ity of the driver to always checkthe inside/outside rearview mirrorand the area behind the vehiclebefore and whilst backing upbecause there is a dead zone thatcan't see through the camera.
Always keep the camera lens clean. If lens is covered with for-eign matter, the camera may notoperate normally.
OCM040111R
HAZARD WARNING FLASHER
Page 141 of 312
Features of your vehicle
66
4
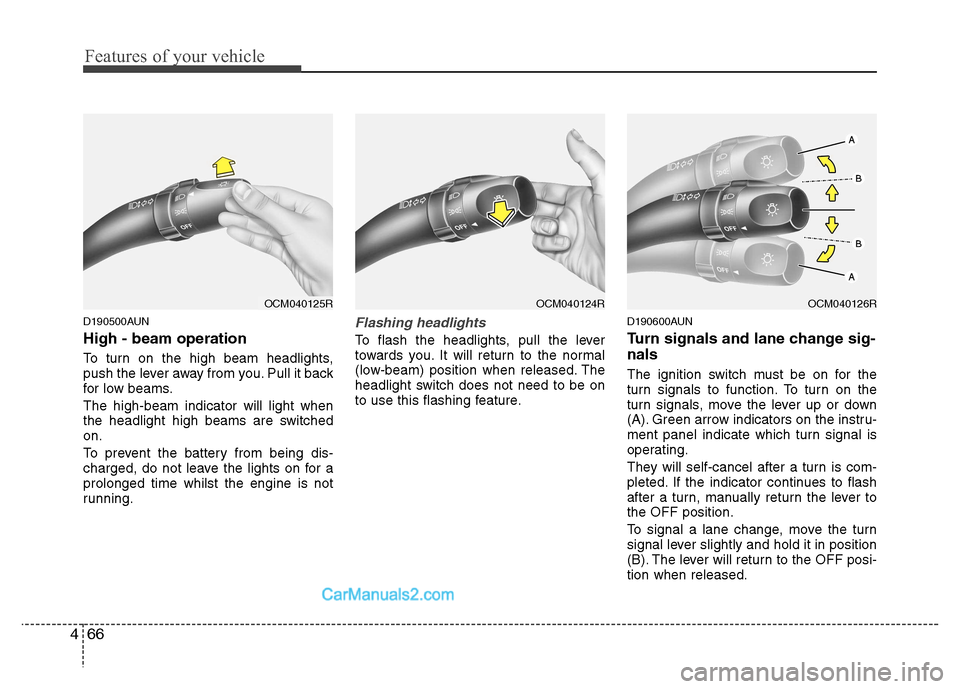
D190500AUN High - beam operation
To turn on the high beam headlights,
push the lever away from you. Pull it back
for low beams. The high-beam indicator will light when
the headlight high beams are switchedon.
To prevent the battery from being dis-
charged, do not leave the lights on for aprolonged time whilst the engine is not
running.Flashing headlights
To flash the headlights, pull the lever
towards you. It will return to the normal
(low-beam) position when released. The
headlight switch does not need to be on
to use this flashing feature. D190600AUN
Turn signals and lane change sig- nals
The ignition switch must be on for the
turn signals to function. To turn on the
turn signals, move the lever up or down
(A). Green arrow indicators on the instru-
ment panel indicate which turn signal is
operating.
They will self-cancel after a turn is com-
pleted. If the indicator continues to flash
after a turn, manually return the lever tothe OFF position.
To signal a lane change, move the turn
signal lever slightly and hold it in position
(B). The lever will return to the OFF posi-tion when released.
OCM040125ROCM040124ROCM040126R
Page 142 of 312
467
Features of your vehicle
If an indicator stays on and does not
flash or if it flashes abnormally, one of the
turn signal bulbs may be burned out andwill require replacement.
✽✽NOTICE
If an indicator flash is abnormally quick
or slow, bulb may be burned out or have
a poor electrical connection in the cir-
cuit.
D190700AFD
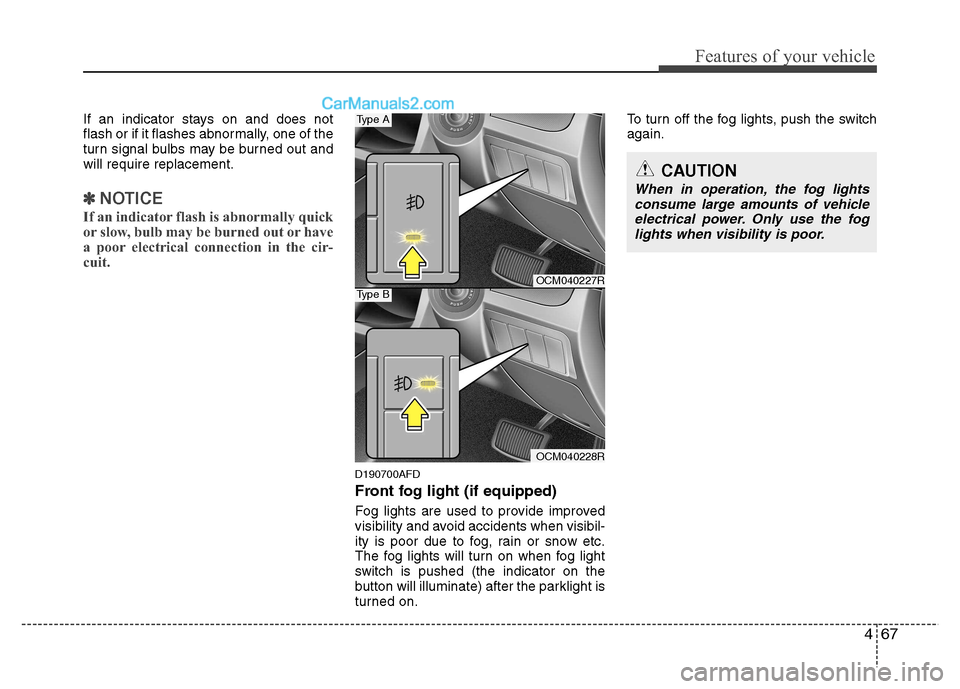
Front fog light (if equipped)
Fog lights are used to provide improved
visibility and avoid accidents when visibil-
ity is poor due to fog, rain or snow etc.
The fog lights will turn on when fog light
switch is pushed (the indicator on the
button will illuminate) after the parklight is
turned on. To turn off the fog lights, push the switchagain.
CAUTION
When in operation, the fog lights
consume large amounts of vehicle electrical power. Only use the fog lights when visibility is poor.
OCM040227R
OCM040228R
Type A
Type B
Page 186 of 312
4111
Features of your vehicle
✽✽NOTICE
If you install an aftermarket HID head
lamp, your vehicle’s audio and electron-
ic device may malfunction.
Antenna D300102BFD
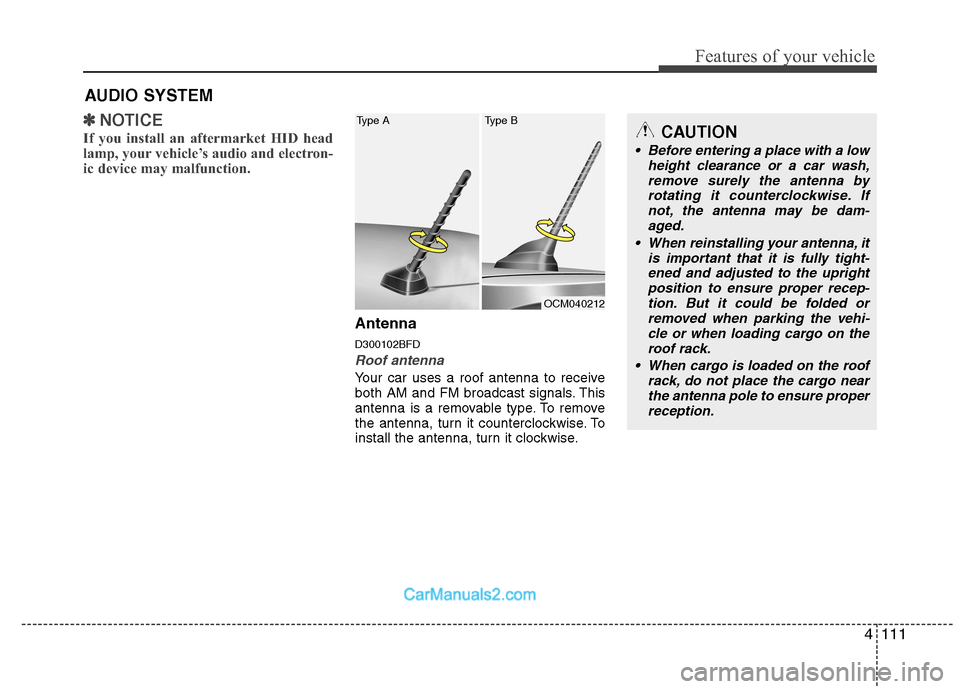
Roof antenna
Your car uses a roof antenna to receive
both AM and FM broadcast signals. This
antenna is a removable type. To remove
the antenna, turn it counterclockwise. To
install the antenna, turn it clockwise.
AUDIO SYSTEM
CAUTION
• Before entering a place with a low
height clearance or a car wash,
remove surely the antenna by rotating it counterclockwise. Ifnot, the antenna may be dam-aged.
When reinstalling your antenna, it is important that it is fully tight-ened and adjusted to the upright position to ensure proper recep-
tion. But it could be folded or removed when parking the vehi-cle or when loading cargo on the roof rack.
When cargo is loaded on the roof rack, do not place the cargo nearthe antenna pole to ensure properreception.
OCM040212
Type A Type B
Page 262 of 312
559
Driving your vehicle
E140400AUN Driving with a trailer
Towing a trailer requires a certain
amount of experience. Before setting out
for the open road, you must get to know
your trailer. Acquaint yourself with the
feel of handling and braking with the
added weight of the trailer. And always
keep in mind that the vehicle you are
driving is now a good deal longer and not
nearly so responsive as your vehicle is
by itself.
Before you start, check the trailer towbar
and platform, safety cables, electrical
connector(s), lights, tyres and mirror
adjustment. If the trailer has electric
brakes, start your vehicle and trailer mov-
ing and then apply the trailer brake con-
troller by hand to be sure the brakes are
working. This lets you check your electri-
cal connection at the same time.
During your trip, check occasionally to be
sure that the load is secure, and that the
lights and any trailer brakes are still work-ing.E140401AUN
Following distance
Stay at least twice as far behind the vehi-
cle ahead as you would when driving
your vehicle without a trailer. This can
help you avoid situations that require
heavy braking and sudden turns.
E140402AUN
Passing
You’ll need more passing distance up
ahead when you’re towing a trailer. And,
because of the increased vehicle length,
you’ll need to go much farther beyond the
passed vehicle before you can return to
your lane.
E140403AUN
Backing up
Hold the bottom of the steering wheel
with one hand. Then, to move the trailer
to the left, just move your hand to the left.
To move the trailer to the right, move your
hand to the right. Always back up slowly
and, if possible, have someone guide
you.E140404AUN
Making turns
When you’re turning with a trailer, make
wider turns than normal. Do this so your
trailer won’t strike soft shoulders, kerbs,
road signs, trees, or other objects. Avoid
jerky or sudden manoeuvres. Signal well
in advance.