window Hyundai Santa Fe 2012 User Guide
[x] Cancel search | Manufacturer: HYUNDAI, Model Year: 2012, Model line: Santa Fe, Model: Hyundai Santa Fe 2012Pages: 419, PDF Size: 5.61 MB
Page 95 of 419
Features of your vehicle
16
4
CAUTION
To prevent possible damage to
the power window system, do notopen or close two windows ormore at the same time. This willalso ensure the longevity of the fuse.
Never try to operate the main switch on the driver's door andthe individual door windowswitch in the opposite directionsat the same time. If this is done,the window will stop and cannotbe opened or closed.WARNING - Windows
NEVER leave the ignition key in the vehicle.
NEVER leave any child unattend- ed in the vehicle. Even very
young children may inadvertently
cause the vehicle to move, entan-
gle themselves in the windows,
or otherwise injure themselves or
others.
Always double check to make sure all arms, hands, head and
other obstructions are safely out
of the way before closing a win-
dow.
Do not allow children to play with the power windows. Keep the dri-
ver’s door power window lock
switch in the LOCK position
(pressed). Serious injury can
result from unintentional window
operation by the child.
Do not extend face or arms out- side through the window opening
while driving.
Page 107 of 419
Features of your vehicle
28
4
Inside rearview mirror
Adjust the rearview mirror so that the
center view through the rear window is
seen. Make this adjustment before you
start driving.
D140101AUN
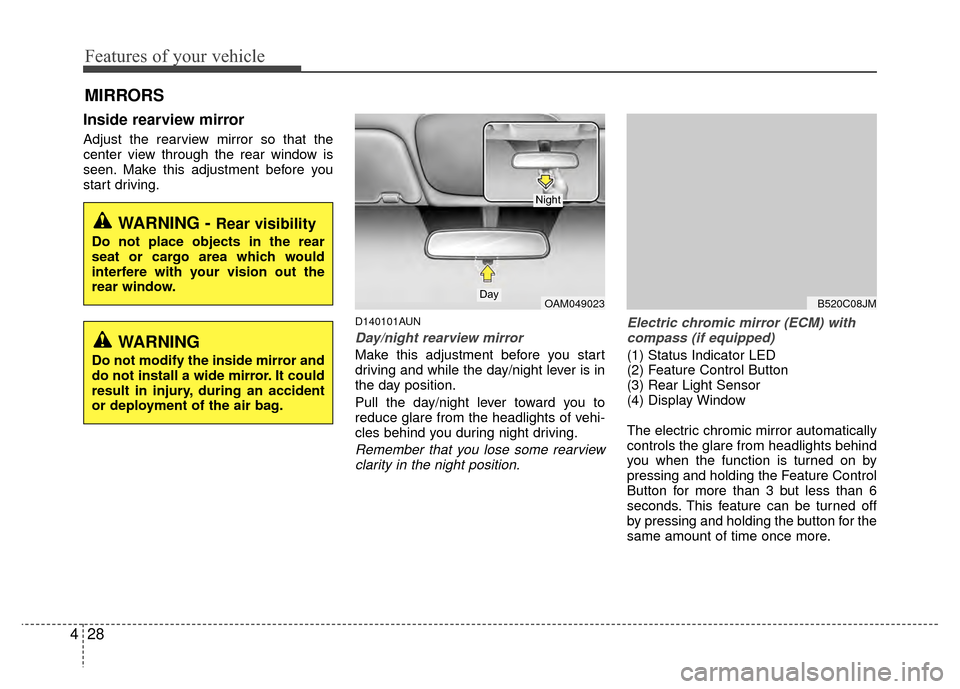
Day/night rearview mirror
Make this adjustment before you start
driving and while the day/night lever is in
the day position.
Pull the day/night lever toward you to
reduce glare from the headlights of vehi-
cles behind you during night driving.
Remember that you lose some rearview
clarity in the night position. Electric chromic mirror (ECM) with
compass (if equipped)
(1) Status Indicator LED
(2) Feature Control Button
(3) Rear Light Sensor
(4) Display Window
The electric chromic mirror automatically
controls the glare from headlights behind
you when the function is turned on by
pressing and holding the Feature Control
Button for more than 3 but less than 6
seconds. This feature can be turned off
by pressing and holding the button for the
same amount of time once more.
MIRRORS
WARNING - Rear visibility
Do not place objects in the rear
seat or cargo area which would
interfere with your vision out the
rear window.
OAM049023Day
Night
B520C08JM
WARNING
Do not modify the inside mirror and
do not install a wide mirror. It could
result in injury, during an accident
or deployment of the air bag.
Page 111 of 419
Features of your vehicle
32
4
Automatic-Dimming Night Vision
Safety™ (NVS®) Mirror
The NVS®Mirror in your vehicle is the
most advanced way to reduce annoying
glare in the rearview mirror during any
driving situation. For more information
regarding NVS
®mirrors and other appli-
cations, please refer to the Gentex web-
site:
www.gentex.com Automatic-dimming function
Your mirror will automatically dim upon
detecting glare from the vehicles travel-
ing behind you. The auto-dimming func-
tion can be controlled by the Dimming
ON/OFF Button:
1. Pressing the button turns the auto-
dimming function OFF which is indicat-
ed by the green Status Indicator LED
turning off.
2. Pressing the button again turns the auto-dimming function ON which is
indicated by the green Status Indicator
LED turning on.
✽ ✽NOTICE
The mirror defaults to the ON position
each time the vehicle is started.
Z-Nav™ Compass Display
The NVS™ Mirror in your vehicle is also
equipped with a Z-Nav™ Compass that
shows the vehicle Compass heading in
the Display Window using the 8 basic
cardinal headings (N, NE, E, SE, etc.).
Compass function
The Compass can be turned ON and
OFF and will remember the last state
when the ignition is cycled. To turn the
display feature ON/OFF:
1. Press and release the button to
turn the display feature OFF.
2. Press and release the button again to turn the display back ON.
Additional options can be set with press
and hold sequences of the button and
are detailed below.
There is a difference between magnetic
north and true north. The compass in the
mirror can compensate for this difference
when it knows the Magnetic Zone in
which it is operating. This is set either by
the dealer or by the user. The operating
Zone Numbers for North America are
shown in the figure on the following sec-
tion.
CAUTION
The NVS®Mirror automatically
reduces glare during driving condi- tions based upon light levels moni-tored in front of the vehicle andfrom the rear of the vehicle. Theselight sensors are visible throughopenings in the front and rear of the mirror case. Any object that wouldobstructs either light sensor willdegrade the automatic dimmingcontrol feature.
Page 137 of 419
Features of your vehicle
58
4
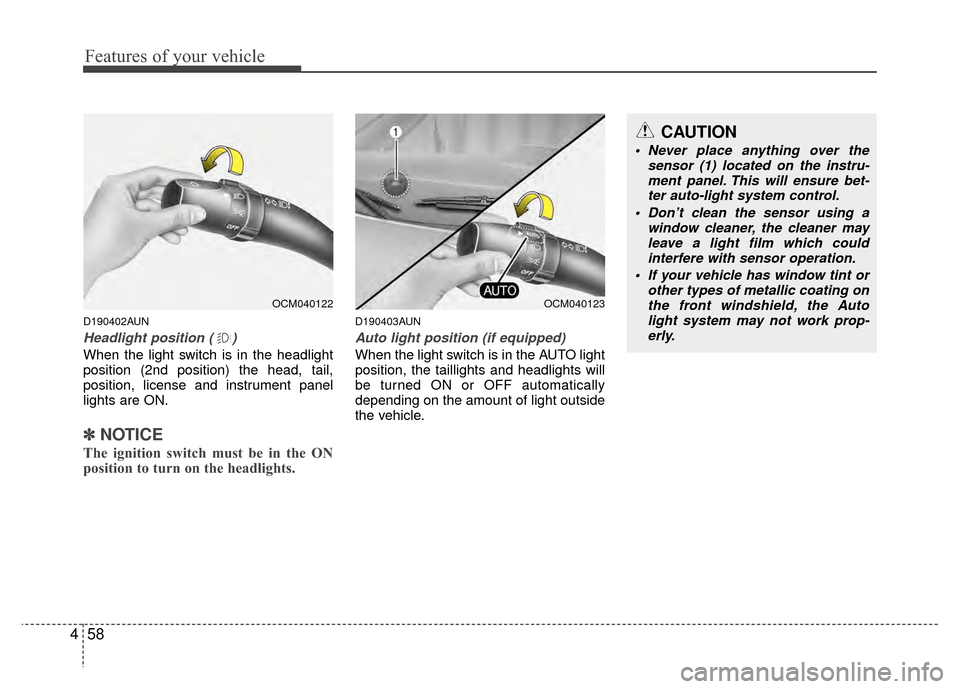
D190402AUN
Headlight position ( )
When the light switch is in the headlight
position (2nd position) the head, tail,
position, license and instrument panel
lights are ON.
✽ ✽
NOTICE
The ignition switch must be in the ON
position to turn on the headlights.
D190403AUN
Auto light position (if equipped)
When the light switch is in the AUTO light
position, the taillights and headlights will
be turned ON or OFF automatically
depending on the amount of light outside
the vehicle.
CAUTION
Never place anything over the
sensor (1) located on the instru-ment panel. This will ensure bet- ter auto-light system control.
Don’t clean the sensor using a window cleaner, the cleaner mayleave a light film which could interfere with sensor operation.
If your vehicle has window tint or other types of metallic coating onthe front windshield, the Auto light system may not work prop-erly.
OCM040122OCM040123
Page 140 of 419
461
Features of your vehicle
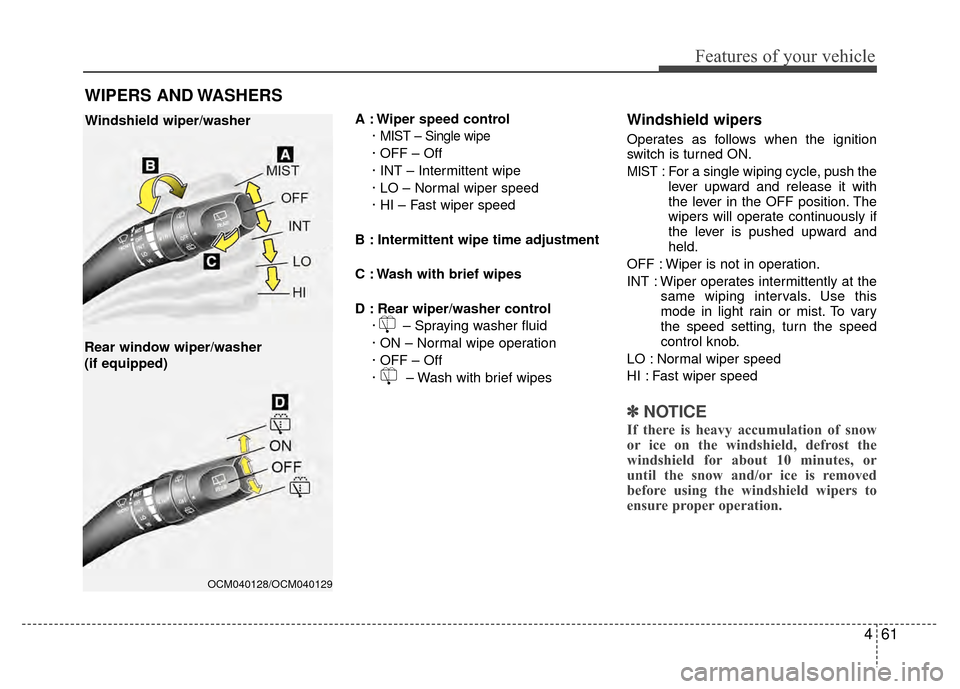
A : Wiper speed control·
MIST – Single wipe
· OFF – Off
· INT – Intermittent wipe
· LO – Normal wiper speed
· HI – Fast wiper speed
B : Intermittent wipe time adjustment
C : Wash with brief wipes
D : Rear wiper/washer control · – Spraying washer fluid
· ON – Normal wipe operation
· OFF – Off
· – Wash with brief wipes
Windshield wipers
Operates as follows when the ignition
switch is turned ON.
MIST : For a single wiping cycle, push thelever upward and release it with
the lever in the OFF position. The
wipers will operate continuously if
the lever is pushed upward and
held.
OFF : Wiper is not in operation.
INT : Wiper operates intermittently at the same wiping intervals. Use this
mode in light rain or mist. To vary
the speed setting, turn the speed
control knob.
LO : Normal wiper speed
HI : Fast wiper speed
✽ ✽ NOTICE
If there is heavy accumulation of snow
or ice on the windshield, defrost the
windshield for about 10 minutes, or
until the snow and/or ice is removed
before using the windshield wipers to
ensure proper operation.
WIPERS AND WASHERS
Windshield wiper/washer
Rear window wiper/washer
(if equipped)
OCM040128/OCM040129
Page 141 of 419
Features of your vehicle
62
4
D200200AFD
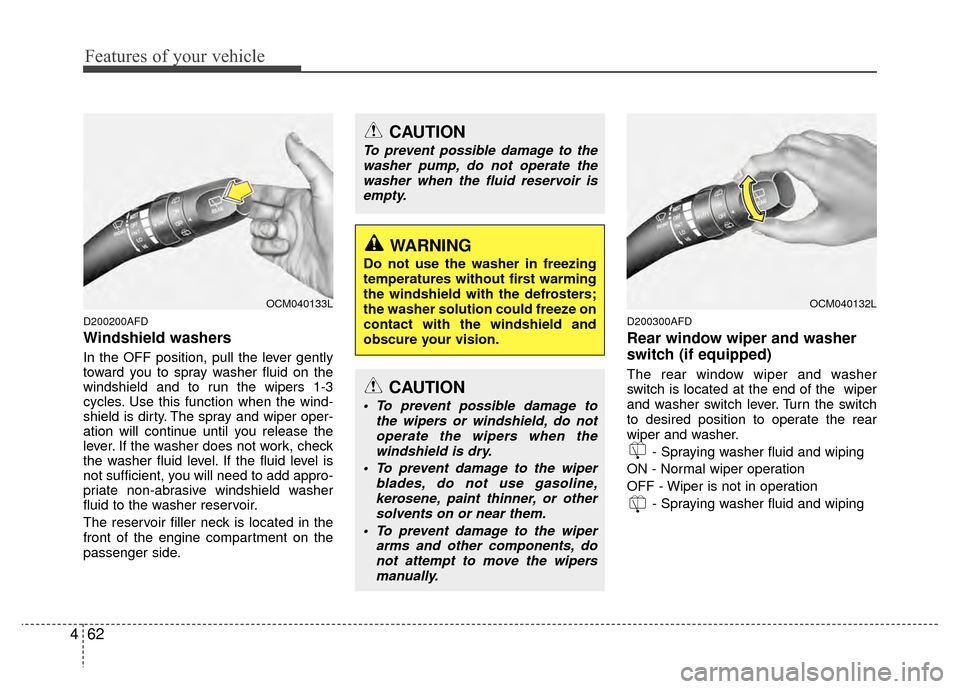
Windshield washers
In the OFF position, pull the lever gently
toward you to spray washer fluid on the
windshield and to run the wipers 1-3
cycles. Use this function when the wind-
shield is dirty. The spray and wiper oper-
ation will continue until you release the
lever. If the washer does not work, check
the washer fluid level. If the fluid level is
not sufficient, you will need to add appro-
priate non-abrasive windshield washer
fluid to the washer reservoir.
The reservoir filler neck is located in the
front of the engine compartment on the
passenger side.
D200300AFD
Rear window wiper and washer
switch (if equipped)
The rear window wiper and washer
switch is located at the end of the wiper
and washer switch lever. Turn the switch
to desired position to operate the rear
wiper and washer.
- Spraying washer fluid and wiping
ON - Normal wiper operation
OFF - Wiper is not in operation - Spraying washer fluid and wiping
OCM040133L
CAUTION
To prevent possible damage to thewasher pump, do not operate thewasher when the fluid reservoir isempty.
WARNING
Do not use the washer in freezing
temperatures without first warming
the windshield with the defrosters;
the washer solution could freeze on
contact with the windshield and
obscure your vision.
CAUTION
To prevent possible damage to the wipers or windshield, do notoperate the wipers when thewindshield is dry.
To prevent damage to the wiper blades, do not use gasoline,kerosene, paint thinner, or other solvents on or near them.
To prevent damage to the wiper arms and other components, donot attempt to move the wipersmanually.
OCM040132L
Page 145 of 419
Features of your vehicle
66
4
D220000AUN
✽
✽
NOTICE
If you want to defrost and defog on the
front windshield, refer to “Windshield
Defrosting and Defogging” in this sec-
tion.
D220100AUN
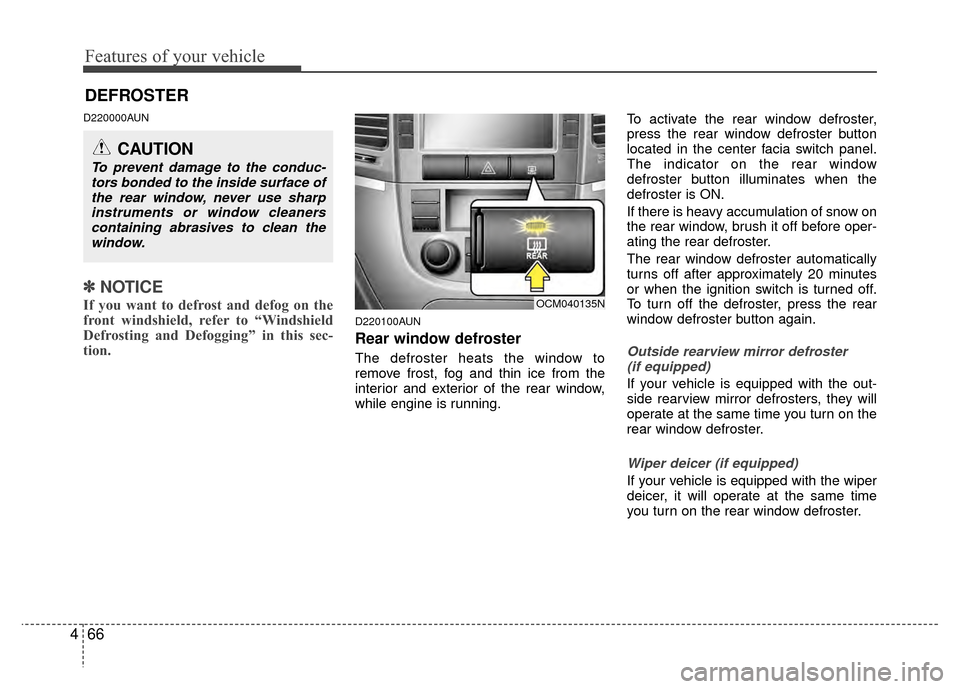
Rear window defroster
The defroster heats the window to
remove frost, fog and thin ice from the
interior and exterior of the rear window,
while engine is running. To activate the rear window defroster,
press the rear window defroster button
located in the center facia switch panel.
The indicator on the rear window
defroster button illuminates when the
defroster is ON.
If there is heavy accumulation of snow on
the rear window, brush it off before oper-
ating the rear defroster.
The rear window defroster automatically
turns off after approximately 20 minutes
or when the ignition switch is turned off.
To turn off the defroster, press the rear
window defroster button again.Outside rearview mirror defroster
(if equipped)
If your vehicle is equipped with the out-
side rearview mirror defrosters, they will
operate at the same time you turn on the
rear window defroster.
Wiper deicer (if equipped)
If your vehicle is equipped with the wiper
deicer, it will operate at the same time
you turn on the rear window defroster.
DEFROSTER
CAUTION
To prevent damage to the conduc- tors bonded to the inside surface ofthe rear window, never use sharpinstruments or window cleanerscontaining abrasives to clean thewindow.
OCM040135N
Page 146 of 419
467
Features of your vehicle
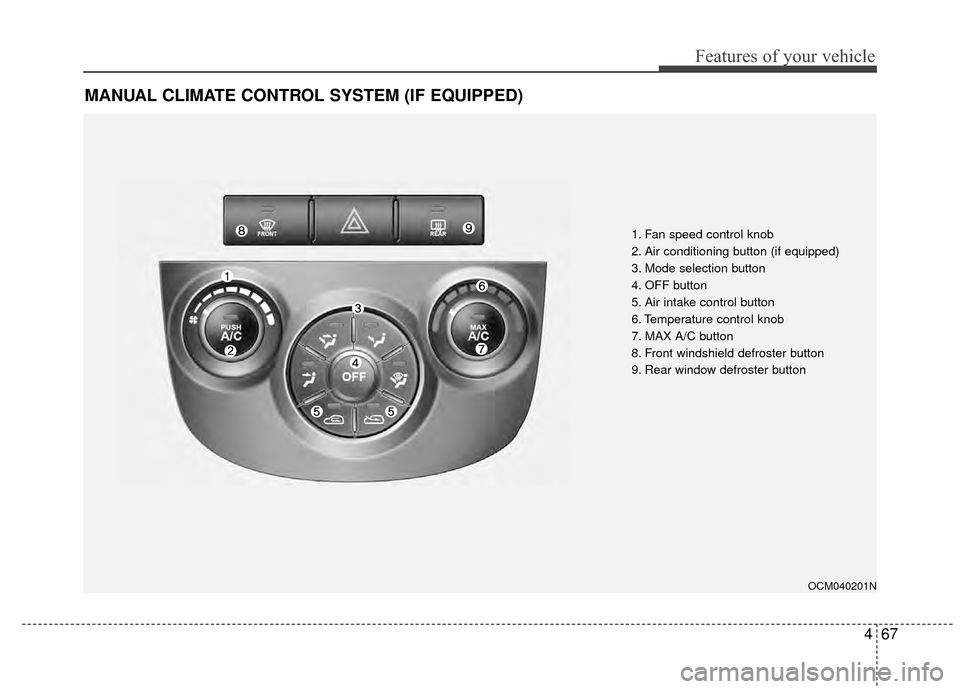
MANUAL CLIMATE CONTROL SYSTEM (IF EQUIPPED)
OCM040201N
1. Fan speed control knob
2. Air conditioning button (if equipped)
3. Mode selection button
4. OFF button
5. Air intake control button
6. Temperature control knob
7. MAX A/C button
8. Front windshield defroster button
9. Rear window defroster button
Page 148 of 419
469
Features of your vehicle
Mode selection
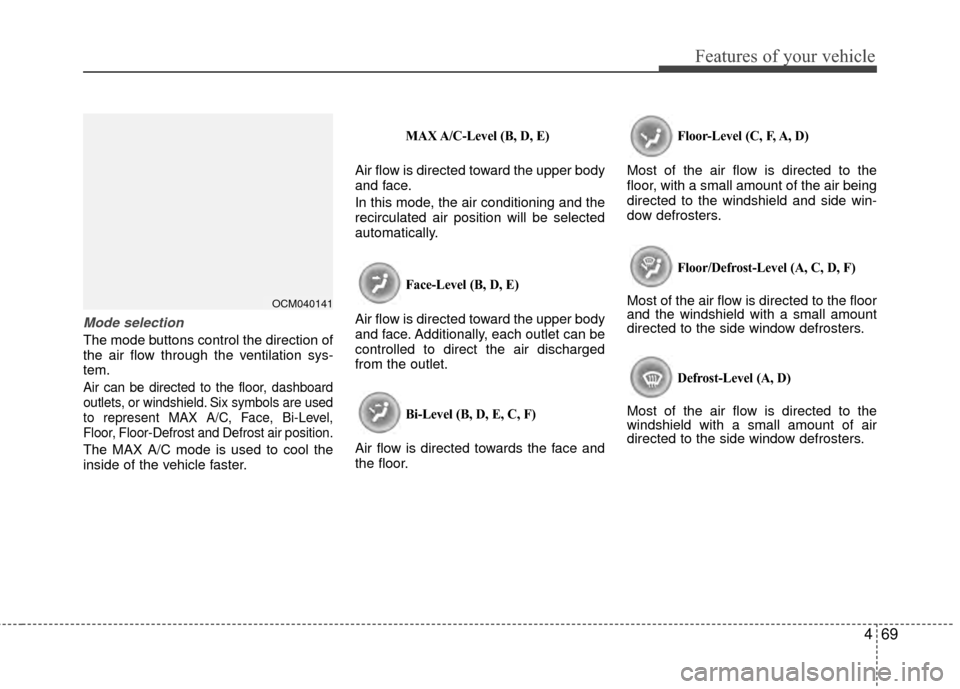
The mode buttons control the direction of
the air flow through the ventilation sys-
tem.
Air can be directed to the floor, dashboard
outlets, or windshield. Six symbols are used
to represent MAX A/C, Face, Bi-Level,
Floor, Floor-Defrost and Defrost air position.
The MAX A/C mode is used to cool the
inside of the vehicle faster.
MAX A/C-Level (B, D, E)
Air flow is directed toward the upper body
and face.
In this mode, the air conditioning and the
recirculated air position will be selected
automatically.
Face-Level (B, D, E)
Air flow is directed toward the upper body
and face. Additionally, each outlet can be
controlled to direct the air discharged
from the outlet.
Bi-Level (B, D, E, C, F)
Air flow is directed towards the face and
the floor.
Floor-Level (C, F, A, D)
Most of the air flow is directed to the
floor, with a small amount of the air being
directed to the windshield and side win-
dow defrosters.
Floor/Defrost-Level (A, C, D, F)
Most of the air flow is directed to the floor
and the windshield with a small amount
directed to the side window defrosters.
Defrost-Level (A, D)
Most of the air flow is directed to the
windshield with a small amount of air
directed to the side window defrosters.
OCM040141
Page 150 of 419
471
Features of your vehicle
Recirculated air position With the recirculated airposition selected, air from
the passenger compart-
ment will be drawn through
the heating system and
heated or cooled according
to the function selected.
Outside (fresh) air position With the outside (fresh) airposition selected, air enters
the vehicle from outside
and is heated or cooled
according to the function
selected.
✽ ✽ NOTICE
Prolonged operation of the heater in the
recirculated air position (without air
conditioning selected) may cause fogging
of the windshield and side windows and
the air within the passenger compart-
ment may become stale.
In addition, prolonged use of the air con-
ditioning with the recirculated air posi-
tion selected will result in excessively dry
air in the passenger compartment.
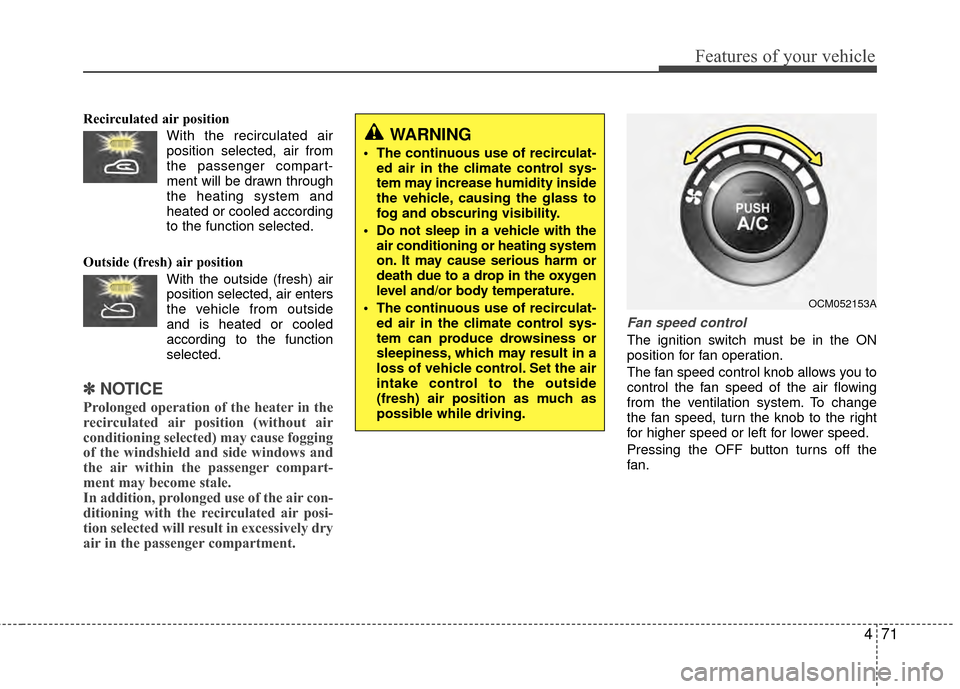
Fan speed control
The ignition switch must be in the ON
position for fan operation.
The fan speed control knob allows you to
control the fan speed of the air flowing
from the ventilation system. To change
the fan speed, turn the knob to the right
for higher speed or left for lower speed.
Pressing the OFF button turns off the
fan.
WARNING
• The continuous use of recirculat-
ed air in the climate control sys-
tem may increase humidity inside
the vehicle, causing the glass to
fog and obscuring visibility.
Do not sleep in a vehicle with the air conditioning or heating system
on. It may cause serious harm or
death due to a drop in the oxygen
level and/or body temperature.
The continuous use of recirculat- ed air in the climate control sys-
tem can produce drowsiness or
sleepiness, which may result in a
loss of vehicle control. Set the air
intake control to the outside
(fresh) air position as much as
possible while driving.
OCM052153A