navigation Hyundai Santa Fe 2016 Navigation Manual
[x] Cancel search | Manufacturer: HYUNDAI, Model Year: 2016, Model line: Santa Fe, Model: Hyundai Santa Fe 2016Pages: 66, PDF Size: 4.46 MB
Page 1 of 66
AUDIO & NAVIGATION SYSTEM
OWNER’S MANUAL
Santa Fe
Please read this manual carefully before operating your set and retain it for future reference.
Designs and specifi cations are subject to change without prior notice.
ENGLISH
DEUTSCH
FRANÇAIS
ESPAÑOL
ITALIANO
NEDERLANDS
РУССКИЙ
SVENSKA
Page 2 of 66
2
Safety notes . . . . . . . . . . . . . . . . . . . . . . . . . . . . . . . . . . . . . . . . . . . . . . . . . . . . . 7-8
Types of Playable Discs . . . . . . . . . . . . . . . . . . . . . . . . . . . . . . . . . . . . . . . . . . . . . . 9
Precautions of handling discs and player . . . . . . . . . . . . . . . . . . . . . . . . . . . . . . . 9
NOTES ON COPYRIGHTS . . . . . . . . . . . . . . . . . . . . . . . . . . . . . . . . . . . . . . . . . . 10
Disposal of your old appliance . . . . . . . . . . . . . . . . . . . . . . . . . . . . . . . . . . . . . . . 10
Control Panel . . . . . . . . . . . . . . . . . . . . . . . . . . . . . . . . . . . . . . . . . . . . . . . . . . . 11-12
Steering wheel remote control . . . . . . . . . . . . . . . . . . . . . . . . . . . . . . . . . . . . . . . 13
Start-up screen . . . . . . . . . . . . . . . . . . . . . . . . . . . . . . . . . . . . . . . . . . . . . . . . . . . 14
Turning the unit on/ Turning the unit off . . . . . . . . . . . . . . . . . . . . . . . . . . . . . . . 14
Inserting a disc/ Ejecting a disc . . . . . . . . . . . . . . . . . . . . . . . . . . . . . . . . . . . . . 14
Adjusting the volume . . . . . . . . . . . . . . . . . . . . . . . . . . . . . . . . . . . . . . . . . . . . . . 14
Selecting a source on the control panel . . . . . . . . . . . . . . . . . . . . . . . . . . . . . . . 15
Selecting a source on the screen. . . . . . . . . . . . . . . . . . . . . . . . . . . . . . . . . . . . . 15
Rear view camera (Optional) . . . . . . . . . . . . . . . . . . . . . . . . . . . . . . . . . . . . . . . . . 15
General operations of SETUP menu . . . . . . . . . . . . . . . . . . . . . . . . . . . . . . . . 16-19
Bluetooth . . . . . . . . . . . . . . . . . . . . . . . . . . . . . . . . . . . . . . . . . . . . . . . . . . . . . . 16
System . . . . . . . . . . . . . . . . . . . . . . . . . . . . . . . . . . . . . . . . . . . . . . . . . . . . . . 16-17
Traffic/ Navigation . . . . . . . . . . . . . . . . . . . . . . . . . . . . . . . . . . . . . . . . . . . . . . . 18
Audio . . . . . . . . . . . . . . . . . . . . . . . . . . . . . . . . . . . . . . . . . . . . . . . . . . . . . . . 18-19
Display . . . . . . . . . . . . . . . . . . . . . . . . . . . . . . . . . . . . . . . . . . . . . . . . . . . . . . . . 19
General information . . . . . . . . . . . . . . . . . . . . . . .7-10Table of contents
Name of each component . . . . . . . . . . . . . . . . 11-13
Basic operation . . . . . . . . . . . . . . . . . . . . . . . . . 14-15
Setup . . . . . . . . . . . . . . . . . . . . . . . . . . . . . . . . . 16-19
Page 3 of 66
3
What is GPS?. . . . . . . . . . . . . . . . . . . . . . . . . . . . . . . . . . . . . . . . . . . . . . . . . . . . . 20
About satellite signals . . . . . . . . . . . . . . . . . . . . . . . . . . . . . . . . . . . . . . . . . . . . . . 20
Acquiring satellite signals . . . . . . . . . . . . . . . . . . . . . . . . . . . . . . . . . . . . . . . . . . . 20
Initial navigation screen. . . . . . . . . . . . . . . . . . . . . . . . . . . . . . . . . . . . . . . . . . . . . 20
Indicators of the map screen . . . . . . . . . . . . . . . . . . . . . . . . . . . . . . . . . . . . . 20-21
How to view a map screen . . . . . . . . . . . . . . . . . . . . . . . . . . . . . . . . . . . . . 20-21
Changing the scale of a map . . . . . . . . . . . . . . . . . . . . . . . . . . . . . . . . . . . . . . 21
Adjusting the navigation volume . . . . . . . . . . . . . . . . . . . . . . . . . . . . . . . . . . . . . 21
Navigation menu overview . . . . . . . . . . . . . . . . . . . . . . . . . . . . . . . . . . . . . . . . . . 22
General operations of destination menu . . . . . . . . . . . . . . . . . . . . . . . . . . . . . . . 22
Address Search . . . . . . . . . . . . . . . . . . . . . . . . . . . . . . . . . . . . . . . . . . . . . . . . . . . 23
Last Destinations . . . . . . . . . . . . . . . . . . . . . . . . . . . . . . . . . . . . . . . . . . . . . . . . . . 24
Address Book . . . . . . . . . . . . . . . . . . . . . . . . . . . . . . . . . . . . . . . . . . . . . . . . . . . . 24
POI (Point of Interest) . . . . . . . . . . . . . . . . . . . . . . . . . . . . . . . . . . . . . . . . . . . 24-26
Near Position . . . . . . . . . . . . . . . . . . . . . . . . . . . . . . . . . . . . . . . . . . . . . . . . . . . 25
Near Destination . . . . . . . . . . . . . . . . . . . . . . . . . . . . . . . . . . . . . . . . . . . . . . . . 26
In City/ Name . . . . . . . . . . . . . . . . . . . . . . . . . . . . . . . . . . . . . . . . . . . . . . . . . . 26
Hyundai service . . . . . . . . . . . . . . . . . . . . . . . . . . . . . . . . . . . . . . . . . . . . . . . . . 26
Phone Number. . . . . . . . . . . . . . . . . . . . . . . . . . . . . . . . . . . . . . . . . . . . . . . . . . 26
GPS Input . . . . . . . . . . . . . . . . . . . . . . . . . . . . . . . . . . . . . . . . . . . . . . . . . . . . . . . 27
Parking . . . . . . . . . . . . . . . . . . . . . . . . . . . . . . . . . . . . . . . . . . . . . . . . . . . . . . . . . . 28
Continue Guidance/ Stop Guidance . . . . . . . . . . . . . . . . . . . . . . . . . . . . . . . . . . . . . 28
Using Map . . . . . . . . . . . . . . . . . . . . . . . . . . . . . . . . . . . . . . . . . . . . . . . . . . . . . . . 28
Tour Planner . . . . . . . . . . . . . . . . . . . . . . . . . . . . . . . . . . . . . . . . . . . . . . . . . . .29-30
Store Destination . . . . . . . . . . . . . . . . . . . . . . . . . . . . . . . . . . . . . . . . . . . . . . . . . . 31
Store Position . . . . . . . . . . . . . . . . . . . . . . . . . . . . . . . . . . . . . . . . . . . . . . . . . . . . 31
Home 1/ Work2/ 3 ~ 12 . . . . . . . . . . . . . . . . . . . . . . . . . . . . . . . . . . . . . . . . . . . . 32
Getting started with navigation . . . . . . . . . . . . 20-21Table of contents
Destination input menu . . . . . . . . . . . . . . . . . . . 22-32
Page 8 of 66
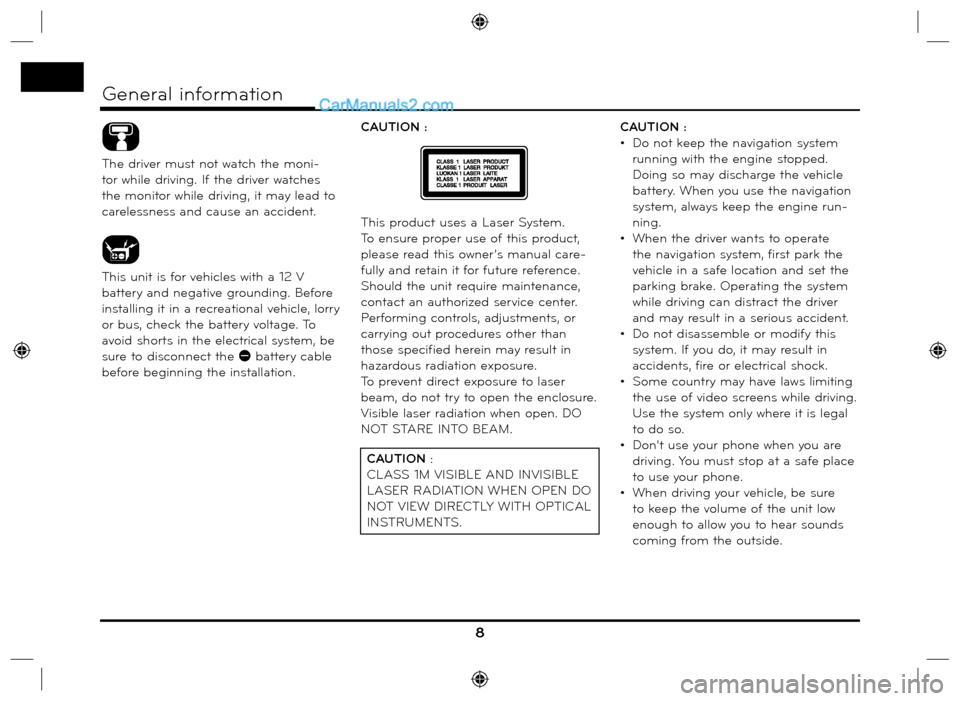
The driver must not watch the moni-
tor while driving. If the driver watches
the monitor while driving, it may lead to
carelessness and cause an accident.
This unit is for vehicles with a 12 V
battery and negative grounding. Before
installing it in a recreational vehicle, lorry
or bus, check the battery voltage. To
avoid shorts in the electrical system, be
sure to disconnect the E battery cable
before beginning the installation.CAUTION :
This product uses a Laser System.
To ensure proper use of this product,
please read this owner’s manual care-
fully and retain it for future reference.
Should the unit require maintenance,
contact an authorized service center.
Performing controls, adjustments, or
carrying out procedures other than
those specified herein may result in
hazardous radiation exposure.
To prevent direct exposure to laser
beam, do not try to open the enclosure.
Visible laser radiation when open. DO
NOT STARE INTO BEAM.CAUTION :
• Do not keep the navigation system
running with the engine stopped.
Doing so may discharge the vehicle
battery. When you use the navigation
system, always keep the engine run-
ning.
• When the driver wants to operate
the navigation system, first park the
vehicle in a safe location and set the
parking brake. Operating the system
while driving can distract the driver
and may result in a serious accident.
• Do not disassemble or modify this
system. If you do, it may result in
accidents, fire or electrical shock.
• Some country may have laws limiting
the use of video screens while driving.
Use the system only where it is legal
to do so.
• Don't use your phone when you are
driving. You must stop at a safe place
to use your phone.
• When driving your vehicle, be sure
to keep the volume of the unit low
enough to allow you to hear sounds
coming from the outside.
8
General information
CAUTION :
CLASS 1M VISIBLE AND INVISIBLE
LASER RADIATION WHEN OPEN DO
NOT VIEW DIRECTLY WITH OPTICAL
INSTRUMENTS.
Page 16 of 66
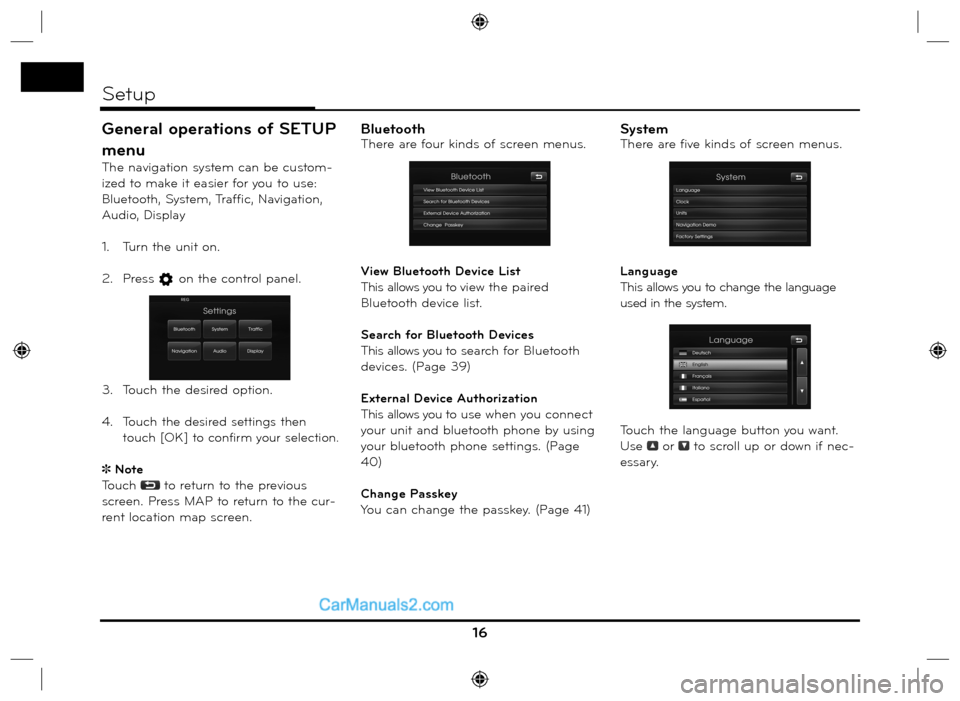
General operations of SETUP
menu
The navigation system can be custom-
ized to make it easier for you to use:
Bluetooth, System, Traffic, Navigation,
Audio, Display
1. Turn the unit on.
2. Press
on the control panel.
3. Touch the desired option.
4. Touch
the desired settings then
t
ouch [OK] to confirm your selection.
Note
Touch
to return to the previous
screen. Press MAP to return to the cur-
rent location map screen.
BluetoothThere are four kinds of screen menus.
View Bluetooth Device List
This allows you to view the paired
Bluetooth device list.
Search for Bluetooth Devices
This allows you to search for Bluetooth
devices. (Page 39)
External Device Authorization
This allows you to use when you connect
your unit and bluetooth phone by using
your bluetooth phone settings. (Page
40)
Change Passkey
You can change the passkey. (Page 41)SystemThere are five kinds of screen menus.
Language
This allows you to change the language
used in the system.
Touch the language button you want.
Use
or to scroll up or down if nec-
essary.
16
Setup
Page 17 of 66
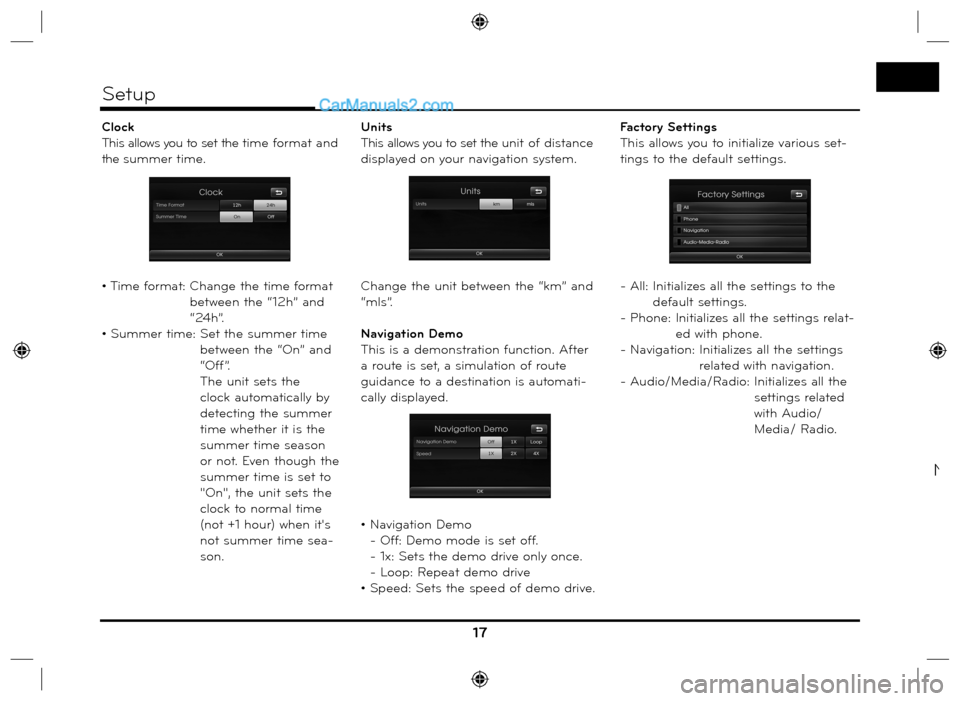
Clock
This allows you to set the time format and
the summer time.
• Time format: Change the time format
between the “12h” and
“24h”.
• Summer time: Set the summer time
between the “On” and
“Off”.
The unit sets the
clock automatically by
detecting the summer
time whether it is the
summer time season
or not. Even though the
summer time is set to
"On", the unit sets the
clock to normal time
(not +1 hour) when it's
not summer time sea-
son.Units
This allows you to set the unit of distance
displayed on your navigation system.
Change the unit between the “km” and
“mls”.
Navigation Demo
This is a demonstration function. After
a route is set, a simulation of route
guidance to a destination is automati-
cally displayed.
• Navigation Demo
- Off: Demo mode is set off.
- 1x: Sets the demo drive only once.
- Loop: Repeat demo drive
• Speed: Sets the speed of demo drive.Factory Settings
This allows you to initialize various set-
tings to the default settings.
- All: Initializes all the settings to the
default settings.
- Phone: Initializes all the settings relat-
ed with phone.
- Navigation:
Initializes all the settings
related with navigation.
- Audio/Media/Radio: Initializes all the
settings related
with Audio/
Media/ Radio.
17
Setup
N
Page 18 of 66
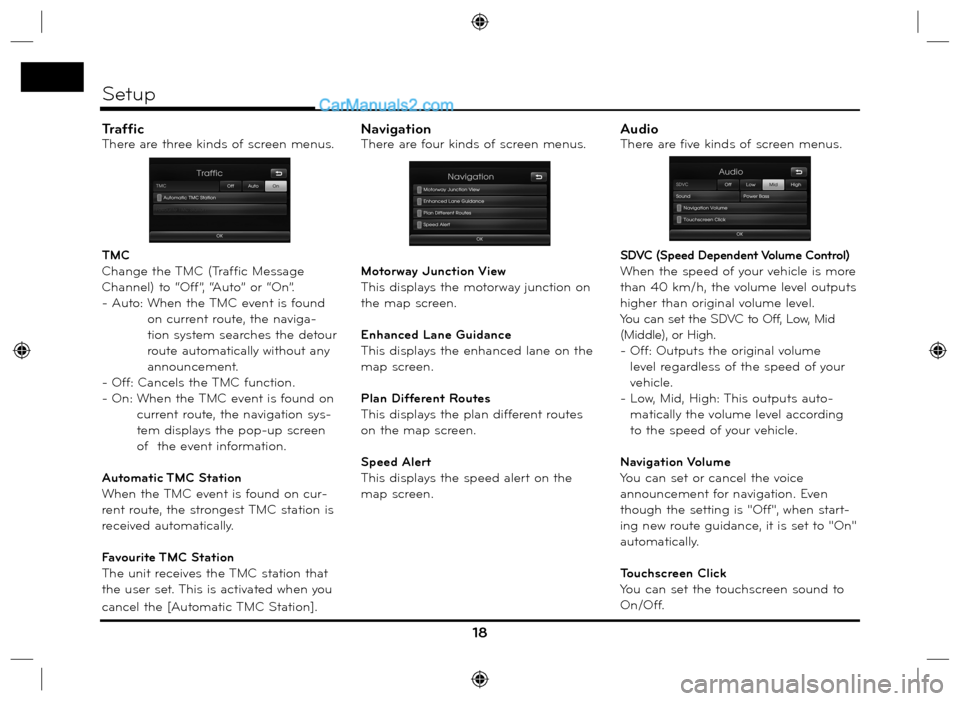
TrafficThere are three kinds of screen menus.
TMC
Change the TMC (Traffic Message
Channel) to “Off”, “Auto” or “On”.
- Auto: When the TMC event is found
on current route, the naviga-
tion system searches the detour
route automatically without any
announcement.
- Off: Cancels the TMC function.
- On: When the TMC event is found on
current route, the navigation sys-
tem displays the pop-up screen
of the event information.
Automatic TMC Station
When the TMC event is found on cur-
rent route, the strongest TMC station is
received automatically.
Favourite TMC Station
The unit receives the TMC station that
the user set. This is activated when you
cancel the [Automatic TMC Station].NavigationThere are four kinds of screen menus.
Motorway Junction View
This displays the motorway junction on
the map screen.
Enhanced Lane Guidance
This displays the enhanced lane on the
map screen.
Plan Different Routes
This displays the plan different routes
on the map screen.
Speed Alert
This displays the speed alert on the
map screen.AudioThere are five kinds of screen menus.
SDVC (Speed Dependent Volume Control)
When the speed of your vehicle is more
than 40 km/h, the volume level outputs
higher than original volume level.
You can set the SDVC to Off, Low, Mid
(Middle), or High.
- Off: Outputs the original volume
level regardless of the speed of your
vehicle.
- Low, Mid, High: This outputs auto-
matically the volume level according
to the speed of your vehicle.
Navigation Volume
You can set or cancel the voice
announcement for navigation. Even
though the setting is "Off", when start-
ing new route guidance, it is set to "On"
automatically.
Touchscreen Click
You can set the touchscreen sound to
On/Off.
18
Setup
Page 20 of 66
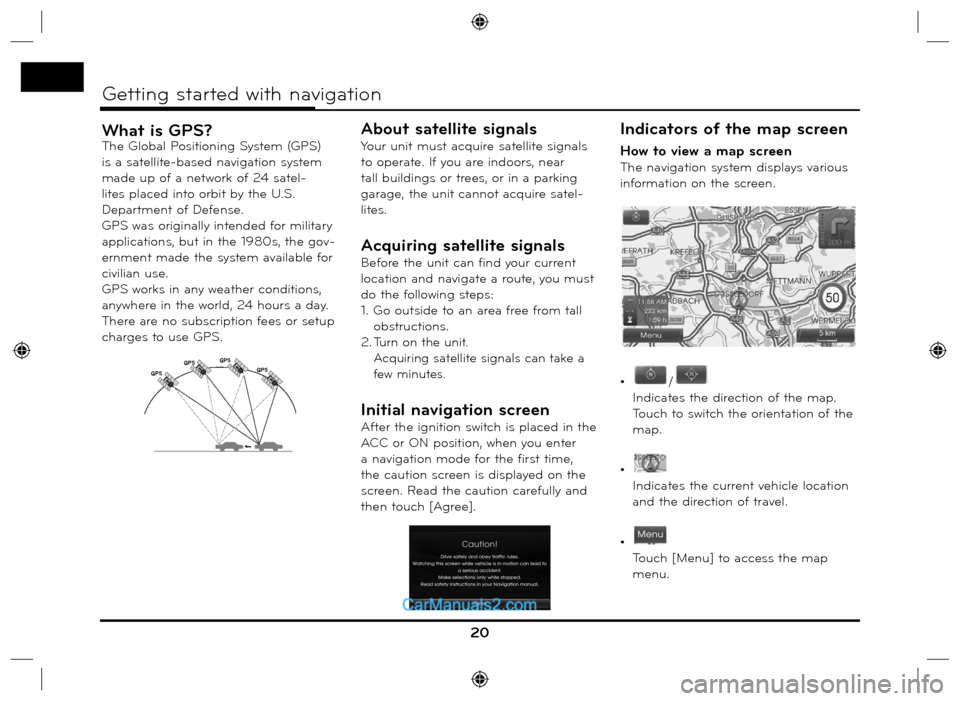
What is GPS?The Global Positioning System (GPS)
is a satellite-based navigation system
made up of a network of 24 satel-
lites placed into orbit by the U.S.
Department of Defense.
GPS was originally intended for military
applications, but in the 1980s, the gov-
ernment made the system available for
civilian use.
GPS works in any weather conditions,
anywhere in the world, 24 hours a day.
There are no subscription fees or setup
charges to use GPS.
About satellite signals
Your unit must acquire satellite signals
to operate. If you are indoors, near
tall buildings or trees, or in a parking
garage, the unit cannot acquire satel-
lites.
Acquiring satellite signals
Before the unit can find your current
location and navigate a route, you must
do the following steps:
1. Go outside to an area free from tall
obstructions.
2.
Turn on the unit.
Acquiring satellite signals can take a
few minutes.
Initial navigation screen
After the ignition switch is placed in the
ACC or ON position, when you enter
a navigation mode for the first time,
the caution screen is displayed on the
screen. Read the caution carefully and
then touch [Agree].
Indicators of the map screen
How to view a map screen
The navigation system displays various
information on the screen.
•
/
Indicates the direction of the map.
Touch to switch the orientation of the
map.
•
Indicates the current vehicle location
and the direction of travel.
•
Touch [Menu] to access the map
menu.
20
Getting started with navigation
GPSGPSGPS
GPS
Page 21 of 66
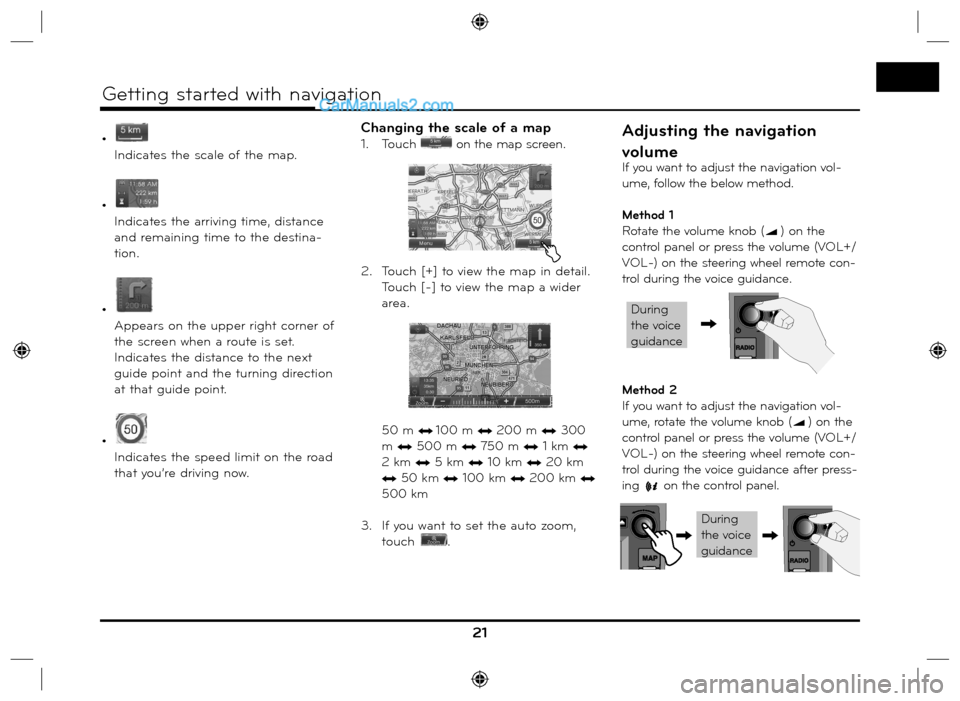
•
Indicates the scale of the map.
•
Indicates the arriving time, distance
and remaining time to the destina-
tion.
•
Appears on the upper right corner of
the screen when a route is set.
Indicates the distance to the next
guide point and the turning direction
at that guide point.
•
Indicates the speed limit on the road
that you’re driving now.
Changing the scale of a map
1. Touch on the map screen.
2. Touch [+] to view the map in detail.
Touch [-] to view the map a wider
area.
50 m n 100 m n 200 m n 300
m
n 500 m n 750 m n 1 km n
2 km
n 5 km n 10 km n 20 km
n 50 km n 100 km n 200 km n
500 km
3. If you want to set the auto zoom,
touch
.
21
Getting started with navigation
Adjusting the navigation
volume
If you want to adjust the navigation vol-
ume, follow the below method.
Method 1
Rotate the volume knob (
) on the
control panel or press the volume (VOL+/
VOL-) on the steering wheel remote con-
trol during the voice guidance.
Method 2
If you want to adjust the navigation vol-
ume, rotate the volume knob (
) on the
control panel or press the volume (VOL+/
VOL-) on the steering wheel remote con-
trol during the voice guidance after press-
ing
on the control panel.
,
During
the voice
guidance
During
the voice
guidance
,,
Page 22 of 66
![Hyundai Santa Fe 2016 Navigation Manual Navigation menu overviewGeneral operations of destina-
tion menu
1. Turn the unit on.
2. Press NAV on the control. The navi-
gation menu appears on the screen.
3. Touch [Navigation], [Advanced] or Hyundai Santa Fe 2016 Navigation Manual Navigation menu overviewGeneral operations of destina-
tion menu
1. Turn the unit on.
2. Press NAV on the control. The navi-
gation menu appears on the screen.
3. Touch [Navigation], [Advanced] or](/img/35/16333/w960_16333-21.png)
Navigation menu overviewGeneral operations of destina-
tion menu
1. Turn the unit on.
2. Press NAV on the control. The navi-
gation menu appears on the screen.
3. Touch [Navigation], [Advanced] or
[Favourites] to select the desired
option.4. Touch the preferred setting method.
• Address: Finds a destination by
setting an address. (Page 23)
• Last Destinations: Sets a destina-
tion to a location that you have
lastly set. (Page 24)
• Address Book: Sets a destination
to a location stored in the address
book. (Page 24)
• POI: Searches for a destination
from various categories of busi-
nesses or locations. (Page 24-26)
• Parking: Sets a parking as your
destination. (Page 28)
• Continue/Stop Guidance: Sets the
guidance to On/Off. (Page 28)
• GPS Input: Sets a latitude and
a longitude as your destination.
(Page 27)
• Using Map: Searches for a destina-
tion by scrolling the map. (Page 28)
• Tour Planner: Adds new destination
or way point. (Page 29-30)
• Store Destination: Stores your desti-
nation in the address book. (Page 31)
• Store Position: Stores your position
in the address book. (Page 31)
• Home 1/ Work2/ 3~12: You can
set a home location, work location
or etc you want for the place you
return to most often. (Page 32)
22
Destination input menu
/
[Advanced] menu
[Favourites] menu