parking Hyundai Santa Fe 2016 Owner's Manual - RHD (UK, Australia)
[x] Cancel search | Manufacturer: HYUNDAI, Model Year: 2016, Model line: Santa Fe, Model: Hyundai Santa Fe 2016Pages: 699, PDF Size: 15.65 MB
Page 15 of 699
23
Your vehicle at a glance
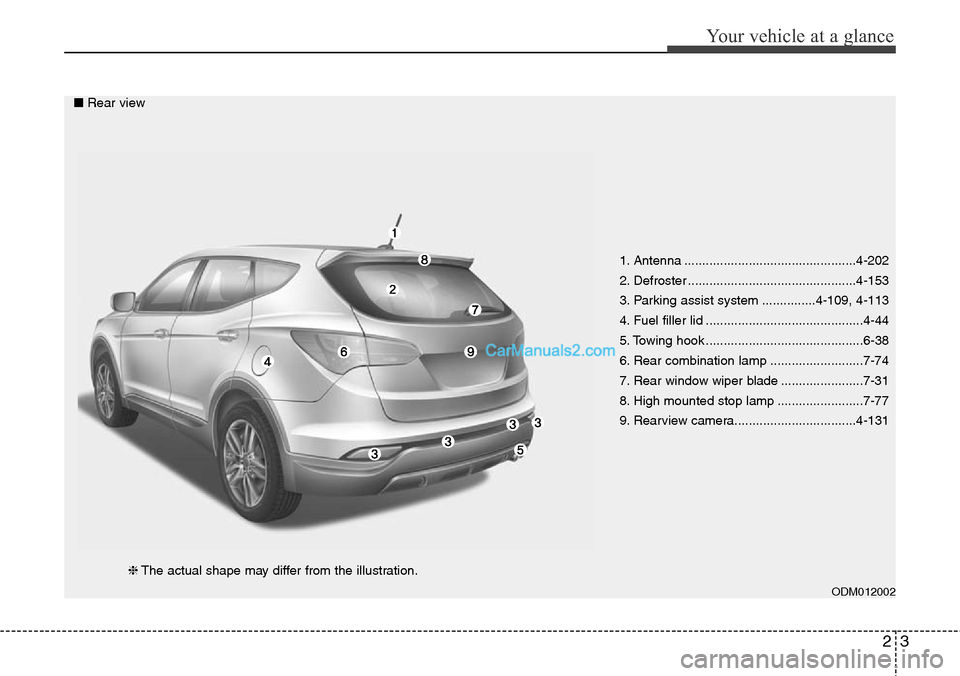
1. Antenna ................................................4-202
2. Defroster ...............................................4-153
3. Parking assist system ...............4-109, 4-113
4. Fuel filler lid ............................................4-44
5. Towing hook ............................................6-38
6. Rear combination lamp ..........................7-74
7. Rear window wiper blade .......................7-31
8. High mounted stop lamp ........................7-77
9. Rearview camera..................................4-131
ODM012002
■Rear view
❈The actual shape may differ from the illustration.
Page 17 of 699
25
Your vehicle at a glance
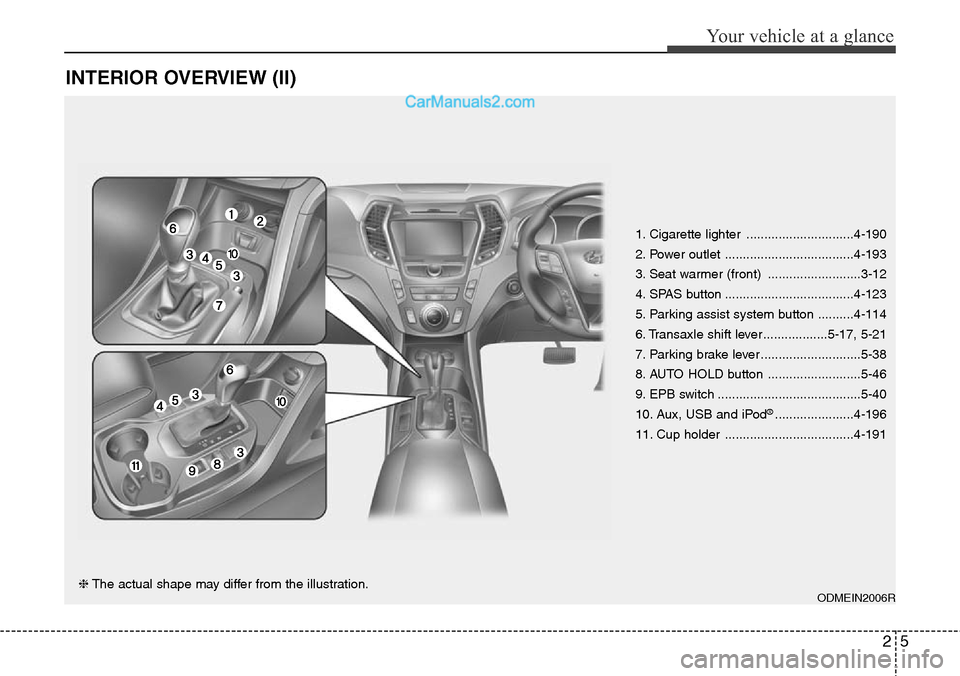
INTERIOR OVERVIEW (II)
1. Cigarette lighter ..............................4-190
2. Power outlet ....................................4-193
3. Seat warmer (front) ..........................3-12
4. SPAS button ....................................4-123
5. Parking assist system button ..........4-114
6. Transaxle shift lever ..................5-17, 5-21
7. Parking brake lever ............................5-38
8. AUTO HOLD button ..........................5-46
9. EPB switch ........................................5-40
10. Aux, USB and iPod
®......................4-196
11. Cup holder ....................................4-191
ODMEIN2006R❈The actual shape may differ from the illustration.
Page 41 of 699
321
Safety features of your vehicle
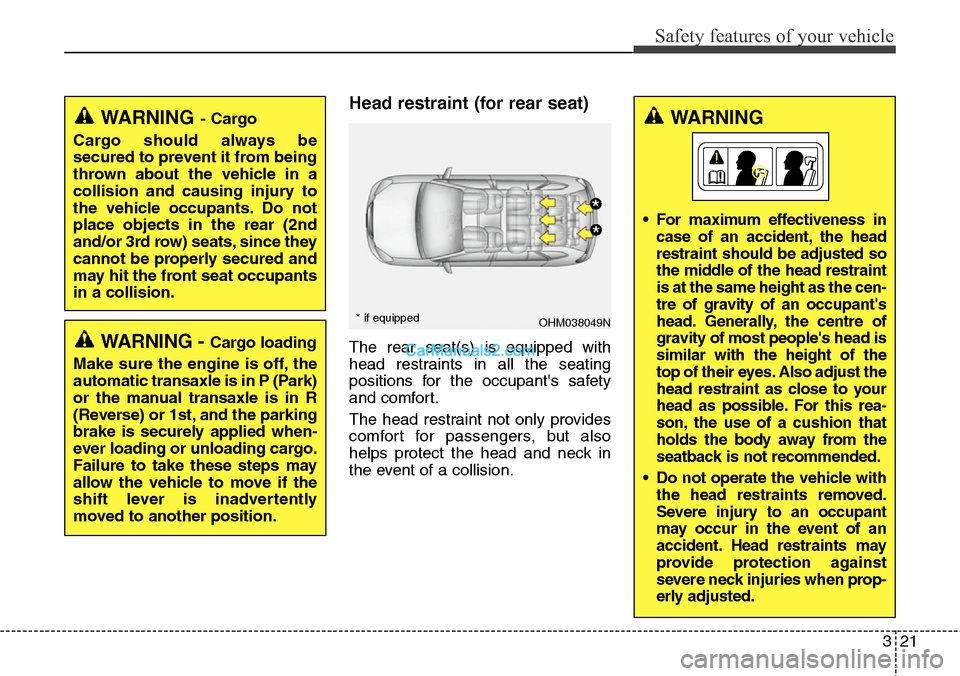
Head restraint (for rear seat)
The rear seat(s) is equipped with
head restraints in all the seating
positions for the occupant's safety
and comfort.
The head restraint not only provides
comfort for passengers, but also
helps protect the head and neck in
the event of a collision.
WARNING- Cargo
Cargo should always be
secured to prevent it from being
thrown about the vehicle in a
collision and causing injury to
the vehicle occupants. Do not
place objects in the rear (2nd
and/or 3rd row) seats, since they
cannot be properly secured and
may hit the front seat occupants
in a collision.
WARNING - Cargo loading
Make sure the engine is off, the
automatic transaxle is in P (Park)
or the manual transaxle is in R
(Reverse) or 1st, and the parking
brake is securely applied when-
ever loading or unloading cargo.
Failure to take these steps may
allow the vehicle to move if the
shift lever is inadvertently
moved to another position.
OHM038049N
*
*
* if equipped
WARNING
• For maximum effectiveness in
case of an accident, the head
restraint should be adjusted so
the middle of the head restraint
is at the same height as the cen-
tre of gravity of an occupant's
head. Generally, the centre of
gravity of most people's head is
similar with the height of the
top of their eyes. Also adjust the
head restraint as close to your
head as possible. For this rea-
son, the use of a cushion that
holds the body away from the
seatback is not recommended.
• Do not operate the vehicle with
the head restraints removed.
Severe injury to an occupant
may occur in the event of an
accident. Head restraints may
provide protection against
severe neck injuries when prop-
erly adjusted.
Page 100 of 699
Mirrors . . . . . . . . . . . . . . . . . . . . . . . . . . . . . . . . . . 4-58
• Inside rearview mirror . . . . . . . . . . . . . . . . . . . . . . . . 4-58
• Outside rearview mirror . . . . . . . . . . . . . . . . . . . . . . . 4-62
Instrument cluster . . . . . . . . . . . . . . . . . . . . . . . . . 4-66
• Instrument Cluster Control . . . . . . . . . . . . . . . . . . . . 4-68
• LCD Display Control . . . . . . . . . . . . . . . . . . . . . . . . . 4-69
• Gauges . . . . . . . . . . . . . . . . . . . . . . . . . . . . . . . . . . . . . 4-69
• Transaxle Shift Indicator . . . . . . . . . . . . . . . . . . . . . . 4-74
LCD display . . . . . . . . . . . . . . . . . . . . . . . . . . . . . . 4-76
• LCD Modes . . . . . . . . . . . . . . . . . . . . . . . . . . . . . . . . . 4-76
• Service Mode . . . . . . . . . . . . . . . . . . . . . . . . . . . . . . . . 4-77
• User Settings Mode . . . . . . . . . . . . . . . . . . . . . . . . . . . 4-78
• A/V Mode . . . . . . . . . . . . . . . . . . . . . . . . . . . . . . . . . . . 4-80
• Turn By Turn Mode. . . . . . . . . . . . . . . . . . . . . . . . . . . 4-81
• Warning Messages . . . . . . . . . . . . . . . . . . . . . . . . . . . . 4-81
Trip computer . . . . . . . . . . . . . . . . . . . . . . . . . . . . . 4-88
• Overview. . . . . . . . . . . . . . . . . . . . . . . . . . . . . . . . . . . . 4-88
• Trip A/B . . . . . . . . . . . . . . . . . . . . . . . . . . . . . . . . . . . . 4-89
• Fuel Economy . . . . . . . . . . . . . . . . . . . . . . . . . . . . . . . 4-90
Warning and indicator lights . . . . . . . . . . . . . . . . 4-93
• Warning lights . . . . . . . . . . . . . . . . . . . . . . . . . . . . . . . 4-93
• Indicator Lights . . . . . . . . . . . . . . . . . . . . . . . . . . . . . 4-103
Rear parking assist system . . . . . . . . . . . . . . . . . 4-109
• Operation . . . . . . . . . . . . . . . . . . . . . . . . . . . . . . . . . . 4-109
• Non-operational conditions . . . . . . . . . . . . . . . . . . . 4-110• Self-diagnosis . . . . . . . . . . . . . . . . . . . . . . . . . . . . . . . 4-112
Parking assist system . . . . . . . . . . . . . . . . . . . . . . 4-113
• Operation . . . . . . . . . . . . . . . . . . . . . . . . . . . . . . . . . . 4-114
• Non-operational conditions . . . . . . . . . . . . . . . . . . . 4-116
• Self-diagnosis . . . . . . . . . . . . . . . . . . . . . . . . . . . . . . . 4-118
Smart parking assist system(SPAS) . . . . . . . . . . 4-119
• Operation . . . . . . . . . . . . . . . . . . . . . . . . . . . . . . . . . . 4-120
• Non-operational conditions . . . . . . . . . . . . . . . . . . . 4-120
• How the system works . . . . . . . . . . . . . . . . . . . . . . . 4-123
• Additional instructions . . . . . . . . . . . . . . . . . . . . . . . 4-130
• System malfunction . . . . . . . . . . . . . . . . . . . . . . . . . . 4-130
Rearview camera . . . . . . . . . . . . . . . . . . . . . . . . . 4-131
Hazard warning flasher . . . . . . . . . . . . . . . . . . . . 4-132
Lighting . . . . . . . . . . . . . . . . . . . . . . . . . . . . . . . . . 4-133
• Battery saver function. . . . . . . . . . . . . . . . . . . . . . . . 4-133
• Headlamp escort function. . . . . . . . . . . . . . . . . . . . . 4-133
• Smart cornering light . . . . . . . . . . . . . . . . . . . . . . . . 4-133
• Lighting control . . . . . . . . . . . . . . . . . . . . . . . . . . . . . 4-134
• Traffic direction change . . . . . . . . . . . . . . . . . . . . . . 4-136
• High - beam operation . . . . . . . . . . . . . . . . . . . . . . . 4-137
• Turn signals and lane change signals . . . . . . . . . . . 4-138
• Front fog light . . . . . . . . . . . . . . . . . . . . . . . . . . . . . . 4-139
• Rear fog light . . . . . . . . . . . . . . . . . . . . . . . . . . . . . . . 4-140
• Daytime running light . . . . . . . . . . . . . . . . . . . . . . . . 4-140
• Headlight levelling device . . . . . . . . . . . . . . . . . . . . . 4-141
4
Page 121 of 699
423
Features of your vehicle
Deadlocks (if equipped)
Some vehicles are equipped with a
deadlock system. Deadlocks prevent
opening of a door from either inside
or outside the vehicle once the dead-
locks have been activated providing
an additional measure of vehicle
security.
To lock the vehicle using the deadlock
function, the doors must be locked by
using the transmitter or smart key. To
unlock the vehicle, the transmitter or
smart key must be used again.
Door lock/unlock features
Impact sensing door unlock sys-
tem
All doors will automatically unlock
when an impact causes the air bags
to deploy.
Speed sensing door lock system
(if equipped)
All doors will automatically lock after
the vehicle speed exceeds 9 mph
(15 km/h).
You can activate or deactivate the
auto door lock/unlock features in the
vehicle. Refer to "User setting" in this
section.
WARNING
Do not lock the doors with the
transmitter or the smart key
with anybody left in the vehicle.
The passenger in the vehicle
cannot unlock the doors with
the door lock button. For exam-
ple, if the door is locked with
the transmitter, the passenger
in the vehicle cannot unlock the
door without the transmitter.
WARNING- Unlocked
vehicles
Leaving your vehicle unlocked
can invite theft or possible harm
to you or others from someone
hiding in your vehicle whilst
you are gone. Always remove
the ignition key, engage the
parking brake, close all win-
dows and lock all doors when
leaving your vehicle unattend-
ed.
WARNING- Unattended
children
An enclosed vehicle can
become extremely hot, causing
death or severe injury to unat-
tended children or animals who
cannot escape the vehicle.
Furthermore, children might
operate features of the vehicle
that could injure them, or they
could encounter other harm,
possibly from someone gaining
entry to the vehicle. Never leave
children or animals unattended
in your vehicle.
Page 155 of 699
457
Features of your vehicle
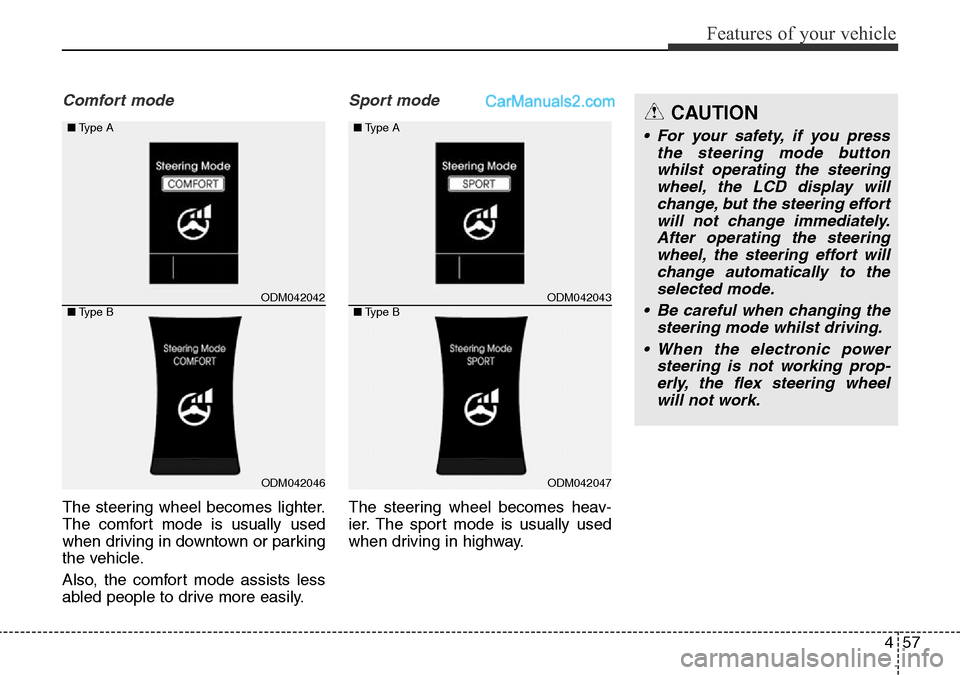
Comfort mode
The steering wheel becomes lighter.
The comfort mode is usually used
when driving in downtown or parking
the vehicle.
Also, the comfort mode assists less
abled people to drive more easily.
Sport mode
The steering wheel becomes heav-
ier. The sport mode is usually used
when driving in highway.
ODM042042
ODM042046 ■Type A
■Type B
ODM042043
ODM042047
■Type A
■Type B
CAUTION
• For your safety, if you press
the steering mode button
whilst operating the steering
wheel, the LCD display will
change, but the steering effort
will not change immediately.
After operating the steering
wheel, the steering effort will
change automatically to the
selected mode.
• Be careful when changing the
steering mode whilst driving.
• When the electronic power
steering is not working prop-
erly, the flex steering wheel
will not work.
Page 161 of 699
463
Features of your vehicle
Remote control
Electric type
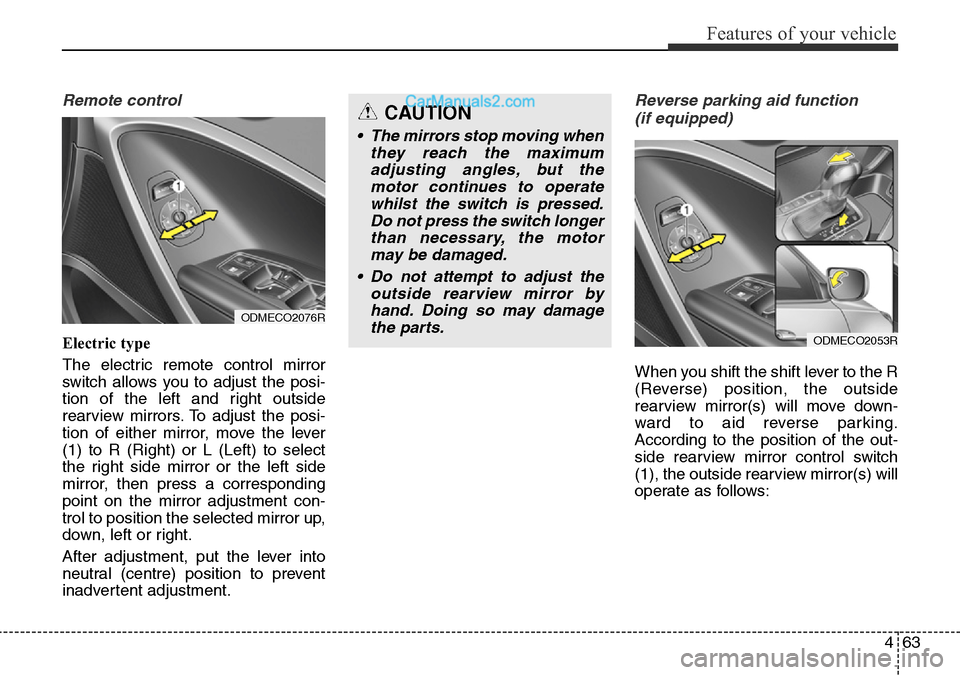
The electric remote control mirror
switch allows you to adjust the posi-
tion of the left and right outside
rearview mirrors. To adjust the posi-
tion of either mirror, move the lever
(1) to R (Right) or L (Left) to select
the right side mirror or the left side
mirror, then press a corresponding
point on the mirror adjustment con-
trol to position the selected mirror up,
down, left or right.
After adjustment, put the lever into
neutral (centre) position to prevent
inadvertent adjustment.
Reverse parking aid function
(if equipped)
When you shift the shift lever to the R
(Reverse) position, the outside
rearview mirror(s) will move down-
ward to aid reverse parking.
According to the position of the out-
side rearview mirror control switch
(1), the outside rearview mirror(s) will
operate as follows:
CAUTION
• The mirrors stop moving when
they reach the maximum
adjusting angles, but the
motor continues to operate
whilst the switch is pressed.
Do not press the switch longer
than necessary, the motor
may be damaged.
• Do not attempt to adjust the
outside rearview mirror by
hand. Doing so may damage
the parts.
ODMECO2053R
ODMECO2076R
Page 192 of 699
Features of your vehicle
94 4
Parking Brake & Brake
Fluid Warning Light
This warning light illuminates:
• Once you set the ignition switch or
Engine Start/Stop Button to the ON
position.
- It illuminates for approximately 3
seconds
- It remains on if the parking brake
is applied.
• When the parking brake is applied.
• When the brake fluid level in the
reservoir is low.
- If the warning light illuminates
with the parking brake released, it
indicates the brake fluid level in
reservoir is low.If the brake fluid level in the reservoir
is low:
1. Drive carefully to the nearest safe
location and stop your vehicle.
2. With the engine stopped, check
the brake fluid level immediately
and add fluid as required (For
more details, refer to “Brake Fluid”
in chapter 7). Then check all brake
components for fluid leaks. If any
leak on brake system is still found,
the warning light remains on, or
the brakes do not operate proper-
ly, do not drive the vehicle.
In this case, we recommend that
you have the vehicle towed to a
HYUNDAI authorised repairer and
inspected.Dual-diagonal braking system
Your vehicle is equipped with dual-
diagonal braking systems. This
means you still have braking on two
wheels even if one of the dual sys-
tems should fail.
With only one of the dual systems
working, more than normal pedal
travel and greater pedal pressure are
required to stop the vehicle.
Also, the vehicle will not stop in as
short a distance with only a portion
of the brake system working.
If the brakes fail whilst you are driv-
ing, shift to a lower gear for addition-
al engine braking and stop the vehi-
cle as soon as it is safe to do so.
Page 193 of 699
495
Features of your vehicle
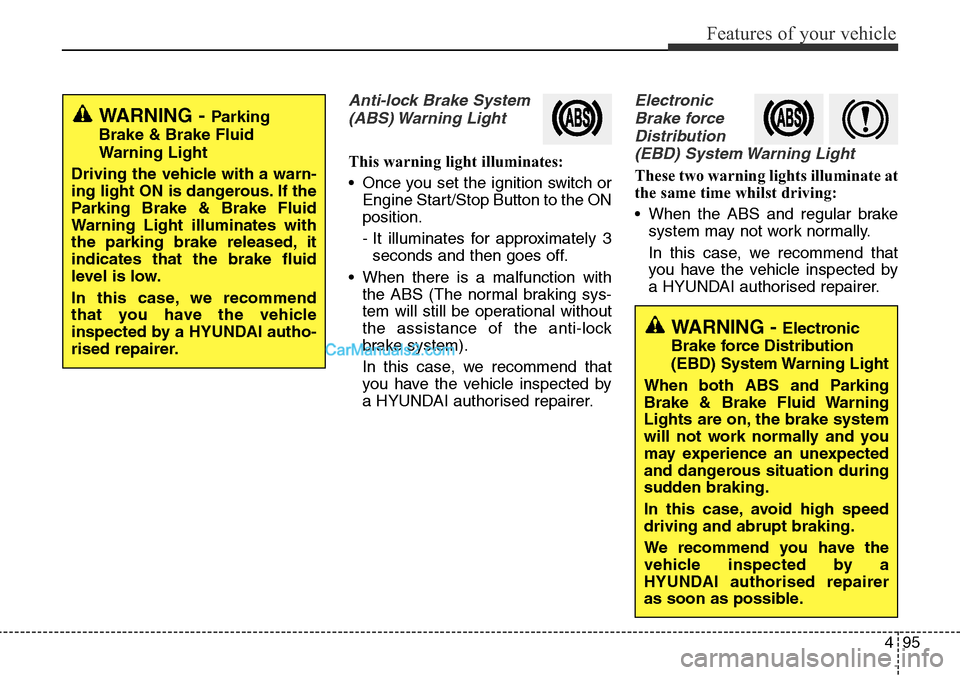
Anti-lock Brake System
(ABS) Warning Light
This warning light illuminates:
• Once you set the ignition switch or
Engine Start/Stop Button to the ON
position.
- It illuminates for approximately 3
seconds and then goes off.
• When there is a malfunction with
the ABS (The normal braking sys-
tem will still be operational without
the assistance of the anti-lock
brake system).
In this case, we recommend that
you have the vehicle inspected by
a HYUNDAI authorised repairer.
Electronic
Brake force
Distribution
(EBD) System Warning Light
These two warning lights illuminate at
the same time whilst driving:
• When the ABS and regular brake
system may not work normally.
In this case, we recommend that
you have the vehicle inspected by
a HYUNDAI authorised repairer.
WARNING - Parking
Brake & Brake Fluid
Warning Light
Driving the vehicle with a warn-
ing light ON is dangerous. If the
Parking Brake & Brake Fluid
Warning Light illuminates with
the parking brake released, it
indicates that the brake fluid
level is low.
In this case, we recommend
that you have the vehicle
inspected by a HYUNDAI autho-
rised repairer.
WARNING - Electronic
Brake force Distribution
(EBD) System Warning Light
When both ABS and Parking
Brake & Brake Fluid Warning
Lights are on, the brake system
will not work normally and you
may experience an unexpected
and dangerous situation during
sudden braking.
In this case, avoid high speed
driving and abrupt braking.
We recommend you have the
vehicle inspected by a
HYUNDAI authorised repairer
as soon as possible.
Page 194 of 699
Features of your vehicle
96 4
✽NOTICE- Electronic Brake
force Distribution
(EBD) System
Warning Light
When the ABS Warning Light is on
or both ABS and Parking Brake &
Brake Fluid Warning Lights are on,
the speedometer, odometer, or trip-
meter may not work. Also, the EPS
Warning Light may illuminate and
the steering effort may increase or
decrease.
In this case, we recommend you
have the vehicle inspected by a
HYUNDAI authorised repairer as
soon as possible.
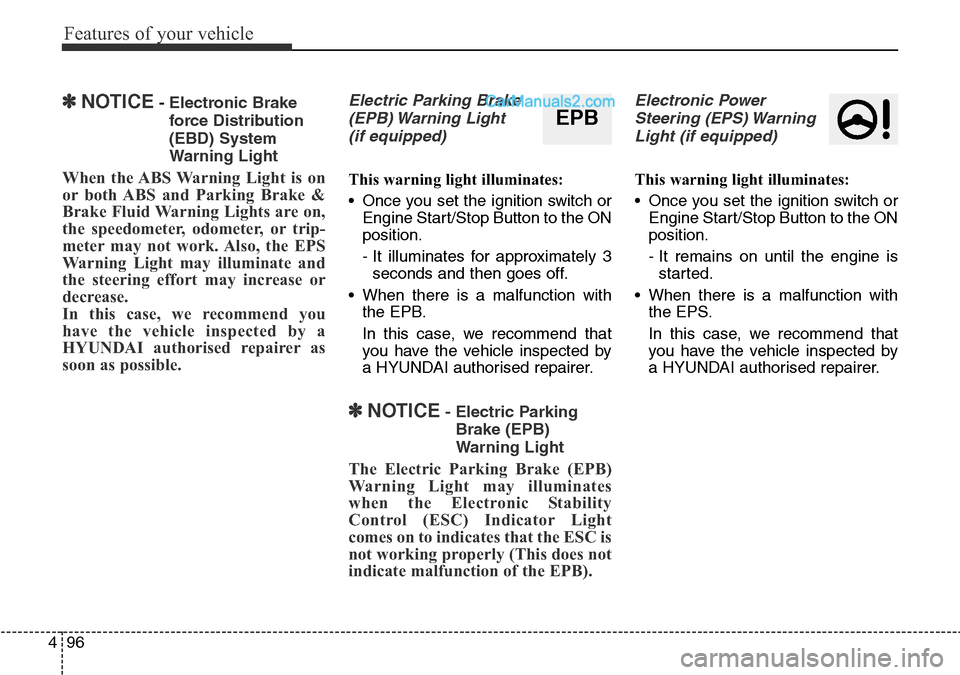
Electric Parking Brake
(EPB) Warning Light
(if equipped)
This warning light illuminates:
• Once you set the ignition switch or
Engine Start/Stop Button to the ON
position.
- It illuminates for approximately 3
seconds and then goes off.
• When there is a malfunction with
the EPB.
In this case, we recommend that
you have the vehicle inspected by
a HYUNDAI authorised repairer.
✽NOTICE- Electric Parking
Brake (EPB)
Warning Light
The Electric Parking Brake (EPB)
Warning Light may illuminates
when the Electronic Stability
Control (ESC) Indicator Light
comes on to indicates that the ESC is
not working properly (This does not
indicate malfunction of the EPB).
Electronic Power
Steering (EPS) Warning
Light (if equipped)
This warning light illuminates:
• Once you set the ignition switch or
Engine Start/Stop Button to the ON
position.
- It remains on until the engine is
started.
• When there is a malfunction with
the EPS.
In this case, we recommend that
you have the vehicle inspected by
a HYUNDAI authorised repairer.
EPB