Smart mode Hyundai Santa Fe 2019 User Guide
[x] Cancel search | Manufacturer: HYUNDAI, Model Year: 2019, Model line: Santa Fe, Model: Hyundai Santa Fe 2019Pages: 557, PDF Size: 14.8 MB
Page 194 of 557
3-105
Convenient features of your vehicle
3
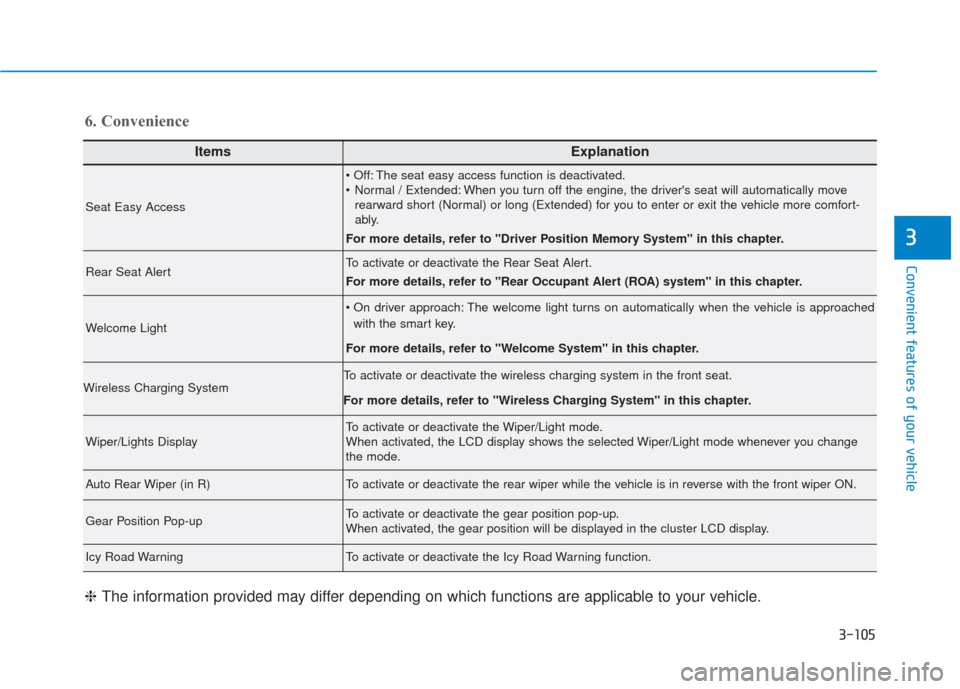
ItemsExplanation
Seat Easy Access
The seat easy access function is deactivated.
Normal / Extended: When you turn off the engine, the driver's seat will automatically moverearward short (Normal) or long (Extended) for you to enter or exit the vehicle more comfort-
ably.
For more details, refer to "Driver Position Memory System" in this chapter.
Rear Seat AlertTo activate or deactivate the Rear Seat Alert.
For more details, refer to "Rear Occupant Alert (ROA) system" in this chapter.
Welcome Light
The welcome light turns on automatically when the vehicle is approached with the smart key.
For more details, refer to ''Welcome System'' in this chapter.
Wireless Charging SystemTo activate or deactivate the wireless charging system in the front seat.
For more details, refer to "Wireless Charging System" in this chapter.
Wiper/Lights DisplayTo activate or deactivate the Wiper/Light mode.
When activated, the LCD display shows the selected Wiper/Light mode whenever you change
the mode.
Auto Rear Wiper (in R)To activate or deactivate the rear wiper while the vehicle is in reverse with the front wiper ON.
Gear Position Pop-upTo activate or deactivate the gear position pop-up.
When activated, the gear position will be displayed in the cluster LCD display.
Icy Road WarningTo activate or deactivate the Icy Road Warning function.
6. Convenience
❈ The information provided may differ depending on which functions are applicable to your vehicle.
Page 197 of 557
3-108
Convenient features of your vehicle
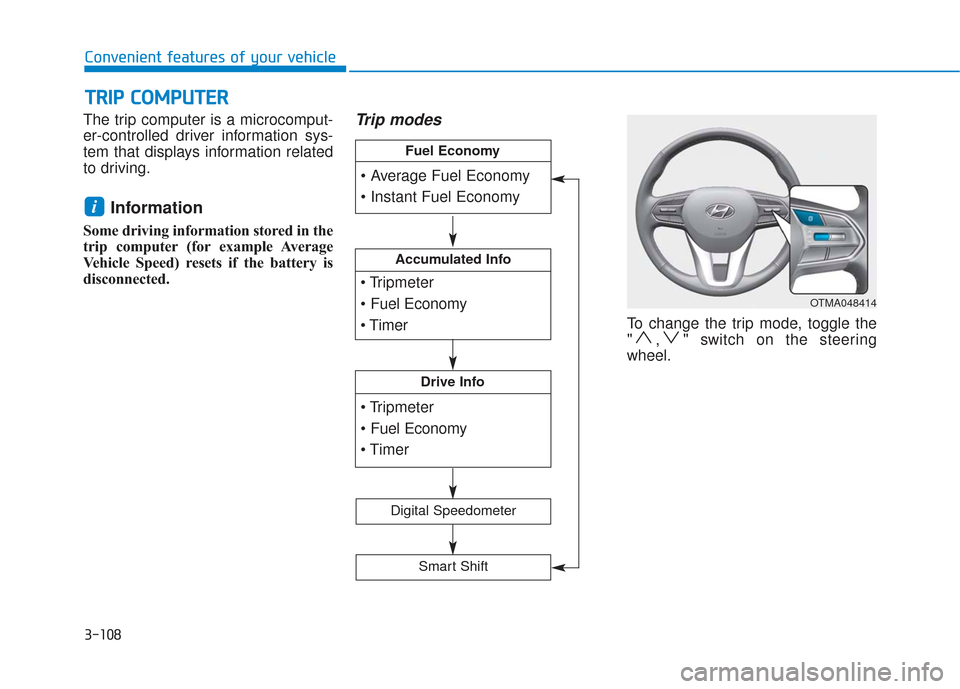
The trip computer is a microcomput-
er-controlled driver information sys-
tem that displays information related
to driving.
Information
Some driving information stored in the
trip computer (for example Average
Vehicle Speed) resets if the battery is
disconnected.
Trip modes
To change the trip mode, toggle the
" , " switch on the steering
wheel.
i
T
T R
R I
IP
P
C
C O
O M
M P
PU
U T
TE
ER
R
OTMA048414
Accumulated Info
Drive Info
Fuel Economy
Digital Speedometer
Smart Shift
Page 200 of 557
3-111
Convenient features of your vehicle
3
The driving information will continue to
be counted while the engine is still run-
ning (for example, when the vehicle is
in traffic or stopped at a stop light).
Information
The vehicle must be driven for a mini-
mum of 0.19 miles (300 meters) since the
last ignition key cycle before the average
fuel economy will be recalculated.
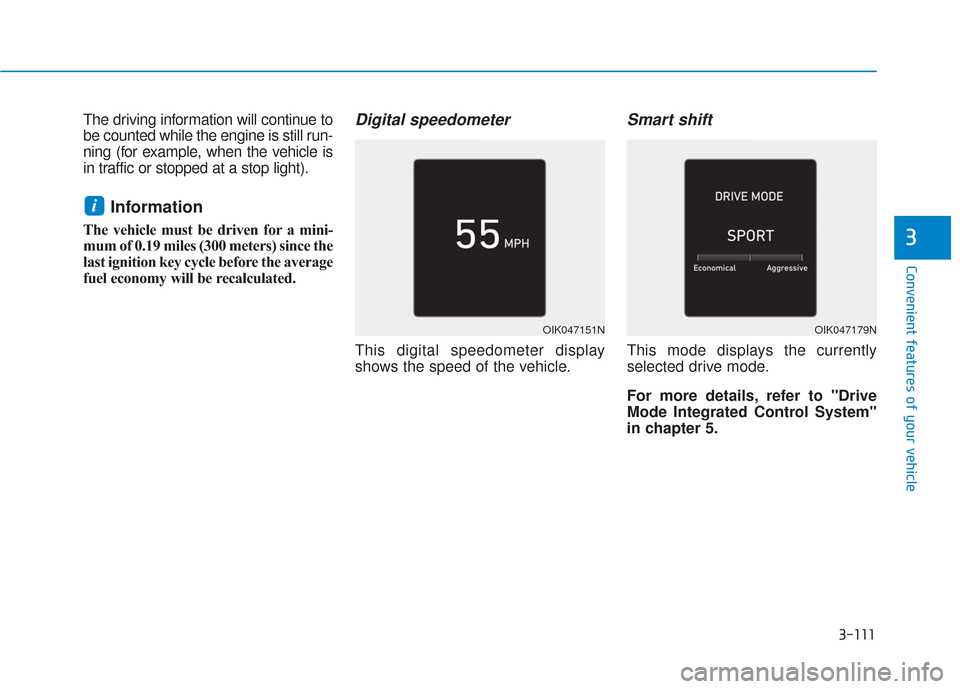
Digital speedometer
This digital speedometer display
shows the speed of the vehicle.
Smart shift
This mode displays the currently
selected drive mode.
For more details, refer to "Drive
Mode Integrated Control System''
in chapter 5.
i
OIK047151NOIK047179N
Page 202 of 557
3-113
Convenient features of your vehicle
3
Head-up display ON/OFF
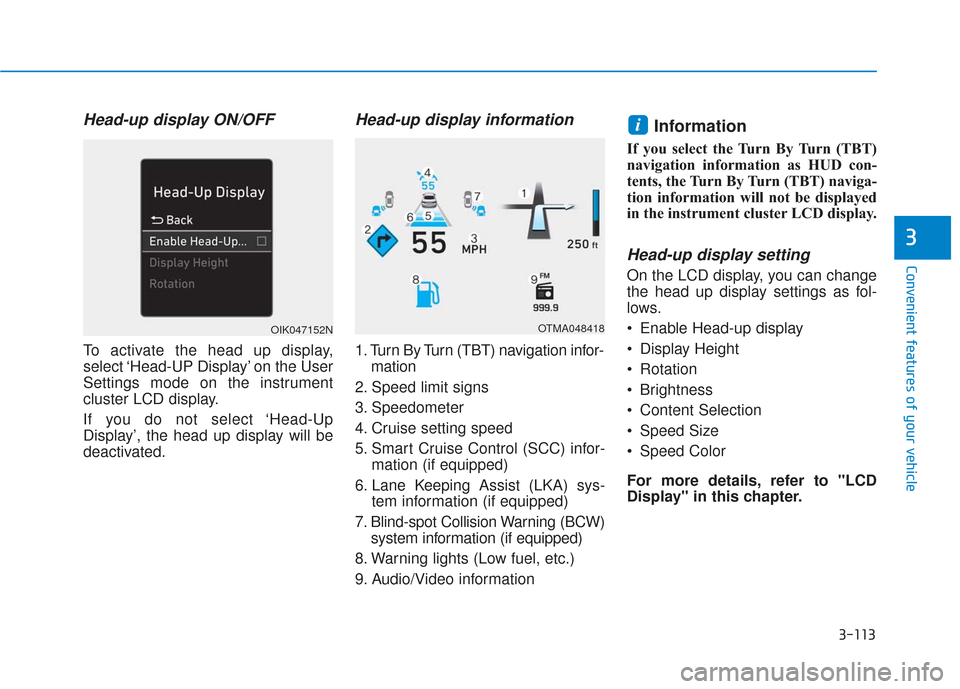
To activate the head up display,
select ‘Head-UP Display’ on the User
Settings mode on the instrument
cluster LCD display.
If you do not select ‘Head-Up
Display’, the head up display will be
deactivated.
Head-up display information
1. Turn By Turn (TBT) navigation infor-mation
2. Speed limit signs
3. Speedometer
4. Cruise setting speed
5. Smart Cruise Control (SCC) infor- mation (if equipped)
6. Lane Keeping Assist (LKA) sys- tem information (if equipped)
7. Blind-spot Collision Warning (BCW) system information (if equipped)
8. Warning lights (Low fuel, etc.)
9. Audio/Video information
Information
If you select the Turn By Turn (TBT)
navigation information as HUD con-
tents, the Turn By Turn (TBT) naviga-
tion information will not be displayed
in the instrument cluster LCD display.
Head-up display setting
On the LCD display, you can change
the head up display settings as fol-
lows.
Enable Head-up display
Display Height
Rotation
Brightness
Content Selection
Speed Size
Speed Color
For more details, refer to "LCD
Display" in this chapter.
i
OTMA048418OIK047152N
Page 210 of 557
3-121
Convenient features of your vehicle
3
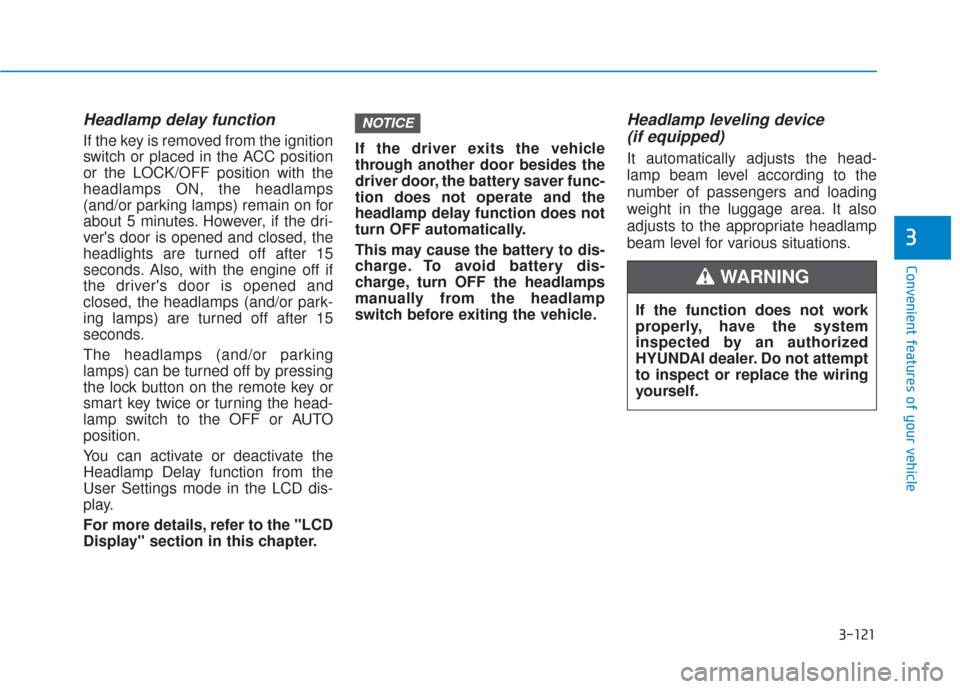
Headlamp delay function
If the key is removed from the ignition
switch or placed in the ACC position
or the LOCK/OFF position with the
headlamps ON, the headlamps
(and/or parking lamps) remain on for
about 5 minutes. However, if the dri-
ver's door is opened and closed, the
headlights are turned off after 15
seconds. Also, with the engine off if
the driver's door is opened and
closed, the headlamps (and/or park-
ing lamps) are turned off after 15
seconds.
The headlamps (and/or parking
lamps) can be turned off by pressing
the lock button on the remote key or
smart key twice or turning the head-
lamp switch to the OFF or AUTO
position.
You can activate or deactivate the
Headlamp Delay function from the
User Settings mode in the LCD dis-
play.
For more details, refer to the "LCD
Display" section in this chapter.If the driver exits the vehicle
through another door besides the
driver door, the battery saver func-
tion does not operate and the
headlamp delay function does not
turn OFF automatically.
This may cause the battery to dis-
charge. To avoid battery dis-
charge, turn OFF the headlamps
manually from the headlamp
switch before exiting the vehicle.
Headlamp leveling device
(if equipped)
It automatically adjusts the head-
lamp beam level according to the
number of passengers and loading
weight in the luggage area. It also
adjusts to the appropriate headlamp
beam level for various situations.
NOTICE
If the function does not work
properly, have the system
inspected by an authorized
HYUNDAI dealer. Do not attempt
to inspect or replace the wiring
yourself.
WARNING
Page 214 of 557
3-125
Convenient features of your vehicle
3
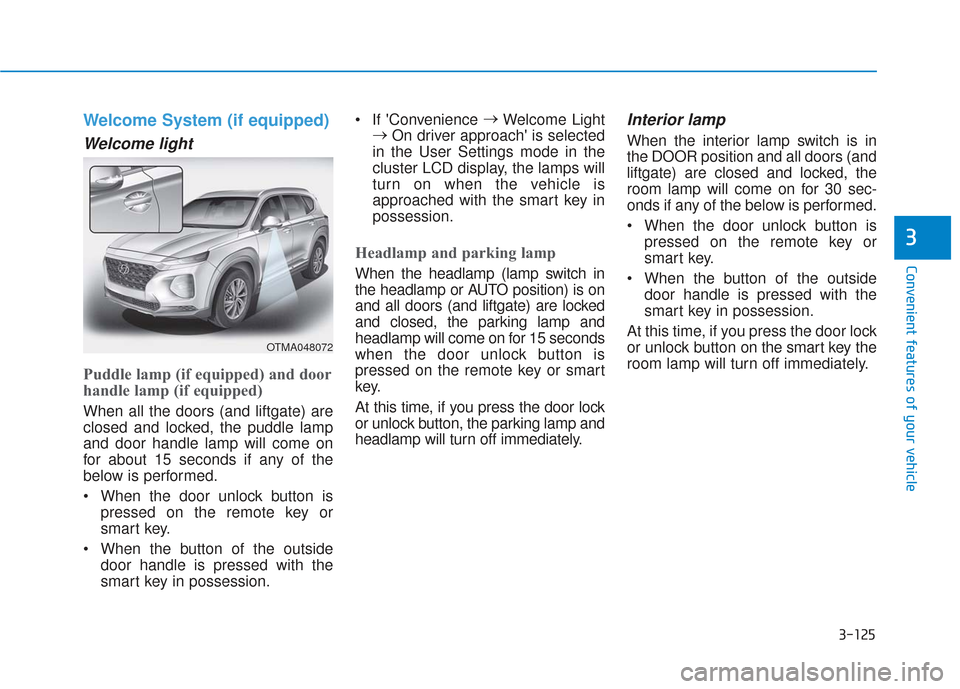
Welcome System (if equipped)
Welcome light
Puddle lamp (if equipped) and door
handle lamp (if equipped)
When all the doors (and liftgate) are
closed and locked, the puddle lamp
and door handle lamp will come on
for about 15 seconds if any of the
below is performed.
When the door unlock button ispressed on the remote key or
smart key.
When the button of the outside door handle is pressed with the
smart key in possession. If 'Convenience
→
Welcome Light
→ On driver approach' is selected
in the User Settings mode in the
cluster LCD display, the lamps will
turn on when the vehicle is
approached with the smart key in
possession.
Headlamp and parking lamp
When the headlamp (lamp switch in
the headlamp or AUTO position) is on
and all doors (and liftgate) are locked
and closed, the parking lamp and
headlamp will come on for 15 seconds
when the door unlock button is
pressed on the remote key or smart
key.
At this time, if you press the door lock
or unlock button, the parking lamp and
headlamp will turn off immediately.
Interior lamp
When the interior lamp switch is in
the DOOR position and all doors (and
liftgate) are closed and locked, the
room lamp will come on for 30 sec-
onds if any of the below is performed.
When the door unlock button is pressed on the remote key or
smart key.
When the button of the outside door handle is pressed with the
smart key in possession.
At this time, if you press the door lock
or unlock button on the smart key the
room lamp will turn off immediately.
OTMA048072
Page 262 of 557
3-173
Convenient features of your vehicle
3
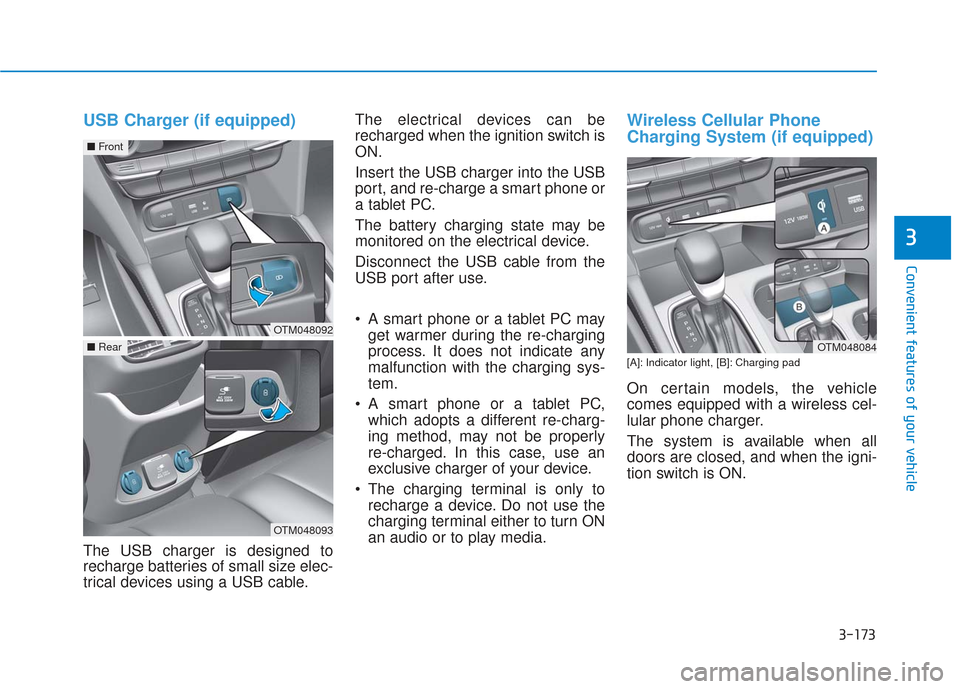
USB Charger (if equipped)
The USB charger is designed to
recharge batteries of small size elec-
trical devices using a USB cable.The electrical devices can be
recharged when the ignition switch is
ON.
Insert the USB charger into the USB
port, and re-charge a smart phone or
a tablet PC.
The battery charging state may be
monitored on the electrical device.
Disconnect the USB cable from the
USB port after use.
A smart phone or a tablet PC may
get warmer during the re-charging
process. It does not indicate any
malfunction with the charging sys-
tem.
A smart phone or a tablet PC, which adopts a different re-charg-
ing method, may not be properly
re-charged. In this case, use an
exclusive charger of your device.
The charging terminal is only to recharge a device. Do not use the
charging terminal either to turn ON
an audio or to play media.
Wireless Cellular Phone
Charging System (if equipped)
[A]: Indicator light, [B]: Charging pad
On certain models, the vehicle
comes equipped with a wireless cel-
lular phone charger.
The system is available when all
doors are closed, and when the igni-
tion switch is ON.
OTM048084
OTM048092
■ Front
OTM048093
■Rear
Page 263 of 557
3-174
Convenient features of your vehicle
To charge a cellular phone
The wireless cellular phone charging
system charges only the Qi-enabled
cellular phones ( ). Read the label
on the cellular phone accessory
cover or visit your cellular phone
manufacturer's website to check
whether your cellular phone supports
the Qi technology.
The wireless charging process starts
when you put a Qi-enabled cellular
phone on the wireless charging unit.
1. Remove other items, including thesmart key, from the wireless charg-
ing unit. If not, the wireless charg-
ing process may be interrupted.
Place the cellular phone on the
center of the charging pad ( ).
2. The indicator light is orange when the cellular phone is charging. The
indicator light turns green when
phone charging is complete.
3. You can turn ON or OFF the wire- less charging function in the user
settings mode on the instrument
cluster. For further information,
refer to the "LCD Display Modes"
in this chapter. If your cellular phone is not charging:
- Slightly change the position of the
cellular phone on the charging
pad.
- Make sure the indicator light is orange.
The indicator light will blink orange for
10 seconds if there is a malfunction in
the wireless charging system.
In this case, temporarily stop the
charging process, and re-attempt to
charge your cellular phone again.
The system warns you with a mes-
sage on the LCD display if the cellular
phone is still on the wireless charging
unit after the engine is turned OFF
and the front door is opened.
Information
For some manufacturers' cellular
phones, the system may not warn you
even though the cellular phone is left
on the wireless charging unit. This is
due to the particular characteristic of
the cellular phone and not a malfunc-
tion of the wireless charging. The wireless cellular phone
charging system may not sup-
port certain cellular phones,
which are not verified for the Qi
specification ( ).
When placing your cellular phone on the charging mat,
position the phone in the middle
of the mat for optimal charging
performance. If your cell phone
is off to the side, the charging
rate may be less and in some
cases the cell phone may experi-
ence higher heat conduction.
In some cases, the wireless charging may stop temporarily
when the Remote Key or Smart
Key is used, either when starting
the vehicle or locking/unlocking
the doors, etc.
When charging certain cellular phones, the charging indicator
may not change to green when
the cell phone is fully charged.
NOTICE
i
Page 275 of 557
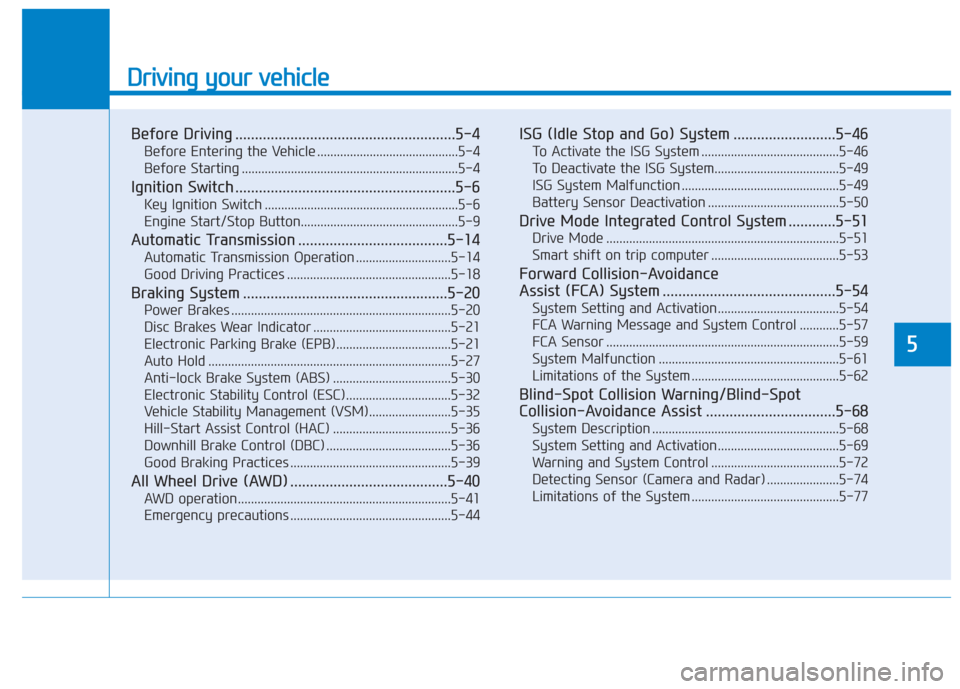
Driving your vehicle
5
Before Driving ........................................................5-4
Before Entering the Vehicle ...........................................5-4
Before Starting ..................................................................5-4
Ignition Switch ........................................................5-6
Key Ignition Switch ...........................................................5-6
Engine Start/Stop Button................................................5-9
Automatic Transmission ......................................5-14
Automatic Transmission Operation .............................5-14
Good Driving Practices ..................................................5-18
Braking System ....................................................5-20
Power Brakes ...................................................................5-20
Disc Brakes Wear Indicator ..........................................5-21
Electronic Parking Brake (EPB)...................................5-21
Auto Hold ........................................................................\
..5-27
Anti-lock Brake System (ABS) ....................................5-30
Electronic Stability Control (ESC)................................5-32
Vehicle Stability Management (VSM).........................5-35
Hill-Start Assist Control (HAC) ....................................5-36
Downhill Brake Control (DBC) ......................................5-36
Good Braking Practices .................................................5-39
All Wheel Drive (AWD) ........................................5-40
AWD operation.................................................................5-41
Emergency precautions .................................................5-44
ISG (Idle Stop and Go) System ..........................5-46
To Activate the ISG System ..........................................5-46
To Deactivate the ISG System......................................5-49
ISG System Malfunction ................................................5-49
Battery Sensor Deactivation ........................................5-50
Drive Mode Integrated Control System ............5-51
Drive Mode .......................................................................5\
-51
Smart shift on trip computer .......................................5-53
Forward Collision-Avoidance
Assist (FCA) System ............................................5-54
System Setting and Activation.....................................5-54
FCA Warning Message and System Control ............5-57
FCA Sensor .......................................................................5\
-59
System Malfunction .......................................................5-61
Limitations of the System .............................................5-62
Blind-Spot Collision Warning/Blind-Spot
Collision-Avoidance Assist .................................5-68
System Description .........................................................5-68
System Setting and Activation.....................................5-69
Warning and System Control .......................................5-72
Detecting Sensor (Camera and Radar) ......................5-74
Limitations of the System .............................................5-77
Page 276 of 557
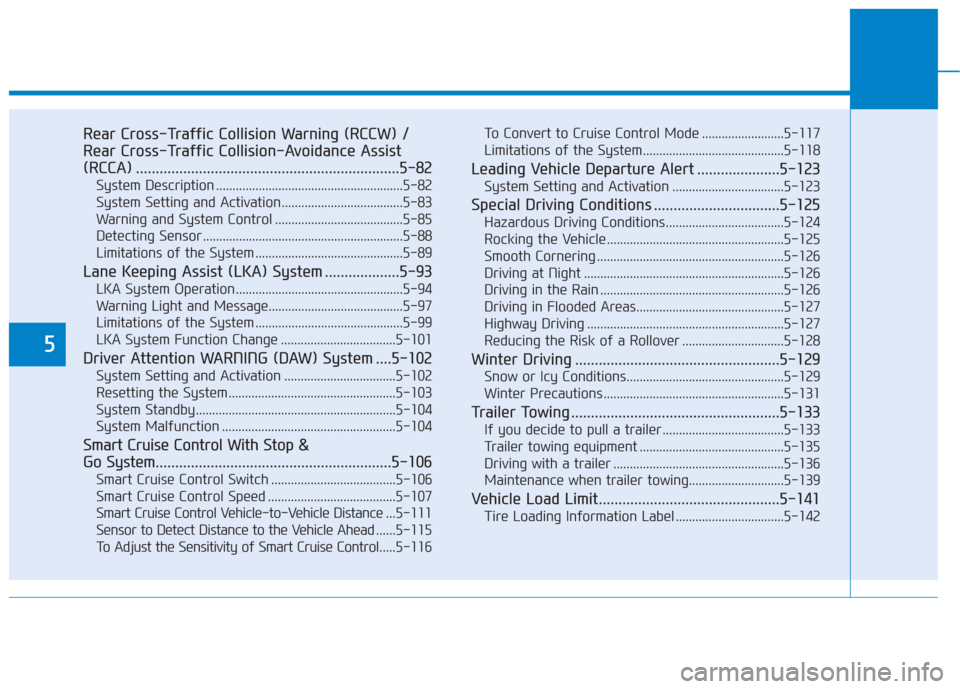
5
Rear Cross-Traffic Collision Warning (RCCW) /
Rear Cross-Traffic Collision-Avoidance Assist
(RCCA) ...................................................................5-82
System Description .........................................................5-82
System Setting and Activation.....................................5-83
Warning and System Control .......................................5-85
Detecting Sensor .............................................................5-88
Limitations of the System .............................................5-89
Lane Keeping Assist (LKA) System ...................5-93
LKA System Operation...................................................5-94
Warning Light and Message.........................................5-97
Limitations of the System .............................................5-99
LKA System Function Change ...................................5-101
Driver Attention WARNING (DAW) System ....5-102
System Setting and Activation ..................................5-102
Resetting the System ...................................................5-103
System Standby.............................................................5-104
System Malfunction .....................................................5-104
Smart Cruise Control With Stop &
Go System............................................................5-106
Smart Cruise Control Switch ......................................5-106
Smart Cruise Control Speed .......................................5-107
Smart Cruise Control Vehicle-to-Vehicle Distance ... 5-111
Sensor to Detect Distance to the Vehicle Ahead ......5-115
To Adjust the Sensitivity of Smart Cruise Control .....5-116To Convert to Cruise Control Mode .........................5-117
Limitations of the System...........................................5-118
Leading Vehicle Departure Alert .....................5-123
System Setting and Activation ..................................5-123
Special Driving Conditions ................................5-125
Hazardous Driving Conditions....................................5-124
Rocking the Vehicle ......................................................5-125
Smooth Cornering .........................................................5-126
Driving at Night .............................................................5-126
Driving in the Rain ........................................................5-126
Driving in Flooded Areas.............................................5-127
Highway Driving ............................................................5-127
Reducing the Risk of a Rollover ...............................5-128
Winter Driving ....................................................5-129
Snow or Icy Conditions................................................5-129
Winter Precautions .......................................................5-131
Trailer Towing .....................................................5-133
If you decide to pull a trailer .....................................5-133
Trailer towing equipment ............................................5-135
Driving with a trailer ....................................................5-136
Maintenance when trailer towing.............................5-139
Vehicle Load Limit..............................................5-141
Tire Loading Information Label .................................5-142