Driver info Hyundai Santa Fe 2019 Owner's Manual
[x] Cancel search | Manufacturer: HYUNDAI, Model Year: 2019, Model line: Santa Fe, Model: Hyundai Santa Fe 2019Pages: 557, PDF Size: 14.8 MB
Page 10 of 557
F10
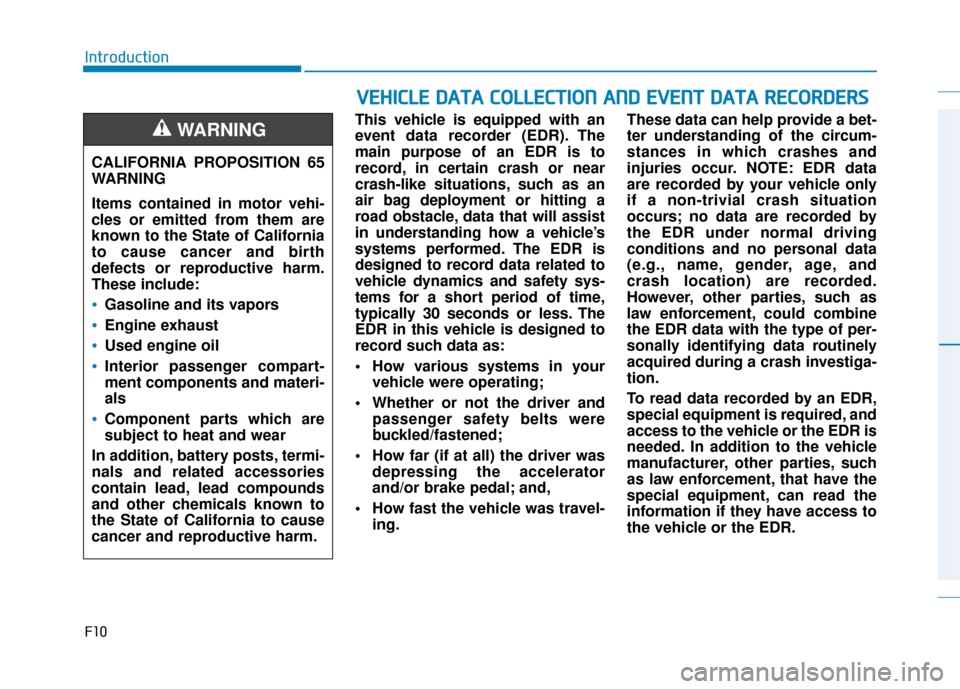
IntroductionThis vehicle is equipped with an
event data recorder (EDR). The
main purpose of an EDR is to
record, in certain crash or near
crash-like situations, such as an
air bag deployment or hitting a
road obstacle, data that will assist
in understanding how a vehicle’s
systems performed. The EDR is
designed to record data related to
vehicle dynamics and safety sys-
tems for a short period of time,
typically 30 seconds or less. The
EDR in this vehicle is designed to
record such data as:
How various systems in yourvehicle were operating;
Whether or not the driver and passenger safety belts were
buckled/fastened;
How far (if at all) the driver was depressing the accelerator
and/or brake pedal; and,
How fast the vehicle was travel- ing. These data can help provide a bet-
ter understanding of the circum-
stances in which crashes and
injuries occur. NOTE: EDR data
are recorded by your vehicle only
if a non-trivial crash situation
occurs; no data are recorded by
the EDR under normal driving
conditions and no personal data
(e.g., name, gender, age, and
crash location) are recorded.
However, other parties, such as
law enforcement, could combine
the EDR data with the type of per-
sonally identifying data routinely
acquired during a crash investiga-
tion.
To read data recorded by an EDR,
special equipment is required, and
access to the vehicle or the EDR is
needed. In addition to the vehicle
manufacturer, other parties, such
as law enforcement, that have the
special equipment, can read the
information if they have access to
the vehicle or the EDR.
V V
E
EH
H I
IC
C L
LE
E
D
D A
A T
TA
A
C
C O
O L
LL
LE
E C
CT
T I
IO
O N
N
A
A N
N D
D
E
E V
V E
EN
N T
T
D
D A
A T
TA
A
R
R E
EC
CO
O R
RD
D E
ER
R S
S
CALIFORNIA PROPOSITION 65
WARNING
Items contained in motor vehi-
cles or emitted from them are
known to the State of California
to cause cancer and birth
defects or reproductive harm.
These include:
Gasoline and its vapors
Engine exhaust
Used engine oil
Interior passenger compart-
ment components and materi-
als
Component parts which are
subject to heat and wear
In addition, battery posts, termi-
nals and related accessories
contain lead, lead compounds
and other chemicals known to
the State of California to cause
cancer and reproductive harm.
WARNING
Page 19 of 557
Safety system of your vehicle
Important Safety Precautions ..............................2-2
Always Wear Your Seat Belt ..........................................2-2
Restrain All Children .........................................................2-2
Air Bag Hazards .................................................................2-2
Driver Distraction ..............................................................2-2
Control Your Speed ...........................................................2-3
Keep Your Vehicle in Safe Condition ............................2-3
Seats ........................................................................\
2-4
Safety Precautions ...........................................................2-5
Front Seats ........................................................................\
.2-6
Rear Seats........................................................................\
.2-13
Head Restraints ...............................................................2-17
Seat Warmers and Air Ventilation Seats ...................2-21
Seat Belts ..............................................................2-25
Seat Belt Safety Precautions .......................................2-25
Seat Belt Warning Light ................................................2-26
Seat Belt Restraint System...........................................2-28
Additional Seat Belt Safety Precautions ...................2-34
Care of Seat Belts...........................................................2-37
Child Restraint System (CRS) .............................2-38
Children Always in the Rear .........................................2-38
Selecting a Child Restraint System (CRS) .................2-39
Installing a Child Restraint System (CRS)..................2-41
AIR BAG
- Advanced Supplemental Restraint System ...2-49
Where Are the Air Bags? ..............................................2-51
How Does the Air Bag System Operate?..................2-54
What to Expect After an Air Bag Inflates ................2-59
Occupant Classification System (OCS).......................2-60
Why Didn't My Air Bag Go Off in a Collision? ........2-65
SRS Care ........................................................................\
....2-70
Additional Safety Precautions .....................................2-71
Air Bag Warning Labels .................................................2-71
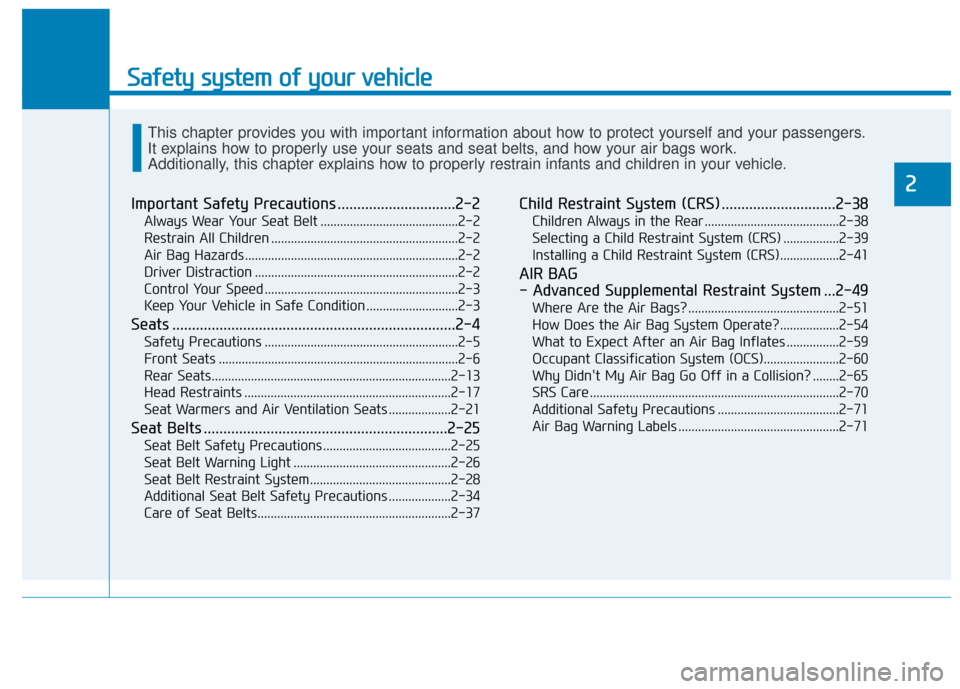
This chapter provides you with important information about how to protect yourself and your passengers.
It explains how to properly use your seats and seat belts, and how your air bags work.
Additionally, this chapter explains how to properly restrain infants and children in your vehicle.
2
Page 40 of 557
2-22
Safety system of your vehicle
To prevent damage to the seat
warmers and seats:
• Never use a solvent such as paint thinner, benzene, alcohol
or gasoline to clean the seats.
Do not place heavy or sharp objects on seats equipped with
seat warmers.
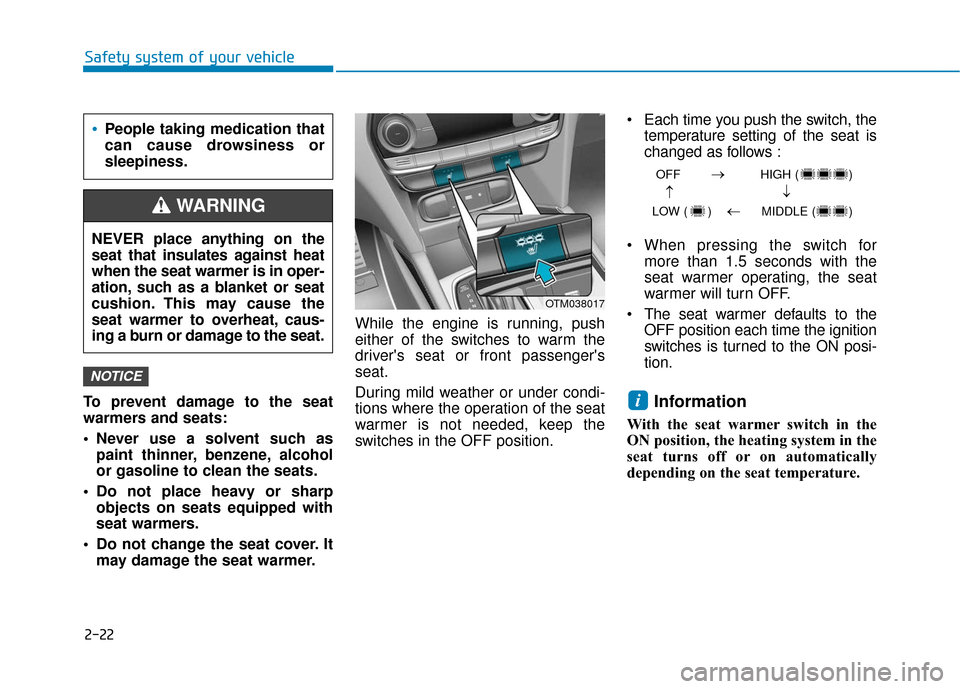
Do not change the seat cover. It may damage the seat warmer. While the engine is running, push
either of the switches to warm the
driver's seat or front passenger's
seat.
During mild weather or under condi-
tions where the operation of the seat
warmer is not needed, keep the
switches in the OFF position. • Each time you push the switch, the
temperature setting of the seat is
changed as follows :
When pressing the switch for more than 1.5 seconds with the
seat warmer operating, the seat
warmer will turn OFF.
The seat warmer defaults to the OFF position each time the ignition
switches is turned to the ON posi-
tion.
Information
With the seat warmer switch in the
ON position, the heating system in the
seat turns off or on automatically
depending on the seat temperature.
i
NOTICE
OFF HIGH ( )
LOW ( ) MIDDLE ( )
→→
→
→
OTM038017
People taking medication that
can cause drowsiness or
sleepiness.
NEVER place anything on the
seat that insulates against heat
when the seat warmer is in oper-
ation, such as a blanket or seat
cushion. This may cause the
seat warmer to overheat, caus-
ing a burn or damage to the seat.
WARNING
Page 89 of 557
2-71
Safety system of your vehicle
2
Additional Safety Precautions
Passengers should not move out
of or change seats while the vehi-
cle is moving.A passenger who is
not wearing a seat belt during a
crash or emergency stop can be
thrown against the inside of the vehi-
cle, against other occupants, or be
ejected from the vehicle.
Do not use any accessories on
seat belts. Devices claiming to
improve occupant comfort or reposi-
tion the seat belt can reduce the pro-
tection provided by the seat belt and
increase the chance of serious injury
in a crash. Do not modify the front seats.
Modification of the front seats could
interfere with the operation of the
supplemental restraint system sens-
ing components or side air bags.
Do not place items under the front
seats.
Placing items under the front
seats could interfere with the opera-
tion of the supplemental restraint
system sensing components and
wiring harnesses.
Do not cause impact to the doors.
Impact to the doors when the Engine
Start/Stop button is in the ON posi-
tion may cause the air bags to inflate.
Modifications to accommodate
disabilities. If you require modifica-
tion to your vehicle to accommodate
a disability, contact the HYUNDAI
Customer Connect Center at 800-
633-5151.
Adding equipment to or modify- ing your air bag equipped vehicle
If you modify your vehicle by chang-
ing your vehicle's frame, bumper sys-
tem, front end or side sheet metal or
ride height, this may affect the opera-
tion of your vehicle's air bag system.
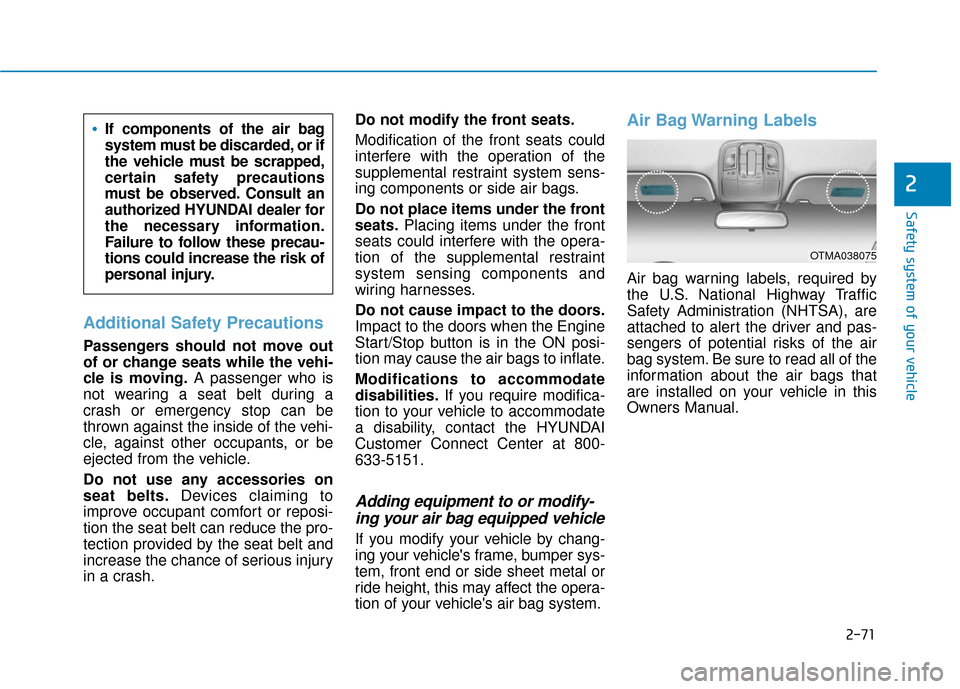
Air Bag Warning Labels
Air bag warning labels, required by
the U.S. National Highway Traffic
Safety Administration (NHTSA), are
attached to alert the driver and pas-
sengers of potential risks of the air
bag system. Be sure to read all of the
information about the air bags that
are installed on your vehicle in this
Owners Manual.
If components of the air bag
system must be discarded, or if
the vehicle must be scrapped,
certain safety precautions
must be observed. Consult an
authorized HYUNDAI dealer for
the necessary information.
Failure to follow these precau-
tions could increase the risk of
personal injury.
OTMA038075
Page 95 of 557
3-6
Convenient features of your vehicle
Mechanical key
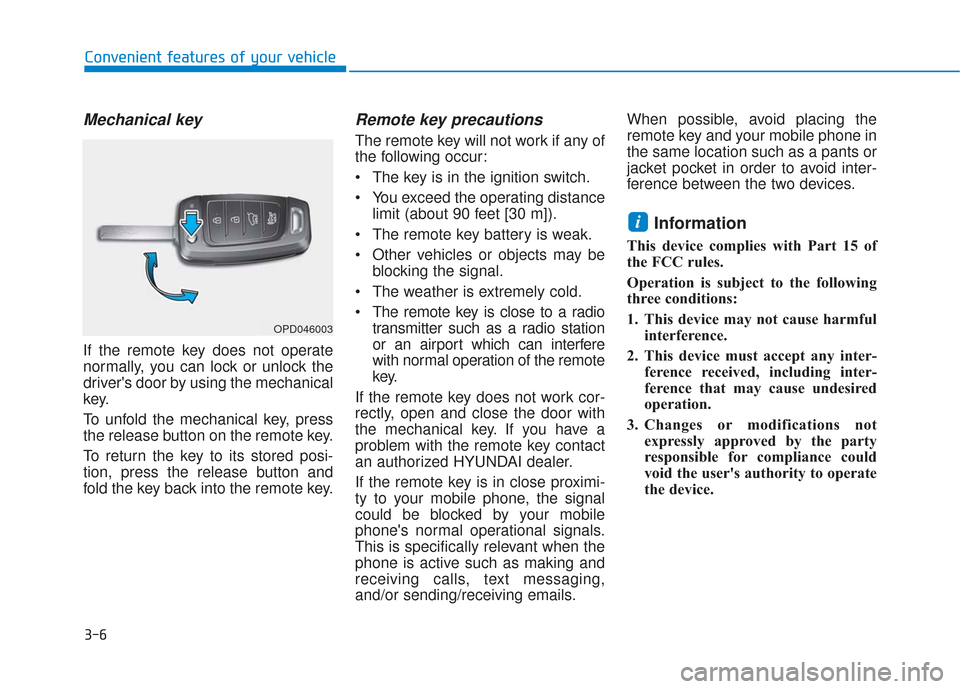
If the remote key does not operate
normally, you can lock or unlock the
driver's door by using the mechanical
key.
To unfold the mechanical key, press
the release button on the remote key.
To return the key to its stored posi-
tion, press the release button and
fold the key back into the remote key.
Remote key precautions
The remote key will not work if any of
the following occur:
• The key is in the ignition switch.
You exceed the operating distancelimit (about 90 feet [30 m]).
The remote key battery is weak.
Other vehicles or objects may be blocking the signal.
The weather is extremely cold.
The remote key is close to a radio transmitter such as a radio station
or an airport which can interfere
with normal operation of the remote
key.
If the remote key does not work cor-
rectly, open and close the door with
the mechanical key. If you have a
problem with the remote key contact
an authorized HYUNDAI dealer.
If the remote key is in close proximi-
ty to your mobile phone, the signal
could be blocked by your mobile
phone's normal operational signals.
This is specifically relevant when the
phone is active such as making and
receiving calls, text messaging,
and/or sending/receiving emails. When possible, avoid placing the
remote key and your mobile phone in
the same location such as a pants or
jacket pocket in order to avoid inter-
ference between the two devices.
Information
This device complies with Part 15 of
the FCC rules.
Operation is subject to the following
three conditions:
1. This device may not cause harmful
interference.
2. This device must accept any inter- ference received, including inter-
ference that may cause undesired
operation.
3. Changes or modifications not expressly approved by the party
responsible for compliance could
void the user's authority to operate
the device.
i
OPD046003
Page 96 of 557
3-7
Convenient features of your vehicle
3
Keep the remote key away from
electromagnetic materials that
block electromagnetic waves to
the key surface.
Battery replacement
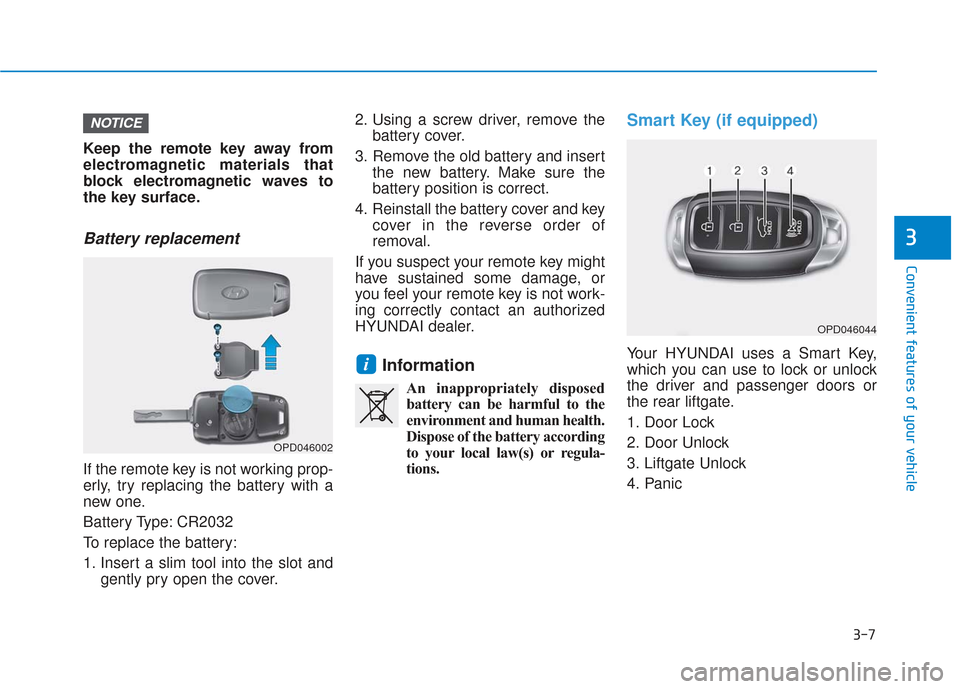
If the remote key is not working prop-
erly, try replacing the battery with a
new one.
Battery Type: CR2032
To replace the battery:
1. Insert a slim tool into the slot andgently pry open the cover. 2. Using a screw driver, remove the
battery cover.
3. Remove the old battery and insert the new battery. Make sure the
battery position is correct.
4. Reinstall the battery cover and key cover in the reverse order of
removal.
If you suspect your remote key might
have sustained some damage, or
you feel your remote key is not work-
ing correctly contact an authorized
HYUNDAI dealer.
Information
An inappropriately disposed battery can be harmful to the
environment and human health.
Dispose of the battery according
to your local law(s) or regula-
tions.
Smart Key (if equipped)
Your HYUNDAI uses a Smart Key,
which you can use to lock or unlock
the driver and passenger doors or
the rear liftgate.
1. Door Lock
2. Door Unlock
3. Liftgate Unlock
4. Panici
NOTICE
OPD046044
OPD046002
Page 97 of 557
3-8
Convenient features of your vehicle
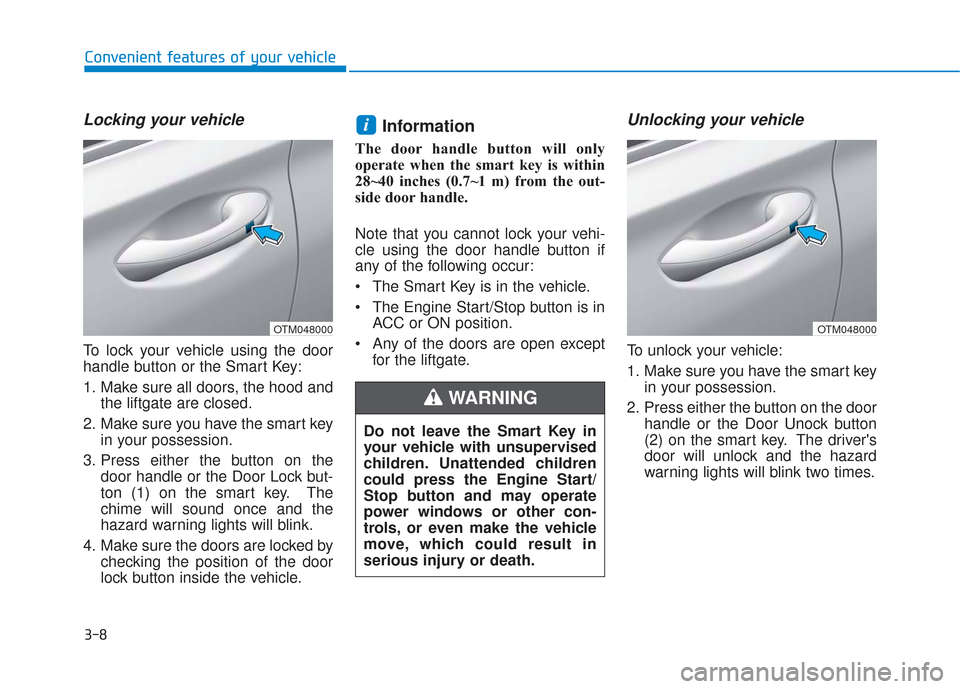
Locking your vehicle
To lock your vehicle using the door
handle button or the Smart Key:
1. Make sure all doors, the hood andthe liftgate are closed.
2. Make sure you have the smart key in your possession.
3. Press either the button on the door handle or the Door Lock but-
ton (1) on the smart key. The
chime will sound once and the
hazard warning lights will blink.
4. Make sure the doors are locked by checking the position of the door
lock button inside the vehicle.
Information
The door handle button will only
operate when the smart key is within
28~40 inches (0.7~1 m) from the out-
side door handle.
Note that you cannot lock your vehi-
cle using the door handle button if
any of the following occur:
The Smart Key is in the vehicle.
The Engine Start/Stop button is inACC or ON position.
Any of the doors are open except for the liftgate.
Unlocking your vehicle
To unlock your vehicle:
1. Make sure you have the smart keyin your possession.
2. Press either the button on the door handle or the Door Unock button
(2) on the smart key. The driver's
door will unlock and the hazard
warning lights will blink two times.
i
Do not leave the Smart Key in
your vehicle with unsupervised
children. Unattended children
could press the Engine Start/
Stop button and may operate
power windows or other con-
trols, or even make the vehicle
move, which could result in
serious injury or death.
WARNING
OTM048000OTM048000
Page 98 of 557
3-9
Convenient features of your vehicle
3
Two Press Unlock Feature
The priority for unlocking the driver
door only, or unlocking all the doors
with one press may be adjusted in
the User Settings mode in the cluster
LCD display.
The Two Press Unlock feature, when
enabled, will require the user to
press the door unlock button once for
driver door only and twice for unlock-
ing all the doors.
Select or Deselect the Two Press
Unlock feature in the User Settings
mode in the cluster LCD display. The
option can be found under the follow-
ing menu:
User Settings ➞Door ➞Two Press
Unlock The Two Press Unlock feature can
also be enabled or disabled by
pressing the door lock and unlock
buttons simultaneously on the Key
FOB:
Press and hold both the Door Lock
button and the Door Unlock button
simultaneously until the hazard
warning lights blink.
This will enable or disable the Two
Press Unlock feature. Repeat this
procedure to enable/disable the
mode again.
Information
• The door handle buttons will only
operate when the smart key is with-
in 28-40 inches (0.7~1m) from the
outside door handle
• Either the driver or front passenger door can be opened with the door
handle button when the smart key
is within this range
• If you press the front passenger outside door handle with the smart
key in your possession, all the doors
will unlock
Opening the liftgate
Non-power liftgate
To unlock and open the liftgate:
1. Make sure you have the smart keyin your possession.
2. Press either the liftgate handle release switch on the vehicle or
press and hold the Liftgate Unlock
button on the smart key for more
than one second. The hazard
warning lights will blink two times
and the liftgate latch will unlock.
3. Once the liftgate is opened and then closed, the liftgate will auto-
matically re-lock after 30 seconds.
Information
• The liftgate handle switch will onlyoperate when the smart key is with-
in 28 inches (0.7 m) from the lift-
gate handle.
• The Liftgate Unlock button (3) will only unlock the liftgate. It will not
release the latch and open the lift-
gate automatically. If the Liftgate
Unlock button is used, someone
must still press the liftgate handle
switch to open the liftgate.
i
i
Page 99 of 557
3-10
Convenient features of your vehicle
Power liftgate
To unlock and open the liftgate:
1. Make sure you have the smart keyin your possession.
2. Press either the liftgate handle release switch on the vehicle or
press and hold the Liftgate Unlock
button on the smart key for more
than one second. The hazard
warning lights will blink two times
and the liftgate latch will open.
3. Once the liftgate is opened and then closed, the liftgate will auto-
matically re-lock after 30 seconds.
Information
The liftgate handle switch will only
operate when the smart key is within
28 inches (0.7 m) from the liftgate
handle.
Panic button
Press and hold the Panic button (4)
for more than one second. The horn
sounds and hazard warning lights
blink for about 30 seconds. To cancel
the panic mode, press any button on
the Smart Key.
Start-up
You can start the vehicle without
inserting the key.
For information, refer to the
"Engine Start/Stop Button" sec-
tion in chapter 5.
To prevent damaging the smart key:
Keep the smart key in a cool, dryplace to avoid damage or mal-
function. Exposure to moisture
or high temperature may cause
the internal circuit of the smart
key to malfunction which may
not be covered under warranty.
Avoid dropping or throwing the smart key.
Protect the smart key from extreme temperatures.
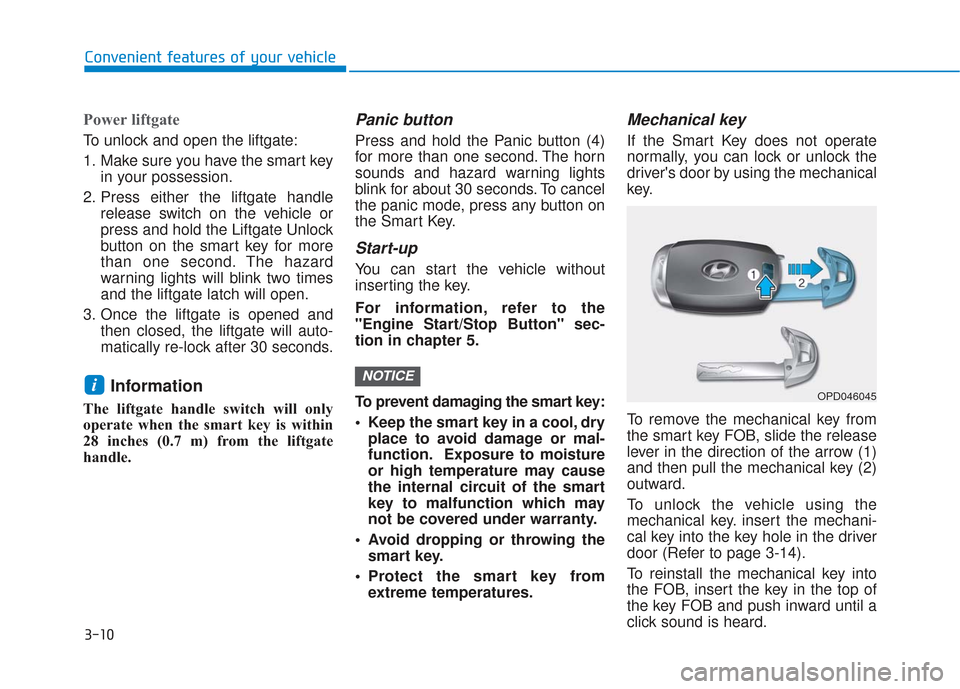
Mechanical key
If the Smart Key does not operate
normally, you can lock or unlock the
driver's door by using the mechanical
key.
To remove the mechanical key from
the smart key FOB, slide the release
lever in the direction of the arrow (1)
and then pull the mechanical key (2)
outward.
To unlock the vehicle using the
mechanical key. insert the mechani-
cal key into the key hole in the driver
door (Refer to page 3-14).
To reinstall the mechanical key into
the FOB, insert the key in the top of
the key FOB and push inward until a
click sound is heard.
NOTICEiOPD046045
Page 104 of 557

3-15
Convenient features of your vehicle
3
Smart key
Press the button on the driver's out-
side door handle while carrying the
Smart Key with you or press theDoor Unlock button on the Smart
Key, the driver's door will unlock.
If you press the button on the front
passenger's outside door, all doors
will unlock.
Once the doors are unlocked, they
may be opened by pulling the door
handle.
When closing the door, push the
door by hand. Make sure that doors
are closed securely.
Information
• In cold and wet climates, door lock
and door mechanisms may not
work properly due to freezing con-
ditions.
• If the door is locked/unlocked mul- tiple times in rapid succession with
either the vehicle key or door lock
switch, the system may stop operat-
ing temporarily in order to protect
the circuit and prevent damage to
system components.
• Two press unlock setting can be changed in the User Settings mode
on the cluster.
Operating Door Locks from
Inside the Vehicle
With the door lock button
To unlock a door, push the doorlock button (1) to the "Unlock"
position. The red mark (2) on the
door lock button will be visible.
To lock a door, push the door lock button (1) to the "Lock" position. If
the door is locked properly, the red
mark (2) on the door lock button
will not be visible.
To open a door, pull the door han- dle (3) outward.
iOTM048000
OPD046004
Door
UnlockDoor Lock
L
L
L
L
o
o
o
o
c
c
c
c
k
k
k
k
/
/
/
/
U
U
U
U
n
n
n
n
l
l
l
l
o
o
o
o
c
c
c
c
k
k
k
k
OTMA048003