user settings Hyundai Santa Fe 2020 Owner's Guide
[x] Cancel search | Manufacturer: HYUNDAI, Model Year: 2020, Model line: Santa Fe, Model: Hyundai Santa Fe 2020Pages: 557, PDF Size: 19.29 MB
Page 207 of 557
3-118
Convenient features of your vehicle
One-touch turn signal function
To activate the One Touch Turn
Signal function, push the turn signal
lever up or down to position (B) and
then release it.
The lane change signals will blink 3,
5 or 7 times.
You can activate or deactivate the
One Touch Turn Signal function or
choose the number of blinks (3, 5, or
7) from the User Settings mode in
the LCD display.
For more details, refer to the "LCD
Display" section in this chapter.
Front fog lamp (if equipped)
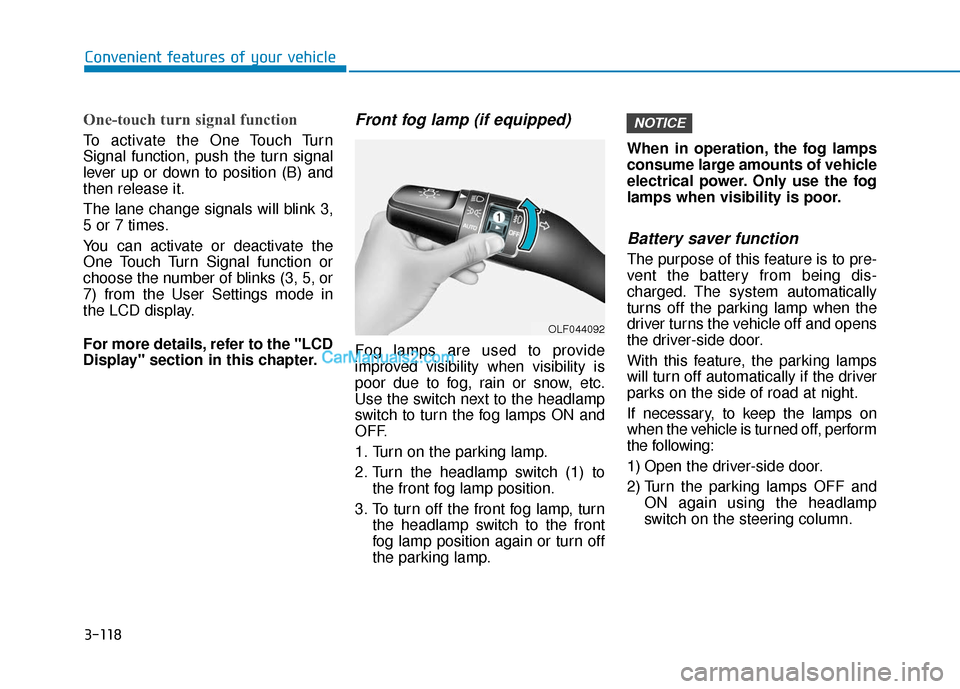
Fog lamps are used to provide
improved visibility when visibility is
poor due to fog, rain or snow, etc.
Use the switch next to the headlamp
switch to turn the fog lamps ON and
OFF.
1. Turn on the parking lamp.
2. Turn the headlamp switch (1) tothe front fog lamp position.
3. To turn off the front fog lamp, turn the headlamp switch to the front
fog lamp position again or turn off
the parking lamp. When in operation, the fog lamps
consume large amounts of vehicle
electrical power. Only use the fog
lamps when visibility is poor.
Battery saver function
The purpose of this feature is to pre-
vent the battery from being dis-
charged. The system automatically
turns off the parking lamp when the
driver turns the vehicle off and opens
the driver-side door.
With this feature, the parking lamps
will turn off automatically if the driver
parks on the side of road at night.
If necessary, to keep the lamps on
when the vehicle is turned off, perform
the following:
1) Open the driver-side door.
2) Turn the parking lamps OFF and
ON again using the headlamp
switch on the steering column.
NOTICE
OLF044092
Page 208 of 557
3-119
Convenient features of your vehicle
3
Headlamp delay function
If the key is removed from the ignition
switch or placed in the ACC position
or the LOCK/OFF position with the
headlamps ON, the headlamps
(and/or parking lamps) remain on for
about 5 minutes. However, if the dri-
ver's door is opened and closed, the
headlights are turned off after 15
seconds. Also, with the engine off if
the driver's door is opened and
closed, the headlamps (and/or park-
ing lamps) are turned off after 15
seconds.
The headlamps (and/or parking
lamps) can be turned off by pressing
the lock button on the remote key or
smart key twice or turning the head-
lamp switch to the OFF or AUTO
position.
You can activate or deactivate the
Headlamp Delay function from the
User Settings mode in the LCD dis-
play.
For more details, refer to the "LCD
Display" section in this chapter.If the driver exits the vehicle
through another door besides the
driver door, the battery saver func-
tion does not operate and the
headlamp delay function does not
turn OFF automatically.
This may cause the battery to dis-
charge. To avoid battery dis-
charge, turn OFF the headlamps
manually from the headlamp
switch before exiting the vehicle.
Headlamp leveling device
(if equipped)
It automatically adjusts the head-
lamp beam level according to the
number of passengers and loading
weight in the luggage area. It also
adjusts to the appropriate headlamp
beam level for various situations.
NOTICE
If the function does not work
properly, have the system
inspected by an authorized
HYUNDAI dealer. Do not attempt
to inspect or replace the wiring
yourself.
WARNING
Page 212 of 557
3-123
Convenient features of your vehicle
3
Welcome System (if equipped)
Welcome light
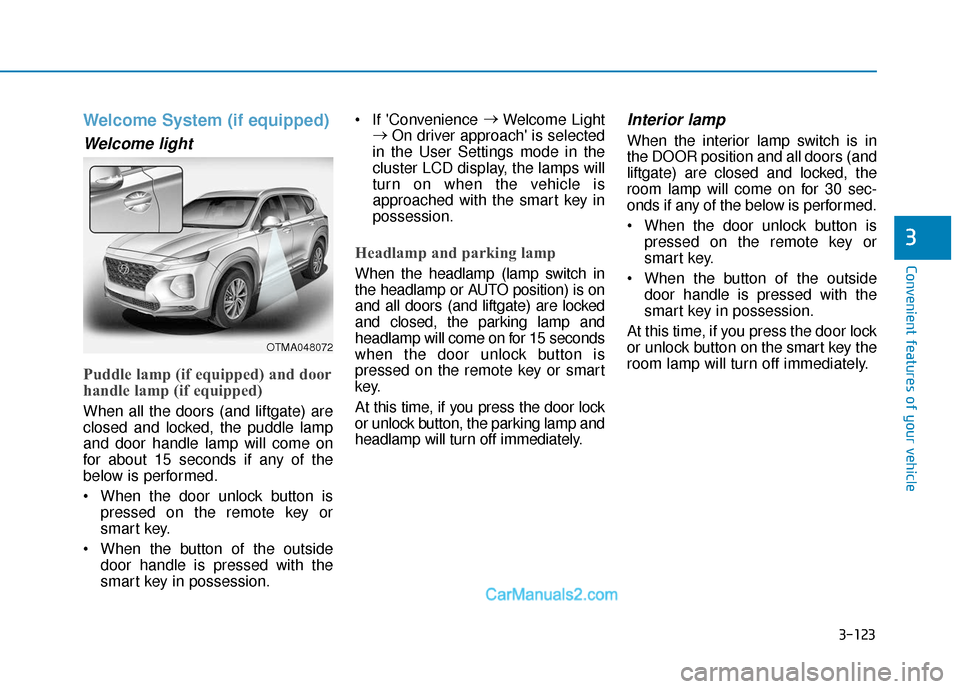
Puddle lamp (if equipped) and door
handle lamp (if equipped)
When all the doors (and liftgate) are
closed and locked, the puddle lamp
and door handle lamp will come on
for about 15 seconds if any of the
below is performed.
When the door unlock button ispressed on the remote key or
smart key.
When the button of the outside door handle is pressed with the
smart key in possession. If 'Convenience
→
Welcome Light
→ On driver approach' is selected
in the User Settings mode in the
cluster LCD display, the lamps will
turn on when the vehicle is
approached with the smart key in
possession.
Headlamp and parking lamp
When the headlamp (lamp switch in
the headlamp or AUTO position) is on
and all doors (and liftgate) are locked
and closed, the parking lamp and
headlamp will come on for 15 seconds
when the door unlock button is
pressed on the remote key or smart
key.
At this time, if you press the door lock
or unlock button, the parking lamp and
headlamp will turn off immediately.
Interior lamp
When the interior lamp switch is in
the DOOR position and all doors (and
liftgate) are closed and locked, the
room lamp will come on for 30 sec-
onds if any of the below is performed.
When the door unlock button is pressed on the remote key or
smart key.
When the button of the outside door handle is pressed with the
smart key in possession.
At this time, if you press the door lock
or unlock button on the smart key the
room lamp will turn off immediately.
OTMA048072
Page 216 of 557
3-127
Convenient features of your vehicle
3
To prevent possible damage tothe washer pump, do not oper-
ate the washer when the fluid
reservoir is empty.
To prevent possible damage to the wipers or windshield, do not
operate the wipers when the
windshield is dry.
To prevent damage to the wiper arms and other components, do
not attempt to move the wipers
manually.
To prevent possible damage to the wipers and washer system,
use anti-freezing washer fluids
in the winter season or cold
weather.
Rear Window Wiper and Washer
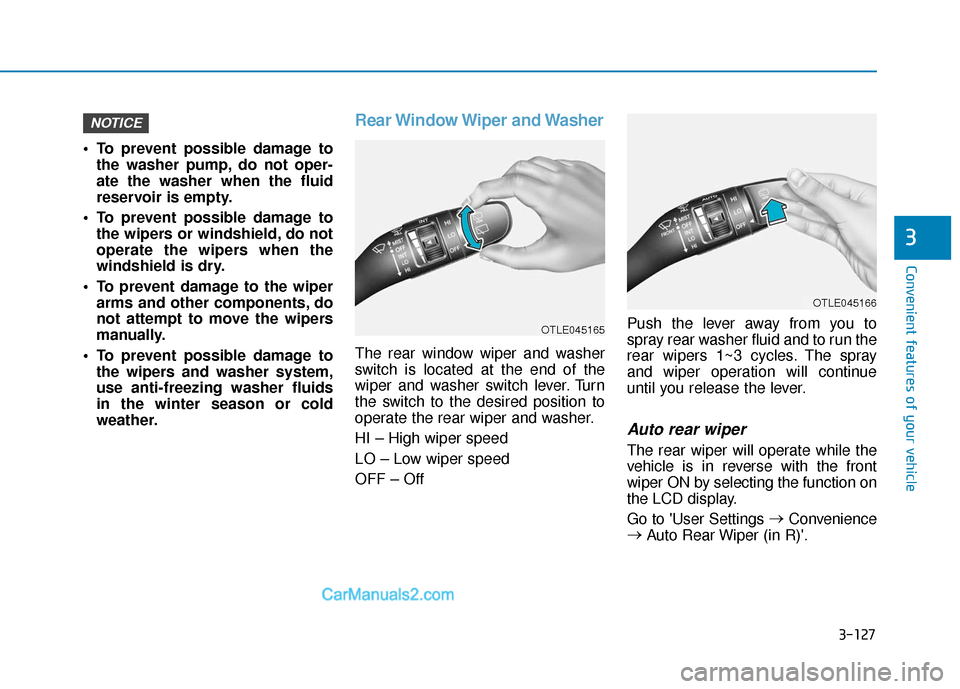
The rear window wiper and washer
switch is located at the end of the
wiper and washer switch lever. Turn
the switch to the desired position to
operate the rear wiper and washer.
HI – High wiper speed
LO – Low wiper speed
OFF – Off Push the lever away from you to
spray rear washer fluid and to run the
rear wipers 1~3 cycles. The spray
and wiper operation will continue
until you release the lever.
Auto rear wiper
The rear wiper will operate while the
vehicle is in reverse with the front
wiper ON by selecting the function on
the LCD display.
Go to 'User Settings
→
Convenience
→ Auto Rear Wiper (in R)'.
NOTICE
OTLE045166
OTLE045165
Page 221 of 557
3-132
BVM (Blind-spot View Monitor) sys-
tem displays the driver-side or pas-
senger-side rear areas in the cluster
when the system is activated.
To turn on BVM system: Under condi-
tion BVM system is enabled in the
settings
1. The ignition switch is turned tothe ON position.
2. The turn signal is activated
To turn off BVM system
1. The ignition switch is turned to the OFF position.
2. The turn signal is deactivated
3. The hazard warning flasher is on
4. A warning screen pops up and takes priority over the Blind-Spot
View Monitor system.System setting
With the engine ON, the Blind-spot
View Monitor system turns on and
gets ready to be activated when the
'User Settings →Driver Assistance
→ Blind-spot safety →Blind-spot
view' is selected on the cluster. The
system stops operation when the set-
ting is deactivated.
Convenient features of your vehicle
Like all assistance systems,
BVM system has limitations.
Over-reliance on the system
may result in a collision.
Always look around your vehi-
cle to make sure there are no
objects or obstacles before
moving the vehicle in any
direction to prevent a colli-
sion.
Objects are closer than they
appear. Failure to visually
confirm that is safe to change
the lane before doing so may
result in crash and serious
injury or death.
Always keep the camera lens
clean. The camera may not
work normally if the lens is
covered with foreign material.
CAUTION
Page 241 of 557
3-152
Convenient features of your vehicle
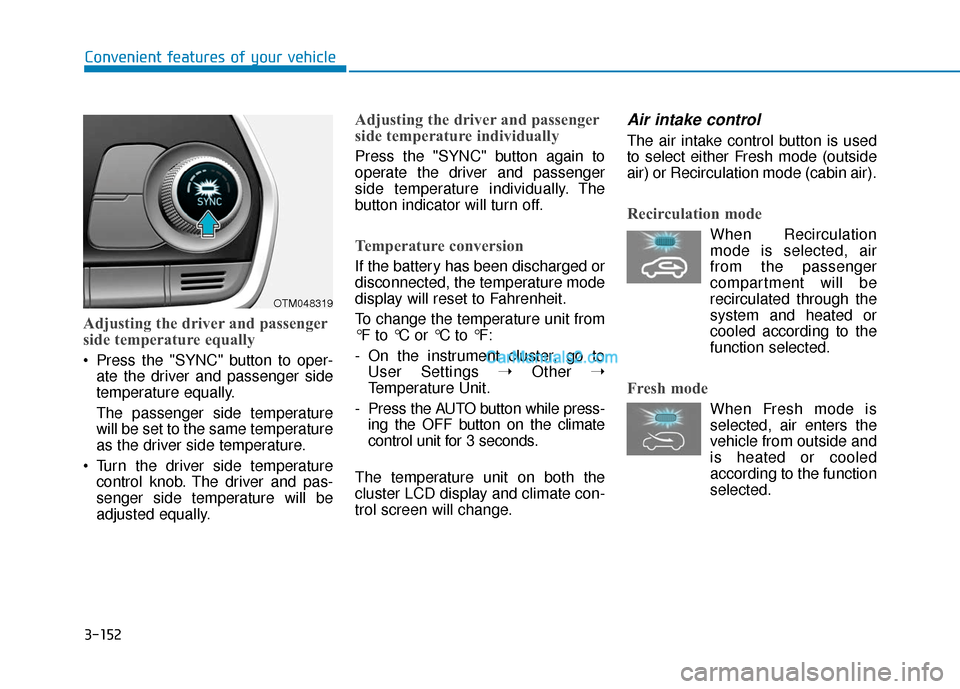
Adjusting the driver and passenger
side temperature equally
Press the "SYNC" button to oper-ate the driver and passenger side
temperature equally.
The passenger side temperature
will be set to the same temperature
as the driver side temperature.
Turn the driver side temperature control knob. The driver and pas-
senger side temperature will be
adjusted equally.
Adjusting the driver and passenger
side temperature individually
Press the "SYNC" button again to
operate the driver and passenger
side temperature individually. The
button indicator will turn off.
Temperature conversion
If the battery has been discharged or
disconnected, the temperature mode
display will reset to Fahrenheit.
To change the temperature unit from
°F to °C or °C to °F:
- On the instrument cluster, go toUser Settings ➝ Other ➝
Temperature Unit.
- Press the AUTO button while press- ing the OFF button on the climate
control unit for 3 seconds.
The temperature unit on both the
cluster LCD display and climate con-
trol screen will change.
Air intake control
The air intake control button is used
to select either Fresh mode (outside
air) or Recirculation mode (cabin air).
Recirculation mode
When Recirculation mode is selected, air
from the passenger
compartment will be
recirculated through the
system and heated or
cooled according to the
function selected.
Fresh mode
When Fresh mode is selected, air enters the
vehicle from outside and
is heated or cooled
according to the function
selected.
OTM048319
Page 263 of 557
3-174
Convenient features of your vehicle
To charge a cellular phone
The wireless cellular phone charging
system charges only the Qi-enabled
cellular phones ( ). Read the label
on the cellular phone accessory
cover or visit your cellular phone
manufacturer's website to check
whether your cellular phone supports
the Qi technology.
The wireless charging process starts
when you put a Qi-enabled cellular
phone on the wireless charging unit.
1. Remove other items, including thesmart key, from the wireless charg-
ing unit. If not, the wireless charg-
ing process may be interrupted.
Place the cellular phone on the
center of the charging pad ( ).
2. The indicator light is orange when the cellular phone is charging. The
indicator light turns green when
phone charging is complete.
3. You can turn ON or OFF the wire- less charging function in the user
settings mode on the instrument
cluster. For further information,
refer to the "LCD Display Modes"
in this chapter. If your cellular phone is not charging:
- Slightly change the position of the
cellular phone on the charging
pad.
- Make sure the indicator light is orange.
The indicator light will blink orange for
10 seconds if there is a malfunction in
the wireless charging system.
In this case, temporarily stop the
charging process, and re-attempt to
charge your cellular phone again.
The system warns you with a mes-
sage on the LCD display if the cellular
phone is still on the wireless charging
unit after the engine is turned OFF
and the front door is opened.
Information
For some manufacturers' cellular
phones, the system may not warn you
even though the cellular phone is left
on the wireless charging unit. This is
due to the particular characteristic of
the cellular phone and not a malfunc-
tion of the wireless charging. The wireless cellular phone
charging system may not sup-
port certain cellular phones,
which are not verified for the Qi
specification ( ).
When placing your cellular phone on the charging mat,
position the phone in the middle
of the mat for optimal charging
performance. If your cellular
phone is off to the side, the
charging rate may be less and in
some cases the cellular phone
may experience higher heat con-
duction.
In some cases, the wireless charging may stop temporarily
when the Remote Key or Smart
Key is used, either when starting
the vehicle or locking/unlocking
the doors, etc.
When charging certain cellular phones, the charging indicator
may not change to green when
the cellular phone is fully
charged.
NOTICE
i
Page 328 of 557
5-54
Driving your vehicle
The Forward Collision-Avoidance
Assist (FCA) system is designed to
help detect and monitor the vehicle
ahead or help detect a pedestrian in
the roadway through radar signals
and camera recognition to warn the
driver that a collision is imminent,
and if necessary, apply emergency
braking.
System Setting and Activation
System setting
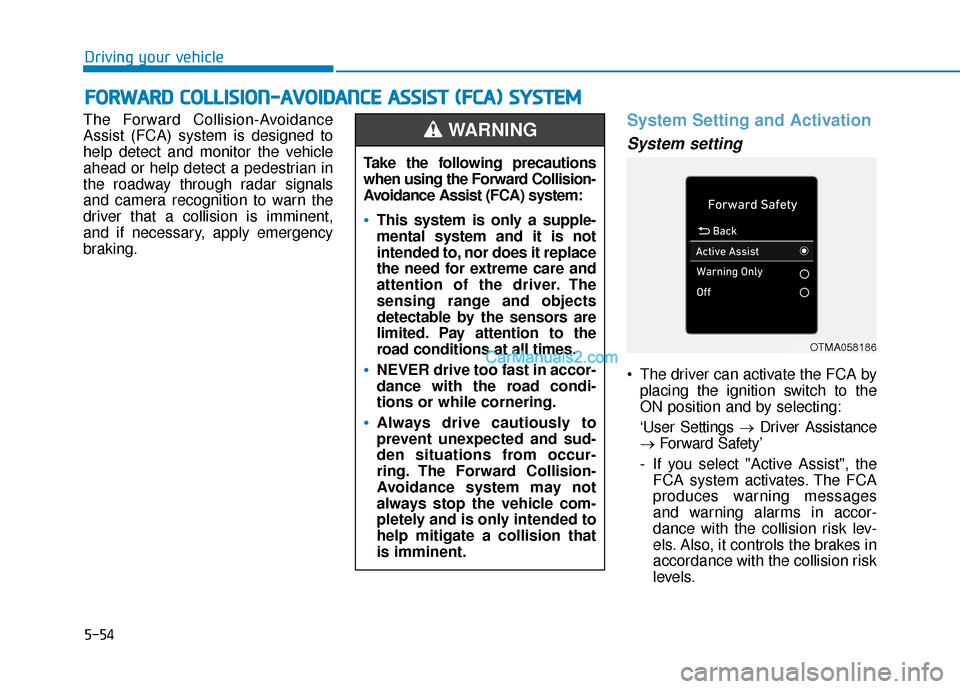
The driver can activate the FCA by placing the ignition switch to the
ON position and by selecting:
‘User Settings → Driver Assistance
→ Forward Safety’
- If you select "Active Assist", the FCA system activates. The FCA
produces warning messages
and warning alarms in accor-
dance with the collision risk lev-
els. Also, it controls the brakes in
accordance with the collision risk
levels.
F FO
O R
RW
W A
AR
RD
D
C
C O
O L
LL
LI
IS
S I
IO
O N
N-
-A
A V
VO
O I
ID
D A
A N
N C
CE
E
A
A S
SS
SI
IS
S T
T
(
( F
F C
C A
A )
)
S
S Y
Y S
ST
T E
EM
M
Take the following precautions
when using the Forward Collision-
Avoidance Assist (FCA) system:
This system is only a supple-
mental system and it is not
intended to, nor does it replace
the need for extreme care and
attention of the driver. The
sensing range and objects
detectable by the sensors are
limited. Pay attention to the
road conditions at all times.
NEVER drive too fast in accor-
dance with the road condi-
tions or while cornering.
Always drive cautiously to
prevent unexpected and sud-
den situations from occur-
ring. The Forward Collision-
Avoidance system may not
always stop the vehicle com-
pletely and is only intended to
help mitigate a collision that
is imminent.
WARNING
OTMA058186
Page 329 of 557
5-55
Driving your vehicle
5
- If you select "Warning Only", theFCA system activates and pro-
duces only warning alarms in
accordance with the collision risk
levels. You should control the
brake directly because the FCA
system do not control the brake.
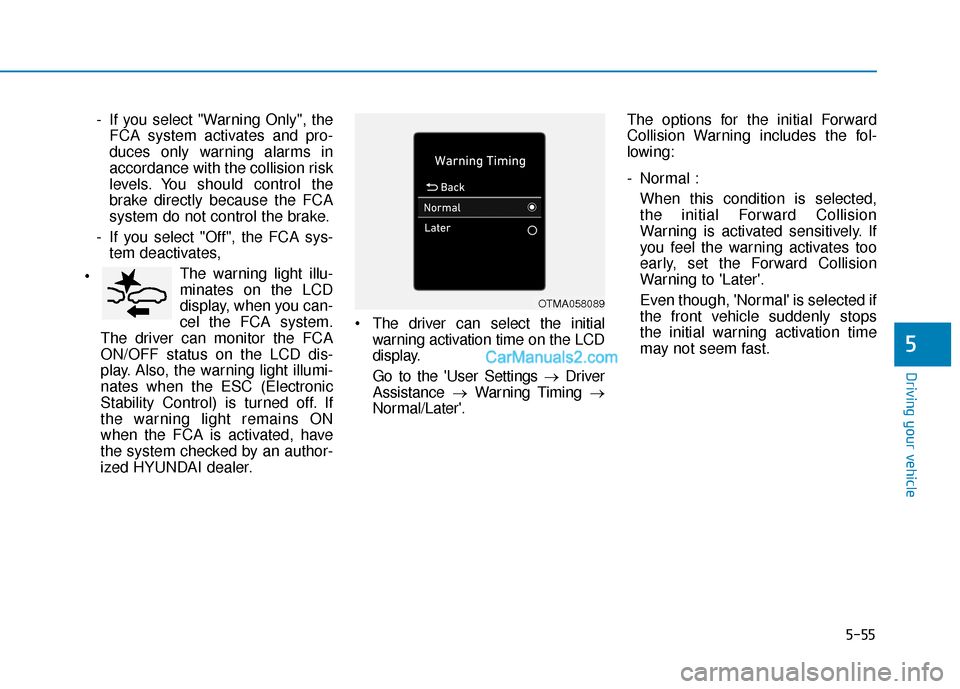
- If you select "Off", the FCA sys- tem deactivates,
The warning light illu-
minates on the LCD
display, when you can-
cel the FCA system.
The driver can monitor the FCA
ON/OFF status on the LCD dis-
play. Also, the warning light illumi-
nates when the ESC (Electronic
Stability Control) is turned off. If
the warning light remains ON
when the FCA is activated, have
the system checked by an author-
ized HYUNDAI dealer. The driver can select the initial
warning activation time on the LCD
display.
Go to the 'User Settings → Driver
Assistance →Warning Timing →
Normal/Later'. The options for the initial Forward
Collision Warning includes the fol-
lowing:
- Normal :
When this condition is selected,
the initial Forward Collision
Warning is activated sensitively. If
you feel the warning activates too
early, set the Forward Collision
Warning to 'Later'.
Even though, 'Normal' is selected if
the front vehicle suddenly stops
the initial warning activation time
may not seem fast.
OTMA058089
Page 331 of 557
5-57
Driving your vehicle
5
FCA Warning Message and
System Control
The FCA produces warning mes-
sages and warning alarms in accor-
dance with the collision risk levels,
such as abrupt stopping of the vehi-
cle in front, insufficient braking dis-
tance, or pedestrian detection. Also,
it controls the brakes in accordance
with the collision risk levels.
The driver can select the initial warn-
ing activation time in the User
Settings in the LCD display. The
options for the initial Forward Collision
Warning include Early or Later initial
warning time.
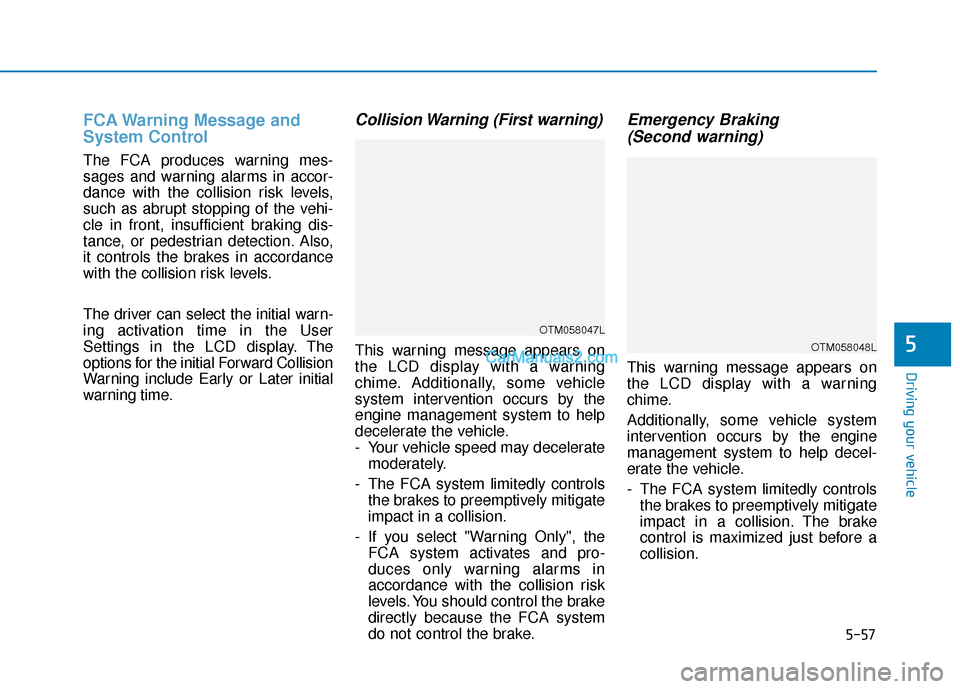
Collision Warning (First warning)
This warning message appears on
the LCD display with a warning
chime. Additionally, some vehicle
system intervention occurs by the
engine management system to help
decelerate the vehicle.
- Your vehicle speed may deceleratemoderately.
- The FCA system limitedly controls the brakes to preemptively mitigate
impact in a collision.
- If you select "Warning Only", the FCA system activates and pro-
duces only warning alarms in
accordance with the collision risk
levels. You should control the brake
directly because the FCA system
do not control the brake.
Emergency Braking(Second warning)
This warning message appears on
the LCD display with a warning
chime.
Additionally, some vehicle system
intervention occurs by the engine
management system to help decel-
erate the vehicle.
- The FCA system limitedly controls
the brakes to preemptively mitigate
impact in a collision. The brake
control is maximized just before a
collision.
OTM058047L
OTM058048L